Project: 97 6-speed, SC400 supercharged 4.7L V8
#151
Lead Lap
iTrader: (3)
Well I guess the debate really is between the GM and Q45 TB. Is the integrated IAC really a big factor for you? I like the larger volume for the scalability later...however the flow on the GM will be nice with all that work done to it...however if you bore it out you will be doing a lot of it over again. If you want to do some work I would port/polish/clean up the Q45 and then you just increased the ID...
#154
Super Moderator

Thread Starter
iTrader: (33)
Join Date: Jul 2004
Location: Sideways on the Yellow Brick Road! < Thats KS!
Posts: 5,827
Likes: 0
Received 4 Likes
on
4 Posts
Well I guess the debate really is between the GM and Q45 TB. Is the integrated IAC really a big factor for you? I like the larger volume for the scalability later...however the flow on the GM will be nice with all that work done to it...however if you bore it out you will be doing a lot of it over again. If you want to do some work I would port/polish/clean up the Q45 and then you just increased the ID...
#156
Lexus Test Driver
iTrader: (3)
IAC is a nice plus. Without it the car wont idle for about 30-45 seconds upon cold start up. My last setup I ran without it. I had to slightly crack the TB open to get it to idle. The IACV is a air bypass that regulates air to the engine while the TB is closed. There are other options in the way of external IACV's that i could get, the GM TB is just a really clean simple way of getting it. I have not totally tossed the idea of the Q45 TB out, I may put 2 TB patterns in my intake elbow that will allow me to try both.
 Hope that helps.
- Jon
#158
Super Moderator

Thread Starter
iTrader: (33)
Join Date: Jul 2004
Location: Sideways on the Yellow Brick Road! < Thats KS!
Posts: 5,827
Likes: 0
Received 4 Likes
on
4 Posts
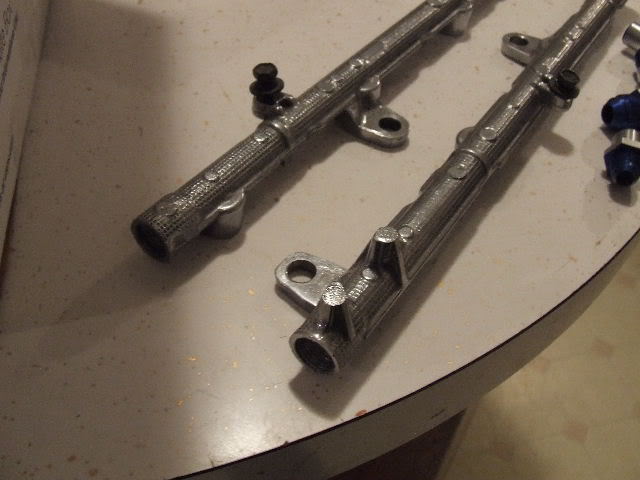
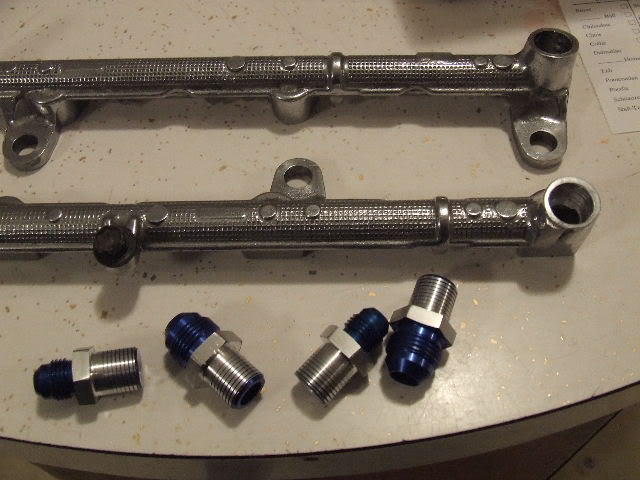
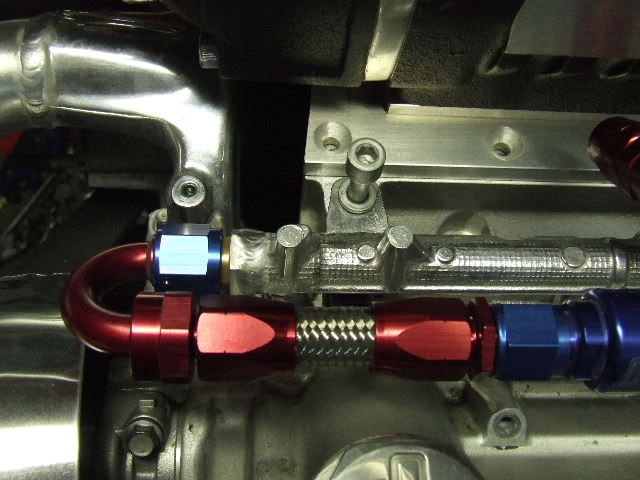
Well for fuel rails I have opted to use the 97 rails. Stock they have Banjo fittings at both ends but thats a easy fix. The important thing is they have a feed from one end and a exit at the other. The bore of them is equal to a AN-8 bore so there is plenty of flow there.
So I basically need to dump the restrictive banjos so here we go. The plan is to feed them with AN-8 and exit them with AN-6. I know the AN-8 feed is a bit overkill but it sure looks nice. I started by drilling out the banjo threads with a initial plan to tap the rails with 3/8 NPT. Once I got them drilled and started to tap them I realized they were really thin around the threads and I was worried that the taper threads would crack them.
My solution was to drill them out a bit more and spin the threads off my AN fittings to creat a slip fit. Next step is to get them TIG welded.
Here are som pics.


#160
Super Moderator

Thread Starter
iTrader: (33)
Join Date: Jul 2004
Location: Sideways on the Yellow Brick Road! < Thats KS!
Posts: 5,827
Likes: 0
Received 4 Likes
on
4 Posts
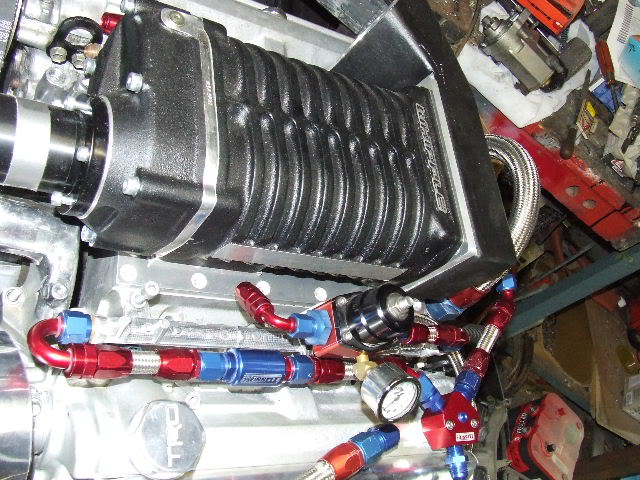
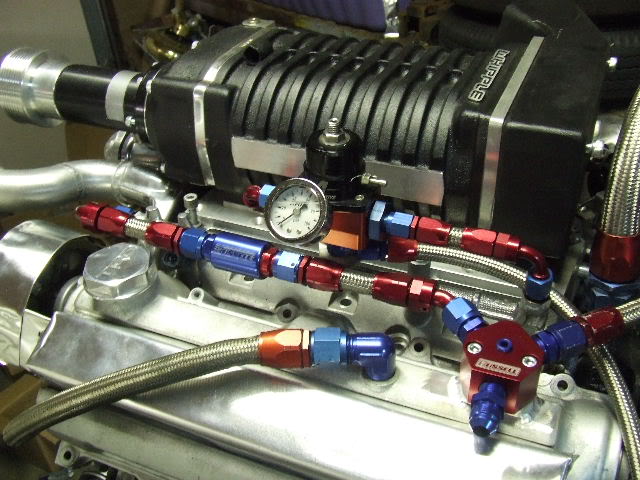
Fuel line Teaser pics! Made a mount for the Y block and welded it to the valve cover. Made another mount for the FPR that bolts to the rail. Still need a 180 (ordered) on the FPR to take the other return line from the other rail. Also need to some more parts to plumb the other rail. Never mind the fitting on the back side of the Y, Just put it on for test fit, it will be a 30 degree routed over to the other rail feed.
Also ignore the aluminum looking cover on the valve cover, thatís just thin aluminum tape for mock up and concept of idea.
Slowly getting there.
Now for the tease!
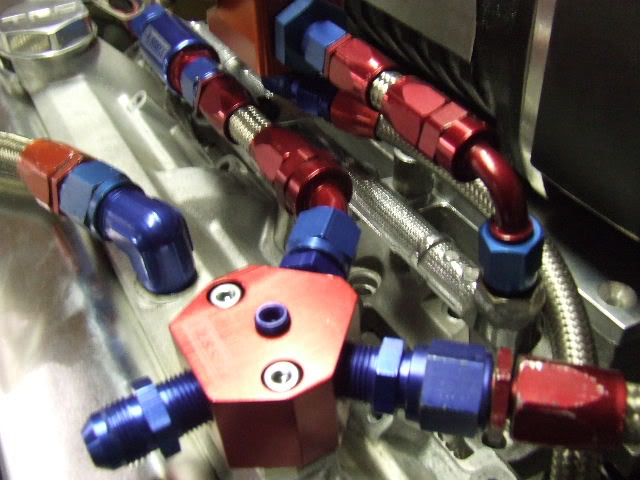
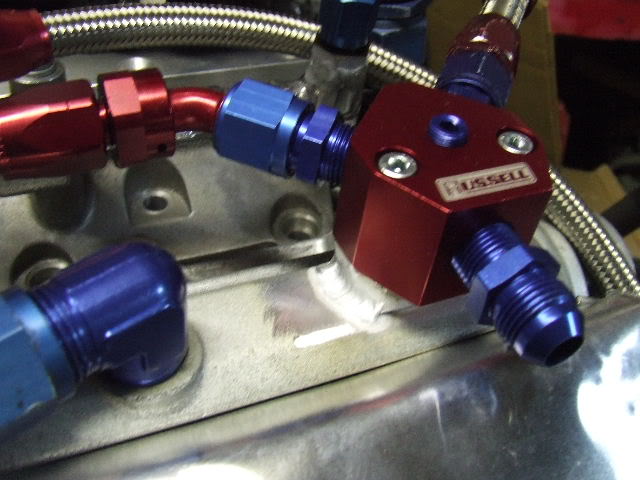
Here is the front feed in. Will have a 180 like this o both sides. Just starting to lay out oil breather lines, stay tuned for more updates, Its starting to get fun!
Also ignore the aluminum looking cover on the valve cover, thatís just thin aluminum tape for mock up and concept of idea.
Slowly getting there.
Now for the tease!


Here is the front feed in. Will have a 180 like this o both sides. Just starting to lay out oil breather lines, stay tuned for more updates, Its starting to get fun!


#161
Lexus Champion
iTrader: (2)
i read that whole write up on checking valve clearances. good write up. that method definitely works. i still do clay occasionally. with this method though you can actually graph, in excel or alike, your dergee of crank rotation versus the clearance you have. you will get a nice curve probably looking a lot like a sinusoidal wave.
later on if you go with a different lift cam you can actually refer back to that graph and have a pretty accurate estimate of possible clearance. obviously cam profiles can vary a lot but its a start.
who made this write up?
i dont use that much clearance on either intake or exhaust. if its there then all good and dandy but you can realistically go down to 0.060" on intake and 0.080" on exhaust.
hurry up with this already. cant take the waiting any more

#162
Super Moderator

Thread Starter
iTrader: (33)
Join Date: Jul 2004
Location: Sideways on the Yellow Brick Road! < Thats KS!
Posts: 5,827
Likes: 0
Received 4 Likes
on
4 Posts
i read that whole write up on checking valve clearances. good write up. that method definitely works. i still do clay occasionally. with this method though you can actually graph, in excel or alike, your dergee of crank rotation versus the clearance you have. you will get a nice curve probably looking a lot like a sinusoidal wave.
later on if you go with a different lift cam you can actually refer back to that graph and have a pretty accurate estimate of possible clearance. obviously cam profiles can vary a lot but its a start.
who made this write up?
i dont use that much clearance on either intake or exhaust. if its there then all good and dandy but you can realistically go down to 0.060" on intake and 0.080" on exhaust.
hurry up with this already. cant take the waiting any more
later on if you go with a different lift cam you can actually refer back to that graph and have a pretty accurate estimate of possible clearance. obviously cam profiles can vary a lot but its a start.
who made this write up?
i dont use that much clearance on either intake or exhaust. if its there then all good and dandy but you can realistically go down to 0.060" on intake and 0.080" on exhaust.
hurry up with this already. cant take the waiting any more

The write up was done by Kelford Cams Tech department.
Waiting is really killing me, But I am getting closer.


