Paint correction And Detailed Ready For Summer - Lexus ISF Ultrasonic Blue Mica
 05-06-17, 08:58 AM
#1
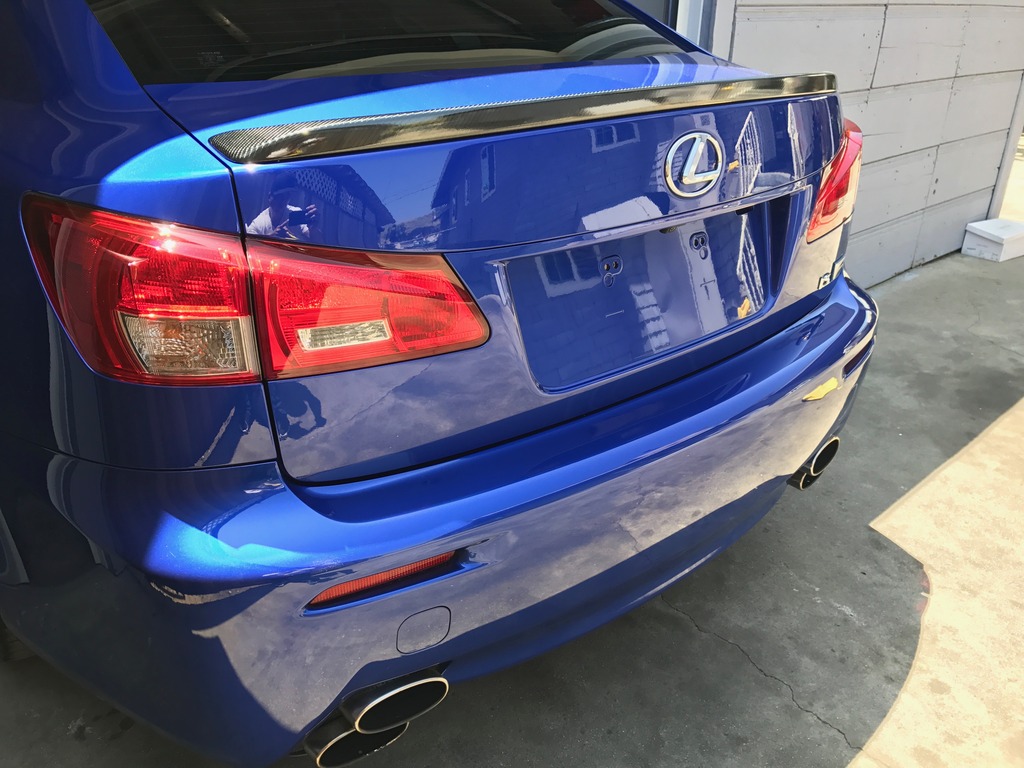
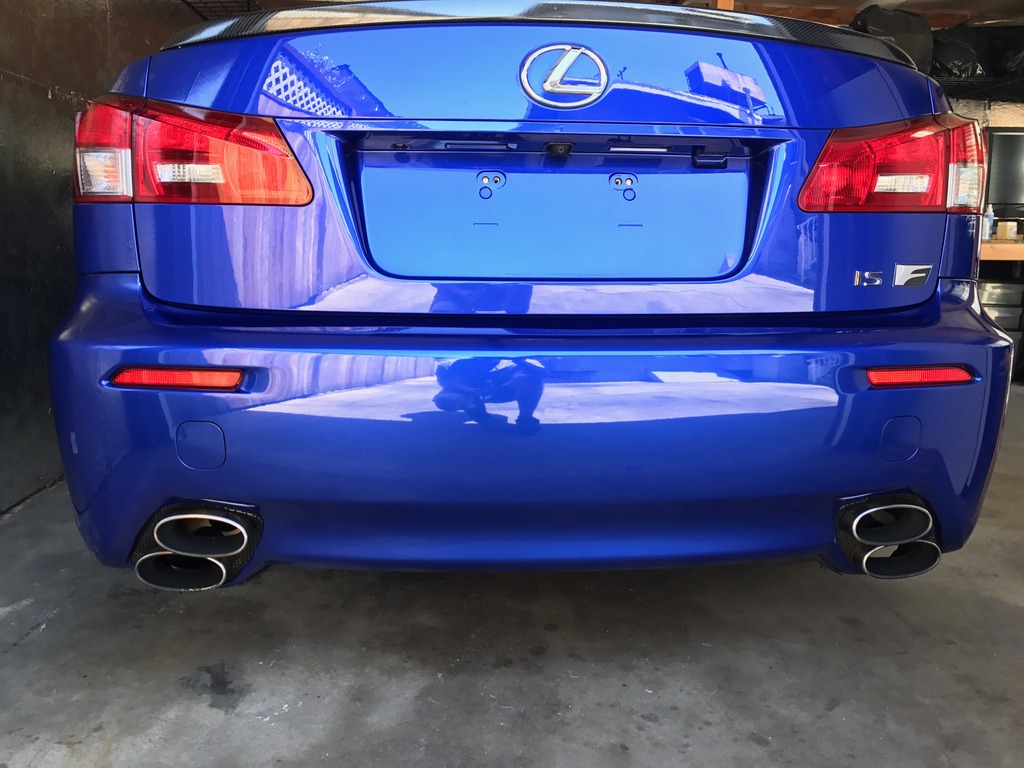
Hello CL, haven't been able to post here in awhile so I figured I post this here as well. Wanted to share an ISF that has been detailed out and ready for summer, if you have any questions, please let me know:
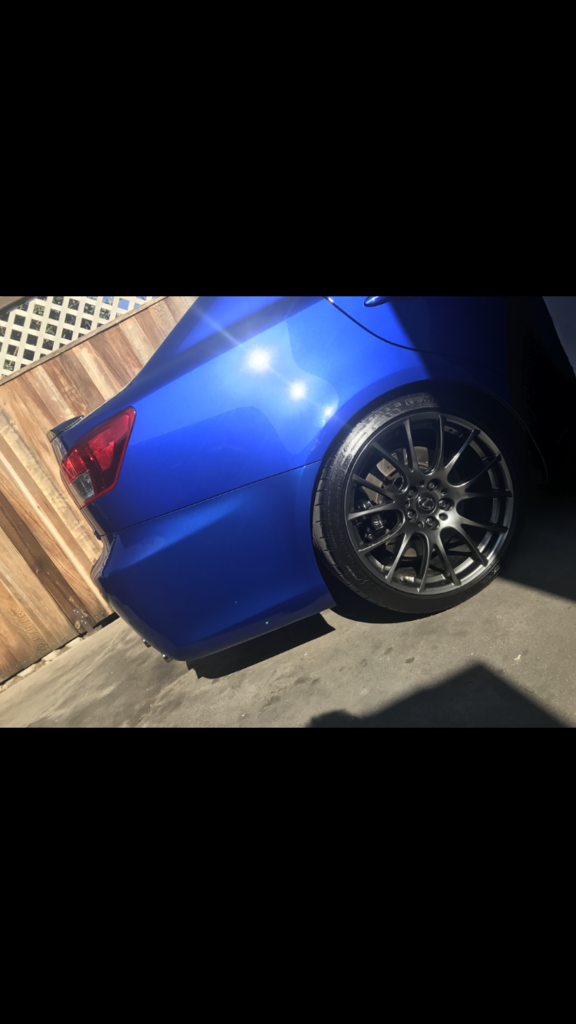
The vehicle I worked on is a daily driver. I have been wanting to correct the paint and try out a coating, however could never dedicate the hours. I have previously corrected the roof/hood,trunk and have maintained it purely with Optimum's No Rinse Solutions, swirls have not reoccurred in these areas, however I held off on the remaining panels until now.
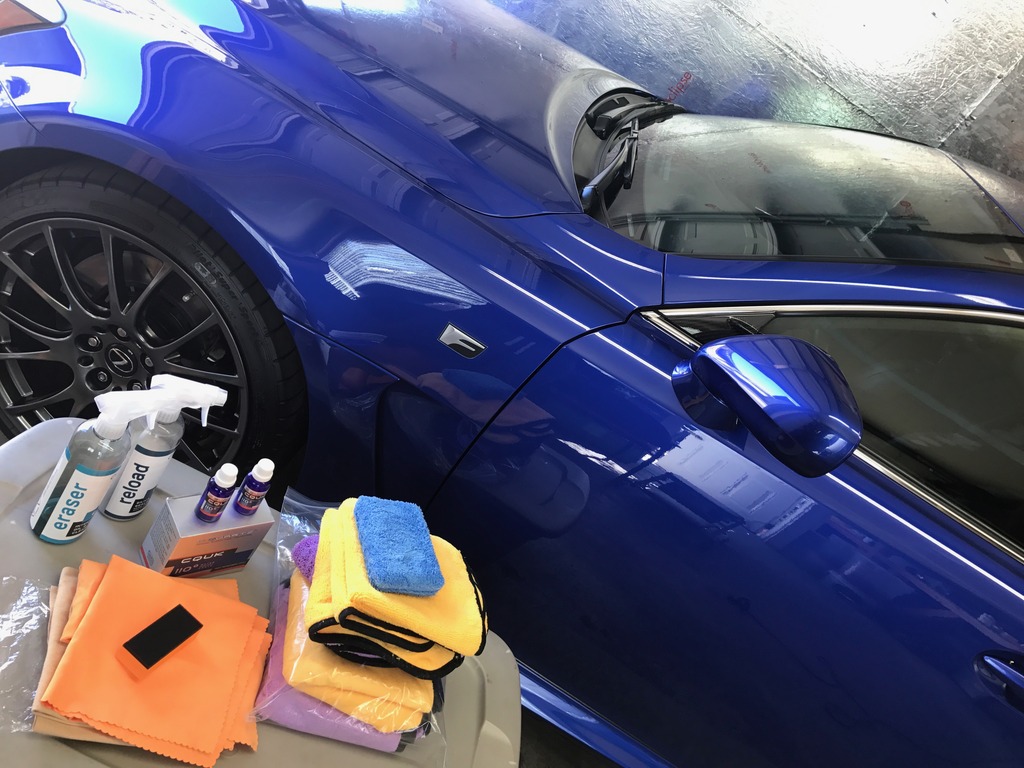
Products and process used:
Tires/Fender Wells: Meguiars super degreaser diluted 10:1, low profile tire brush, wheel woolies brush set
Wheels: Meguiars Wheel Brightener diluted 4:1,famous detailing brush, wheel woolies, speed master jr, green brushes. Wheels/Calipers coated with carpro cquartz uk
Foam: MEguiars gold class
Wash Mitt: Synthethic Sheepskin wash mitt
Dry: Vac n blo, Various microfiber yellow/purple, spritzed with meguiars final inspection
Decontamination: Meguiars clay (gray), nanoskin synethic clay medium
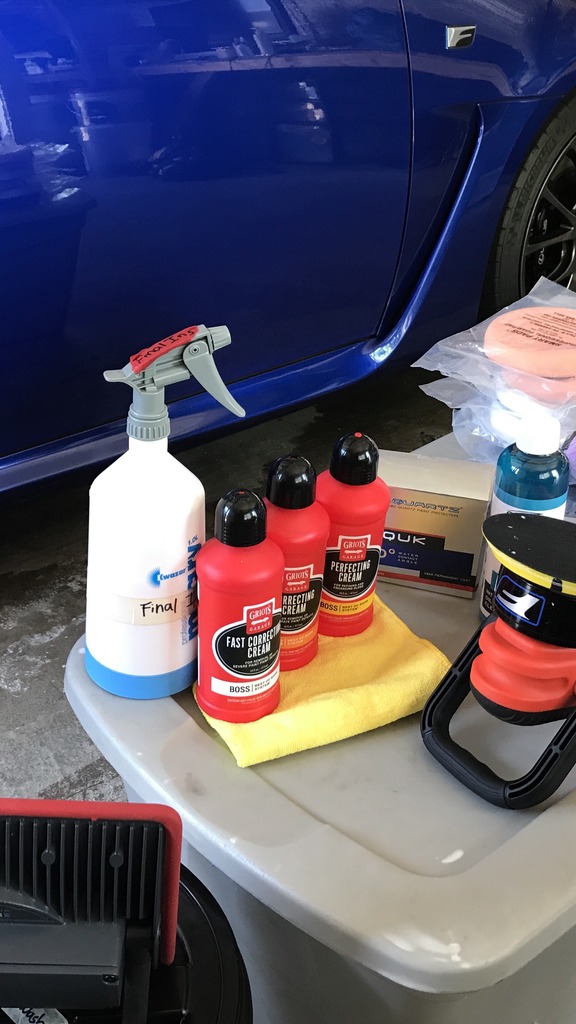
Paint Correction: Griots Fast Correcting Cream/Perfecting Cream/205,
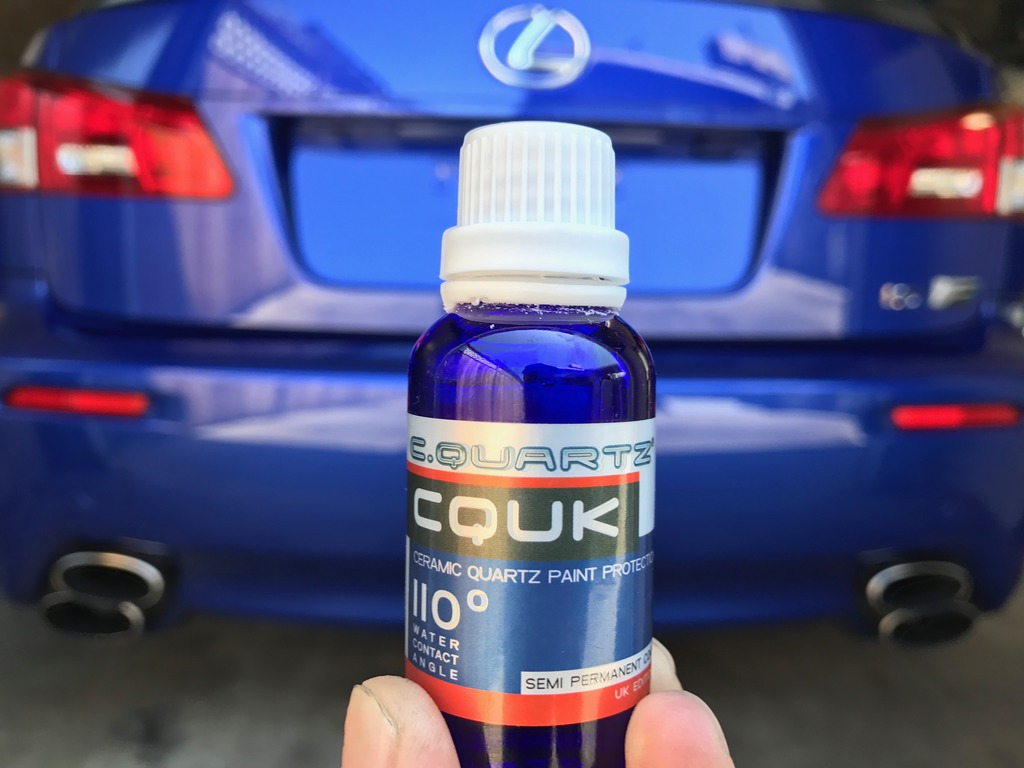
Protection:Carpro Cquartz UK Edition followed by Carpro Reload (new version)
Glass: Meguiars Glass Cleaner followed by Carpro Reload
Dressings: MEguiars Hyper Dressing diluted 4:1 (2 applications), MEguiars Black for Fender liners/front grill, front air dams, and windshield splash shields.
Interior cleaned with meguiars quick interior detailer/all purpose cleaner and mats dressed with Scotchguard, vacuumed with vac n blo (use two separate hoses one to dry and one to vacuum, this avoid cross contamination).
Engine: MEguiars super degreaser, Meguiars Xpress Spray Wax, and Trim Shine
Water: CR Spotless 300 Gallon System
Inspection Lights: Scangrip color grip set, iview
Polisher: Griots 3", 6", orange brush and microfibers for cleaning the pads
Pads: various lake country 5", 3", 4", orange and white
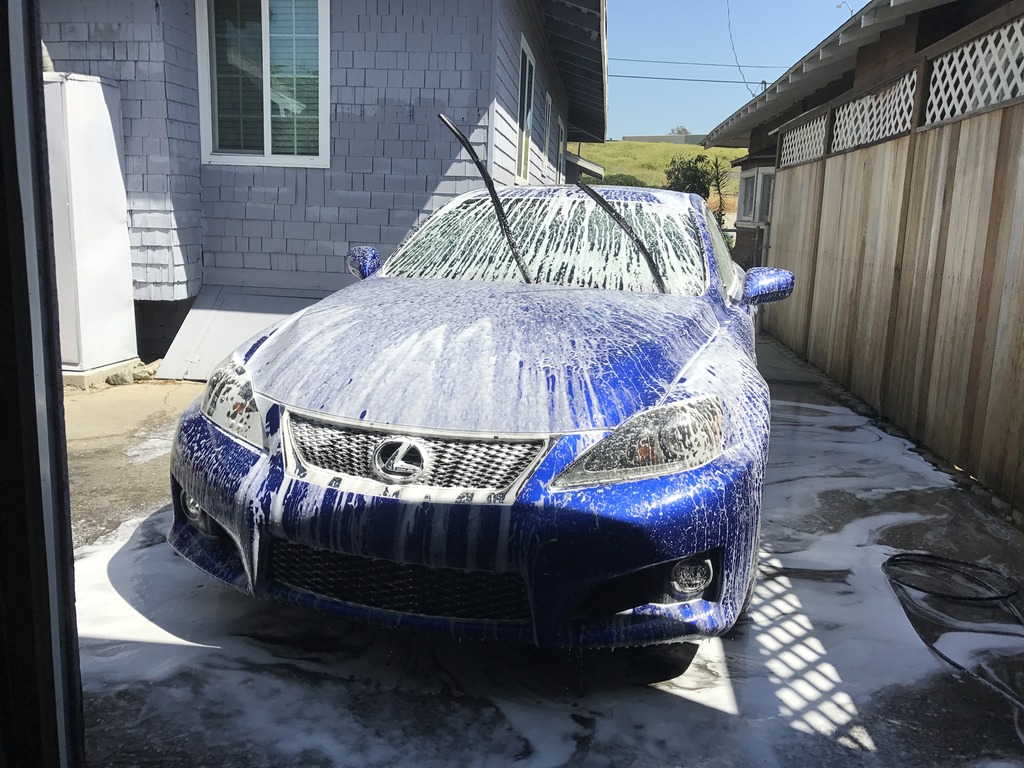
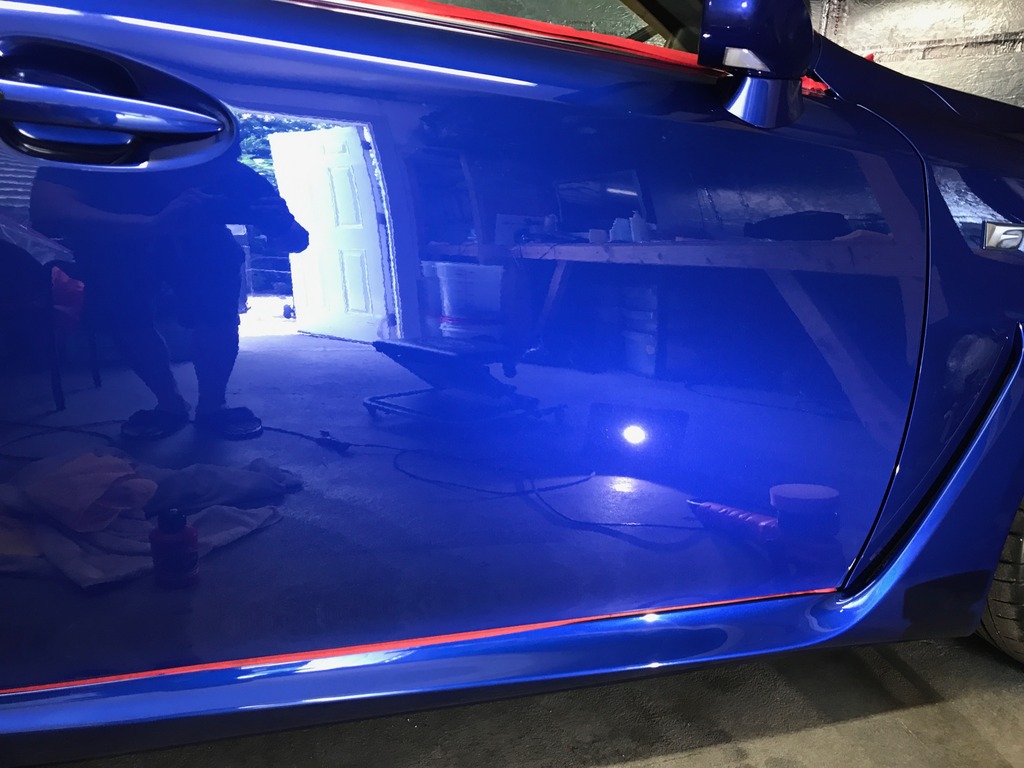
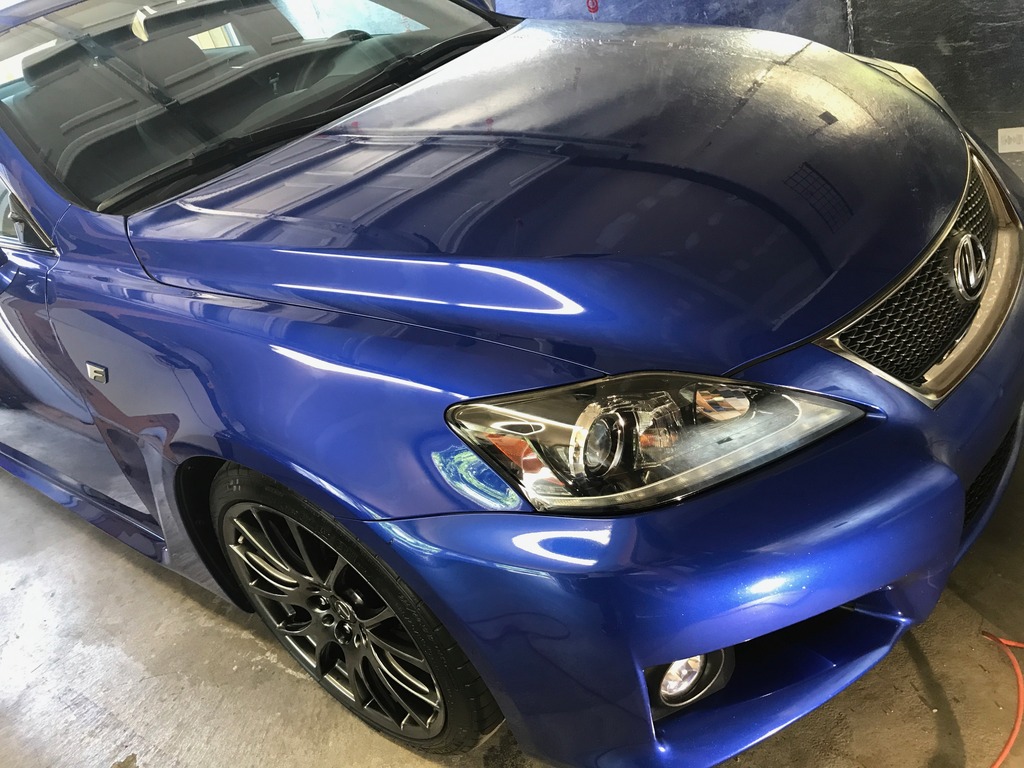
I started with a foam prewash with meguiars gold class soap, cleaned the car very good using the one bucket method because I knew I was chasing after as much defects as I could. Started with the top, hood, and trunk as those areas were previously corrected. I was able to use the boars brushes in the grilles, emblems, mirror, just every crack and crevices where contamination was hiding, since the car was previously maintained using a rinse less wash, these areas were missed easily.
The car was then dried with
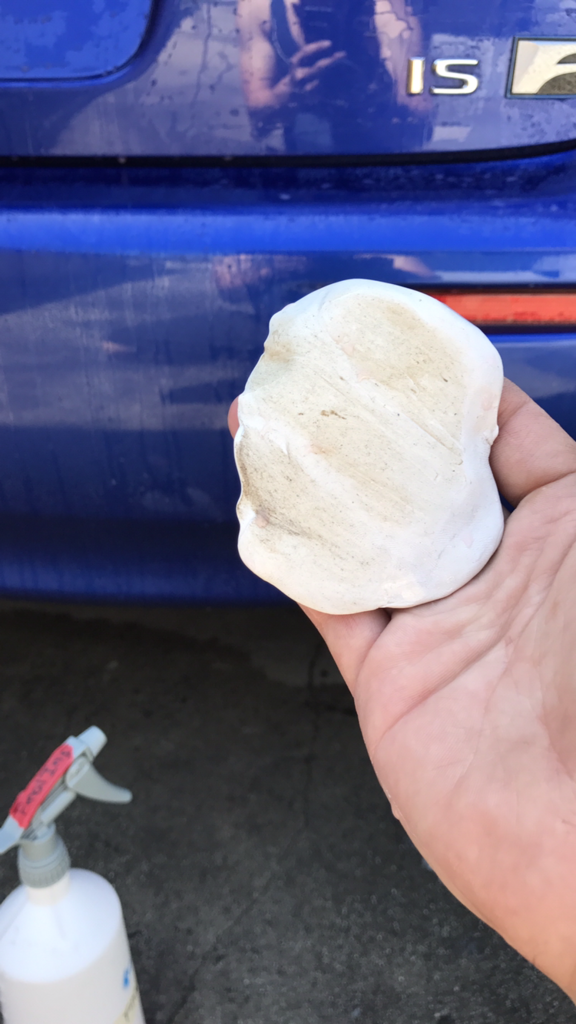
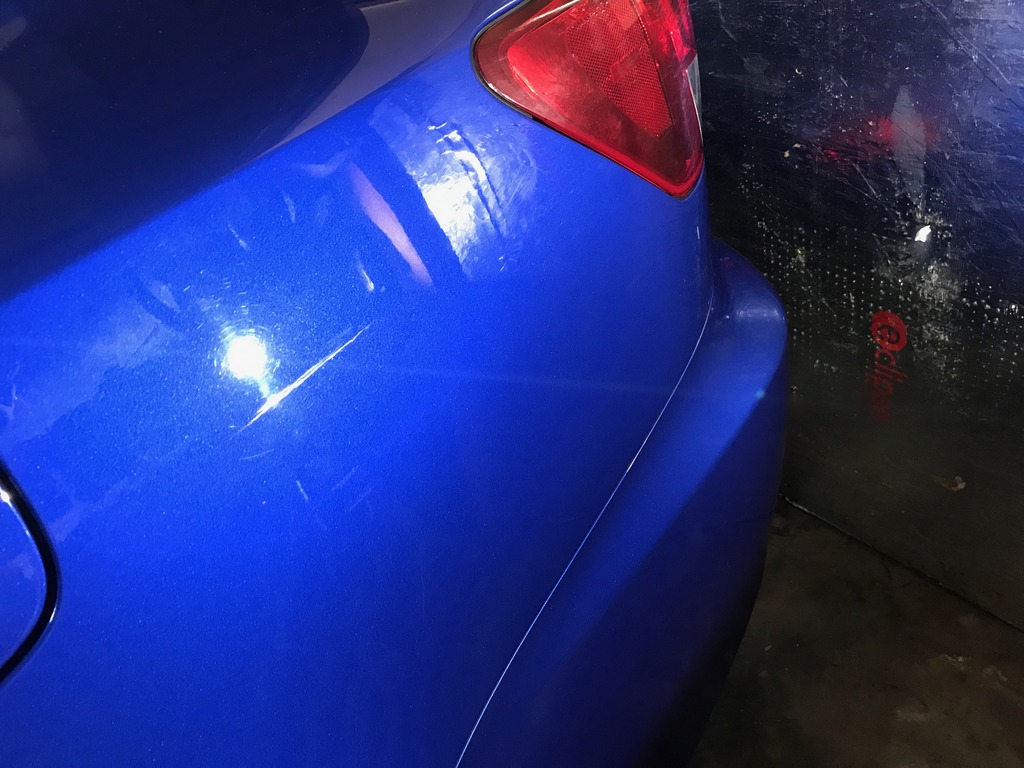
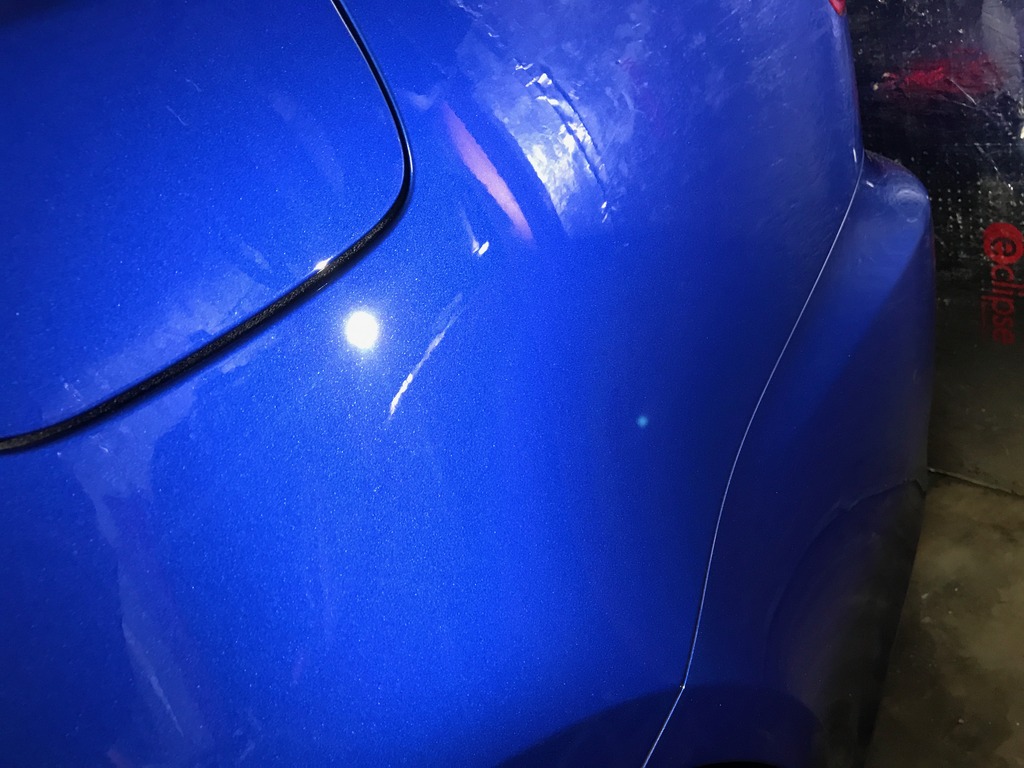
Once the vehicle was cleaned, I started a thorough decon process using meguiars clay (gray), nanoskin clay sponge (blue), and Meguiars final inspection as the lubricant. Not much decon was needed as the car was well maintained with solid protection. I split the clay bar into two pieces, one for the windows and one of the paint. The windows also had a lot of contamination around the edges which the clay bar picked up with ease. The rest of the car was in good shape except for the rear end of the car where lots of bonded contamination was uncovered with the clay bar.
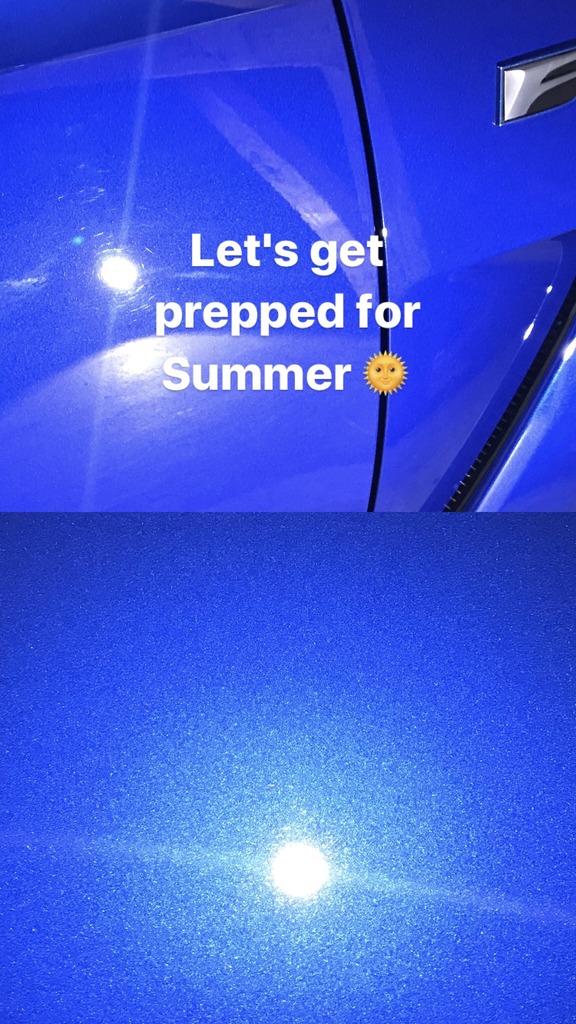
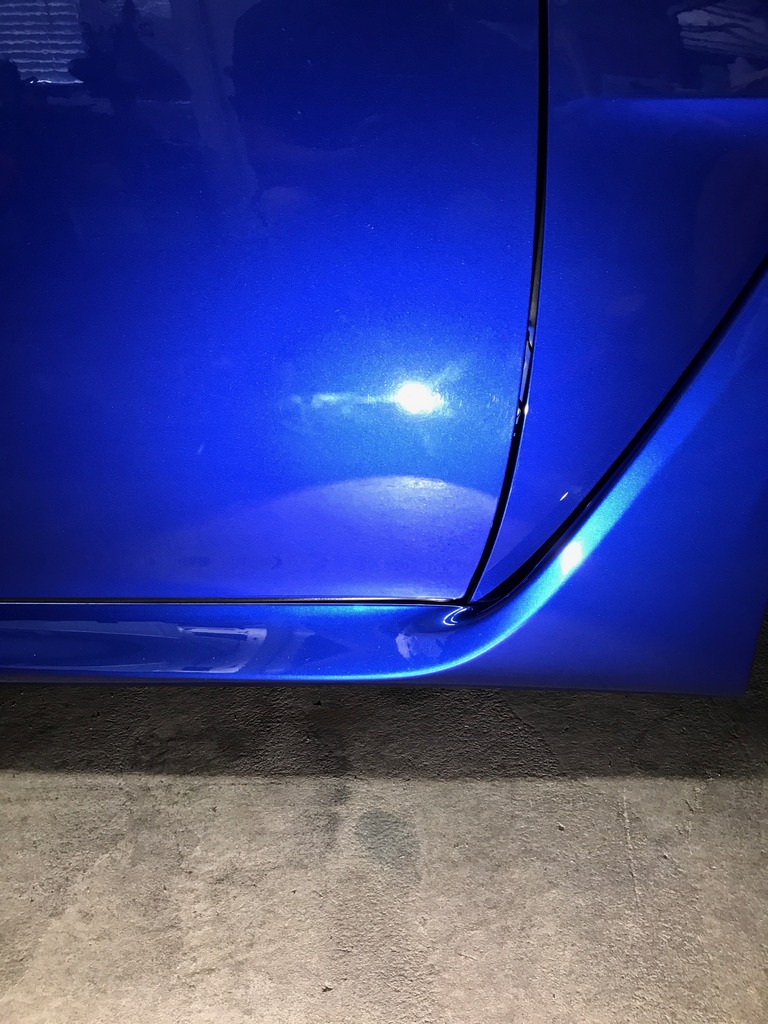
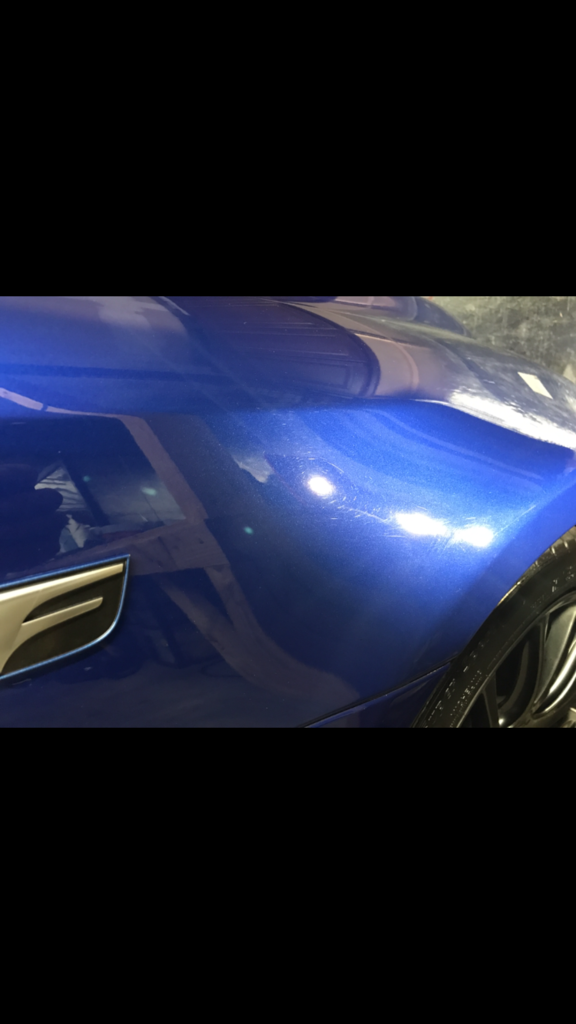
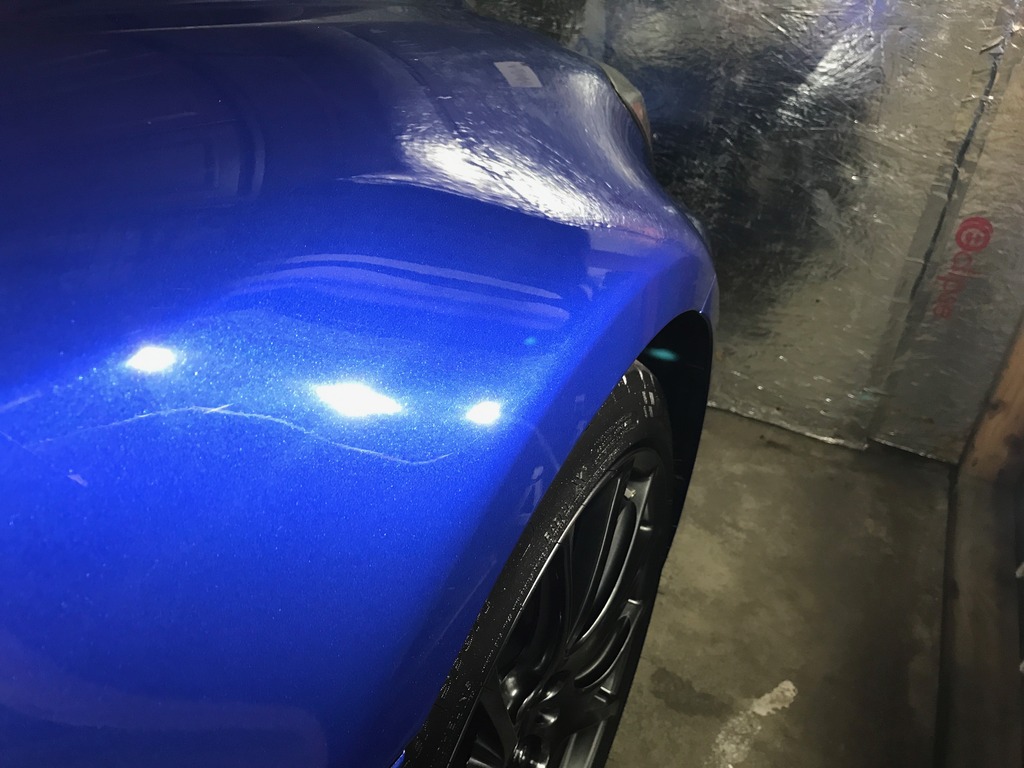
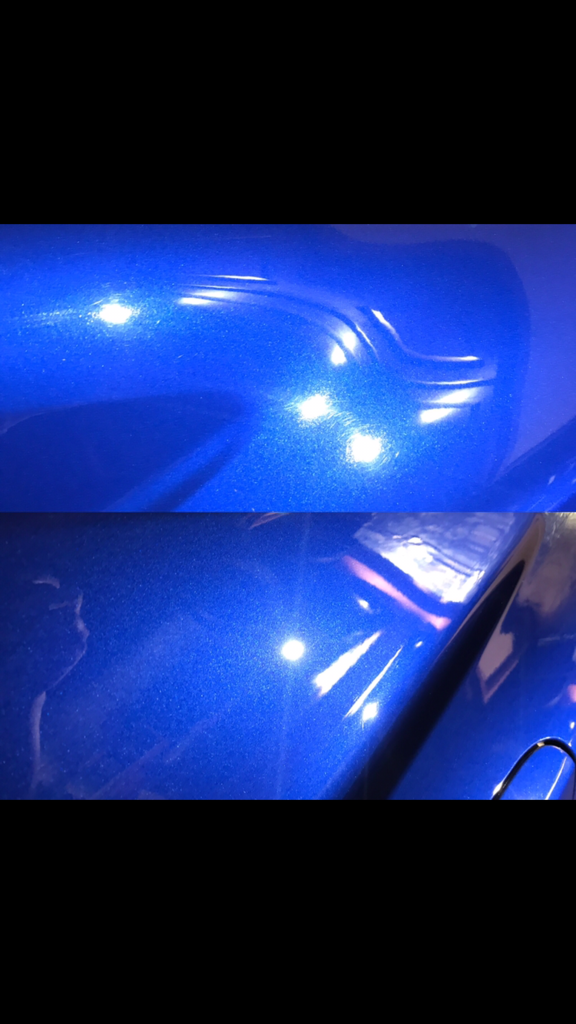
Once the car was thoroughly decontaminated the car was thoroughly inspected using the scangrip lighting system, the upper parts i.e. hood top and trunk were still swirl free from the previous correction so I left those parts alone, the rest of the panels needed some serious tlc as the car was purchased used and did not receive attention it needed.
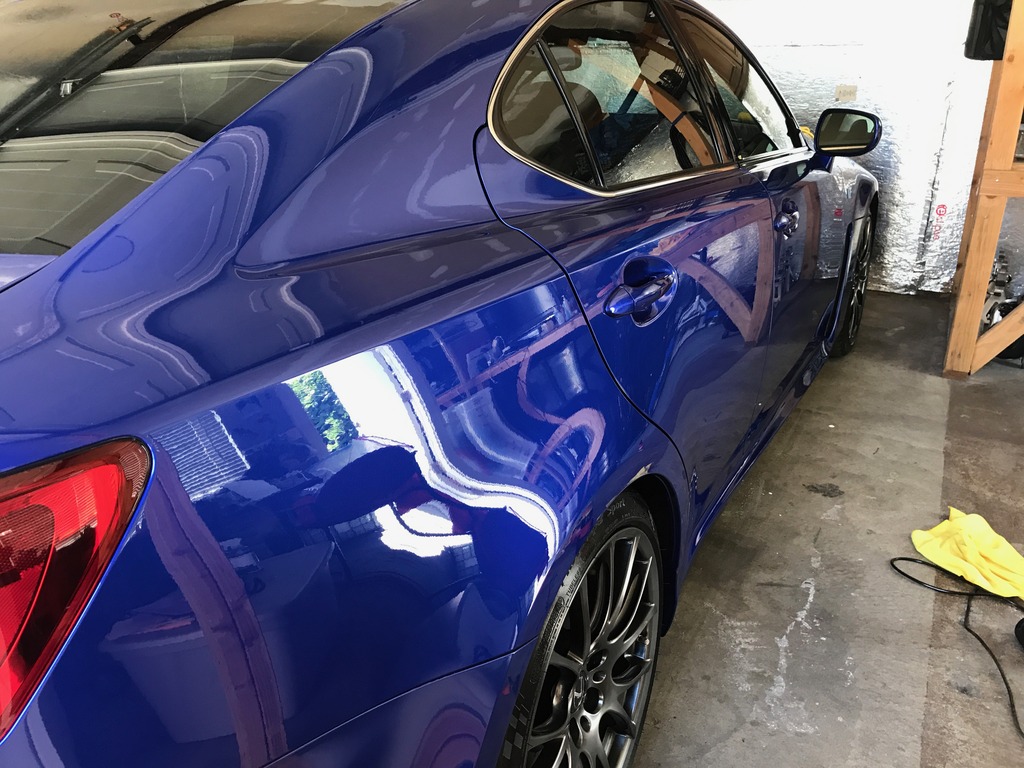
Several test spots using orange/white pad with fast correcting cream, correcting cream, and perfecting cream were used. Initially correcting cream was only taking out minor defects then the product was bumped up to fast correcting cream with white/orange pad, the orange pad was used in the end. I did try one last step using 205 and white pad, however felt that the need that the additional roi on this setup for this daily wasn't worth it for me, maybe in the future however. One of the things I noticed about this compound was that it was very easy to use. Dust free, fast defect removal, and most importantly left the finish lsp ready. I still tried perfecting cream on a few panels then concluded that this step was not worth it for me as this is a daily driver. I adjusted my technique and used the fcc and finished out literally lsp ready. I also re-read the bottle and noticed how Griots claims this product preps for lsp or perfecting cream. I could see why many professionals bump up to microfiber pads, however I wasn't chasing every rid out there. I just wanted to enhance and this product certainly exceeded my expectations and left me with a better finish with less work to follow up with in the end. Another thing to note was that the scan grip lighting reveals a lot more than what the sun can reveal. After the test spots were performed, I was able to bring it out into the sun to inspect the results.
This was the first time trying out the coatings, it was fairly straight forward however I did incur one high spot, however it was because I was working panel by panel and while wiping the off the product on the applied fender, the microfiber slid across the hood and left a spot which was noticed at a later time. This may be something you should look out for if your working panel to panel like I was.
Kudos to the Guys/Gals that post their work here, because it is truly a lot of work to share!


Thanks for viewing!
-James
The vehicle I worked on is a daily driver. I have been wanting to correct the paint and try out a coating, however could never dedicate the hours. I have previously corrected the roof/hood,trunk and have maintained it purely with Optimum's No Rinse Solutions, swirls have not reoccurred in these areas, however I held off on the remaining panels until now.
Products and process used:
Tires/Fender Wells: Meguiars super degreaser diluted 10:1, low profile tire brush, wheel woolies brush set
Wheels: Meguiars Wheel Brightener diluted 4:1,famous detailing brush, wheel woolies, speed master jr, green brushes. Wheels/Calipers coated with carpro cquartz uk
Foam: MEguiars gold class
Wash Mitt: Synthethic Sheepskin wash mitt
Dry: Vac n blo, Various microfiber yellow/purple, spritzed with meguiars final inspection
Decontamination: Meguiars clay (gray), nanoskin synethic clay medium
Paint Correction: Griots Fast Correcting Cream/Perfecting Cream/205,
Protection:Carpro Cquartz UK Edition followed by Carpro Reload (new version)
Glass: Meguiars Glass Cleaner followed by Carpro Reload
Dressings: MEguiars Hyper Dressing diluted 4:1 (2 applications), MEguiars Black for Fender liners/front grill, front air dams, and windshield splash shields.
Interior cleaned with meguiars quick interior detailer/all purpose cleaner and mats dressed with Scotchguard, vacuumed with vac n blo (use two separate hoses one to dry and one to vacuum, this avoid cross contamination).
Engine: MEguiars super degreaser, Meguiars Xpress Spray Wax, and Trim Shine
Water: CR Spotless 300 Gallon System
Inspection Lights: Scangrip color grip set, iview
Polisher: Griots 3", 6", orange brush and microfibers for cleaning the pads
Pads: various lake country 5", 3", 4", orange and white
I started with a foam prewash with meguiars gold class soap, cleaned the car very good using the one bucket method because I knew I was chasing after as much defects as I could. Started with the top, hood, and trunk as those areas were previously corrected. I was able to use the boars brushes in the grilles, emblems, mirror, just every crack and crevices where contamination was hiding, since the car was previously maintained using a rinse less wash, these areas were missed easily.
The car was then dried with
Once the vehicle was cleaned, I started a thorough decon process using meguiars clay (gray), nanoskin clay sponge (blue), and Meguiars final inspection as the lubricant. Not much decon was needed as the car was well maintained with solid protection. I split the clay bar into two pieces, one for the windows and one of the paint. The windows also had a lot of contamination around the edges which the clay bar picked up with ease. The rest of the car was in good shape except for the rear end of the car where lots of bonded contamination was uncovered with the clay bar.
Once the car was thoroughly decontaminated the car was thoroughly inspected using the scangrip lighting system, the upper parts i.e. hood top and trunk were still swirl free from the previous correction so I left those parts alone, the rest of the panels needed some serious tlc as the car was purchased used and did not receive attention it needed.
Several test spots using orange/white pad with fast correcting cream, correcting cream, and perfecting cream were used. Initially correcting cream was only taking out minor defects then the product was bumped up to fast correcting cream with white/orange pad, the orange pad was used in the end. I did try one last step using 205 and white pad, however felt that the need that the additional roi on this setup for this daily wasn't worth it for me, maybe in the future however. One of the things I noticed about this compound was that it was very easy to use. Dust free, fast defect removal, and most importantly left the finish lsp ready. I still tried perfecting cream on a few panels then concluded that this step was not worth it for me as this is a daily driver. I adjusted my technique and used the fcc and finished out literally lsp ready. I also re-read the bottle and noticed how Griots claims this product preps for lsp or perfecting cream. I could see why many professionals bump up to microfiber pads, however I wasn't chasing every rid out there. I just wanted to enhance and this product certainly exceeded my expectations and left me with a better finish with less work to follow up with in the end. Another thing to note was that the scan grip lighting reveals a lot more than what the sun can reveal. After the test spots were performed, I was able to bring it out into the sun to inspect the results.
This was the first time trying out the coatings, it was fairly straight forward however I did incur one high spot, however it was because I was working panel by panel and while wiping the off the product on the applied fender, the microfiber slid across the hood and left a spot which was noticed at a later time. This may be something you should look out for if your working panel to panel like I was.
Kudos to the Guys/Gals that post their work here, because it is truly a lot of work to share!


Thanks for viewing!
-James
Last edited by k20trick; 05-06-17 at 09:03 AM.
 05-06-17, 09:08 AM
#2
Great job!
Detailing is definitely alot of hard work and many hours to do what you did. There is no way around that. What you put in is what you get out. Cut a corner here and there and it will be obvious you did so in the end result.
Definitely more involved and time consuming than some other car care/protection jobs (window tint, installing PPF on a new vehicle) do not require anywhere near this amount of time if done by a seasoned veteran. But detailing, no matter how good or quick you are, you're still doing all the steps and still have a full vehicle to work on, not just the typical front end (PPF) or the glass (tints).
The following users liked this post:
k20trick (05-06-17)
05-06-17, 10:07 AM
#3
Great job!
Detailing is definitely alot of hard work and many hours to do what you did. There is no way around that. What you put in is what you get out. Cut a corner here and there and it will be obvious you did so in the end result.
Definitely more involved and time consuming than some other car care/protection jobs (window tint, installing PPF on a new vehicle) do not require anywhere near this amount of time if done by a seasoned veteran. But detailing, no matter how good or quick you are, you're still doing all the steps and still have a full vehicle to work on, not just the typical front end (PPF) or the glass (tints).
Detailing is definitely alot of hard work and many hours to do what you did. There is no way around that. What you put in is what you get out. Cut a corner here and there and it will be obvious you did so in the end result.
Definitely more involved and time consuming than some other car care/protection jobs (window tint, installing PPF on a new vehicle) do not require anywhere near this amount of time if done by a seasoned veteran. But detailing, no matter how good or quick you are, you're still doing all the steps and still have a full vehicle to work on, not just the typical front end (PPF) or the glass (tints).
The following users liked this post:
k20trick (05-08-17)
The following users liked this post:
k20trick (05-08-17)
05-16-17, 11:04 AM
#6
Looking good! Of course days later I came here to look for your thread after suggesting you post here lololol.
Just finished mine up over the weekend. Menzerna polished, PowerLock sealant, and Liquid Sov topped.
Just finished mine up over the weekend. Menzerna polished, PowerLock sealant, and Liquid Sov topped.
05-16-17, 12:53 PM
#7
I haven't posted on cl for awhile, but per your post, its here!

**I thought you were going with a coating?**
Powerlock and pinnacle souvern is some pretty serious stuff I have a sample of the wolfgang one it looks good on usb too!
Last edited by k20trick; 05-16-17 at 12:58 PM.
Trending Topics


Thread
Thread Starter
Forum
Replies
Last Post