
DIY:Install SuperPro Rear Inner Main Control Arm Bushing
 06-08-14, 04:06 AM
#1
Driver
Thread Starter

I started this today and I will be continuing tomorrow (Monday).
So far, the car is winning.

After battling with the Tom's bracing and the exhaust I was finally able to remove one arm from the vehicle. The next challenge was to try to press out the bushing without damaging the sheet metal on the arm. This is because the bushing sleeve is not fully encased. Try pressing the bush and the sides of the arm start to move and deform.
What I have managed to do is burn the rubber out using a map gas torch and cut the sleeve using a hacksaw. A quick few blows with the hammer and out it came.
Tomorrow I hope to reinstall this one fairly quickly and video the process on the other side.
Oh and I discovered that I have lost a nut and bolt from one of my Tom's arms!
 I'll have to find a replacement.
Cheers,
Chris
I'll update this thread with pics tomorrow as well.
 06-14-14, 05:25 AM
#2
Driver
Thread Starter
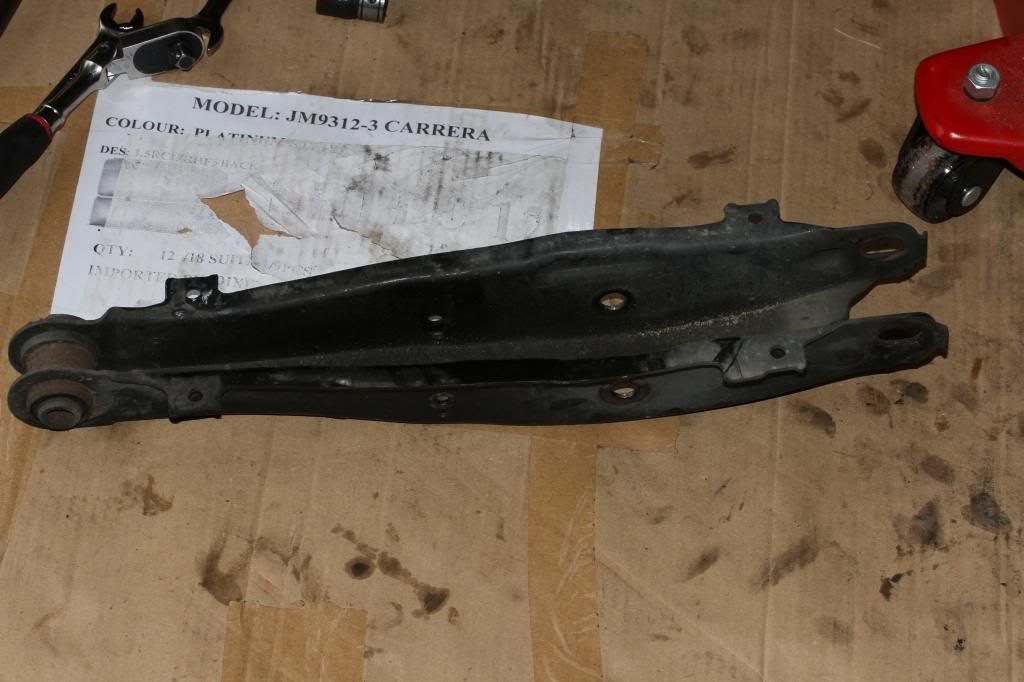
Buy the bushings from Figs Engineering.
First, jack up the car and remove rear wheel.
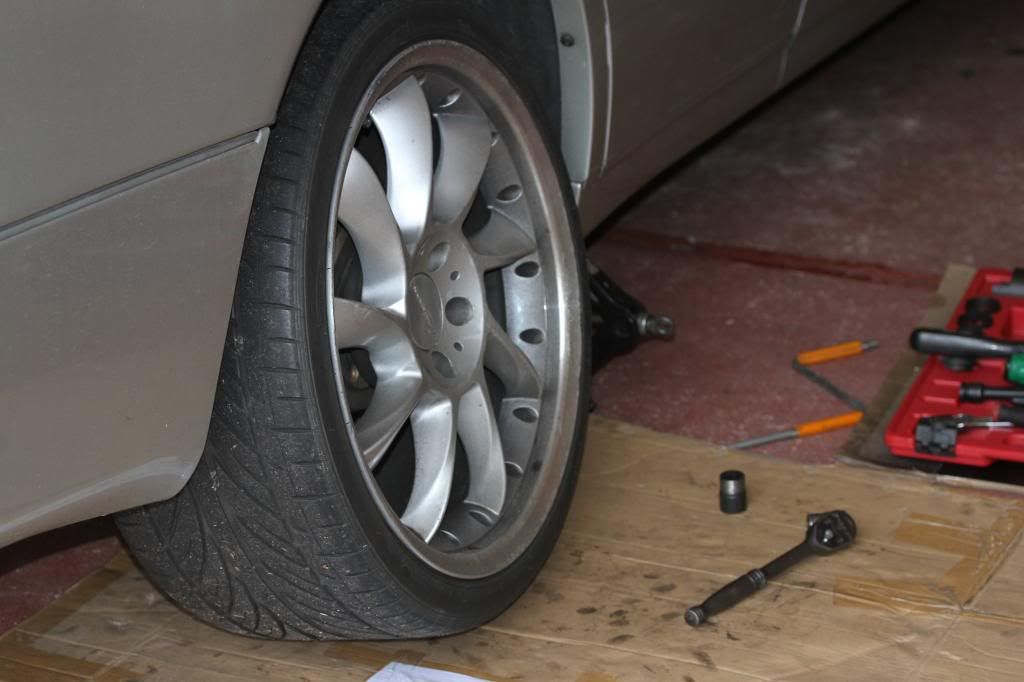
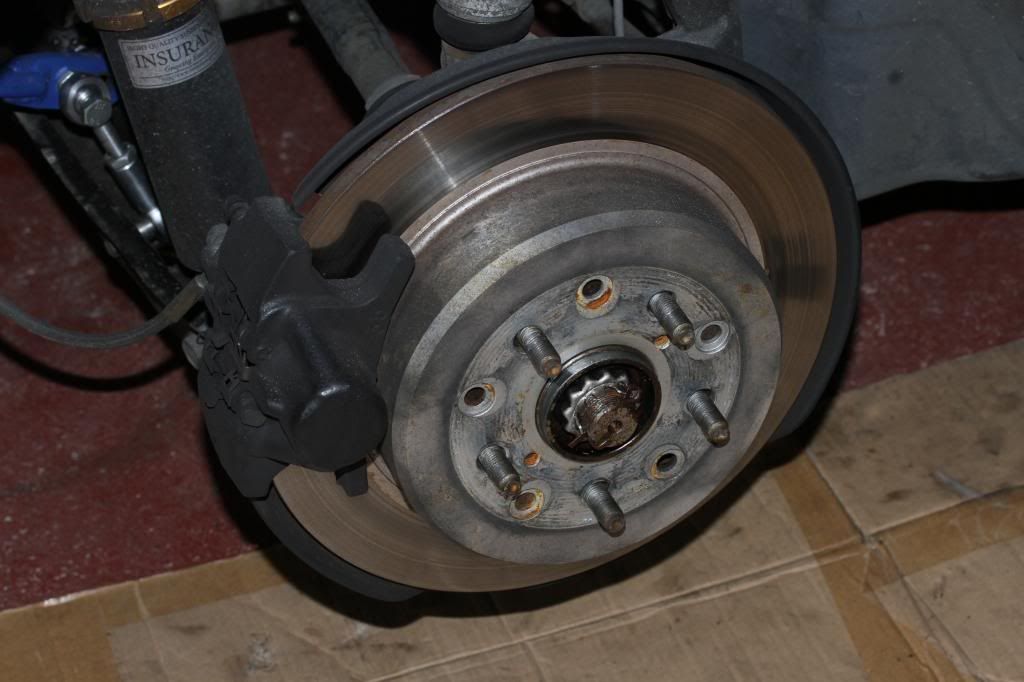
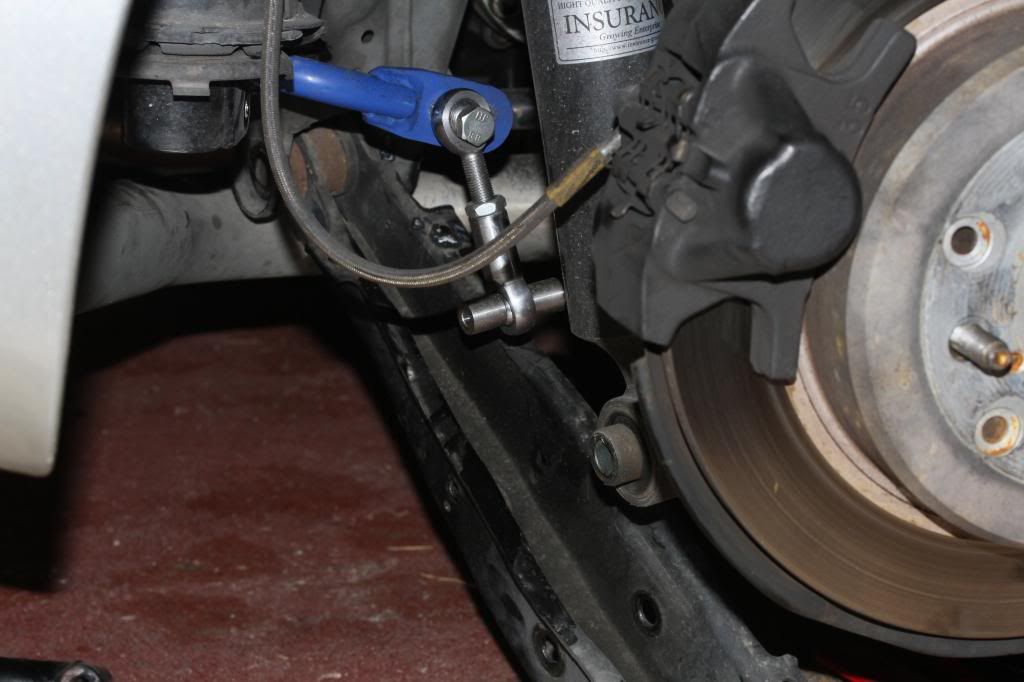
Remove the nuts and bolts holding the shock absorber, the swaybar link and the hub knuckle. I used a jack under the arm to assist in removing them.
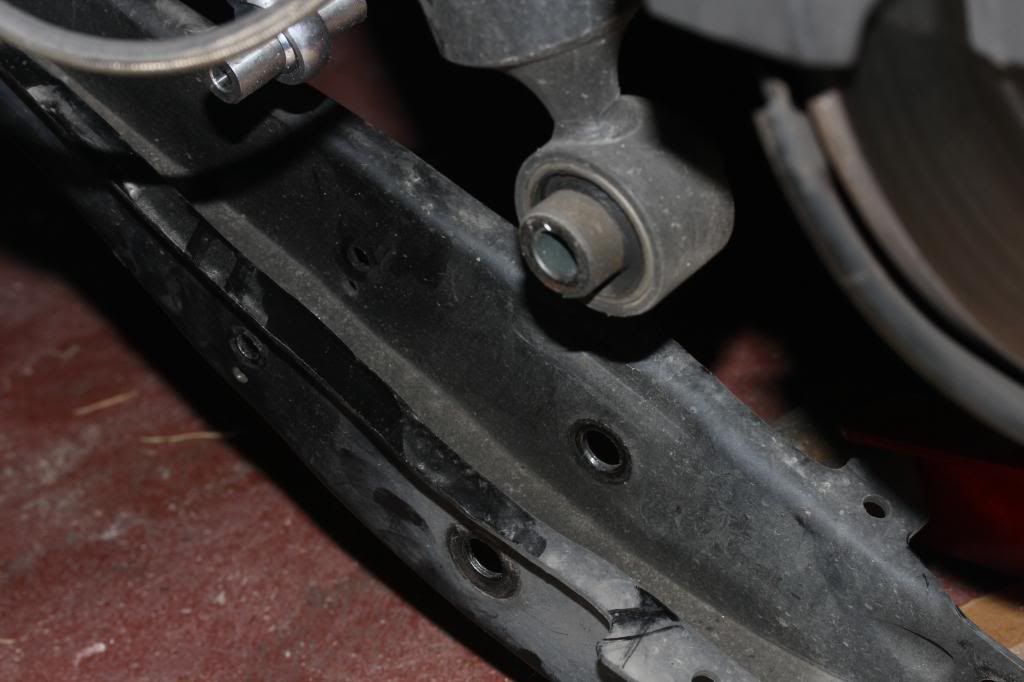
As you can see, it is difficult to press out the bushing as there is no support in the middle.

Remove the arm and burn out the centre of the OEM bushing by using a Map gas torch. Burn out the rubber completely.
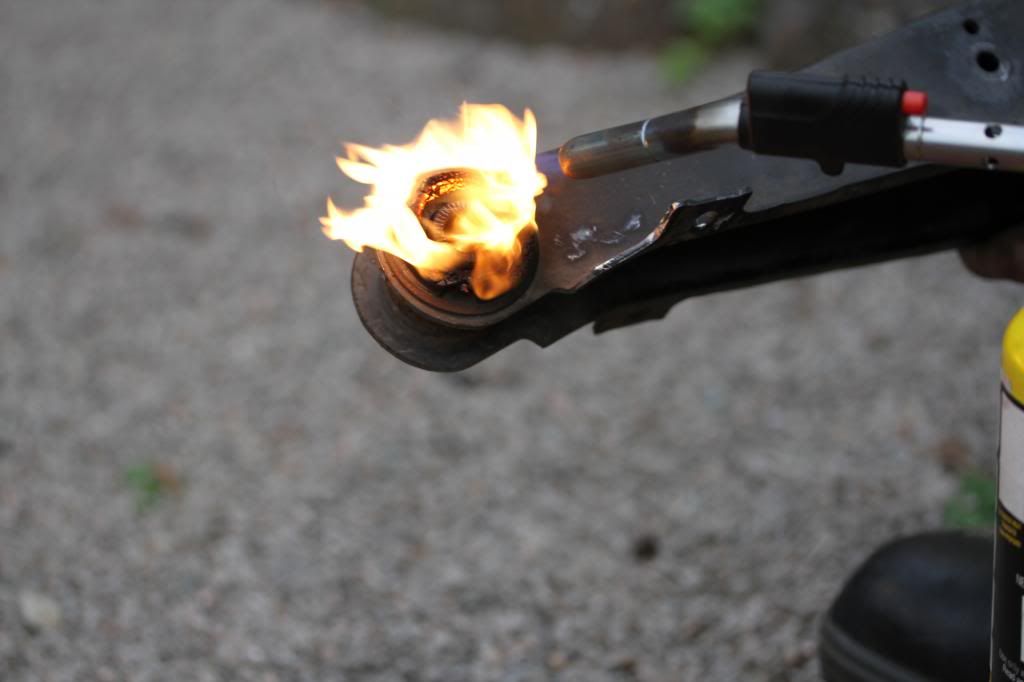
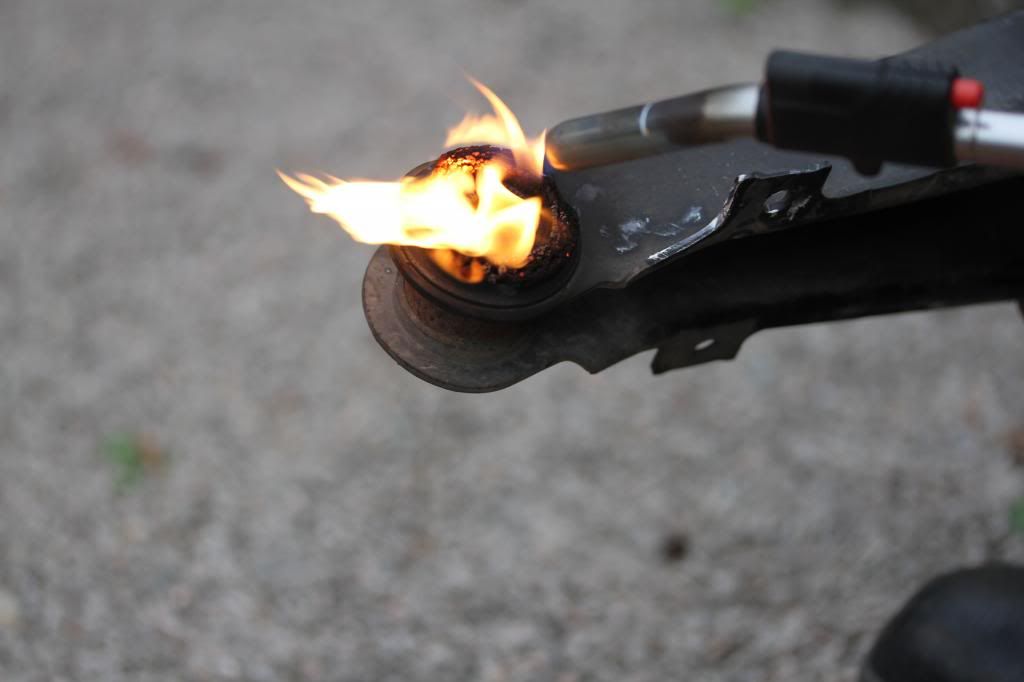
The centre sleeve will drop out. Be careful as map gas is REALLY HOT. Also, the melting rubber is messy and toxic smelling.
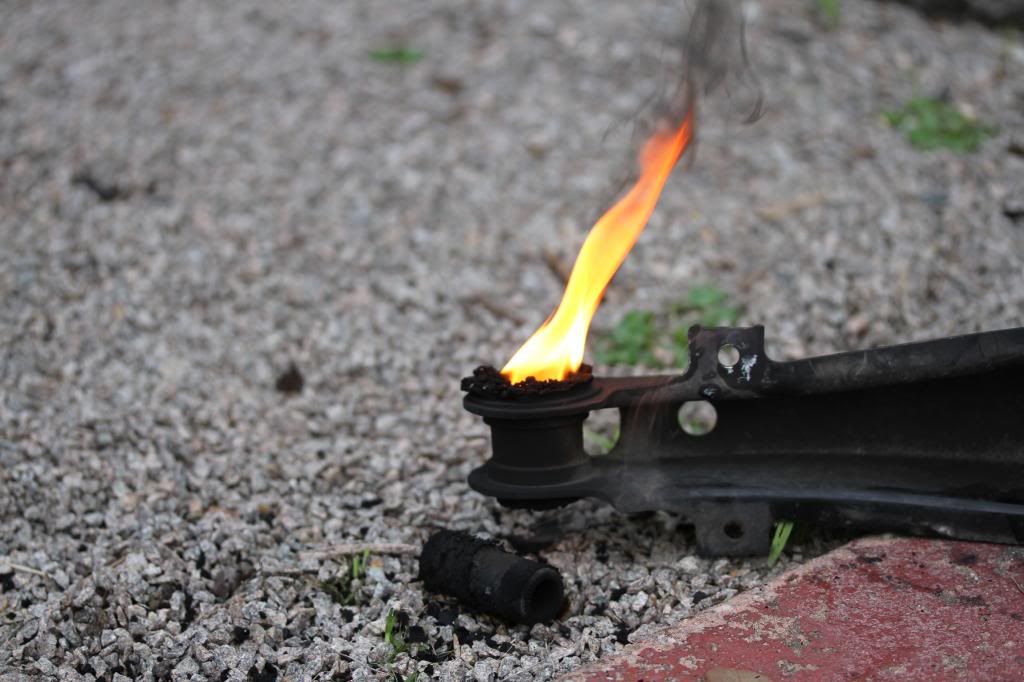
Use a hacksaw to carefully remove the old sleeve trying to avoid the sheet metal from bending.
Then knock the the bushing out. Be patient and it will come out. I used more heat and a few cuts.A bit of a sanding helps if the outer sleeve is rusty.
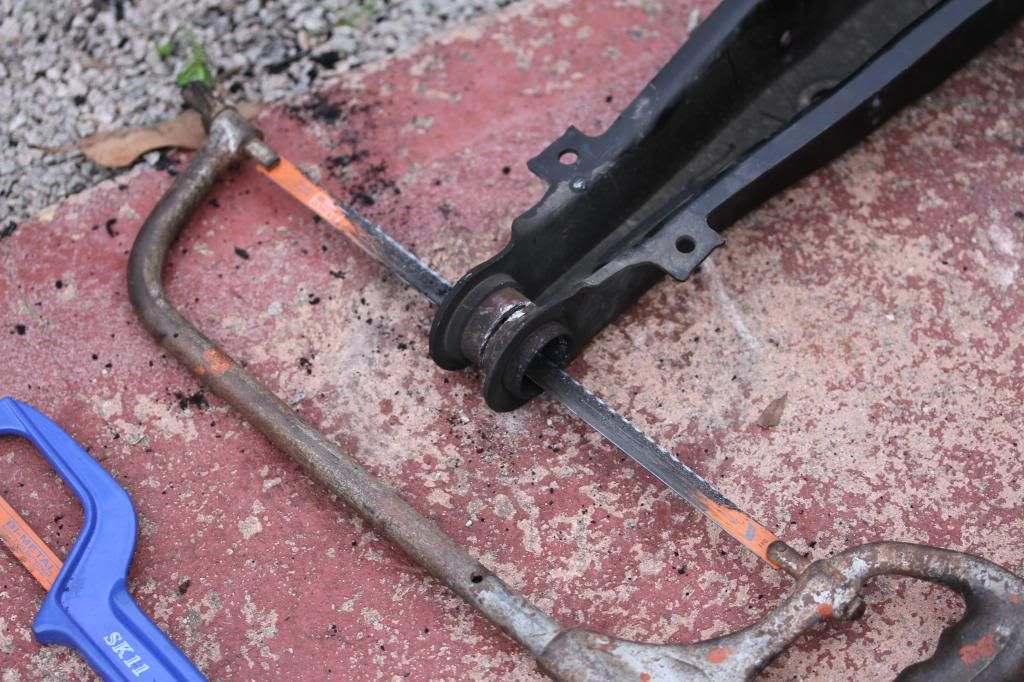
I used a socket and tapped it into the lip on the side to prevent the sheet metal from bending in when I pressed the new bushing back in. I used the g-clamp press tool that Figs Engineering recommends. Again, go slow and methodical. If you don't the sheet metal with just bend.
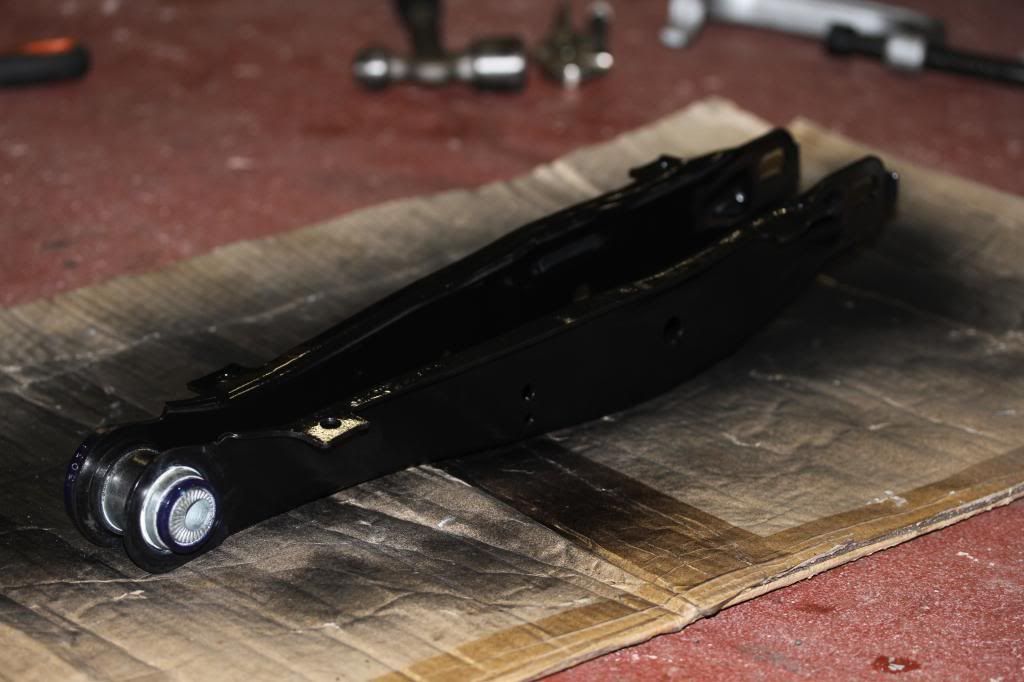
Add some chassis paint and all done. To re-install, bolt it back in. (in reverse order.)
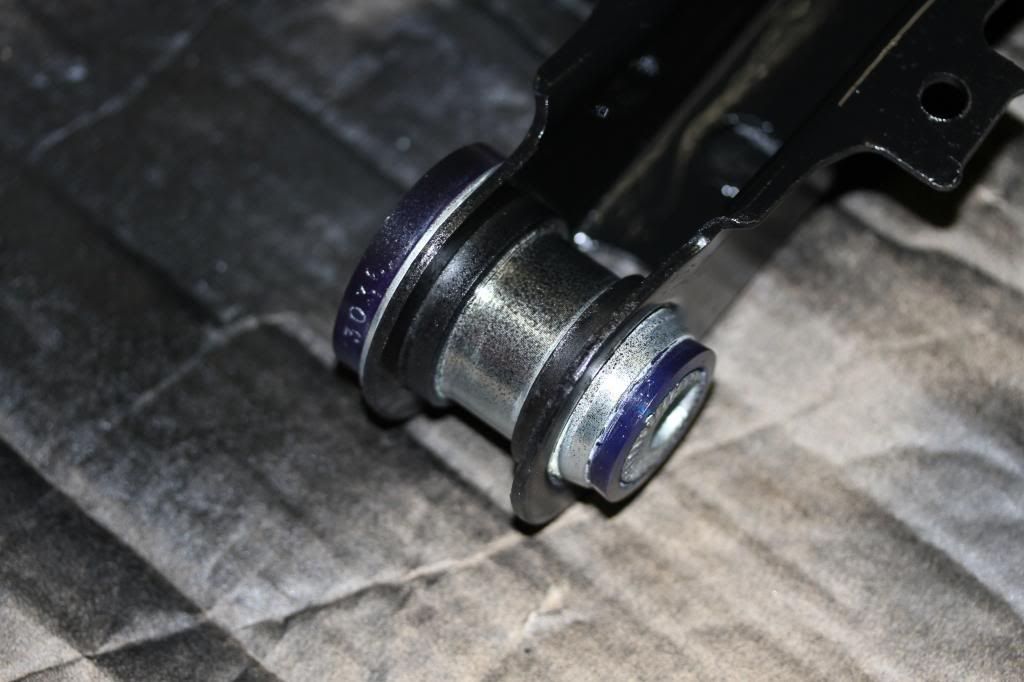
Make sure that you point the offset in the correct spot. If it's wrong, you can press the middle sleeve halfway out again, adjust it and press it back in.
Do the same for the other side and get the car a prof wheel alignment.
Chris
First, jack up the car and remove rear wheel.


Remove the nuts and bolts holding the shock absorber, the swaybar link and the hub knuckle. I used a jack under the arm to assist in removing them.


As you can see, it is difficult to press out the bushing as there is no support in the middle.


Remove the arm and burn out the centre of the OEM bushing by using a Map gas torch. Burn out the rubber completely.


The centre sleeve will drop out. Be careful as map gas is REALLY HOT. Also, the melting rubber is messy and toxic smelling.

Use a hacksaw to carefully remove the old sleeve trying to avoid the sheet metal from bending.
Then knock the the bushing out. Be patient and it will come out. I used more heat and a few cuts.A bit of a sanding helps if the outer sleeve is rusty.


I used a socket and tapped it into the lip on the side to prevent the sheet metal from bending in when I pressed the new bushing back in. I used the g-clamp press tool that Figs Engineering recommends. Again, go slow and methodical. If you don't the sheet metal with just bend.
Add some chassis paint and all done. To re-install, bolt it back in. (in reverse order.)

Make sure that you point the offset in the correct spot. If it's wrong, you can press the middle sleeve halfway out again, adjust it and press it back in.
Do the same for the other side and get the car a prof wheel alignment.
Chris
Last edited by christodav; 06-20-14 at 10:01 PM.
 06-20-14, 09:31 PM
#4
Driver
Thread Starter
Chris
Last edited by christodav; 06-20-14 at 09:58 PM.

Thread
Thread Starter
Forum
Replies
Last Post
nthach
LS - 1st and 2nd Gen (1990-2000)
2
08-23-09 11:14 PM