Daizen Bushings Install Step By Step *56K Warning*
 03-27-06, 01:27 PM
#1
Instructor
Thread Starter

Polyurethane Bushings for any vehicle is an essential upgrade to the suspension for older cars. Changing the factory rubber bushings to urethane will enhance ride quality, allowing a tighter and more responsive steering at high speeds. You will not have to change your bushings again once you have urethane bushings because they will never crack or deteriorate. Factory bushings are rubber based, therefore deteriorates throughout time. I am sure all of you SC owners know what I am talking about, factory rubber bushings are  .
.
There are not many aftermarket tuning manufacturers who produce anything for the SC. Luckily for us SC owners, we got the DAIZEN brand which has lots of suspension parts: control arm bushings, camber adjustment kit, lowering springs, sway bars and even STEERING RACK BUSHINGS!!.
I had the privilege of getting my DAIZEN front Upper and Lower control arm bushings as well as the steering rack bushings changed by Todd of TM Engineering.
Todd did the R&D for all of the DAIZEN products and he has an extensive knowledge in the JZZ30 chassis. I am posting pictures of the step by step installation of these bushings. Hope these pictures will help you guys in either installing the bushings yourself (If you got the proper tools) or you can print this out and give them to your mechanics in assisting installing these DAIZEN bushings.

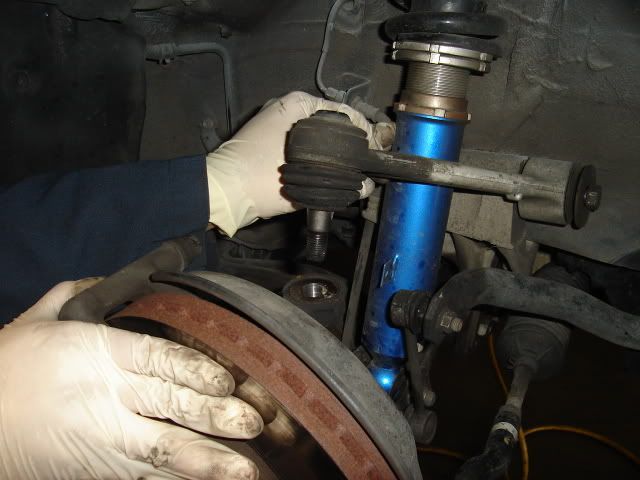
First of all, remove the Brake Caliper
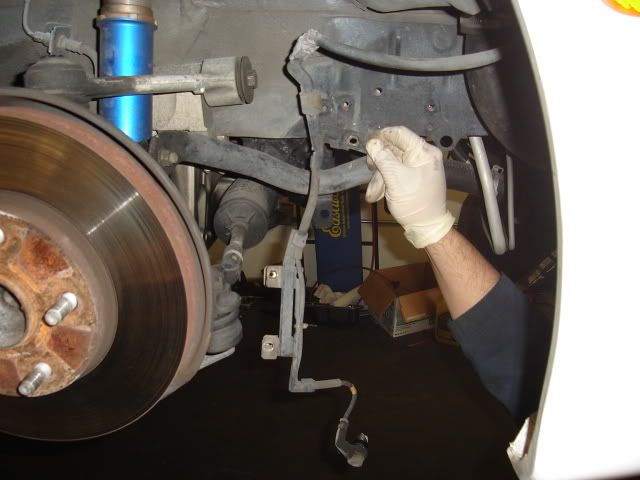
Make sure to remove the ABS sensor off the brake caliper
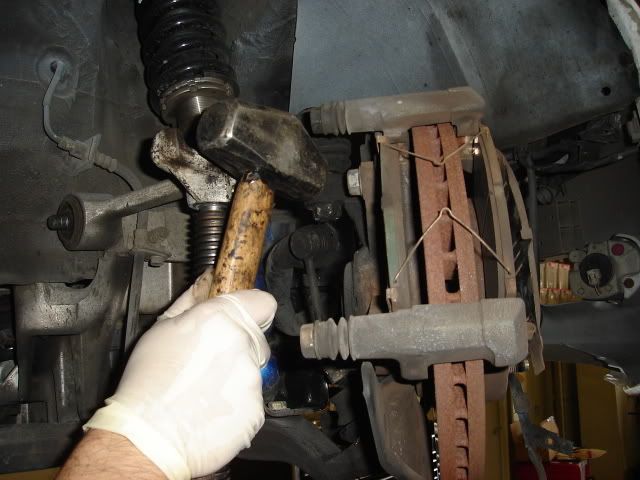
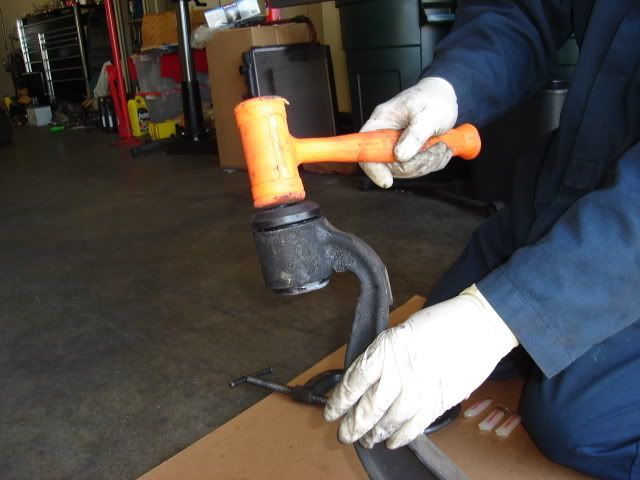
Use a hammer and knock loose the upper control arm
.There are not many aftermarket tuning manufacturers who produce anything for the SC. Luckily for us SC owners, we got the DAIZEN brand which has lots of suspension parts: control arm bushings, camber adjustment kit, lowering springs, sway bars and even STEERING RACK BUSHINGS!!.
I had the privilege of getting my DAIZEN front Upper and Lower control arm bushings as well as the steering rack bushings changed by Todd of TM Engineering.
Todd did the R&D for all of the DAIZEN products and he has an extensive knowledge in the JZZ30 chassis. I am posting pictures of the step by step installation of these bushings. Hope these pictures will help you guys in either installing the bushings yourself (If you got the proper tools) or you can print this out and give them to your mechanics in assisting installing these DAIZEN bushings.
First of all, remove the Brake Caliper
Make sure to remove the ABS sensor off the brake caliper
Use a hammer and knock loose the upper control arm
 03-27-06, 01:37 PM
#2
Instructor
Thread Starter
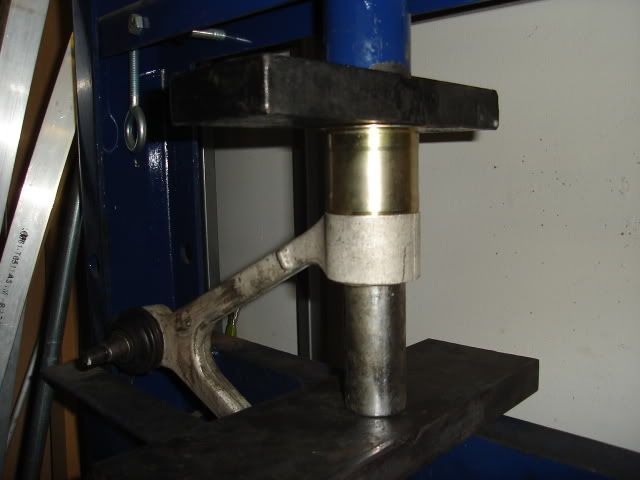
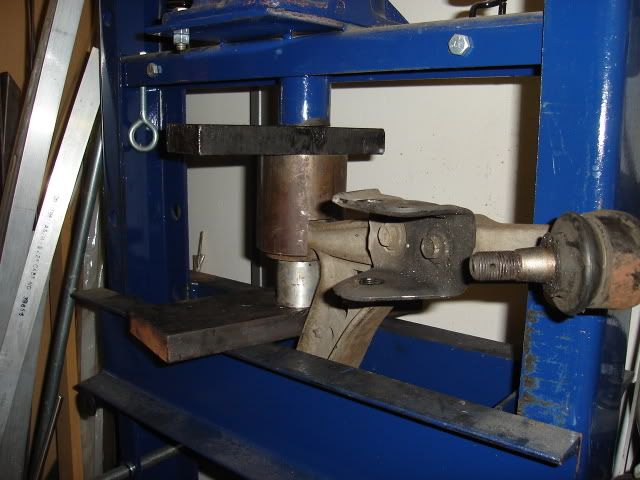
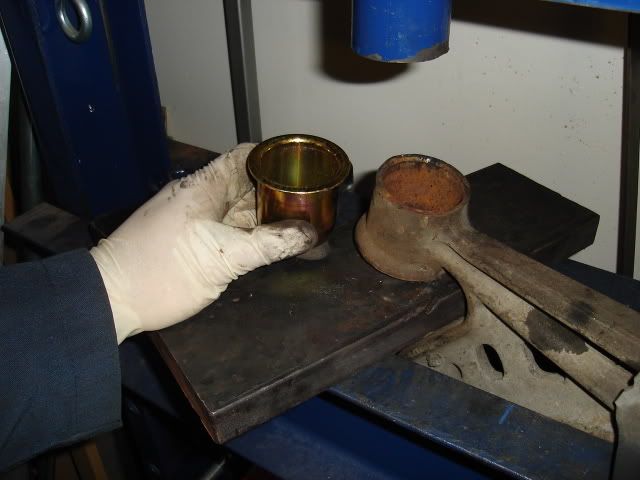
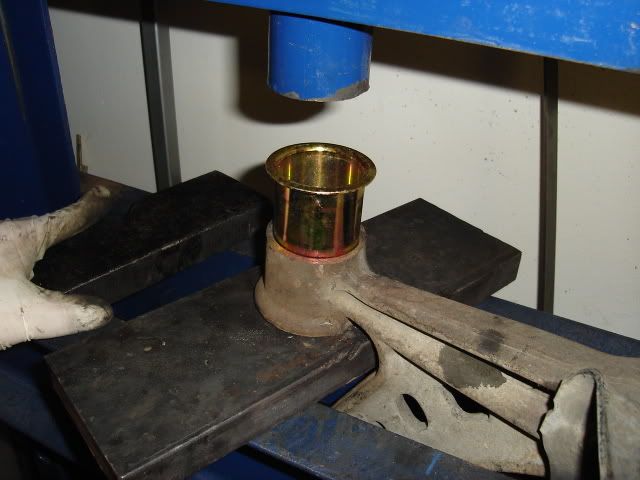
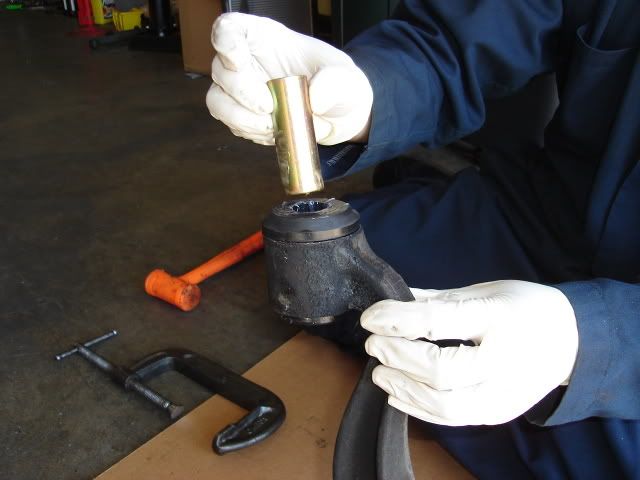
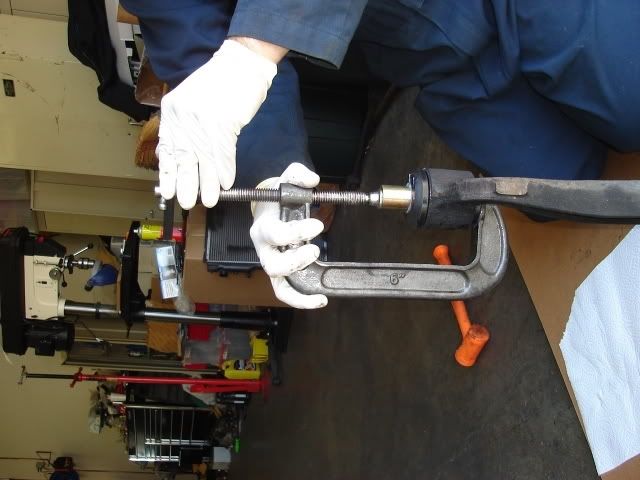
Press out the old bushings from the Control Arms
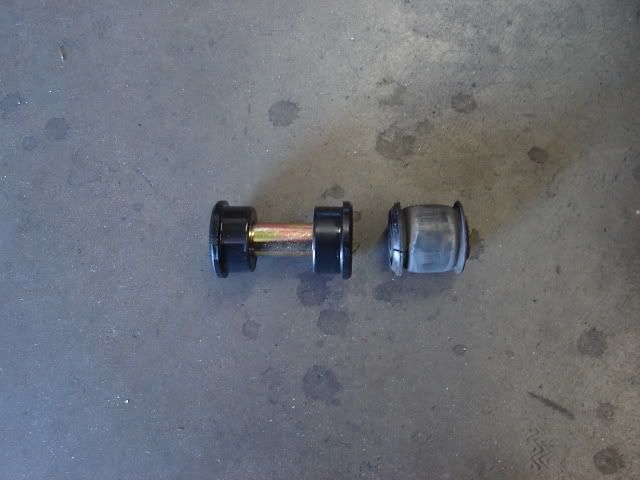
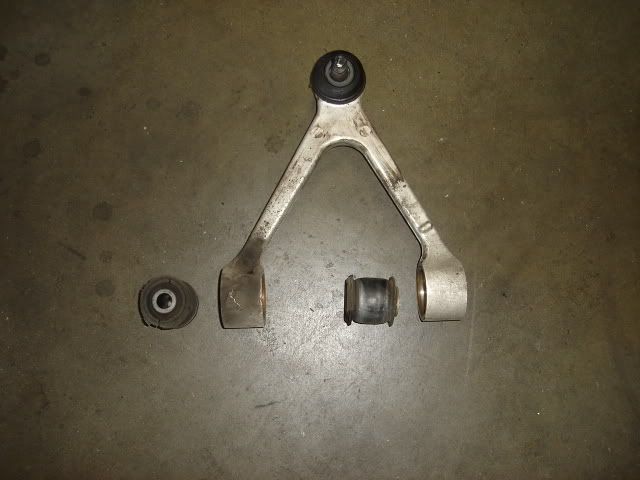
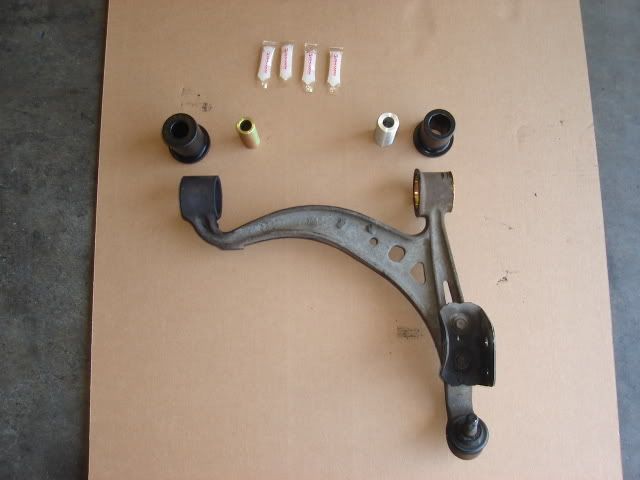
(Left) NEW BUSHINGS (Right) OLD BUSHINGS, notice the crack at the edge
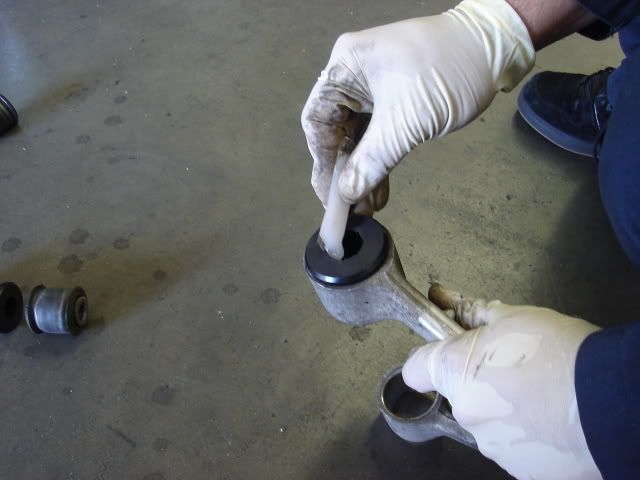
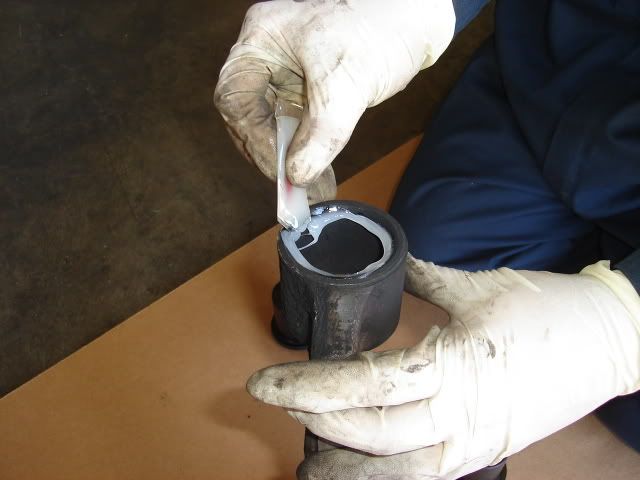
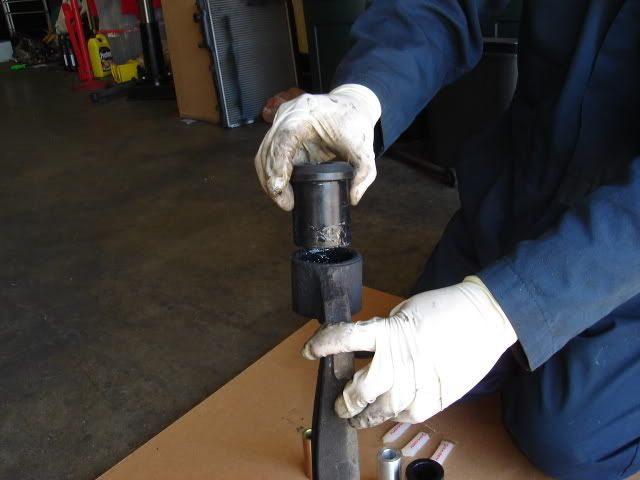
Use liberal amount of Daizen grease that comes with the kit
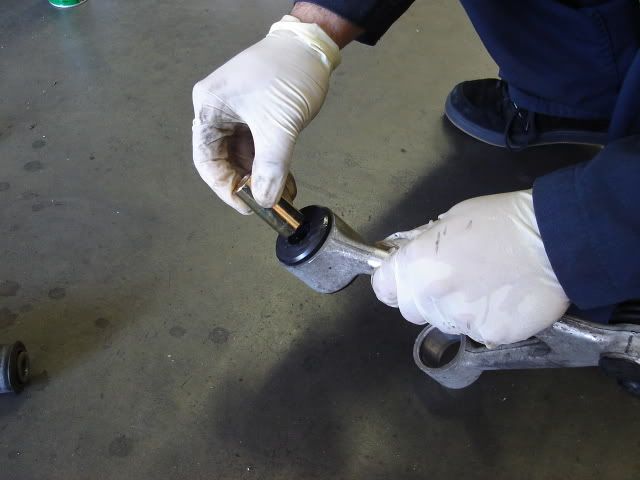
Make sure to clean off the grease and debris from the old joints
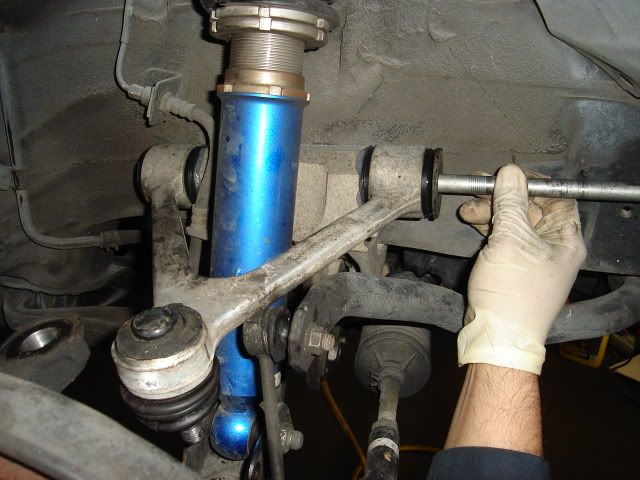
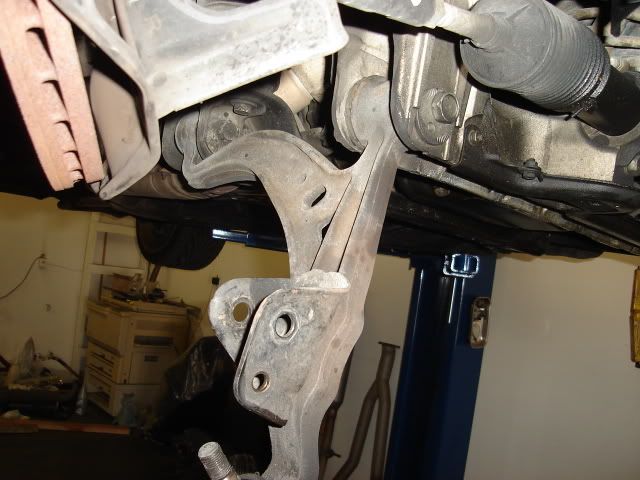
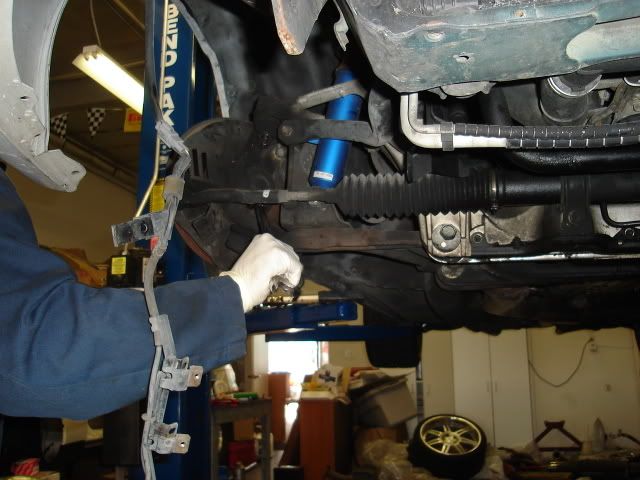
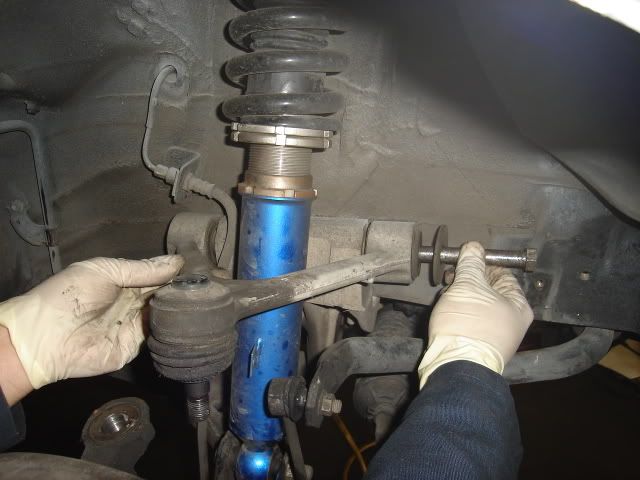
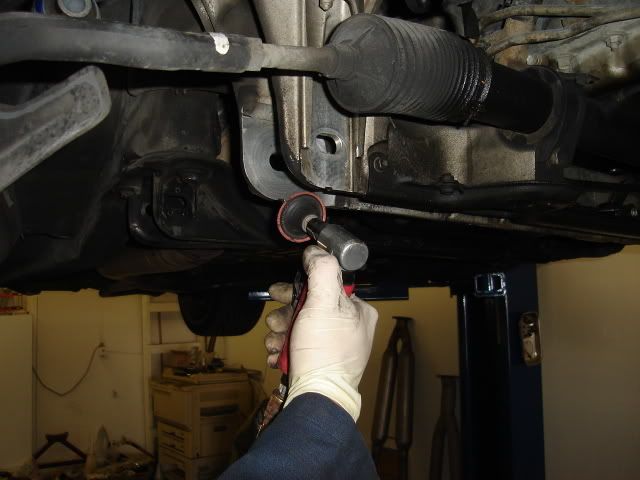
Now, remove the lower control arms by loosen the 3 bolts
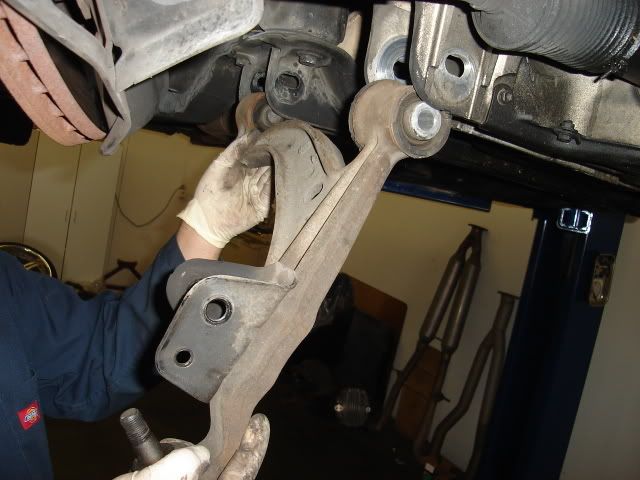
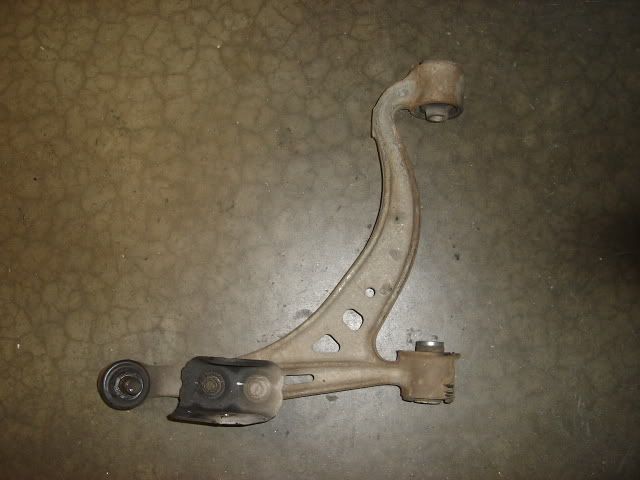
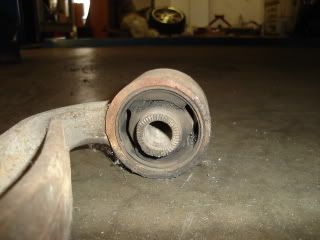
As you can see, the old rubber bushing is all deteriorated
 03-27-06, 02:06 PM
#5
Instructor
Thread Starter
After the installation of the Daizen bushings, you will need to re-align your ride.
The car feels so much better now, its a bit stiff but I like it. I feel the road a lot more and the suspension feels a lot more sturdy. I recommend these bushings to all Soarer and Aristo owners.
To purchase these bushings go to www.tmengineering.net and get yours today!
Its much cheaper than buying new control arms from the dealership or other brand of bushings that uses RUBBER instead of URETHANE.


Trending Topics
02-09-07, 08:51 AM
#9
Lexus Test Driver

2nd on that sticky-- but it should also be known that the originals can be removed by heating with a plumbing torch, but a cutting torch will heat much quicker and easier. Also when you use that method, you leave the shells you see being pressed into the fitting in place from the originals and just remove the rubber -- and you heat the center sleeve until the rubber starts smoking for about a minute, then you can slide it out easily with some channel locks while turning it back and forth a bit.
It's also recommended to only do the lower arms-- the uppers are way less likely to be worn out, and the original uppers softer rubber will help maintain the smooth ride--- They say to only do both if you're seriously racing autox-- otherwise the lowers alone will offer a big increase in handlinge by themselves.
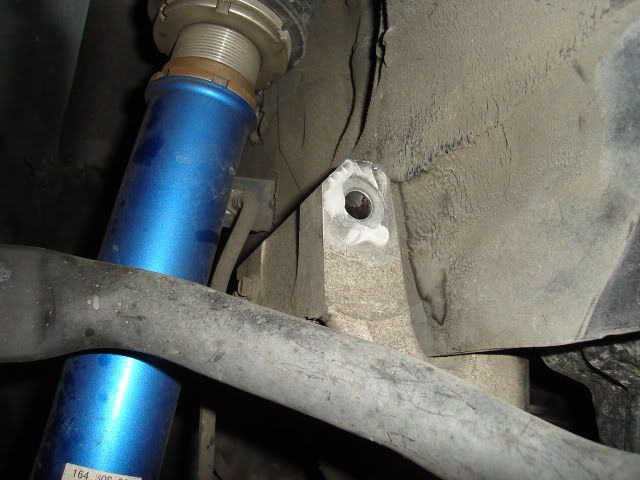
Also, if you can't remove your swaybar endlinks due to rust, you can remove the two bolts that hold the lower strut mount onto the arm (pictured above)- after you disconnect the lower strut bolt--
It's not really that bad of a job, you just need to be sure and use grease liberally on the center sleeves outside surface as they will be moving/rotating inside the bushing-- The sleeve is stationary once the cam bolts are torqued, and the bushing moves around it-- and also grease the faces of the bushings very liberally, and clean the inside of the mounts where the bushings mount--- and grease those surfaces too--
It's also recommended to only do the lower arms-- the uppers are way less likely to be worn out, and the original uppers softer rubber will help maintain the smooth ride--- They say to only do both if you're seriously racing autox-- otherwise the lowers alone will offer a big increase in handlinge by themselves.
Also, if you can't remove your swaybar endlinks due to rust, you can remove the two bolts that hold the lower strut mount onto the arm (pictured above)- after you disconnect the lower strut bolt--
It's not really that bad of a job, you just need to be sure and use grease liberally on the center sleeves outside surface as they will be moving/rotating inside the bushing-- The sleeve is stationary once the cam bolts are torqued, and the bushing moves around it-- and also grease the faces of the bushings very liberally, and clean the inside of the mounts where the bushings mount--- and grease those surfaces too--
02-09-07, 11:31 AM
#10
Driver School Candidate

Now if we could just replace the ball joints, we'd be in business.
Guys, please note that this is a total waste of time if your lower ball joint is shot. If you remove the control arm and the ball joint stud just flops around, PLEASE get new control arms. The lower ball joint takes the entire weight of the front end on it. There have been rumours that there is a company that makes replacement lower and upper ball joints. however, I haven't actually found it, nor can I see how they could replace them easily. I'd imagine you'd have to heat the hell out of the control arm and possibly spray liquid nitrogen on the ball joint itself to get it out.. Has anyone ever successfully changed one out?
I'm about ready to buy a set for the junker just so i quit swapping lanes every time I run up the edge of the semi truck tire grooves in our asphalt highways around here.
If the joint is relatively tight (meaning it is a bit stiff or even REALLY hard to move in every direction) then it is OK.
The supras fit and I've found them for 200 apiece. Ebay has the RIGHT one for 189, and the left for 289..go figure.
I watched a supra lose a complete spindle at the strip once..lower ball joint stud pulled OUT of the control arm on weight transfer during launch, because it was so worn out, and the entire spindle ripped out of the car (upper stud broke off) but it destroyed the wheel well, fender and door on the way out.
The upper control arms are exactly the same as the MK III supra as well. (gives you a better choice?) However, the upper control arms are not load bearing, meaning the ball joints will pretty much last forever.

