When you click on links to various merchants on this site and make a purchase, this can result in this site earning a commission. Affiliate programs and affiliations include, but are not limited to, the eBay Partner Network.
I have a inductive wireless charger and keep my phone in the car whenever I am not at work (unusual, I know). I rigged a timer circuit (ELK-960 Delay Timer Module), so that it continues to charge the phone for three hours after I turn off the car.
If you come up with a cup holder, you will achieve legendary status. Most longtime owners of the SC reflexively reach for the cup whenever starting/stopping/turning quickly.
This weekend, hopefully, I will work more on this. I have a big sheet of kyvex thermoplastic left-over from a project years ago that I am going to try to use. I don't have a vacuum former so I am going to need to think about how I can form it. Way too big for the 3D printer.
for the vinyl wrapping, wear a cotton glove to work around curves and recessed areas while applying heat with a heat gun set on low.
You don't slit your corners? I thought about trying to vacuum-bag the pieces. I have a feeling that this is the only part that would really need something like that. The rest I am planning to do is fairly flat pieces.
Right now, the plan is the door controls, radio face, map light, and shifter. Any suggestions on a better vinyl? This was the 3M 1080 series BR120. To me, it looks like spray paint once it is applied and that is the look I was attempting to avoid.
Today has not been a good day for me. And on that note, I won't be touching anything else in the car tonight. Arrgh. The only reason I am going to show this next picture of my stupid mistake is in the hopes that it saves someone else from making the same stupid mistake.
That, my friends, is a cracked LCD. Cracked by yours truly while removing the original polarizer. Everything was going just fine until that last little bit. When I pulled off the polarizer, the LCD lifted up and then slapped back down and cracked. So, lesson learned... don't pull up on the polarizer. Use a flat razor blade and just keep working it off all the way to the end.
I guess the good news is that the LCD reversal did work. Just needs some tint to black out the background. Well, on a functional LCD anyway. I was planning to replace the backlight LEDs, but this was a sign to just leave $%!^ alone tonight.
And now I am on the hunt for a new A/C control unit. Of course everything still works so it is not the absolute end of the world.
This is going to be my new home for the next couple of months while I develop the several electronics mods I have planned. At the moment I am working on the 4G LTE router that will provide internet in the car.
The board in the middle of the desk is the Vensmile PC that will be the base computer. Upgrading it to Windows 10 was not a straightforward experience. I have everything working but the bluetooth because I haven't been able to locate drivers for it yet. Worst case, it works just fine with a dongle attached and that might be better than the built in anyway. More details about this PC coming up soon. It is a perfect fit to mount inside the Nav display. Once I eventually get the screen, you'll see it on the desk installed. But for now, I am studying it to see what my possibilities are with it.
Back to the current project - the router.
It starts life with a TP-Link TL-MR3020 portable router. This contains one USB port and built in drivers for 4G/3G USB modems. For the 4G modem, I am using a Huawei E3372s USB modem. You insert your SIM card and you can also insert a micro-SD card.
Right now I have it on the default setup and it is working fine. It will be getting a change in firmware to OpenWRT for some expanded capabilities.
A few of the things on the wish list are a camera that I intend to mount inside the dash and a GPS module. This would provide the ability to track the car down if it were ever stolen. It would also allow me to get a nice picture of the perp. USB cameras are cheap these days, so why not?
OpenWRT runs on Linux, so pretty much the sky is the limit as long as someone wrote software or drivers for it. The community is huge and there is a ton of software already, so the sky really is the limit.
Specific to the car, though, will be the ability to boot up automatically with the car and connect so the internet is ready when I need it. I also need to keep in mind security, firewalls, and blocking applications that would just eat up my monthly bandwidth. And of course, the router will be installed in a location not accessible to me while driving so I need it to require very little interaction from me, but also have the ability to operate it remotely from the computer.
I am looking to add battery backup to it so I could remotely turn it on while the car is not running and have it boot up the computer as well. This would allow me to work on the computer/router from the house while the car is in the driveway.
The 8GB micro-SD will be available to those that connect to the network. I don't have a specific plan for it yet but it might store any configuration information or android apps that someone might need if they connect to the network in the car. More of one of those 'might be useful in the future' things that were just easy to add.
The PC will be connected with the single ethernet port on the router instead of using potentially unreliable wifi.
I should mention that the router is capable of operating as a DLNA server as well. One could plug in a USB hard drive or stick and have it serve all the media for the car. That would save the main computer from having to handle that. Anyone connecting with a tablet or phone in the car could then watch a movie or privately listen to music.
And then finally, it needs to be encapsulated in a moisture-proof box with proper connectors that will not shake loose in the car.
Some other projects you see on the desk are the original touchscreen which I am still working on converting to USB so that I can use it with the computer.
You also see the Techstream cable which is being hacked to leave connected in the car and provide OBD and techstream capability in the installed computer.
Finally, I have the USB/Audio cigarette lighter module (from the Nissan Juke) that I am working on. I am abandoning the charger route for it because I am planning to integrate wireless charging in the car. So this will become a simple USB port to the computer and audio aux in. The hub I am using has BC1.2 charging built in, so it could still support charging devices that support that.
An aux USB charger will still be installed in the passenger seatbelt/airbag indicator for passenger use as shown earlier in the thread.
BGW70, you might appreciate the test equipment sitting there.
1. A home-built power supply made from an ATX computer supply. I use the 12V mainly to power up the car electronics while I am working on them.
2. A Hantek 6022E USB 20Mhz Dual channel USB oscilloscope
3. A LogicPort 32 channel USB logic analyzer
And of course a Buspirate and a few USB to serial cables tangled up in there as well as Arduino and AVR microcontroller programmers.
Those are more of my toys for doing portable work. The real stuff is down in the workshop but the dining room is more comfortable.
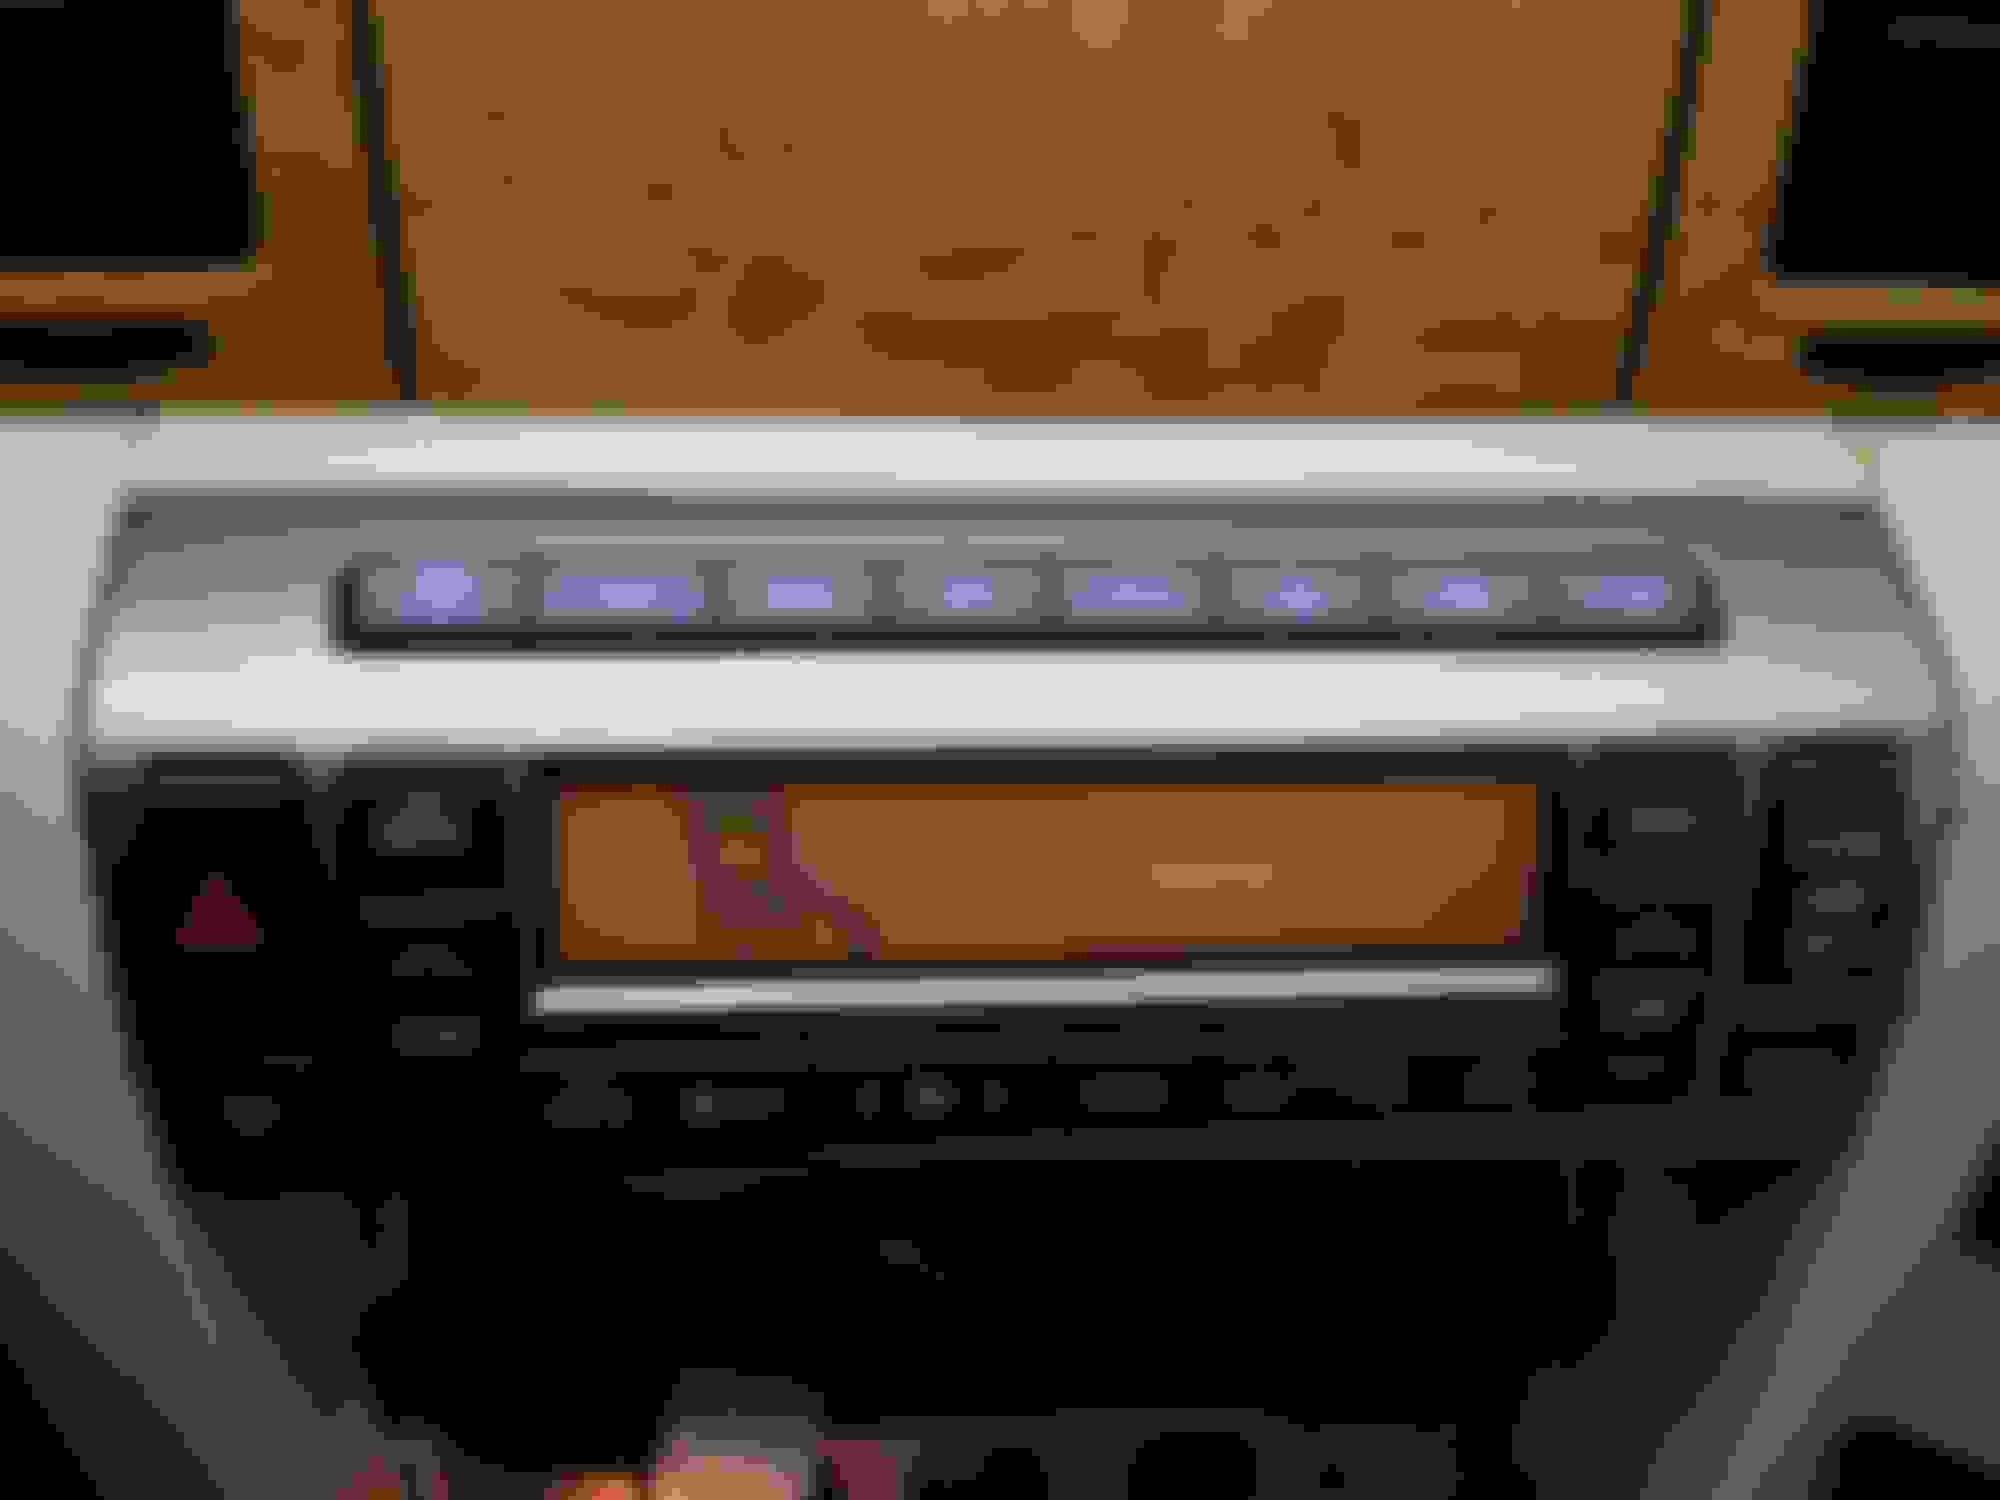
Changed the LEDs in the top nav buttons. I didn't replace the LEDs in the A/C controls because I am going to need to replace it anyway since I cracked the LCD and you need to mess with the LCD even more to get to the circuit board with the LEDs on it. With winter in Michigan coming, I couldn't afford to screw it up any more than I already have. So this will have to wait.
Replacing the LEDs was very simple since they are already LEDs and had resistors already in place. I just removed the green LEDs and replaced them with 3mm blue LEDs.
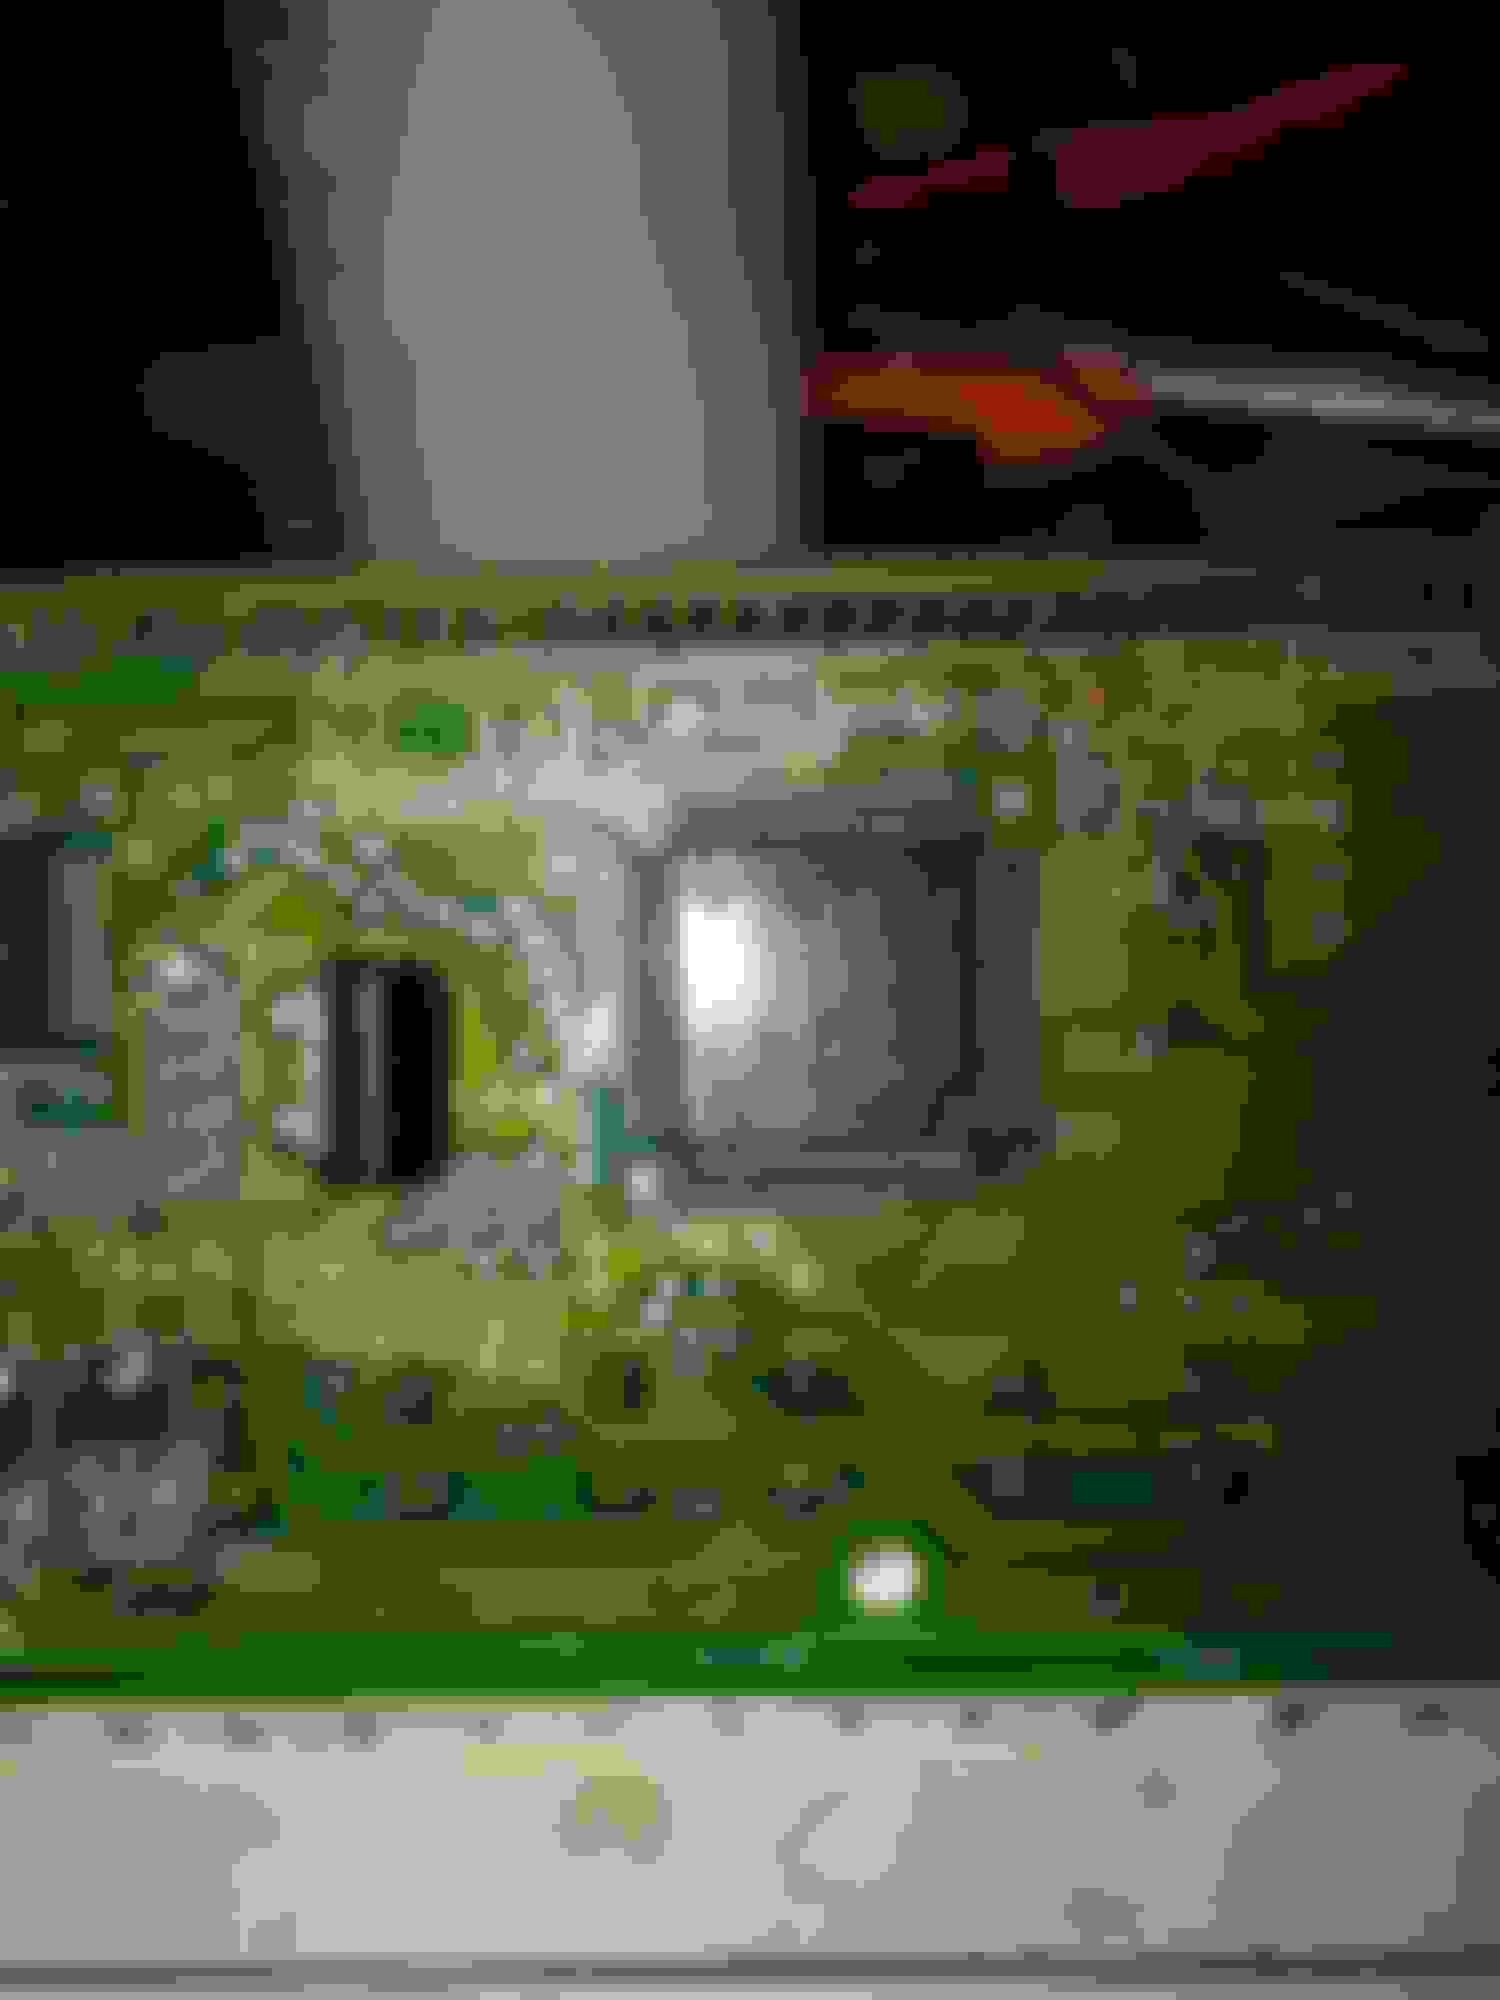
While I was in there, I checked out the leads going to the LCD because a common complaint by others has been missing elements in their LCDs. I found that there were several solder fractures and when I reflowed the solder on all of the leads black gunk oozed out. That is a sign of oxidation inside the solder joints. If you have missing elements, I would suggest trying to reflow the LCD pins. It's pretty simple and you don't need to mess with the actual LCD to do it.
The row of pins along the top are the leads to the LCD. Reflow (just heat up with a soldering iron until the flux boils away and the black gunk comes out) those.
The LCD reversal was relatively simple and would have went without a hitch if I had not been impatient and pulled on the polarizer at the end.
The original polarizer is a piece of plastic glued to the LCD. It does have the black line dividing the top and bottom printed on it. If you want to reverse your digits, you will need to carefully remove this plastic film using a razor and some heat from a heat gun. Don't pull like I did because the LCD is just sitting in the plastic tray. It will flop around. If you lift it up and it slaps back down, your LCD will end up looking like mine.
After you remove the polarizer, clean the LCD with goof-off and a little elbow grease. I have a scalpel with a flat scraper blade that I also used to help remove the stubborn pieces of glue. Don't press too hard on the LCD or you could bruise it which will result in dark spots.
Take your new polarizing film and move it around to find the right angle that makes the LCD appear black. Then cut out a piece of the film the size of the LCD, matching that angle. Peel off the backing covering the adhesive and apply it to your LCD.
If you keep the white backlighting, your only real option is to use a tint to filter the background color and make only the digits appear white. If you change to blue, red, green, etc... you will need to get a matching gel filter to block out the background color.
For now, the AC controls are installed back in the dash and I won't be messing with it anymore until I get a replacement.
BGW70, you might appreciate the test equipment sitting there.
1. A home-built power supply made from an ATX computer supply. I use the 12V mainly to power up the car electronics while I am working on them.
2. A Hantek 6022E USB 20Mhz Dual channel USB oscilloscope
3. A LogicPort 32 channel USB logic analyzer
And of course a Buspirate and a few USB to serial cables tangled up in there as well as Arduino and AVR microcontroller programmers.
Those are more of my toys for doing portable work. The real stuff is down in the workshop but the dining room is more comfortable.
Very nice setup! I too have an old computer power supply or two laying around, they certainly come in handy sometimes! ;-)
The O-scope is certainly a handy tool in the technology Arsenal...one that I do not have :-(
There must be some universal rule that all the really important components for your project must arrive on a Monday. The computer, the router, and now the LCD. I won't get around to doing much with it during the week and as I install it in the NAV unit casing, I will detail that in another post. But I wanted to spend a few minutes talking about it. Mostly because there might be some questions about the decisions I made choosing this one.
First, an unfortunately a little blurry, picture of the LCD running Windows 10 at 1280x800.
An LCD kit consists of two components. You have the LCD itself and the controller.
Important specs of an LCD are the NATIVE resolution (be careful with this), the brightness rating, contrast ratio (ratio of black to white), LVDS or RGB TTL, glossy or matte finish, IPS/Retina/TFT and several other factors I am probably not thinking about right now.
This display has the following characteristics:
1280*800 (original NAV screen is 840x480)
Brightness is 400 Cd/m2
Surface treatment is Hard coated, Glare resistant (hmm... it appears glossy to me)
Contrast Ratio is 800:1
Technology: IPS
LVDS (Low Voltage Differential Signal) this is medium important because the differential signaling is more noise resistant than TTL RGB.
IPS is a technology which provides a very wide viewing angle. The picture will remain bright at 120 degrees in all directions. This is an important feature for the placement of the nav display.
This is not a sunlight viewable display. The first sign is the brightness of only 400. Sunlight viewable displays usually have at least an 800 brightness rating. They also have a rear reflector that scatters light and a special diffuse filter on the front. This LCD will require some extras to make it sunlight viewable. So why didn't I just buy a sunlight viewable screen? Because after weeks of searching, I could not find one with a native resolution of 1280*800 (the most I have seen in a 7" LCD.) All of them were either 640x480 or 840x480. If that was acceptable, I would have just used the original LCD but we all know how grainy that looks! So, I had to compromise and will need to learn some new tricks to make it work. After a little research, I believe I have a formula that will work. We shall see.
My only disappointment is that the LCD appears gloss to me even though the specifications claim anti-glare. Thankfully there are films to help with this. If you have a choice, you want a matte finish LCD.
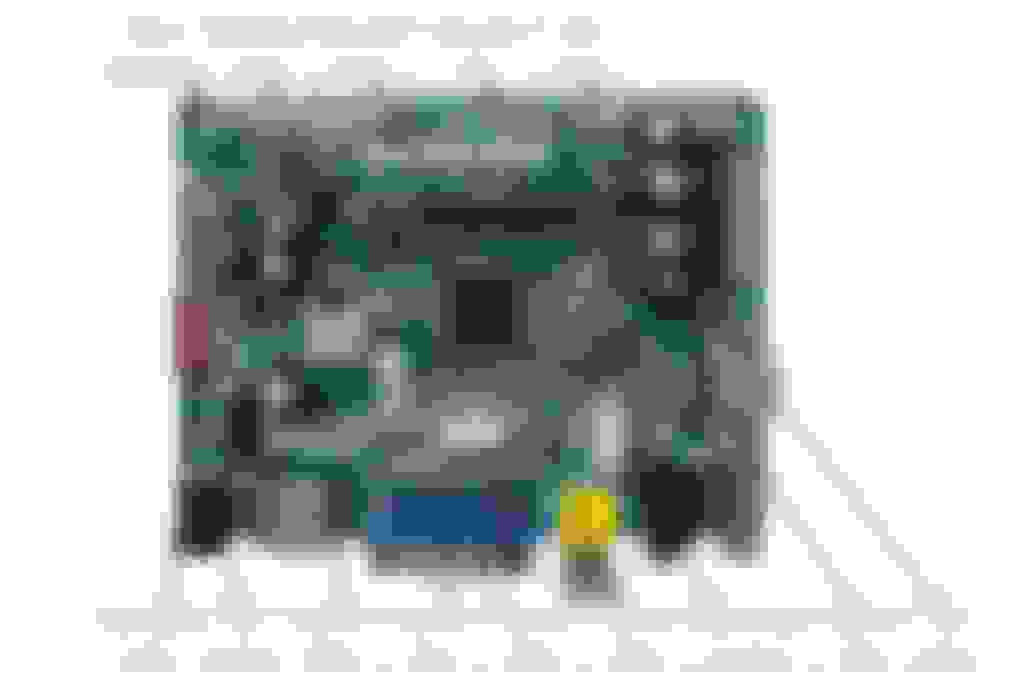
So now, a little about the controller. My main reason for choosing this particular controller is that all connections have solder headers, including the HDMI. This will allow me to make secure connections that will not rattle loose in the car. That was numero uno on my list.
This controller accepts composite RCA video, HDMI, Component video, and VGA. Additionally, it has multiple composite inputs with a trigger for reversing (backup camera.)
An additional feature that was not so important to me is the ability to accept a USB drive directly with photos, music, video, and text and play them without any need from a computer.
Finally, there is a small community and the information around the web on how to customize the software in the controller. I am not certain how important that will be yet, but it may be necessary to control the display without the included button board or IR for things like switching inputs, brightness, etc...
One last thing: this controller can accept HD video of 1080p and has a max resolution of 1920x1080. Obviously it would be scaled on the native 1280x800 screen.
I've said it previously, but with the VGA interface, it is possible to accept the video from the stock NAV ECU. The difficulty though would be keeping the touchscreen and the rest of the functions working with it. I have pretty much talked myself out of worrying about that since there doesn't seem to be anything the stock ECU does that I can't replace with a PC.
Side note: I replaced the radio backlighting with blue LEDs yesterday. But I did not switch out the polarizer yet. I have blue filter gel coming which I will need to complete that. I also removed the one resistor to brighten up all buttons. I also ordered some 3mm wide angle LEDs (tip from another thread here on replacing LEDs) so I plan to redo the buttons with those to get a more uniform brightness.
The budget isn't going to allow replacing my climate controls for a little while, I am afraid. That project may wait until spring (we in Michigan hibernate in the winter).
But, you ask, how does video look? Well, video playback is not one of the main things I plan to use it for. However, here is a shot of it playing some 720p video through the built in media player. It looks very crisp in person. The iphone doesn't seem to like taking a picture of this LCD for some reason.
Built in media player menu
Video submenu shows preview of video. Hmm... 1280x640?
The built in player is a bit cumbersome even with the remote, requiring several clicks to get to the media file. And of course with no touchscreen control, it is pretty much useless anyway.
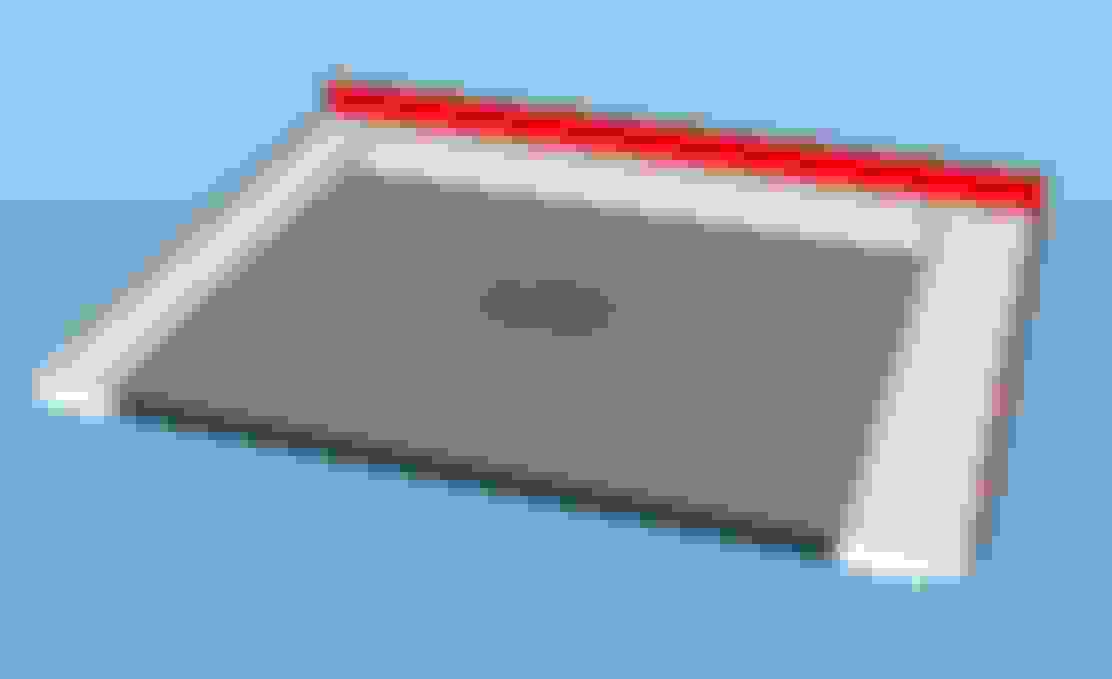
So what do you do when an LCD doesn't fit perfectly? Well, you create 3D models of all the parts and then design a bracket, of course!
The LCD was also just a bit too tall so I had to cut the bottom of the original metal frame off. Then I created 3D models of the new LCD and the original frame. I could then play around with centering the viewable area within the frame. I then designed spacers to fit around the display in order to mount and center it.
Since the original frame will have a piece of thick lexan glued to it, this doesn't affect the structural integrity.
Since the original LCD used CCFL lamps on either side, the new LCD (LED backlight) was not wide enough. So we had to make a frame within a frame. I had to make a couple tweaks to the design and printing version 2. Pictures will come shortly. Also designed (but not shown) is a strain-relief bracket for the cable.
These will be reprinted. I just used settings for the fastest speed printing while test-fitting. Once finalized, these spacers will be taped to the back of the LCD and then taped to the frame (3m double-sided tape). I may drill some holes in the frame and screw it on instead, but the walls are pretty thin. I am not sure that will be possible.
Very temporarily installed in the original nav display housing. LCD still has the protective film over it and the lexan is not glued on yet. Although it was centered in the frame, it looks like it is not quite centered according to the front cover. I will need to tweak my spacers to move it over just a smidgen. Top and bottom look about perfect, though.
This was a glare test with a lamp shining directly above the display. Most of that glare can be attributed to the lexan and the screen protector that I have not removed yet. The lexan is going to get some treatment to reduce the glare. Considering that, it was not as bad as I had expected it to be. The backlight is also not set to max brightness yet either.
Without the lamp shining directly on it. Pardon the fingerprints. Everything will be cleaned up before the final install. And still the iphone just will not take a clear picture of this display. Looks terrible in pictures but I assure that it is very crisp.
Displaying Windows 10 from the mini PC. Notice that there is a light leak on the left side due to the original mask tape lifting. There just isn't anything there for it to hold on to. I will be making a paper mask to go around the display, anyway.
Mounting feet I designed so I can set the unit standing up on the desk while working on it. Forgot to take a picture of it standing up. Since the lexan is not attached to the frame yet, it doesn't stay in place when I stand it up. 3M tape is on the way.
There is a great deal of light loss through the back of the display. I imagine I can improve the brightness significantly by reflecting that back through the LCD. I have the rear reflector from a junk LCD monitor that I will be installing on the back. That should improve it's daylight readability significantly.
The original nav display is a stack of assemblies. You have the LCD mounted in the frame at the front, the LCD controller mounted to another frame behind that, and then the motherboard with the outside world connections were on yet another frame on top of that. I will be more or less replicating that. Brains being the windows PC, of course. This means plenty of custom brackets to mount all the pieces inside the display. There is a ton of room in there!
I started removing some connectors on the controller board and will be ordering locking connectors (JST-PH 2mm) to install on the board. We don't want anything vibrating loose while driving so we can't stick with the normal connectors. I have also modified the firmware to power on immediately when power is applied. There is a delay while the screen comes on. There is a signal on the board to turn the backlight on or off. I might have the display powered up whenever the car is running, but only switch on the backlight when the nav display is opened. Since the delay is not really that long, it might not be a big deal since the door takes some time to open anyway. I haven't decided yet which route I will go.
Plenty more work to do before it is ready. It will likely be on my desk for the next few months as I develop it. Before it is all done, there is going to be some custom circuit boards that need to be built to fully interface it into the car and interconnect everything. My goal is to keep as much of it as possible self-contained in the display for easy removal. There is also a strong possibility that I might decide on different components along the way. There really is no recipe for this and part of it is learning along the way.
Note: Although the description stated that there was a trigger on the board for a reversing camera, I am not seeing it in the datasheet for the controller. I will probably only be using USB cameras in the car, so I will probably skip using any of the video inputs anyway.
====
I was into the CarPC scene back in 2006 with an install in my old car. But that excitement quickly fizzled out for me because in most cases a carPC was just an expensive MP3 player at that time. Mobile internet was prohibitively expensive back then which severely limited what you could do. Another issue is that PC navigation software sucks compared to a standalone GPS. Unfortunately, it still really sucks.
You can see a huge drop in this fad just by looking at the last posting dates at mp3car.com forums. It was at one time THE place to go for that hobby. It is pretty much dead now. So, this brings up a very valid question about "why". Why have a computer in the car? What would make it worth it? Playing MP3s and streaming radio are almost secondary things on my list. Movies? My eyes need to be on the road! What I am looking for is to add convenience in my driving experience. I am thinking things like being able to find the closest gas stations, restaurants, etc.. on my drive. Maybe see what local events are happening or what movies are playing at the theater. Maybe help me and my fiance decide which restaurant to eat at. Linking between my home PC, smart phone, or work computer to sync up reminders for me. Some which might be triggered by location such as a reminder to buy something when I reach the store. I would like to track maintenance so I know when to get periodic service done, or track my mileage, etc... You get the idea, practical stuff.
With Cortana in windows 10, Siri, Google now, etc... voice assistants have advanced quite a bit. This is why I chose Windows 10. Cortana still has a lot of advancing to do and there isn't an SDK yet for building your own apps around it, but built in there is a lot it can do for you. Cortana is always listening. You can ask her questions like "Hey Cortana, find the nearest gas station." With mobile internet, much of the possibilities are endless. And google, firefox, and microsoft now have cloud applications that will sync across devices allowing you to enter something on your phone and have it synced up in the car.
And of course Windows 10 supports live tiles which can display constantly updating information from several applications on a single condensed screen. It also supports multiple desktops, so swiping between applications is quick as well.
There are a ton of possibilities far beyond just listening to MP3's. So many of them are untapped. All of this requires a great deal of set up and configuration, though. It really is a massive project to get all the right apps, get the right integration between the apps, and make everything work the way you want it to work.
It's the holy grail, isn't it? Nothing out there quite seems to do it all. It was what everyone in this hobby strives for, but it always remains elusive. But there have been some serious advancements in technology since 2006 that I think could really make many of those dreams in 2006 a possibility now.
I can't promise I will be successful, but the first step is getting the computer in the car, getting it connected to the systems in the car, and getting the basics working. Consideration needs to be made for being able to develop and work on adding features without needing to remove the computer from the car or trying to develop inside the car on a tiny 7 inch screen. Possibilities are either to create an elaborate emulation environment or provide some means of remote access to the computer from inside the house.
So that's a look inside the mind of those of us geeks that are into this sort of thing and maybe why we do it.


 10-01-15, 04:22 PM

 I was planning to replace the backlight LEDs, but this was a sign to just leave $%!^ alone tonight.