When you click on links to various merchants on this site and make a purchase, this can result in this site earning a commission. Affiliate programs and affiliations include, but are not limited to, the eBay Partner Network.
So I am the new owner of a 2003 SC430. The car was well taken care of, and I got a decent price for it due to a few (aesthetic) fixer-uppers.
First, the CD deck was jammed. I pulled it out and fixed that on the second day. The top CD tray was off track. A simple fix.
No idea if the tape deck works (who has tapes anymore?) but the heads were clean so I suspect that it does.
NOTE: Tape adapter doesn't seem to work unless there is audio always playing. There is sense circuitry that ejects a tape if it is not playing audio. Found the service manual for the head unit (attached.) Yes, it does have the pins for audio in mod mentioned in another thread. It is on the main board by the connector for the tape deck.
The antenna mast is broken and it looks like a common thing. Planning to just replace it with a whip antenna. I have always hated retractable antennas anyway.
And the cupholder was broken. Replacement on order.
That's about it other than a few light scratches here and there which can be buffed out. Color is midnight pearl (very dark purple.)
So I am a geek and an electrical engineer by day, so of course I am planning to mod this thing.
I am an electrical engineer in the aerospace industry and also a geek, so of course I planned to geek out this car. I did this with my previous car, but the hacking possibilities of this car are far greater. For starters, my old car did not have any type of bus to control anything and no built in display.
My goal is to keep things looking mostly stock and integrating things to make them look like they belong there. I have a lot of tools at my disposal such as a 3D printer, laser cutter, etc... so this should be interesting.
I started this thread because sharing knowledge is a wonderful thing and I love suggestions and ideas since I can't think of everything. Please give me some ideas and if I like it, you will be rewarded with the details on doing it!
Here's some of my current plans:
Replace interior lights with LEDs throughout. This means stereo unit and all of the other convenience lights. While I am in there, make sure all lenses are cleaned and clear. Order, laser cut or make new lenses or light pipes if not.
USB charger integration. I want two USB ports with full fast charging capability. One for the driver and another for a passenger. I'd put one in the back, but who am I kidding? Nobody is going to fit in the back. The driver USB port will be replacing the cigarette lighter. Also in this new jack will be a Aux audio in. Passenger side is going in the passenger seatbelt warning indicator above the glovebox. Chargers will be BC 1.2 compliant for fast charging on modern phones.
Computer/Media integration, keeping the stock navi and headunit with full vehicle bus integration.
a. Bluetooth phone/MP3 stereo integration.
b. Mobile WIFI router built in
c. Chromecast/Miracast wireless display integration
d. Ejecting tablet dock under passenger seat. Tablet will integrate with the system.
e. Dashcam/DVR. Looking at using it for security as well. The cam will be installed inside the rearview mirror.
f. GPS tracking (find my car if it were stolen)
g. Information display in the rearview mirror (not sure what I will display here yet.)
h. Integration of an SDR (Software defined radio) which will allow reception of police/emergency scanners and, well, just about anything radio.
To do all this, I will need to do some serious hacking of the vehicle bus which is AVC-LAN on Toyota, Lexus, and Scion. This allows full integration of new systems and control of components as well as being controlled by stock components (think of your headunit controlling an MP3 library with displayed text!)
I know that I can buy some of this stuff already pre-built but they are way overpriced for what they do in my opinion. Not to mention that you need multiple modules do due various things when most of it could all be integrated into one module since the bulk of what they all do is pretty much the same. So, I am planning to design and build all my own components.
Ok, with that out of the way, I already have some things to contribute so hang tight for the next post and enjoy!
Again, please participate with ideas or suggestions no matter how wild. I'd love this to be the ultimate thread for modding. I plan to share all details and if the end result is a polished enough system, I might consider selling them (for a not-outrageous overprice like this other stuff.) Of course, if you have the tools and skills, you can just build your own as well. I will attempt to be that thorough.
EDIT 9/11: Cleaned up the text and added the headunit service manual as an attachment
Last edited by Retroplay; 09-11-15 at 06:16 PM.
Reason: Changed title of thread
So, the built in Nav screen is really the centerpiece of the car. I want all of my mods to look as stock as possible. However, one of the advantages to buying a used car is not being so concerned about the resale value. This fules my bravery. But not brave enough to rip out my NAV screen and reverse engineer it. So, I did some digging and found a non-working unit for cheap. I tore it all the way down to the LCD and gathered up some information to share.
The LCD is A Toshiba TFD70W23A 800x480 Transmissive type LCD. Backlight is CCFL with two bulbs (which is very bright for a 7" screen.) This is a pretty standard type of LCD usually found in car navigation and industrial control panels. The transmissive part is what is supposed to make it daylight readable. I say supposed to because the thing is still hard to read when the sun is bright. But it is better than a run of the mill LCD.
The touch screen is (IR (infrared) based. Basically a matrix of IR beams pass along the screen. Your finger breaks the beams and this is how it can sense the position of your fingers. This is also pretty standard for industrial stuff because it allows a very thick glass to cover and protect the LCD. The glass is about 2mm thick. Newer models seem to have just a normal resistive touchscreen with thinner glass.
The video from the navigation computer is RGBs which is similar to the European SCART format. In fact the display and ECU is PAL based (525 scanlines, 50hz). RGBs is similar to VGA however, the sync signal is composite (combined horizontal and vertical sync) and the scan frequency being 50hz which is out of range of most VGA cards. It is also interlaced.
Being 840x480, you are limited to 480i which is what you used to be used to with DVD and old TVs. So don't expect HD to work with the screen without a converter and an ugly picture. Bottom line is that though this was high-end stuff back in the day (and no doubt cost Toyota $600+ for the panel) it looks seriously outdated by today's standards.
As-is, you could connect a VGA input to the monitor with a fairly simple circuit. There are several VGA to SCART adapters out there and those should work. Your main limitation is that most modern graphics cards can't output the 50hz frequency. So you would probably need something called a scan converter. There are plenty of stuff out there because the nerds in the arcade hobby use these to replace their arcade screens with modern screens.
I've looked at the video converters available and they are far too expensive for what they are. All you need is a composite to VGA converter and a VGA switch.
So, here is a juicy tidbit:
The LCD controller on-board is a Sharp PN IR3Y29B which supports composite/S-Video and RGBS inputs. It also has a pin to switch between these inputs. I have confirmed that the composite input does make it over the cable to the main board which has the factory connectors on it. I still need to trace it see if it makes it all the way to the connectors as well as the pin needed to switch between the two inputs. There are several pins on the factory connectors that I have not yet accounted for. The wiring diagrams seem to only detail the pins that are hooked up and used.
There is also a connector on the top of the unit with nothing connected to it. I traced 3 of its pins to the touchscreen board. I will need to research this further to figure out its purpose. I suspect it is for factory calibration/test of the touchscreen.
I am debating whether to replace the screen or not. 800x480 is not the best resolution. I am looking at 1280x800 panels which would allow 720p HD. The one I am looking at has HDMI, VGA, and two composite inputs. It is IPS which increases the viewing angle. This is the main reason the display is difficult to read from the drivers seat. But it was a limitation of the technology at the time. No doubt this was the best viewing angle possible at the time.
A new screen would also mean LED backlighting and the potential for what they call "boosters" which increase the brightness of the screen to insane levels. Also LED backlights last thousands of times longer than CCFL lamps.
One possibility is to replace it with a tablet (either windows 8 or Android) but then I lose the stock navigation and the IR touchscreen.
If I replace just the LCD with a newer, higher resolution screen I can make a simple modification to the VGA input to work with the factory NAV (which I am not sure I will keep working anyway.)
The glass for the touchscreen is a frame which mounts around the LCD and from the looks of it, it shouldn't be too difficult to install on a different screen. This is probably the way I will go. The LCD controller and backlight driver is on a seperate board from the touchscreen and IEBus control board. So this should be a screen replacement only with some slight modifications to the metal back housing for HDMI and composite inputs. Some mods would be needed to allow the main board of the nav to control the LCD for things like brightness, color, and contrast. This is the direction I am leaning right now.
I'll get some pictures up here soon of the insides of this since I have not found any pictures of one torn down yet. Given that these normally run anywhere from $350 to $900, I can understand why most people would not want to tear down their screens. I paid $95 for this one and I have fixed it already.
If anyone has any requests for information on the display, just let me know and I will try to answer them. This is a fairly unique opportunity to get some details on the internals.
EDIT: Before anyone tries to follow and orders the Jenaux device (USB and audio in), don't. I finally received it today and it is huge. It will not fit in the cigarette lighter socket. Almost twice the diameter of the lighter socket.
I tore out the cigarette lighter and ashtray assembly. Since I won't allow smoking in the car, these were easy first targets for hacking. The cigarette lighter socket was pretty corroded anyway so it barely worked for a plug in charger.
So, I picked up a name-brand (don't buy cheap chinese crap chargers!) USB charger. The type that sits flush in the socket.
This would be a good time to point out that I have a 3D printer, so this will help a great deal in fabrication of my mods.
Using the 3D printer, I quickly designed up a retention jig for the charger and wired it in place of the socket. It now sits flush enough that I can plug in a phone charger cable and stow the cable in the ashtray box and still close the lid.
While I was in there, I also made a lamp in the lid over the ashtray box. I wired this in to the previous cigarette light lamp. It is using 6 white LEDs on 2 strips and is wired to a switch that only allows it to come on when the lid is opened (and the dash illumination is enabled.) I used a tilt switch, which is not working out as well as I like because it is very sensitive to vibration. I will be replacing this with magnetic switches soon.
I mentioned above about adding a USB charging socket and Audio Aux in to the same socket. I have it on order and will be installing that in place of the charger I have in there now. This unit is actually a USB extension cable (no charger built in) for a radio that has a USB port. I will be building a little circuit to provide charging and a switch to switch between fast charging and using the full USB.
The ashtray box is planned to have a cover where I will be mounting some controls. I don't have it fully planned out what I will be putting in there, but one thing that is a definite is mini USB port to an IEBus interface I am putting together. This allows you to plug in a computer there and control anything on the IEBus which is pretty much everything. I want ready access for development purposes.
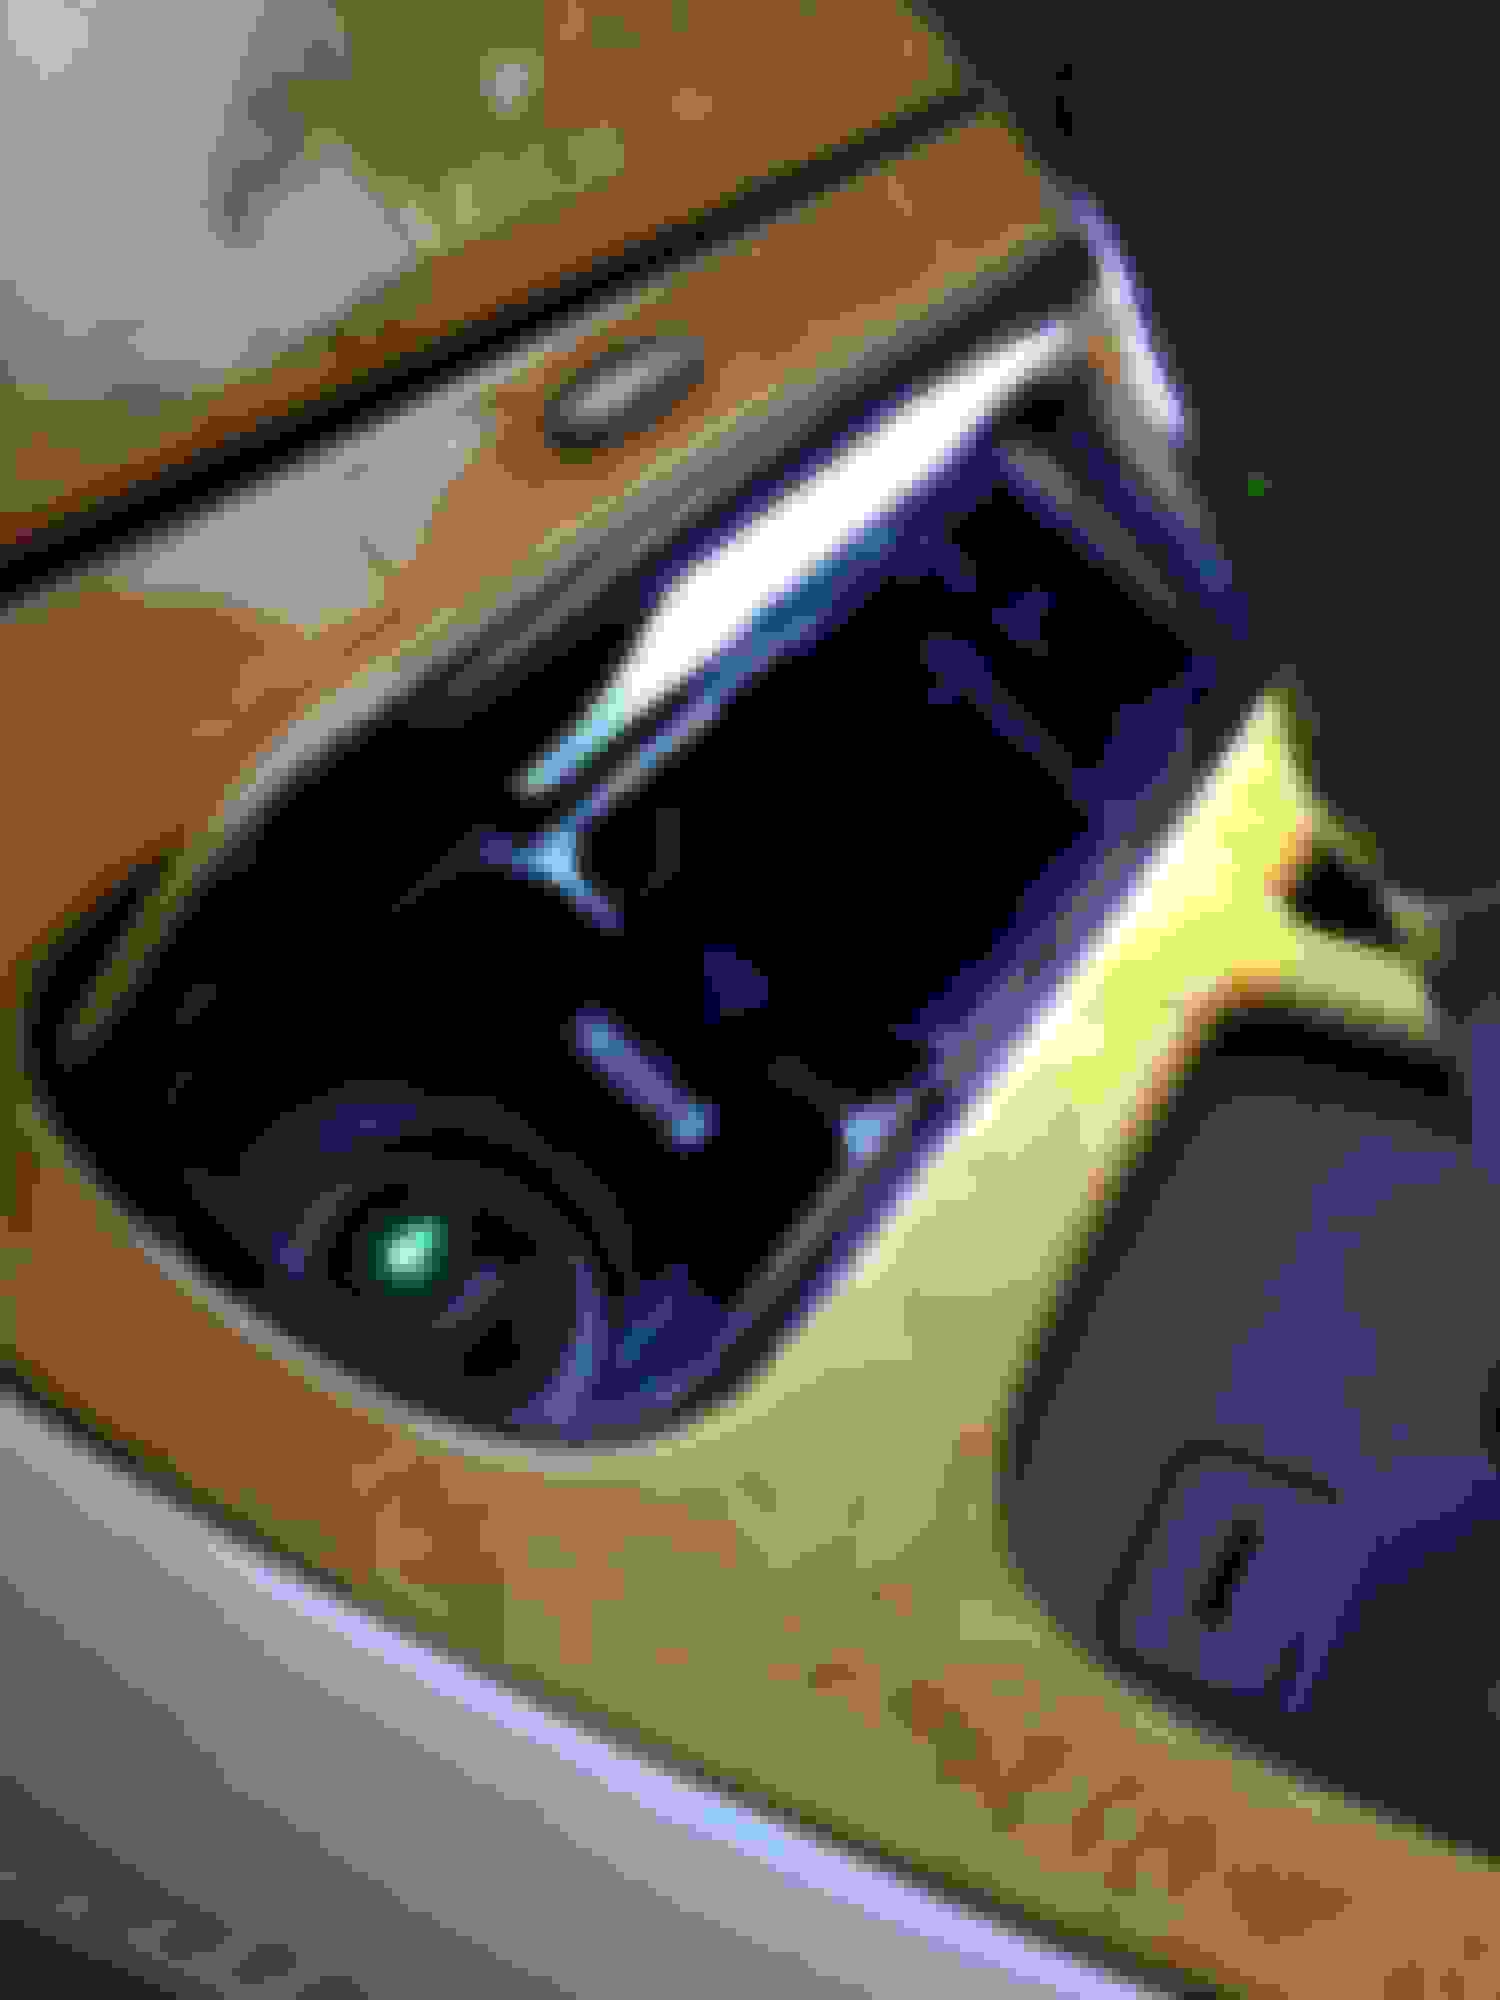
So, one of the options for this car was an integrated cellular phone system. As such, the microphones would be installed in the map light assembly. Since my car does not have the phone option, I needed to add my own mic to this area (for bluetooth and voice recognition purposes).
I also plan to switch out the lamps to LEDs, so I tore this this out and got to work.
I first designed and printed an assembly to hold a microphone in the original spot on the drivers side. If you just toss in any ordinary mic, it will pick up vibration and car noise. So I ordered an isolated mic which is basically a mic inside a rubber assembly to isolate it from vibration. I whipped together a small preamplifier that can run off the 12V which is connected to the homelink system power which is always live. A plentiful run of shielded audio cable wraps it up. Right now, it is just coiled up in there waiting for a place to go. I will install quick disconnect connectors later.
So, I mentioned that I wanted to replace the lamps with LED lights. So, first of all, every lamp reference source says the map lights are DE3175s. They are not. They are BA9s. So, I ordered a set of LED replacement bulbs and put them in there. And nothing...
Come to find out that that map light has the ground on the center contact and the live on the outer contact. This doesn't matter for standard lamps, but LEDs require the polarity to be correct. So, I tore it out again and rewired it. This was not a simple thing because there is an OR circuit wiring in there for the Door switch. You can see it in the wiring diagrams. In the end I was successful.
I ordered red lamps because they are easy on the eyes (I work in the aerospace industry BTW). Red doesn't cause the pupils to dilate so it won't blind you at night. Blue is the worst, btw. But Blue is also the easiest to see at night. So (not too bright) blue is good for location lamps. For lighting that might be turned on at night, you want green or red.
Well, these LEDs are just not bright at all. And also I believe there is a law in my area about having red lighting that can be seen from the outside.
While discussing this with a friend he mentioned how it would be neat if you could have the color adjustable.
Well, neopixels can do that! So we have a couple of neopixel boards on their way. They will need a microcontroller to control them, but those are cheap and the code is simple. I picked up the 7 LED board from adafruit. Should be plenty bright. Oh, and the brightness can be adjusted programmatically as well.
So, the plan is to have a few presets which can be changed quickly (like day/night) and allow my in-car computer or phone to change the colors further if I wish.
These neopixels also remember the last setting at power on.
$12 for two neopixel boards and a cheap $6 arduino mini clone.
I want to redo the microphone system and am still waiting on the parts for the lighting, so no pictures yet.
I am very interested in what you are doing. I have an '02 and the NAV screen assembly was not functioning properly when I purchased the car. One of the servo motors was not working, which I replaced and then found out the small control board appears to be bad. I could apply power to either motor and the screen would tilt and the door would open and close.
The screen was in rough shape too, I finally figured it would cost me less money to go ahead and purchase a good used one on eBay.
When I plugged it in, everything worked great! The old unit is now in a box but since you have joined the SC world I may bring it back out to fix it. With your help of course!
My background is not at your level. I am a technician and I learned my skill in the USAF. Mostly airborne communications equipment but I have always tinkered with anything electrical.
So over at http://angrycamel.com/category/iebus/ a guy developed an IECBus interface and some really nice software tools. It allows you to poke around and discover all devices and act as a slave or a master on the bus. Essentially allowing you to get info from or control any device on the bus. It also allows you to make a DLL which you can then use in your own programs. One example he has there is turning the touchscreen into a mouse.
The hardware is a bit dated and I am not a huge fan of how he has the connection to the IEBus working. So, I was able to find some HA1218FP interface ICs on ebay. I picked up 5 for $10. These have no smarts, but do provide the correct electrical interface to the bus.
I am working to convert the hardware and software over to Arduino which will make assembly very easy and provide a USB interface. The goal is to make it work with his awesome PC software. Currently, I have it mostly working on an Arduino Uno but my end goal is to get it running on an Arduino Pro Micro (Teensy), nano, and micro which are very small. This way, I can place them throughout for special functions. The arduino pro micro can also easily be programmed as a USB mouse, keyboard, or joystick which requires no special drivers on windows or linux. Another advantage to using an arduino is that the whole thing is self powered.
This is all nerdy talk, but the biggest benefit of porting this over to Arduino is that it can then be programmed into any Arduino supported controller. Right now, it is very device specific. And if you stick with his method of interfacing to the IEBus, it only requires a few resistors and a couple diodes added to the Arduino.
I'm sure this will be something lots will be interested in here, so I will post up all the details when ready.
I am very interested in what you are doing. I have an '02 and the NAV screen assembly was not functioning properly when I purchased the car. One of the servo motors was not working, which I replaced and then found out the small control board appears to be bad. I could apply power to either motor and the screen would tilt and the door would open and close.
The screen was in rough shape too, I finally figured it would cost me less money to go ahead and purchase a good used one on eBay.
When I plugged it in, everything worked great! The old unit is now in a box but since you have joined the SC world I may bring it back out to fix it. With your help of course!
My background is not at your level. I am a technician and I learned my skill in the USAF. Mostly airborne communications equipment but I have always tinkered with anything electrical.
The screen I picked up doesn't have the door assembly. The controller for the motors is on a separate little board. I am sure it would be dead simple to fix, though. Most likely something jammed the door and it either blew a fuse or one of the drivers. Both simple fixes.
Since you have the door assembly out, can you confirm which connector (or if) it connects to on the back of the screen? The wiring diagrams I have found left out one connector so I am not sure what it is used for. I assumed it connected to the door motor controller.
Similiar backgrounds, BTW. I actually work on and develop airborne electronics. Probably some of the stuff you played with as a technician.
I would love to get my hands on a PD7204 chip which actually handles all the IEBus protocol for you which seriously reduces the amount of code required. However, the only 2 ways I know to get them is to either pay $5,000 to a guy on ebay selling 2500 of them (thought about it and then reselling them separately) or rip one out of some used equipment. The problem is knowing which equipment is guaranteed to have it. The stock head unit does not, but the nav screen does. I am planning to keep this board in my nav unit though, so I can't borrow it from there. And even a broken nav unit is expensive.
Has anyone been inside enough equipment to know which ones have this IC? Apparently this is common to Toyota, Honda, Lexus, and Scion. I am thinking about picking up a Honda head unit for like $20, but if it doesn't have the chip, $20 can add up fast.
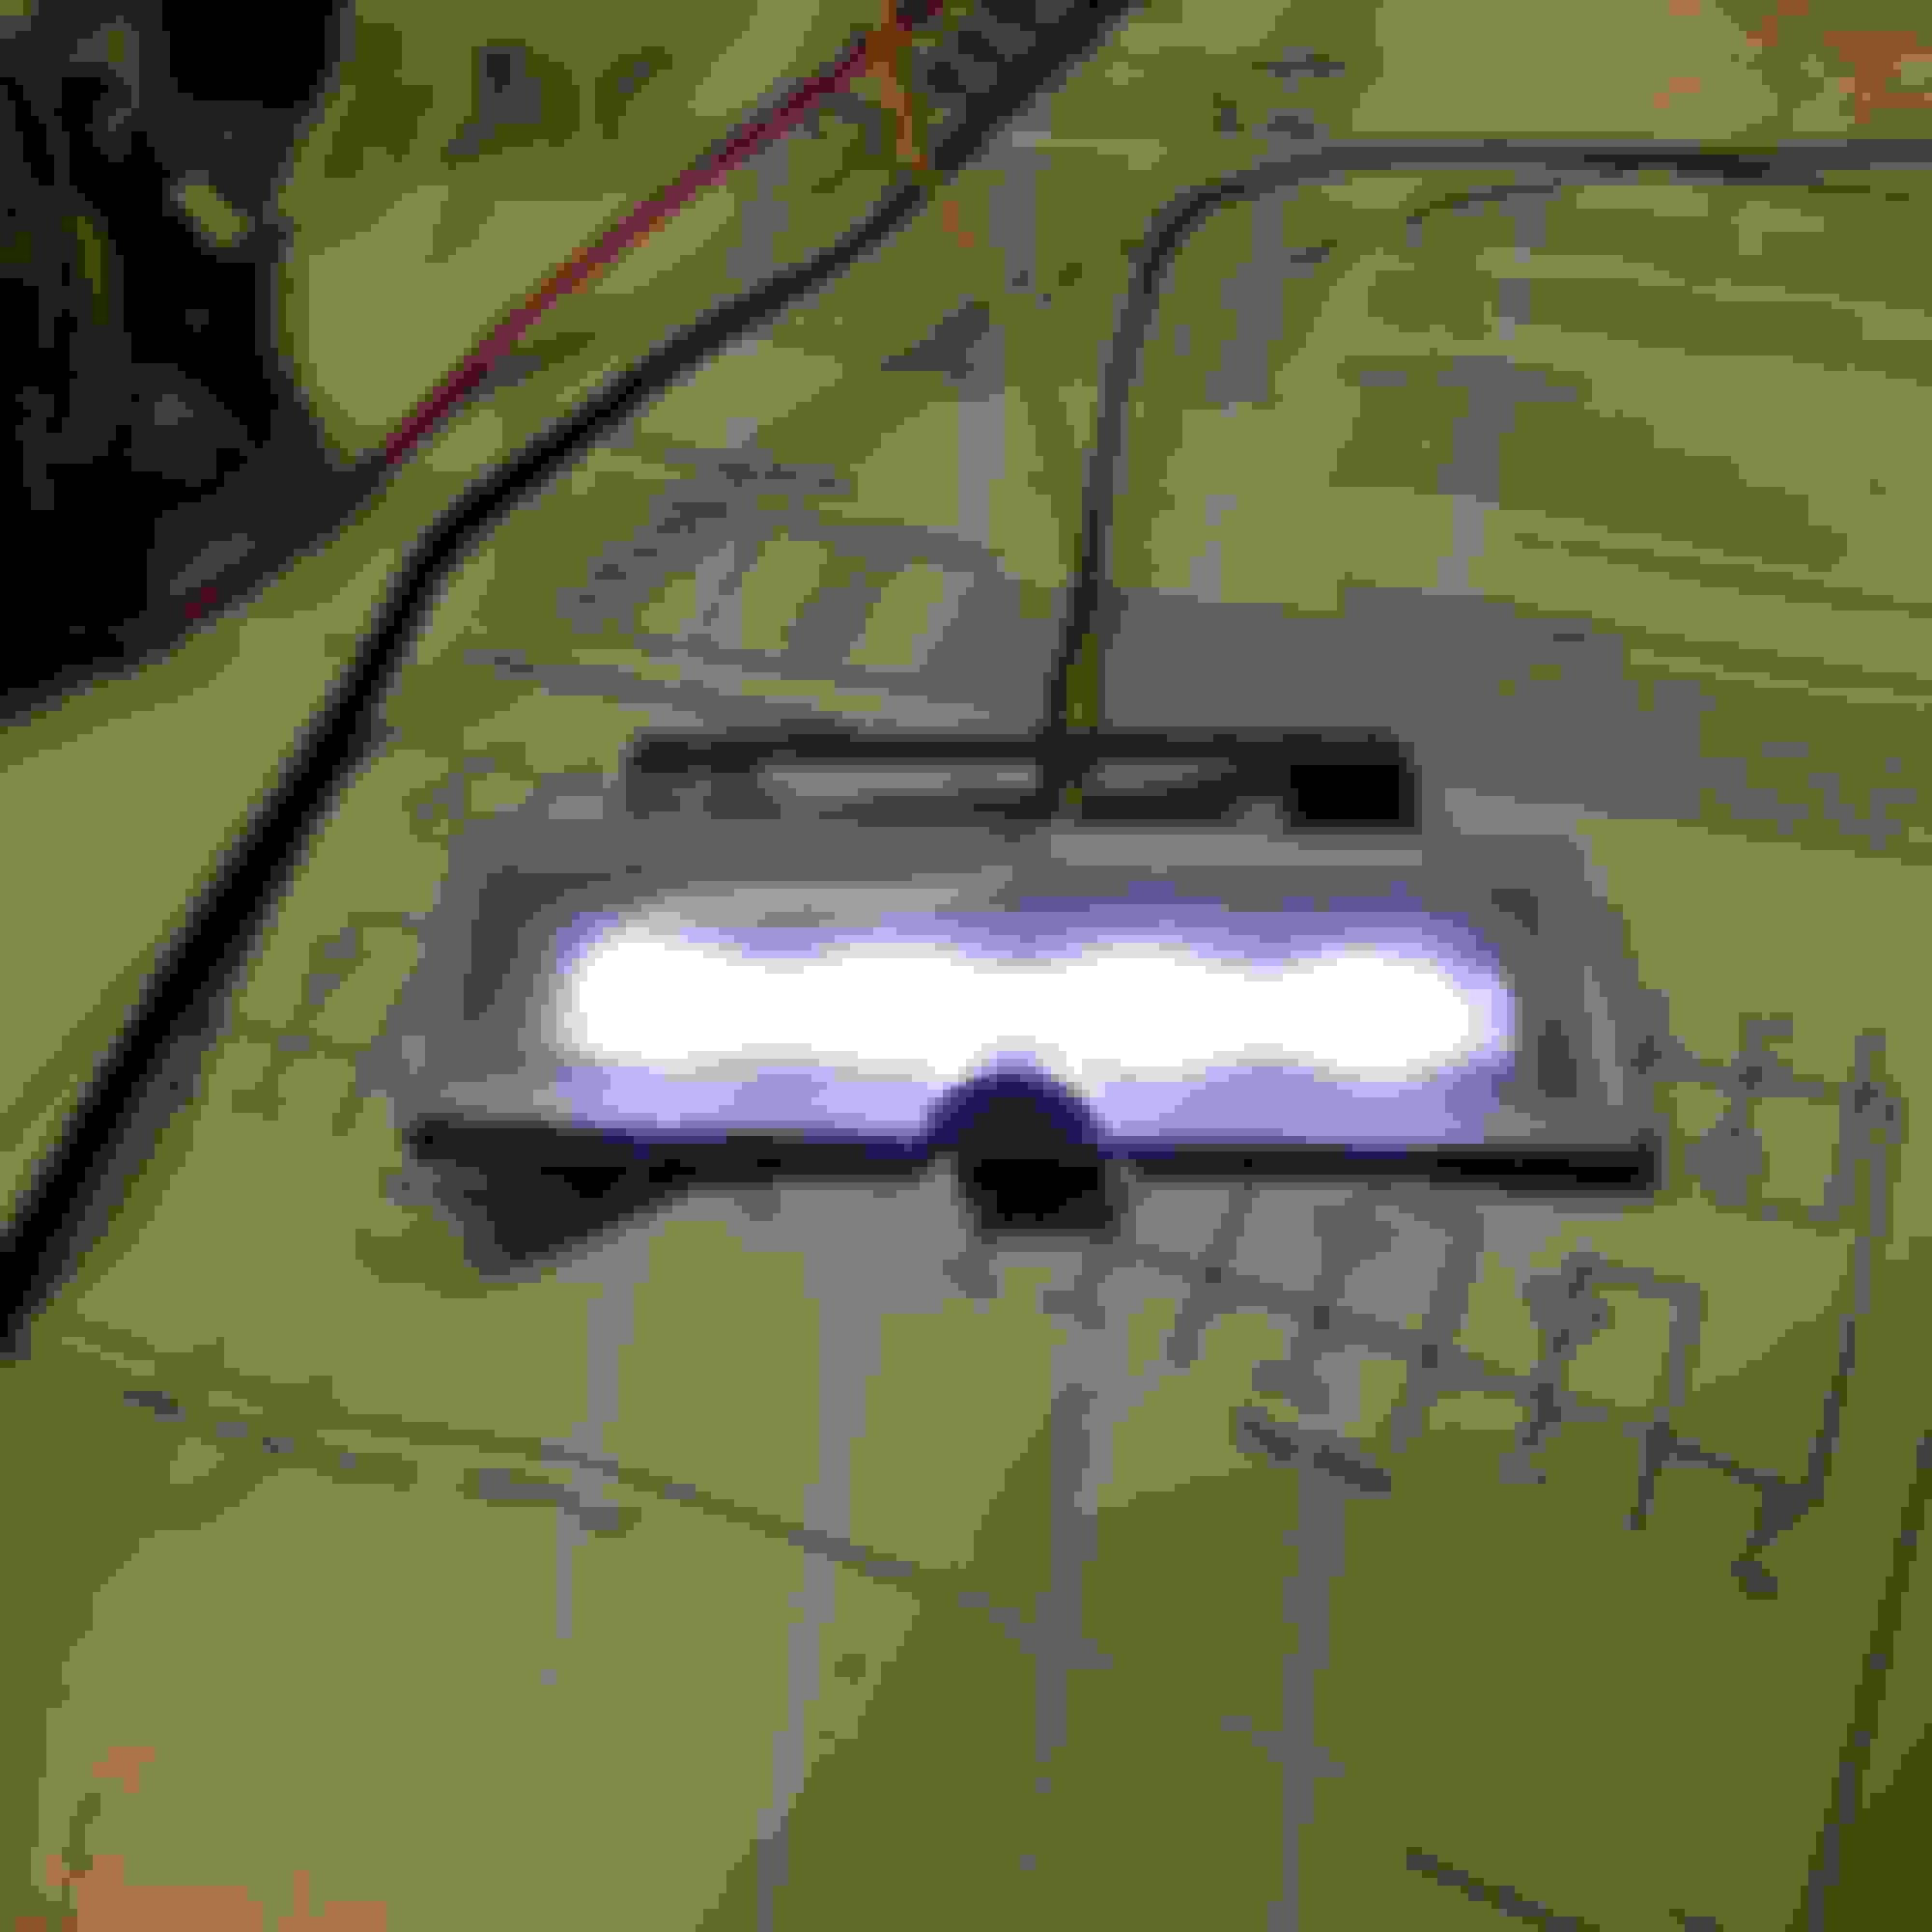
This is the little indicator above the glovebox which indicates whether the passenger side airbag is on. It's ugly.
Since everybody knows the airbag is on when someone above 25lbs is sitting in the passenger seat and has their belt buckled, it seems more like a dummy light also.
I have tried to work through the wiring diagram, but I am not sure I am seeing it on there. There is a passenger seatbelt indicator, but I can't tell if that is in the dash or this little light.
What I am thinking about doing is removing it and turning it into another USB charger socket for a passenger (or open to other suggestions for passenger convenience). But I am not yet sure what the impact is from removing it. Anybody know?
So I am the new owner of a 2003 SC430. The car was well taken care of, and I great a nice price for it due to a few (asthetic) fixer-uppers.
First, the CD deck was jammed. Pulled it out and fixed that on my second day. No idea if the tape deck works but the heads were clean.
The antenna mast is broken and it looks like a common thing. Planning to just replace it with a whip antenna.
One of the cupholders has a broken plastic piece.
That's about it other than a few scratches here and there which can be buffed out.
So I am a geek and an electrical engineer by day, so of course I am planning to mod this thing.
Here's some of my plans/progress (I will detail them separately):
1. Replace interior lights with LEDs throughout. While I am in there, make sure all lenses are cleaned and clear.
2. USB charger port to replace the cigarette lighter socket. Will also have an audio input jack in the same socket.
3. Car computer/media center keeping the stock Navi and Head Unit. Multiple mods to go along with that.
A. Bluetooth Phone/Media integration
B. Mobile Wifi and GPS tracking
C. Miracast wireless display
D. Possibly using stock Nav screen
4. Dash cam/DVR in stock rearview mirror
5. Info display inside stock rear view mirror
6. IEBus integration
Ok, with that out of the way, I already have some things to contribute so hang tight for the next post!
I recently changed my HID low beam headlights and now my car won't start. From my numerous google searches this appears to be a common problem. I have a long active thread about my situation. Given your electrical expertise, and any suggestions would be greatly appreciated!
In terms of your mods, you might consider NAVIKS. You can wire a backup camera to your factory GPS, as well as stream you iphone wirelessly. It's really fun.
I am very new to the SC 430 (just bought it two weeks ago) and haven't looked anywhere near the headlights yet, but I will take a look at your thread and see if I can help.
I am going to (hopefully) show you all how overpriced those NAVIKS/NAVTOOL things are. They are not worth over $150 for what they do. You could slap something together with off the shelf stuff for much less than even $150.
 09-08-15, 03:12 PM