
Shifter/Power Switch/VSC Switch/LED Mod
 01-23-15, 01:10 PM
#61
Sometimes i really wish i lived in the US 
As for the mirror adjustment, its originally equipped with a T4 bulb on the rear. So i guess yours is just out
The push button for the radio door is the last thing i need to do. But i can remember where i put it. Half of the car is apart at the moment
Will also do the seabelt lights when i'm taking out the seats for cleaning and minor leather refurbush
 01-23-15, 01:41 PM
#62
Oh, and yes i will be installing an aftermarket 2din radio screen instead of the oem radio. I just have'nt found the right one yet. Will be looking forward to see if Pioneer is releasing something new this summer.
So i won't be making an DIY on how to install LED's on the oem radio. but i could imagine that its the same way as the climate control unit.
So i won't be making an DIY on how to install LED's on the oem radio. but i could imagine that its the same way as the climate control unit.
01-23-15, 03:15 PM
#63
Lead Lap

Great job Rollaboy.
01-23-15, 03:25 PM
#64
Lead Lap
Shawn, my 2002 has lights on the mirror adjustment arrows. I had to turn my lights on first though.
01-26-15, 11:11 PM
#65
Sometimes i really wish i lived in the US
As for the mirror adjustment, its originally equipped with a T4 bulb on the rear. So i guess yours is just out
The push button for the radio door is the last thing i need to do. But i can remember where i put it. Half of the car is apart at the moment
Will also do the seabelt lights when i'm taking out the seats for cleaning and minor leather refurbush
01-30-15, 07:53 PM
#66
Driver School Candidate

hey guys, awesome thread! I did the shifter bulbs and will be doing the climate control ones in the near future, one problem I can't seem to figure out though is that my mirror control lights have never worked, and neither does the stereo control lights, could that have anything to do with a fuse? or maybe having an after market stereo? thanks
01-31-15, 02:35 PM
#69
Driver School Candidate
sexusc430, try to check the fuse i talked about on page 4 in this thread.
ShawnOk, its a 3-SMD-1210 LED bulb for the ignition Like these:
ShawnOk, its a 3-SMD-1210 LED bulb for the ignition
Like these:
01-31-15, 05:53 PM
#70
hey guys, awesome thread! I did the shifter bulbs and will be doing the climate control ones in the near future, one problem I can't seem to figure out though is that my mirror control lights have never worked, and neither does the stereo control lights, could that have anything to do with a fuse? or maybe having an after market stereo? thanks
02-04-15, 03:20 PM
#71
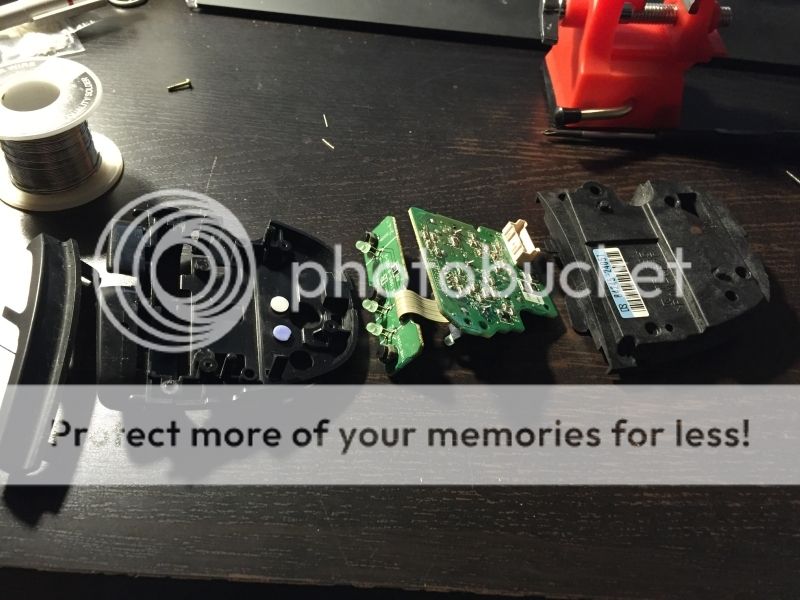
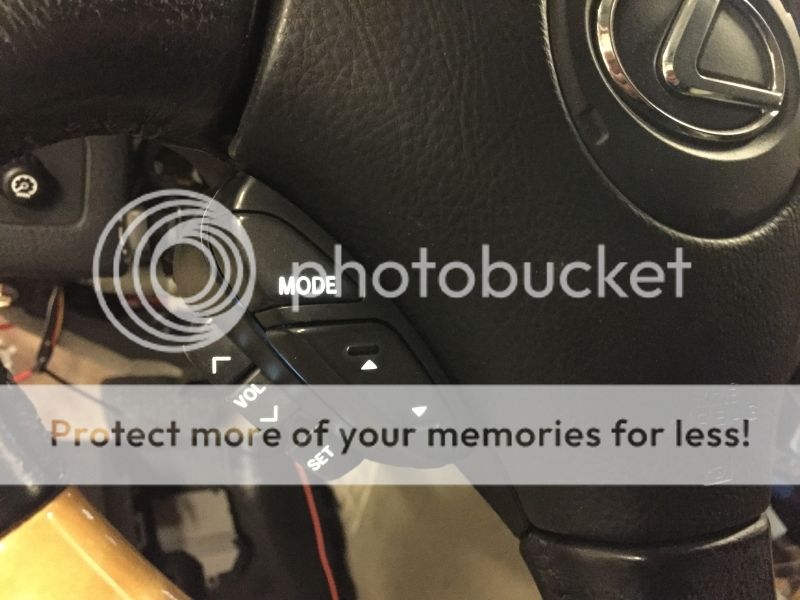
Heres some news. Of'course i could'nt go without modding the steering wheel controls also
Well its a tricky one. First you have to take off the cover from behind the controls. There is a small hole in the cover. I found out AFTER i got the cover off AND broke the small tab inside the cover. Well i glued it back so should'nt be any problem.
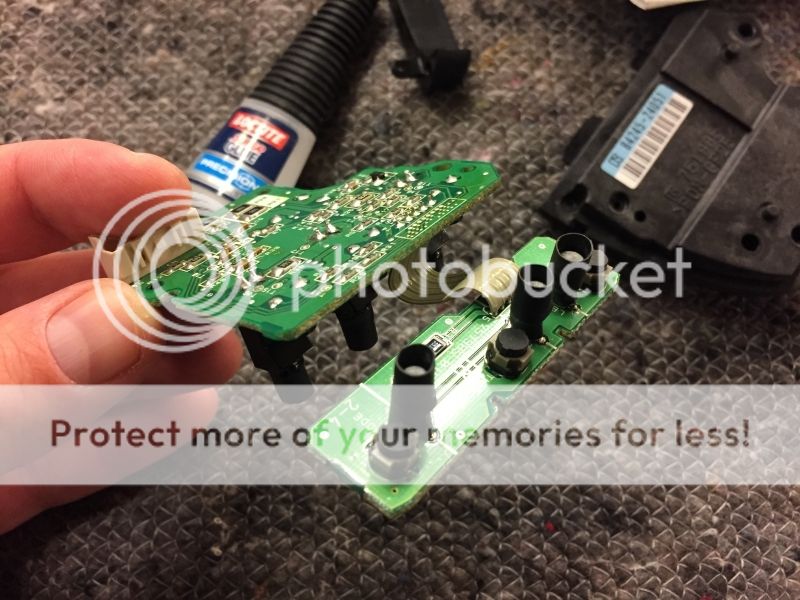
Well here is the unit dissasembled. We need 6 pcs 3mm led's. The hardest part was to get the old ones out and and get it clean for installing the new white ones.
Here they are soldered:
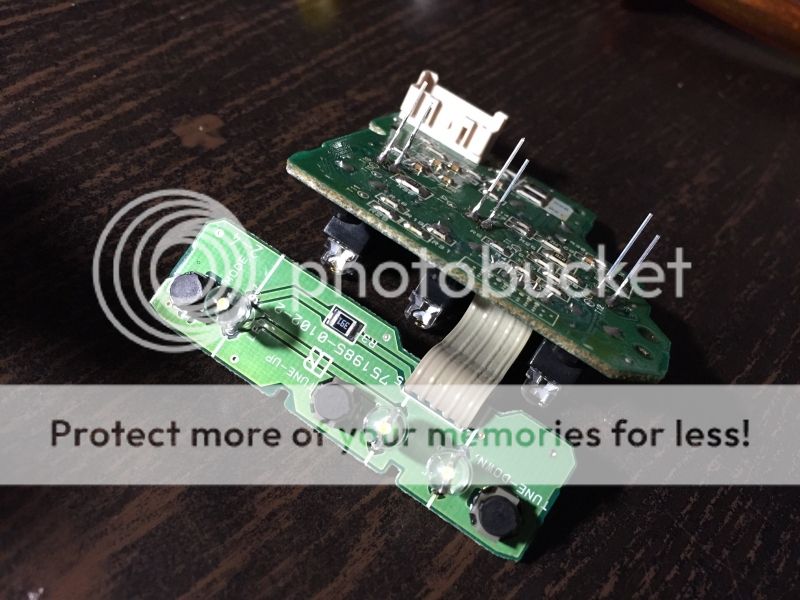
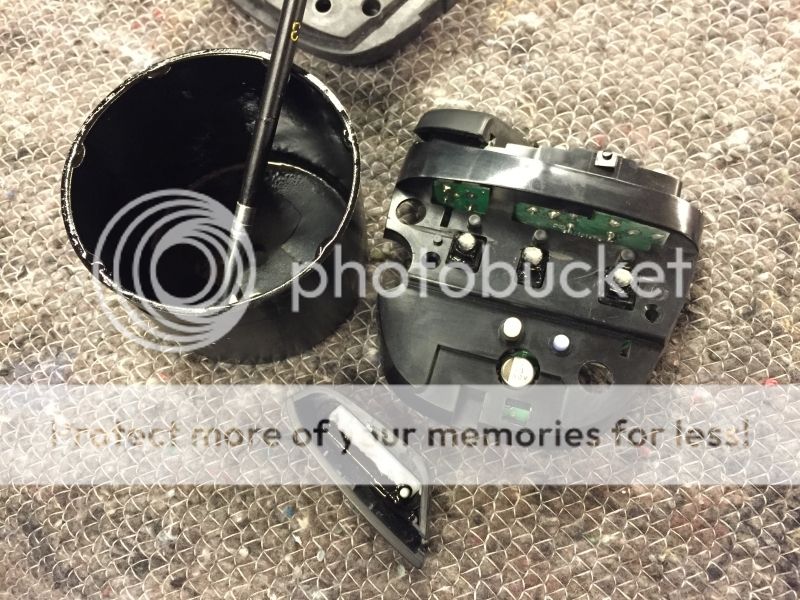
And here is what you don't want to happen when i pressed the print circuit back in place i was'nt paying attention so the buttons where jammed and i broke two of the buttons
 They can not be repaired. Luckily i had a spare unit because i bought an extra steering wheel. Pheew. So took the button from that one and soldered to the new one. Not an easy task. Its so small and you dont want to warm them up too much.
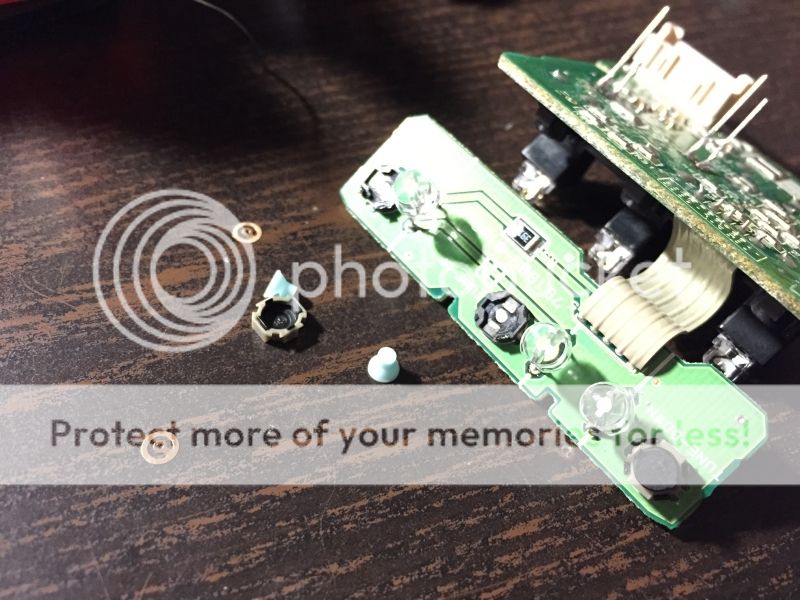
Well here i have pointed out the three spots where you should be careful to use a small screwdriver and get the button tabs away from the circuit board so they don't get damaged.
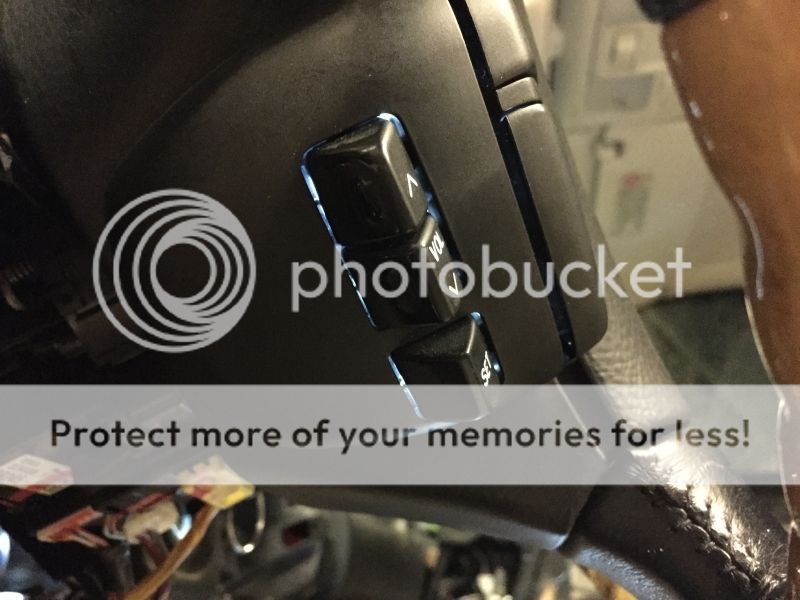
Final job. Installed and good to go
But the led's are very bright so some of the light can be seen from underneath the buttons. Still working on something to fix this. I guess the most guys can live with that, but i want to see if i can make it perfect

More backlight
But after this i sit back and looked at all my new lights in the cabin and was very pleased with the result ....until my eye catch this  So next project its the rearview mirror
 ")

Well its a tricky one. First you have to take off the cover from behind the controls. There is a small hole in the cover. I found out AFTER i got the cover off AND broke the small tab inside the cover. Well i glued it back so should'nt be any problem.
Well here is the unit dissasembled. We need 6 pcs 3mm led's. The hardest part was to get the old ones out and and get it clean for installing the new white ones.
Here they are soldered:
And here is what you don't want to happen
when i pressed the print circuit back in place i was'nt paying attention so the buttons where jammed and i broke two of the buttons They can not be repaired. Luckily i had a spare unit because i bought an extra steering wheel. Pheew. So took the button from that one and soldered to the new one. Not an easy task. Its so small and you dont want to warm them up too much.Well here i have pointed out the three spots where you should be careful to use a small screwdriver and get the button tabs away from the circuit board so they don't get damaged.
Final job. Installed and good to go
But the led's are very bright so some of the light can be seen from underneath the buttons. Still working on something to fix this. I guess the most guys can live with that, but i want to see if i can make it perfect
More backlight
But after this i sit back and looked at all my new lights in the cabin and was very pleased with the result ....until my eye catch this
So next project its the rearview mirror
Last edited by Rollaboy; 02-04-15 at 03:58 PM.
02-04-15, 03:41 PM
#72
Lead Lap
Nice job Rollaboy. That indeed is a tricky one.
02-12-15, 05:37 AM
#74
Finally got the steering wheel controls finished.
The new LED's are so bright they let some light out under the buttons. The best thing would properly be to find new resistors for the LED's but since i felt i didn't had the time for that i instead used some sandpaper to make the LED's more blurry. For the MODE and UP and DOWN led's i used heat shrink tubing around the led's to cover off some of the light. I also tried that on the Volume UP and DOWN and SET button, but there were not enough room for the button to work properly. So the last thing i went with was painting the LED's on the sides so the light is more centered. I also painted some of the white area inside the MODE and UP/DOWN button and that had a little but decent effect also. Everything turned out better than before. Not 100% perfect but i can live with it.
Heat shrink tubing around the led's. Did not work with the Volume UP/DOWN and SET buttons. Not enough space for the buttons to operate.
Instead i coated the sides of the led's with black paint and made the led's more blurry with sanding paper.
Another view inside the buttons where i have painted some of the white plastic black so the light stays inside the buttons.
Well done with that. Now to the rearview mirror.
Didn't want the green light so i've changed it out with a yellow/amber smd instead. First the gren:
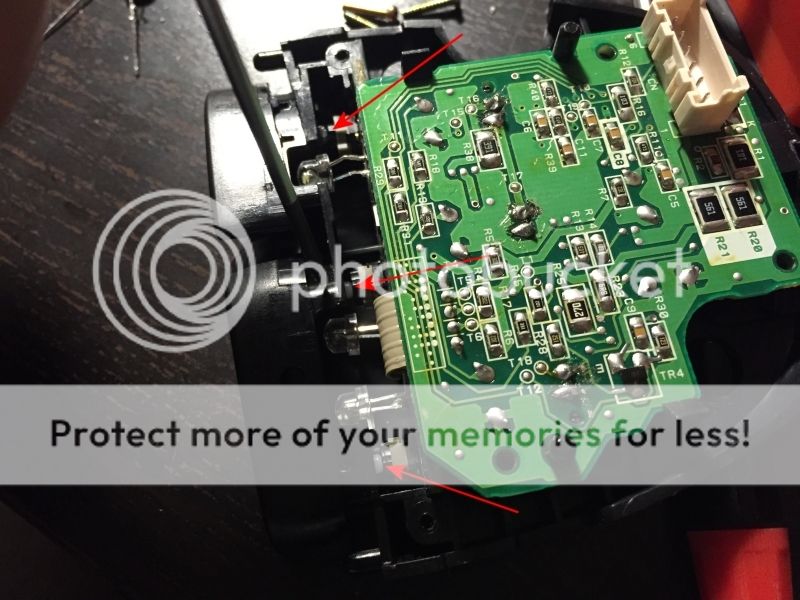
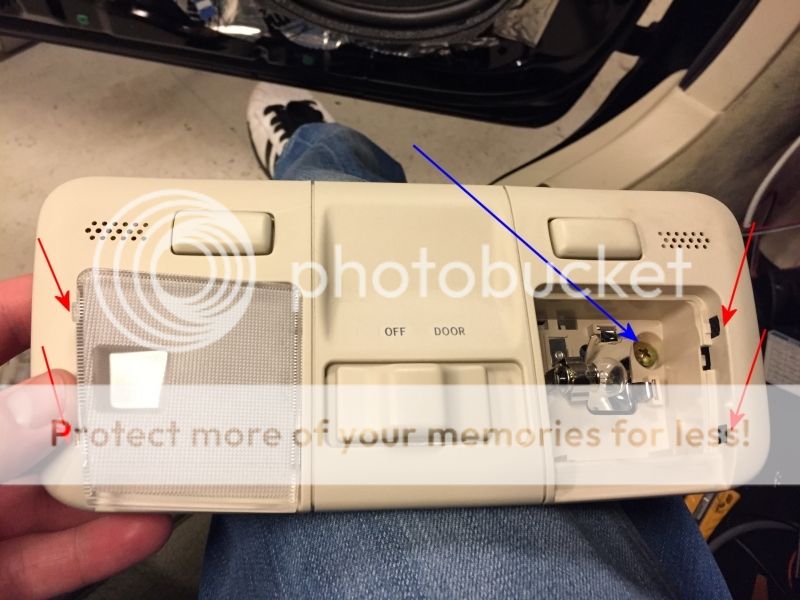
First thing you have to do is remove the cabin light covers. Use a small screwdriver where the red arrows are. Be careful and take your time. you don't want to scratch anything. After that there are two screws under the covers you have to remove (blue arrow).
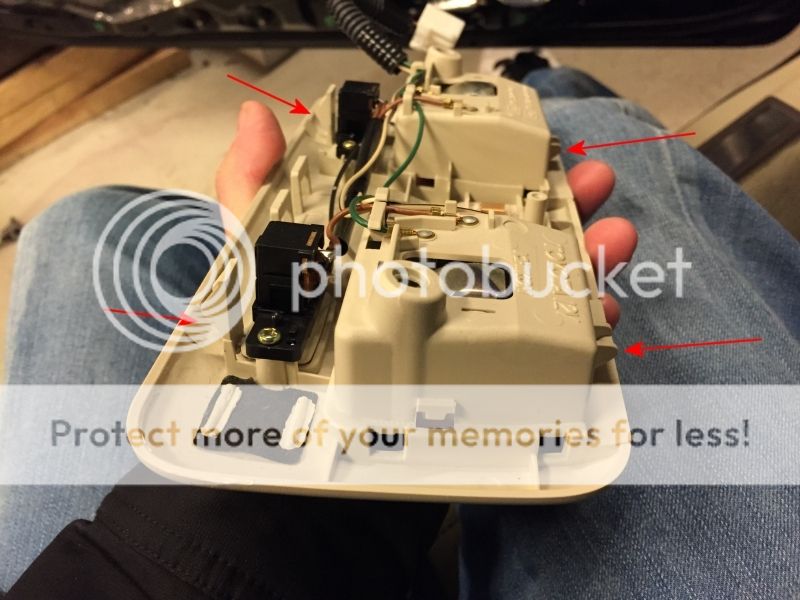
Here you can see the four plastic pieces that holds the unit in place. The unit is now loose and you can take it down and disconnect the wiring.
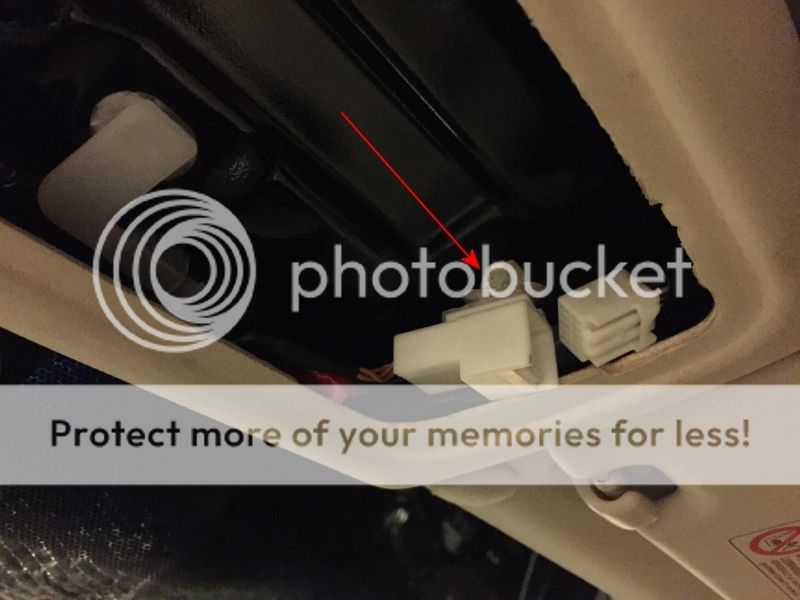
Also disconnect the wirring for the rearview mirror and use a flat screwdriver to gently pop out the connector from the roof.
Then remove the small plastic cap on the rearview mirror arm with a flat screwdriver (i don't have a picture of it). Then you can remove the rearview mirror from its base that is glued to the windscreen.

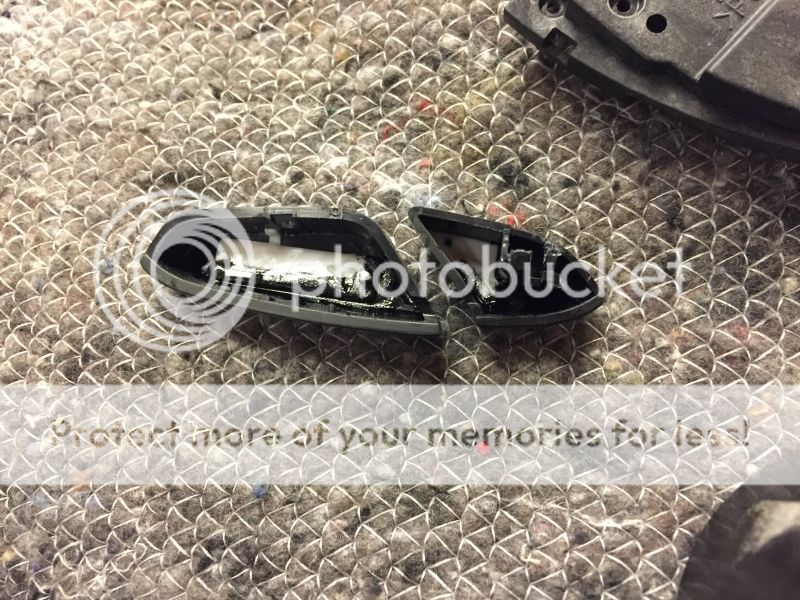
Gently use a flat screwdriver to open the housing. Its actually very easy and comes off without any problems.
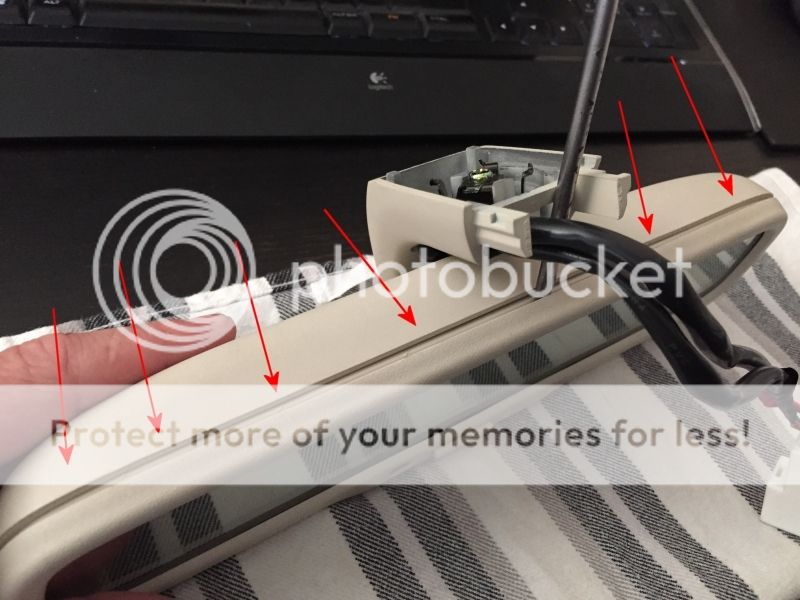
Open the housing carefully.
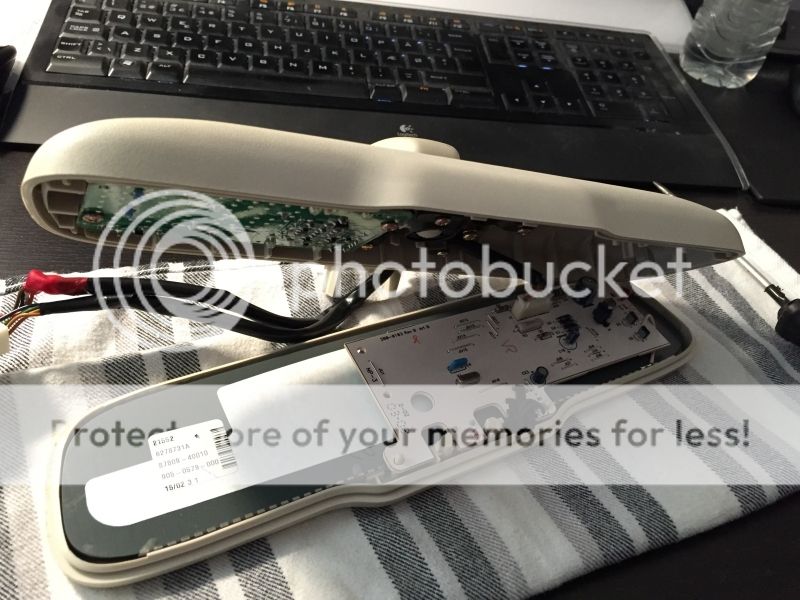
Flip over the circuit board and locate the SMD that needs to be removed and a new one soldered in any color you want.
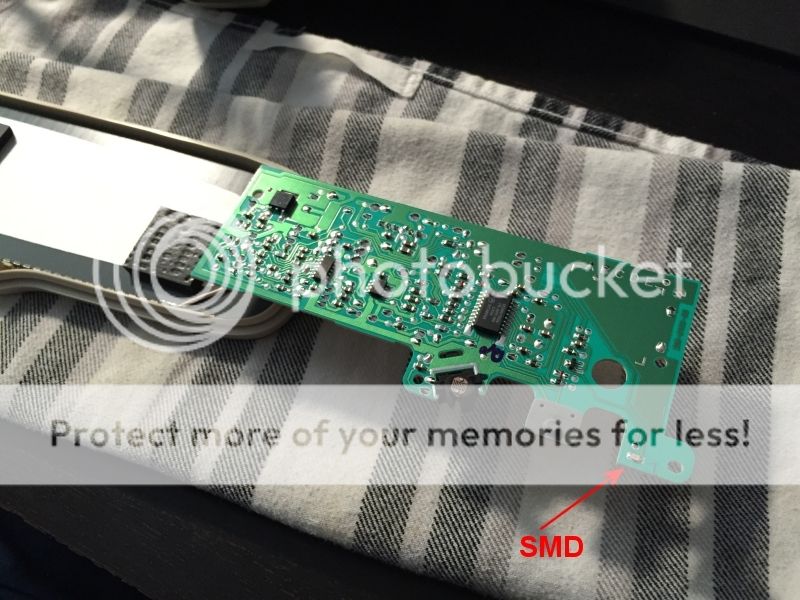
Well there you go

Now install everything back in reverse
The last thing i need to change the LED's is the seatbelts. I won't be removing the seats right now but in a few month i guess. So i will be doing a DIY on that also
The new LED's are so bright they let some light out under the buttons. The best thing would properly be to find new resistors for the LED's but since i felt i didn't had the time for that i instead used some sandpaper to make the LED's more blurry. For the MODE and UP and DOWN led's i used heat shrink tubing around the led's to cover off some of the light. I also tried that on the Volume UP and DOWN and SET button, but there were not enough room for the button to work properly. So the last thing i went with was painting the LED's on the sides so the light is more centered. I also painted some of the white area inside the MODE and UP/DOWN button and that had a little but decent effect also. Everything turned out better than before. Not 100% perfect but i can live with it.
Heat shrink tubing around the led's. Did not work with the Volume UP/DOWN and SET buttons. Not enough space for the buttons to operate.
Instead i coated the sides of the led's with black paint and made the led's more blurry with sanding paper.
Another view inside the buttons where i have painted some of the white plastic black so the light stays inside the buttons.
Well done with that. Now to the rearview mirror.
Didn't want the green light so i've changed it out with a yellow/amber smd instead. First the gren:
First thing you have to do is remove the cabin light covers. Use a small screwdriver where the red arrows are. Be careful and take your time. you don't want to scratch anything. After that there are two screws under the covers you have to remove (blue arrow).
Here you can see the four plastic pieces that holds the unit in place. The unit is now loose and you can take it down and disconnect the wiring.
Also disconnect the wirring for the rearview mirror and use a flat screwdriver to gently pop out the connector from the roof.
Then remove the small plastic cap on the rearview mirror arm with a flat screwdriver (i don't have a picture of it). Then you can remove the rearview mirror from its base that is glued to the windscreen.
Gently use a flat screwdriver to open the housing. Its actually very easy and comes off without any problems.
Open the housing carefully.
Flip over the circuit board and locate the SMD that needs to be removed and a new one soldered in any color you want.
Well there you go
Now install everything back in reverse
The last thing i need to change the LED's is the seatbelts. I won't be removing the seats right now but in a few month i guess. So i will be doing a DIY on that also
03-04-15, 04:17 PM
#75
Lead Lap
Do any of you know if the trunk and fuel door switches have a light? (Shawn or Rollaboy?) I just looked at it and it appears that they do not. The icons are silk screened on to the switches rather than having a white plastic icon embedded into the switch to allow light through.
I pulled the switch housing out and there are 6 contacts on the back, so that would allow enough contacts to control the trunk and fuel door and a light circuit. It looks like the assembly can be taken apart but I have a hard time imagining that it has lights in there. OTOH, since it has 6 contacts, I have to wonder if there is another model out there with lights. (Circuits 2 & 3 control the fuel door and 4 & 5 control the trunk.)
It sure would be nice if one existed that did have lights since those buttons are practically impossible to see when sitting in the driver's seat. So that would be another question for you guys, do you know if there is another assembly available with lights in the switch levers?