DIY Success Stories
 08-29-11, 07:58 PM
#1
Rookie
Thread Starter

Join Date: Jan 2008
Location: CA
Posts: 78
Likes: 0
Received 0 Likes
on
0 Posts
In light of my recent success with a couple of DIYs, I figure we should have a thread to post all of our success stories from the DIYs we have on this amazing forums. It'll be a good place to share what we did, but more importantly thank the great people who posted those awesome DIYs! 
You don't have to post in this format, but I think it would be helpful for other people in case they want to search around in the thread.
Trouble Codes: P0171, P0125, P1133, and P1135
DIY Performed: MAF Sensor Cleaning and Replacing Air/Fuel Sensor
The Story: Several years ago when I was a complete noob, I got the P0171 code, and the mechanic ended up charging me 3 hours of labor and $190 to replace the sensor. Shame on me. Last week, P0171 was fixed with cleaning out the MAF sensor with the cleaner I bought for $8, and it only took me about 30 minutes. Most of that time was spent trying to unscrew a really tight screw.
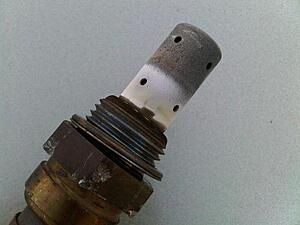
P0125, P1133, and P1135 were fixed today about an hour ago by replacing the Bank 1 Sensor 1. The worst part, and also the part that took the longest, was unplugging it. I tried going from under the hood, and I couldn't get, then I tried under the car and I still couldn't get it. I went back for the sensor from under the hood, and finally got it... That was about an hour of trying. Only if I had known how hard I had to press on it, I think I would've gotten it in 15 minutes. Unscrewing the sensor wasn't difficult at all. I did use WD-40 to loosen it up, or maybe it was already loose enough after trying for a few minutes. Either way, it came off. I used a regular 22mm box wrench because I couldn't find one that was offset. I highly recommend getting the offset box wrench. It's difficult to maneuver from under the car. After I was able to replace the dead sensor, I reset the codes and drove it around for about 10 miles (last time I reset the code to see if I get the same codes, the light came back on within a mile). The sensor cost me $87 from Amazon, and $13 for the wrench. All in all, it took me about 2.5 hours to complete the DIY. I would say 1.5 hour of it was spent working on the car and the rest was spent cursing at the damn sensor.
Here's a picture of my dead sensor:
For a job that I was quoted anywhere from 3-4 hours ($100/hr) in labor along with $200-$300 for the A/F sensors, I ended up spending $137 for everything including the ODB-II scanner and a few hours after work.
Thank you to 81corolla and hypervish for making those DIYs, and thanks to everyone that contributed in those threads with your own stories!

You don't have to post in this format, but I think it would be helpful for other people in case they want to search around in the thread.
Trouble Codes: P0171, P0125, P1133, and P1135
DIY Performed: MAF Sensor Cleaning and Replacing Air/Fuel Sensor
The Story: Several years ago when I was a complete noob, I got the P0171 code, and the mechanic ended up charging me 3 hours of labor and $190 to replace the sensor. Shame on me. Last week, P0171 was fixed with cleaning out the MAF sensor with the cleaner I bought for $8, and it only took me about 30 minutes. Most of that time was spent trying to unscrew a really tight screw.
P0125, P1133, and P1135 were fixed today about an hour ago by replacing the Bank 1 Sensor 1. The worst part, and also the part that took the longest, was unplugging it. I tried going from under the hood, and I couldn't get, then I tried under the car and I still couldn't get it. I went back for the sensor from under the hood, and finally got it... That was about an hour of trying. Only if I had known how hard I had to press on it, I think I would've gotten it in 15 minutes. Unscrewing the sensor wasn't difficult at all. I did use WD-40 to loosen it up, or maybe it was already loose enough after trying for a few minutes. Either way, it came off. I used a regular 22mm box wrench because I couldn't find one that was offset. I highly recommend getting the offset box wrench. It's difficult to maneuver from under the car. After I was able to replace the dead sensor, I reset the codes and drove it around for about 10 miles (last time I reset the code to see if I get the same codes, the light came back on within a mile). The sensor cost me $87 from Amazon, and $13 for the wrench. All in all, it took me about 2.5 hours to complete the DIY. I would say 1.5 hour of it was spent working on the car and the rest was spent cursing at the damn sensor.
Here's a picture of my dead sensor:

For a job that I was quoted anywhere from 3-4 hours ($100/hr) in labor along with $200-$300 for the A/F sensors, I ended up spending $137 for everything including the ODB-II scanner and a few hours after work.
Thank you to 81corolla and hypervish for making those DIYs, and thanks to everyone that contributed in those threads with your own stories!
 08-30-11, 06:07 AM
#2
Driver
Join Date: Dec 2010
Location: Indiana
Posts: 154
Likes: 0
Received 0 Likes
on
0 Posts
Congrats. The hardest part of "DIY" jobs is to get past the fear and hesitation of doing the job. I recently did the plugs on my wifes rx and was not looking forward to the job. After some time andpatience I got the job done. Im figuring the job at an Indy would have cost me $400-$600 . Im going to do the O2 sensors next along with suspension and exhaust. I found complete OEM new in box ehaust system including cats along with O2 sensors and suspenion for under $700. Im not a welder but sure with the forums I am on that I can find a good one locally. I look forward to the suspension work as it will be my first shot at doing it. I also watched and interesting video via youtube on a DIY timing belt replacement. Its a 24 hour job on my 540 which I dread but looks like no more than 4 hours to do it on the Lexus. Im excited about that on as well. Now if I could just be victorious on these damned seatbelt retractors I will be exstatic
I hope to have Some DIY's made up on the suspension with video and pics. This is the best Lexus forum I have found for the RX and plan to stick with it for a long time.
I hope to have Some DIY's made up on the suspension with video and pics. This is the best Lexus forum I have found for the RX and plan to stick with it for a long time.
08-30-11, 10:38 AM
#3
Rookie
Thread Starter
Join Date: Jan 2008
Location: CA
Posts: 78
Likes: 0
Received 0 Likes
on
0 Posts
I completely agree with the hesitation and fear being the hardest part. At first it can feel overwhelming, but once you have started and completed the job, the gratification is amazing. And it's not just knowing that you saved hundreds of dollars by not taking it to a mechanic, but the feeling of accomplishing fixing a car trouble is great.
08-30-11, 04:22 PM
#4
Driver School Candidate

Join Date: Aug 2011
Location: Jamaica
Posts: 25
Likes: 0
Received 0 Likes
on
0 Posts
I completely agree with the hesitation and fear being the hardest part. At first it can feel overwhelming, but once you have started and completed the job, the gratification is amazing. And it's not just knowing that you saved hundreds of dollars by not taking it to a mechanic, but the feeling of accomplishing fixing a car trouble is great.
08-30-11, 09:30 PM
#5
Pole Position
I posted a about a year ago, but finding my coolant leak on my RX300 was a real challenge, turned out the intake manifold was leaking in the valley of the engine and made it appear to be the thermostat housing....yep had to remove the intake manifold and put new gaskets in....quite a feat, and lots of stuff to remove to get to that point. But learned where the knock sensors were, bypass hose, etc....and when done the engine stopped leaking...
08-31-11, 05:56 PM
#6
Rookie
Thread Starter
Join Date: Jan 2008
Location: CA
Posts: 78
Likes: 0
Received 0 Likes
on
0 Posts
Another DIY done!
Trouble Codes: N/A
DIY Performed: RX300 AC/Alternator Belt Adjustment
The Story: I've been PLAGUED by the squeaking/screeching noise whenever I turn on my AC. It was really embarrassing to be driving around anywhere while sounding like a screaming jalopy.
I took stab at the DIY and I actually used a 3/8" drive ratchet instead. There is very little space in there so it was difficult getting my hands around. I did the 90 degree belt turn test and I could easily turn it beyond 90 degrees. I loosened up the adjusting lock and then tightened the adjust bolt as much as I could until I could turn the belt just barely 90 degrees. It took me a while to get it as tight as I wanted because I could barely move the ratchet with each turn.
Once I was done, I tightened back the adjusting lock (I kept tightening and tightening it, but it would still turn a little each time? ), started the engine and turned on the AC. No noise right off the bat The ultimate test will be tomorrow morning when I drive off to work. As long as I don't hear a screeching/squeaking noise in the morning and the adjusting lock is properly tightened, it'll be another DIY under my belt!
Thanks for the DIY, TunedRX300!
Next: replacing brake rotors?
Trouble Codes: N/A
DIY Performed: RX300 AC/Alternator Belt Adjustment
The Story: I've been PLAGUED by the squeaking/screeching noise whenever I turn on my AC. It was really embarrassing to be driving around anywhere while sounding like a screaming jalopy.
I took stab at the DIY and I actually used a 3/8" drive ratchet instead. There is very little space in there so it was difficult getting my hands around. I did the 90 degree belt turn test and I could easily turn it beyond 90 degrees. I loosened up the adjusting lock and then tightened the adjust bolt as much as I could until I could turn the belt just barely 90 degrees. It took me a while to get it as tight as I wanted because I could barely move the ratchet with each turn.
Once I was done, I tightened back the adjusting lock (I kept tightening and tightening it, but it would still turn a little each time?
), started the engine and turned on the AC. No noise right off the bat The ultimate test will be tomorrow morning when I drive off to work. As long as I don't hear a screeching/squeaking noise in the morning and the adjusting lock is properly tightened, it'll be another DIY under my belt!Thanks for the DIY, TunedRX300!
Next: replacing brake rotors?
Last edited by Mut; 08-31-11 at 06:00 PM.

Thread
Thread Starter
Forum
Replies
Last Post