
HOW TO: SC300 High Pressure Power Steering Hose
 01-29-09, 12:03 AM
#1
I'm sure most of you have a leaking power steering hose. In my case, mine was leaking from the clamp closest to the pump. So instead of going to the dealer and paying $400 for a whole new hose assembly from the dealer, I got mine repaired for $60 at a well known hose shop called Hose Power USA.
Leaking hose
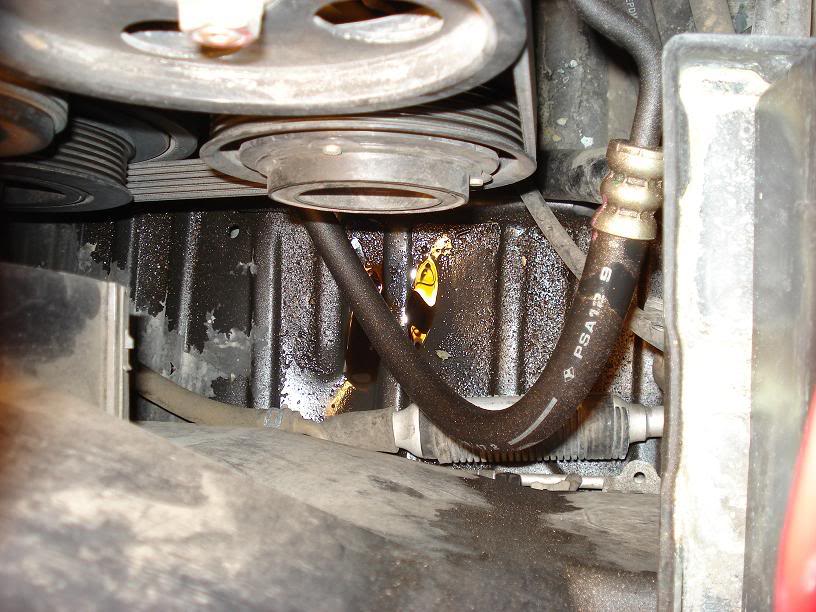
REMOVAL:
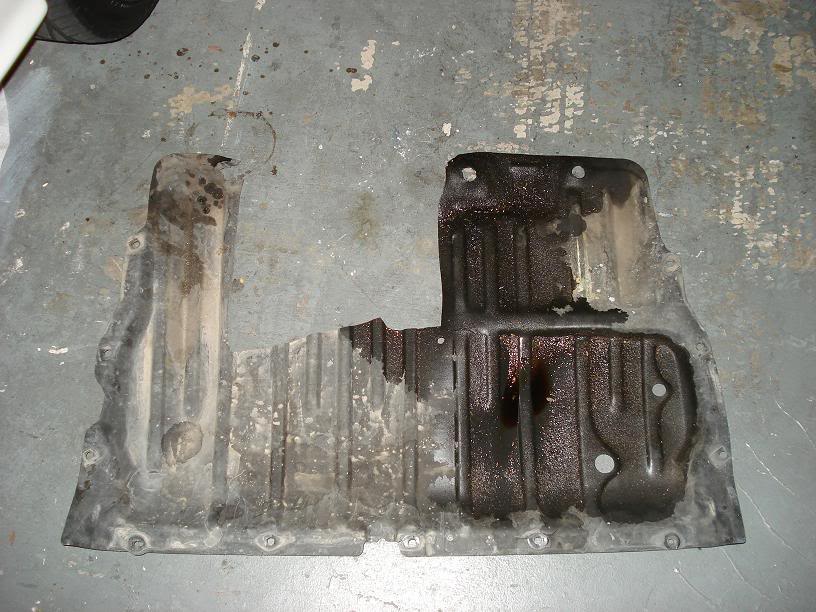
Before you do anything, jack up your car and put it on jackstands and take off the lower splash shield
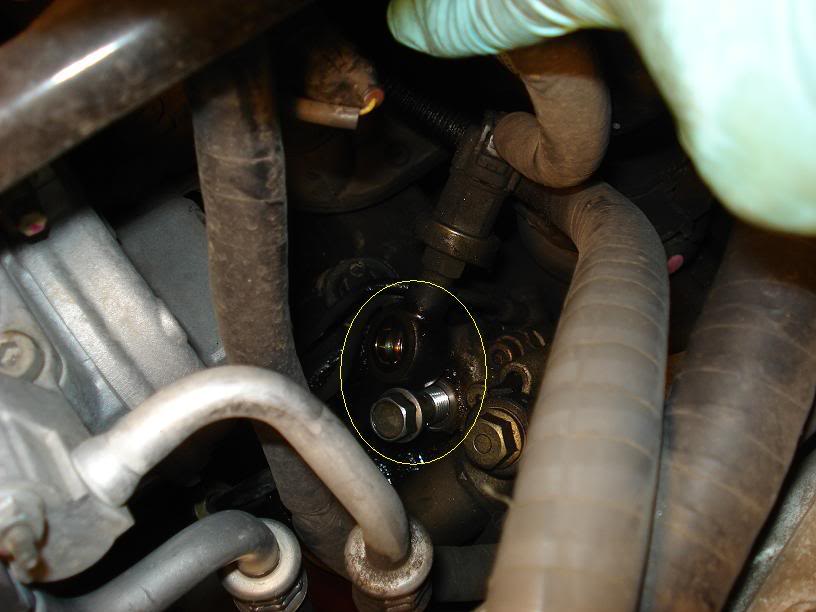
Under your car, take off these two 10mm bolts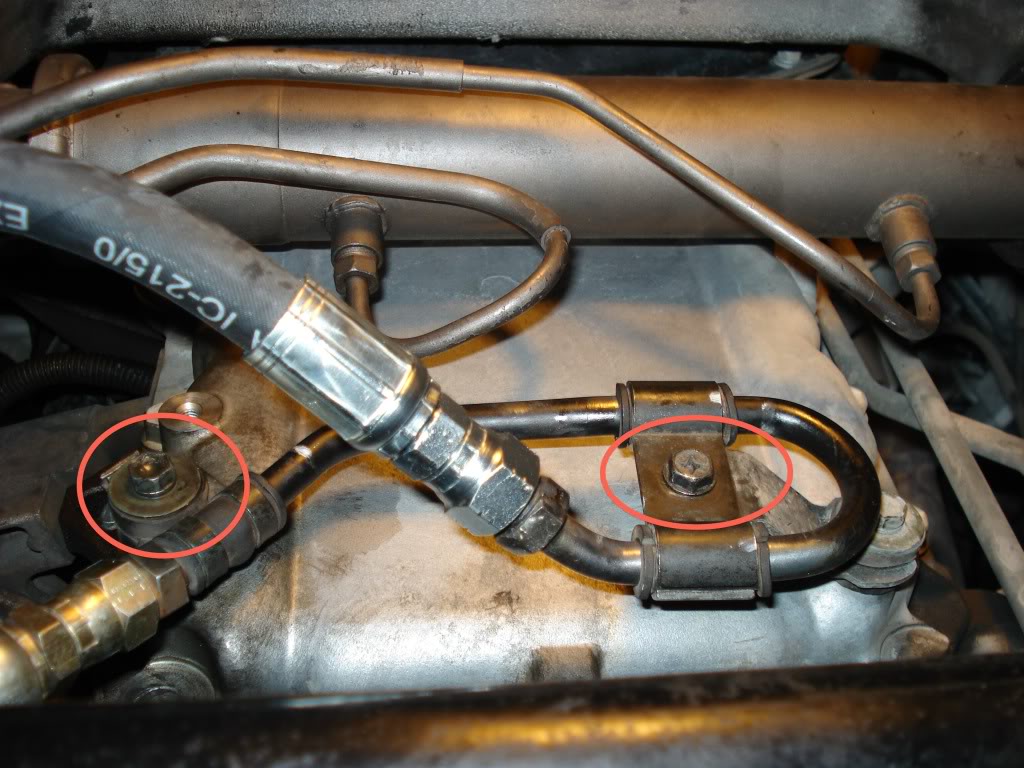
Loosen this 17mm banjo bolt and a few cups of fluid will start coming out, just make sure you have a drain pan to catch all this fluid. Once it starts to slow down take off the bolt and take off the double washer and replace bolt/set aside. Take off the connector from the sensor using a flat head screwdriver to push and separate the tab.

Leaking hose
REMOVAL:
Before you do anything, jack up your car and put it on jackstands and take off the lower splash shield
Under your car, take off these two 10mm bolts
Loosen this 17mm banjo bolt and a few cups of fluid will start coming out, just make sure you have a drain pan to catch all this fluid. Once it starts to slow down take off the bolt and take off the double washer and replace bolt/set aside. Take off the connector from the sensor using a flat head screwdriver to push and separate the tab.
 01-29-09, 12:03 AM
#2
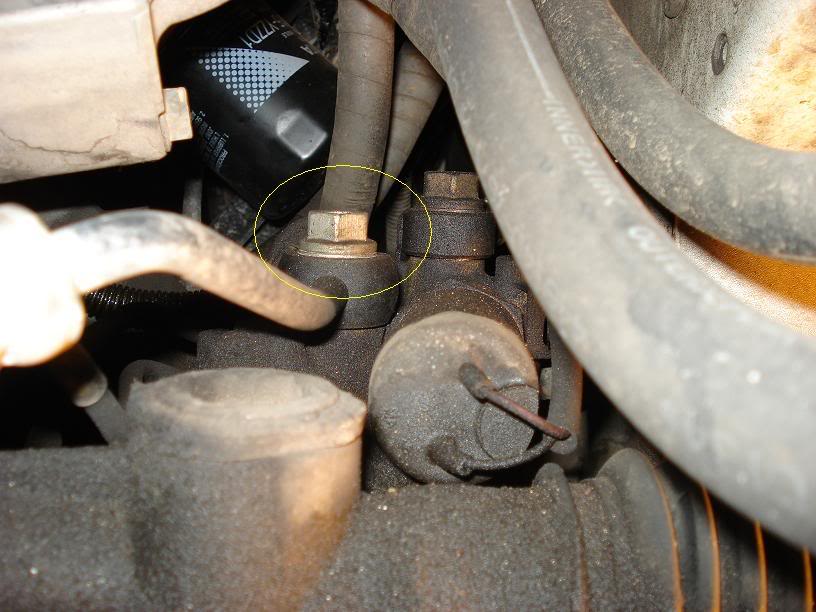
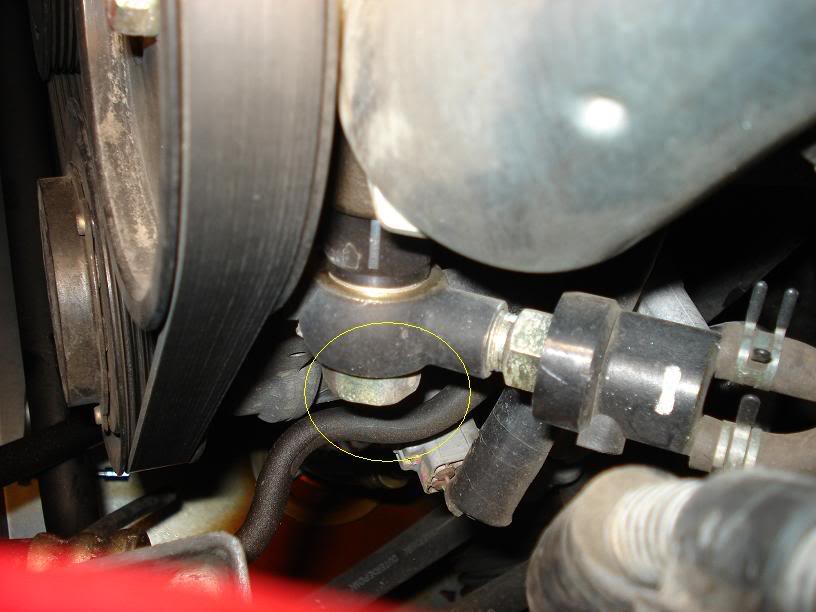
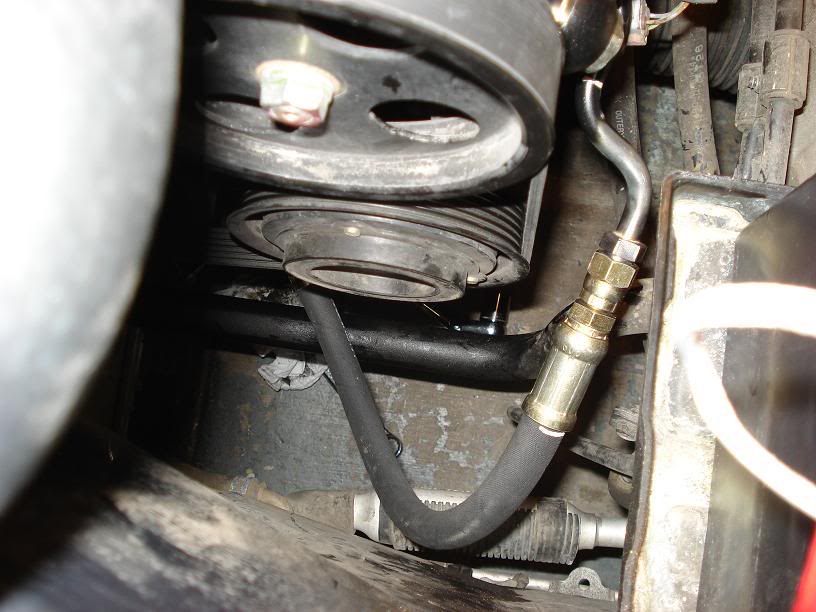
Now move on up to the top bolt, it should be a 22mm. Take off the vacuum hoses and remove the bolt. Set the double washer aside.
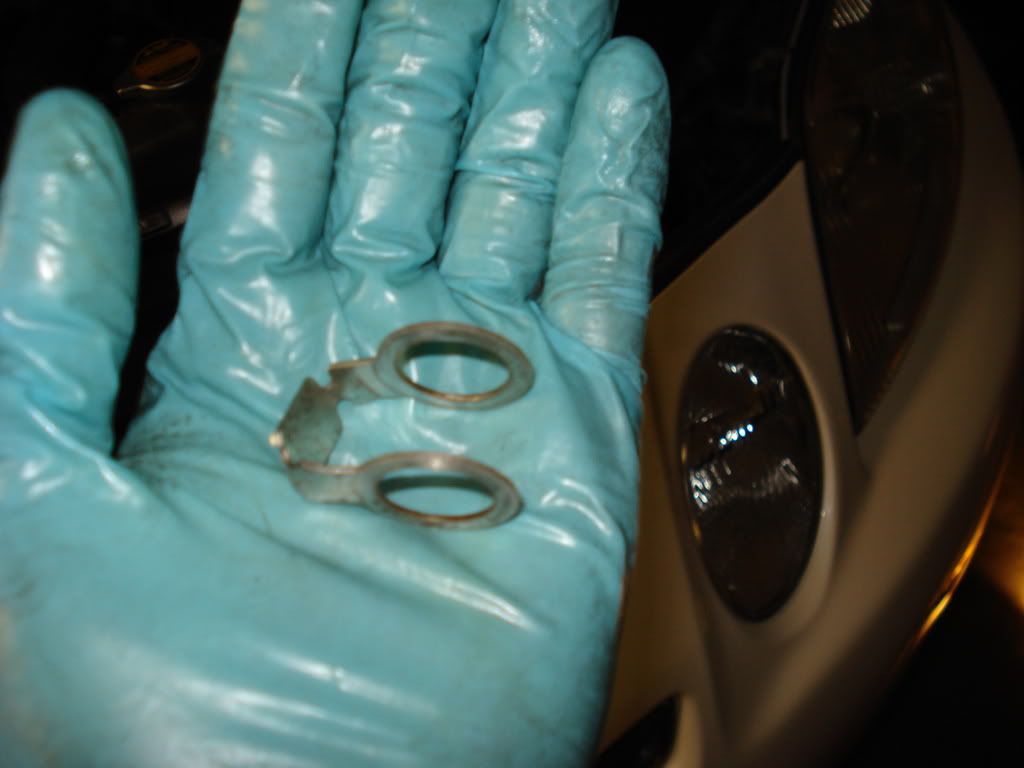
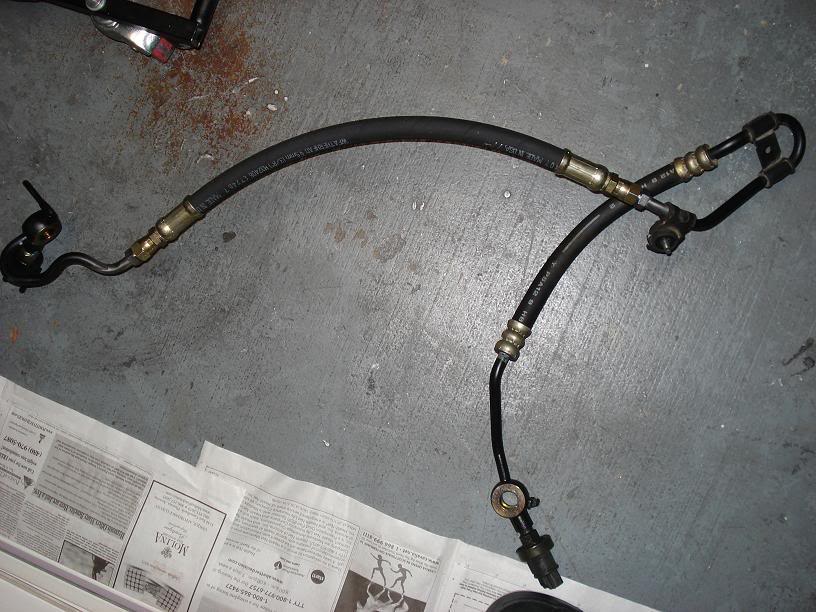
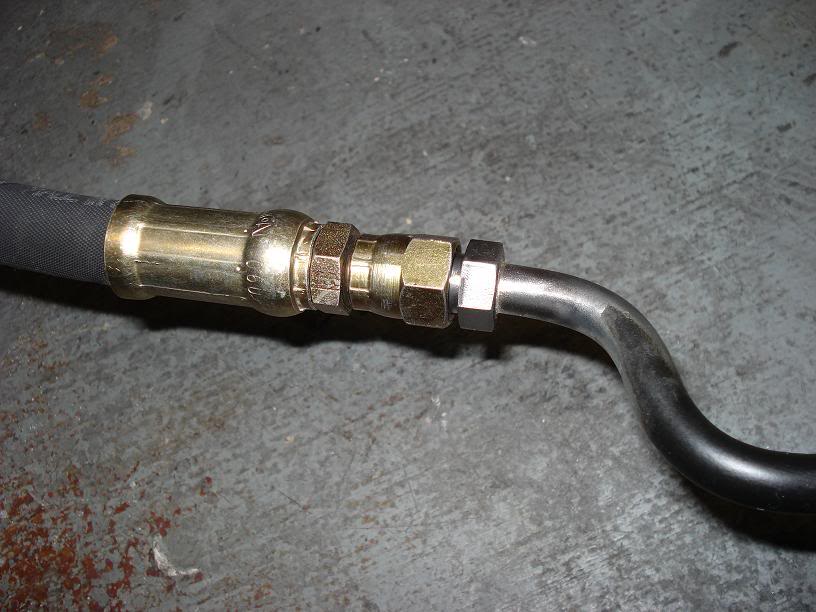
This is how how the hose looks like off the car, as you can see there are two sensors on each end.
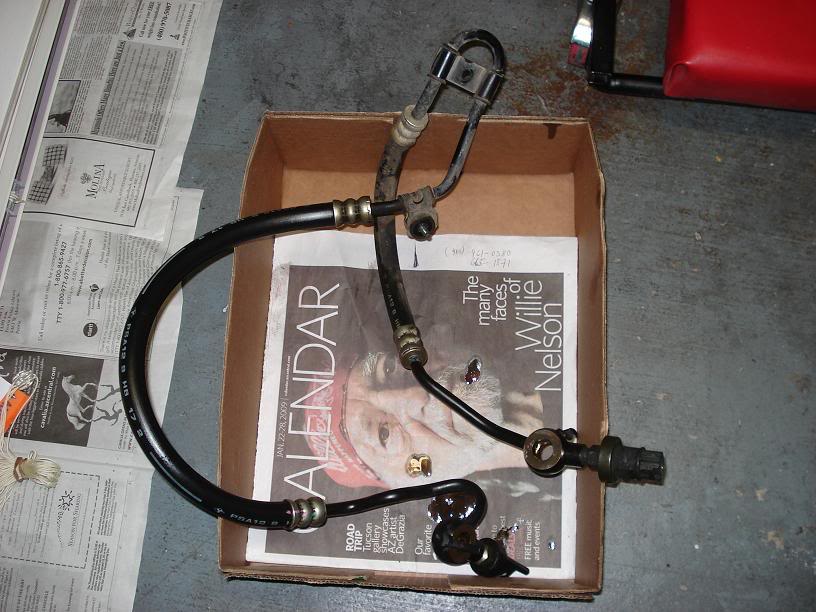
Here is a picture with a new upper replacement hose.
REINSTALL: To make things easy, install the two 10mm bolts FIRST, this will be like a third hand when it comes to aligning and putting the banjo bolts back on. Dont forget about the double washers. I installed the upper banjo first and then did the lower banjo afterwards. I had trouble trying to get the upper banjo screwed in straight, this takes patience because there is not much slack with the hose. Both banjo bolts need to be torqued to 49ft-lbs. Connect the connector and connect the vacuum hoses. Replace the splash shield.

ALMOST DONE!
BLEEDING: While your car is jacked up with the wheels off the ground, pour DEXRON III Automatic Transmission Fluid in the reservoir(Or whatever your PS cap says). Start the car and let it idle for a few minutes. Turn the wheels lock to lock a few times. Your fluid may start foaming, this is from the air in the system. Now lower your car with the wheels on the ground. Pour some more fluid in the reservoir. Now turn your wheels lock to lock and hold it for 2-3 seconds on lock. Do this a few times until you don't see anymore bubbles in the reservoir and until the fluid level is normal. Replace cap and you are done!
This is how how the hose looks like off the car, as you can see there are two sensors on each end.
Here is a picture with a new upper replacement hose.
REINSTALL: To make things easy, install the two 10mm bolts FIRST, this will be like a third hand when it comes to aligning and putting the banjo bolts back on. Dont forget about the double washers. I installed the upper banjo first and then did the lower banjo afterwards. I had trouble trying to get the upper banjo screwed in straight, this takes patience because there is not much slack with the hose. Both banjo bolts need to be torqued to 49ft-lbs. Connect the connector and connect the vacuum hoses. Replace the splash shield.
ALMOST DONE!
BLEEDING: While your car is jacked up with the wheels off the ground, pour DEXRON III Automatic Transmission Fluid in the reservoir(Or whatever your PS cap says). Start the car and let it idle for a few minutes. Turn the wheels lock to lock a few times. Your fluid may start foaming, this is from the air in the system. Now lower your car with the wheels on the ground. Pour some more fluid in the reservoir. Now turn your wheels lock to lock and hold it for 2-3 seconds on lock. Do this a few times until you don't see anymore bubbles in the reservoir and until the fluid level is normal. Replace cap and you are done!

 i need to do this.
Trending Topics
01-30-09, 05:15 AM
#8
Lead Lap
Join Date: Oct 2006
Location: VA
Posts: 451
Likes: 0
Received 0 Likes
on
0 Posts
for about the same price you can get this, for those that dont have a hose shop around their area.
http://store.driftmotion.com/static/Item1jzpshose.php
http://store.driftmotion.com/static/Item1jzpshose.php
 02-02-09, 06:55 PM
#10
Driver School Candidate

Join Date: Feb 2009
Location: fl
Posts: 7
Likes: 0
Received 0 Likes
on
0 Posts
for about the same price you can get this, for those that dont have a hose shop around their area.
http://store.driftmotion.com/static/Item1jzpshose.php
http://store.driftmotion.com/static/Item1jzpshose.php
02-02-09, 09:33 PM
#11
Lexus Test Driver

Join Date: Aug 2003
Location: California
Posts: 887
Likes: 0
Received 0 Likes
on
0 Posts
Proper recognition to Luxor for an awesome write up. I personally did nearly the exact same repair about a year ago without the benifit of this superb write up. You nailed it. btw, my out the door cost after a 20 minute wait was $38.27 at http://www.rbisj.com/ in San Jose, CA.
About the driftmotion part....
The photo of this part shows 90 degree elbow bends on each side. That would not have worked at all on my SC300 and it does not look anything like the pictures in Luxor's "How-To". So that leads to me to question if anyone has actually used this part to repair or replace? I don't see how it would fit.
About the driftmotion part....
for about the same price you can get this, for those that dont have a hose shop around their area.
http://store.driftmotion.com/static/Item1jzpshose.php
http://store.driftmotion.com/static/Item1jzpshose.php
02-05-09, 06:14 PM
#12
Lead Lap
iTrader: (4)

Join Date: Jan 2006
Location: CA
Posts: 626
Likes: 0
Received 0 Likes
on
0 Posts
About the driftmotion part.... The photo of this part shows 90 degree elbow bends on each side. That would not have worked at all on my SC300 and it does not look anything like the pictures in Luxor's "How-To". So that leads to me to question if anyone has actually used this part to repair or replace? I don't see how it would fit.
 02-06-09, 11:59 AM
#15

i went to napa auto parts.. i used a hax saw and cut the metal clamps in 1/3rds that attach the steel line to the rubber hose but was careful not to go in to deep so i didnt cut the steel line flare.. before i detatched it i marked the angle of the hose and the steel line and went to napa bought hose from them and they crimped it together for less then $30. 60 cheap enough compared to lexus dealer since they want $300 for it.. but save an additional 30$ DIY 