uh turbo time NA-T feed me!

 01-10-07, 12:41 PM
#347
Lexus Test Driver
Thread Starter
iTrader: (2)

Join Date: Feb 2004
Location: Behind you
Posts: 1,509
Likes: 0
Received 0 Likes
on
0 Posts
The project is on slow-down mode until I sell some of my old parts to help fund the intercooler kit manufacturing. So, anyone wanna help out? 
Mean and Clean .
.

UPDATE: I disconnected the mid-pipe from catback exhaust and the car is a lot louder. A nice discovery was the driveability in vacuum has improved and the car revs noticeably quicker, but I need to re-tune the car to see if this will help throttle transitions from vacuum and throughout boost better.
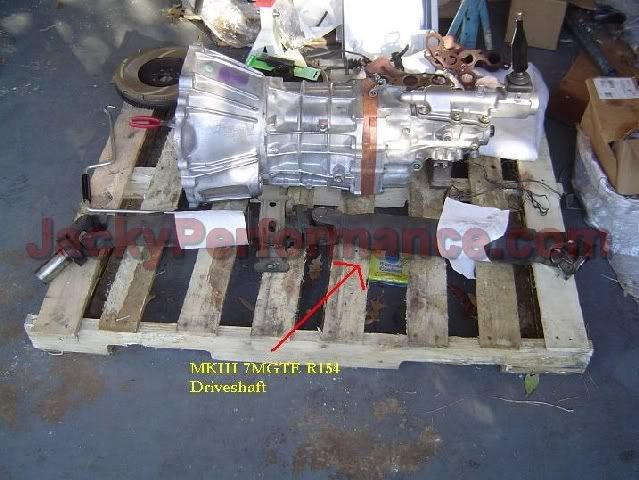
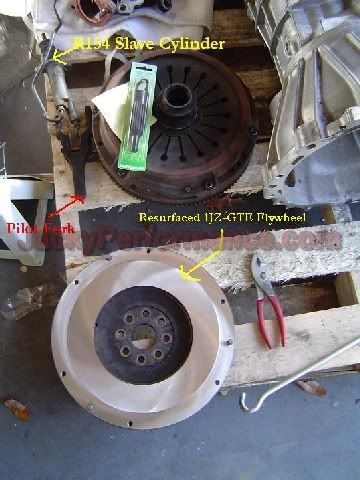
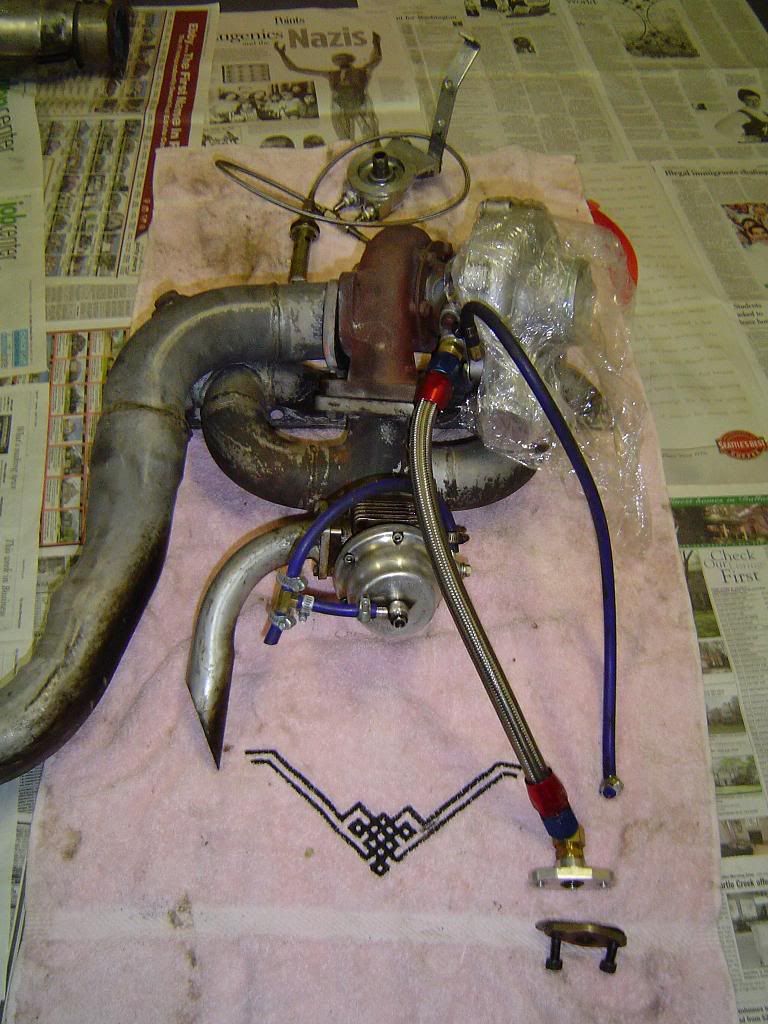
UPDATE 2: Gathered some more transmission parts:
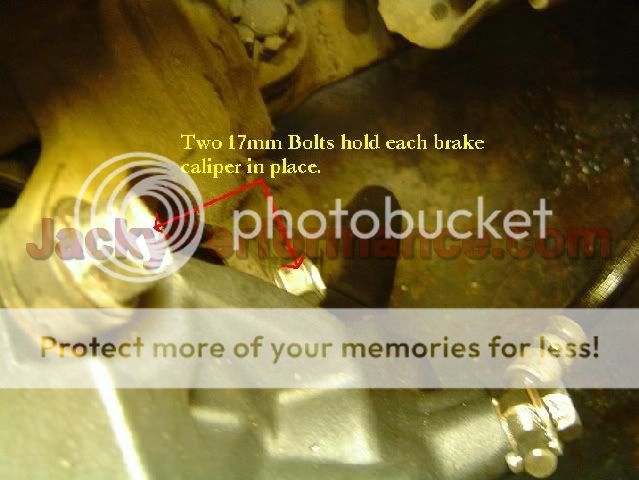
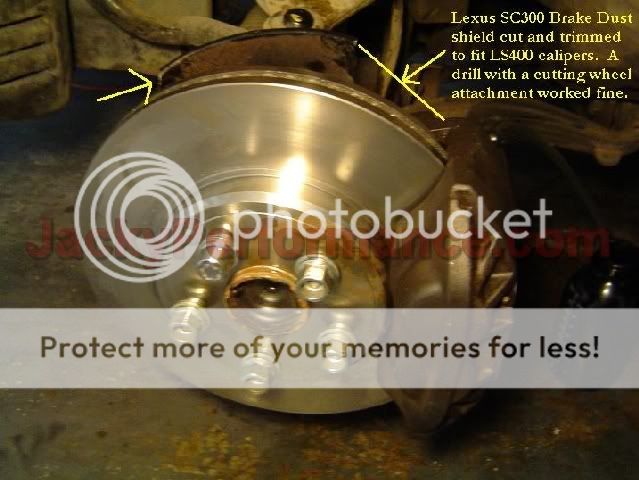
UPDATE 3: More Powerful engine means more speed. More speed means we need more stopping power! LS400 Front Brake Guide:
The Lexus LS400 brake calipers (1995-2000 models) are more powerful 4-piston calipers that are also lightweight compared to stock sc300/sc400 and mkiv Supra NA calipers. They stop these cars a lot better, were designed to stop the ls400 cars from 150pmh to ZERO mph, and are easy to install. Here is how I did mine:
1) Remove your wheels and lug nuts
2) Our Brake Calipers are held in place by TWO 17mm bolts. Unscrew these and the brake caliper is now loose and slides off the brake rotor (aka disc). Since the lug nuts are off and you've just removed the brake caliper, there is nothing securing the brake rotor (aka disc) in place. So, slide the brake rotor off the wheel studs and replace it with a LS400 brake rotor.
3) Put the wheel lug-nuts on and hand tighten to keep the new LS400 brake rotor steady & secure.
4) Hammer/Bend/Cut parts of the sc300 brake dust shield to fit the LS400 brake calipers.
5) Place LS400 calipers on the rotor and align the TWO mounting holes. Install TWO LS400 17mm Brake Caliper bolts (shorter than sc300 ones) and torque them to 87 ft/lbs of torque.
6) Disconnect your stock brake lines from the sc300 brake caliper (2-piston inferior design) and screw that same bolt-brake line into your LS400 calipers = very simple. You're just plugging the same brake line, that was in the sc300 caliper, into the LS400 caliper.
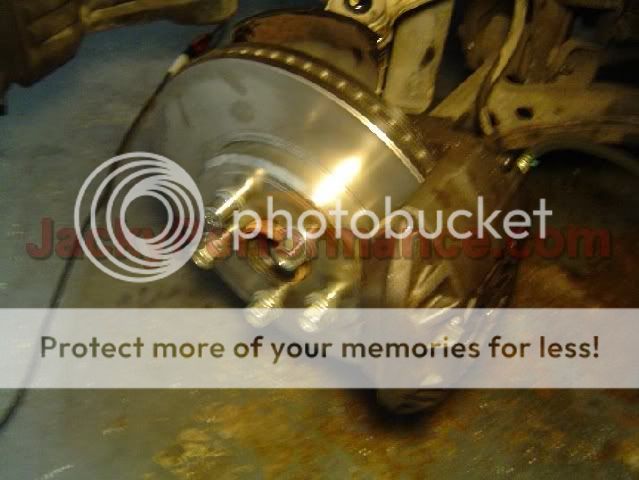
7) Bleed your brakes properly!
And yes I finally put the fan shroud back on :
:
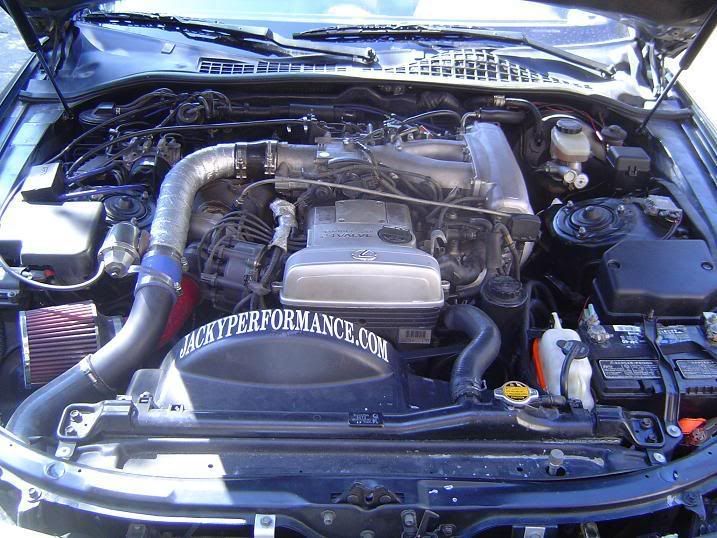
Mean and Clean
.UPDATE: I disconnected the mid-pipe from catback exhaust and the car is a lot louder. A nice discovery was the driveability in vacuum has improved and the car revs noticeably quicker, but I need to re-tune the car to see if this will help throttle transitions from vacuum and throughout boost better.
UPDATE 2: Gathered some more transmission parts:
UPDATE 3: More Powerful engine means more speed. More speed means we need more stopping power! LS400 Front Brake Guide:
The Lexus LS400 brake calipers (1995-2000 models) are more powerful 4-piston calipers that are also lightweight compared to stock sc300/sc400 and mkiv Supra NA calipers. They stop these cars a lot better, were designed to stop the ls400 cars from 150pmh to ZERO mph, and are easy to install. Here is how I did mine:
1) Remove your wheels and lug nuts
2) Our Brake Calipers are held in place by TWO 17mm bolts. Unscrew these and the brake caliper is now loose and slides off the brake rotor (aka disc). Since the lug nuts are off and you've just removed the brake caliper, there is nothing securing the brake rotor (aka disc) in place. So, slide the brake rotor off the wheel studs and replace it with a LS400 brake rotor.
3) Put the wheel lug-nuts on and hand tighten to keep the new LS400 brake rotor steady & secure.
4) Hammer/Bend/Cut parts of the sc300 brake dust shield to fit the LS400 brake calipers.
5) Place LS400 calipers on the rotor and align the TWO mounting holes. Install TWO LS400 17mm Brake Caliper bolts (shorter than sc300 ones) and torque them to 87 ft/lbs of torque.
6) Disconnect your stock brake lines from the sc300 brake caliper (2-piston inferior design) and screw that same bolt-brake line into your LS400 calipers = very simple. You're just plugging the same brake line, that was in the sc300 caliper, into the LS400 caliper.
7) Bleed your brakes properly!
And yes I finally put the fan shroud back on
:
Last edited by dejacky; 03-05-07 at 10:21 PM.
03-27-07, 08:04 PM
#348
Lexus Test Driver
Thread Starter
iTrader: (2)
Join Date: Feb 2004
Location: Behind you
Posts: 1,509
Likes: 0
Received 0 Likes
on
0 Posts
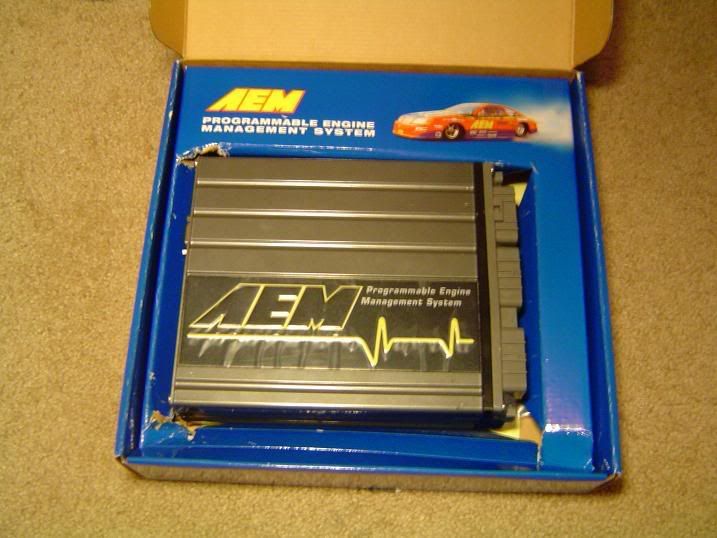
I've ditched the map-ecu and purchased AEM EMS 30-1101:
Still working on getting the car driveable with AEM EMS. Here is the youtube video of the bouncing rpm's and increasing AFR values in neutral while idling:
http://www.youtube.com/watch?v=s2sG2QE6dMo
Does anyone know how to fix this?
Still working on getting the car driveable with AEM EMS. Here is the youtube video of the bouncing rpm's and increasing AFR values in neutral while idling:
http://www.youtube.com/watch?v=s2sG2QE6dMo
Does anyone know how to fix this?
Last edited by dejacky; 03-29-07 at 10:53 PM.


 05-22-07, 06:56 AM
#355
Intermediate
dejacky: Keep it up Bro, Your my HERO!!!! 
I have a NA-T kit but have not installed it yet, im in need of electronics, IC piping, Bolts & Gaskets. any info would be Great.
I have a NA-T kit but have not installed it yet, im in need of electronics, IC piping, Bolts & Gaskets. any info would be Great.
Last edited by breed; 05-22-07 at 07:02 AM. Reason: Brain Fart
05-23-07, 05:42 PM
#356
Lexus Test Driver
Thread Starter
iTrader: (2)
Join Date: Feb 2004
Location: Behind you
Posts: 1,509
Likes: 0
Received 0 Likes
on
0 Posts
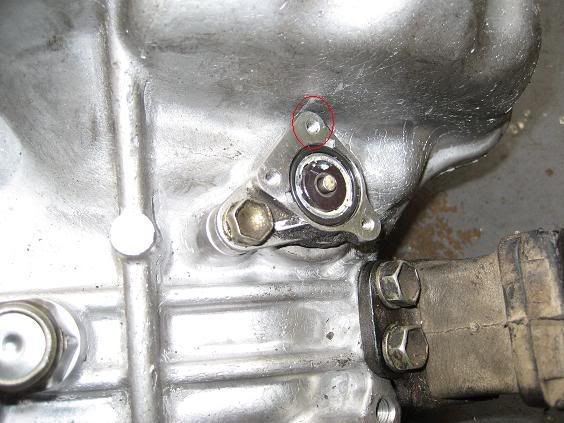
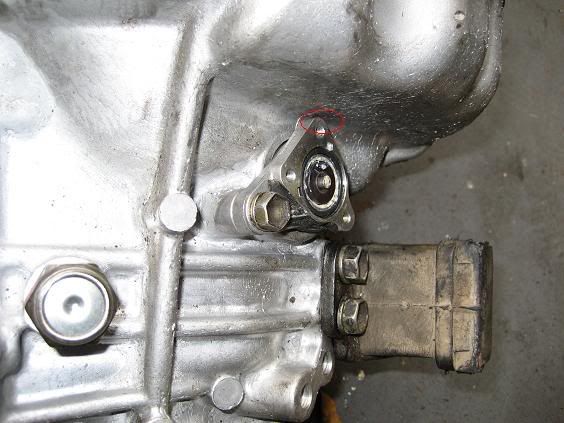
Interesting discovery: The w58 speed gear seems to integrate with the Soarer R154 internal speedometer gear fine. When I turn the transmission shaft, the speed gear also turns. But, the w58 transmission has a outer groove that allows the w58 speed sensor clip to fit. With this soarer R154, the eletrical clip won't fit because it hits the transmissions casing. Any fix ideas?
 05-23-07, 08:33 PM
#357
Lexus Champion
Jacky, I think I've decided to go with the same IC setup that you're running, except probably with a bigger core. Have you made any progress on the kits you mentioned before (don't remember if it was here or ClubNA-T)?
05-30-07, 07:35 PM
#358
Lexus Test Driver
Thread Starter
iTrader: (2)
Join Date: Feb 2004
Location: Behind you
Posts: 1,509
Likes: 0
Received 0 Likes
on
0 Posts
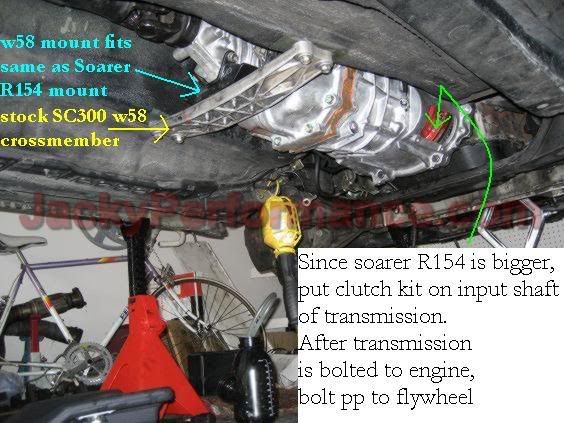
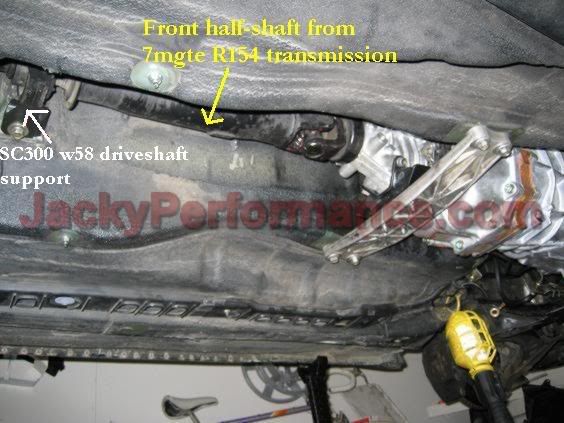
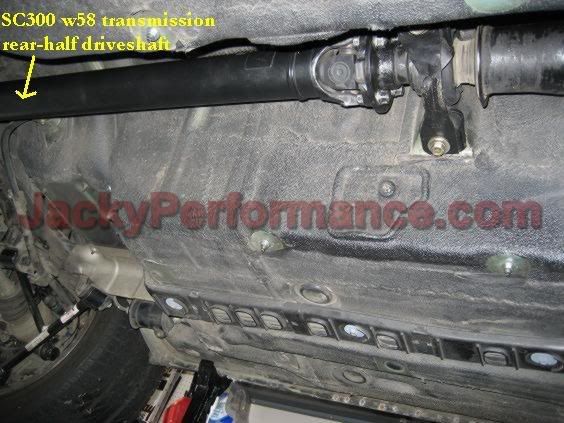
Update: Soarer Transmission practically installed. Here is how I did it:
Last edited by dejacky; 06-25-07 at 06:42 PM.
07-31-07, 11:21 AM
#359
Lexus Test Driver
Thread Starter
iTrader: (2)
Join Date: Feb 2004
Location: Behind you
Posts: 1,509
Likes: 0
Received 0 Likes
on
0 Posts
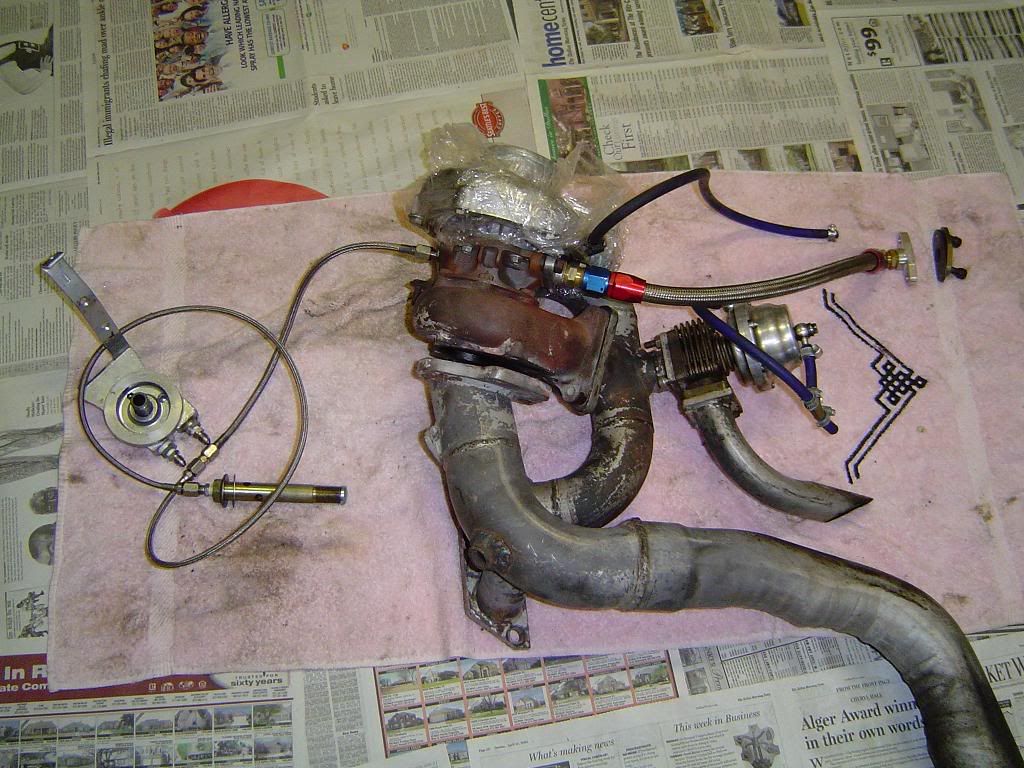
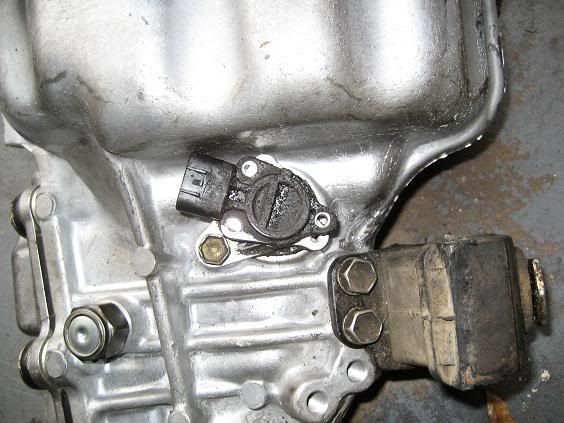
I extended speedometer and reverse-light sensor wires, so those work fine now. I also installed the MSD 6A ignition and got the car dyno tuned by Justin Nenni of Tuning Concepts and discovered I need a higher capacity wastegate spring since we were only able to boost to 21psi with my Greddy Profec B. Power figures were ~365rwhp and 360ft/lbs of torque. We plan to redyno with a higher capacity wastegate spring and with some other minor bugs fixed. Spark plugs were NGK 6097 with 0.026'' gap. Based on the power figures, we feel the turbo is smaller than a "te-44." I plan on having Majestic Turbo inspect this to confirm our findings.
Also, something weird I found with my Southbend clutch setup is that it's not disengaging/engaging properly at higher rpms and when car sees boost...the consensus is that it's defective...I do not look forward to installing the clutch again ....more to come later.
Also, something weird I found with my Southbend clutch setup is that it's not disengaging/engaging properly at higher rpms and when car sees boost...the consensus is that it's defective...I do not look forward to installing the clutch again
....more to come later.
Last edited by dejacky; 07-31-07 at 01:01 PM.
08-02-07, 12:08 PM
#360
Lexus Test Driver
iTrader: (2)
Join Date: Jul 2003
Location: California
Posts: 1,177
Likes: 0
Received 0 Likes
on
0 Posts
Only 21psi? Is that a typo?
What pressure are you looking to run?
Those power figures look rather on the low side for 21psi, even with a TE-44. Reason I say that is it's Justin tuning an AEM.
Haven't seen you on AIM lately. Where ya at?
Cheers,
~Alan