LS430 Valve Cover Gasket Question
 01-19-15, 06:52 AM
#1
Driver School Candidate
Thread Starter
Join Date: Feb 2010
Location: Kansas
Posts: 6
Likes: 0
Received 0 Likes
on
0 Posts
Hello everyone,
I have searched a little bit around the forum and haven't found a specific answer to my question about my 2001 LS430, so I thought I would pick the brains of the gurus real quick before I start.
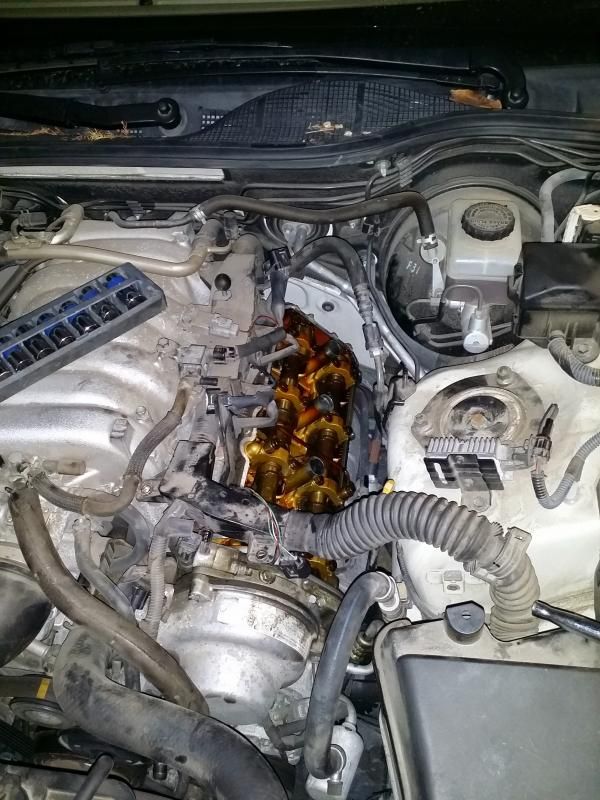
I'm not new to cars but haven't worked on the Lexus a whole lot (It hasn't needed it! Wonderful car.) but I am smelling oil and have determined that there is a little bit coming out of the valve covers (probably burning up on the exhaust manifold) and I'm going to replace the valve cover gaskets to combat the problem.
I do all of my work myself if possible, and haven't taken my cars to the dealer in a while. So I'd like to do this myself. I already ordered the fel-pro gasket set for both sides, but my questions are these:
1) Kind of a dumb question but I've never replaced the spark plugs either. Since we have coil on plug (and tube seals that come in the kit) The plugs are down in the block a bit and we don't have to remove plugs to do valve cover seals, right?
2) When you put the new seal in, do you have to RTV it at all, or does it just press in? I can't afford to have the car down for more than it takes to do the repair, and would like to avoid time to let the RTV set if possible.
I'm going to tackle this repair tomorrow evening, so any help and/or advice is appreciated. Thanks in advance!
I have searched a little bit around the forum and haven't found a specific answer to my question about my 2001 LS430, so I thought I would pick the brains of the gurus real quick before I start.
I'm not new to cars but haven't worked on the Lexus a whole lot (It hasn't needed it! Wonderful car.) but I am smelling oil and have determined that there is a little bit coming out of the valve covers (probably burning up on the exhaust manifold) and I'm going to replace the valve cover gaskets to combat the problem.
I do all of my work myself if possible, and haven't taken my cars to the dealer in a while. So I'd like to do this myself. I already ordered the fel-pro gasket set for both sides, but my questions are these:
1) Kind of a dumb question but I've never replaced the spark plugs either. Since we have coil on plug (and tube seals that come in the kit) The plugs are down in the block a bit and we don't have to remove plugs to do valve cover seals, right?
2) When you put the new seal in, do you have to RTV it at all, or does it just press in? I can't afford to have the car down for more than it takes to do the repair, and would like to avoid time to let the RTV set if possible.
I'm going to tackle this repair tomorrow evening, so any help and/or advice is appreciated. Thanks in advance!
Last edited by xjsman89; 01-19-15 at 06:56 AM.

 01-19-15, 11:51 AM
#3
Moderator
Great diagrams, RKW...
 01-19-15, 12:17 PM
#5
Driver School Candidate
Thread Starter
Join Date: Feb 2010
Location: Kansas
Posts: 6
Likes: 0
Received 0 Likes
on
0 Posts
Thanks for the diagrams, that does help. I appreciate the response!
To anyone who has done this, is there anything specifically I should watch for, or is it a fairly straightforward job?
To anyone who has done this, is there anything specifically I should watch for, or is it a fairly straightforward job?


Trending Topics
01-19-15, 06:20 PM
#8

You do not have to remove the spark plugs but you do have to unbolt the COP and pull the whole boot out of the hole going thru the valve cover. Sometimes the boot gets stuck on the ceramic of the plug so some gentle wiggling and twisting may be needed to get it to break free.
There is a tranny dipstick holder bolted to the back head on the drivers side that kinda gets in the way. You can bend it a bit to gain clearance. I do not believe you need any RTV (FIPG) if you buy good quality gaskets and clean the surfaces well before re-install.
Even though this is a fairly "easy" job as far as LS work goes, there are still a bunch of little hoses and connectors in the way. Take several pics along the away just in case you forget how something goes back together. Cheap insurance.
Finally, and I am not trying to discourage you from replacing the gaskets...but did you first check the existing cover bolts to see if they might just be loose? Sometimes they work loose and all it takes to fix the leak is re-snugging them down.
Here is a link to changing the spark plugs. Good pics here showing the first steps to be taken (although you may elect not to change the plugs). https://www.clublexus.com/forums/ls4...with-pics.html
01-19-15, 06:58 PM
#9
Lexus Champion

Thanks Guys... I've learned a lot about the LS430 from this forum - people on here are the best! I'm glad the diagrams were helpful.
01-20-15, 02:21 PM
#10

If you are doing both sides, definitely replace the plugs. The passenger side is more time consuming.
01-21-15, 12:34 PM
#11
Driver School Candidate
Thread Starter
Join Date: Feb 2010
Location: Kansas
Posts: 6
Likes: 0
Received 0 Likes
on
0 Posts
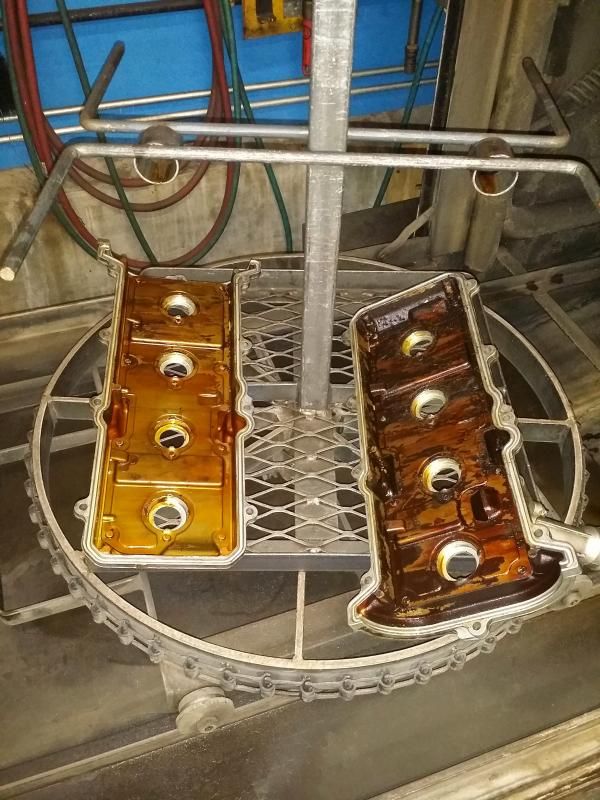
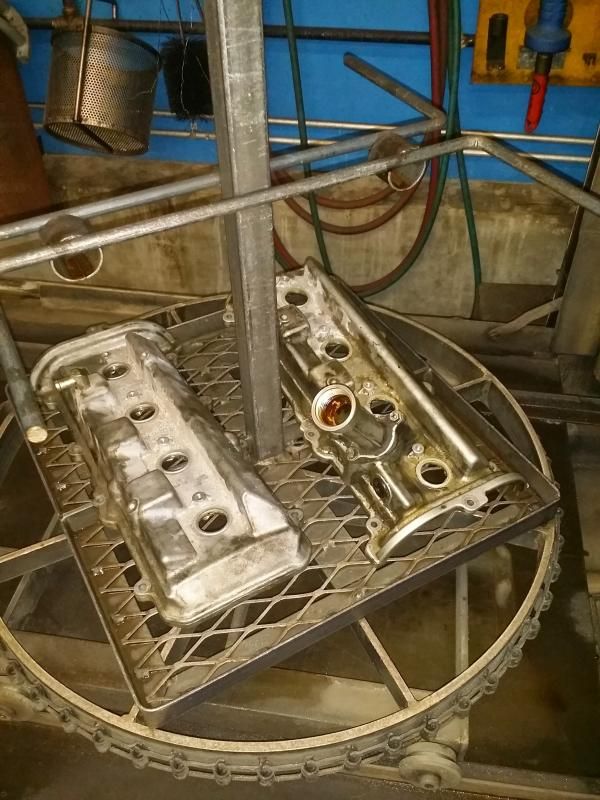
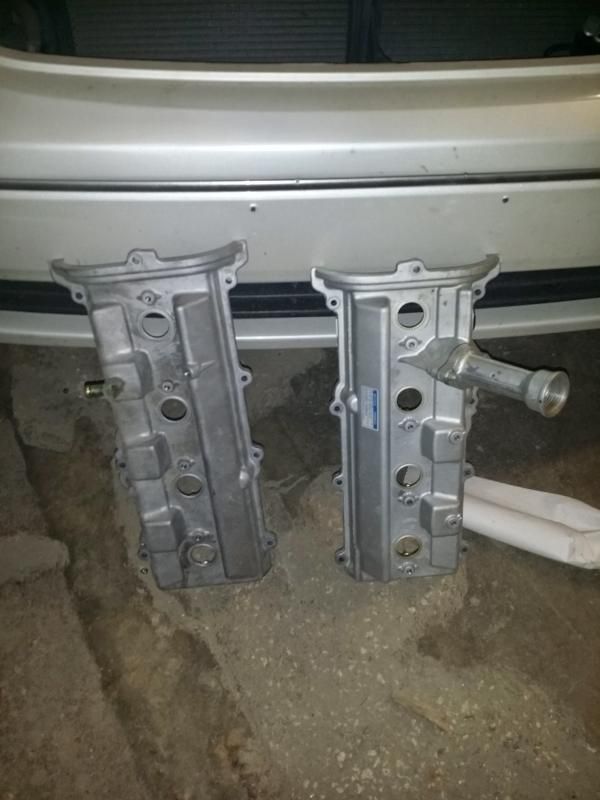
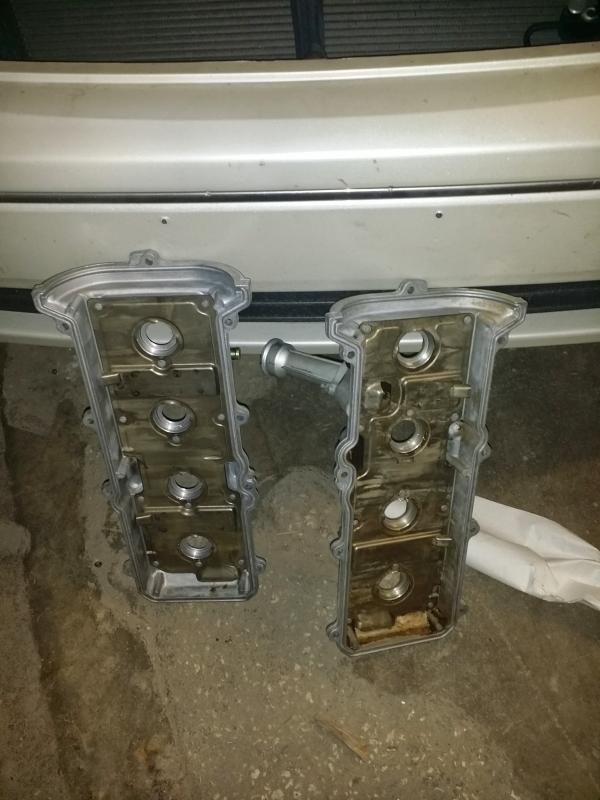
Thanks everyone for the tips and RKW for the diagrams. I got it done last night. It took a little longer than I expected. It wasn't difficult, just time consuming to get all of the stuff out of the way, get the valve covers off, get the plug boots put in and old bolt gaskets removed, etc. Took about 5 hours from opening the hood to closing it, but that includes 45 minutes of wash tank time for the valve covers to get cleaned.
The driver's valve cover had a fair amount of sludge on it so I put them both in our wash tank to clean them off. (we have an engine shop here where I work among other things, so that was really convenient. We actually have a 3UZ in the shop now for a rebuild.)
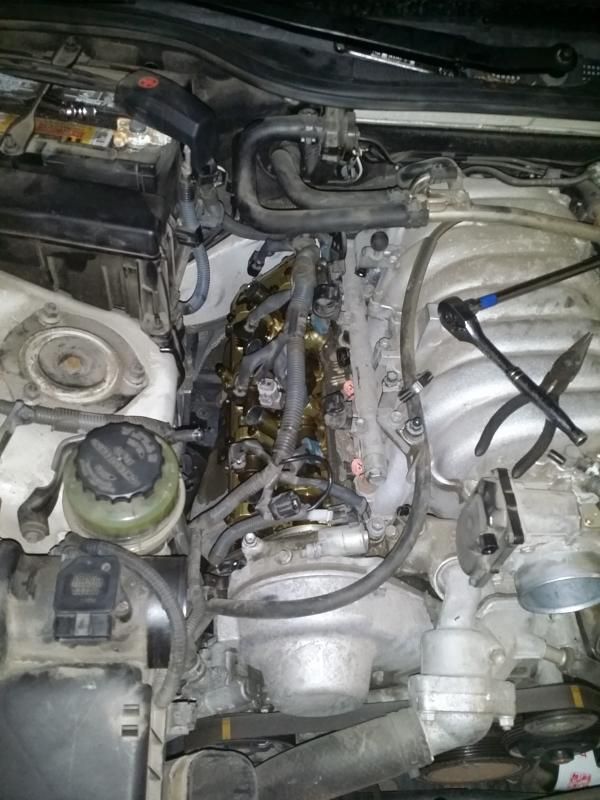
I urge anyone reading this thread contemplating this job to do it, just do as everyone has suggested. Go slow, take lots of pictures, get the wiring harness out of the way before you try to pull the covers out, and BE CAREFUL when putting the tabs back down on the plug boots. I almost punched through a couple of them when the pliers slipped.
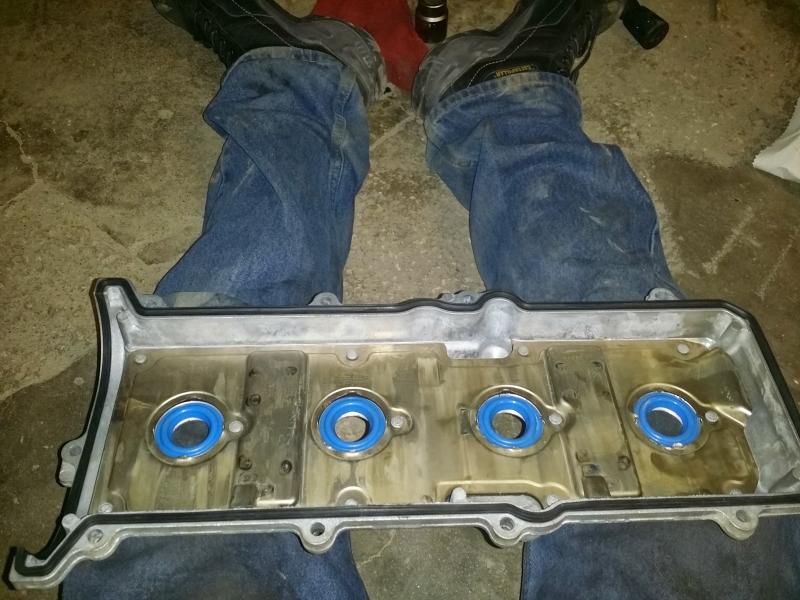
When taking the old boots out I found it was easiest to put a flathead screwdriver at the flat portion of the gasket where it meets the underside of the top of the valve cover and twisting the screwdriver to pry it up. My boots were hard as rocks, and I had a tough time getting them out at first.
I'm thankful that this is the type of gasket that you put on dry without RTV. Once I had them off that was pretty evident since the valve covers have tabs on them to hold the gasket in place when fitting it onto the heads.
Thanks again for the help, everybody. I saved quite a bit by doing this myself!
The driver's valve cover had a fair amount of sludge on it so I put them both in our wash tank to clean them off. (we have an engine shop here where I work among other things, so that was really convenient. We actually have a 3UZ in the shop now for a rebuild.)


I urge anyone reading this thread contemplating this job to do it, just do as everyone has suggested. Go slow, take lots of pictures, get the wiring harness out of the way before you try to pull the covers out, and BE CAREFUL when putting the tabs back down on the plug boots. I almost punched through a couple of them when the pliers slipped.
When taking the old boots out I found it was easiest to put a flathead screwdriver at the flat portion of the gasket where it meets the underside of the top of the valve cover and twisting the screwdriver to pry it up. My boots were hard as rocks, and I had a tough time getting them out at first.
I'm thankful that this is the type of gasket that you put on dry without RTV. Once I had them off that was pretty evident since the valve covers have tabs on them to hold the gasket in place when fitting it onto the heads.
Thanks again for the help, everybody. I saved quite a bit by doing this myself!
Last edited by xjsman89; 01-21-15 at 12:46 PM.
 01-22-15, 06:59 AM
#13
Driver School Candidate
Thread Starter
Join Date: Feb 2010
Location: Kansas
Posts: 6
Likes: 0
Received 0 Likes
on
0 Posts
Good luck, man!
Last edited by xjsman89; 01-22-15 at 07:15 AM.
01-22-15, 09:17 AM
#14
Good job. I am so jealous of your parts cleaner system!
Now, I would not classify that as "sludge" on your valve covers but as "vanish", which is very common to most higher mileage engines.
Now, I would not classify that as "sludge" on your valve covers but as "vanish", which is very common to most higher mileage engines.

Thread
Thread Starter
Forum
Replies
Last Post
02msmg3
GS - 2nd Gen (1998-2005)
4
12-16-10 10:50 AM