When you click on links to various merchants on this site and make a purchase, this can result in this site earning a commission. Affiliate programs and affiliations include, but are not limited to, the eBay Partner Network.
Removing the upper control arm ball joint may damage that ball joint. Is there another way? Is that what is done according to typical procedures used by dealers and certified mechanics?
First of all, I cannot tell you what dealers or certified mechanics would do, but, the Lexus shop manual suggests separating the upper control arm from the axle carrier. Since we plan to reuse the ball joint, avoid using any impact-type wedge folk type separators which will damage the ball joint. Instead use a press-type separator such as those shown on this Youtube video "http://www.youtube.com/watch?v=OBLyB18Pq4k". Check with your local AutoZone for a loaner.
The key issue I ran into was to compress the strut/spring assembly enough for the re-installation. At first, I didn't have the right tool for it so I short-cut the process and ended up taking me 4 hours to complete one strut. I had to cut away some of the wheel well liner so I can keep the spring compressors on the spring for the re-installation. It can be done - just very difficult and can be dangerous. On the other hand, if the dealers or certified mechanics have proper tools, which are small enough to fit into the strut tower, to compress the strut/spring assembly, then separating the ball joint would not be necessary.
For the second strut, I went to my local AutoZone to borrow the "ball joint separator" and followed the Lexus procedure to complete the second strut in less than one hour.
Yes, the Lexus shop manual suggests separating the upper control arm from the axle carrier. At first, I didn't have the right tool for it so I short-cut the process and ended up taking me 4 hours to complete one strut. I had to cut away some of the wheel well liner and kept the spring compressors on the strut/spring assembly. It can be done - just very difficult and somewhat dangerous. For the second strut, I went to my local AutoZone to borrow the "ball joint separator" and followed the Lexus procedure to complete the second strut in less than one hour. Here's the Lexus procedures for your reference.
Thanks for posting these, really helpful.
you wouldn't happen to have a pdf of the manual for the front install would you?
I selected KYB shocks to keep the OEM ride characteristics and firmness. The old struts had over 100K miles on them, and were a bit loose allowing the mini-bounce to transfer into the cabin (vibration). The new struts eliminated all that...
I did speak to a Lexus mechanic who suggested hitting top of the axle carrier, the "knuckles" on either side of the ball joint with a hammer. This approach worked perfectly! The press tool would also work well, but I was unable to locate one for loan and the hammer approach was easy. I was cautioned to avoid hitting the top of the ball joint - makes sense.
I finished the job easily and am back on the road. Using the jack to re-install the ball joint was a slick suggestion that made that aspect of the job go smoothly.
Does the rear end alignment need to be checked - reset as a result of replacing the struts?
Does the rear end alignment need to be checked - reset as a result of replacing the struts?
Congratulations on your successful completion of the strut replacement...
If you have not had an alignment done recently, then I'd go ahead and have it checked. In my case, NTB checked my alignment after the strut replacement, and found that no adjustments were needed. I was told, in general, that as long as the spring height did not change, the alignment would not change either.
Thank you for the great write up! I used it as a "guide" as I did all 4 struts and a rear wheel hub this on Saturday. I attempted to use a loaner ball joint separator from Advance Auto and it was too small. it wouldn't fit around the joint and it also wouldn't spread open far enough. I was going to run up to a different parts store and get a different separator but it looking at the space between the joint stud and the axle boot I didn't know how it would even fit in there. there wasn't even enough room to get the nut off?
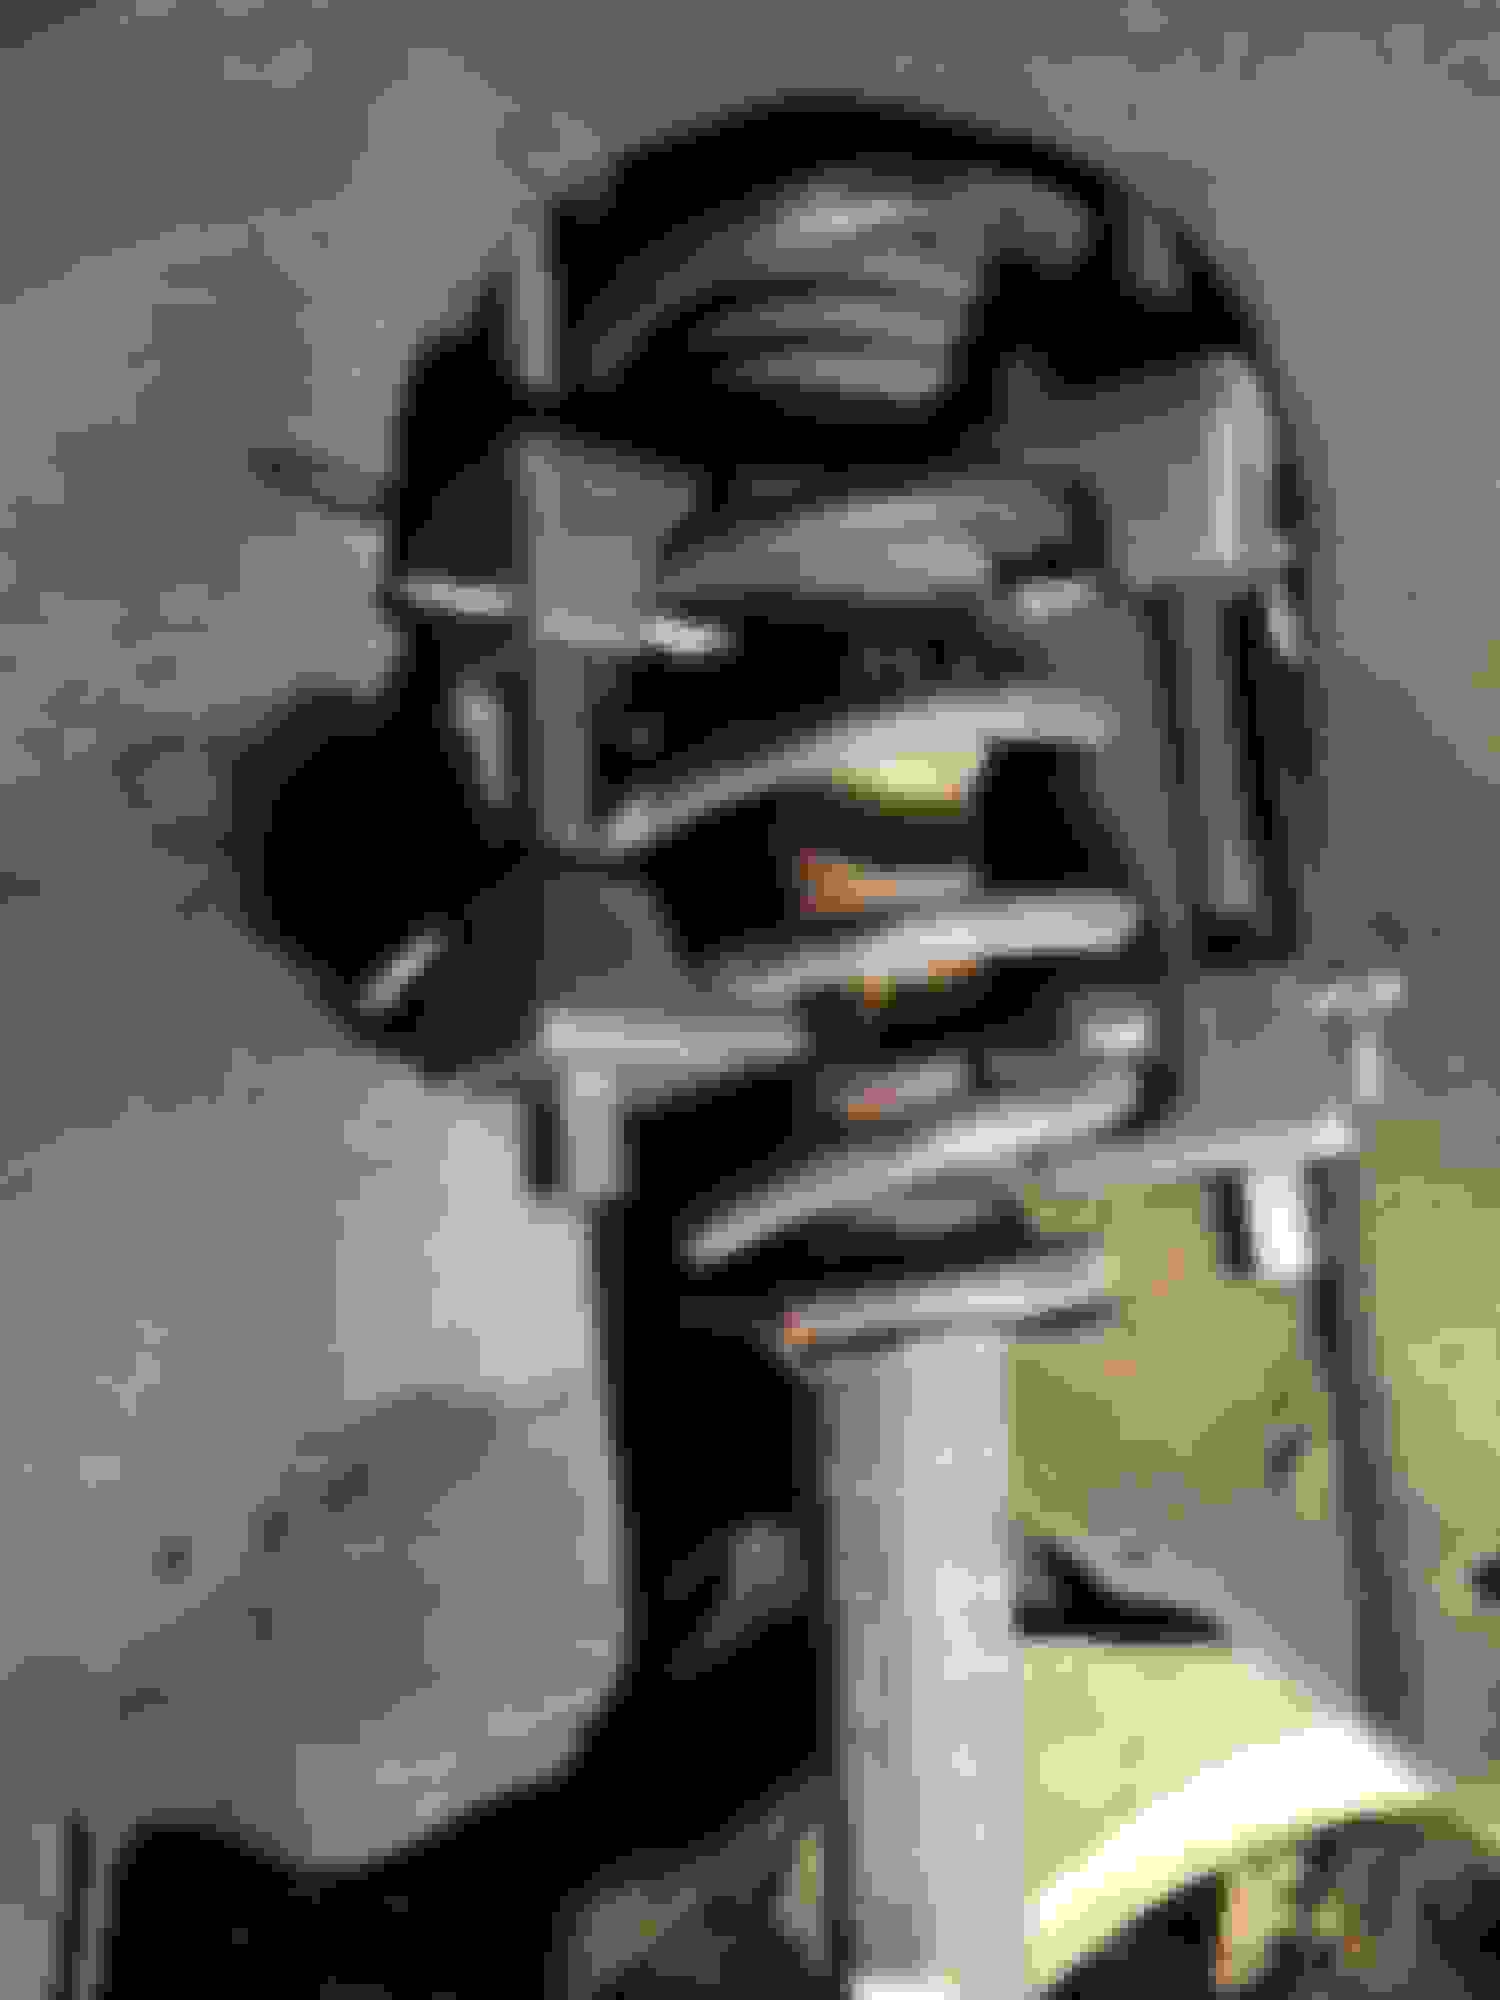
I went to plan "B". I know you said it was extremely difficult to get the spring compressors in there and noted you had to cut away some of the inner well to do it. I had to give it a try. To my surprise it worked pretty easy and I got it off. I also had to change the hub on that wheel which ended up being a real pain. The puller actually pulled the hub assembly apart! Inner bearing was shot. It was discolored from heat. On the second rear strut in took me less than 20 minutes to get the strut out. Took me an hour total to get the strut out and new one installed. The car was already up in the air and rear deck panel was already loose from doing the drivers side. I included a picture with the spring compressor installed while on the car. When tightened as much as possible, the spring was loose on the strut and I was able to remove both rear springs and install the new struts with the compressors still on the spring without separating the ball joints.
I installed Monroe OE Spectrum struts and they have an unbelievable ride!! Smooth as silk but still doesn't roll or dive at all in hard turns or stops! I would highly recommend them. I wasn't expecting a huge improvement because the shocks still looked fine. when I pulled them out the strut still extended on its own but they did seem to have less resistance when pressing them. They where original as the date stickers where still on them from 11/2001 i believe. 190,000 miles and 13 years and they still functioned somewhat.
BTW, the front struts look easier but took a little longer than the rears for me. I did have to separate the joints on the fronts but but i just topped out the nut, tapped the control arm a couple of times and one smack of the hammer on the topped out nut and they popped right off. I also had to use a torch to heat the lower strut nut red hot and they came right off. tried a breaker bar without heat but I didn't want to snap anything. A torch makes short work for any rusted nuts.
Brewmyowm, thanks for the feedback regarding the Monroes, I was considering using them for the rear and maybe OEM for the front.
Are the Monroe's made in Japan? I could have sworn I saw that some of their line is. I don't want to use KYB, the consensus is that the aftermarket KYB is firmer than stock, looking for a smooth ride.
As a helpful tip, when I change to coils I didn't need to compress springs or disconnect ball joints. When uninstalling, once every bolt is removed, I put a 2x4 by the bottom of the shock body where the strut bolt hole is on the shock and hit it out with a hammer. When reinstalling, you can actually push down the part the lower strut bolt is connected to, just enough to partially get in the strut hole. Once it is partially in, I had a piece of wood on a jack placed under the shock and jacked it up. Once it is jacked high enough, the bolt will go through without a problem. Then just reinstall everything. You are good to go. That's just how I did mine, took less than 30 min per side once I removed the whole rear seat ( removed to run wires for the edfc controller)
I also found out later that if you disengage the sway bar, you can get the axle carrier to drop down even lower to make room for the strut/spring removal.
Brewmyowm, thanks for the feedback regarding the Monroes, I was considering using them for the rear and maybe OEM for the front.
Are the Monroe's made in Japan? I could have sworn I saw that some of their line is. I don't want to use KYB, the consensus is that the aftermarket KYB is firmer than stock, looking for a smooth ride.
I don't know where they are made. I've heard the same thing as you about KYB struts. I've also read that they were OEM struts but I haven't found any hard facts regarding that. For me, I used Monroes for two reasons. One being that I've had good experience on other cars with the brand and two, they had a buy 4 get a rebabte for the cost of one (4 for the price of 3). I bought them at rockauto.com for $376.01 delivered to my door and I'll get a rebate for the least expensive strut ($90.79) so I'll have a net cost of $285.22 for all four struts. Lexus struts would have cost me $500.86 from Lexus with the discount. $215 in saving will buy a lot of beer...
As a helpful tip, when I change to coils I didn't need to compress springs or disconnect ball joints. When uninstalling, once every bolt is removed, I put a 2x4 by the bottom of the shock body where the strut bolt hole is on the shock and hit it out with a hammer. When reinstalling, you can actually push down the part the lower strut bolt is connected to, just enough to partially get in the strut hole. Once it is partially in, I had a piece of wood on a jack placed under the shock and jacked it up. Once it is jacked high enough, the bolt will go through without a problem. Then just reinstall everything. You are good to go. That's just how I did mine, took less than 30 min per side once I removed the whole rear seat ( removed to run wires for the edfc controller)
Way to much pressure for me to attempt this method IMO. One slip and it could do damage or injuries but that's just me. The location of the bottom of the strut prevents you from getting a jack positioned directly under it. I attempted to take a little pressure of the strut but I just went ahead and tightened the compressors a little more and I couldn't fit the jack in there (which is why i just took more pressure off by cranking the compressors).
 10-30-14, 08:33 AM