
TUTORIAL: DIY Headlight Aim on UCF20 (95-97)
 12-21-05, 07:25 PM
#1

Yes, promised to get this done months ago, HERE IT IS!!!
(lol)
1. remove top air intake and the filter+housing. also remove battery if u need to adjust the drivers side light as well. (i didnt need to so i didnt.)
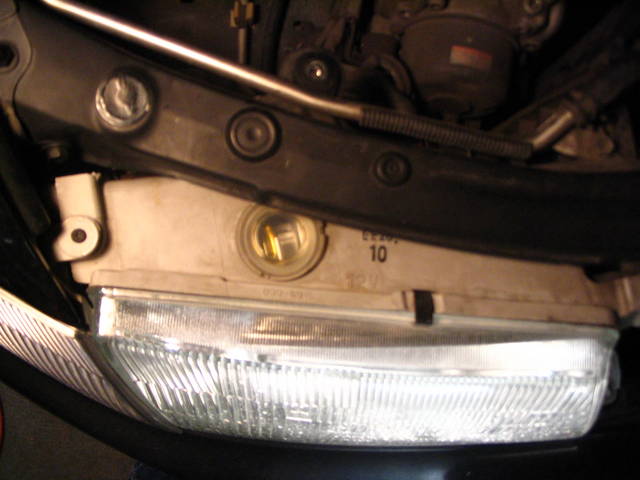
2. Check the headlight aim on both sides using the green levels shown.
Drivers Side:

Passenger Side:
3.
Adjusting Vertically
turn this bolt while watching level to adjust vertically (up+down)
Driver Side:
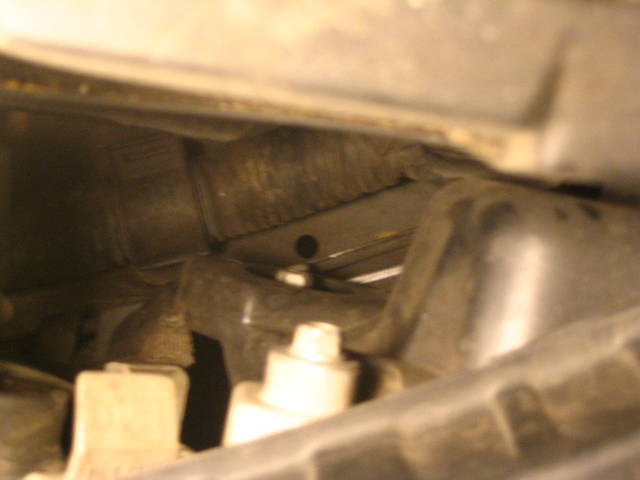
Passenger Side:
4.
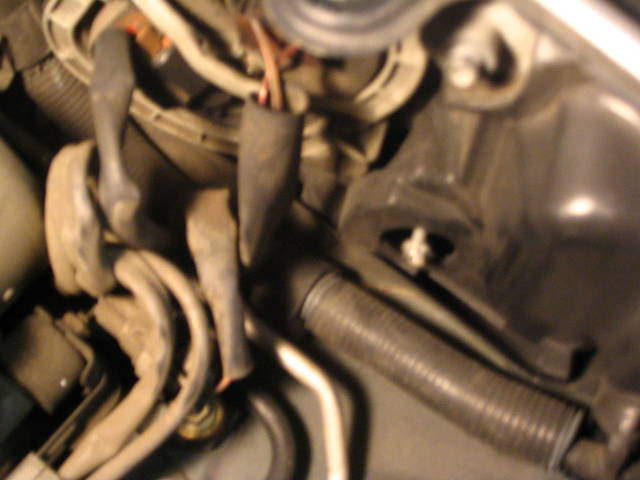
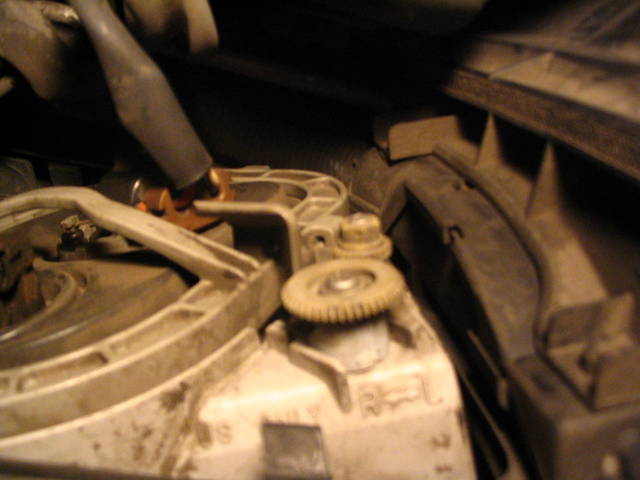
Adjusting Horizontally
to adjust horizontally (Left+Right) adjust the screw set in the white plastic ****.
Driver Side:
Passenger Side:
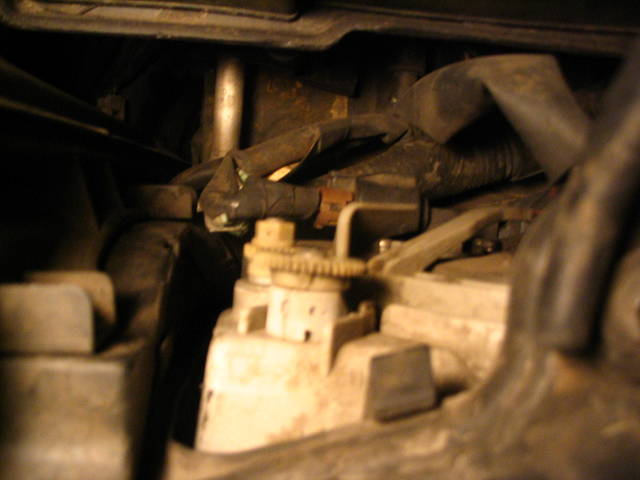
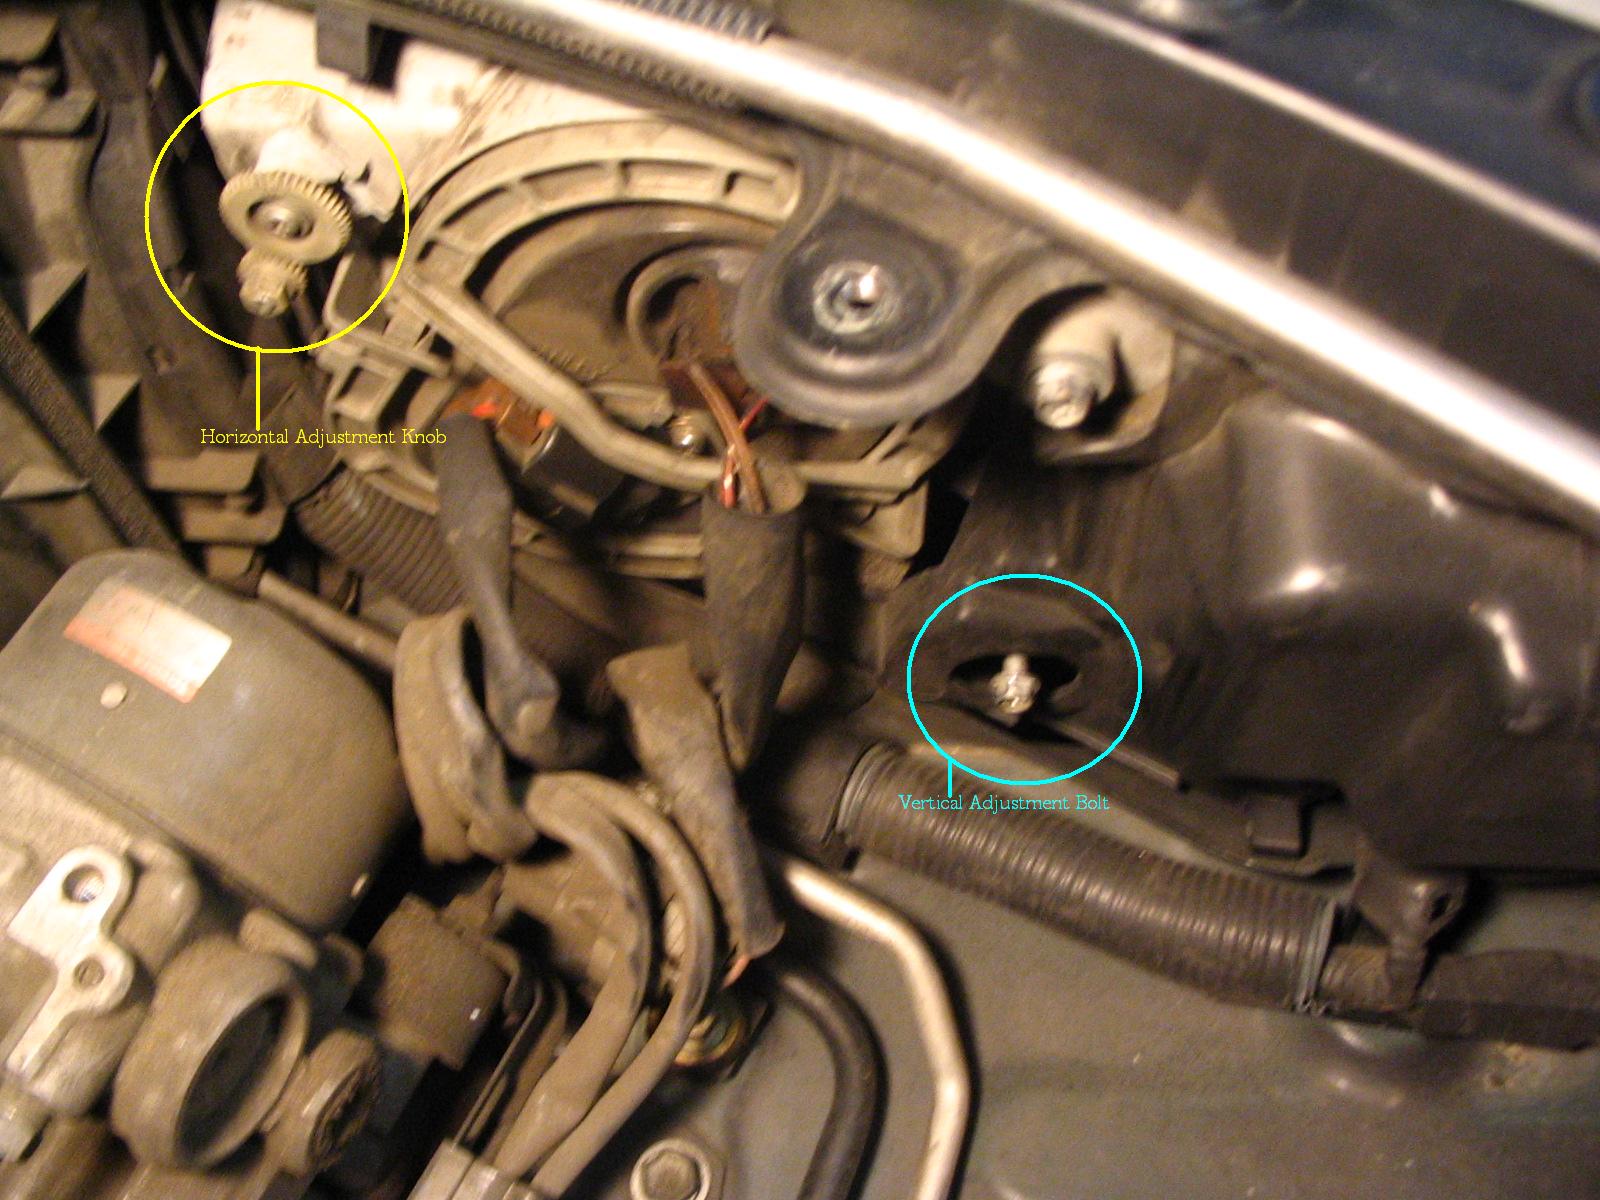
once again, here is a general Overview of the purpose of the adjustment bolts. (passenger side used as an example)
Props:None, its DIY yo!
(props idea jacked from LexLS)
any questions or comments pls lemme know.
(lol)
1. remove top air intake and the filter+housing. also remove battery if u need to adjust the drivers side light as well. (i didnt need to so i didnt.)
2. Check the headlight aim on both sides using the green levels shown.
Drivers Side:
Passenger Side:
3.
Adjusting Vertically
turn this bolt while watching level to adjust vertically (up+down)
Driver Side:
Passenger Side:
4.
Adjusting Horizontally
to adjust horizontally (Left+Right) adjust the screw set in the white plastic ****.
Driver Side:
Passenger Side:
once again, here is a general Overview of the purpose of the adjustment bolts. (passenger side used as an example)
Props:None, its DIY yo!
(props idea jacked from LexLS)
any questions or comments pls lemme know.
Last edited by GRAND_LS 4; 07-31-06 at 10:08 AM.

 12-22-05, 12:56 PM
#7

Good write-up. Some additional:
The little bolt on the fender side of the headlight assembly is the vertical adjustment for the fog light. The fog can only be adjusted for vertical.
The main headlight, the adjustment **** is dual action and pulling or pushing it adjusts it either vertically or horizontally when turning it. There is an unlock tab you have to disengage before making adjustemnts. The tab is missing from PureDrifters headlight as pictured. So be gentle, our cars are getting older so these little plastic parts and gears are easily broken. If you peg the adjustment screw, don't force it, as you will wear away the gear teeth.
The green vials...are general guides but they aren't super accurate. Find a good wall and adjust to the beam charactersitics you want. BUT, there is limited adjustment and depending how the bulb is, the pattern changes.
 Take a dark towel and cover the headlight you aren't adjusting. This allows you to see how the beam is from the particular headlight. AND remember, go easy when adjusting. The plastic is aging so being too forceful may be a $$$ lesson if you need a new assembly.
Oh...cover the main headlight beam with a towel if/when adjusting the fogs.
The little bolt on the fender side of the headlight assembly is the vertical adjustment for the fog light. The fog can only be adjusted for vertical.
The main headlight, the adjustment **** is dual action and pulling or pushing it adjusts it either vertically or horizontally when turning it. There is an unlock tab you have to disengage before making adjustemnts. The tab is missing from PureDrifters headlight as pictured. So be gentle, our cars are getting older so these little plastic parts and gears are easily broken. If you peg the adjustment screw, don't force it, as you will wear away the gear teeth.
The green vials...are general guides but they aren't super accurate. Find a good wall and adjust to the beam charactersitics you want. BUT, there is limited adjustment and depending how the bulb is, the pattern changes.
Take a dark towel and cover the headlight you aren't adjusting. This allows you to see how the beam is from the particular headlight. AND remember, go easy when adjusting. The plastic is aging so being too forceful may be a $$$ lesson if you need a new assembly. Oh...cover the main headlight beam with a towel if/when adjusting the fogs.
Last edited by RA40; 12-22-05 at 01:00 PM.
Trending Topics
12-22-05, 08:15 PM
#8
Originally Posted by RA40
Good write-up. Some additional:
The little bolt on the fender side of the headlight assembly is the vertical adjustment for the fog light. The fog can only be adjusted for vertical.
The main headlight, the adjustment **** is dual action and pulling or pushing it adjusts it either vertically or horizontally when turning it. There is an unlock tab you have to disengage before making adjustemnts. The tab is missing from PureDrifters headlight as pictured. So be gentle, our cars are getting older so these little plastic parts and gears are easily broken. If you peg the adjustment screw, don't force it, as you will wear away the gear teeth.
The green vials...are general guides but they aren't super accurate. Find a good wall and adjust to the beam charactersitics you want. BUT, there is limited adjustment and depending how the bulb is, the pattern changes. Take a dark towel and cover the headlight you aren't adjusting. This allows you to see how the beam is from the particular headlight. AND remember, go easy when adjusting. The plastic is aging so being too forceful may be a $$$ lesson if you need a new assembly.
Oh...cover the main headlight beam with a towel if/when adjusting the fogs.
The little bolt on the fender side of the headlight assembly is the vertical adjustment for the fog light. The fog can only be adjusted for vertical.
The main headlight, the adjustment **** is dual action and pulling or pushing it adjusts it either vertically or horizontally when turning it. There is an unlock tab you have to disengage before making adjustemnts. The tab is missing from PureDrifters headlight as pictured. So be gentle, our cars are getting older so these little plastic parts and gears are easily broken. If you peg the adjustment screw, don't force it, as you will wear away the gear teeth.
The green vials...are general guides but they aren't super accurate. Find a good wall and adjust to the beam charactersitics you want. BUT, there is limited adjustment and depending how the bulb is, the pattern changes.
Take a dark towel and cover the headlight you aren't adjusting. This allows you to see how the beam is from the particular headlight. AND remember, go easy when adjusting. The plastic is aging so being too forceful may be a $$$ lesson if you need a new assembly. Oh...cover the main headlight beam with a towel if/when adjusting the fogs.
02-18-08, 11:40 PM
#9
Driver School Candidate

Join Date: May 2007
Location: Hawaii
Posts: 8
Likes: 0
Received 0 Likes
on
0 Posts
Hello, recently someone hit my passenger side fender, damaging the entire headlight assembly. I was wondering when the body shop installs a new one, will the headlight auto adjust? I have a '00 LS400 with factory HIDS, thanks.
02-11-09, 08:24 PM
#11

I have a 1999 LS400 with autoleveling HIDs and had to take it to the dealer after one headlight was replaced and wasn`t shooting right. Didn`t take long and was $61.**
02-12-09, 05:04 PM
#13

i got a 91 with one piece headlight, but currently i'm stationing away from my home. can anyone tell me if i have the green water bar? thanks
p.s. or it doesn't matter what headlights you have.
p.s. or it doesn't matter what headlights you have.