

 01-06-15, 04:03 PM
Last edit by: IB Advertising
See related guides and technical advice from our community experts:
Browse all: Exterior Guides
- How to Install JDM LED Turn Signal Mirrors
Step by step instructions for do-it-yourself repairs
Browse all: Exterior Guides

It's finally done....GS300 LED turn signal mirror covers installed...DIY thread
01-18-09, 12:37 AM
#1
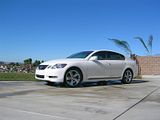
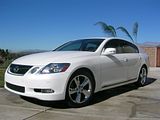
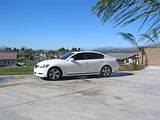
Alright fellas, someone had to do it....here it is, I just installed these tonight and they look great, not too ricey, just OEM looking...DIY pics and tutorial to follow....this is a tough one, total install about 3-4 hours.... but it is way worth it....couple pics, DIY to come very soon....
EDIT UPDATE August 21, 2010
I sourced my covers from this site, you can see my car's pic there
http://lexussignals.com/lexus-gs3504...504300609.html
I know many people sell this product, the one from lexus signals was a perfect fit, and 2 years later, all leds work perfectly, no fogging in the lights, paint color has not faded.....perfect as day 1.
Last edited by EyeKutr; 08-21-10 at 12:04 PM.
 01-18-09, 12:38 AM
#2
Here we go….few words before we get to the nitty gritty…..This is an involved DIY projecct but the results are fantastic. I had several concerns before I ordered these…I will adress them because you are all wondering the same things….PM me for the place I got these as the quality on this product is amazing.
What the heck are these ? they are the shells for our mirror assembly, only they have integrated LEDs, they replace the mirror shells on there now, so you are going to have to take the mirror assembly off and take it apart and replace the mirror shell. They are not a cheap plastic that sits on top, YOU CANT DO THAT TO A GS !!!!
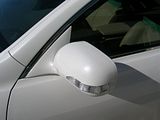
How is the fit? The set I received fit 100% perfect, I am amazed
How is the paint? My color is crystal white and paint is perfect match, no runs, drips, debris, they look OEM quality.
How is the thickness? Quality? Seems identical to OEM
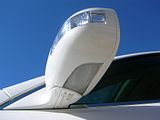
Quality of LED housing ? sealed, seems fine
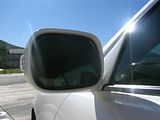
Size of LED housing? It is as big as they could be and still fit the mirror assembly
Does mirror lose any functionality? None
Would I be better off with 08+ mirrors? After I see the way the OEM mirrors hook up, I am 99% certain, you wont be able to simply swap mirrors as the harness that fits the mirror brains in the doors would have to have a different plug, you would need to get those as well, and who knows??
First some fitment pics….
What the heck are these ? they are the shells for our mirror assembly, only they have integrated LEDs, they replace the mirror shells on there now, so you are going to have to take the mirror assembly off and take it apart and replace the mirror shell. They are not a cheap plastic that sits on top, YOU CANT DO THAT TO A GS !!!!
How is the fit? The set I received fit 100% perfect, I am amazed
How is the paint? My color is crystal white and paint is perfect match, no runs, drips, debris, they look OEM quality.
How is the thickness? Quality? Seems identical to OEM
Quality of LED housing ? sealed, seems fine
Size of LED housing? It is as big as they could be and still fit the mirror assembly
Does mirror lose any functionality? None
Would I be better off with 08+ mirrors? After I see the way the OEM mirrors hook up, I am 99% certain, you wont be able to simply swap mirrors as the harness that fits the mirror brains in the doors would have to have a different plug, you would need to get those as well, and who knows??
First some fitment pics….


Last edited by EyeKutr; 01-19-09 at 10:46 PM.
01-18-09, 12:39 AM
#3
See the pdf for taking the mirror off, apart
DIY steps…..make sure you have the right tools….
Soldering iron, screw drivers, electric tape, some adhesive caulk, needlenose, Tricycle…youll see
YOU CAN GET 194 LED lights for the puddle lights, the ones on our car are not LED for sure, I left mine alone because I have had 194 LEDs fail and I did not want to have to take these apart just to replace them.
I used some silicone around the LED housing before I installed them just to make sure they are watersealed 100%. Test the lights before you do anything, just to make sure you don’t have a bad LED.
WORK WITH THE WINDOWS DOWN.
I also cut the little wire plugs because it made install easier and I solder rather than use snap in plugs….YOU DO NOT WANT TO HAVE TO REMOVE ALL THIS for a a plug that can come loose….or a poor connection

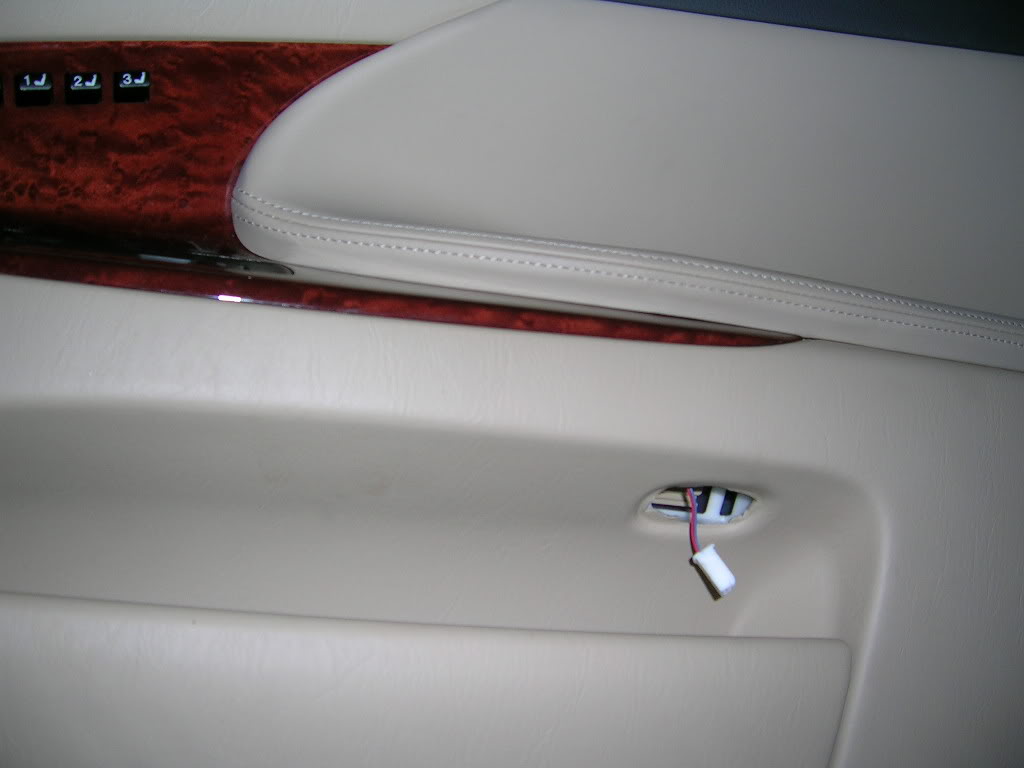
OK, look in the pdf attached in the above post…find the map light LED on the door panel and remove it with a screwdriver, it pops off, unplug LED and put it away and use a #2 phillips and remove the screw
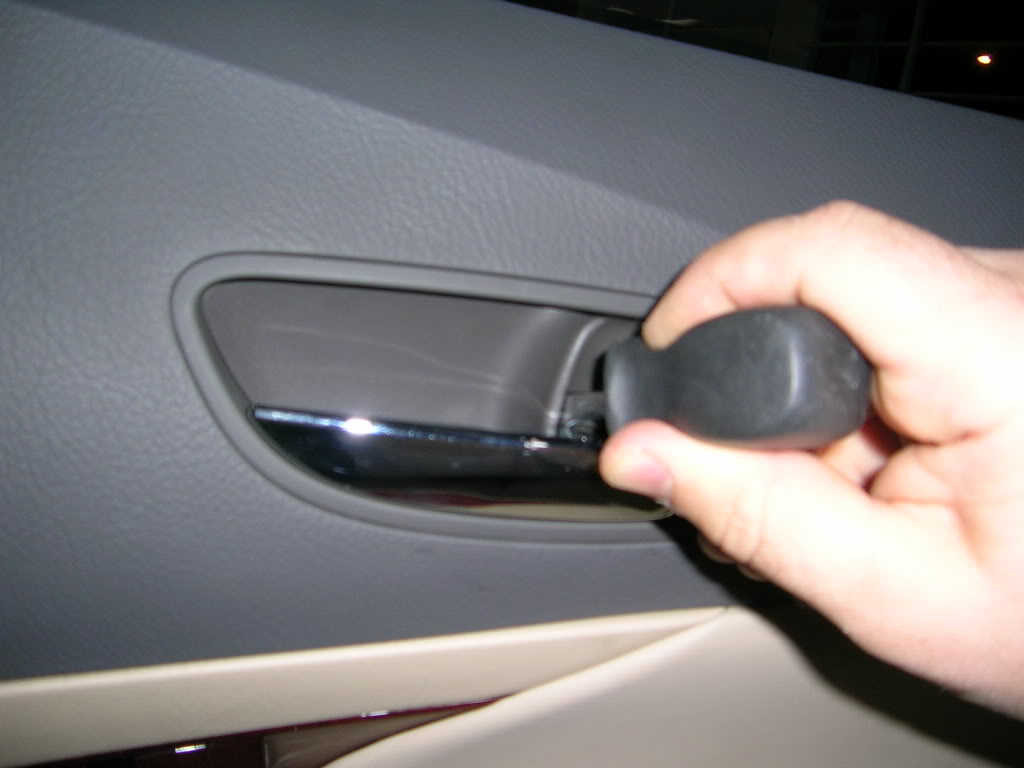
Next use a small flathead screwdriver and remove the plastic trim behing the inside door handle exposing a screw, remove screw
Take a broad screwdriver and insert down below between panel and metal door and panel pops off. No need to remove it, place something under it so it does not sag too low.
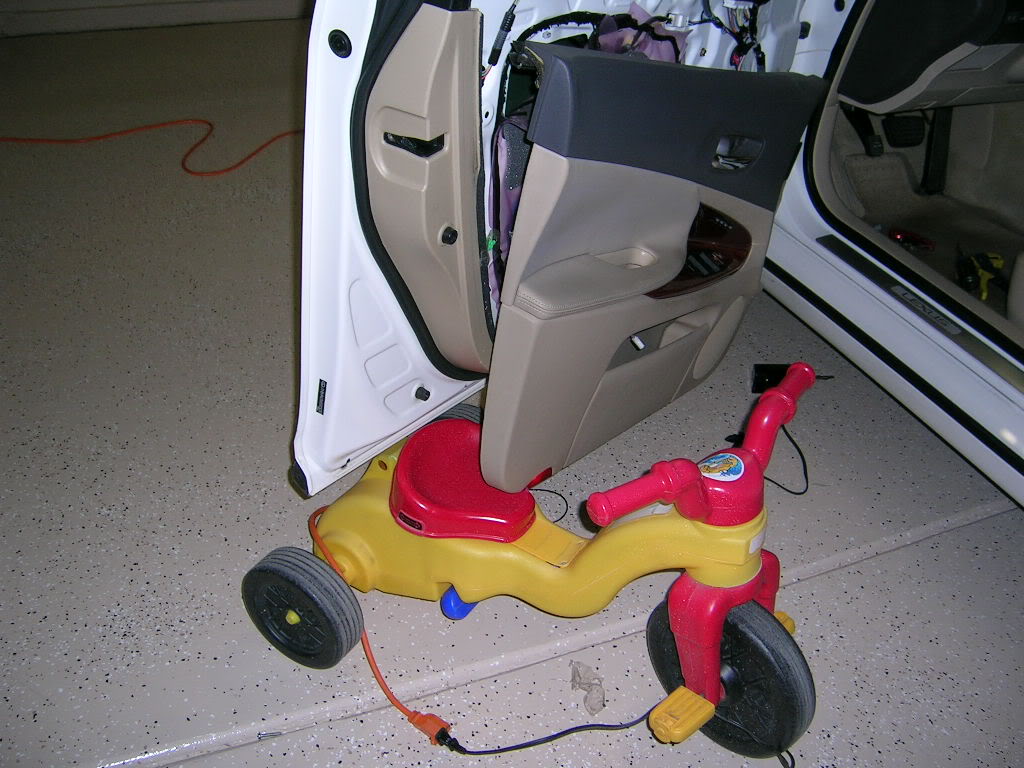
Use a screwdriver to remove the screw and pop off the plastic cover over the mirror housing, there is a single black clip that pops off
Use a 10mm socket wrench to remove the 3 bolts from the mirror housing. Pull firmly off from outside the car and housing comes off. Be sure to remove the plug from the mirror brain.
Take the mirror somewhere you can work on it and this is the hard part.
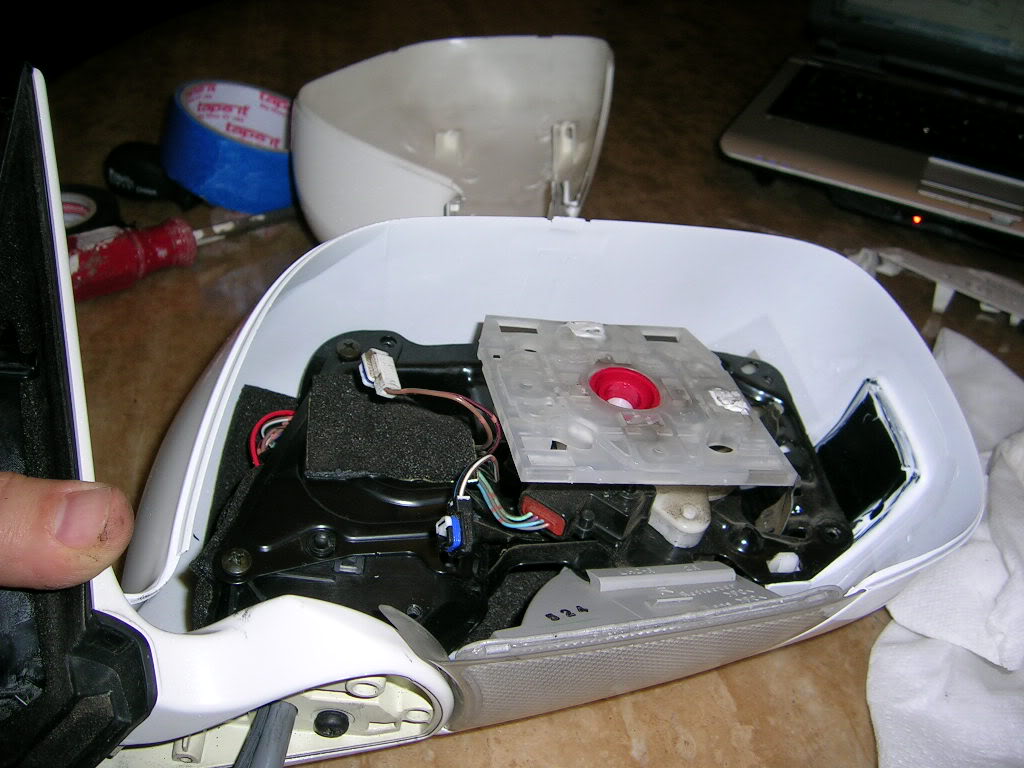
You want to look at the mirror from below….
MAKE SURE YOU READ THE PDF FILE in this post
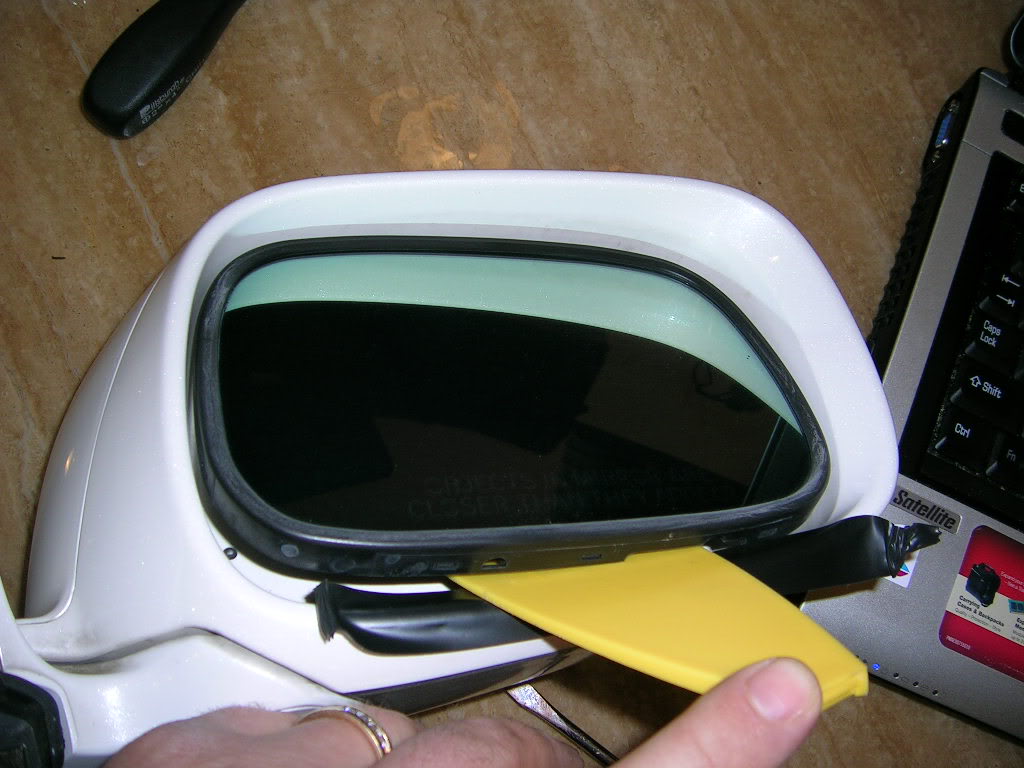
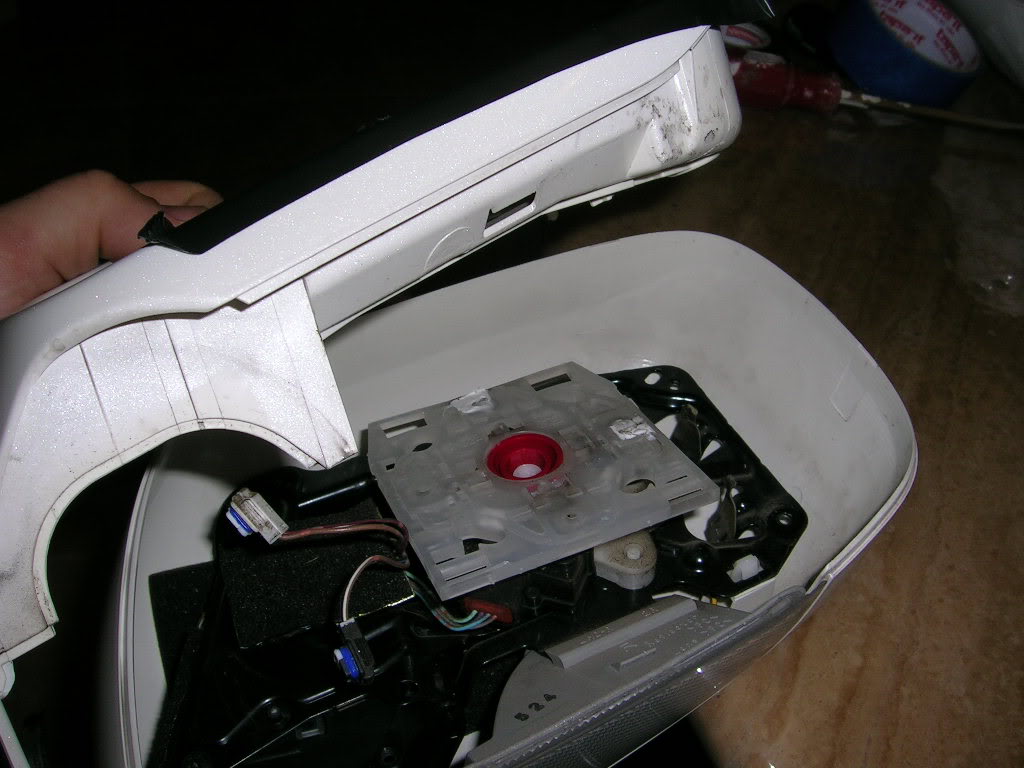
Look in here and you will see a WHITE plastic panel holding the mirror on
You need to use a bent screwdriver to get under the panel and pry apart the mirror from the panel….THIS IS THE HARDEST STEP OF THIS WHOLE DAMN THING
Be careful, you could break stuff here, including the mirror itself I assume…
Once you pop off the mirror, gently tilt up and pull down, there is some adhesive caulk in there that simply lets go and the mirror comes off the motor from under it…
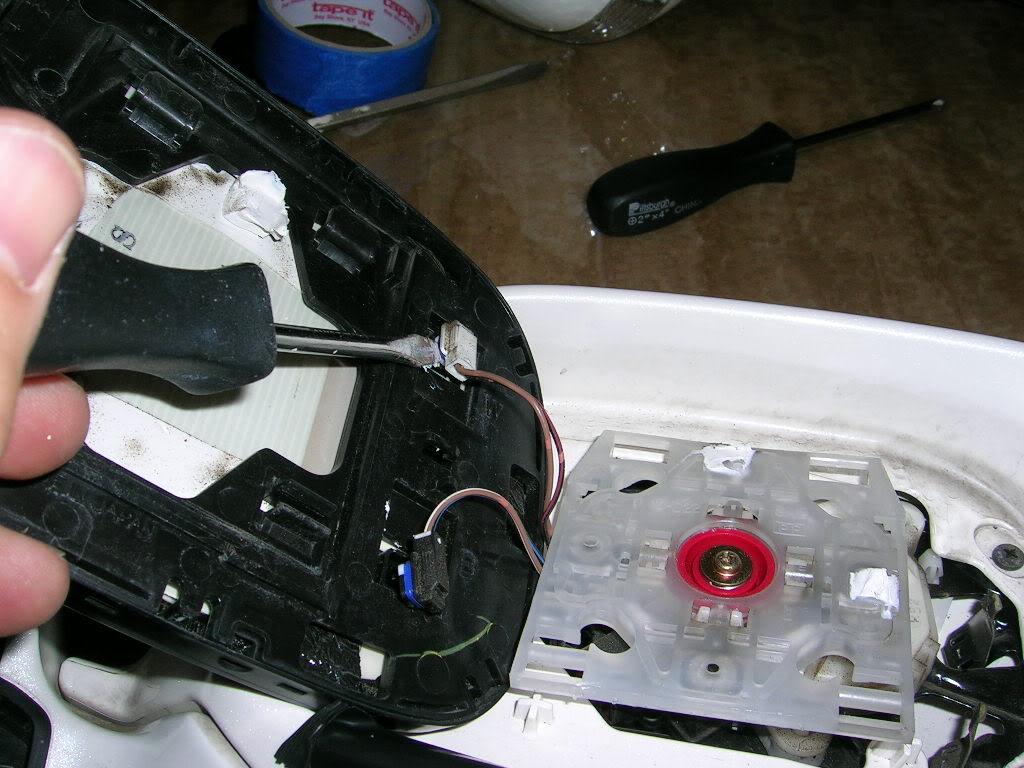
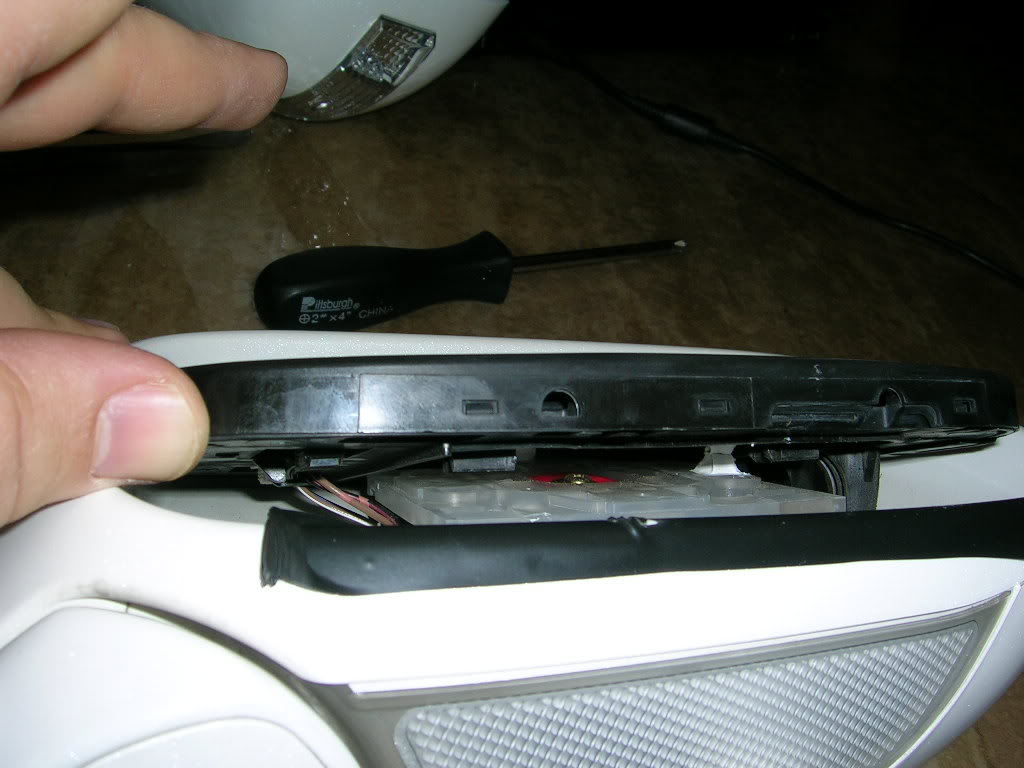
Next take a screwdriver and pop off the two mirror connections….
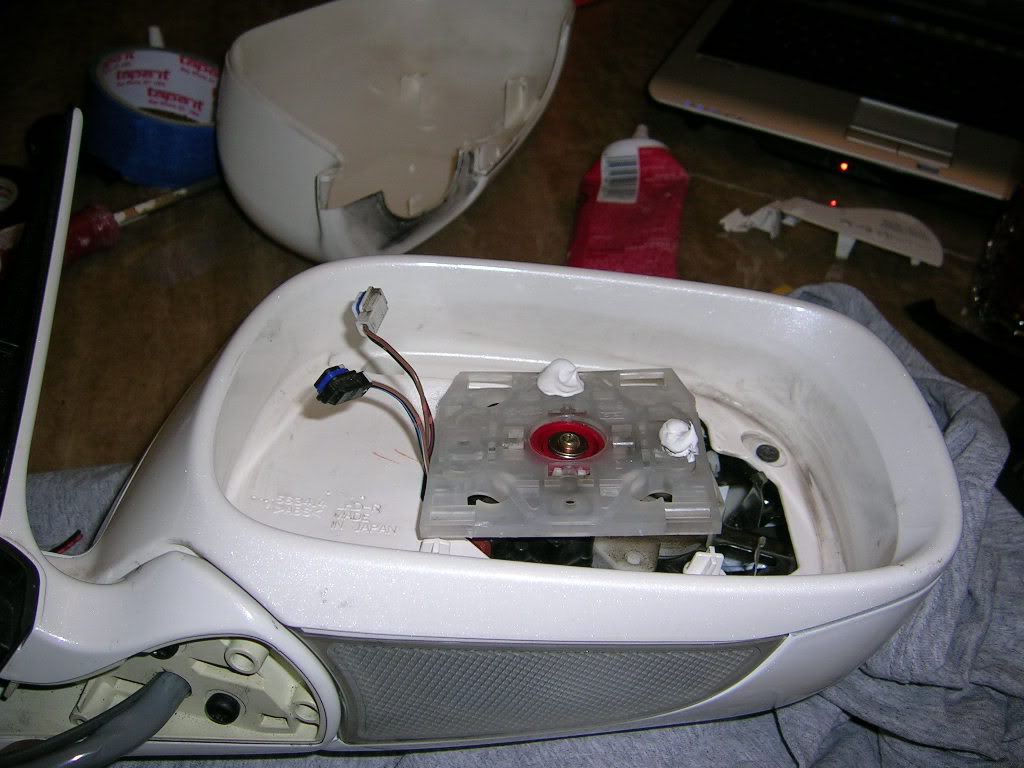
IMPORTANT STEP…Take the screw off the middle of the mirror tilt mechanism (with spring) this allows the panel to come off the frame
Take 4 screws off the front and mirror frame comes off
Remove the bulb from the puddle lighst and remove the puddle light…
Use long needlenose to compress clips and allow the mirror shell to come off the assembly, BE NICE TO THESE CLIPS THEY ARE REUSED
DIY steps…..make sure you have the right tools….
Soldering iron, screw drivers, electric tape, some adhesive caulk, needlenose, Tricycle…youll see
YOU CAN GET 194 LED lights for the puddle lights, the ones on our car are not LED for sure, I left mine alone because I have had 194 LEDs fail and I did not want to have to take these apart just to replace them.
I used some silicone around the LED housing before I installed them just to make sure they are watersealed 100%. Test the lights before you do anything, just to make sure you don’t have a bad LED.
WORK WITH THE WINDOWS DOWN.
I also cut the little wire plugs because it made install easier and I solder rather than use snap in plugs….YOU DO NOT WANT TO HAVE TO REMOVE ALL THIS for a a plug that can come loose….or a poor connection
OK, look in the pdf attached in the above post…find the map light LED on the door panel and remove it with a screwdriver, it pops off, unplug LED and put it away and use a #2 phillips and remove the screw
Next use a small flathead screwdriver and remove the plastic trim behing the inside door handle exposing a screw, remove screw
Take a broad screwdriver and insert down below between panel and metal door and panel pops off. No need to remove it, place something under it so it does not sag too low.
Use a screwdriver to remove the screw and pop off the plastic cover over the mirror housing, there is a single black clip that pops off
Use a 10mm socket wrench to remove the 3 bolts from the mirror housing. Pull firmly off from outside the car and housing comes off. Be sure to remove the plug from the mirror brain.
Take the mirror somewhere you can work on it and this is the hard part.
You want to look at the mirror from below….
MAKE SURE YOU READ THE PDF FILE in this post
Look in here and you will see a WHITE plastic panel holding the mirror on
You need to use a bent screwdriver to get under the panel and pry apart the mirror from the panel….THIS IS THE HARDEST STEP OF THIS WHOLE DAMN THING
Be careful, you could break stuff here, including the mirror itself I assume…
Once you pop off the mirror, gently tilt up and pull down, there is some adhesive caulk in there that simply lets go and the mirror comes off the motor from under it…
Next take a screwdriver and pop off the two mirror connections….
IMPORTANT STEP…Take the screw off the middle of the mirror tilt mechanism (with spring) this allows the panel to come off the frame
Take 4 screws off the front and mirror frame comes off
Remove the bulb from the puddle lighst and remove the puddle light…
Use long needlenose to compress clips and allow the mirror shell to come off the assembly, BE NICE TO THESE CLIPS THEY ARE REUSED
Last edited by EyeKutr; 01-18-09 at 08:59 PM.
01-18-09, 12:40 AM
#4
You will need to run the LED wire through the mirror GUTS
Gently peel off the plastic as pictured and remove bottom cover (pops off) from the attachment side from the car
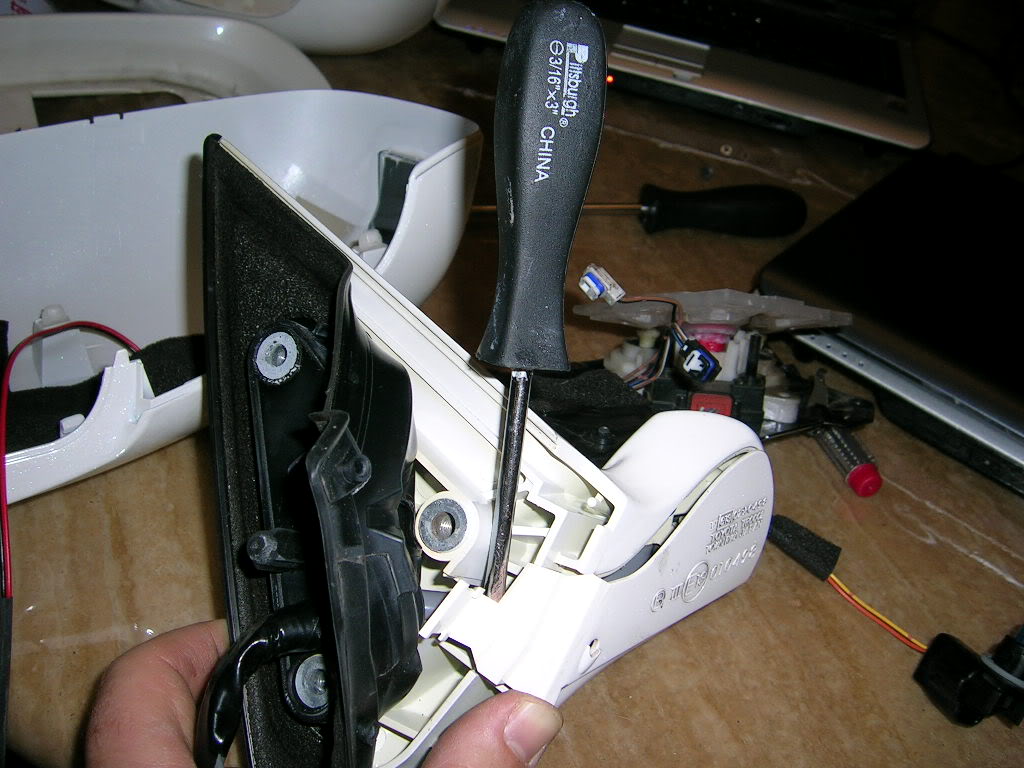
Remove 3 screws so that you can get the assembly apart to help get the wire through…..ON THE DRIVER SIDE, I was simply able to push the wire through, on the passenger side, it was tight and I had to disassemble.
Once you get the wire through this, you can reassmeble everything in reverse, it is easy….
<br>
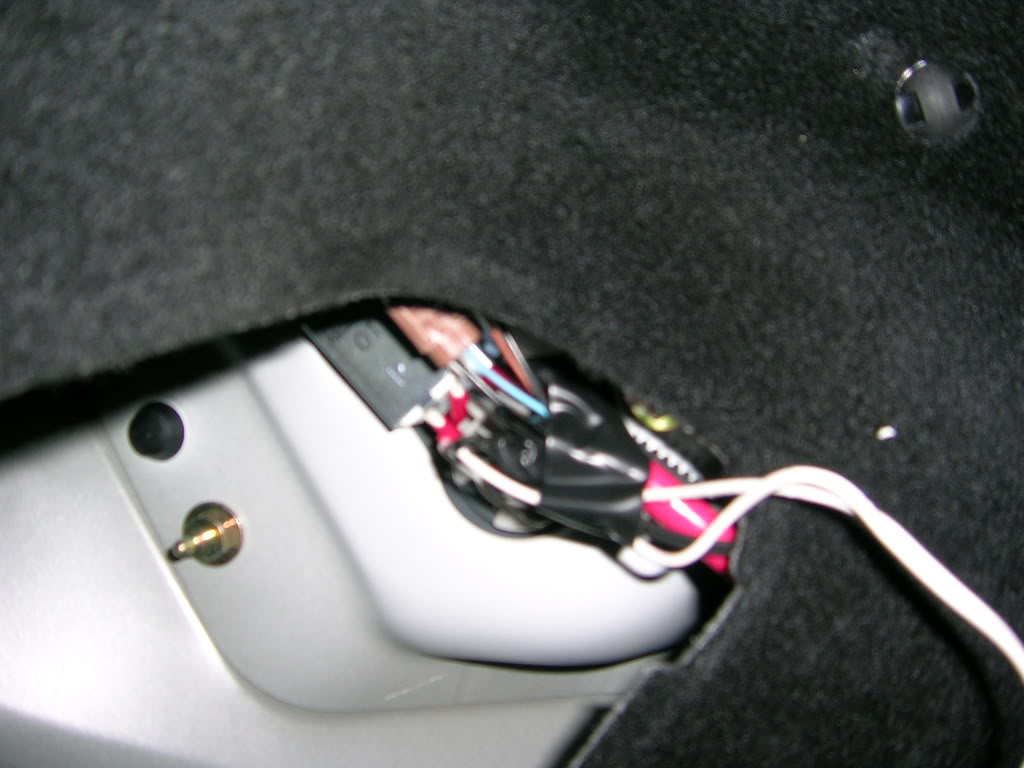
Now that this is done, you need to wire them up. I am sure there are several sources, but for me the easiest place was to tap in to the signal lamps at the trunk.
UPDATE: Mike has found an easier place to tap......Here is what he added and you can see post #65 for pics.....I quote him.....
Okay to tap the wires up front:
On the driver side there are the wires to tap. If you take off the sill cover in front of the sills on the driver side. There is a YELLOW wire and a GREEN wire. They are both much thicker then the other wires in there so trust me you will know. The smaller gauge wires do not work. I tested them all with a volt meter to find them yesterday. I tried to find the relay per the print out I had but I had no luck.
Here is the way I did it.....
Simply pop off the panels from the bottom of the kick panels and the plastic next to the rear seat backrest, pops right off (all 3 pieces).

Once you remove the vertical panel from the side of the seat, push your wire through to the trunk area. Get in the trunk and pull apart the black panel and look for your wire, this is easy. Pull wire and tap into the turn signal bulb, splice however you like and you are good. Make sure you keep positive and negative straight.
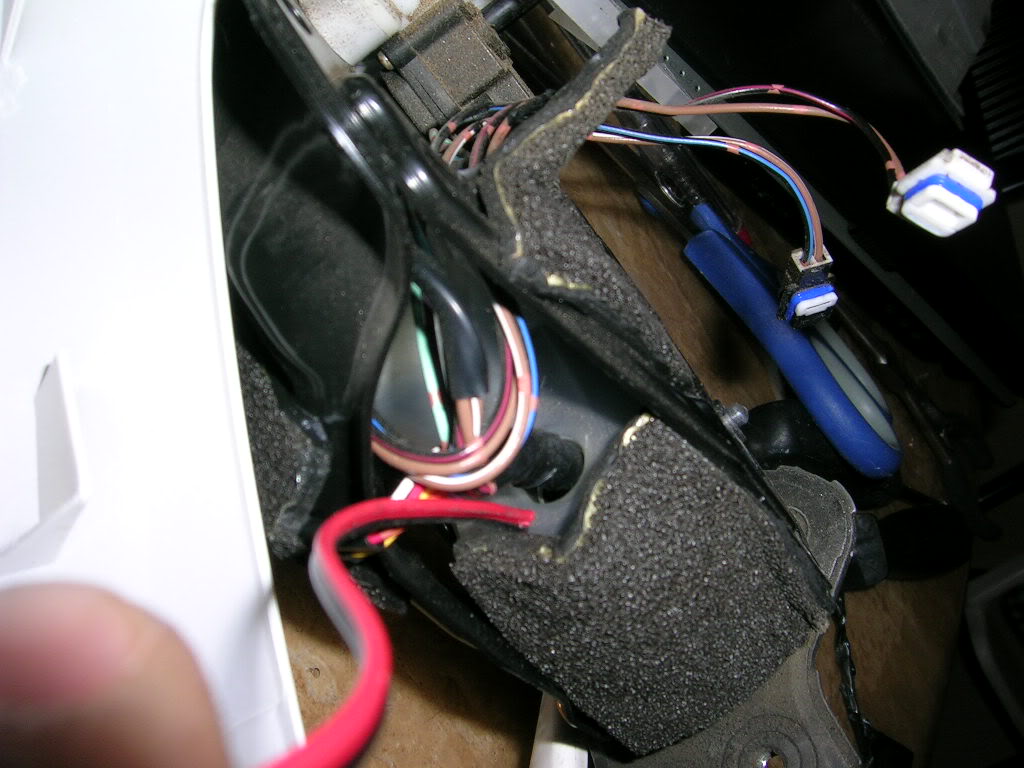
Run wire to the front and get to the door….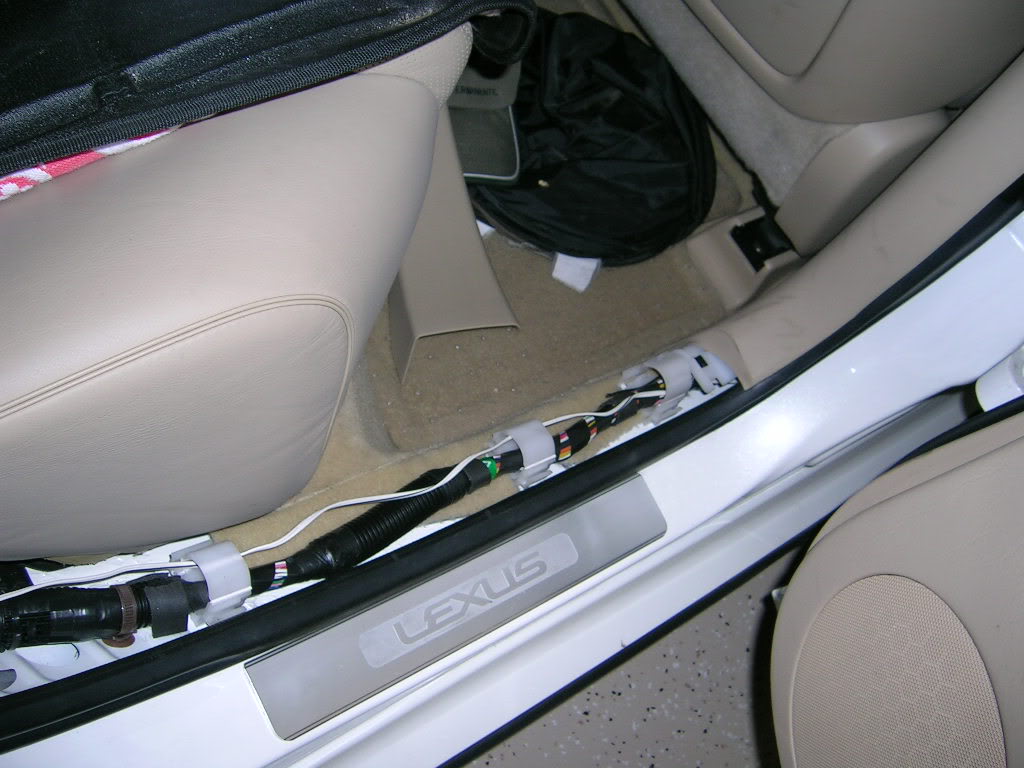
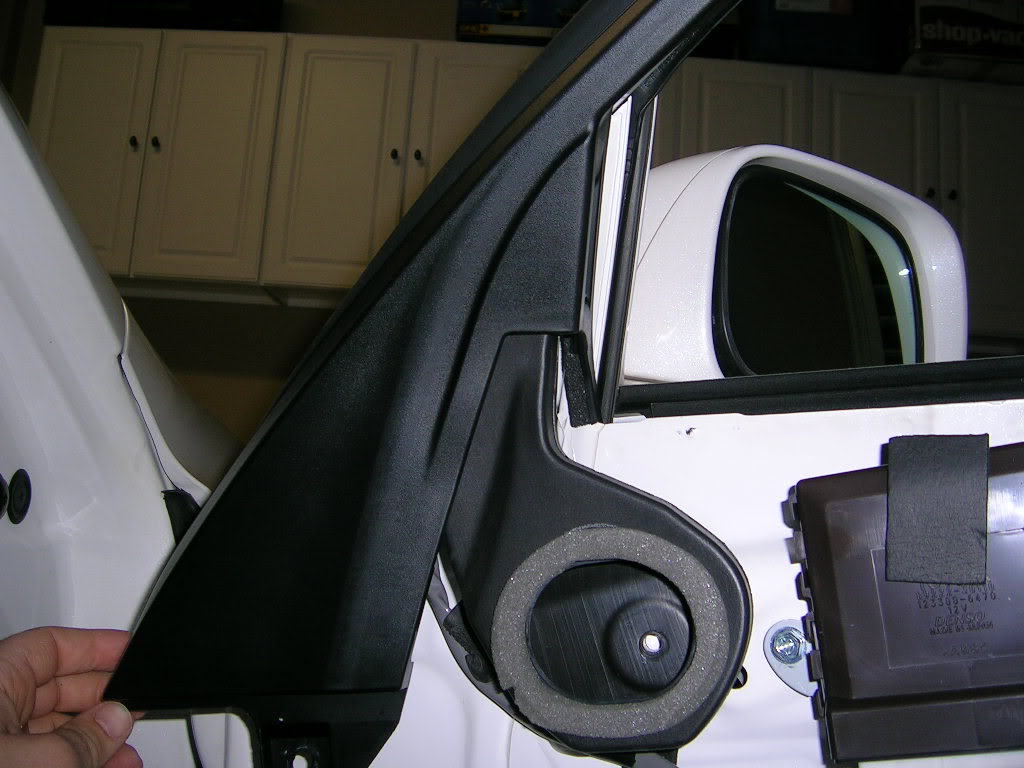
Now, you can spend an hour or two trying to get the wire through the loom that is there or do what I did, just run it in the door frame as pictured…There is a small area in the rubber seal where wires can be run, I think this is there on purpose. See pic.
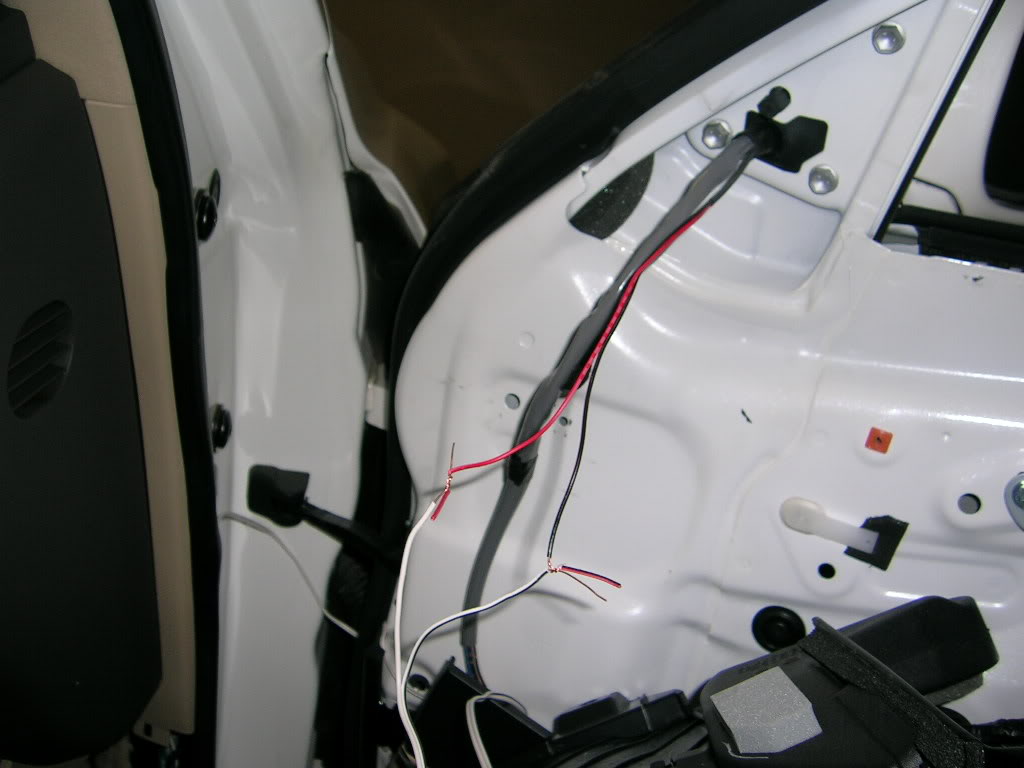

Solder your connections and test the lights again….reassemble door panel in reverse order.
Gently peel off the plastic as pictured and remove bottom cover (pops off) from the attachment side from the car
Remove 3 screws so that you can get the assembly apart to help get the wire through…..ON THE DRIVER SIDE, I was simply able to push the wire through, on the passenger side, it was tight and I had to disassemble.
Once you get the wire through this, you can reassmeble everything in reverse, it is easy….
<br>
Now that this is done, you need to wire them up. I am sure there are several sources, but for me the easiest place was to tap in to the signal lamps at the trunk.
UPDATE: Mike has found an easier place to tap......Here is what he added and you can see post #65 for pics.....I quote him.....
Okay to tap the wires up front:
On the driver side there are the wires to tap. If you take off the sill cover in front of the sills on the driver side. There is a YELLOW wire and a GREEN wire. They are both much thicker then the other wires in there so trust me you will know. The smaller gauge wires do not work. I tested them all with a volt meter to find them yesterday. I tried to find the relay per the print out I had but I had no luck.
Here is the way I did it.....
Simply pop off the panels from the bottom of the kick panels and the plastic next to the rear seat backrest, pops right off (all 3 pieces).
Once you remove the vertical panel from the side of the seat, push your wire through to the trunk area. Get in the trunk and pull apart the black panel and look for your wire, this is easy. Pull wire and tap into the turn signal bulb, splice however you like and you are good. Make sure you keep positive and negative straight.
Run wire to the front and get to the door….
Now, you can spend an hour or two trying to get the wire through the loom that is there or do what I did, just run it in the door frame as pictured…There is a small area in the rubber seal where wires can be run, I think this is there on purpose. See pic.
Solder your connections and test the lights again….reassemble door panel in reverse order.
Last edited by EyeKutr; 03-27-09 at 07:55 PM.
 where did ya get'em??
