
6K HID Headlamps - Installation and Before/After pics!!!!!
 10-14-06, 06:22 PM
#1
I received my 6K D4S HID bulbs in the mail earlier today...obviously making it a priority to install them the minute I opened the package.
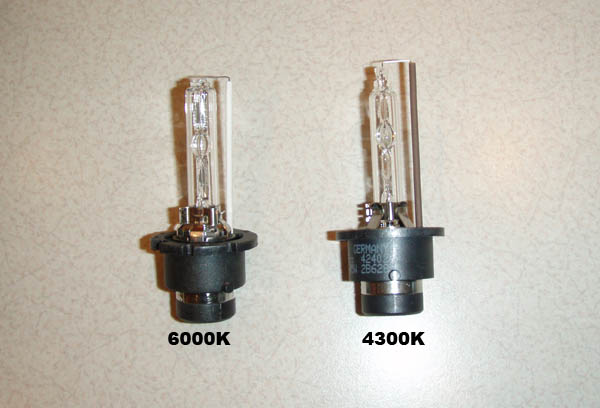
I've posted pics of the installation and before/after pics of the factory 4300K hids vs. the 6000K hids.
Bulbs look pretty much the same.
Remove the light compartment cover to access the HID bulb.
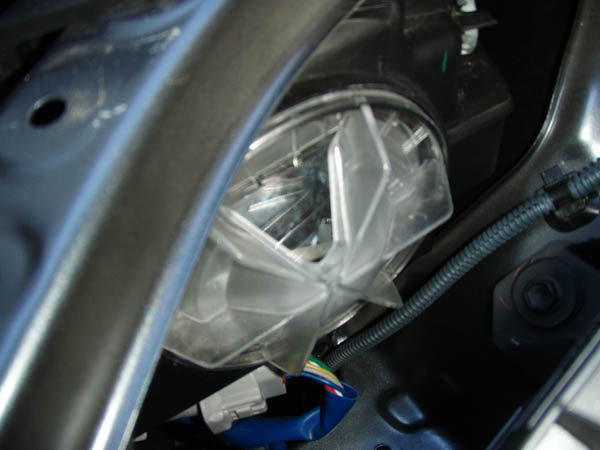
Remove the wire connection to the HID bulb to access the HID bulb. You will need to twist the silver **** about an inch counter-clockwise to unlock the connection.

There are two spring clips that have to release in order to remove the HID bulb. All you have to do is pinch both sides until the clips pop out of its retainer. The clip wire is held by a small screw (see picture) so you won't have to worry about it falling out of place. You can then remove the factory HID bulb and install your new one.

Once installed, reassemble the spring clips, connect the silver **** and lock it in place, snap the light compartment back in place, and cross your fingers!
Make sure the leave the HIDs on for atleast 15 minutes to break them in.
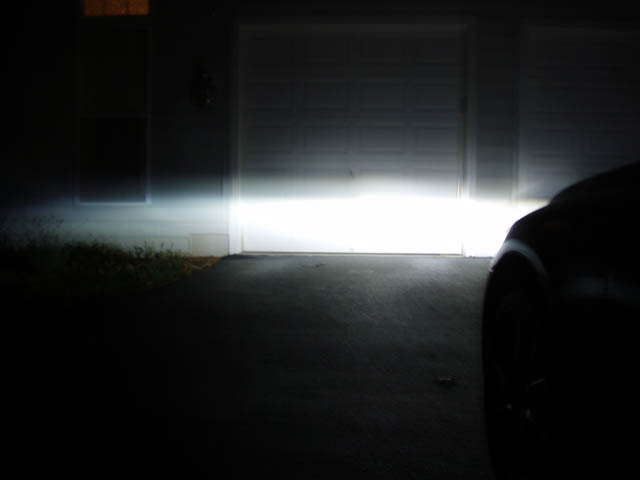
Here are some before & after pics of the headlamps compared with my 194 5-LED Super Wide Angle parking bulbs.
BEFORE
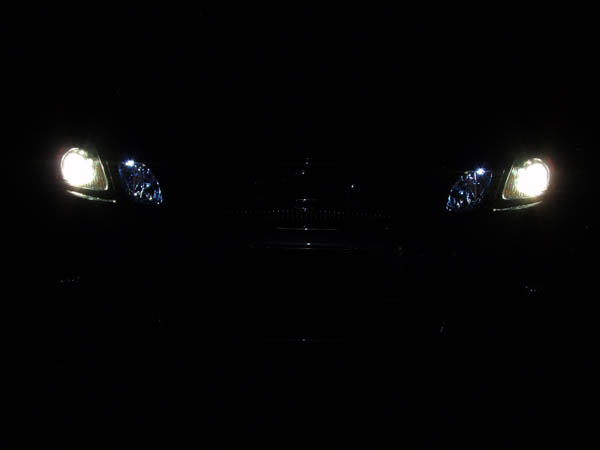
AFTER


BEFORE
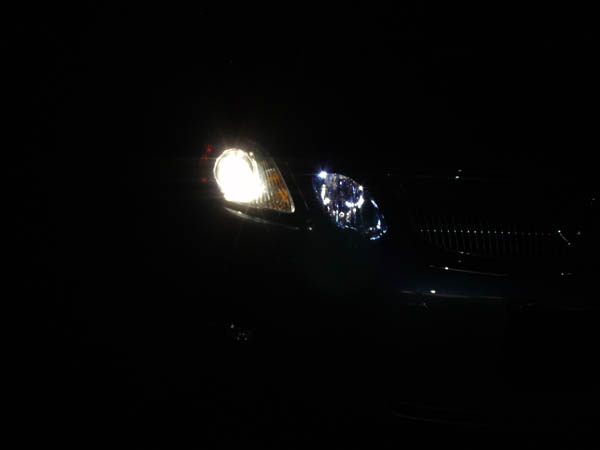
AFTER
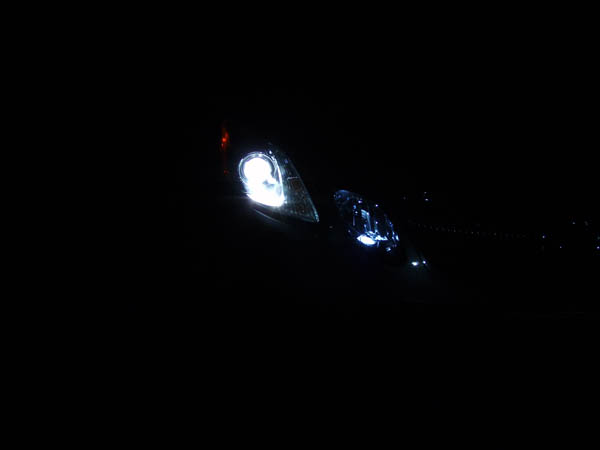
I am soooooooooooooooooooo pleased with the turnout! The 6K's match better with my parking LEDs.
If any of you are interested in getting these D4S bulbs, check out http://www.xenonvalot.com/
They have great customer service and they ship anywhere in the US via EXPRESS mail!
YEAAAAAAAAAAAAAAAAAAAAAAAAAAAA!!!!!!!!!
I've posted pics of the installation and before/after pics of the factory 4300K hids vs. the 6000K hids.
Bulbs look pretty much the same.
Remove the light compartment cover to access the HID bulb.
Remove the wire connection to the HID bulb to access the HID bulb. You will need to twist the silver **** about an inch counter-clockwise to unlock the connection.
There are two spring clips that have to release in order to remove the HID bulb. All you have to do is pinch both sides until the clips pop out of its retainer. The clip wire is held by a small screw (see picture) so you won't have to worry about it falling out of place. You can then remove the factory HID bulb and install your new one.
Once installed, reassemble the spring clips, connect the silver **** and lock it in place, snap the light compartment back in place, and cross your fingers!
Make sure the leave the HIDs on for atleast 15 minutes to break them in.
Here are some before & after pics of the headlamps compared with my 194 5-LED Super Wide Angle parking bulbs.
BEFORE
AFTER
BEFORE
AFTER
I am soooooooooooooooooooo pleased with the turnout!
The 6K's match better with my parking LEDs.If any of you are interested in getting these D4S bulbs, check out http://www.xenonvalot.com/
They have great customer service and they ship anywhere in the US via EXPRESS mail!
YEAAAAAAAAAAAAAAAAAAAAAAAAAAAA!!!!!!!!!

 10-14-06, 06:56 PM
#4
Driver
Join Date: Jul 2006
Location: Ca
Posts: 112
Likes: 0
Received 0 Likes
on
0 Posts
Nice work. Just curious how the visability is on the street. I know with the stock HID's it's fairly white. With the 6K Blub, how different is it? Do you mostly see blue?
Sorry for the ignorance. Not too familiar with the blub temperature and how it projects.
Thanks
Sorry for the ignorance. Not too familiar with the blub temperature and how it projects.
Thanks


Trending Topics
10-14-06, 07:23 PM
#9
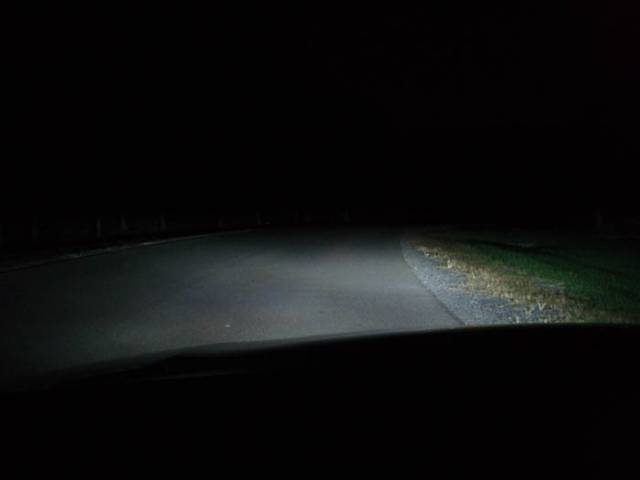
Just a slight difference in brightness, but that is expected going from 4300K to 6000K. I think HID fogs are definitely necessary if you want some more brightness...I guess I just found out my next upgrade...
Last edited by conclevage; 10-14-06 at 10:06 PM.
10-14-06, 07:44 PM
#11
Pole Position

Join Date: Aug 2006
Location: CA
Posts: 242
Likes: 0
Received 0 Likes
on
0 Posts