
DIY ***Official LS400 Brake conversion with pictures***
 03-09-12, 10:20 AM
#1
Alright! I finally got to create a nice DIY thread!!
First I would like to throw out a reason why I decided to grind and not use RCA's.
The LS400 conversion is a brake conversion for people on a budget. I am on a budget, and if I can do it within the realm of safety, I will do it. The reason I did not use RCA's is because the cost of them plus the LS conversion superceeds the cost of Supra TT conversion which is better. The cost of 17mm RCA is $180 from Figs.
If you are not on a budget or not interested in grinding, you can use the supra TT calipers which, from what I understand, do not require modification to fit. These calipers can be had for less than you can buy LS400 calipers and RCA's for. The supra calipers also have better rotor and pad options.
Prices:
LS400 calipers used $160 shipped with all hardware
LS400 Rotors and "gold" pads from Advance auto parts online $109 with coupon (BIG30)
Brake fluid $9.99
Total $278.99
A couple of disclaimers:
-Grinding the caliper may render your caliper inoperable. Please use extreme caution when grinding the caliper, to not grind too far.
-I am in no way responsible for what you do to your car, this is strictly informative.
Great-now that we have that out of the way, lets begin with the conversion!
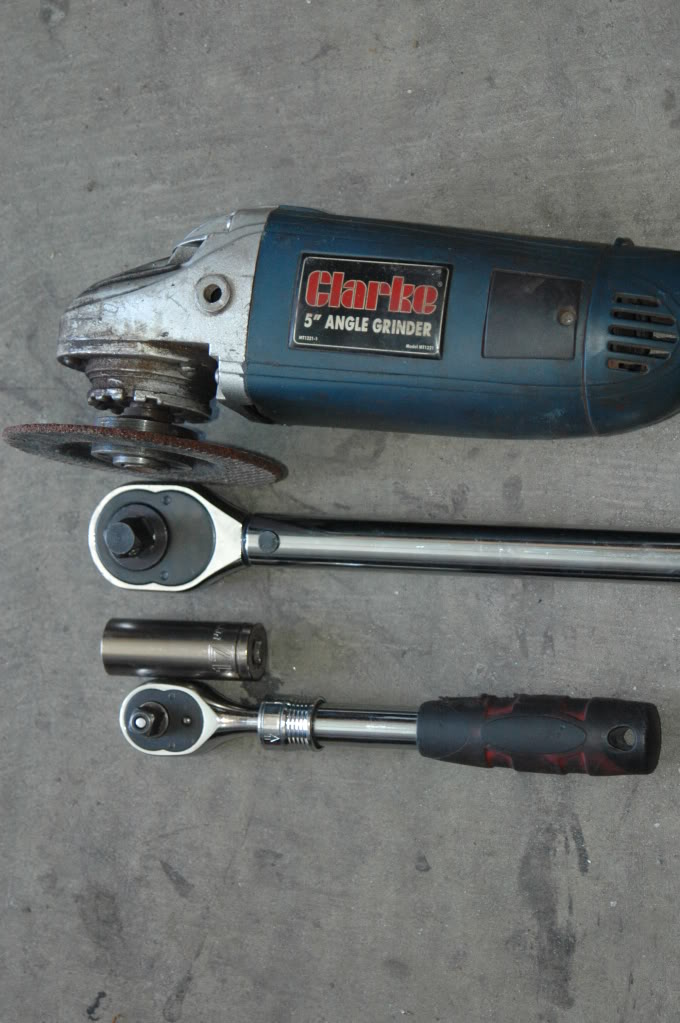
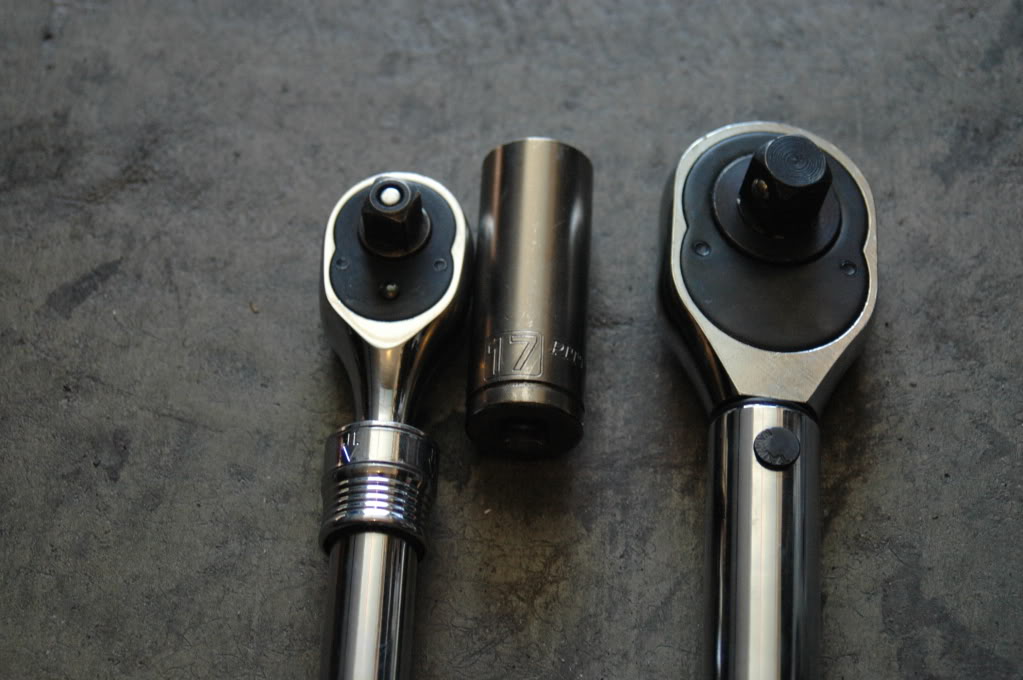
First off: Tools that are needed for the project
- 17mm socket (I used a deep socket)
- 3/8 drive ratchet
- 5" grinder
- Torque wrench (not really needed)
14mm socket (I too used a deep socket)
***IMPORTANT*** Safety glasses (seriously....not trying to be all safe and such, but these are 100% necessary)
Brake fluid (big bottle)
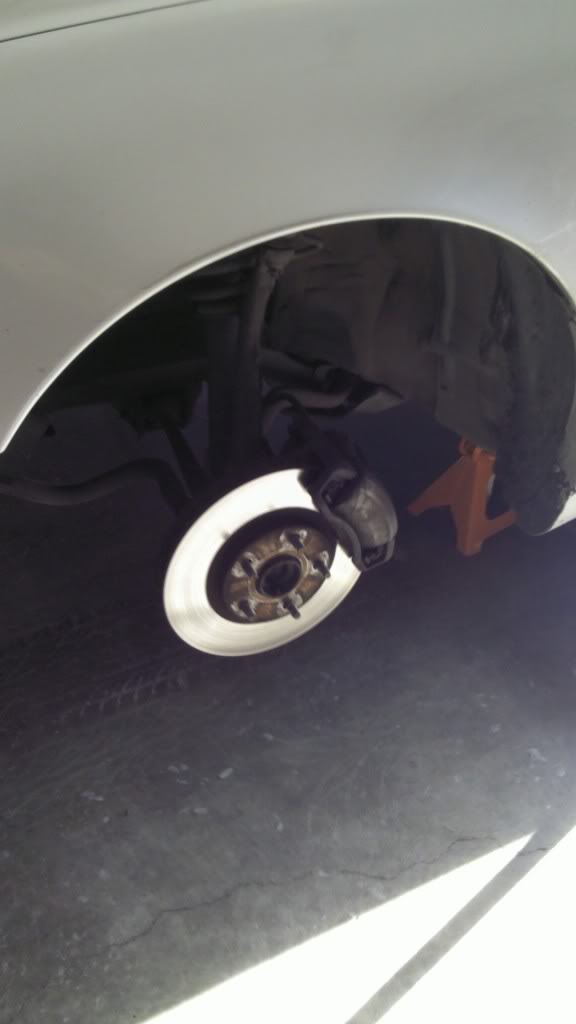
Step 1: Remove wheel
Alright-now that you have the wheel off, you are left with your crappy stock GS calipers. In order to remove them you will need a 17mm socket, 14mm socket, and the ratchet
Step 2: Loosen the brake line bolt. Its easier to do it while the caliper is still on the car so you don't have to fight with it moving when trying to get that bolt loose.
Step 3: Remove the two bolts (17mm) holding the caliper bracket and remove the whole caliper
Step 4: Remove the brake line (you might want a rag or some type of bucket to drain brake fluid into)
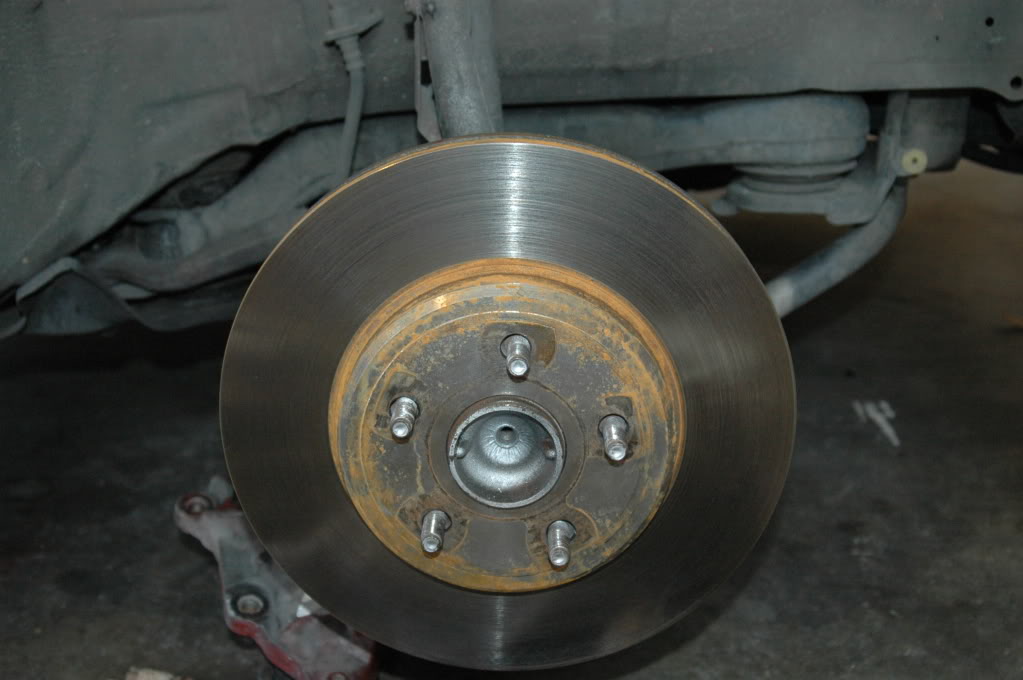
Step 5: remove the rotor. These can be hard to remove at times, a rubber mallet is nice to have if it is stuck on the hub.
Now it is time for the fun, or not so fun, part of grinding and checking clearances.
Step 6: Place rotor onto hub
Step 7: Place caliper on rotor and try to get the top bolt in. If you cannot, proceed to next step. If you can get it in, check the bottom where it is hitting. Make a mark to grind there.
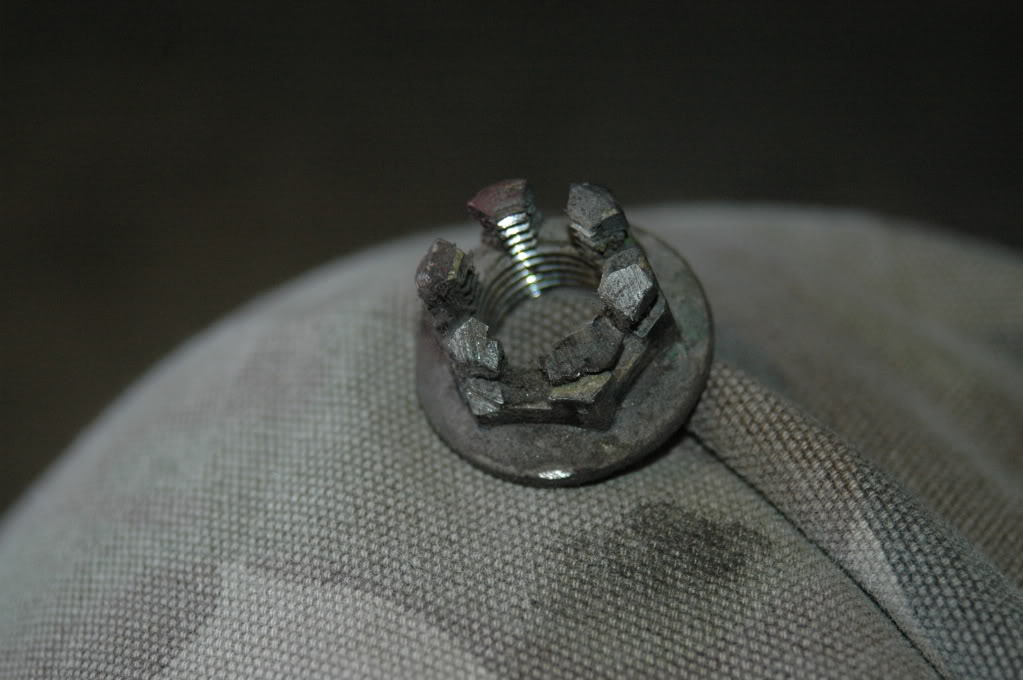
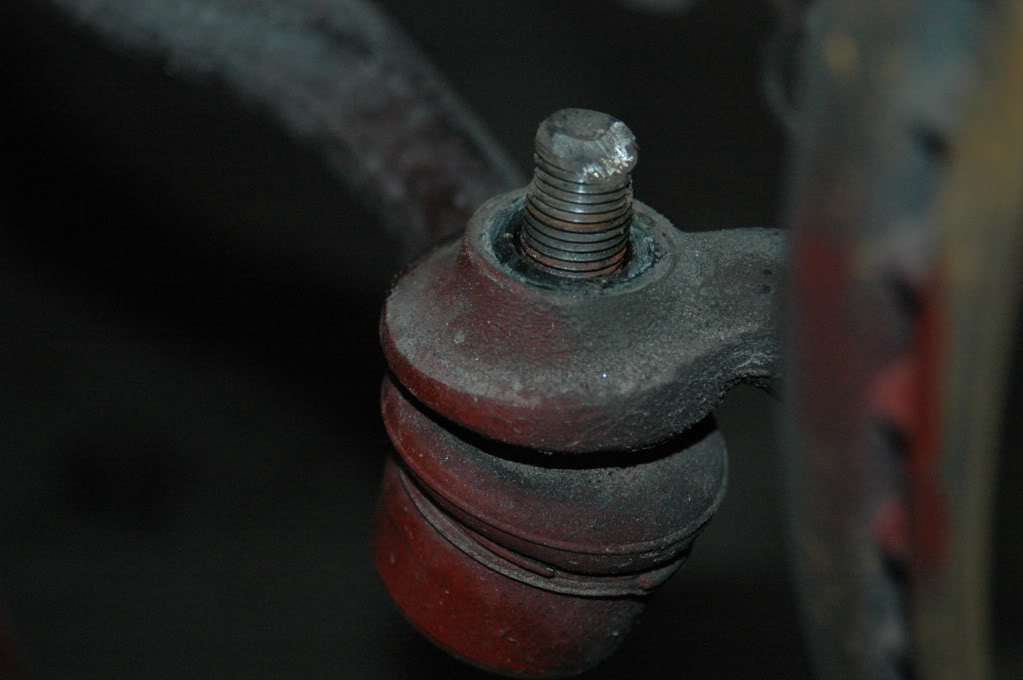
Step 8: Grind SMALL amounts of the caliper and lower bolt and nut. ***REMEMBER TO USE SAFETY GLASSES*** These calipers are aluminum and grind VERY easily. The metal shards are sharp and fly fast. Please do small amounts and check where it is hitting more than a few times, or you risk the chance of ruining the caliper.
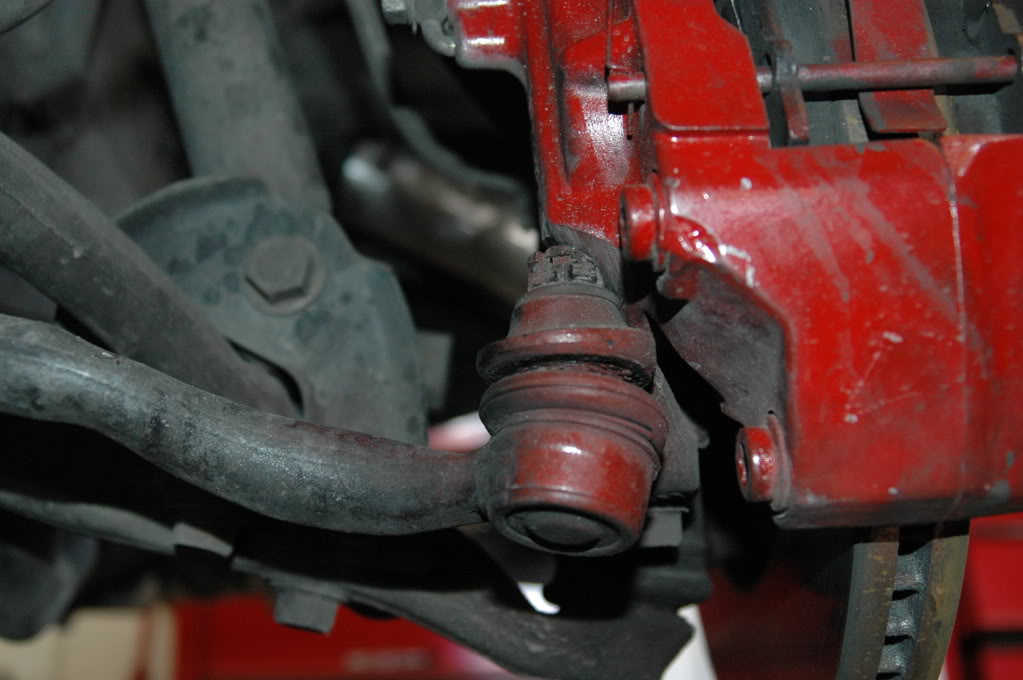
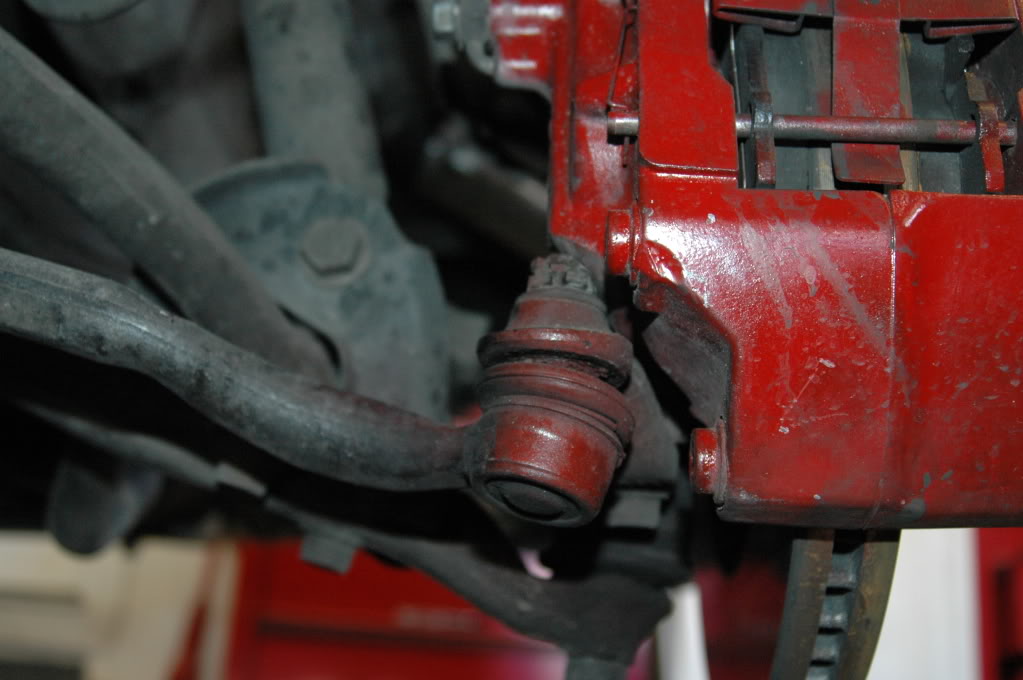
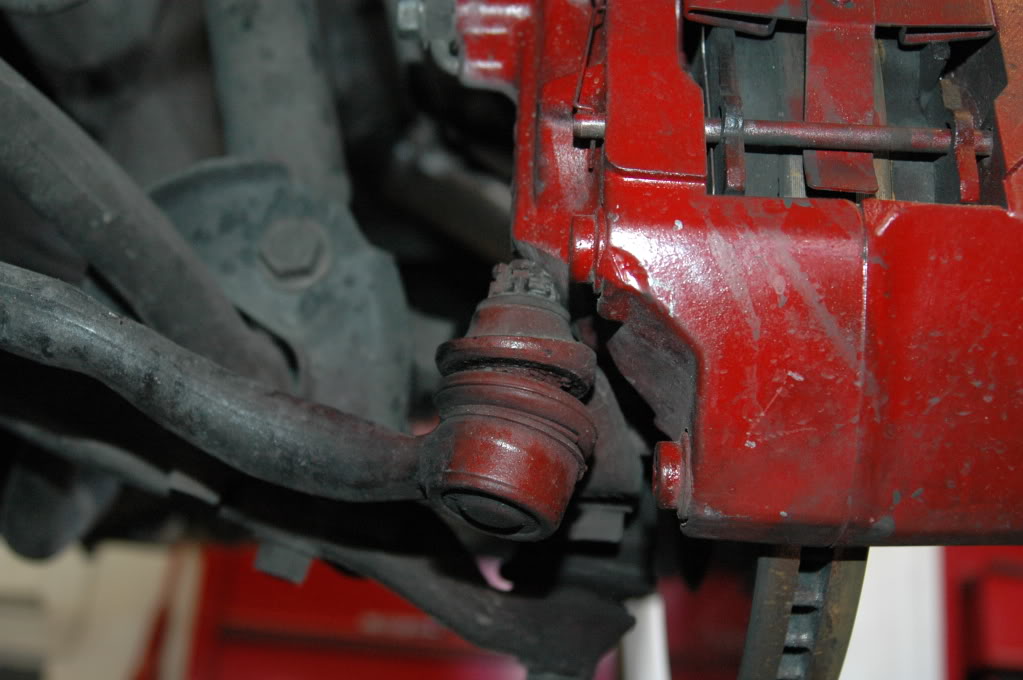
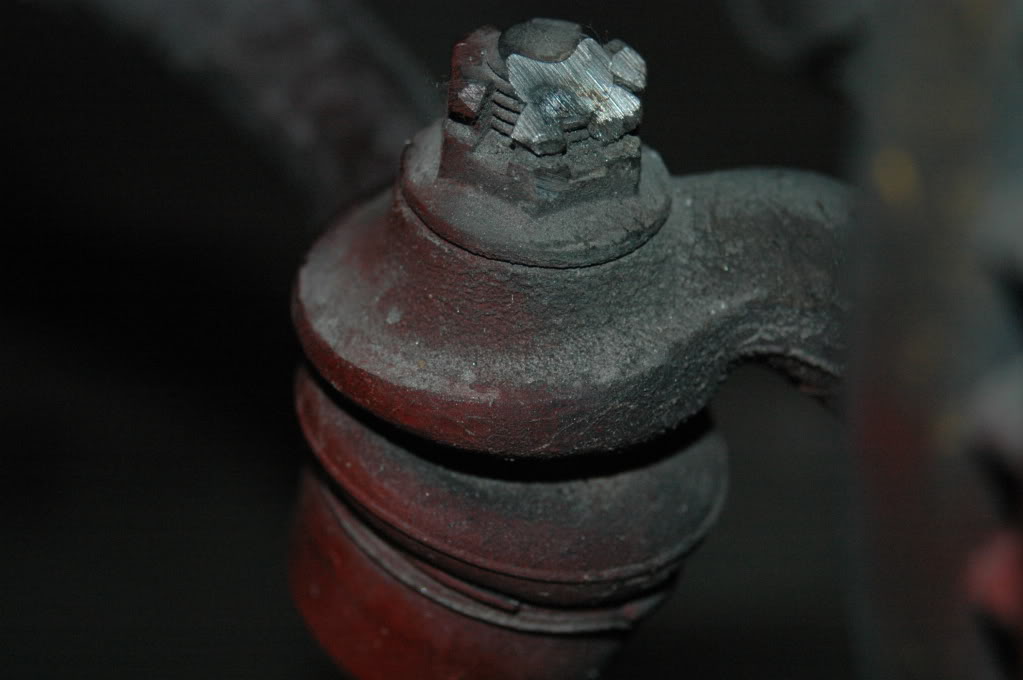
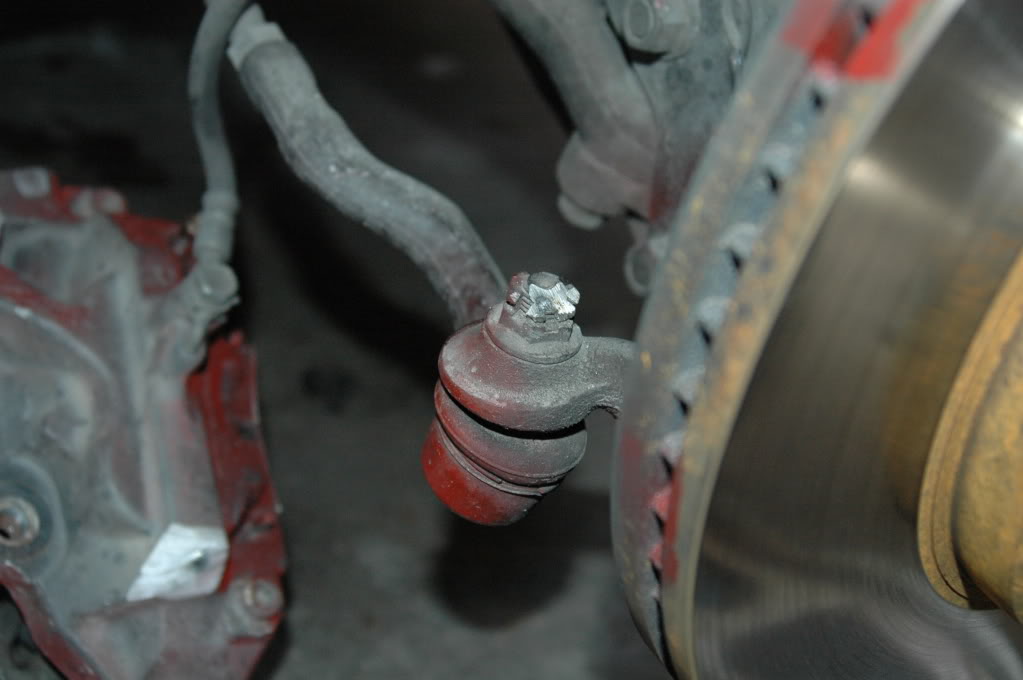
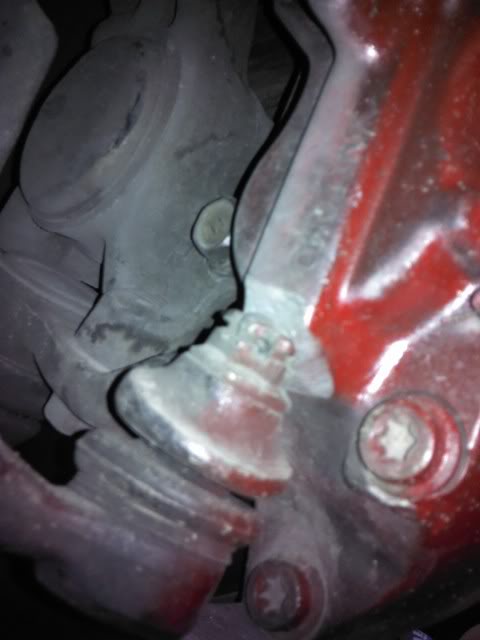
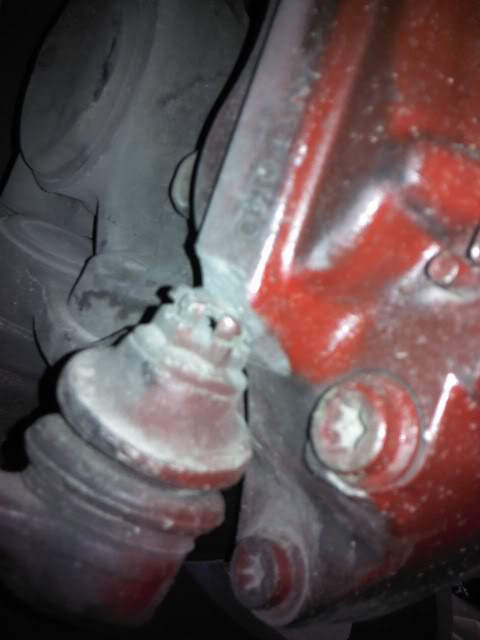
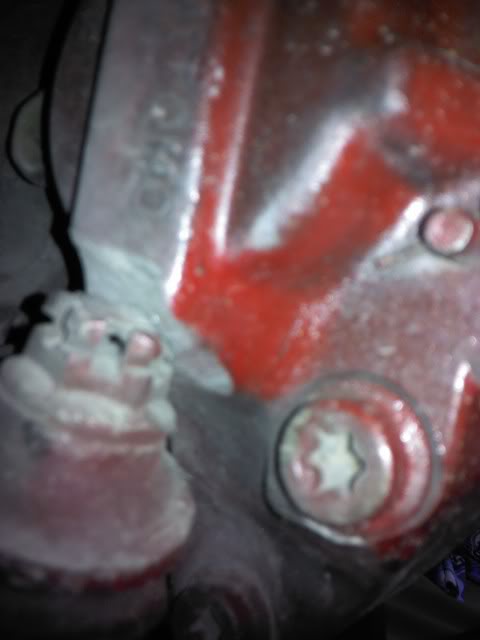
Step 9: Place rotor back on and see where the caliper is hitting again, and proceed to grind until you get the caliper to fit properly. You should be left with something that looks like this.
The black residue is not a hole (obviously) it is grease I didn't wipe off.
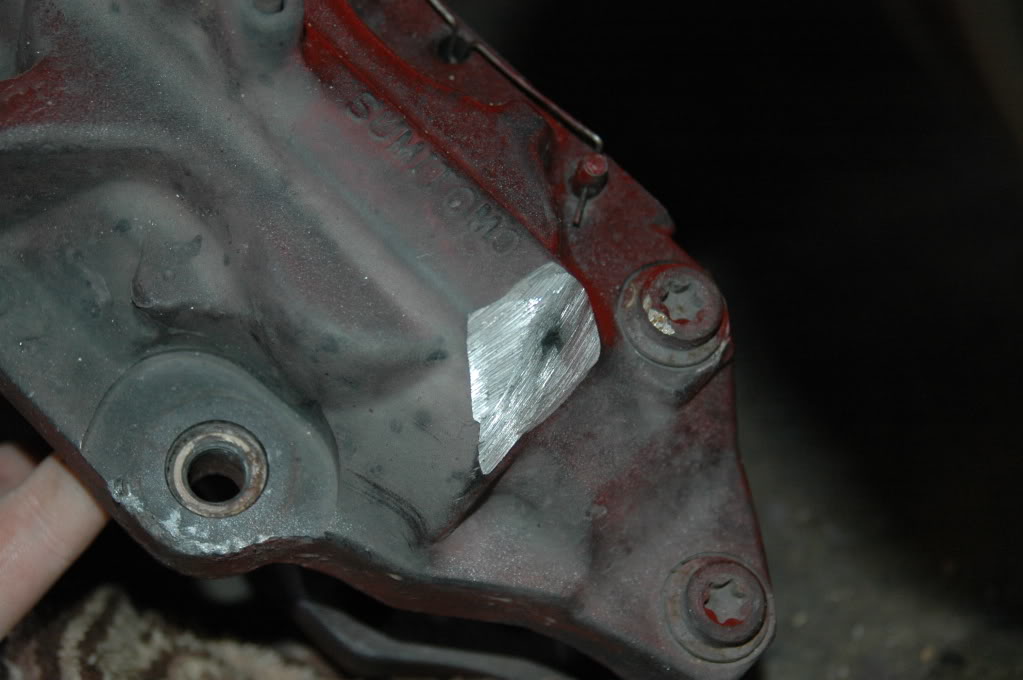
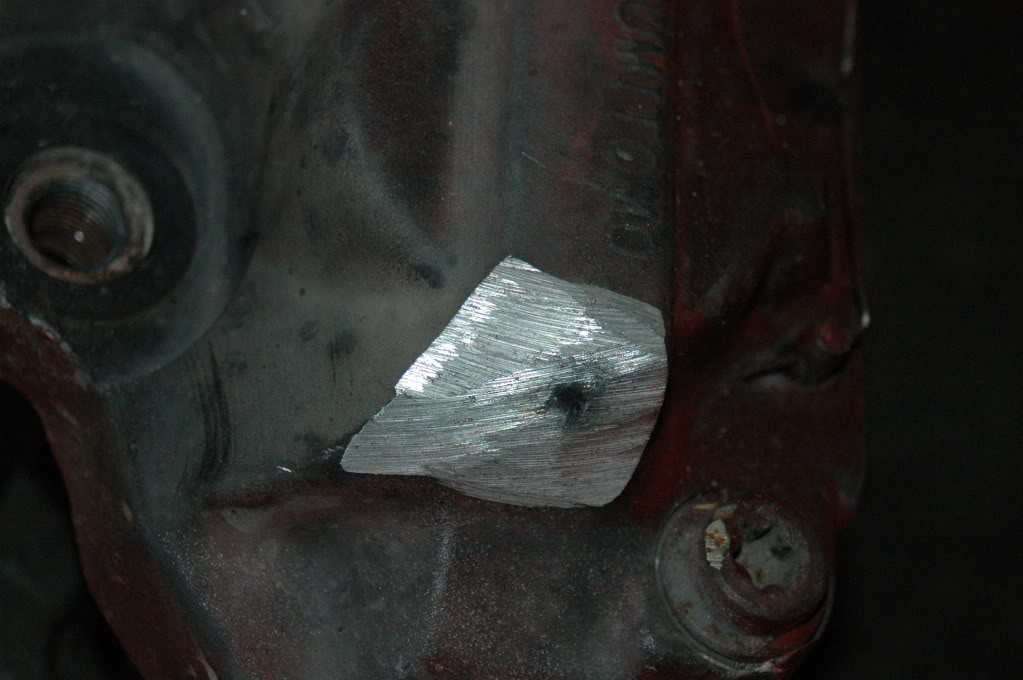
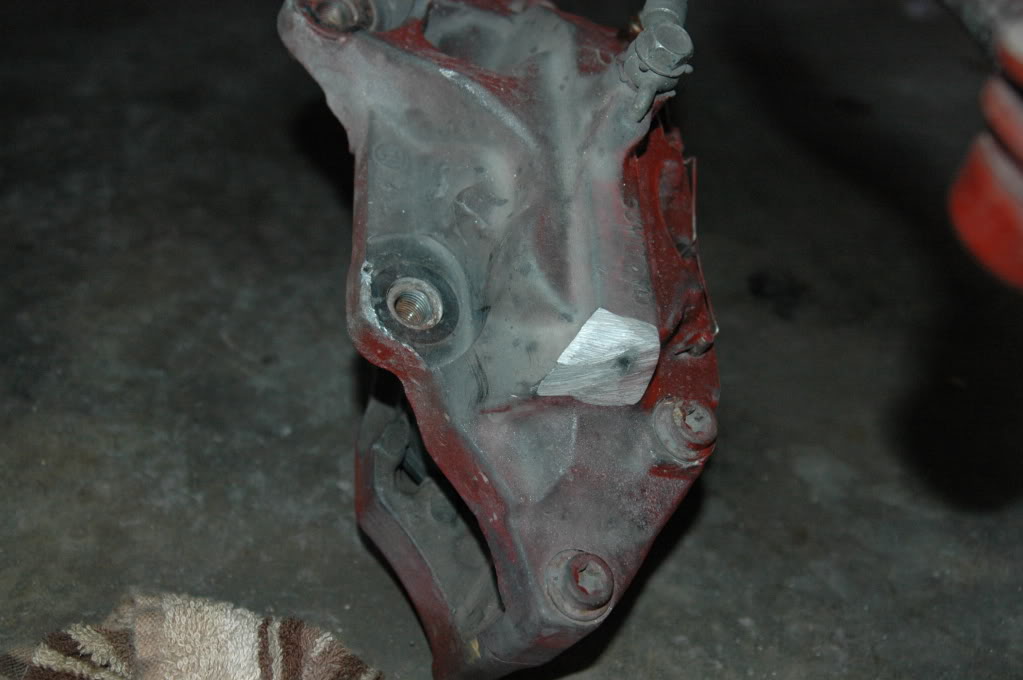
That last picture is just to show you what you are still left with. You do not have to grind very much of that!
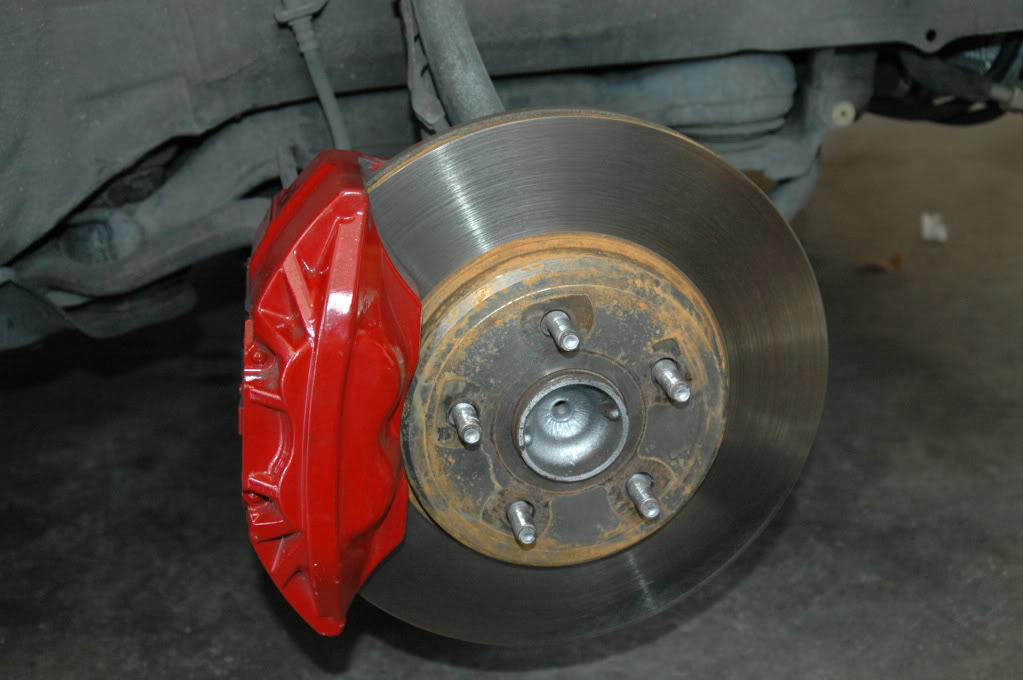
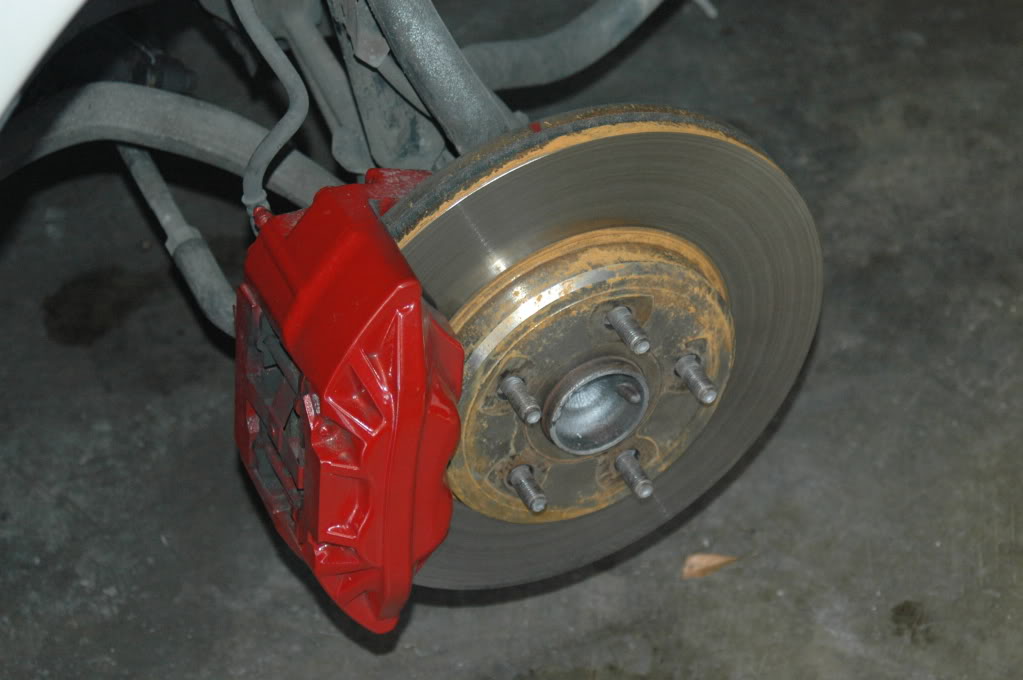
Step 10: Install rotor then put caliper on top, and bolt her in!
Step 11: Install brake line (make sure to get the copper washers on there!)
Step 12: Bleed the brakes. This part is a PAIN! If you have access to a power bleeder-I suggest using it. Otherwise do it like I did, and basically use a big bottle of brake fluid. Make sure not to run the master cylinder out of fluid else you run the risk of getting air in the ABS pump (which is not good)
Step 13: Test drive! Don't forget to torque your wheels! I use 90 ft/lbs
These calipers are one of the best modifications I have done to my car. They work really well, and stop extremely quick! If you have any problems, shoot me a PM or post up here in the thread. I don't mind answering questions! Hope you enjoy your new brakes!
I have personally had these brakes for 1,000 miles so far (good lord, how time flies). I feel like I just did them yesterday, and they perform extremely well. I have done 120mph to 0 in the matter of seconds. No shaking, and it barely uses ABS.
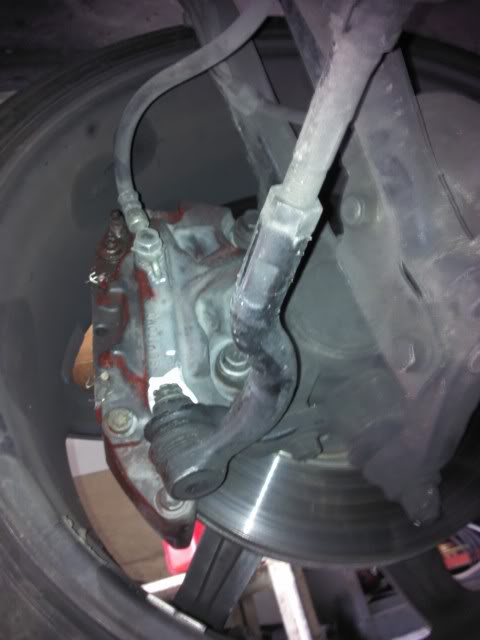
Extra pictures just to help
First I would like to throw out a reason why I decided to grind and not use RCA's.
The LS400 conversion is a brake conversion for people on a budget. I am on a budget, and if I can do it within the realm of safety, I will do it. The reason I did not use RCA's is because the cost of them plus the LS conversion superceeds the cost of Supra TT conversion which is better. The cost of 17mm RCA is $180 from Figs.
If you are not on a budget or not interested in grinding, you can use the supra TT calipers which, from what I understand, do not require modification to fit. These calipers can be had for less than you can buy LS400 calipers and RCA's for. The supra calipers also have better rotor and pad options.
Prices:
LS400 calipers used $160 shipped with all hardware
LS400 Rotors and "gold" pads from Advance auto parts online $109 with coupon (BIG30)
Brake fluid $9.99
Total $278.99
A couple of disclaimers:
-Grinding the caliper may render your caliper inoperable. Please use extreme caution when grinding the caliper, to not grind too far.
-I am in no way responsible for what you do to your car, this is strictly informative.
Great-now that we have that out of the way, lets begin with the conversion!
First off: Tools that are needed for the project
- 17mm socket (I used a deep socket)
- 3/8 drive ratchet
- 5" grinder
- Torque wrench (not really needed)
14mm socket (I too used a deep socket)
***IMPORTANT*** Safety glasses (seriously....not trying to be all safe and such, but these are 100% necessary)
Brake fluid (big bottle)
Step 1: Remove wheel
Alright-now that you have the wheel off, you are left with your crappy stock GS calipers. In order to remove them you will need a 17mm socket, 14mm socket, and the ratchet
Step 2: Loosen the brake line bolt. Its easier to do it while the caliper is still on the car so you don't have to fight with it moving when trying to get that bolt loose.
Step 3: Remove the two bolts (17mm) holding the caliper bracket and remove the whole caliper
Step 4: Remove the brake line (you might want a rag or some type of bucket to drain brake fluid into)
Step 5: remove the rotor. These can be hard to remove at times, a rubber mallet is nice to have if it is stuck on the hub.
Now it is time for the fun, or not so fun, part of grinding and checking clearances.
Step 6: Place rotor onto hub
Step 7: Place caliper on rotor and try to get the top bolt in. If you cannot, proceed to next step. If you can get it in, check the bottom where it is hitting. Make a mark to grind there.
Step 8: Grind SMALL amounts of the caliper and lower bolt and nut. ***REMEMBER TO USE SAFETY GLASSES*** These calipers are aluminum and grind VERY easily. The metal shards are sharp and fly fast. Please do small amounts and check where it is hitting more than a few times, or you risk the chance of ruining the caliper.
Step 9: Place rotor back on and see where the caliper is hitting again, and proceed to grind until you get the caliper to fit properly. You should be left with something that looks like this.
The black residue is not a hole (obviously) it is grease I didn't wipe off.
That last picture is just to show you what you are still left with. You do not have to grind very much of that!
Step 10: Install rotor then put caliper on top, and bolt her in!
Step 11: Install brake line (make sure to get the copper washers on there!)
Step 12: Bleed the brakes. This part is a PAIN! If you have access to a power bleeder-I suggest using it. Otherwise do it like I did, and basically use a big bottle of brake fluid. Make sure not to run the master cylinder out of fluid else you run the risk of getting air in the ABS pump (which is not good)
Step 13: Test drive! Don't forget to torque your wheels! I use 90 ft/lbs
These calipers are one of the best modifications I have done to my car. They work really well, and stop extremely quick! If you have any problems, shoot me a PM or post up here in the thread. I don't mind answering questions! Hope you enjoy your new brakes!
I have personally had these brakes for 1,000 miles so far (good lord, how time flies). I feel like I just did them yesterday, and they perform extremely well. I have done 120mph to 0 in the matter of seconds. No shaking, and it barely uses ABS.
Extra pictures just to help
Last edited by Carfreak70; 03-09-12 at 11:58 AM.

The following users liked this post:
Amel2jzgte (04-24-20)
 03-09-12, 11:43 AM
#3
Nice write up
For those who are not comfortable with grinding FIGS makes 17mm RCA's and SAGE makes 18mm now and they both clear the LS calipers. 1GS and 2GS use the same RCA's in case anyone didn't know. I highly advise against grinding as many people have grind too far causing a pinhole that will leak out the brake fluid. Especially since the calipers are aluminum is easy to grind through them very quickly
For those considering grinding please read this thread
https://www.clublexus.com/forums/gs-...-grinding.html
For those considering grinding please read this thread
https://www.clublexus.com/forums/gs-...-grinding.html
Last edited by Sonic_RC; 03-09-12 at 12:03 PM.
03-09-12, 11:55 AM
#5
I currently have the FIGS 17mm ones and I used to have the SAGE 18mm prototypes but recently sold them but they have the final production ones now.
Here's a link for the FIGS 17mm RCA's
http://shopfigs.com/v1/index.php?rou...&product_id=90
Last edited by DaveGS4; 03-10-12 at 06:23 PM. Reason: Please don't direct sales to non-approved vendor on forum
Trending Topics
 02-11-13, 08:17 AM
#12
Lexus Champion
02-11-13, 09:06 AM
#13
Lexus Champion
Ok I done the following.i put in the bottom bolt to see if it was clearance issue.it bolts on fine.but now the top don't line up.and I'm doing this with the LS rotor off so nothing touches.
