When you click on links to various merchants on this site and make a purchase, this can result in this site earning a commission. Affiliate programs and affiliations include, but are not limited to, the eBay Partner Network.
Is there any way to program the mirrors so they don't move when you put the car in reverse? I think the motors on mine are going out, the drivers side doesn't go down at all and the passenger side does sometimes. Then when you put in drive, I always have to re-adjust the mirrors.
Rusty,
Put your car in reverse, then adjust the mirrors to where you want them while reversing. Then put the car in drive or park. Next time you put the car in reverse, it'll only move to memory from the last time you adjusted while in reverse. Also, when the motor sounds like it's trying to move the mirror but nothing happens, you might have your mirror popped out of place (usually happens when you get your car washed). Just adjust it (will hear pops) until it feels like it's back in place & everything should work as normal. Hope this helps.
Do you know of a NAV system manual for GS350 2007?
Yes, I have a navigation manual that's bigger than the car manual lol. If you're looking for something specific all the information is online at lexus.com
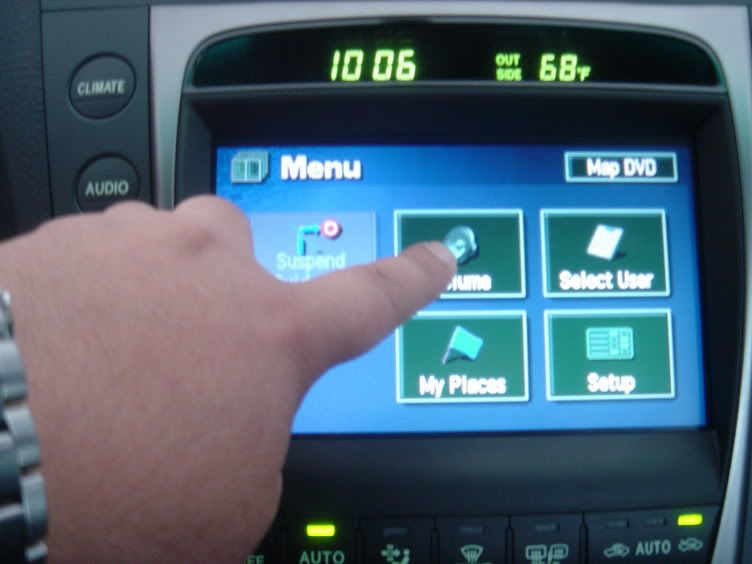
1) Press "Menu" button
2) Press "Volume" on the Nav Screen"
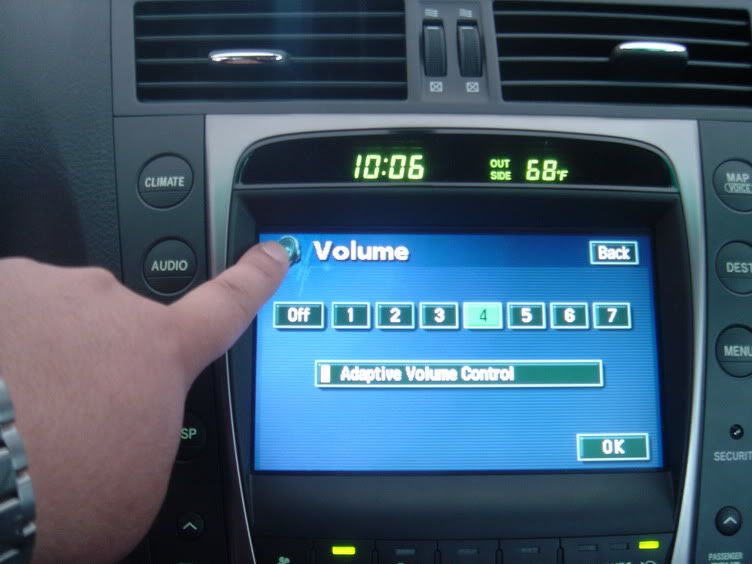
3) Press the "speaker" picture on the top left screen
4) Press the bottom left corner of the screen (it's blank, nothing there)
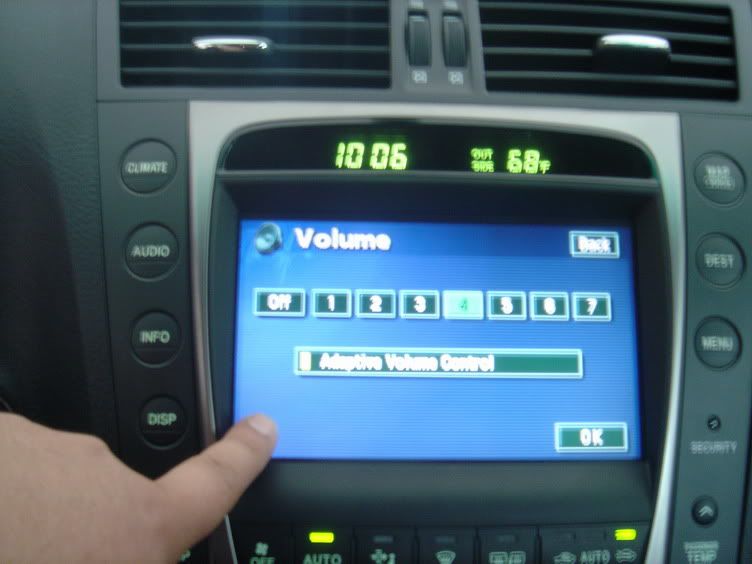
5) Repeat steps 3 & 4
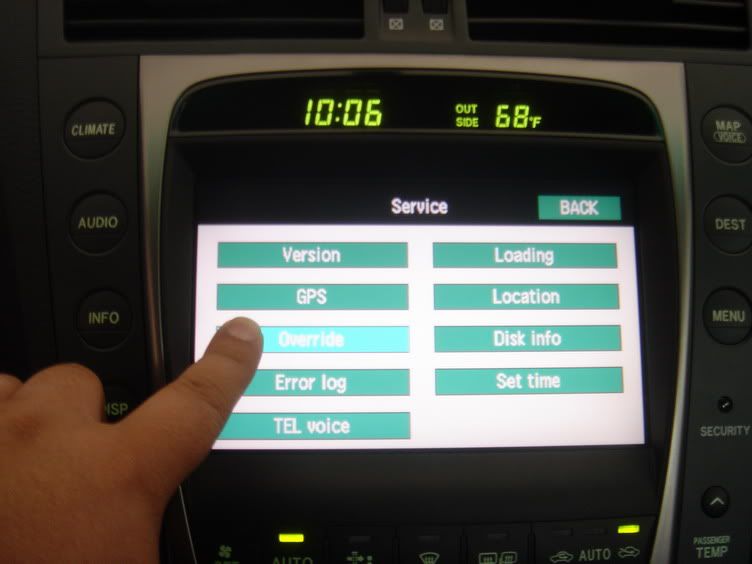
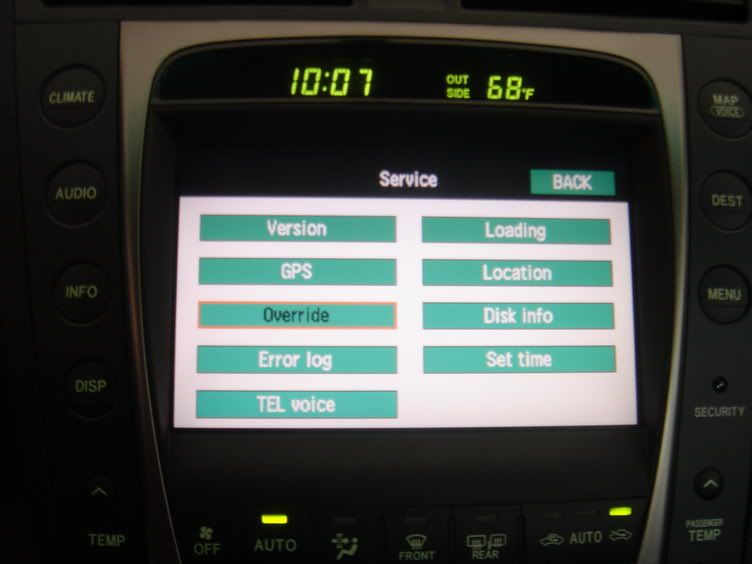
6) A screen should now Appear w/ several functions
7) Find the "Override" button and hold until you hear a "beep"
8) The Override button letters should now be in black as the others are white
9) Press the Back button and you are ready to go!
*** Keep in mind this feature is required to be done everytime you start the vehicle. It will not retain this in memory ***
hey buddy i own a 2007 gs350 awd i have tried it over and over again and it does nothing any help or advice?
Hey guys, I think someone was asking how to stop the side view mirrors from going down when the car is in reverse.
I figured it out - open the console where you adjust the mirrors. You know you have to press L to adjust the left mirror and R to adjust the right, press the R once so the selections goes to the right and then press the R again. the light will turn off on which mirror is active and now the mirrors wont go down when in reverse.
Does this procedure also work for getting to DRL/high beams as well or why I need to remove whole front bumper to actually get to the DRLs comfortably? Thank you!
Originally Posted by Eternity3G
Here's how to change the inner bulb (parking/driving light - whatever it's called) Keep in mind, the day-time running lights are acutally the high-beams running at a lower wattage. This mod only changes the color of the lights when the actual headlights are on.
1) Follow steps in previous "How-to" to remove engine covers.
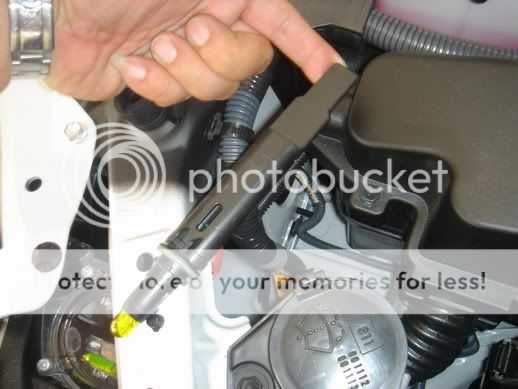
2) Locate light socket housing. You can locate the mini-wedge 168 style bulb in the inner set of circle lights from the outside of the light and follow the bulb back to get to the socket. It's SUPER long.
3) Once you find the socket, twist to loosen and pull out.
4) Remove bulb and replace with new bulb (small wedge/168-style)
5) Re-insert socket and twist to tighten.
6) Replace engine cover and -Done-!
(Smoky effect is secret cancer stick trick.. do at your own risk)
What is the Part No. for the Right Engine Cover Screw rivet/clip
Help,
The Lexus dealer did not have the part and refused to give me the part number.
I tried going to Toyota but they needed the Lexus part no.
Attached is a picture from this forum showing the screw.
I have a 2010 Lexus GS350.
Thanks
The lower door molding on front passenger side door of my son's GS430 had pulled loose. I tried repairing it using 3M double sided molding tape, that would hold for a month or two but would eventually come loose too. I decided to break the remaining tabs off the molding piece and repair it correctly. Once the molding was off, I cleaned all parts up using rubbing alcohol and glued the broken tabs back on using Clear Gorilla Glue and clamping them into place until they had cured. I then removed the white retainer clips by carefully breaking the tabs inside the door and removing the remainder of the tab from the door panel. I purchased new retainer tabs and placed them into the repaired tabs of the molding and placed 3M double sided molding tape on the two end tabs as it was originally. You need to check the spacing of the molding between the front and rear doors and adjusting the white tabs prior to inserting the assembly into the holes in the door. I'd guess the entire process took about an hour in total over a few days time to allow the glue to cure. Link and photos below.
Door without molding showing molding mounting hole. Repaired tab with new retainer Repaired tab with new retainer and 3M molding tape New tabs from Amazon.com pic of new tabs Done....
Push the "invisible" button, but headrest not move at all
Originally Posted by SGT
Credit goes to VVT-i:
The driver side headrest will move up or down automatically when you adjust the driver seat forward or backward. But you can adjust the driver seat manaully by press this little button on the right hand side of the seat.
hi, found the button ,but after pressing it hard, the headrest doesn't move one bit.

 05-14-14, 08:49 AM


 any help or advice?


")