
DIY climate control LED
 09-03-06, 07:29 PM
#1
Lead Lap
Thread Starter
iTrader: (1)
Join Date: Aug 2005
Location: FL
Posts: 771
Likes: 0
Received 0 Likes
on
0 Posts
sorry no pics i have no cam....
so if yr actually thinkin aobut doin it..
its pretty straight forward...
once the climate control is out of car, take it apart, few screws, few clips, once you have the circuit board out with the white plastic frame the LCD and the LEDs soldered on there are what hold it together...
go to a radioshack store n get a desolder gun, and a 40watt solderin iron.. the desoldering gun will make this MUCH MUCH easier... i suggest knowing how to solder and having steady hands as you will have to desolder and resolder about 30 pins real close to each other...
once you desolder the LCD remove it, obviously dont force it, dont crack it, be gentle, make sure all solder is removed and the pins are free moving,
desolder the LED;s paying attention which side is posetive... its left looking straight on..
if looking straight on the bottom connection is posetive the the lights in the back of the circuit board.
so what i did.. there are 8 lights in the panel.. all regular 12v dc amber bumbs with a green condom.. they are held in a lil plastic cup piece.
i took all the lights out and drilled a hole thru each of those. keeping the cup functional just with a str8 hole..
i used 20 (spectrum LEDs off ebay with 15k mcd i think and a 60 degree radius prewired with wires and resistors)
so the design witht he OEM lights uses all kinds of reflection n stuff which dont work well with LEDS.
so i had to break some stuff...
i drilled holes on each side of the 3 holes for the LCD display and used a total of 8 leds for that section. and also used a reflective material to make it even more brighter.. cut a piece out form my black l ight fixture
so BTW i used hot glue to hold the leds in place.
the 3 middle lights for the LCD i wired directly into the other lights as i noticed that they get a little less voltage so it was a little dimmer.
soi i just slipped the LED directly thru the holes that i drilled, stripped the wire and looped it exactly as the old lights were in there.. it kind of slips into its hole and twists as the wires get contact for power. however i broke ooff pieces of the reflection system and used one LED per button. if yr mechanical youll figure it out once you get there.
..then just solder everythn back, make sure nuthn is shorting out.. and violah.1!!
FYI i used 5mm lights for everything.. and the small LEDs i replaced too with 3mm white ill try n snap a shot with my cam..

Trending Topics
09-03-06, 07:41 PM
#8
Lead Lap
Thread Starter
iTrader: (1)
Join Date: Aug 2005
Location: FL
Posts: 771
Likes: 0
Received 0 Likes
on
0 Posts
BTW only the 3 white middle cups have led in them now... the other black ones except the bottom middle one have wires running thru them for power to the separate leds i paired;as it made sence to the design.
 09-05-06, 04:31 AM
#12
Lead Lap
Thread Starter
iTrader: (1)
Join Date: Aug 2005
Location: FL
Posts: 771
Likes: 0
Received 0 Likes
on
0 Posts
allmy phone camera takes as a picture is a big white blob....
its really bright.. i have no hot spots.. it looks exactly like so...
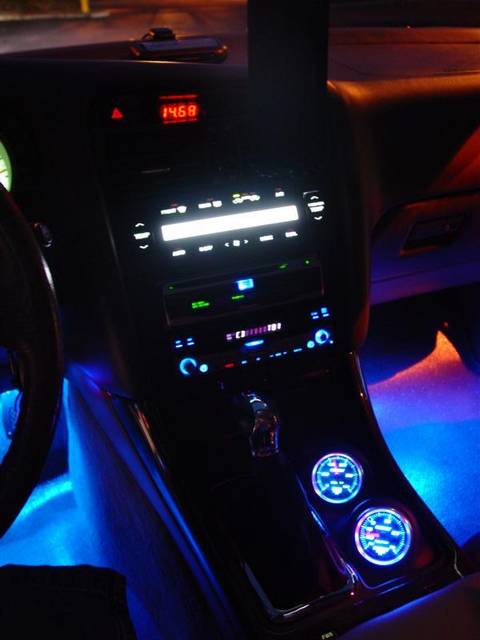
it seems that it might even be a little more brighter.
ill try to take a snap with my friends cam
its really bright.. i have no hot spots.. it looks exactly like so...
it seems that it might even be a little more brighter.
ill try to take a snap with my friends cam