
2jzGTE SCs - The Siblings of my Supra MKIV Toys
 09-01-14, 01:59 PM
#2461

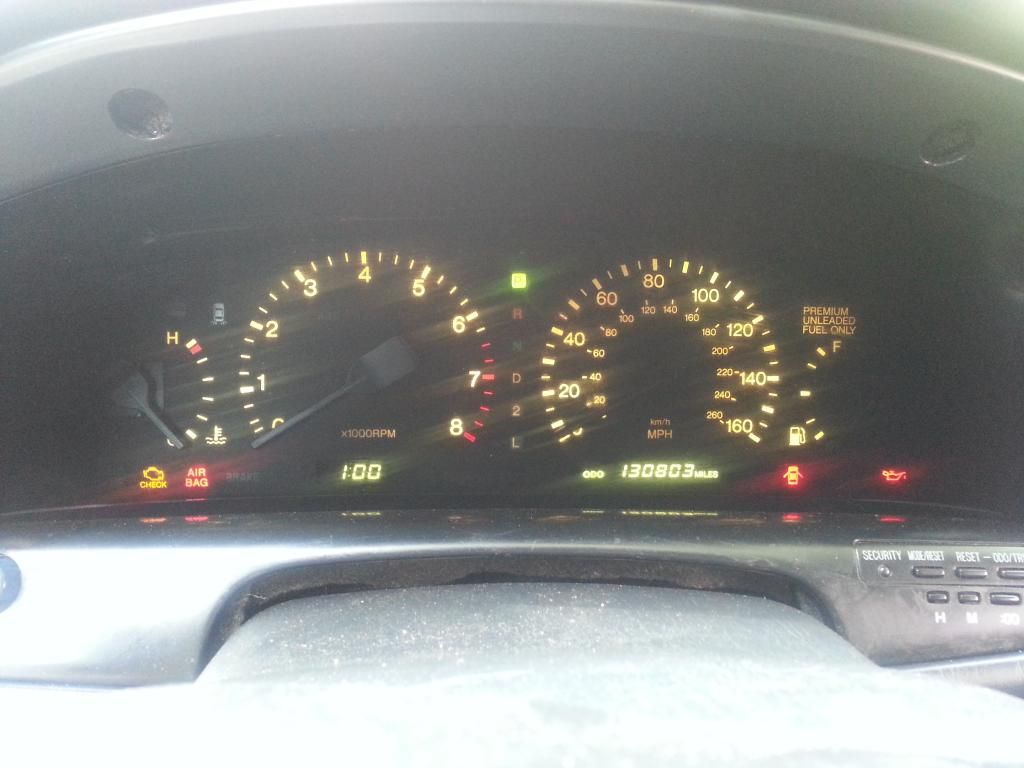
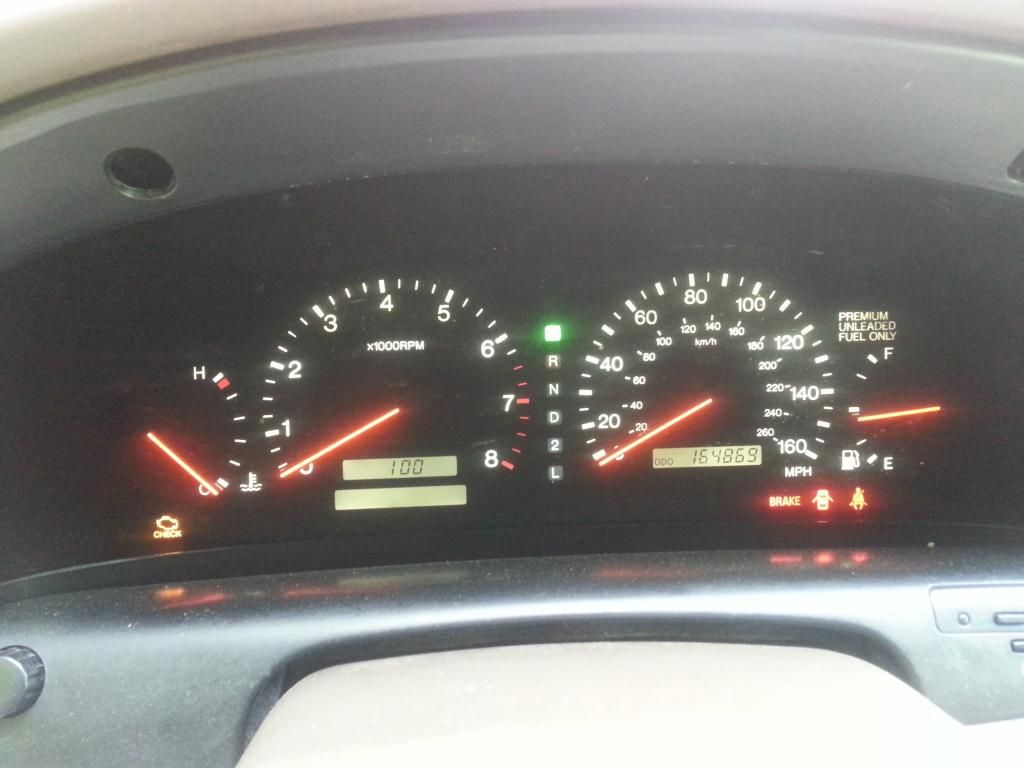
Reasons why I am replacing my 1992 Clusters with 1997 .... burnt lightings / needles
1992
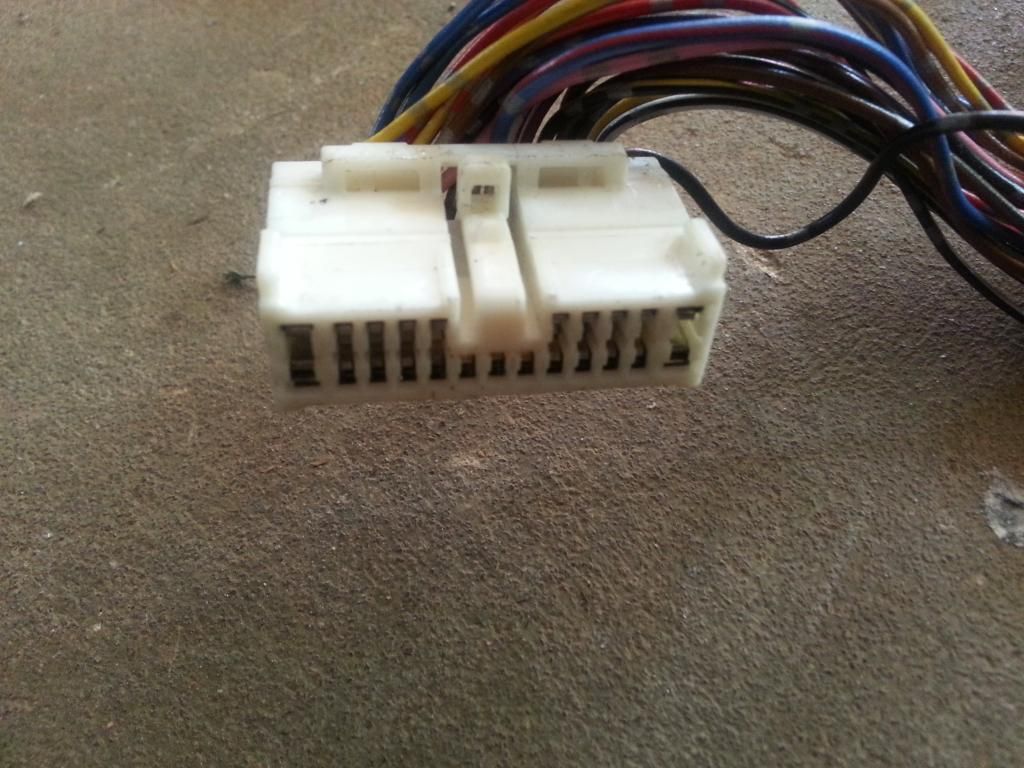
1997
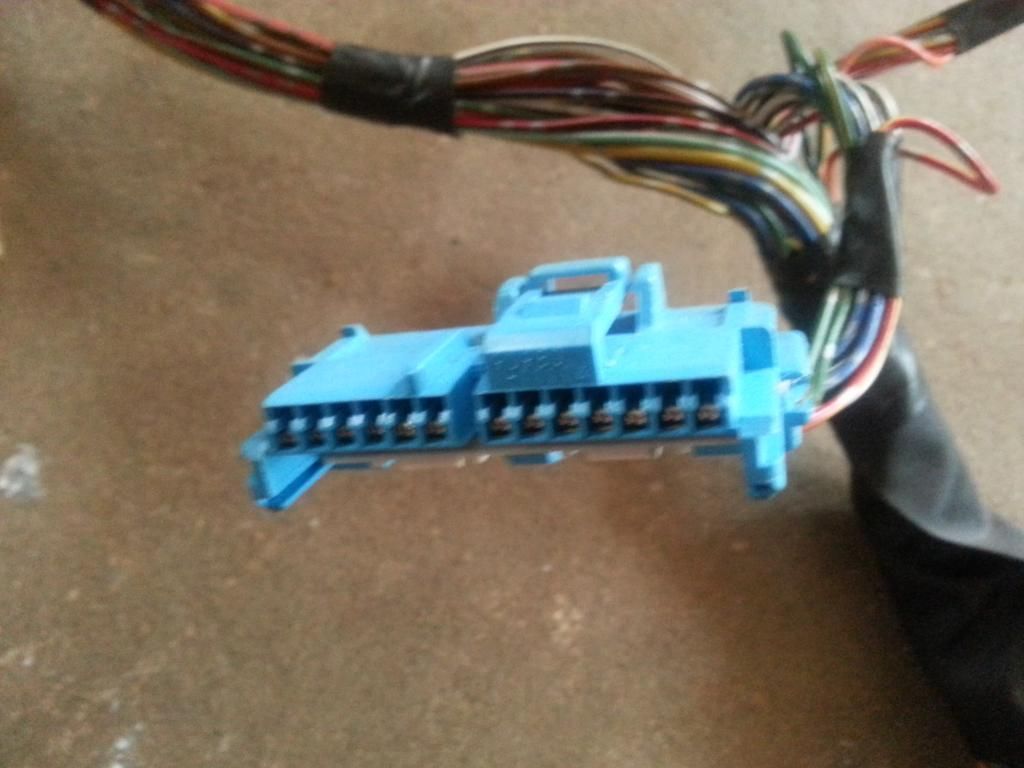
For those who have never seen my 2jzgte Wiring Harness Made Easy Thread, you have to take note that Pin Slot numbering starts on the left with the Connector Lock on Top.
92 Gauge Cluster Connectors
92 Gauge Cluster Connector A - 21 pin slots
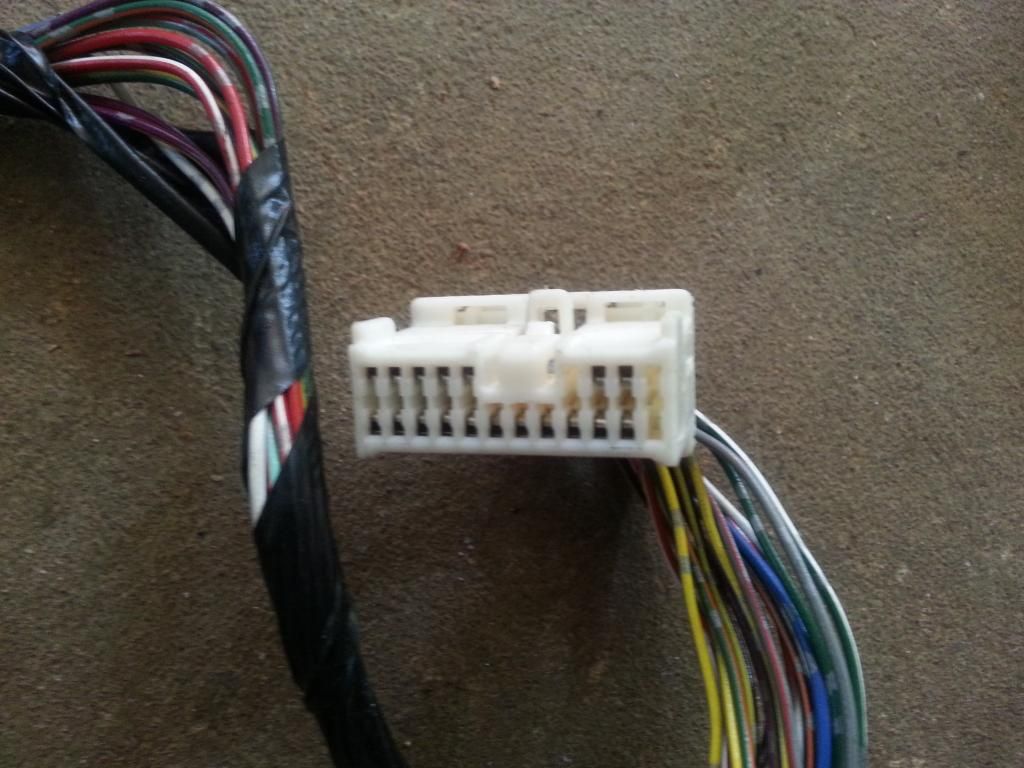
92 Gauge Cluster Connector B - 18 pin slots
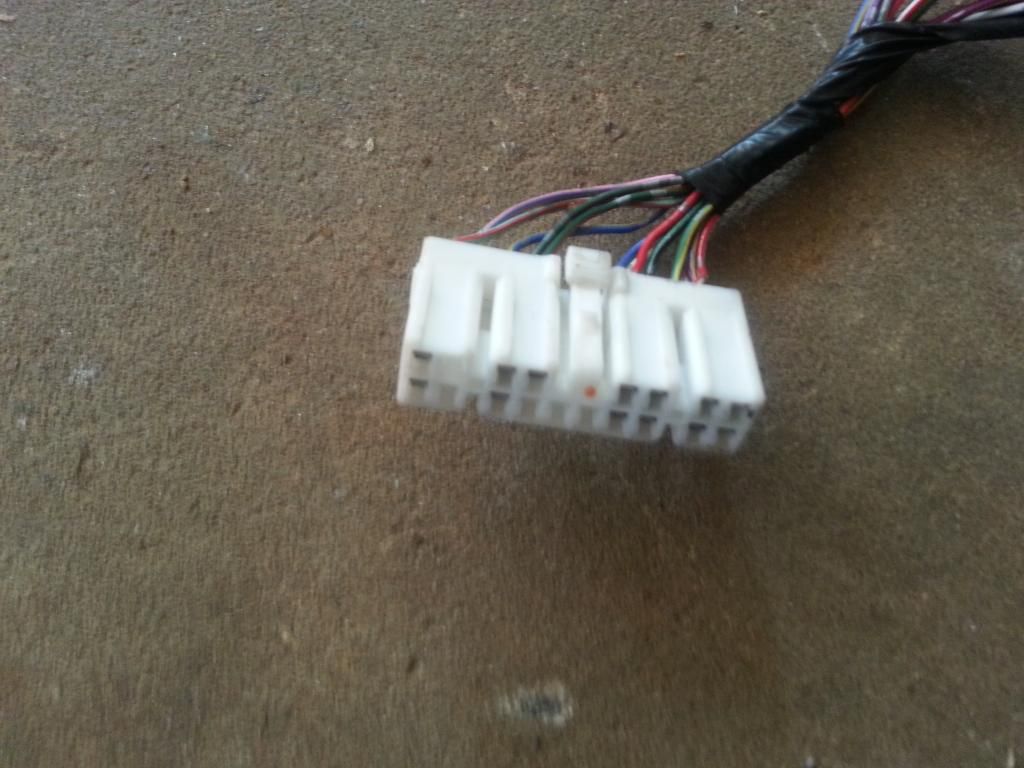
92 Gauge Cluster Connector C - 23 pin slots
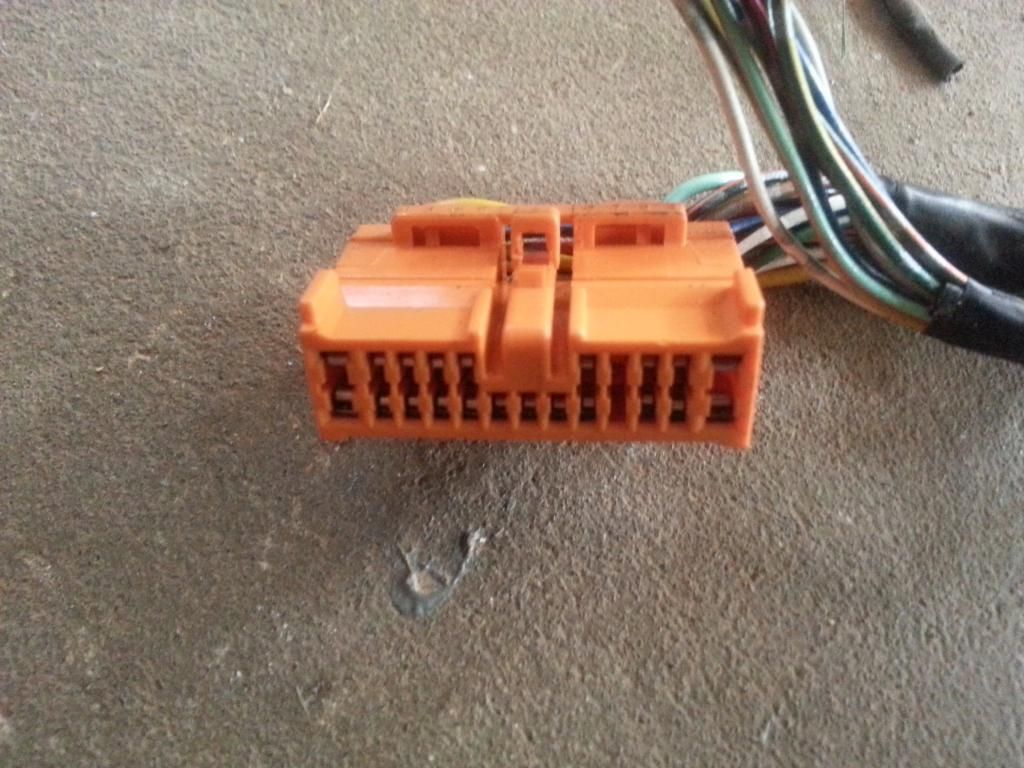
97 Gauge Cluster Connectors
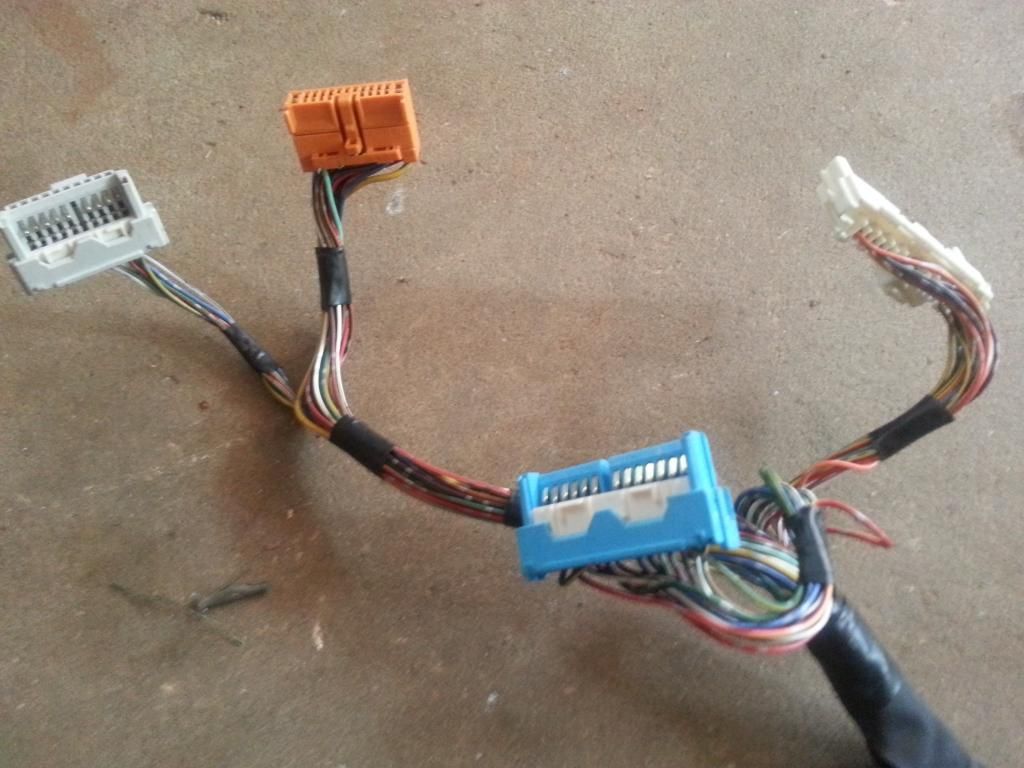
97 Gauge Cluster Connector A - Gray
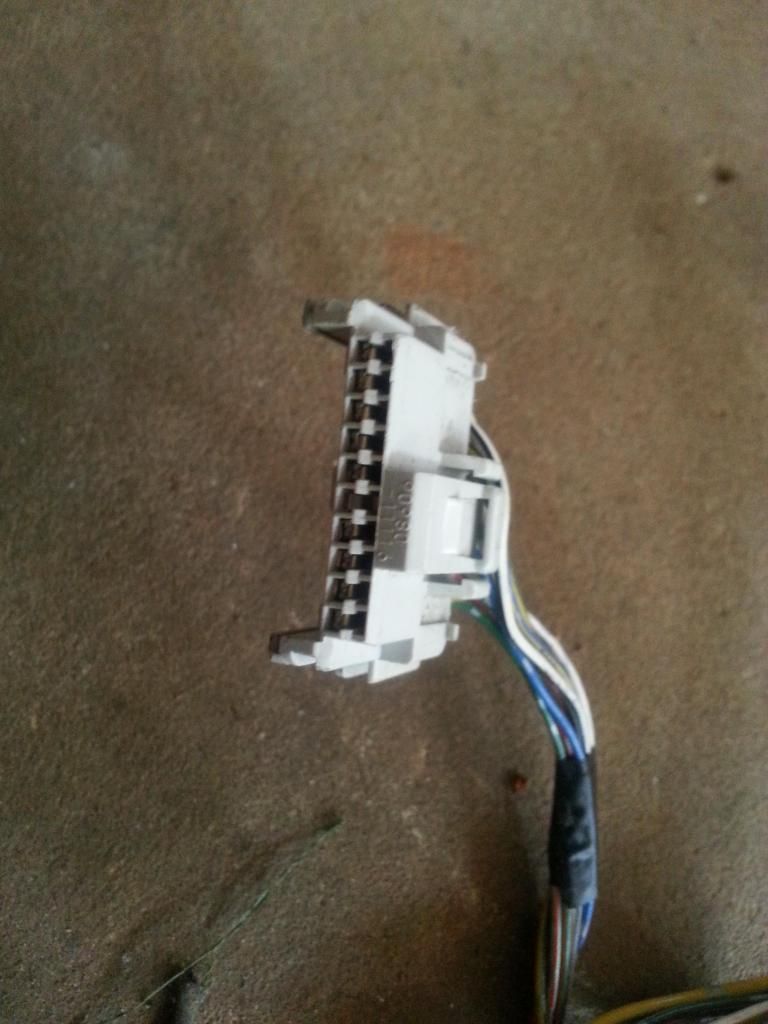
97 Gauge Cluster Connector B - Blue
97 Gauge Cluster Connector C - White
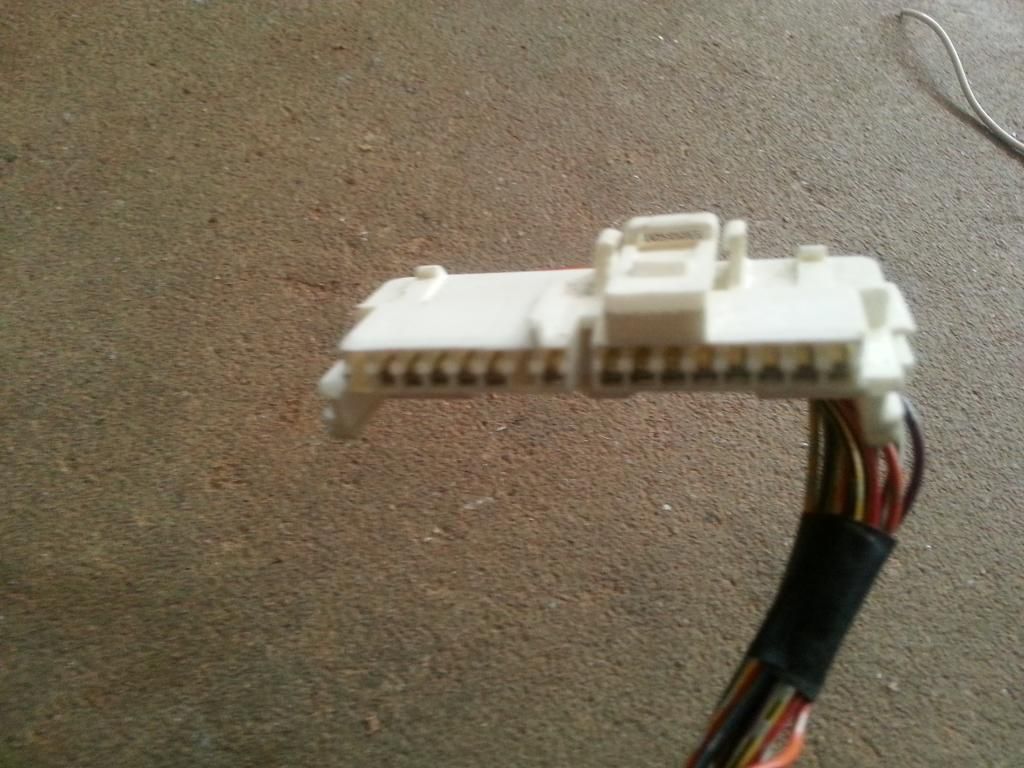
97 Gauge Cluster Connector D - Orange
1992

1997

For those who have never seen my 2jzgte Wiring Harness Made Easy Thread, you have to take note that Pin Slot numbering starts on the left with the Connector Lock on Top.
92 Gauge Cluster Connectors

92 Gauge Cluster Connector A - 21 pin slots

92 Gauge Cluster Connector B - 18 pin slots

92 Gauge Cluster Connector C - 23 pin slots

97 Gauge Cluster Connectors

97 Gauge Cluster Connector A - Gray

97 Gauge Cluster Connector B - Blue

97 Gauge Cluster Connector C - White

97 Gauge Cluster Connector D - Orange

Last edited by gerrb; 09-01-14 at 03:28 PM.
 09-01-14, 02:05 PM
#2462
 , my apologies buddy.. who is this ? I meet a lot of people and I can't keep up with names for which my memory is poor after all in the first place.
Just trying to share so others can save money too
 .
.
Last edited by gerrb; 09-01-14 at 02:21 PM.
09-01-14, 02:51 PM
#2463
Well a big THANK YOU for every one following my build thread !!!!!!!!! I hope you guys have been learning something out of it.
I just realized that it hit over 400,000 clicks / views today after 2 1/2 years (30 months) since I started the thread .
I just realized that it hit over 400,000 clicks / views today after 2 1/2 years (30 months) since I started the thread .
09-01-14, 03:34 PM
#2465
hahahhaha... once I am done with the table on post 2459 and have manually verified the actual harnesses , all you have to do is solder every wire of the new pigtails to the corresponding wire on the old pigtails ... based on what is written on the table
.
09-01-14, 04:58 PM
#2467
That would be a lot of work ... lol
Does anyone have the 97 Sc300/SC400 wiring diagrams in PDF format ? Or can anyone scan the pages of the Combination Meter ? I believe two pages of Page 24.. one is a continuation page. I want to verify some pins of the 97 gauge cluster. Looks like I am missing a page which is the continuation page for the combination meter. And I hate to scour the internet looking for the 97 SC300/SC400 wiring pdf ... got no time for now. I want to finish the gauge cluster conversion table..
you can send the pdf to my email gerrb@att.net .. or snap a picture of both pages and send them to me as picture messages to 7 7 0 six nine six 3345 ...... thanks
Last edited by gerrb; 09-01-14 at 05:03 PM.
09-02-14, 11:14 AM
#2468
Looking forward to the cluster write up....I have been thinking about doing the conversion over 97 style....Not worth it IMO to repair old 92 Cluster and the fact that I have not been able to get the speedometer to work makes me think the motor is shot...
Do you need the entire 97 harness or can you just get the plugs?
Do you need the entire 97 harness or can you just get the plugs?
09-02-14, 11:22 AM
#2469
Looking forward to the cluster write up....I have been thinking about doing the conversion over 97 style....Not worth it IMO to repair old 92 Cluster and the fact that I have not been able to get the speedometer to work makes me think the motor is shot...
Do you need the entire 97 harness or can you just get the plugs?
Do you need the entire 97 harness or can you just get the plugs?
It will be easier for you since you don't need the auto tranny pins / wires.
09-04-14, 02:31 PM
#2470
'
That would be a lot of work ... lol
Does anyone have the 97 Sc300/SC400 wiring diagrams in PDF format ? Or can anyone scan the pages of the Combination Meter ? I believe two pages of Page 24.. one is a continuation page. I want to verify some pins of the 97 gauge cluster. Looks like I am missing a page which is the continuation page for the combination meter. And I hate to scour the internet looking for the 97 SC300/SC400 wiring pdf ... got no time for now. I want to finish the gauge cluster conversion table..
you can send the pdf to my email gerrb@att.net .. or snap a picture of both pages and send them to me as picture messages to 7 7 0 six nine six 3345 ...... thanks
09-05-14, 06:34 PM
#2472
Lead Lap
iTrader: (17)
Join Date: Jan 2010
Location: No longer WOT, I am broke, Gerrb.
Posts: 416
Likes: 0
Received 1 Like
on
1 Post
Mang Gerrb,
Its always nice stopping by at your SC museum. Hahaha... Black Pearl always looking good.. RM1 still a monster even if its multi colored.. I can not wait for that Stroker of yours in one of your SC. Hit me up when that power plant arrive. Definitely want to see it for sure.
Thanks for those parts by the way.
Last edited by PoGikoSc4; 09-05-14 at 06:40 PM.
09-11-14, 08:28 AM
#2473
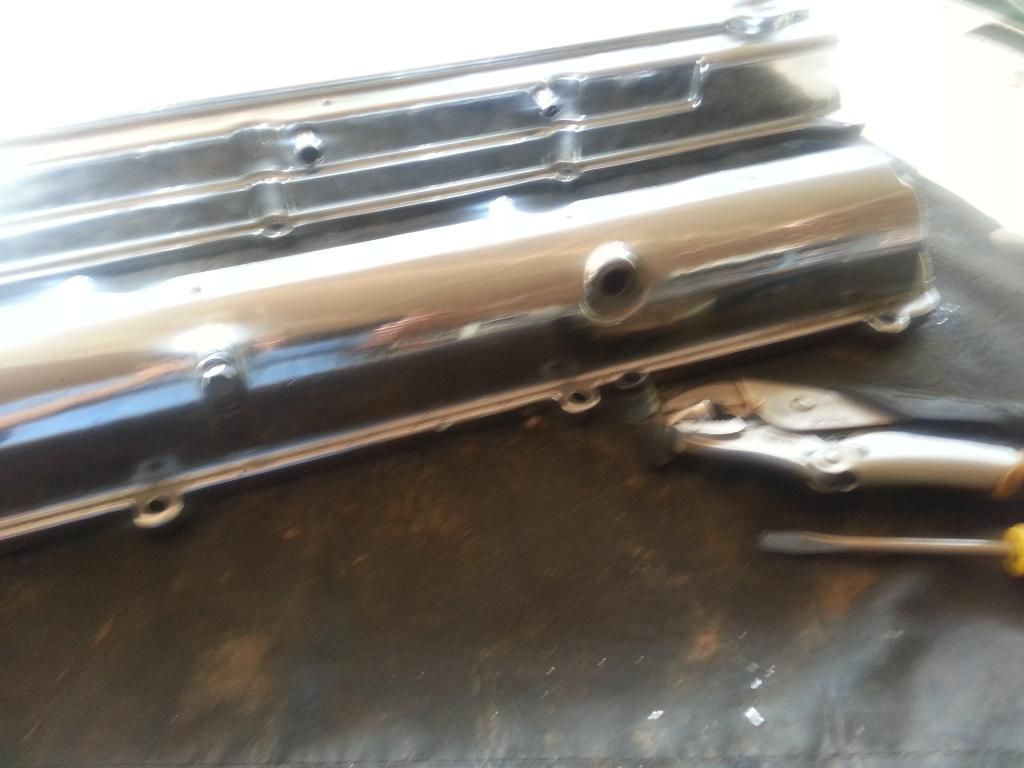
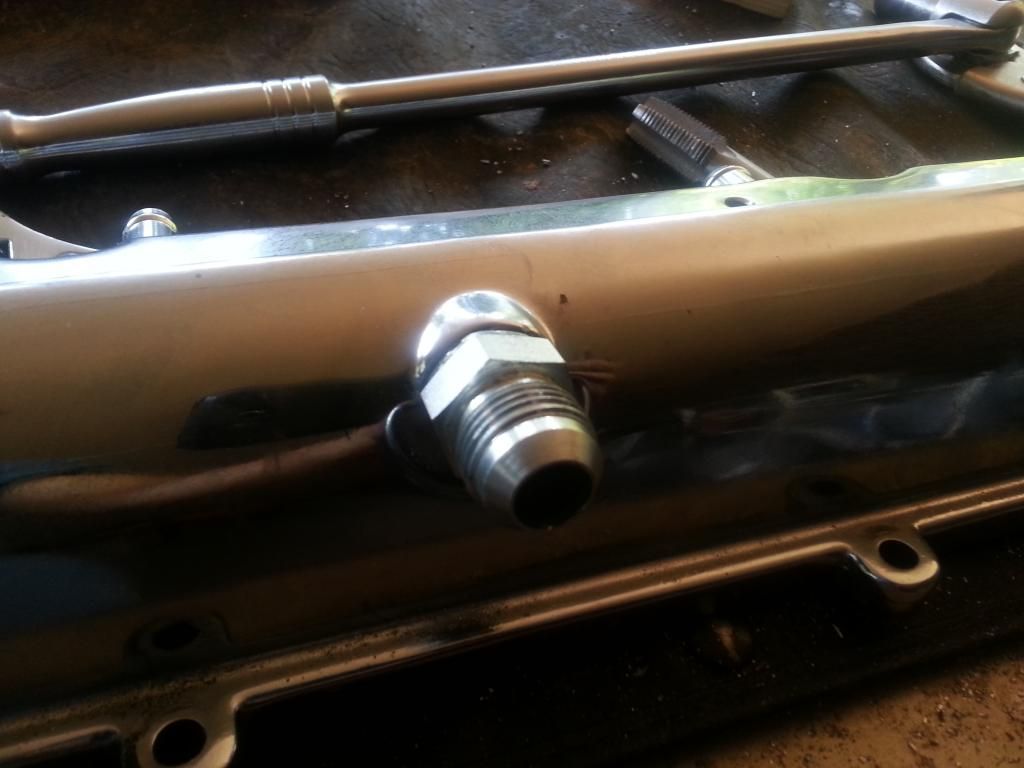
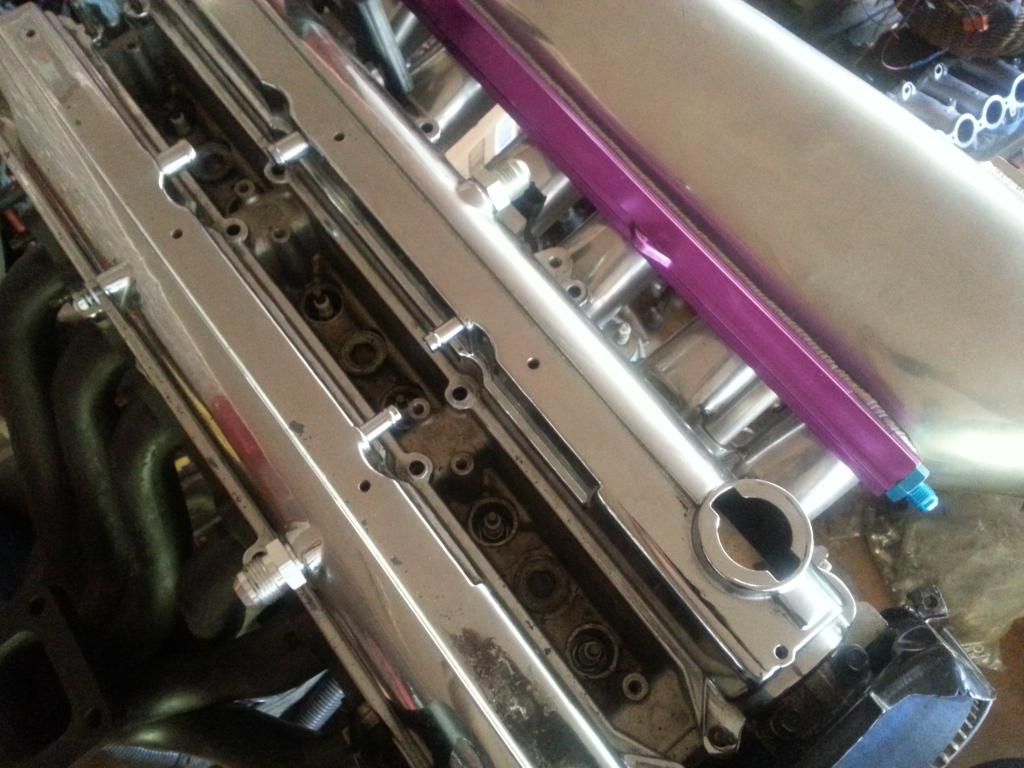
Today, decided to spend some time on the built engine that is going into the other SC300 . I was gonna tap the valve covers for the -10an fittings.
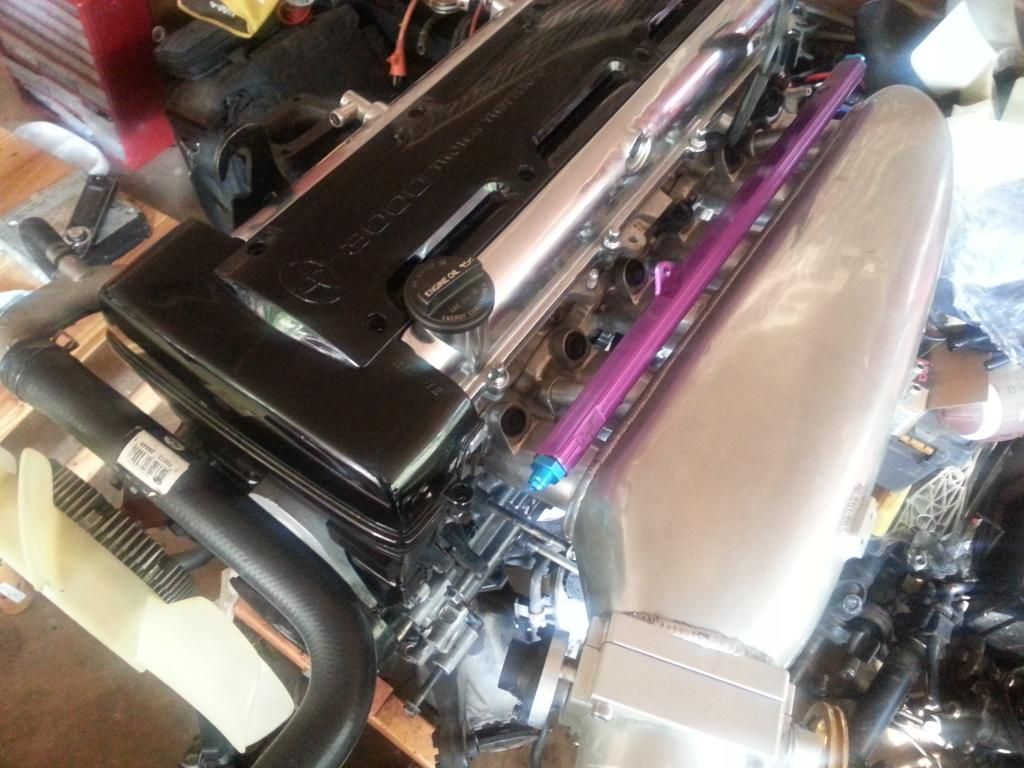
That exhaust valve cover outlet can be pulled out just by twisting it back and forth
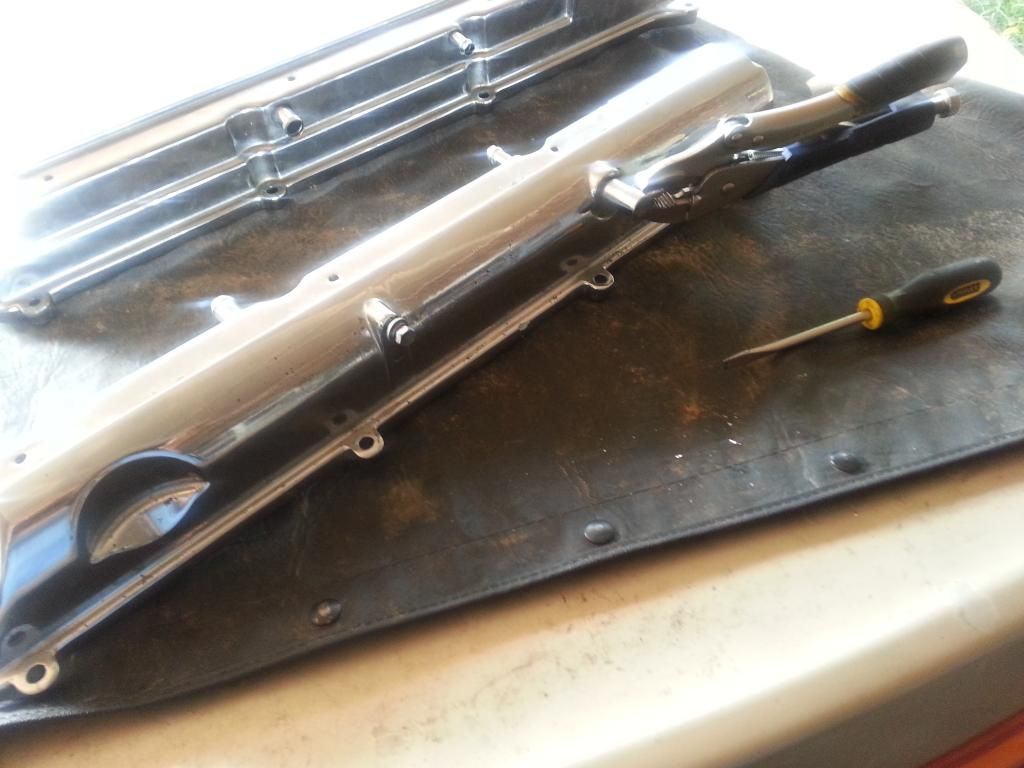
You can get the taps from HB ..less than $20
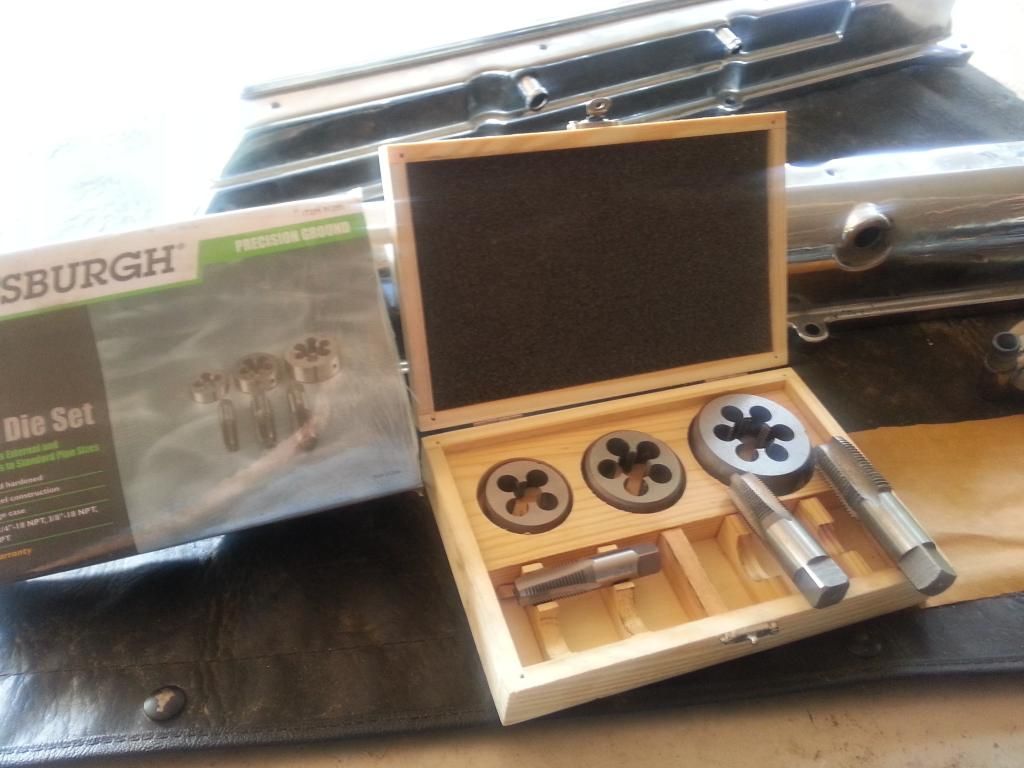
You have to be very careful of metal shavings. I usually make a couple of turns then shake the valve cover downward just to get out the shavings. But surely there will still be some that manage to get in. After the tapping, I usually get a hose and let the water flow from the inside of the valve cover for around 15 minutes so to push out those shavings , then I pour 2 litters of brake fluid from inside to help push shavings out if there are more. The pressurized air will I guess help push stuff out also.
If you don't want to take a risk or are afraid of metal shaving , then just get them welded. I have done the tapping in two of my cars so far and I have no problem.
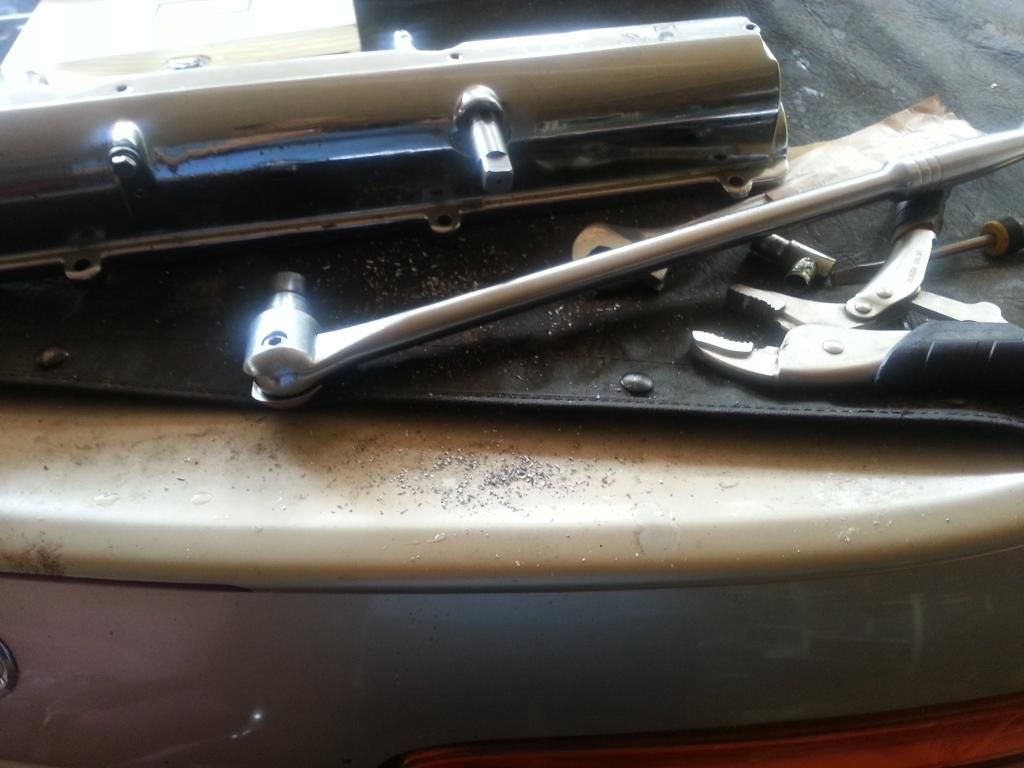
That fitting should screw / bolt on easily .. do not force it otherwise you will hear a pop and will crack your valve cover. If it still doesn't get in easily , then tap it more until you can bolt it in fit and snug without forcing it.
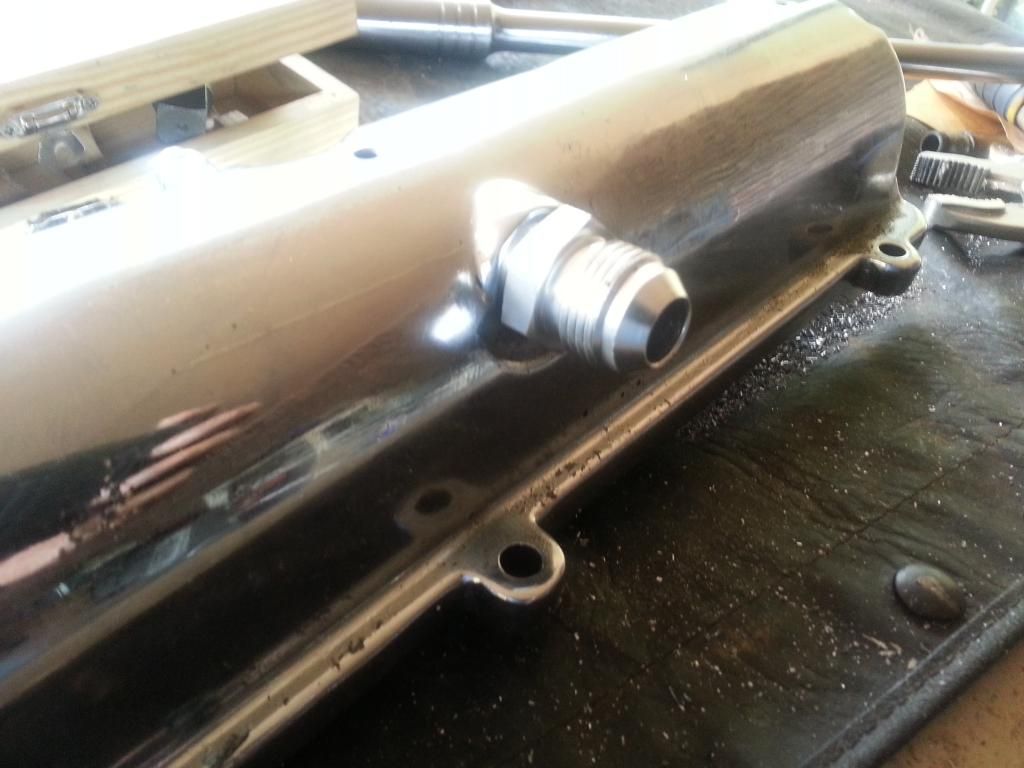
..... got the driver side done... easier cause it has less thread and bigger so it is also easier to mess up so be careful


That exhaust valve cover outlet can be pulled out just by twisting it back and forth


You can get the taps from HB ..less than $20

You have to be very careful of metal shavings. I usually make a couple of turns then shake the valve cover downward just to get out the shavings. But surely there will still be some that manage to get in. After the tapping, I usually get a hose and let the water flow from the inside of the valve cover for around 15 minutes so to push out those shavings , then I pour 2 litters of brake fluid from inside to help push shavings out if there are more. The pressurized air will I guess help push stuff out also.
If you don't want to take a risk or are afraid of metal shaving , then just get them welded. I have done the tapping in two of my cars so far and I have no problem.

That fitting should screw / bolt on easily .. do not force it otherwise you will hear a pop and will crack your valve cover. If it still doesn't get in easily , then tap it more until you can bolt it in fit and snug without forcing it.

..... got the driver side done... easier cause it has less thread and bigger so it is also easier to mess up so be careful


Last edited by gerrb; 09-11-14 at 09:03 AM.
 09-18-14, 07:57 AM
#2475
Thanks  !
!
Engine is ready to rock and roll ,most of the peripherals have been bolted on. I just have to finish the Red Mamba 2 engine bay. I have been shaving it and been lazy to finish it up.. a lot of sanding. But that engine should easily hold 1000rwhp and the best part...my cost on that freaking engine is less than $1500 even with big *** manifold. I have yet to get injectors and turbo for it though.
A friend brought me a 2jzge long block yesterday. Since I have 3 2jz NA short blocks now that are from good running cars , I am tempted to install my extra TT head with a TT head gasket and try an NA-TT into the beige SC and see how far an NA-TT will bring me. I have always wanted to try pushing an NA block after reading some folks making over 900rwhp on a stock NA block. If it pops then install another one....lol... E85 with a good standalone I guess is the secret being at 9.xx compression.
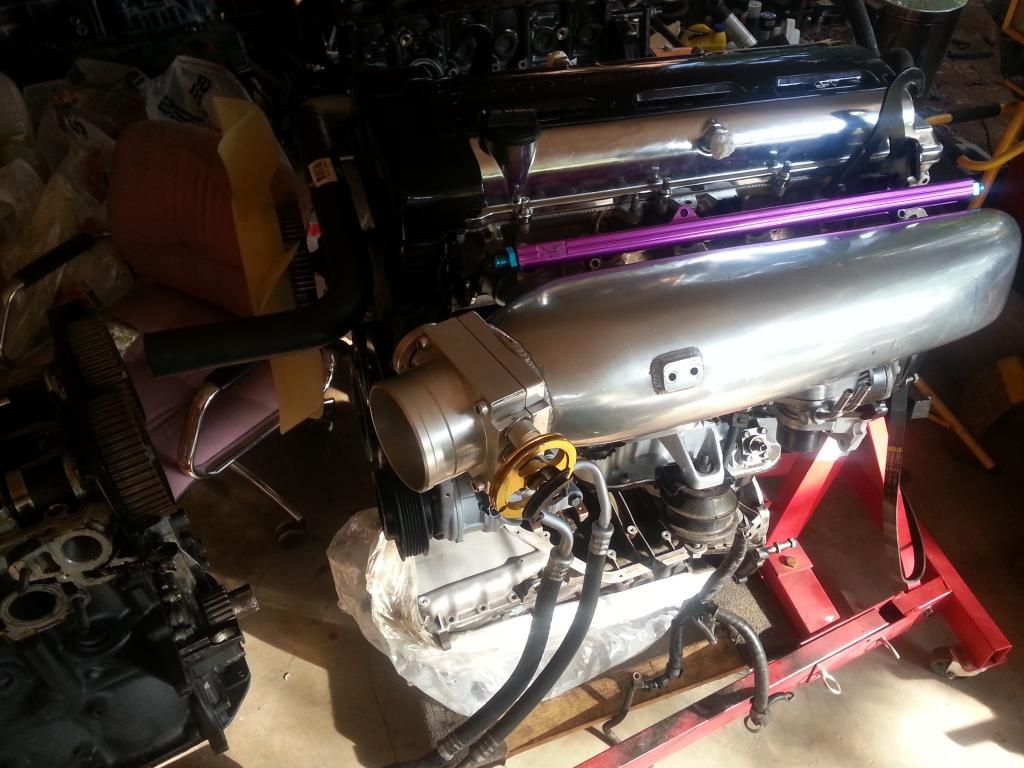
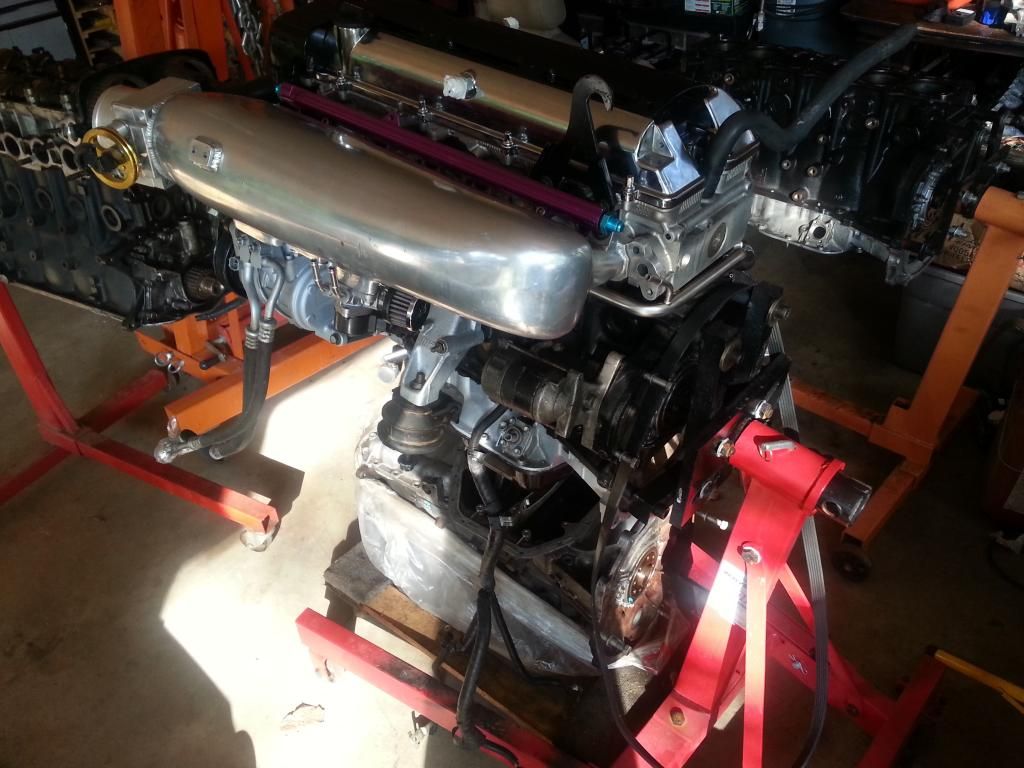
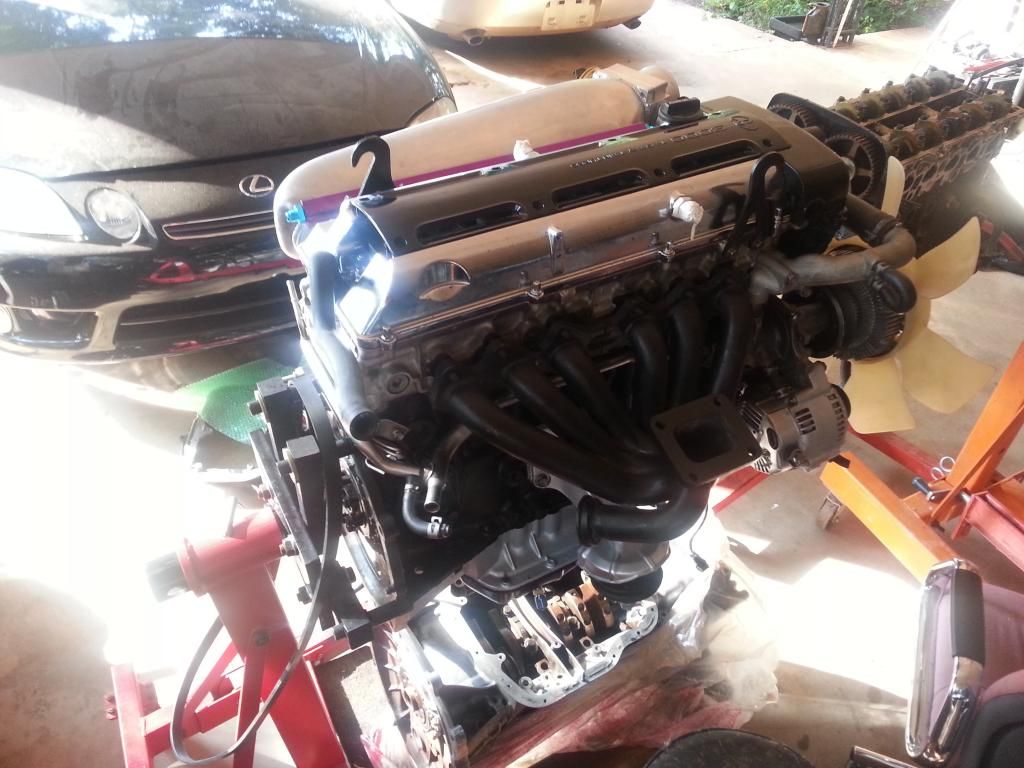
I have really been lazy at working on the Red Mamba 2 engine bay. It is still the same since I stopped working on it 3 months ago, lmaol. But most of the holes have been covered already. At times I honestly think I should have just painted the bay without going through all these shaving... lots of work . I hope it pays off. I would like a clean , tucked finish for this car
!Engine is ready to rock and roll ,most of the peripherals have been bolted on. I just have to finish the Red Mamba 2 engine bay. I have been shaving it and been lazy to finish it up.. a lot of sanding. But that engine should easily hold 1000rwhp and the best part...my cost on that freaking engine is less than $1500 even with big *** manifold. I have yet to get injectors and turbo for it though.
A friend brought me a 2jzge long block yesterday. Since I have 3 2jz NA short blocks now that are from good running cars , I am tempted to install my extra TT head with a TT head gasket and try an NA-TT into the beige SC and see how far an NA-TT will bring me. I have always wanted to try pushing an NA block after reading some folks making over 900rwhp on a stock NA block. If it pops then install another one....lol... E85 with a good standalone I guess is the secret being at 9.xx compression.


I have really been lazy at working on the Red Mamba 2 engine bay. It is still the same since I stopped working on it 3 months ago, lmaol. But most of the holes have been covered already. At times I honestly think I should have just painted the bay without going through all these shaving... lots of work
. I hope it pays off. I would like a clean , tucked finish for this car