Build Threads Details on Club Lexus SC owner vehicles

2000 SC300 Gen V LT build

Thread Tools
 
Search this Thread
 
Old 08-31-20, 01:36 PM
  #1  
shonuff53
Lead Lap
Thread Starter
iTrader: (3)
 
shonuff53's Avatar
 
Join Date: Oct 2007
Location: TX
Posts: 416
Received 14 Likes on 13 Posts
Default 2000 SC300 Gen V LT build

Currently working on a V8 swap into my SC300. Figured I'd share some pictures and details along the way as I've always found helpful information here.

Motor: 5.3L L83 out of a 2015 Silverado
Transmission: T56
Car: 2000 blk/blk SC300

As purchased.


Last edited by shonuff53; 08-31-20 at 01:40 PM.
Old 08-31-20, 02:46 PM
  #2  
shonuff53
Lead Lap
Thread Starter
iTrader: (3)
 
shonuff53's Avatar
 
Join Date: Oct 2007
Location: TX
Posts: 416
Received 14 Likes on 13 Posts
Default

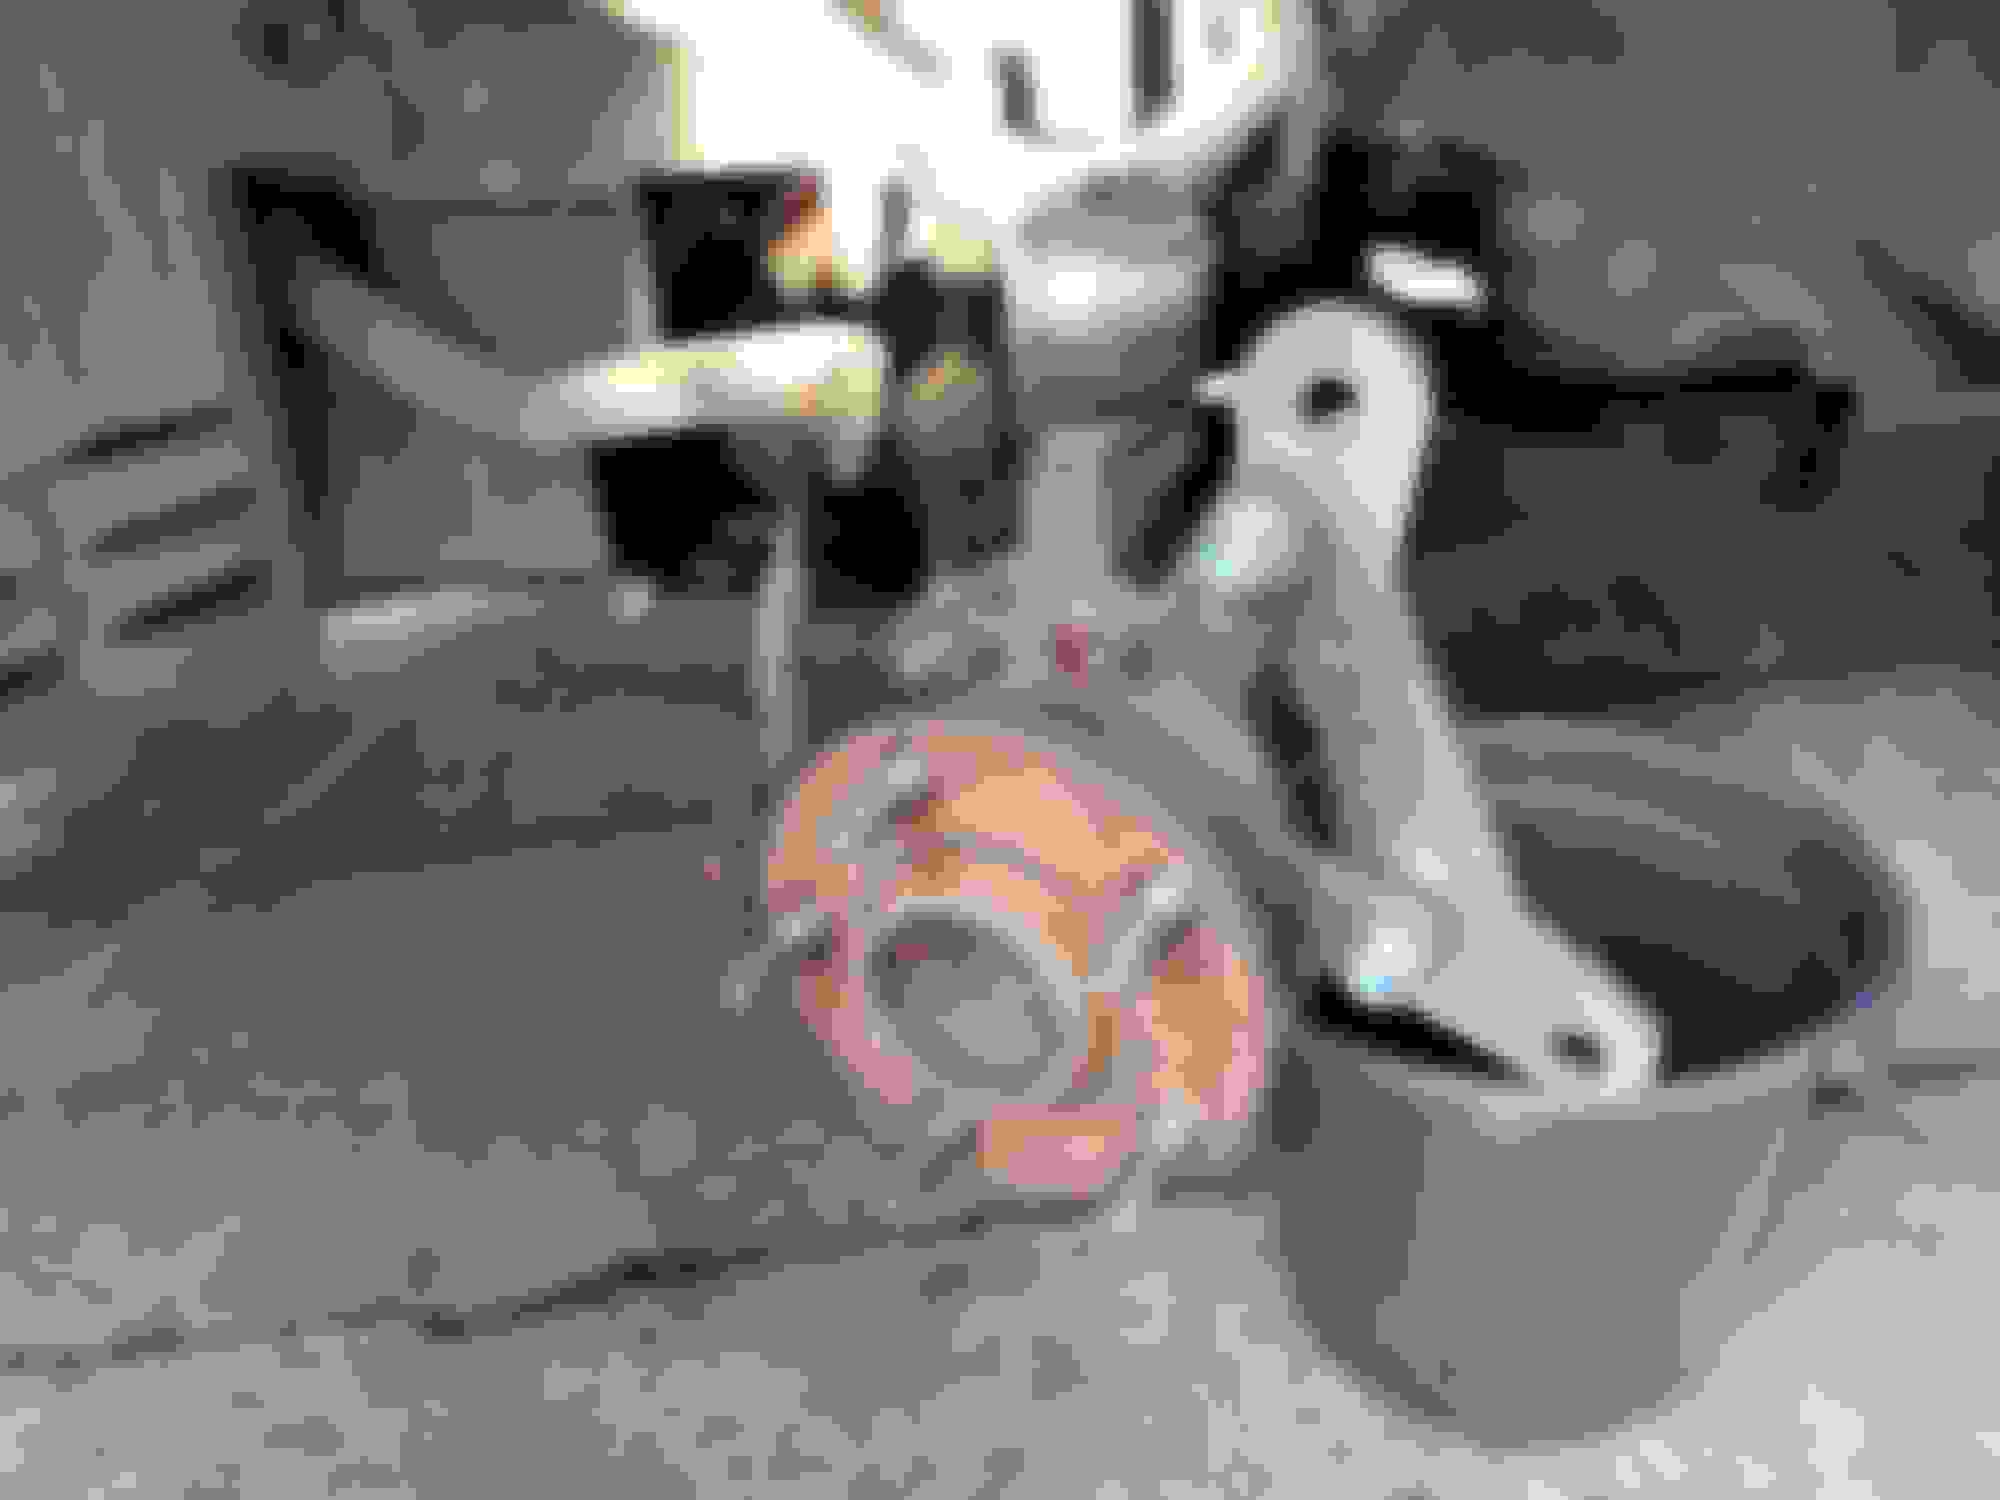
The car was purchased in 2019 and mostly sat for a year while collecting parts for a 2J build. I changed my mind this April to prepare for a LS swap and ended with an LT motor lol. First mod was brakes and wheels. LS460 brakes and some SVE 19x10s squared (probably too big).


Old 09-01-20, 09:37 AM
  #3  
shonuff53
Lead Lap
Thread Starter
iTrader: (3)
 
shonuff53's Avatar
 
Join Date: Oct 2007
Location: TX
Posts: 416
Received 14 Likes on 13 Posts
Default

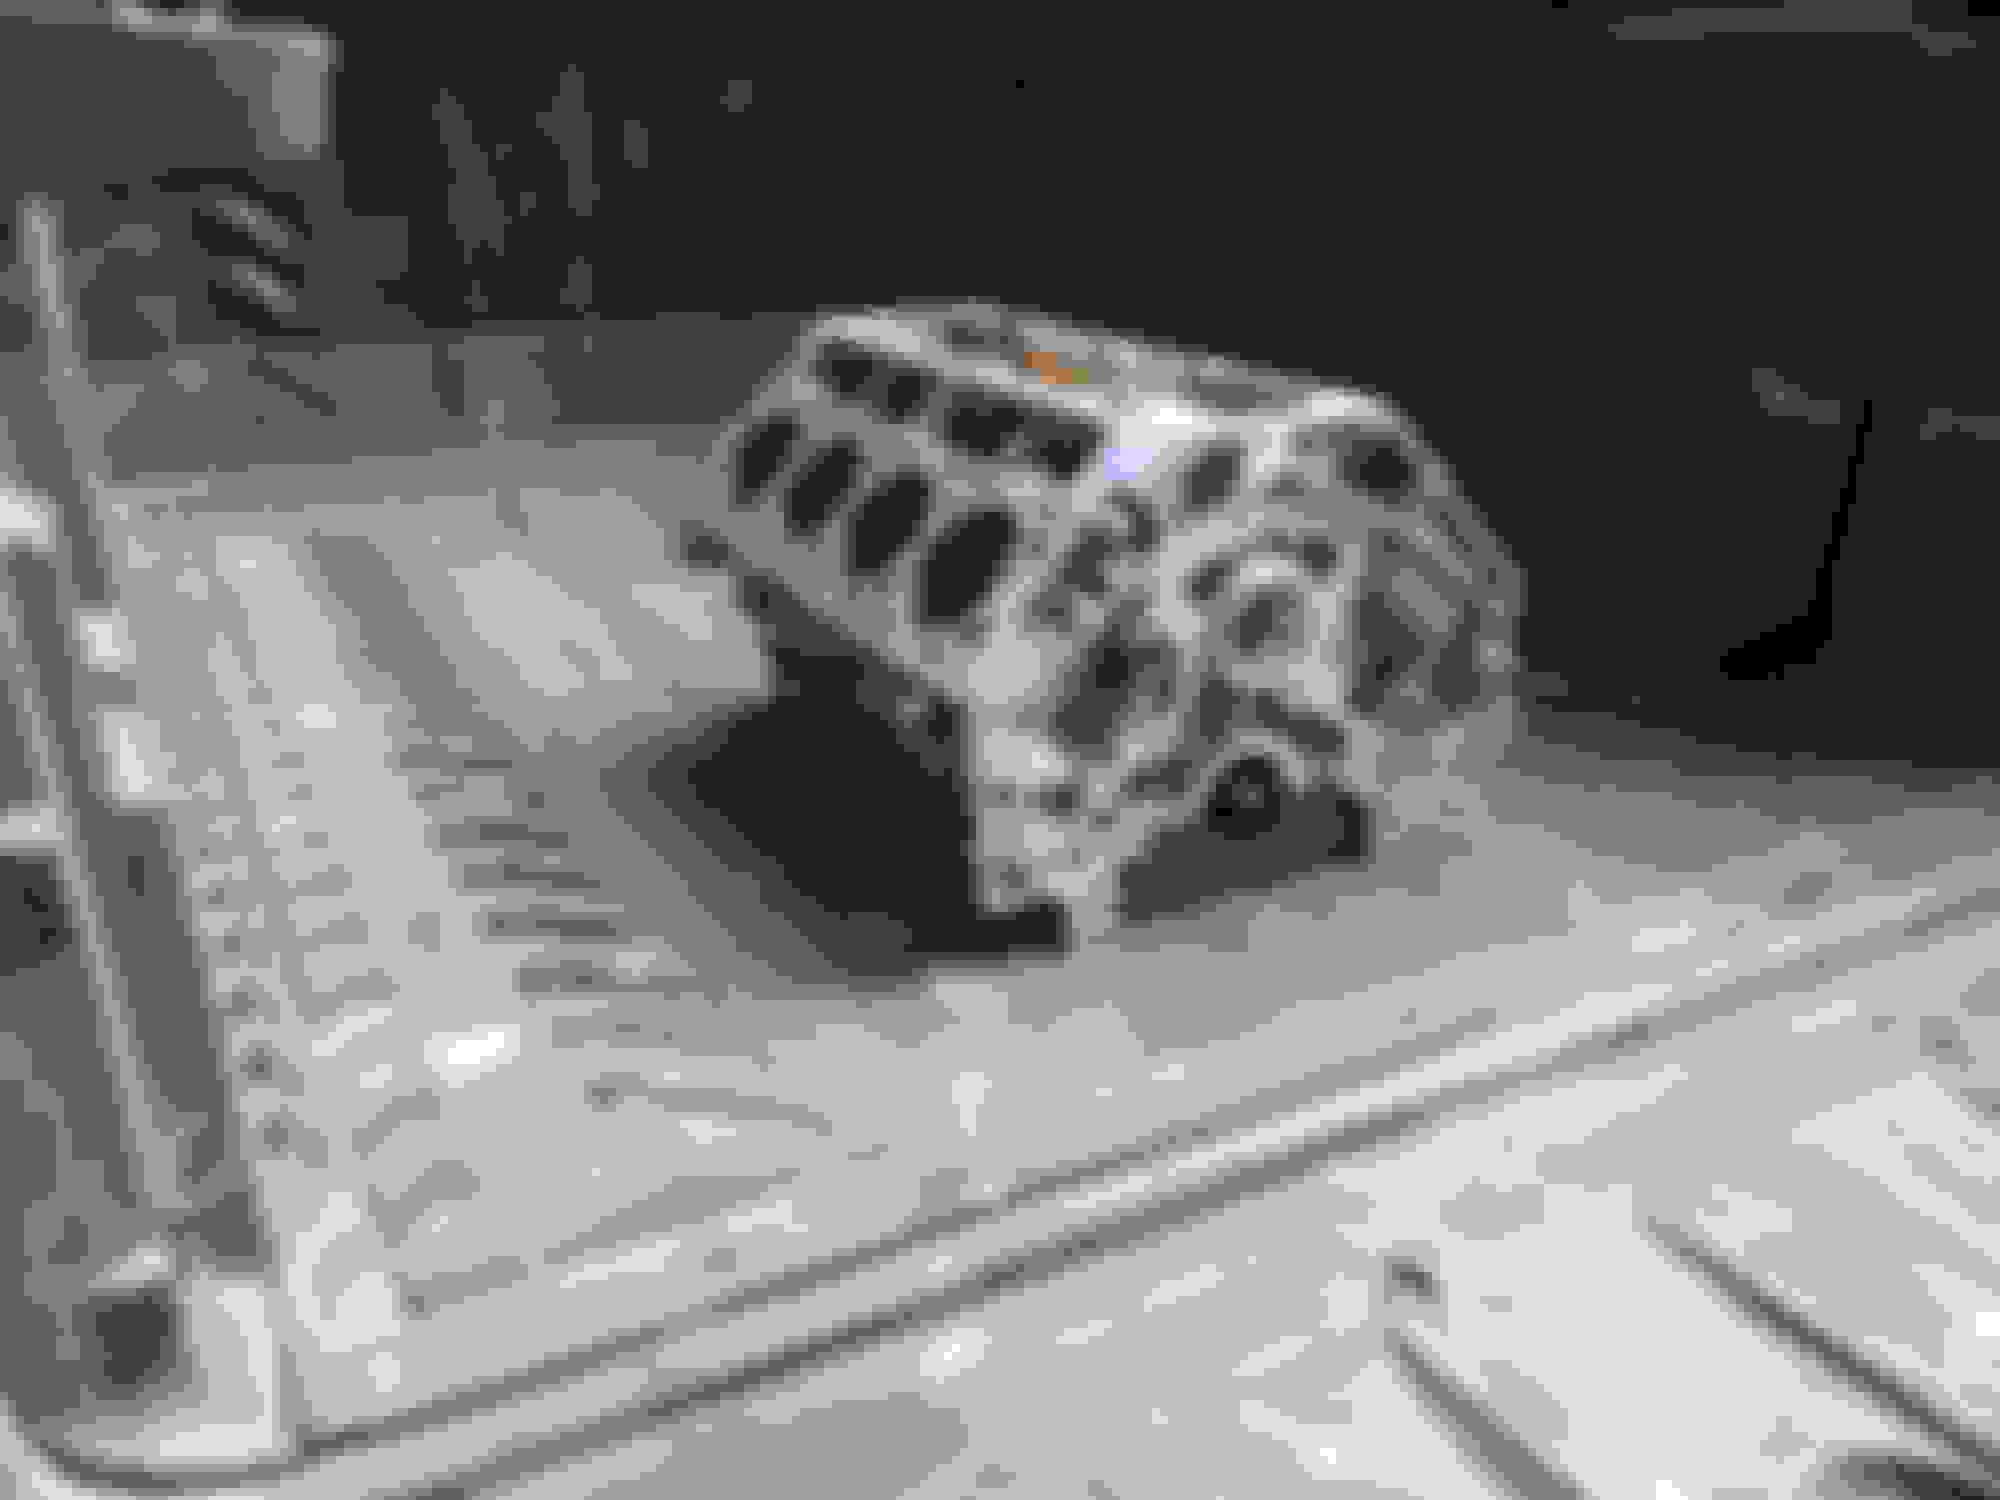
Here's the motor and initial teardown. The plan was to follow some of the part selection and mods found on other similar builds. That means possible crossmember modification, fbody driveshaft, land cruiser clutch master, SC manual clutch pedal, diff adapter, CXRacing mounts, ICT billet engine adapter LT to LS, battery relocation kit, custom wiring, fuel pump and corvette self regulating filter.​​​​​​​


Fuel rails were incredibly difficult to remove. I've seen mixed experiences depending on mileage and conditions.

Old 09-01-20, 09:46 AM
  #4  
shonuff53
Lead Lap
Thread Starter
iTrader: (3)
 
shonuff53's Avatar
 
Join Date: Oct 2007
Location: TX
Posts: 416
Received 14 Likes on 13 Posts
Default

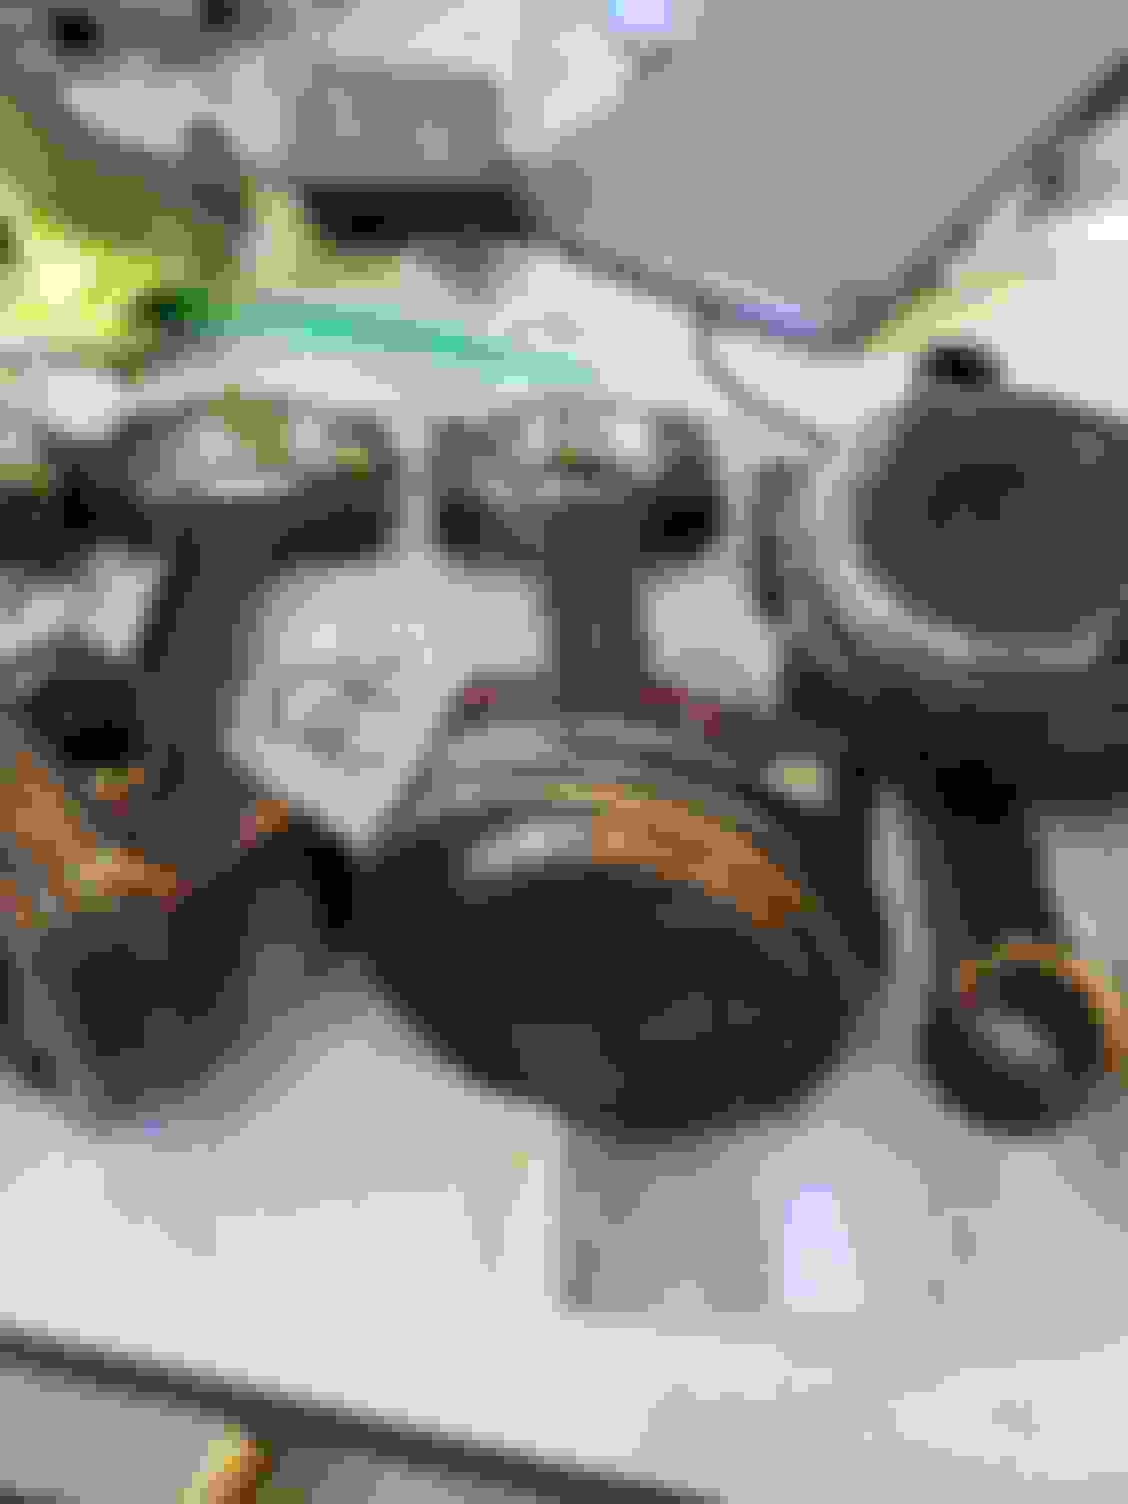
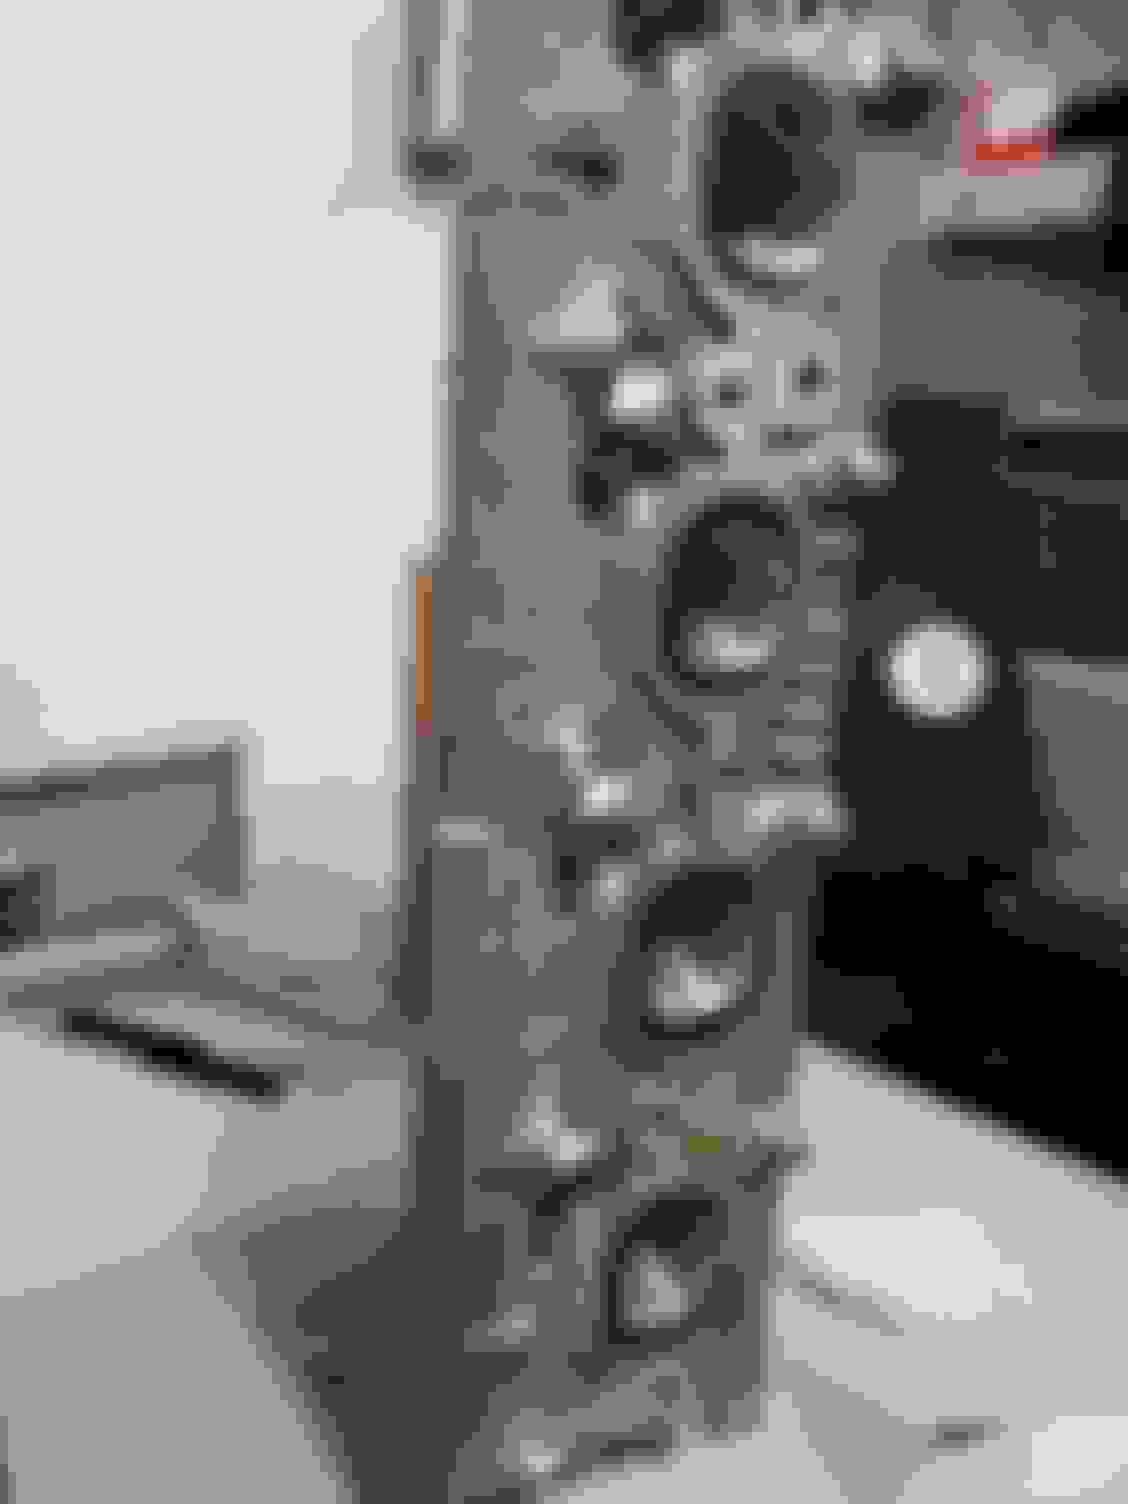
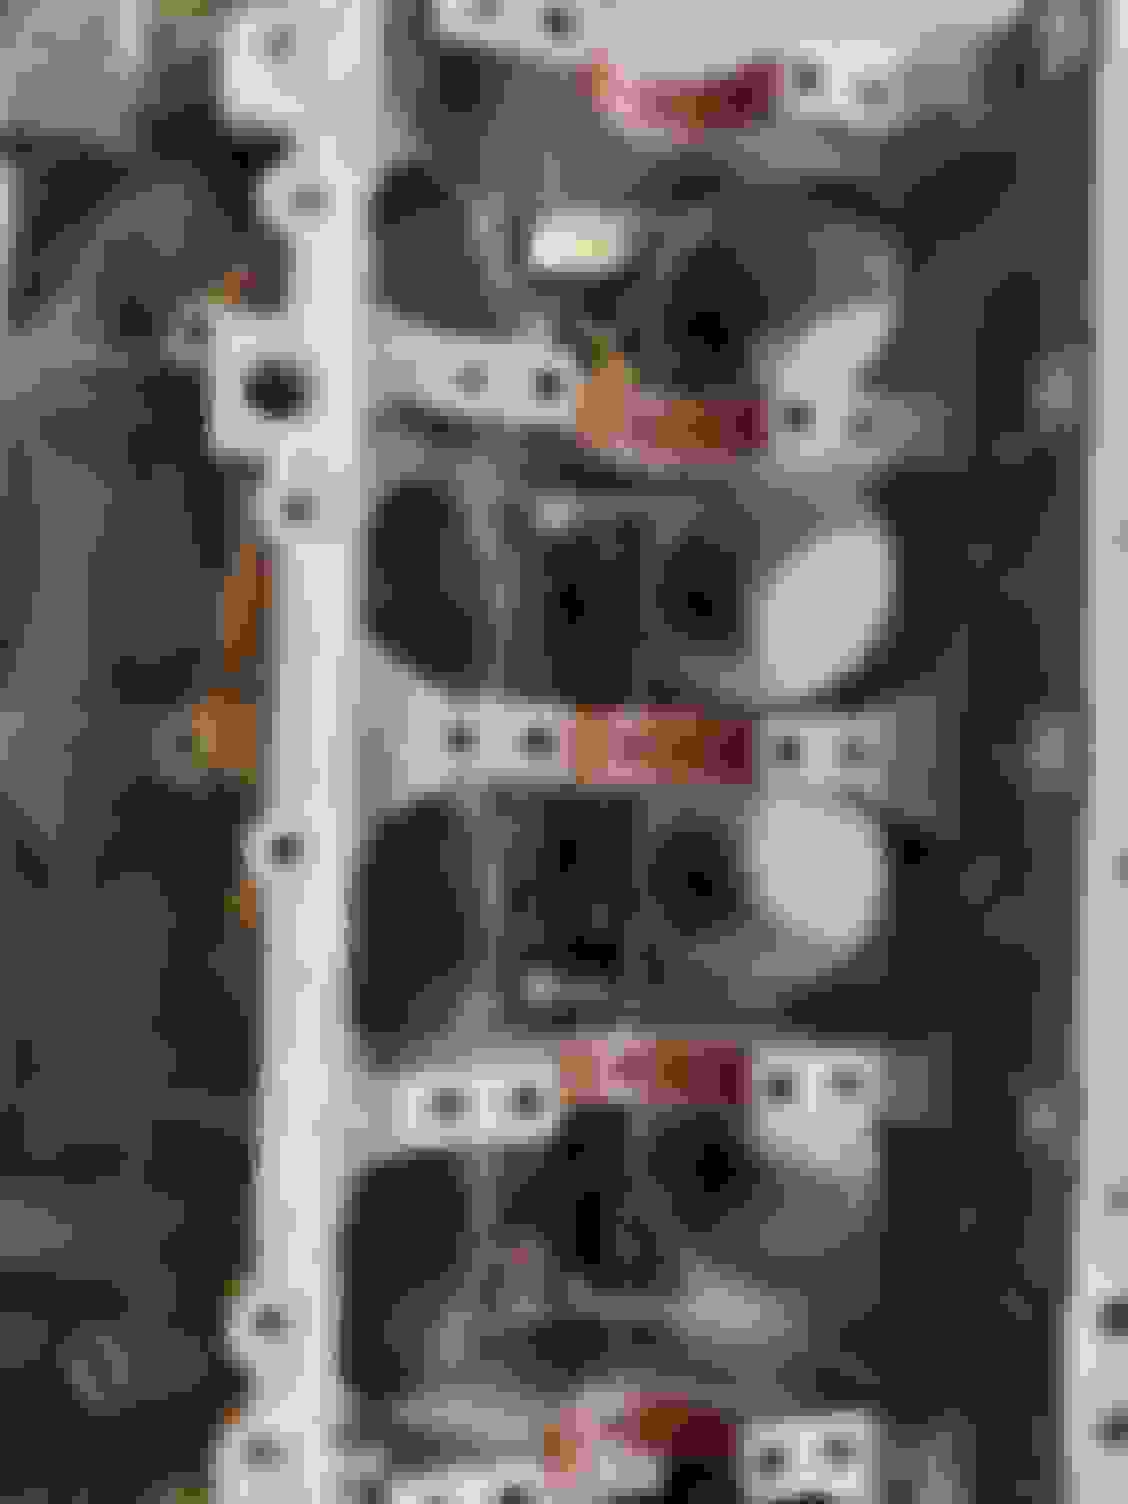
more pics of disassembly.

Everything appeared to be in decent condition. Cylinder 7 was a little too clean (bad dod lifter or stuck injector?) and the exhaust valve extra gunky, cylinder 8 was extra dirty. Both 7&8 had very light vertical scratches, they were noticeable on the pistons as well. Plan was to just check and clean parts myself but I sent everything to get cleaned by a machine shop after I did my effort.


Old 09-01-20, 09:48 AM
  #5  
shonuff53
Lead Lap
Thread Starter
iTrader: (3)
 
shonuff53's Avatar
 
Join Date: Oct 2007
Location: TX
Posts: 416
Received 14 Likes on 13 Posts
Default

the nasty dark piston above was a result of me leaving them in degreaser too long and using a strong solution mixture... don't be me.
Old 09-02-20, 08:02 AM
  #6  
RudysSC
Pole Position
 
RudysSC's Avatar
 
Join Date: Feb 2012
Location: CO
Posts: 2,389
Received 1,207 Likes on 836 Posts
Default

Love the brake upgrade and am always a little envious of a good ol' V8. Looking forward to seeing more.
The following users liked this post:
shonuff53 (09-02-20)
Old 09-02-20, 05:21 PM
  #7  
shonuff53
Lead Lap
Thread Starter
iTrader: (3)
 
shonuff53's Avatar
 
Join Date: Oct 2007
Location: TX
Posts: 416
Received 14 Likes on 13 Posts
Default

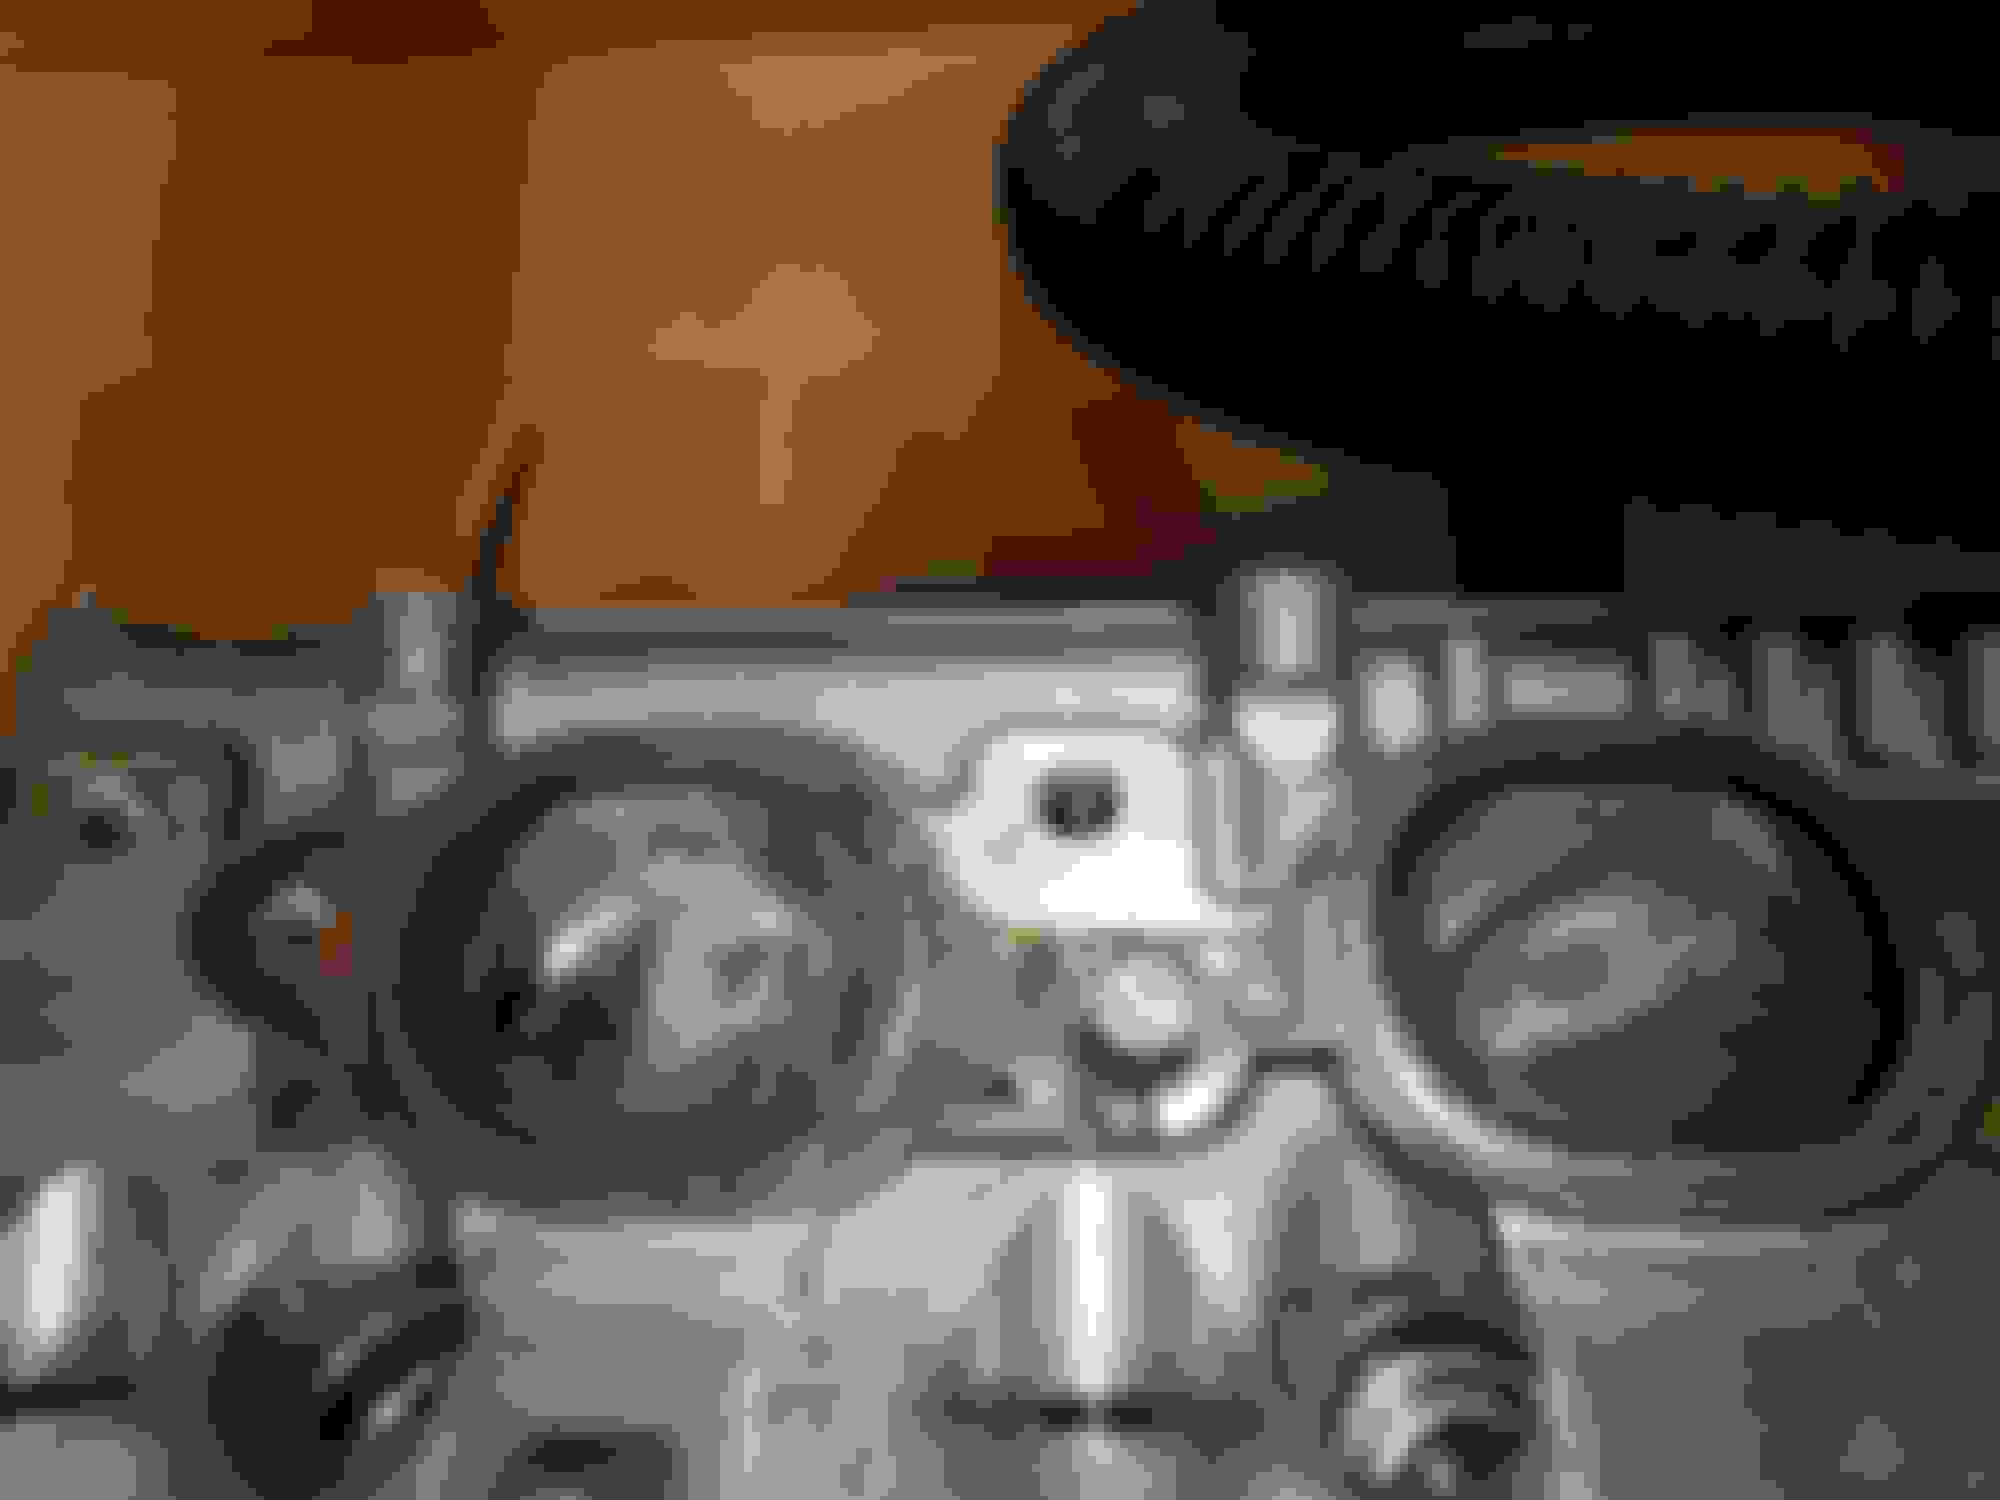
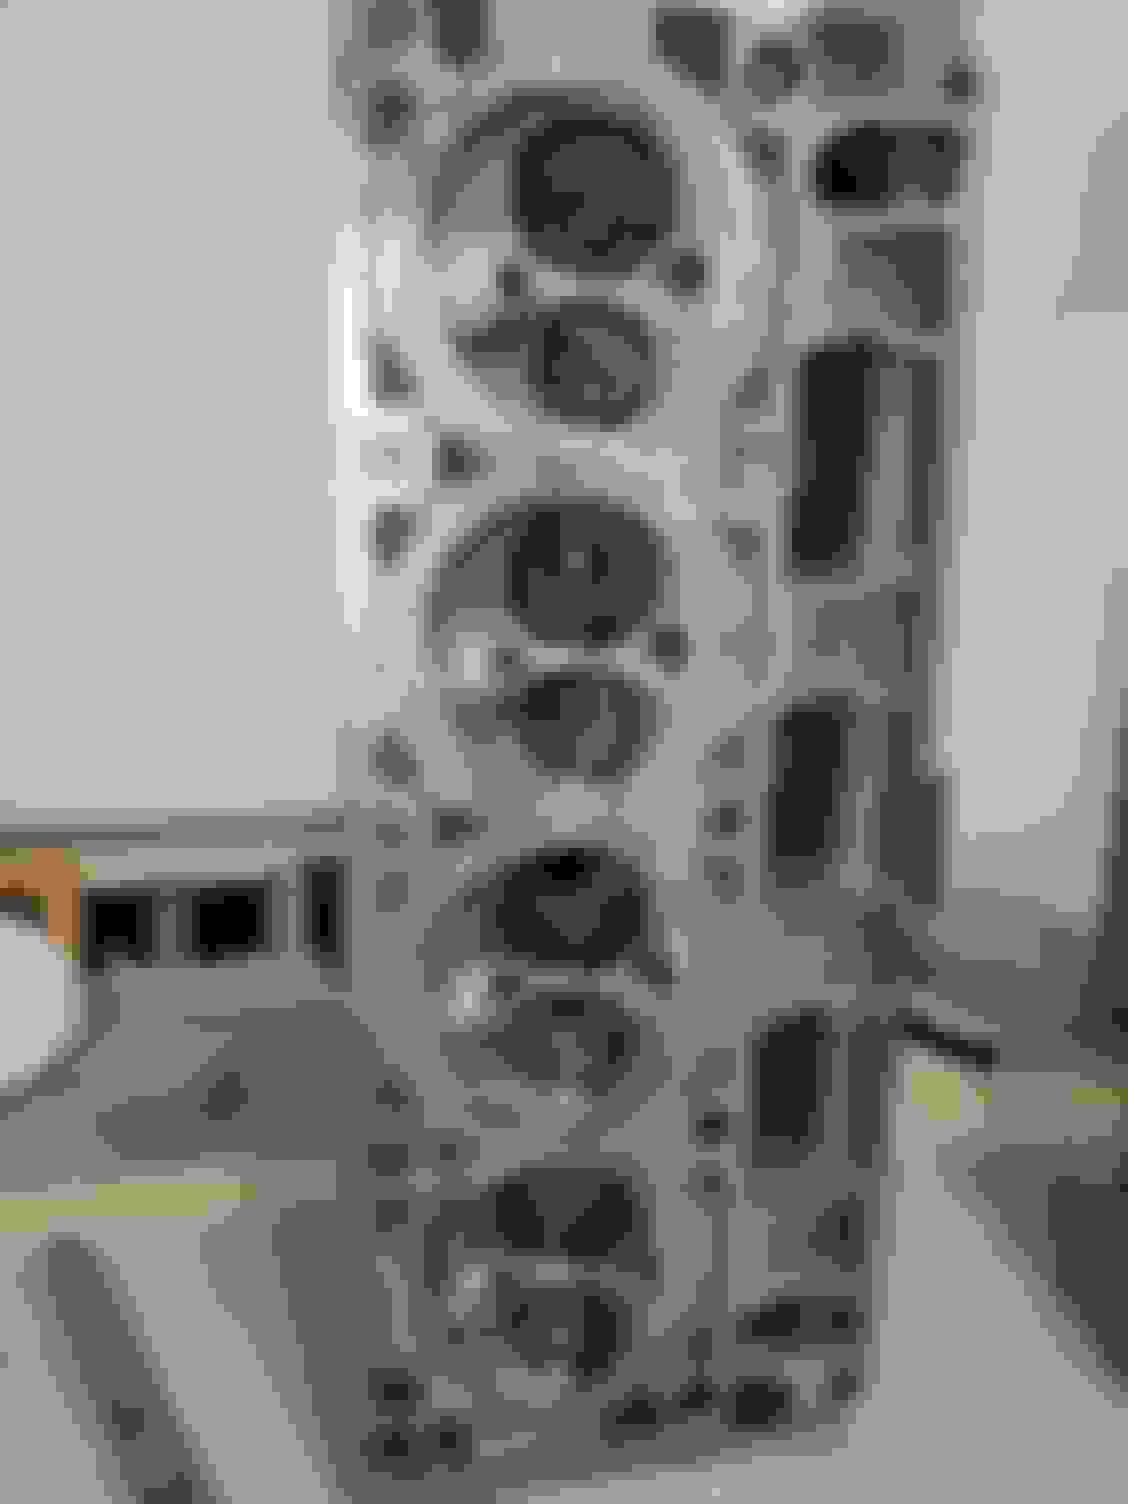
Here's some hand porting I did on the heads in the garage using double cut burrs. Definitely recommend single cut burrs if you're looking to tackle it yourself. Also, I'll note that a reputable LS engine builder does not port the runners on these heads claiming it only hurt the flow numbers. I believe they just deshroud the valves, remove some material from the domes, and light bowl work. So who knows... maybe it was all for nothing lol. Aftet all that, I did some valve lapping and thread chasing, I sent most of the stuff to machine shop for cleaning.


1st part to machine shop

ordered gaskets, seals, and valve train upgrades from Texas Speed.
The following users liked this post:
madmax98 (09-02-21)
Old 09-02-20, 05:27 PM
  #8  
shonuff53
Lead Lap
Thread Starter
iTrader: (3)
 
shonuff53's Avatar
 
Join Date: Oct 2007
Location: TX
Posts: 416
Received 14 Likes on 13 Posts
Default

here's the engine parts back from the machine shop (Power Dynamix).


Old 09-02-20, 05:36 PM
  #9  
shonuff53
Lead Lap
Thread Starter
iTrader: (3)
 
shonuff53's Avatar
 
Join Date: Oct 2007
Location: TX
Posts: 416
Received 14 Likes on 13 Posts
Default

for the wiring, I chose to take it on myself hoping that I can get as many systems to function as normally as possible. There is not as much readily available information for these swaps vs LS swaps but I managed to find enough to get started. The strategy here was to delete factory auto wiring, dod afm wiring, emissions, and some of the factory serial communications wiring (not the obd II plug stuff). This is still in work as I wait on parts and free time.


Old 09-02-20, 05:41 PM
  #10  
shonuff53
Lead Lap
Thread Starter
iTrader: (3)
 
shonuff53's Avatar
 
Join Date: Oct 2007
Location: TX
Posts: 416
Received 14 Likes on 13 Posts
Default

if anyone has advice on 98+ SC wiring with LS engines that is welcomed. From what I've read on IS300 LS swaps, it seems at least one person kept their original ecu wired in with the mass airflow connected to prevent fuel level issues in the gauge cluster.
Old 09-02-20, 07:33 PM
  #11  
shonuff53
Lead Lap
Thread Starter
iTrader: (3)
 
shonuff53's Avatar
 
Join Date: Oct 2007
Location: TX
Posts: 416
Received 14 Likes on 13 Posts
Default

Last week I spent a lot of time removing exhaust, driveshaft, engine etc. Sold the stock cats for a couple hundred!


The following users liked this post:
Ali SC3 (09-03-20)
Old 09-03-20, 10:44 AM
  #12  
Ali SC3
Lexus Champion

iTrader: (10)
 
Ali SC3's Avatar
 
Join Date: Oct 2007
Location: CO
Posts: 10,761
Received 438 Likes on 368 Posts
Default

Cool swap and good luck
The following users liked this post:
shonuff53 (09-03-20)
Old 09-13-20, 02:57 PM
  #13  
shonuff53
Lead Lap
Thread Starter
iTrader: (3)
 
shonuff53's Avatar
 
Join Date: Oct 2007
Location: TX
Posts: 416
Received 14 Likes on 13 Posts
Default

Not much to update, just buying parts and a little engine assembly. Wire wheeled the piston tops (since I corroded them with degreaser), gapped the rings at 0.028 to 0.030 for the top 2 rings, and installed the oil squirters and crankshaft. Note: O'Reilly auto degree gage for bolt stretch sucks. Next is assembling the rods and pistons and torquing them in. If you're curious, I'm reusing the main bearings and hardware . The rods are reusing the bolts and a new set of bearings from mahle.


The following users liked this post:
BrokeEF (09-14-20)
Old 09-15-20, 09:02 PM
  #14  
shonuff53
Lead Lap
Thread Starter
iTrader: (3)
 
shonuff53's Avatar
 
Join Date: Oct 2007
Location: TX
Posts: 416
Received 14 Likes on 13 Posts
Default

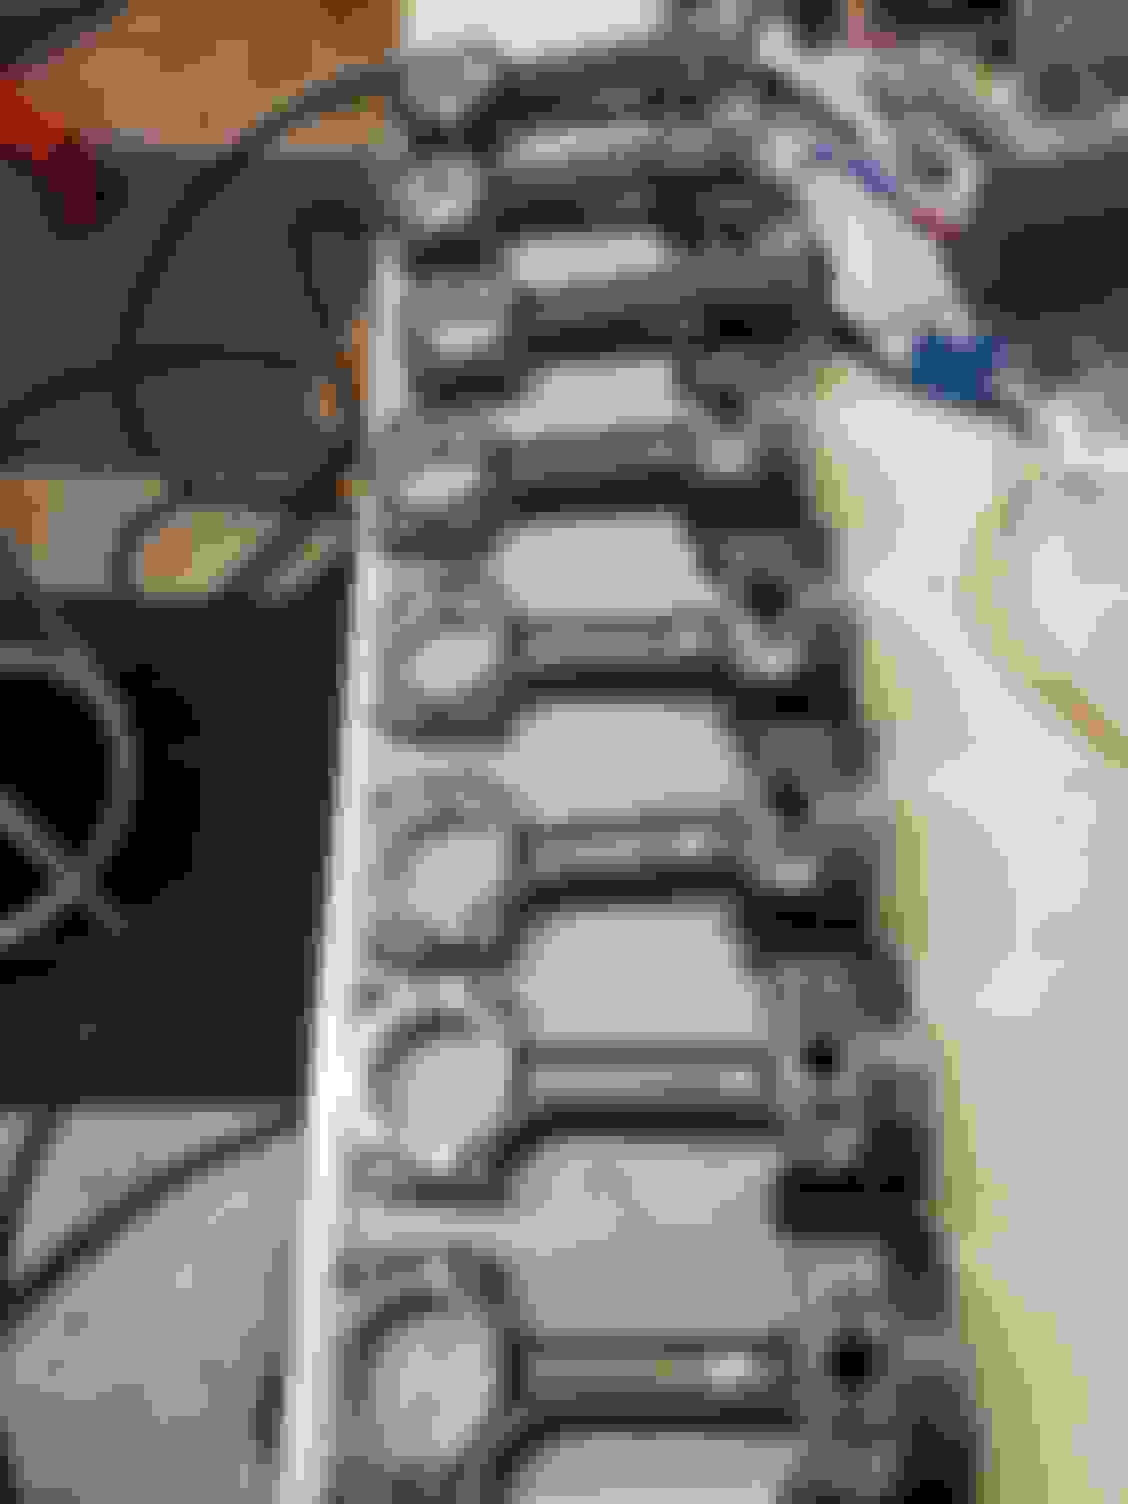
Rods and pistons are in now with the new rings and new bearings from Mahle. Cleaned up cylinder head bolt threads on the block since I forgot to do it earlier. Then, I put the cam in (TSP stg 4 truck cam) with new LS7 style lifters (comparison in the pictures), new timing chain and tensioner. And also installed a VVT lockout for this cam.


LS7 left, L83 right


Old 09-18-20, 05:05 AM
  #15  
shonuff53
Lead Lap
Thread Starter
iTrader: (3)
 
shonuff53's Avatar
 
Join Date: Oct 2007
Location: TX
Posts: 416
Received 14 Likes on 13 Posts
Default

Got the heads on last night with ARP bolts. Next will be trunion uprade and valve lash check.


The following users liked this post:
Bimmerbill (09-18-20)


Quick Reply: 2000 SC300 Gen V LT build


All times are GMT -7. The time now is 02:20 PM.