
Ultimate 1uzfe W58 Conversion Thread! (LOTS OF PICS!)
 04-14-09, 08:30 AM
#1

PLEASE READ www.QUANTUM-AUTO.com Regarding HOWE Bearing issues, please use the Quarter Master unit if you can!
Well is time to spread the word. 1uz + W58 can be done... and pretty easy mind you.
A couple of notes.
I am not responsible if you mess up.
Main Parts
1uzfe W58 Swap Kit (Quantum-Auto.com) includes the following
-Adapter Plate
-Flywheel (Steel or Aluminum depending how deep your pockets are)
-Pressure Plate
-Full Face DF Clutch
-Clutch Lines
-Howe Bearing Spacer
-Alignment Tool
-Pilot Bearing
-Bolt Kit
-OEM Flywheel bolts
Parts you need to source
W58 Transmission from a MK4 Supra OR SC300 - Any year - DO NOT USE AN MK3 Supra W58 unless you know what you are getting yourself into!
Howe 82870 Throwout Bearing
SC300 Clutch Pedal
SC300 Master Cylinder
SC300 Manual Driveshaft
Shifter Bezel Trim Piece
Shift ****
Modifications - Rated 1-10 (1 easy, 10 hard) scale
Cut the transmission tunnel for shifter to poke through (2/10)
Drill out the 2 small holes in the stock transmission crossmember (1/10)
Drill bellhousing for hydraulic lines to stick through (1/10)
Grind down bellhousing in certain areas for clearance (I think there were 3 locations) - (3/10)
Thanks Sean for taking photos
Last edited by RedPhoenix; 08-30-10 at 09:55 PM.
 04-14-09, 08:30 AM
#2
Small run down on how it all goes together. My goal is to get pictures of the next swap I will be involved with for a great in depth write up. But for now I will do my best.
[size=10pt][size=10pt][size=10pt]
Basic How to Swap[/size][/size][/size]
Remove Center Console

Remove Exhaust

Remove Driveshaft

Remove all connectors on the auto tranny, along with the kickdown cable thats connected TO the throttle body. You will also need to move the dipstick (2 people makes this easy, 1 on top 1 on bottom) and remove the transmission cooler lines.

Loosen the 2 bolts for the motor mount slightly so the engine tilts back. This will allow the removal of the top 4 bolts. Remove access panel and unbolt the 6? or 8? bolts that hold the torque converter on. Remove the rest of the bolts for the transmission and slide out the whole transmission. Remove the flexplate after this step.

Now is a GREAT time to replace your rear main seal. Mine was leaking... and its like $20 or $25 for an OEM one...

Attach the adapter plate to the W58. I wound up using old bellhousing bolts and flexplate bolts for this step.


Take the Automatic bellhousing from the transmission that you just removed and bolt it to the adapter plate. You will see where you have to grind the bellhousing for the couple of bolts that are in the way and part of the front seal cover.


[size=10pt][size=10pt][size=10pt]
Basic How to Swap[/size][/size][/size]
Remove Center Console
Remove Exhaust
Remove Driveshaft
Remove all connectors on the auto tranny, along with the kickdown cable thats connected TO the throttle body. You will also need to move the dipstick (2 people makes this easy, 1 on top 1 on bottom) and remove the transmission cooler lines.
Loosen the 2 bolts for the motor mount slightly so the engine tilts back. This will allow the removal of the top 4 bolts. Remove access panel and unbolt the 6? or 8? bolts that hold the torque converter on. Remove the rest of the bolts for the transmission and slide out the whole transmission. Remove the flexplate after this step.
Now is a GREAT time to replace your rear main seal. Mine was leaking... and its like $20 or $25 for an OEM one...
Attach the adapter plate to the W58. I wound up using old bellhousing bolts and flexplate bolts for this step.
Take the Automatic bellhousing from the transmission that you just removed and bolt it to the adapter plate. You will see where you have to grind the bellhousing for the couple of bolts that are in the way and part of the front seal cover.
04-14-09, 08:31 AM
#3
After some griding (you can use a drill with a carbide grinding bit, drill press... etc) you can attach it now to the adapter plate FLUSH as can be. I used the M10 and M12 bolts, washers, and nuts. Red Loctite would be a good idea here.


Place in the pilot bearing so its flush with the crank (not all the way back like I did at first, whoops) and attach the clutch/pressure plate like you would normally do.

Once all that is tightened down, put on the spacer provided by the kit.


Spacer on. You can see the Howe spacers in the bottom of the bellhousing....

Drill 2 holes for the hydraulic lines to stick out of.

All together in its awesomeness.

After that it should be ready to go.

Place in the pilot bearing so its flush with the crank (not all the way back like I did at first, whoops) and attach the clutch/pressure plate like you would normally do.
Once all that is tightened down, put on the spacer provided by the kit.
Spacer on. You can see the Howe spacers in the bottom of the bellhousing....
Drill 2 holes for the hydraulic lines to stick out of.
All together in its awesomeness.
After that it should be ready to go.
Last edited by RedPhoenix; 07-15-09 at 10:19 PM.
04-14-09, 08:31 AM
#4
Slide it in... bolt it up. BAM, Emeril style, it is now mated up.


Looks like it will line it... but it doesnt. You need to cut a couple inches forward.


This is about the time I found out that you can use the SC400 transmission crossmember if you drill out 2 of the 4 holes to match eachother. 2 of them are smaller than the other 2. make them match and it works.


Probably a good time to figure out what to do with the old transmission plugs. The top right one in this picture with the 2 yellow plugs is your NSS (Neutral Safety Switch). You just bridge these together and the car will start. You can bypass it or hook it up to the pedal, whatever you want. The Speed Sensor will plug right in and works. The rest of the wires I ziptied off to the side, but can probably remove them permanently.

Exhaust back on... and ready to go.

Looks like it will line it... but it doesnt. You need to cut a couple inches forward.
This is about the time I found out that you can use the SC400 transmission crossmember if you drill out 2 of the 4 holes to match eachother. 2 of them are smaller than the other 2. make them match and it works.
Probably a good time to figure out what to do with the old transmission plugs. The top right one in this picture with the 2 yellow plugs is your NSS (Neutral Safety Switch). You just bridge these together and the car will start. You can bypass it or hook it up to the pedal, whatever you want. The Speed Sensor will plug right in and works. The rest of the wires I ziptied off to the side, but can probably remove them permanently.
Exhaust back on... and ready to go.
Last edited by RedPhoenix; 04-17-09 at 08:25 AM.
04-14-09, 08:33 AM
#5
This post will be dedicated for misc, random pics and movies.
First video - car moves!
http://www.youtube.com/watch?v=1DMg5_mUpYE
Heres a picture with the 1uz, 5sp conversion as a whole.


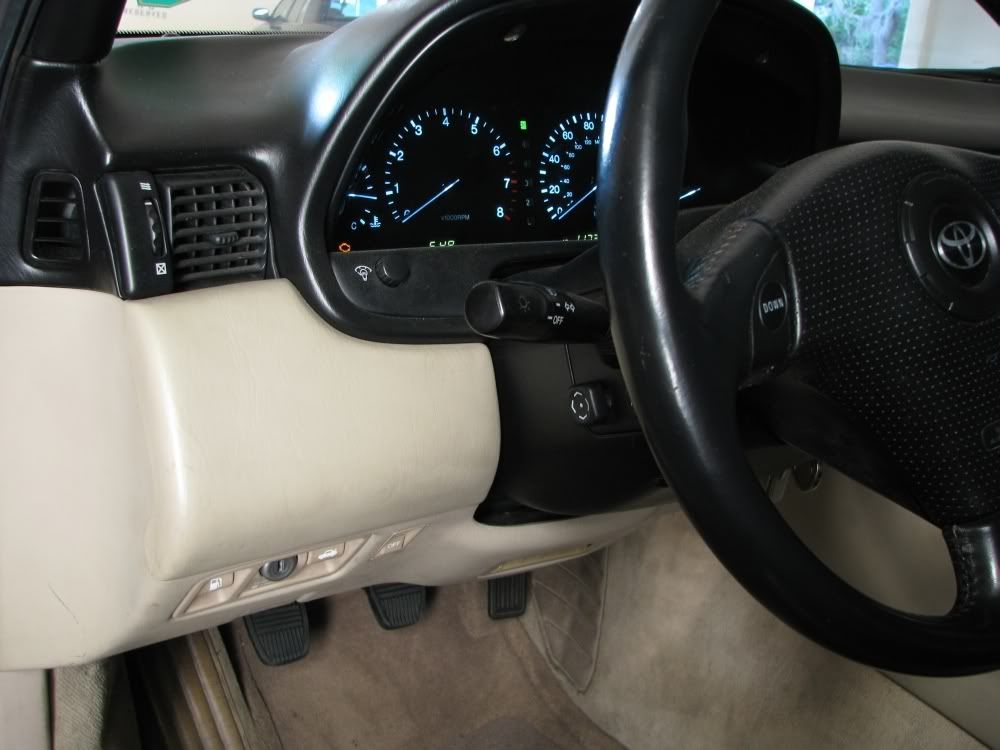
I pulled the TRAC fuse (7.5amp) because 1st gear does not feel good with TRAC on... because 1st gear makes the 1uz come alive... haha

It moves!

Pedal Action
First video - car moves!
http://www.youtube.com/watch?v=1DMg5_mUpYE
Heres a picture with the 1uz, 5sp conversion as a whole.
I pulled the TRAC fuse (7.5amp) because 1st gear does not feel good with TRAC on... because 1st gear makes the 1uz come alive... haha
It moves!
Pedal Action
Last edited by RedPhoenix; 04-14-09 at 08:37 AM.


Trending Topics

 04-14-09, 01:13 PM
#13
Pole Position
Join Date: Dec 2008
Location: NO
Posts: 237
Likes: 0
Received 0 Likes
on
0 Posts
because he used the stock auto bell housing which doesn't have any access holes..

 04-14-09, 02:09 PM
#15
Well... for the obvious reason. 2JZ bellhousing's starter location does not go anywhere near the 1uz's. So I used the 1uz bellhousing with an adapter plate... but since the 1uz bellhousing has no where for a fork to go... the Howe bearing rids all the slave cyl/fork/TOB problems.
Last edited by RedPhoenix; 04-14-09 at 06:15 PM.