Lexus RX: How to Replace Oxygen Sensor
A dying oxygen sensor can trick your engine into giving it more fuel when it doesn't need it, or less fuel when it does.
This article applies to the Lexus RX (2007-2014).
The oxygen sensor measures the amount of oxygen present in the exhaust. The data read from this sensor helps the motor adjust the fuel usage to maximize performance by providing the proper ratio of oxygen to fuel. If the sensor malfunctions and reads the oxygen level as too high, the computer will compensate by dumping in more fuel which leads to wasted gas. Conversely, if it reads too low the computer will lower the amount of fuel which can lead to performance loss and possibly misfire.

Materials Needed
- 7/8" wrench, oxygen sensor socket or spark plug socket
- Flat head screwdriver
- Floor jack
- Jack stands
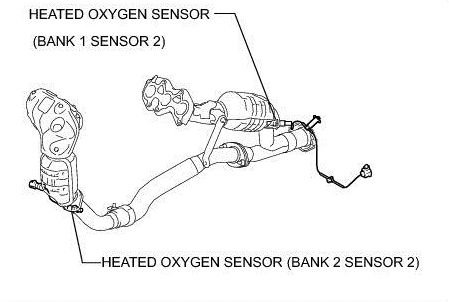
There are two sets of oxygen sensors on the Lexus RX. This article will cover removing the two sensors that are located just past the catalytic converters. The other two are located on the exhaust manifolds before the catalytic converter. The one nearest to the radiator can be easily accessed with an oxygen sensor socket and a wrench. The other is located on the rear exhaust manifold. The easiest way to remove a Bank is by removing the exhaust manifold and the sensor along with it.
Step 1 - Preparation
Depending on which sensors are failing, you may or may not need to put the car on jack stands. Park the car on flat, level ground. Block the rear wheels. Disconnect the negative battery cable. Jack up the front of the car and place it onto jack stands.
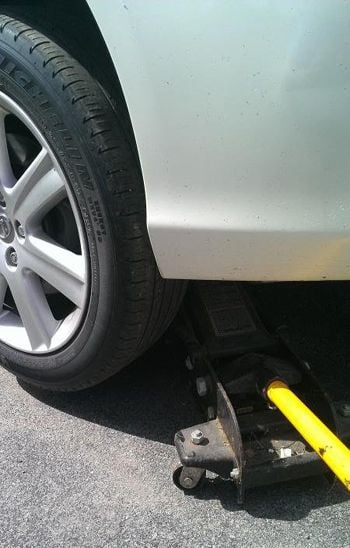
(Related Article: How to Jack Up Your Lexus - ClubLexus.com
Step 2 - Remove the sensor
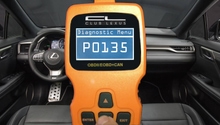
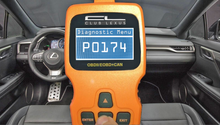
You'll need to locate the sensor you're replacing first. Bank 2 Sensor 1 will be close to the manifold accessible through the engine bay (Figure 3). Bank 1 Sensor 1 is behind the engine before the main catalytic converter (Figure 4). The two other sensors are located after the catalytic converters.
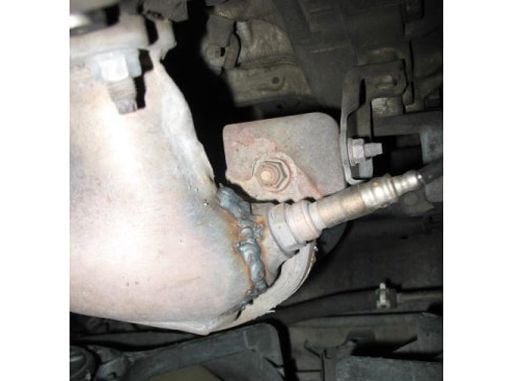
Figure 3. Bank 2 Sensor 1. 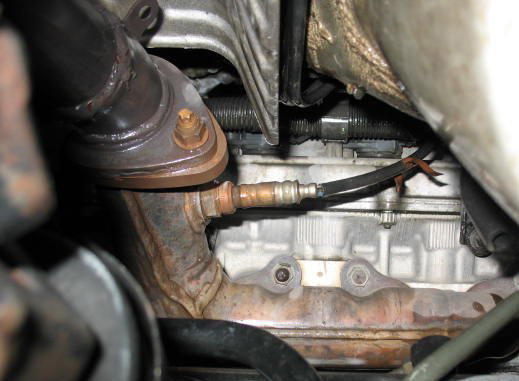
Figure 4. Bank 1 Sensor 1.
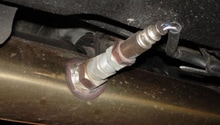
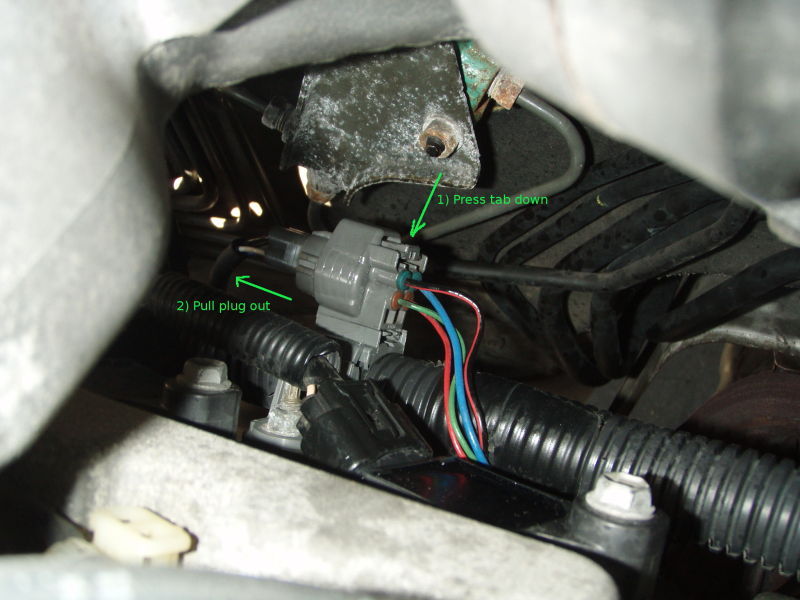
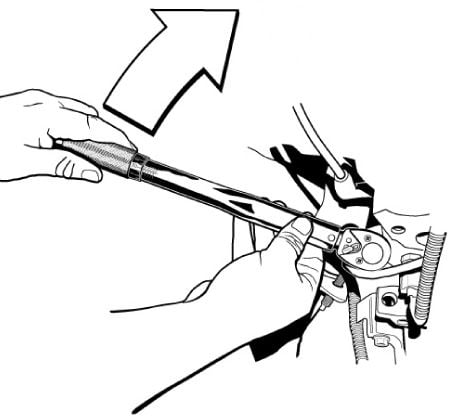
Follow the wires on the sensor you're removing to the wire harness clip. Using a flat head screwdriver, pry up the clip tab and unplug it (Figure 5). Following the wires back, there are little clips that keep the wires from hitting the exhaust. Just wiggle these and they'll come free pretty easily. Now, remove the old sensor by unscrewing it with the 7/8" wrench or the socket.
Removing the sensors might be difficult depending on the amount of rust that's formed on the threads of these sensors. Apply a generous amount of PB Blaster or something similar to the threading, and allow it to sit for a few hours. If you can't manage to get the wrench in place and don't have a slotted socket to allow the wires to pass through, you can cut the old wires right at the sensor and use a normal deep socket on it.
Step 3 - Install new sensor
Apply anti-seize to the threading on the sensor, taking special care not to get any on the actual sensor itself. Hand tighten the sensor in place and then tighten it fully using the wrench or tool. Plug the electrical connection into the wire harness you unplugged the old one from. Re-install any wire clips into the locations you removed them from. You can now reconnect the negative battery cable, reattach the plastic trim, and take the car off of the jack stands.
Related Discussions
- RX Heated O2 Sensor DIY - ClubLexus.com
- Air/Fuel Oxygen Sensor DIY - ClubLexus.com
- Difference Between the Two Sensors - ClubLexus.com