Lexus IS: How to Change Your Oil
Replacing the oil on your Lexus IS is an easy process. Even though it's not expensive to do at an auto shop, it has been known to save you time. Here's how to quickly do it yourself at home.
This article applies to the Lexus IS (2005-2014).
Changing oil is perhaps the simplest maintenance you can perform on your IS, yet many people take their car to the dealership for this service. While you likely won't save a ton of money by changing your own oil, it's an easy and rewarding experience if you're looking to learn how to work on your IS. Best of all, it saves you time otherwise spent driving to the auto shop to waiting for the work to be done. Doing it at home can take only twenty minutes, and you'll know that the job will be done right. Keep reading to learn just how easy changing the oil on your Lexus IS is.

Materials Needed
- Oil filter wrench
- Jack stands or ramps
- Jack
- Oil pan
- Funnel
- Gloves and goggles (optional)
- Oil and oil filter
- 14mm wrench
- Flathead screwdriver
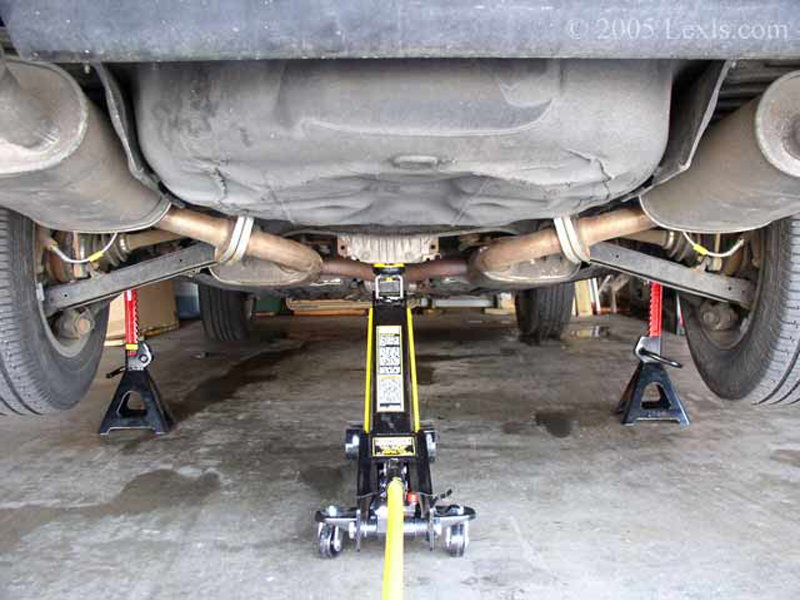
Step 1 - Raise the car up
You can either use a jack and jack stands to lift the front of the car up, or you can buy a pair of ramps and simply drive up onto them. Whichever method you use, make sure to park on a flat surface and set the emergency brake on. If you use a jack and jack stands, raise the car up as high as possible and set one jack stand under each side of the car.
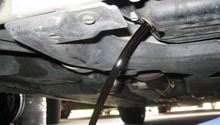
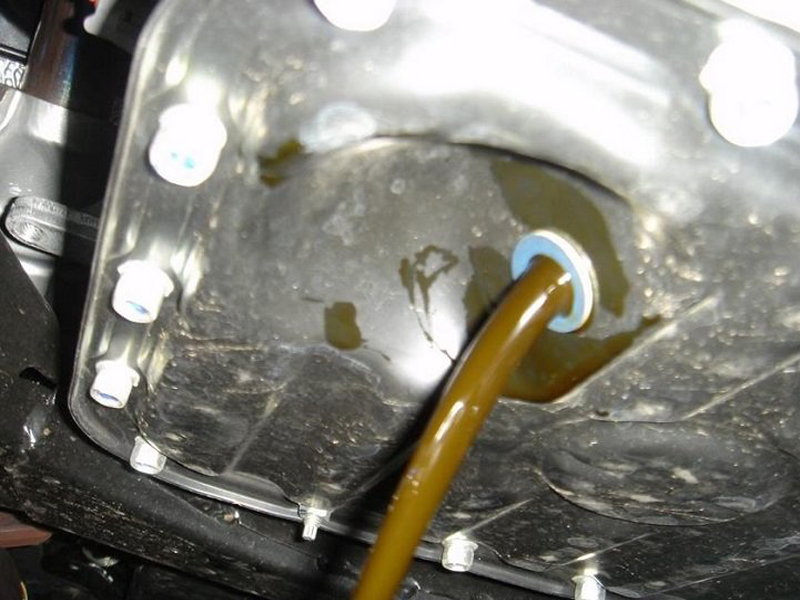
Step 2 - Drain the oil
Open the oil cap to relieve the pressure. Locate the oil pan centered underneath the vehicle and place your drain pan or other container underneath the drain plug to catch the old oil. Loosen the drain plug with a 14mm wrench and then finish removing the plug with your fingers. The old gasket may stick to the pan but you can remove it with a screwdriver if necessary. Allow all the old oil to drain out.
Step 3 - Replace oil filter
The IS' filter cover has one screw at the top with a clip underneath that holds it in place. Remove it using a flathead screwdriver. Behind it you will find a metal oil filter casing. Move your oil drain pan underneath this casing and use your filter wrench to loosen it until you can remove it by hand. Remove the old filter from the casing and remove the old rubber seal. Place the new filter and rubber seal in the casing and apply some fresh oil on the new rubber seal. Re-install the casing.

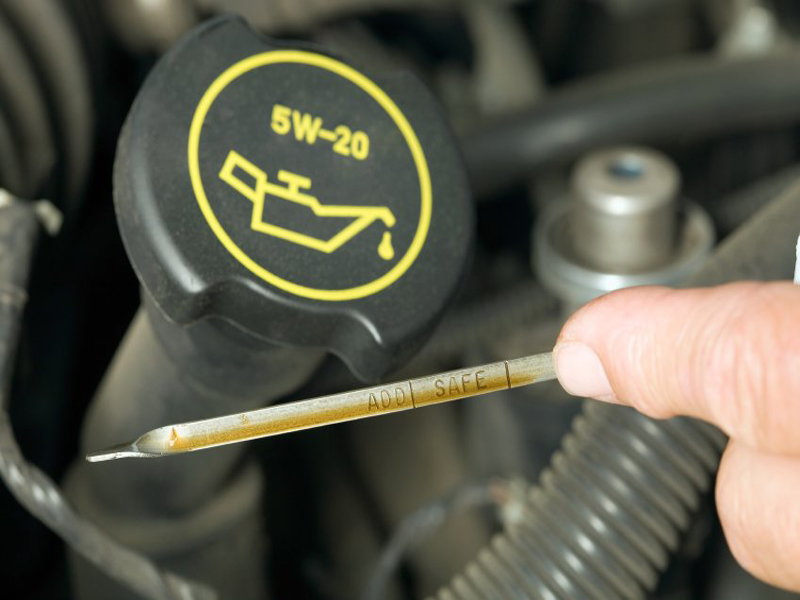
Step 4 - Fill car with fresh oil
Screw your oil drain plug back in and tighten with a wrench. Place your funnel in the oil fill tube to prevent spilling. Pour the new oil in. If you are not sure how much oil to use, check the back page of your owner's manual, and make sure to check the oil level with your dipstick. Do not overfill or underfill! Once you are finished, re-install the oil cap and start the car, letting it run for at least three minutes. Check for any leaks under the car or around the oil filter casing. Turn the engine off and check your oil level again.
Featured Video: Lexus IS 250 Oil Change
Related Discussions
- IS 250 Oil Change - ClubLexus.com
- IS 350 Oil Change - ClubLexus.com