Lexus: How to Wash and Wax Your Lexus
Keep your Lexus' paint clean and polished with our wash and wax walk-throughs. You'll be showroom ready in no time.
One of the best ways to help maintain the value of your car is by cleaning it on a regular basis. There are many products on the market available for you to choose from. As you become more familiar with these tips and what works best with your Lexus, you will choose the right products for you and your car. Here are tips and recommendations to help you get a head start.

Tools and Materials Needed
- Clean water
- Traditional shampoo
- 2 buckets
- Wash mitt
- Microfiber drying towel/ foam sponge
- Wax
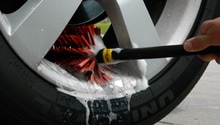
- Wheel cleaner
- Grit guard
How to Properly Wash Your Lexus
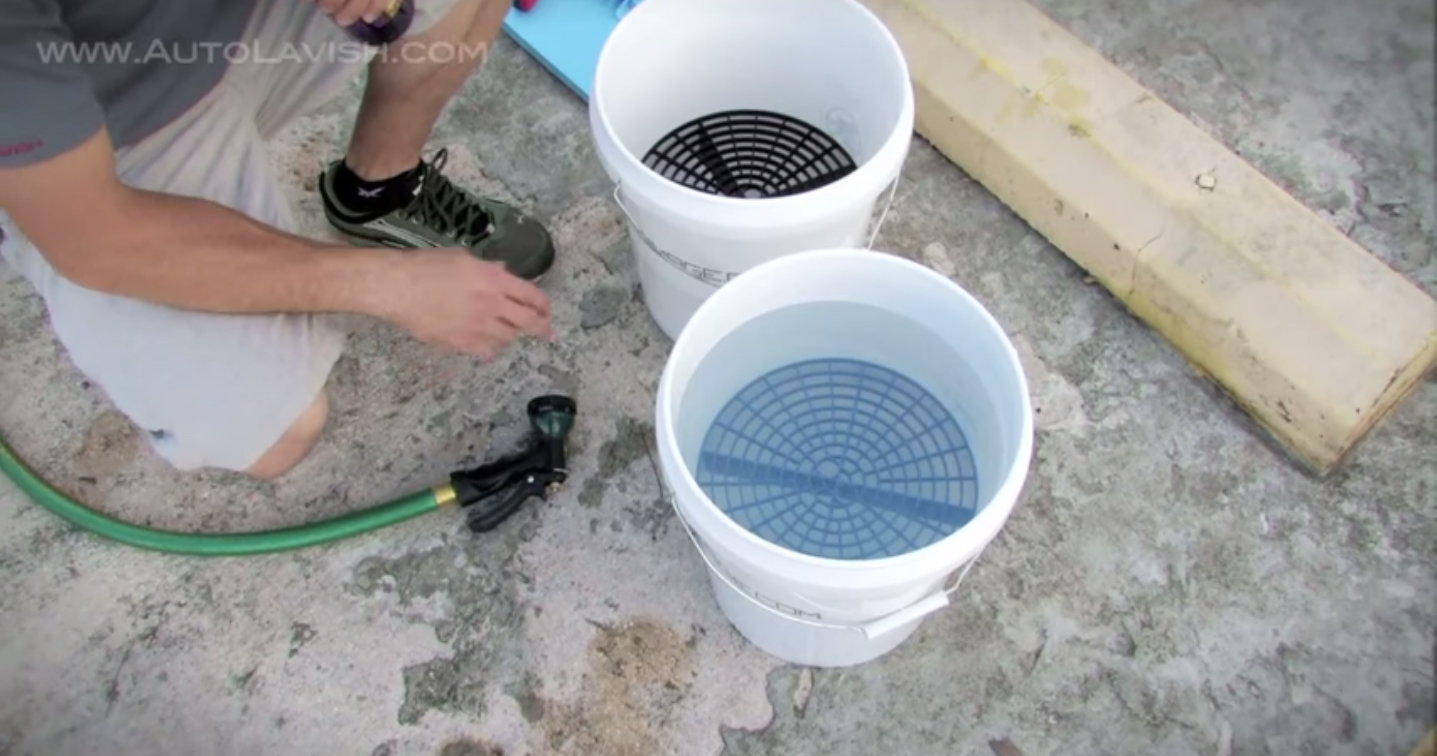
Step 1 - Prepare wash buckets
The two bucket method requires one bucket for soap, and another for cleaning the sponge.
Push your Grit Guard to the bottom of the bucket you intend to be the clean water bucket. Fill up both buckets with clean water. Add soap to one bucket and leave the second bucket with clean water only.
Step 2 - Pre-soap and rinse paint
Drip soapy water from the sponge on to the surface of your car. That soapy foam lifts loose particles from the surface of your paint and carries it with them as it flows off your car. Rinse your car off with a hose when you're ready.
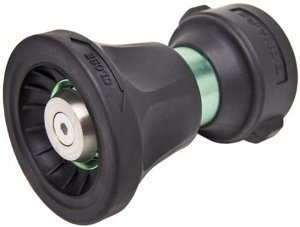
Pro Tip
The Club Lexus community suggests using the Ultimate Hose Nozzle. It is regarded as durable and versatile thanks to it's heavy duty construction and multiple spray modes.
Step 3 - Rub car with soapy mitt
Submerge the wash mitt inside the soapy bucket and wash the car panel by panel. Wipe in straight lines to avoid swirling if there's still grit on the car.
Step 4 - Clean the wash mitt
Dip the dirty mitt in the clean bucket and rub it on the Grit Guard. All the filth that's collected on the mitt will settle at the bottom of the bucket. Squeeze the wash mitt until it is dry and place it into the bucket full of soap.
Return to Step 3 until all panels of the car are clean.
Step 5 - Rinse the car with clean water
Rinse off the vehicle. Use microfiber towels to dry the vehicle. Ideally, this should be done quickly so that water spots don't have time to form.
Pro Tip
Washing your Lexus once a week will not only maintain the beauty of your vehicle, but keep it free of dirt, pollution, and debris that can deteriorate your exterior paint over time. Using a dirty wash mitt creates swirls and scratches. Always make sure to wash from the top to the bottom. The bottom of the car is the dirtiest part of a car.
How Clean your Car with Waterless Wash
Cleaning a car with a waterless was is far and away the easiest method for keeping it clean. This type of wash is recommended if the vehicle is located in a cold climate where regular washing isn't an option. The ClubLexus community like the Optimum No-Rinse product, but any similar product should work as well.
Step 1 - Wash the Lexus
Pick up your microfiber towel, spray your choice of waterless product, and then wipe it off of the vehicle.
Step 2 - Polish the Lexus
Take clean microfiber towels and pass them over your panels to give it a smooth, shiny, and polished finish. Always clean and polish with an unsullied microfiber towel.
There are various wash and wax polishes available to give the Lexus a shiny look after a waterless wash and rinsing.
(Related Article: Optimum No Rinse Wash and Shine How-To - Clublexus.com)
How to Wax your Lexus
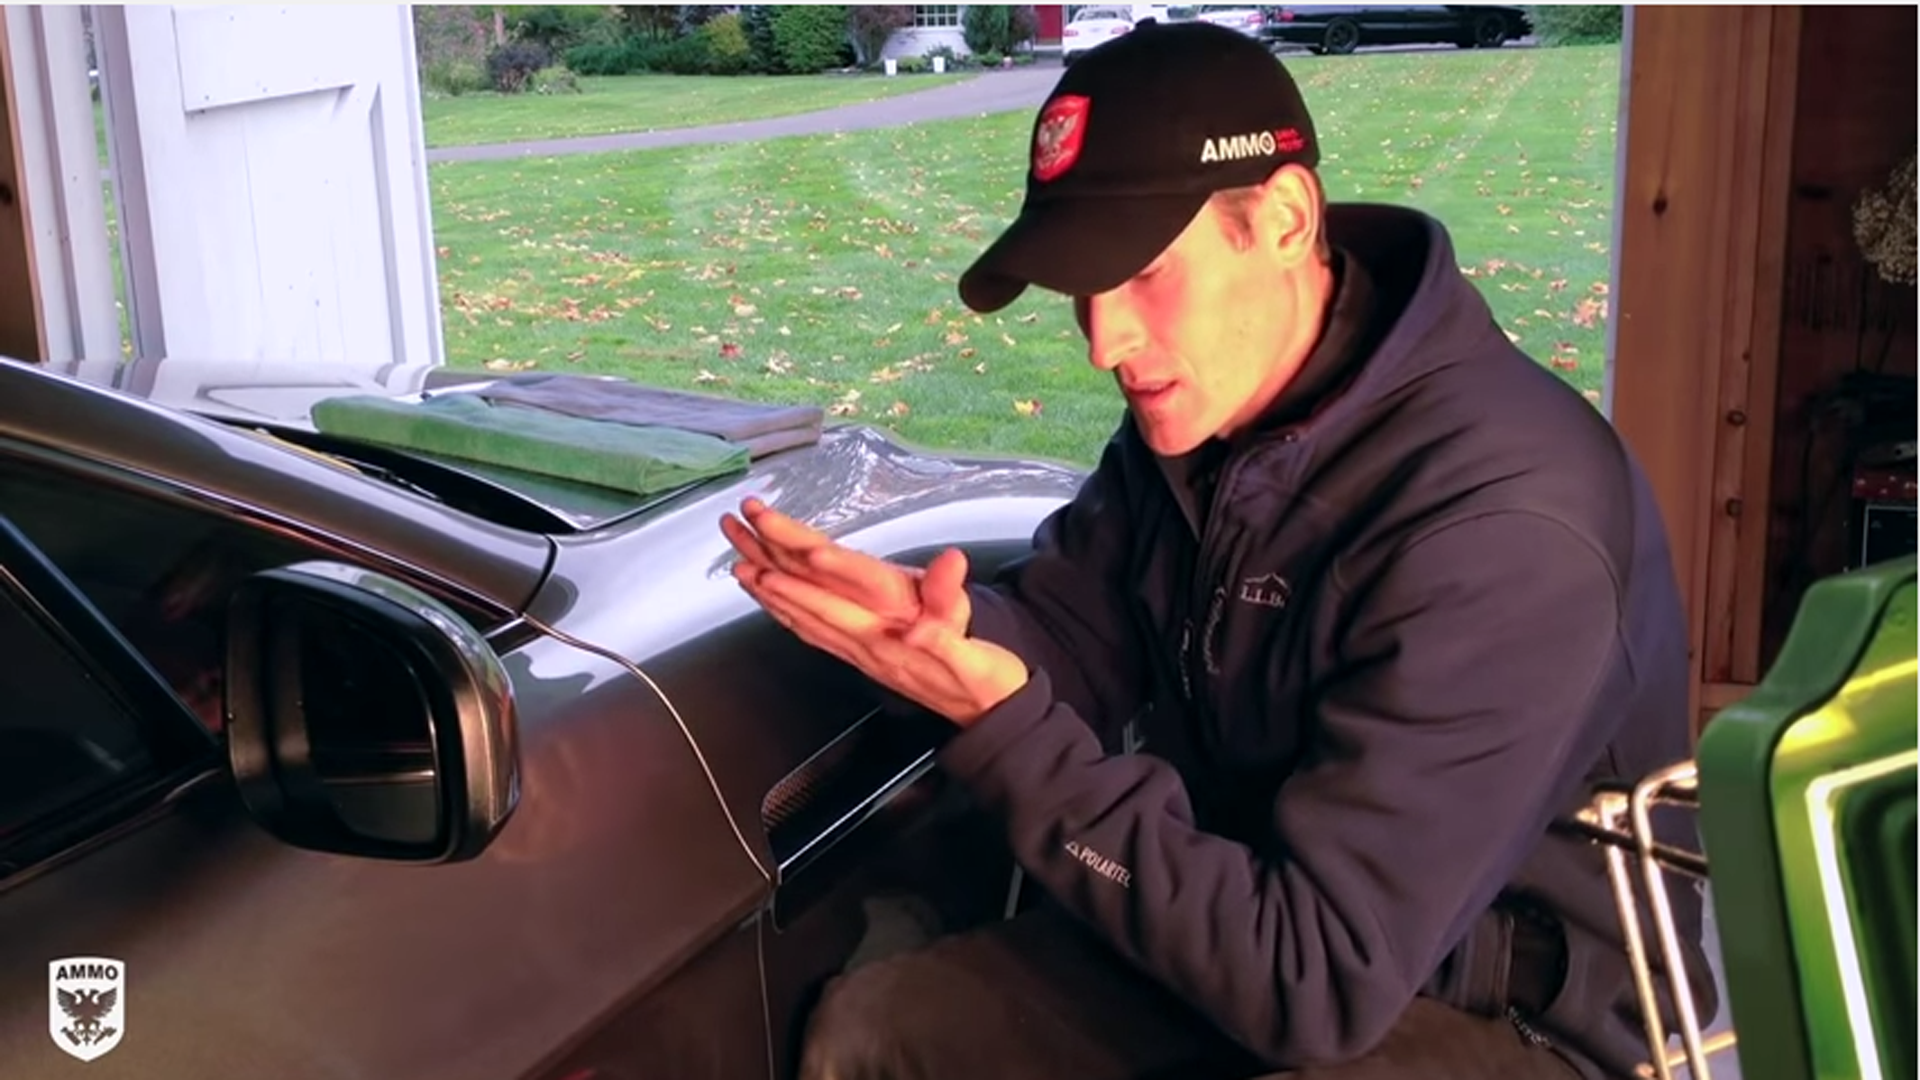
Waxes are a common use of protection and leave a clean finish to the appearance of a car. However, they may only last up to a month. Using your hands to wax the car is an effective technique when the paint is cold or cool. When the paint is warm or hot, the wax will easily spread by using a sponge.
Using your hands may take longer, but there is a science to this technique. When you use your hands, you'll feel particles on the paint which will prevent areas of the car from being missed. Dirt and small rocks can get caught in a sponge without you noticing and scratch the entire surface. You may not notice until the job is done.
This will be easier if you're working indoors with an ambient temperature between 55° and 85° fahrenheit. Too hot, and the wax will dry out before you can spread it; too cold, and the wax will be hard as stone.
Step 1 - Park the car in a covered area
Park your car in a garage or a covered area to prevent dirt or debris from falling onto the surface of the vehicle while you're waxing.
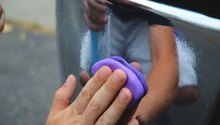
Step 2 - Apply wax to hands
Squeeze a small amount of wax onto your palms and rub the wax into your hands. There should be enough to coat your palms.
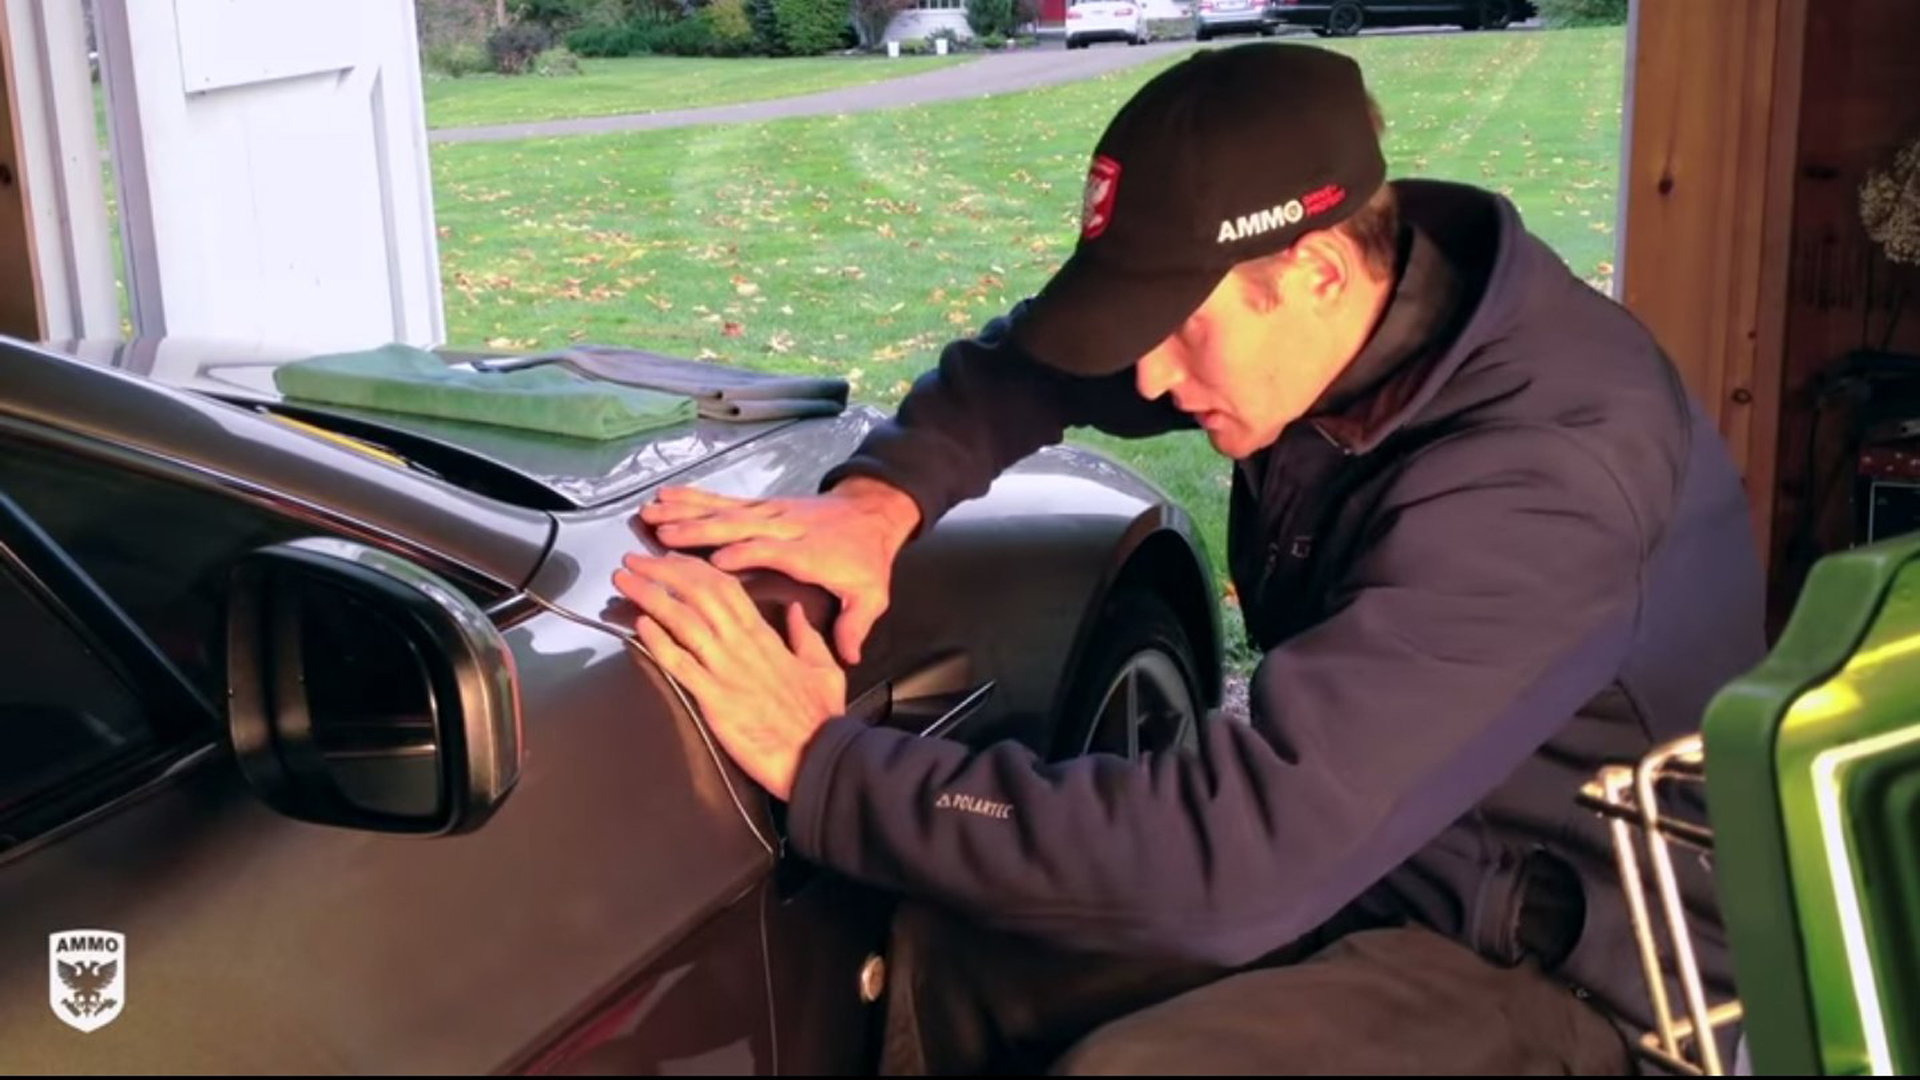
Step 3 - Wax all surface areas
Slowly glide the wax along the surface of the car, working panel by panel. Remember to get every inch of the grill.
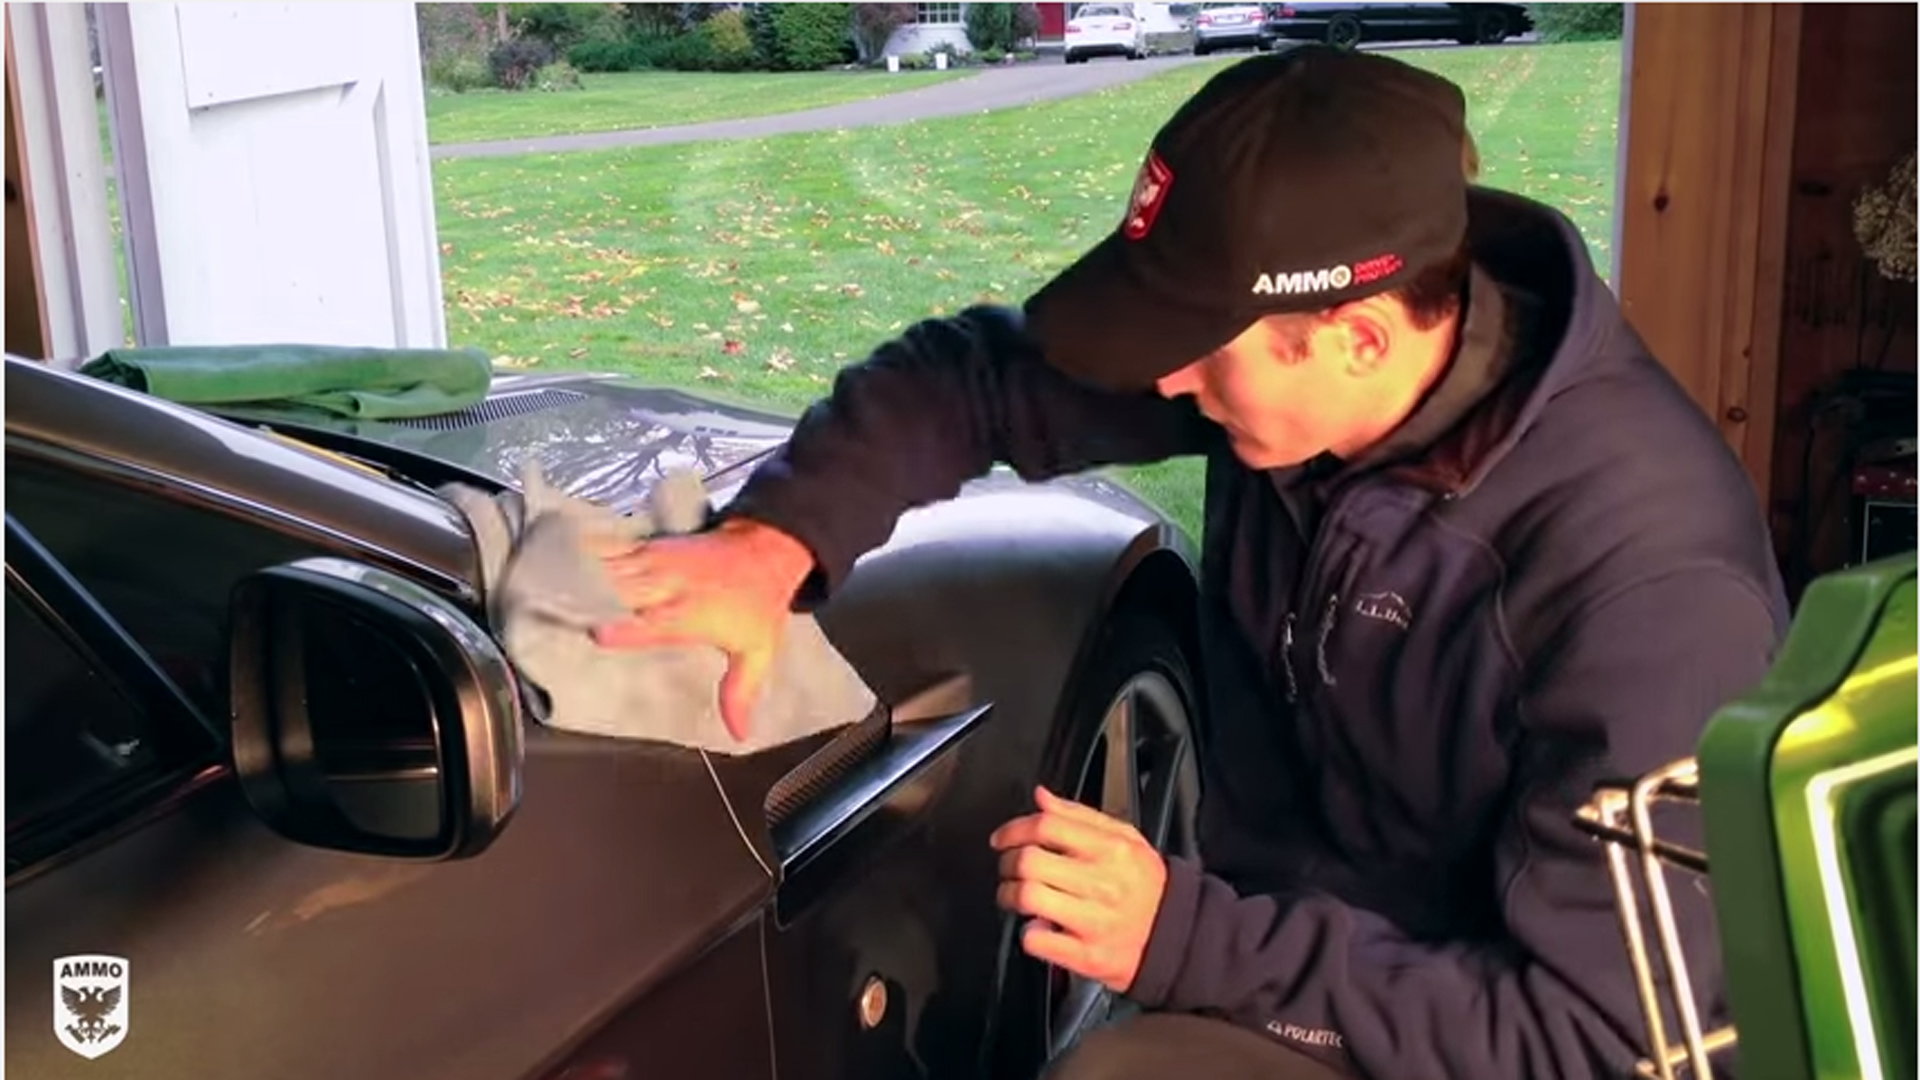
Step 4 - Check your towel for debris and wipe off wax
Use a microfiber towel to wipe the wax from your car and generally shine the surface. Do NOT use the wax towel for any other purpose.
Pro Tip
If applying wax by hand is too tedious, you could also use a foam wax sponge. These yellow foam discs will make the process go by more quickly. Be careful. Using a sponge will increase the chance that you'll miss a spot. Also, your sponge will pick up and drag dirt that you would've have noticed if you had used your hands. This can cause swirling and other finish irregularities.
Featured Video: How to Wax a Car By Hand
Related Discussions and Sites
- How to Wax and Seal - ClubLexus.com
- Where to Buy Microfiber Towels - ClubLexus.com
- Car Wax Comparison Guide - CarsDirect.com
- Detailing and Wash Prep 101 - ClubLexus.com
- How often do you wash your Lexus? - ClubLexus.com