When you click on links to various merchants on this site and make a purchase, this can result in this site earning a commission. Affiliate programs and affiliations include, but are not limited to, the eBay Partner Network.
The rear subframe on our cars has both bushings and mounts that connect it to the chassis. The bushings are on the front of the subframe and can only be replaced by dropping the whole thing.
Since that is beyond what I can do on my driveway with the tools I have, I am just replacing the rear mounts at this time with solid pieces.
The rear subframe mounts allow the subframe to "hang" from the chassis and these can be replaced without dropping the whole frame.
Rear subframe mounts currently available:
-BattleVersion
-PowerHouse Racing
-Titan Motorsports
(I'm sure I'm missing some but these are all the major ones I can think of at the moment)
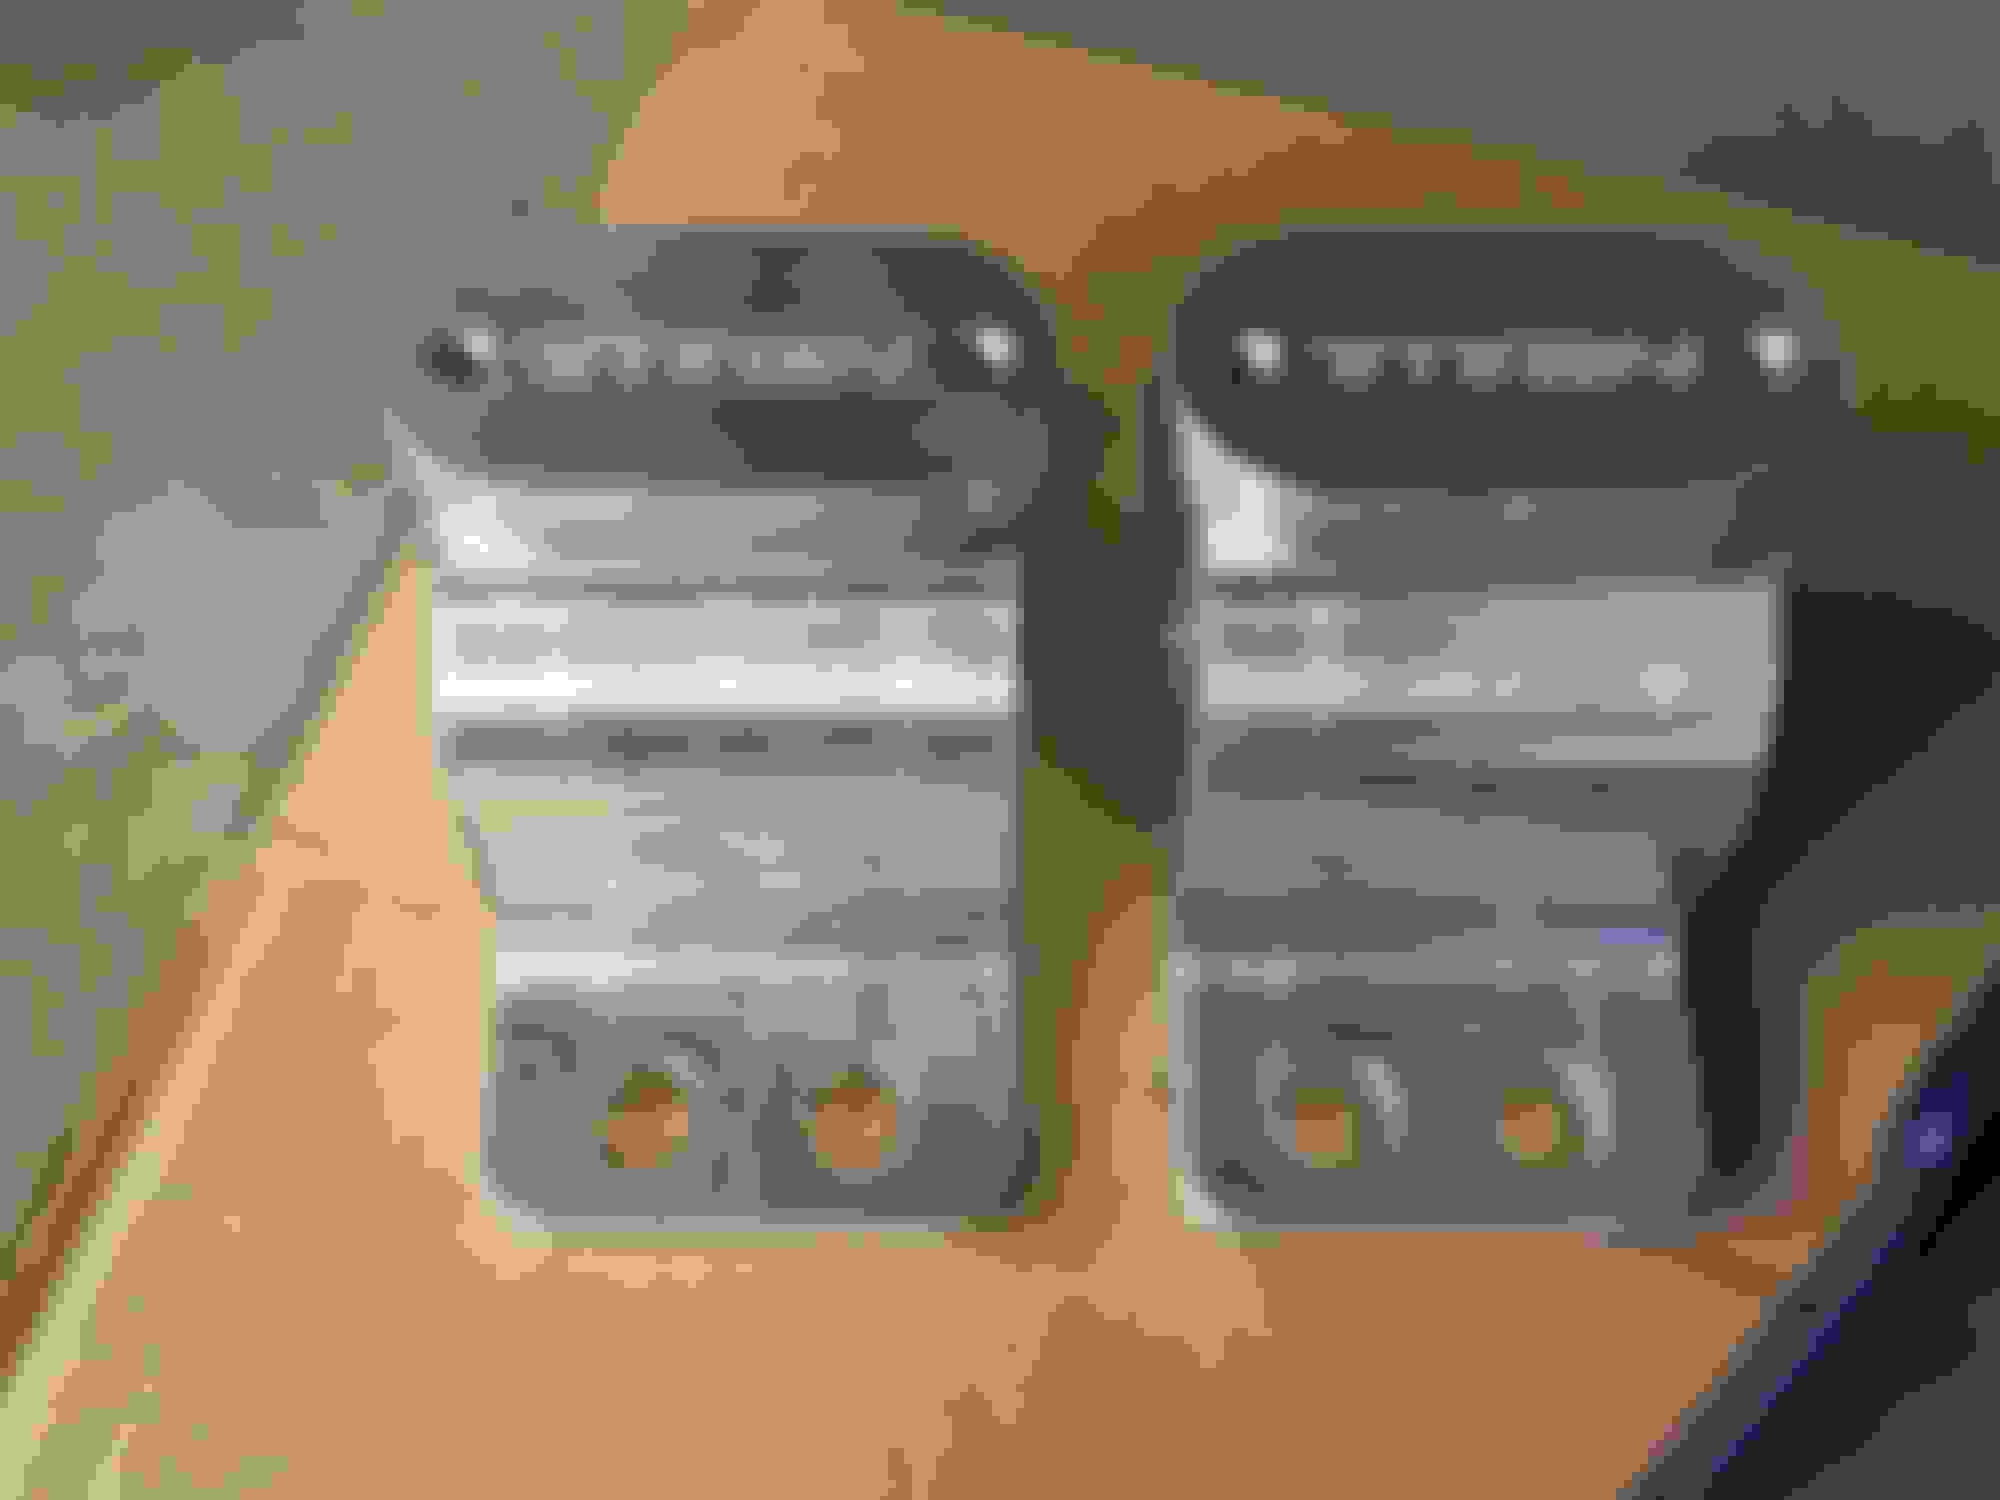
The only real differences I have seen between these mounts are the colors they come in. They are all solid machined blocks of aluminum. Some have logos, some do not.
All of these also fit the JZA80 Supra. And because of this, all come fitted to run JZA80 rear swaybars.
This is what I was planning on doing anyway, so buying these solid mounts allowed me to complete the Supra swaybar conversion AND stiffened up my rear subframe.
These are the mounts I decided on. Titan Motorsports. I will admit they weren't my first choice but RealStreet had a big sale for the July 4th weekend and the price was right.
Now this part is really important. I got lucky and asked another FB member who had the BattleVersion mounts how the install went. He said it's not bad BUT the key thing no one seems to mention with all these solid mounts is that in order to run them correctly/safely you need to run longer bolts.
The OEM SC bolts are fine for the stock mounts, and the OEM Supra mounts, but they are too short for all these billet mounts. The billet mounts have bases that are about 1cm thick. The steel OEM mounts are 1-2mm at most. So basically you need bolts that are 10mm+ longer for proper thread engagement.
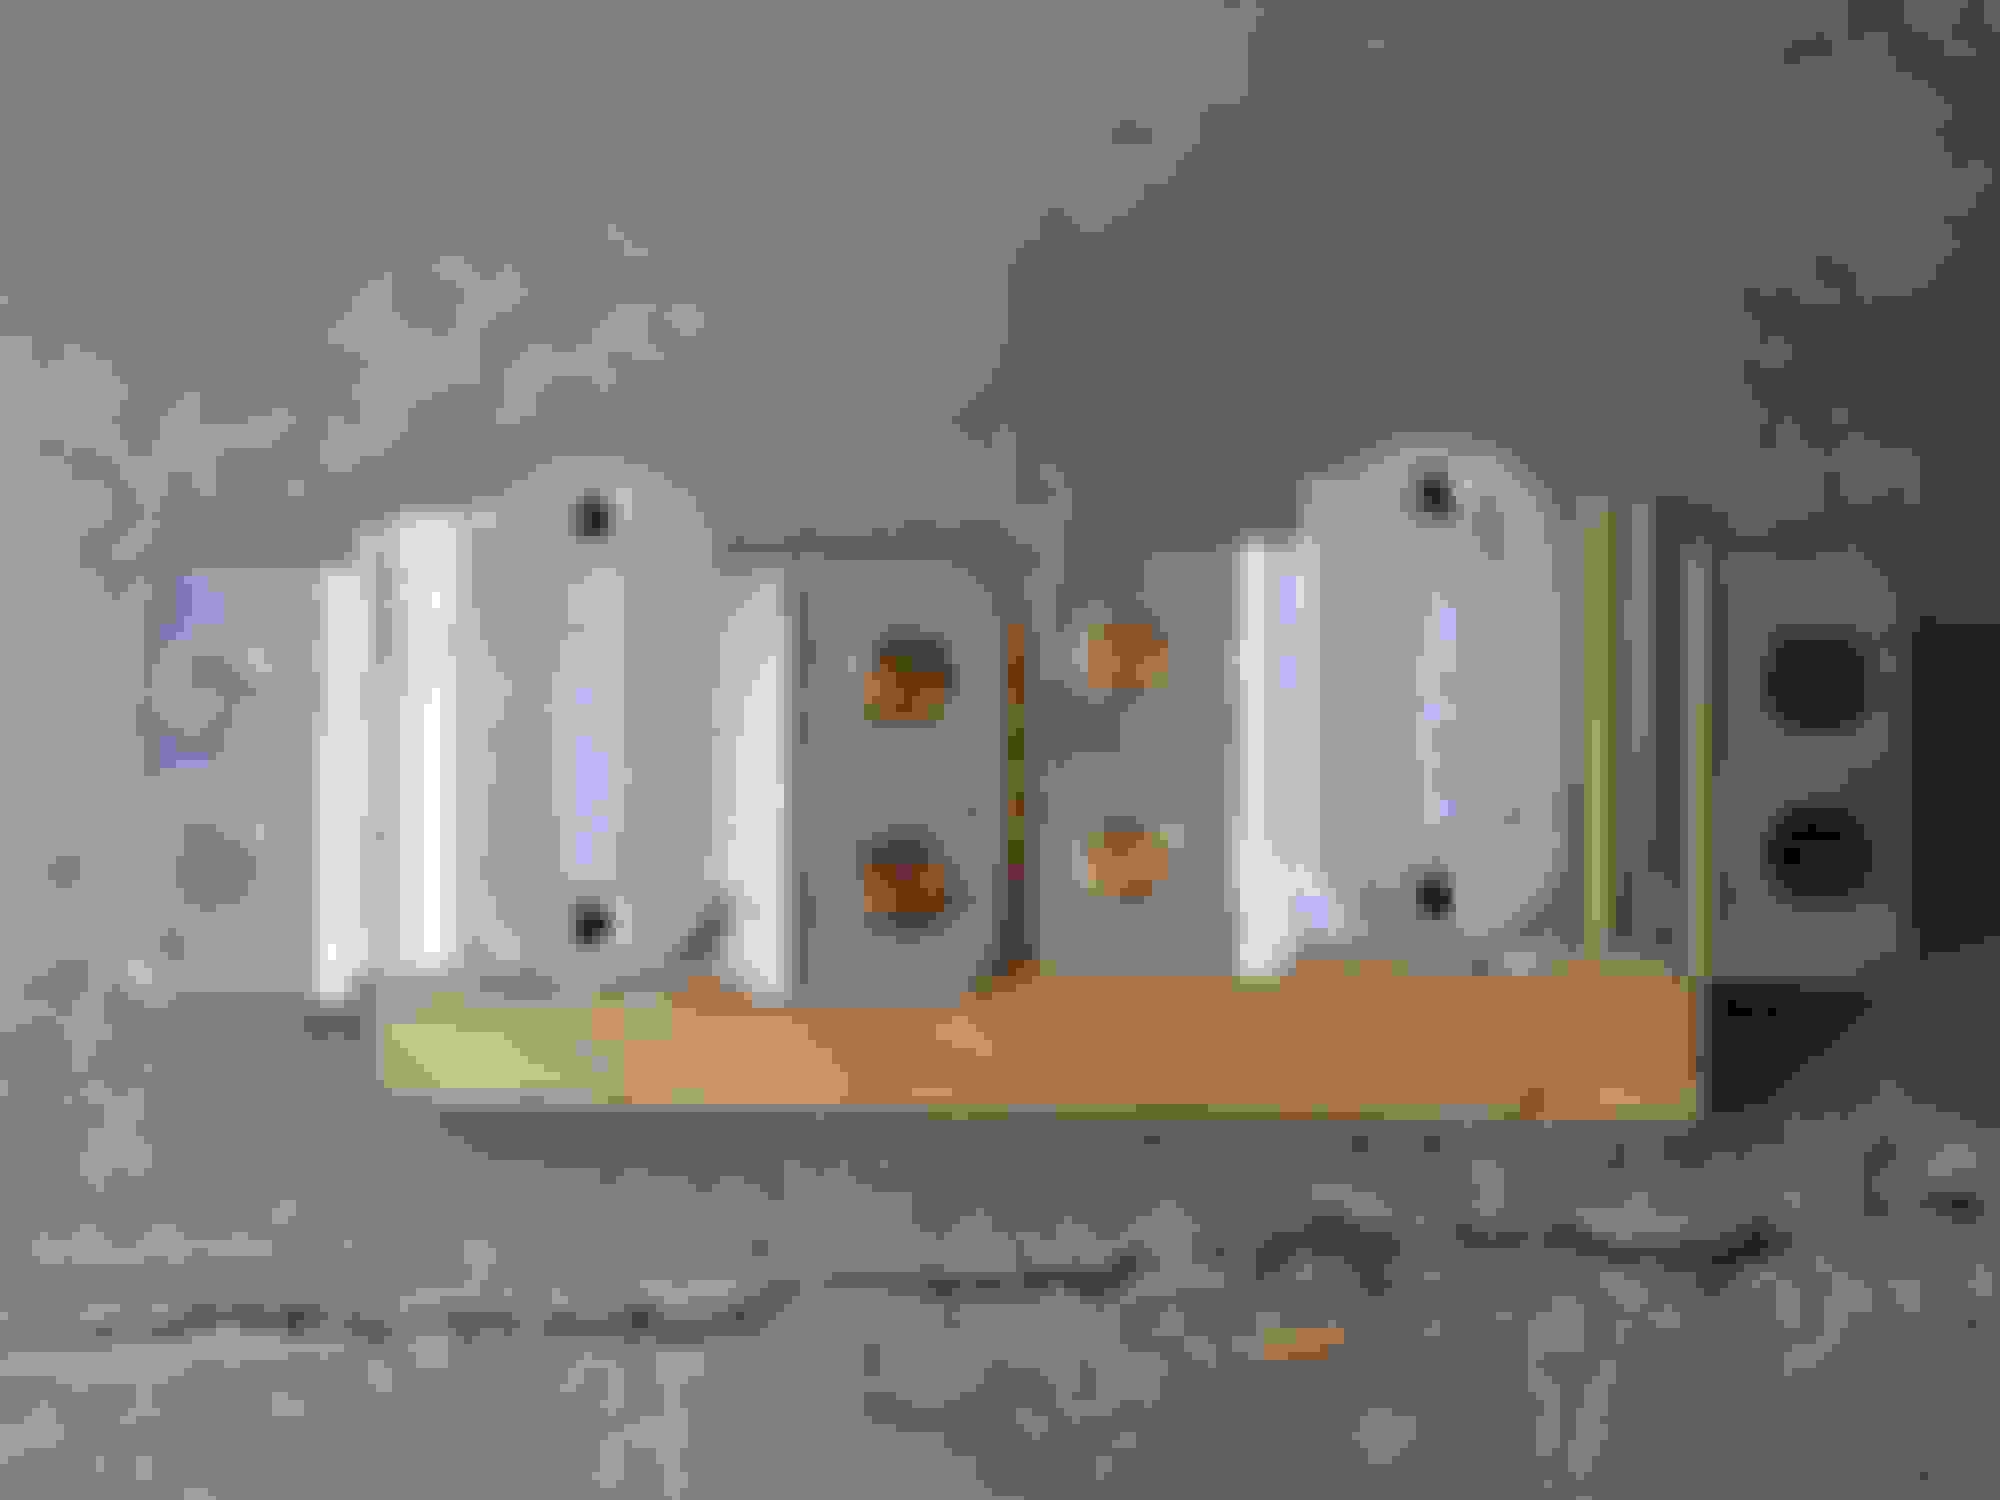
Here's the specs of the hardware I bought:
(8) M10 1.25 x 40mm bolts
(8) M10 washers, OD: 25mm ID: 10mm thickness: 4mm
Removal of old mounts
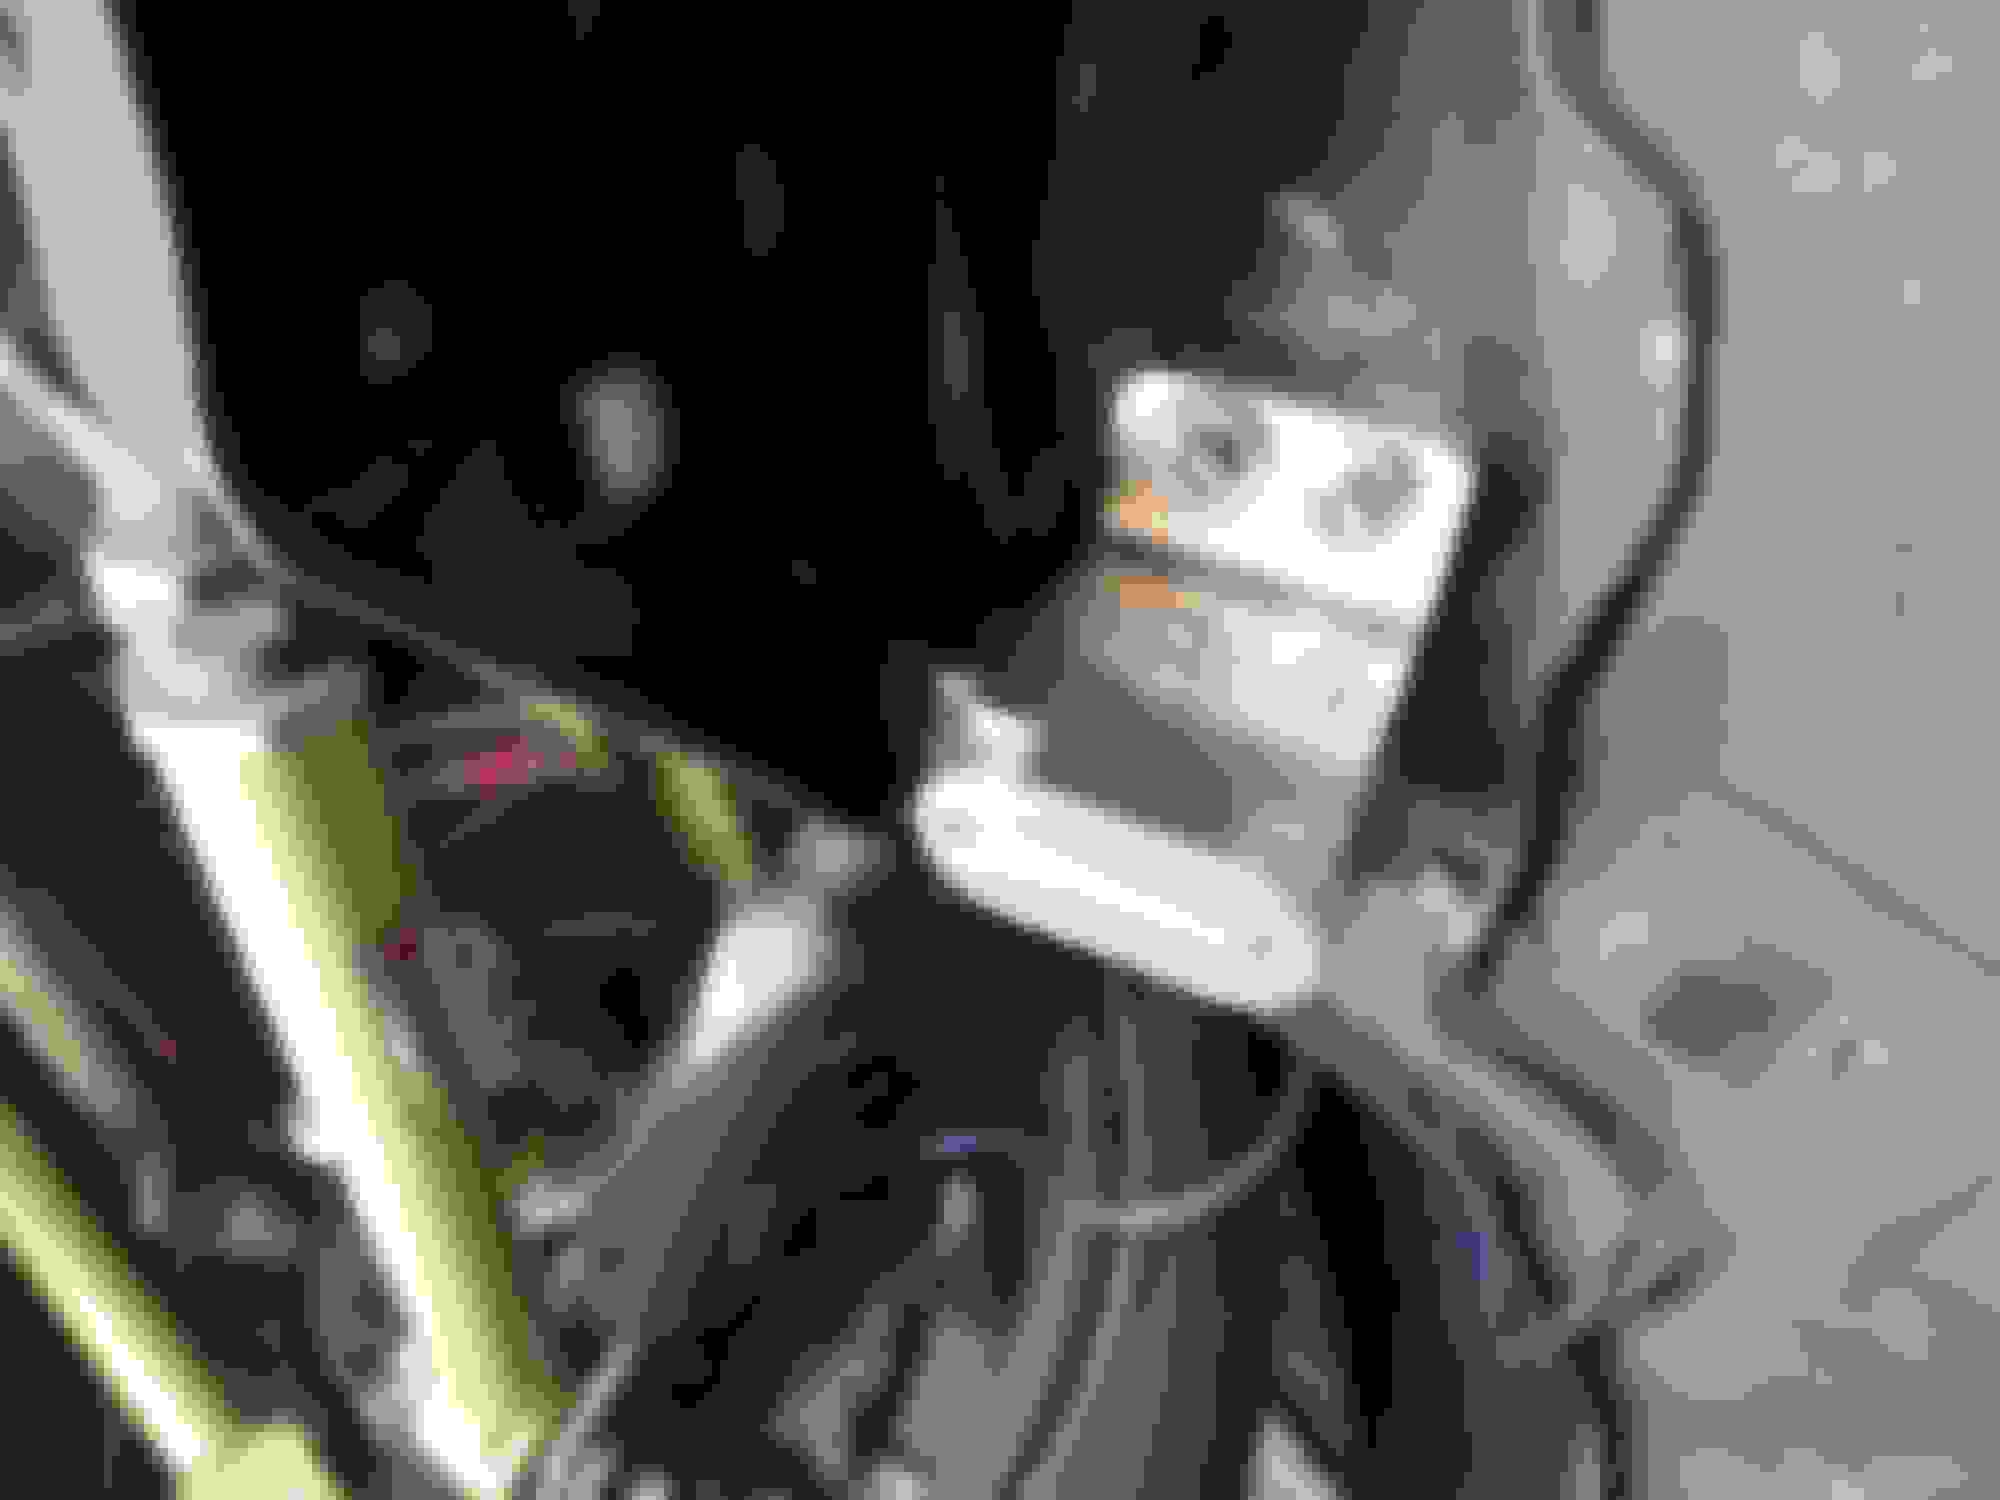
I used a jack to support the subframe by the diff. If you unbolt the mounts from the chassis with the subframe not supported, you will see it sag. It's best to only let it sag while pulling the old mounts off and putting the new ones on.
Unbolting from the chassis is easy and simple. The harder part is getting the mounts off the rear subframe.
This is the before. I am the 2nd owner. I've had it for 14 years and the car was a Florida car before I turned it into a summer "good weather only" car.
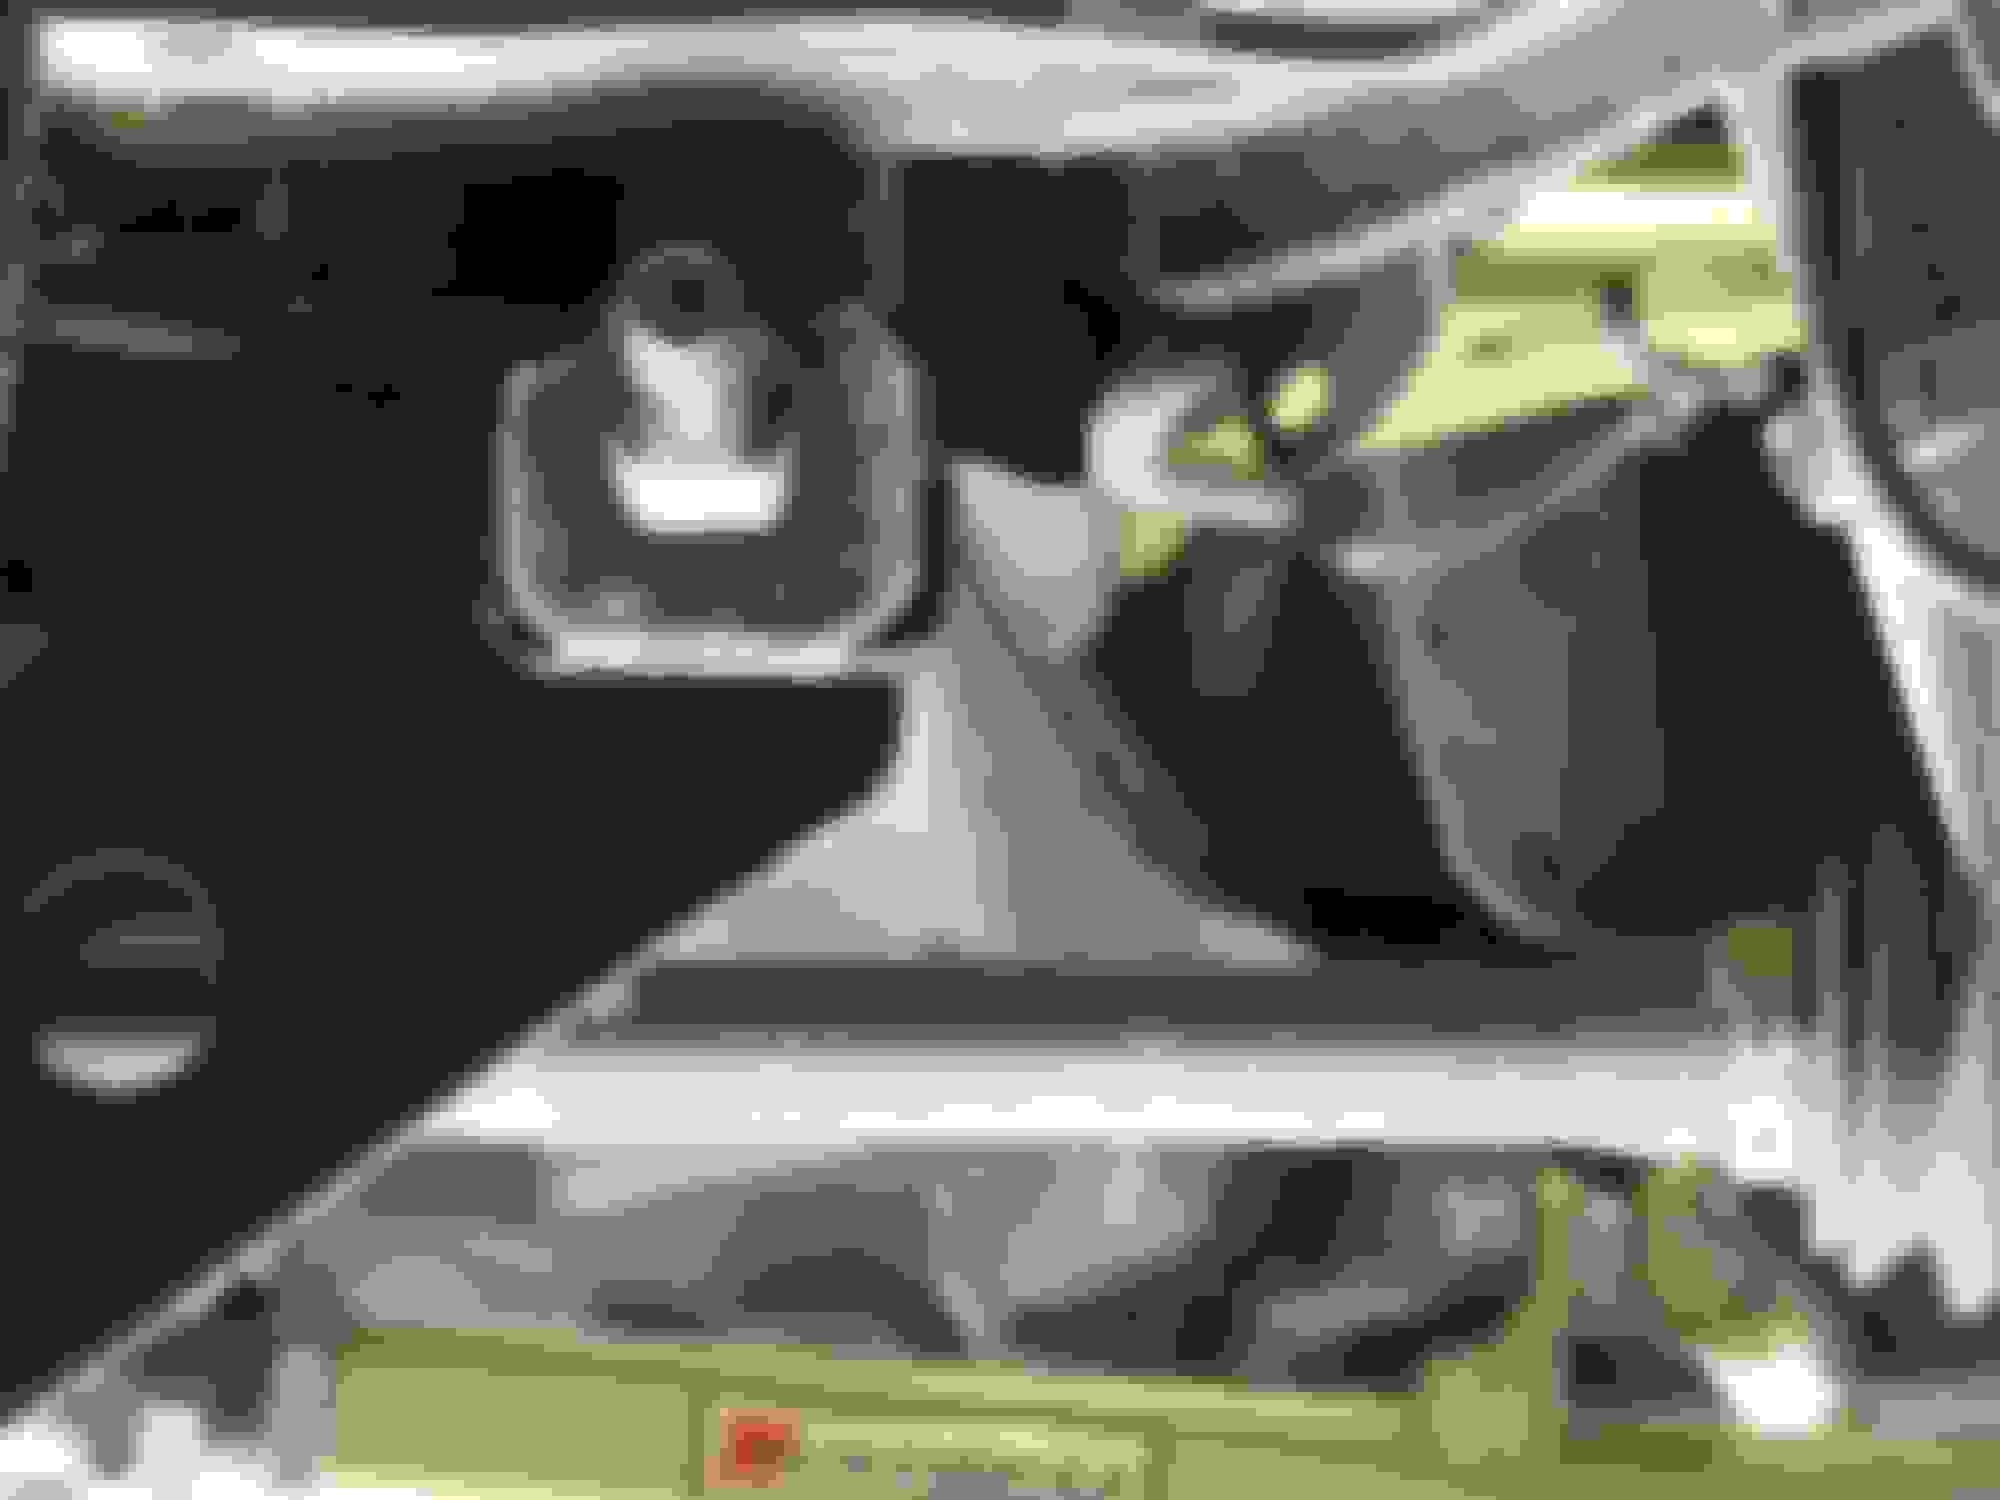
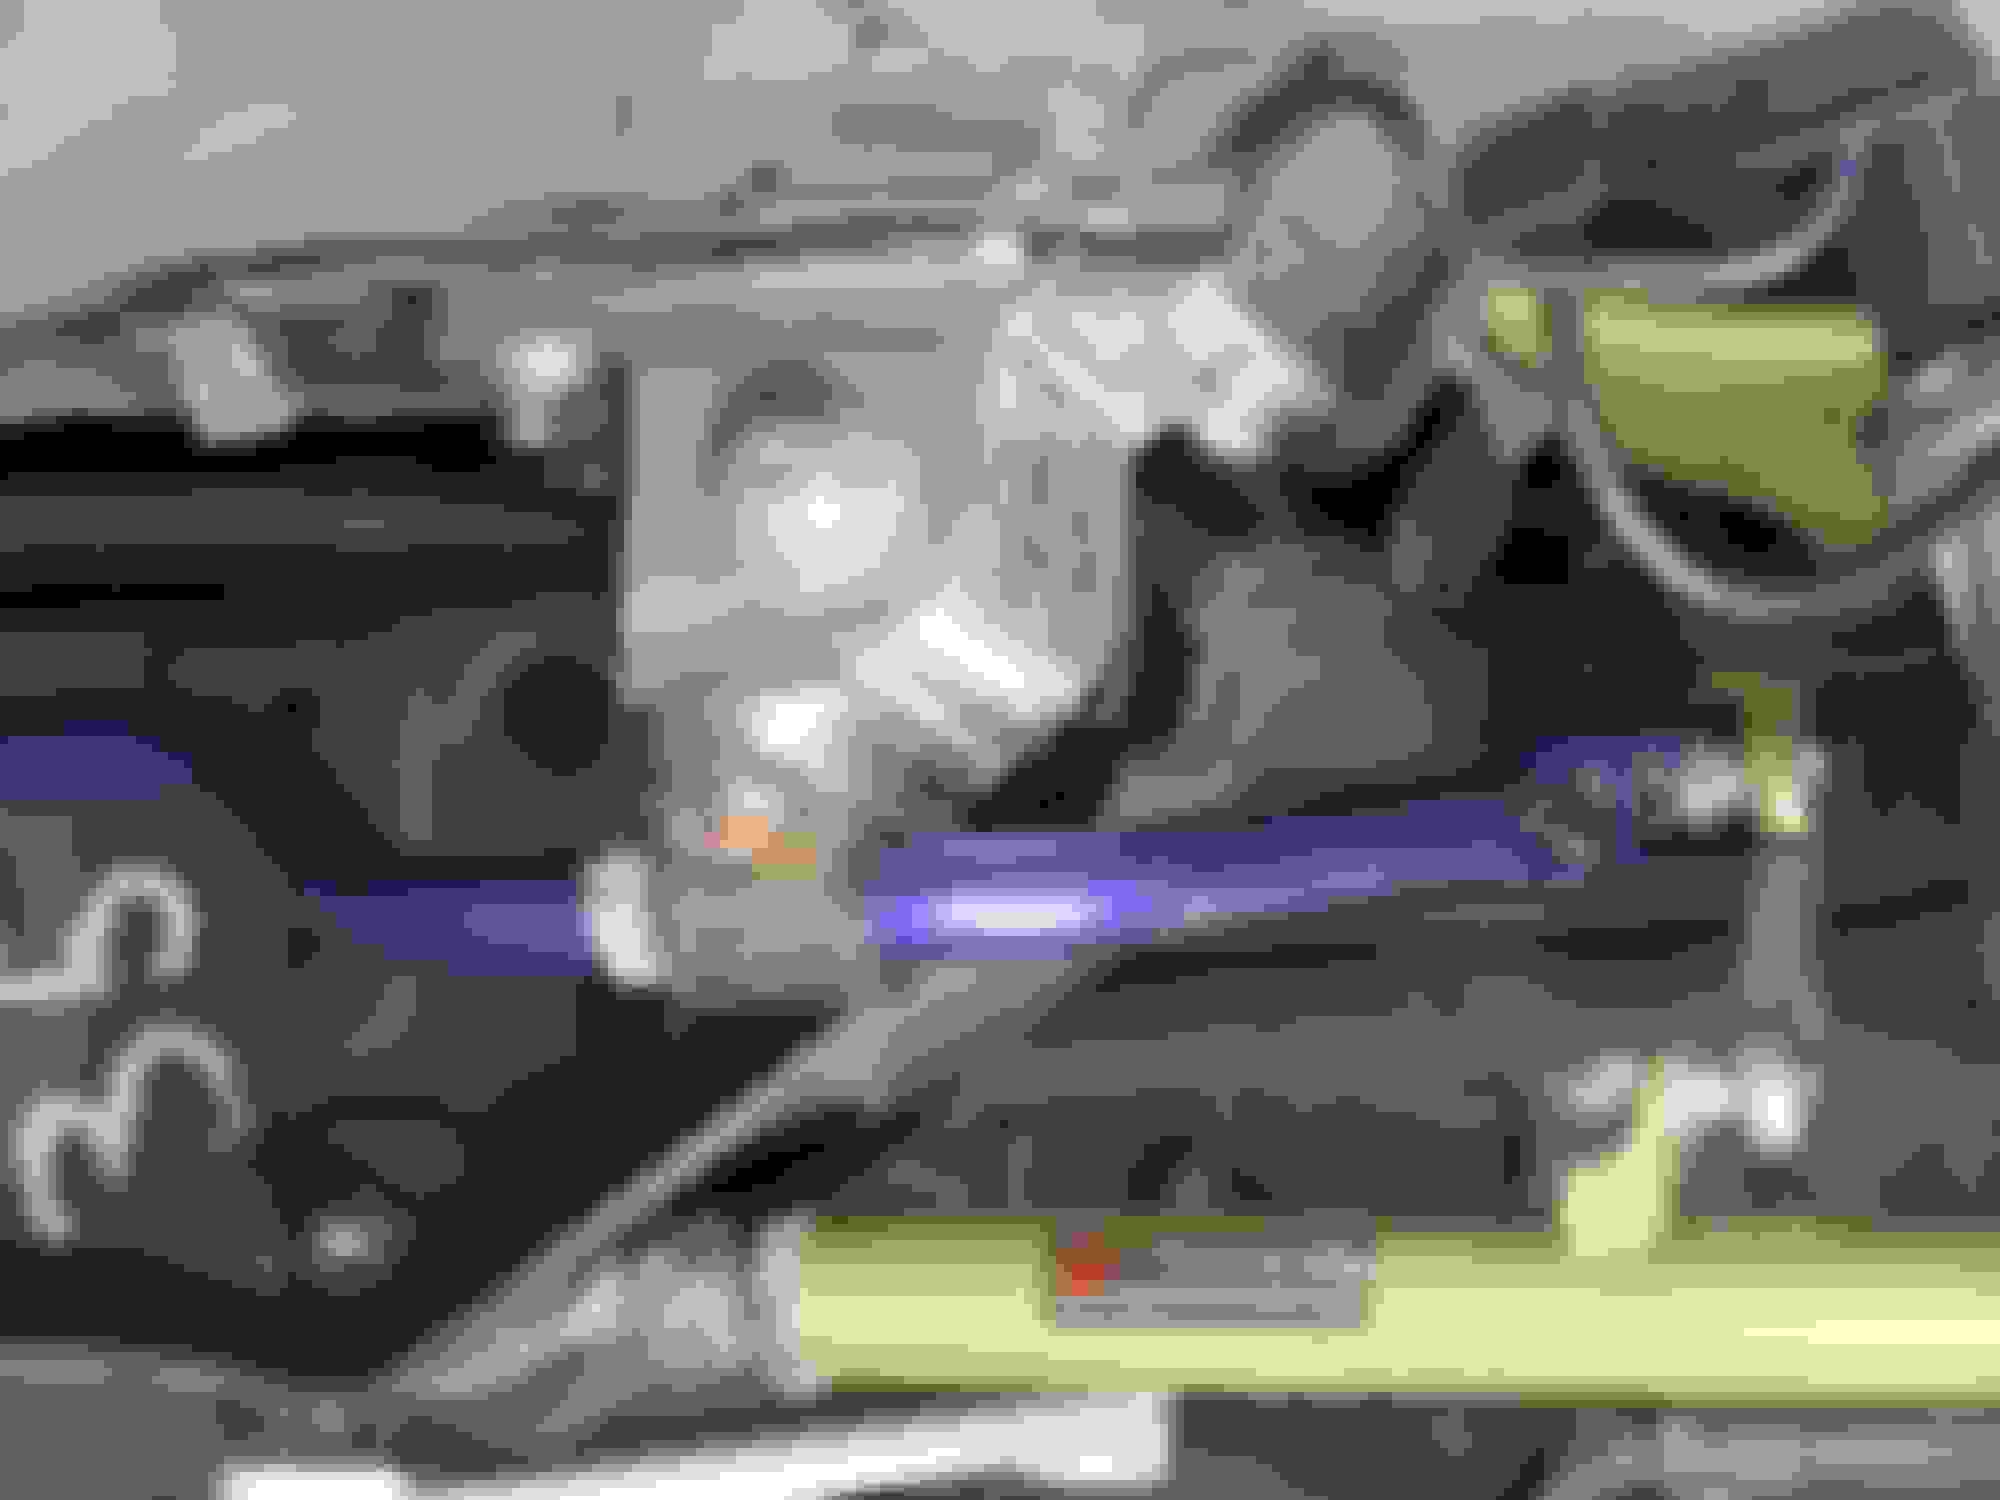
Here are picts of the subframe "pegs" that the mounts slip on to. They are rectangular with rounded edges that slip inside the solid metal collars in the mounts. The problem with the design is that water gets in there. That causes rust. And the rust builds up over time to the point that they corrode themselves together. I'll show pics of that carnage further down.
^ this is what they look like after I cleaned them up a bit with a wire brush.
This is what the inside of the OEM mounts look like. They are not perfect cylinders. They have raised parts in the middle and this design traps water behind it which causes all the rust in the first place.
Here's the deal. They both might come off easy, or they both might fight you tooth and nail to let go.
Mine was 50/50. Once mount came off in less than 30 minutes while the other refused to come off. I spend a total of 12-15 hours banging with a hammer, swearing, spraying with penetrant oil, 4 different prybars (sometimes 2 at a time) then taking breaks so I didn't go insane.
I finally used a big 1in thick chisel as a wedge and hammered it inbetween the subframe and the mount. I got it to move almost 1mm. This fractured most of the rust (I think) so I hosed everything with more CRC Freeze Off then hammered the mount back into place then did the hammer-chisel method again. Each time it got way easier. Finally I got it off.
This was the mount I got off in about 30min
And this is the mount that took 12-15 hours
If you make it this far, congratulations! You've gotten past the hardest part.
To prevent something like that ever happening again, I painted the whole subframe peg with antiseize. No light coatings - I globbed that stuff on to the point where when I put the Titans on it was oozing out.
I have no intention of ever dealing with corrosion like that again. Ever.
Install note: With the Titan and the Battleversion, the curved side of the mounts faces outward. The flat sides face inward. Like in the pic below
And here
Torque specs are as follows:
Subframe mount to chassis: 42 ft.lbs
Subframe nut: 76 ft.lbs
*Some notes on these specs:
-My factory 97 SC300 service manual says 42ft lbs for the bolts but if you search for the specs of these you will find some people debating the actual torque. Most SCs seem to say the specs are in the 20s while all JZA80s say 42. Because I'm converting to the rear Supra swaybar as well, I stuck with the 42ft.lbs number.
-I searched EVERYWHERE for specs on that rear subframe nut. The specs for the bolts on the front of the rear subframe are easy to find but I checked in with friends who are mechanics, parts guys, and service managers/directors of Lexus and Toyota dealerships and NO ONE could give me an exact number. I found one post buried on Supraforums where an old Toyota mechanic said it was lugnut torque. Going off of this I decided to measure the torque needed to break it loose and discovered that it indeed broke between 65 and 85 ft.lbs. So until I can find proof that it isn't 76ft.lbs, this will do. I've had the setup on the car for over a month now and when I rechecked everything, nothing had changed.
Here is the finished result of everything.
The swaybar mounts are 21 ft.lbs (JZA80 are the same spec as SC3/400)
If you still have your oem mounts, could you measure the distance between the the two holes on each side of the mount to see if it's equal or different on each side?
The titan and battle version mounts didn't bolt up on my car. If you look at the mounts closely, distance between the "flat" side of the mount is wider than the "round" side of the mount. On my stock mounts they were equal distance which requires drilling the solid mounts on the "flat" side to match the "round" side.
Sorry, I don't have the original mounts anymore. What was weird about this install was that I had no issues at all. Everything went on easy. I did notice the brake line issue that you pointed out. I just didn't put the nut back and moved the bracket farther down the line.
It's interesting that you say that. People who do the Supra swaybar install with OEM mounts say that the holes need to be widened. I don't have any first hand experience with the BV or PHR mounts, but these Titan mounts fit. I did have to scrape some of the rubberized undercoating off in some spots to make sure the mount sat flush against the metal tho. Otherwise it caused the mount to **** to one side and I did notice that affecting bolting the mount down
The titan mounts didn't fit on my car (98), so I installed the BV mounts which were already drilled out by the previous owner (99). I sold the Titan mounts to a friend of mine who also has a 97 SC300 and he said it fit without modification which makes me wonder if the 98+ subframe mounts are different from 92-97.
Nice job. I have the BV mounts and didn't have to use longer bolts. OEM hardware worked fine for me. Driver side OEM mount came off within 5 minutes, but passenger side had to be cut off. Test of patience.
^ That's kinda funny. My car was the exact same way. Drivers side was the easy one; it had a lot less corrosion in it compared to the other. Penetrant + a prybar and it came off.
Passenger side took hours, half a can of CRC Freeze off, 3 different prybars, 2 hammers (1lb and 3lb) and the 1in chisel bar.
I wonder why that is.
CRC Freeze. Bought a can of that as well. Didn't work for me. I'm sure my neighbors enjoyed my conversations with the passenger side mount. I gave it a cursing!
Wow, I feel a lot better now. I've tried swapping subframe mounts on three SCs. The first was a piece of cake -- both mounts slid off easily -- while the other two [sets] never budged. I stopped well short of 12-15 hours, though.
I got them thru RHDJapan about 5 years ago. They are still listed on their site as of now and the only review listed for them is mine lol. When I first bought them I didn't know if they were going to fit the JZZ30 at all but I decided to take the chance to see if they did. Worse case, I would've kept the trans tunnel brace then sold the subframe braces to one of my friends locally with a late model MKIV. Turns out all 3 pieces fit like they were oem.
Now here's the disclaimer - apparently SC subframes changed slightly at the same time the JZA80 subframes did in 4/96. Years ago, someone bought a set of these and posted about them on facebook and the trans tunnel brace was the only piece that fit on his car. The two subframe braces were either too short or too long for his. I don't remember if his was a 94 or a 95. I remember that his was definitely not a kouki SC3/400 (97+ car)
My car is a 1997, and I have the revised subframe. So I can confirm that these will bolt on to SC3/400s from 97-00.
 09-06-18, 02:22 PM