
 12-16-14, 11:51 AM
Last edit by: IB Advertising
See related guides and technical advice from our community experts:
Browse all: Lexus IS Brake Guides
- Lexus IS GS: How to Change Disc Brake Pads
Step by step instructions for do-it-yourself repairs
Browse all: Lexus IS Brake Guides

IS250 rear brake replacement (GREAT DIY with lots of PICS!)
07-09-09, 12:15 PM
#1
Driver School Candidate
Thread Starter

Join Date: Jul 2009
Location: TX
Posts: 3
Likes: 0
Received 0 Likes
on
0 Posts
this is a just a guide line for you to use. do it at your own risk.
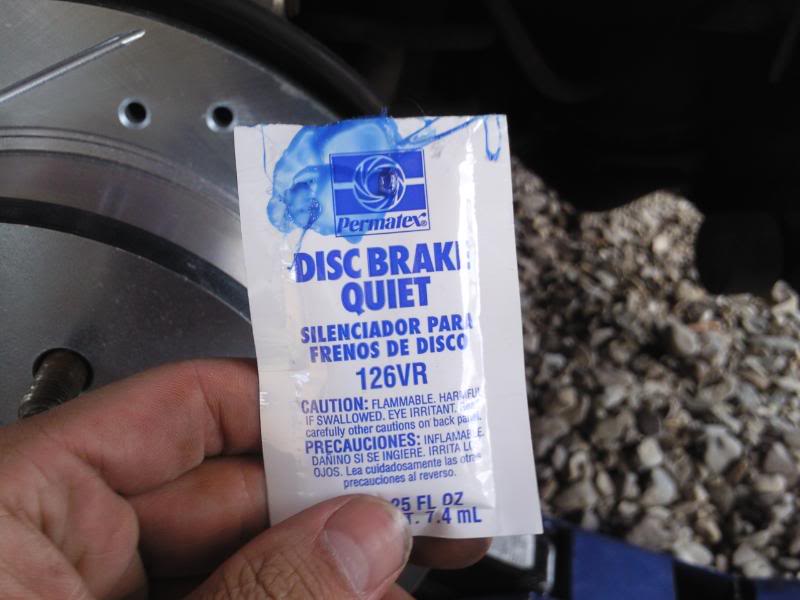
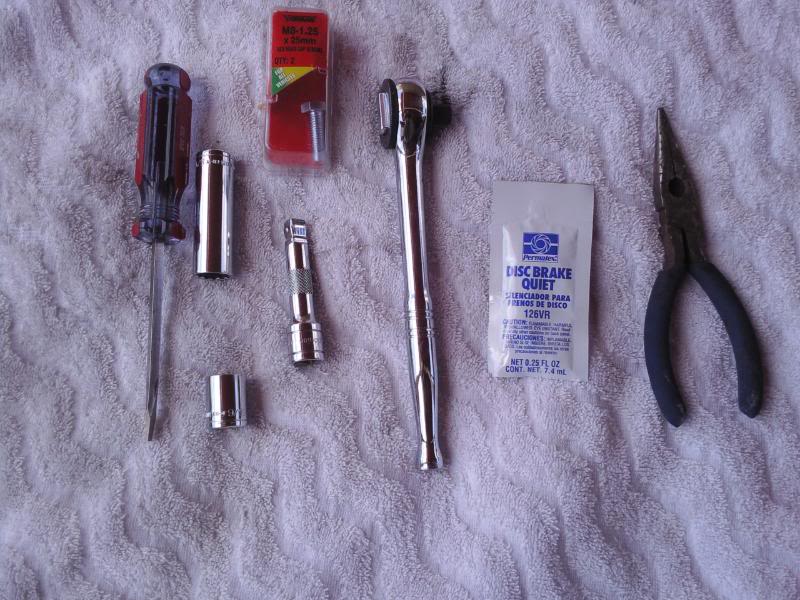 here are some things you will need. 14mm deep socket and regular socket, needle nose pliers, flat head screw driver, brake cleaner, disc brake quiet, hammer, c clamp or a brake caliper tool, equipment to lift vehicle and remove wheel, and a m-8 1.25 screw.
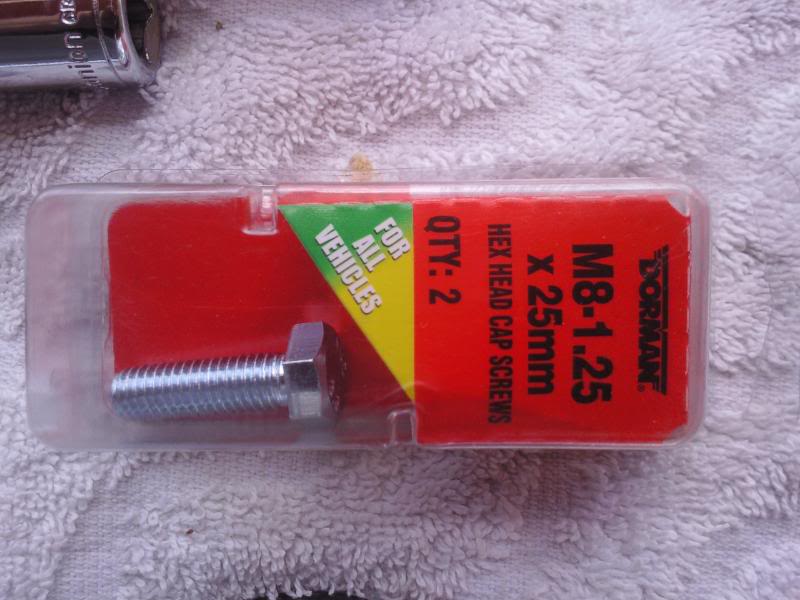
this screw will be used to remove rotors.
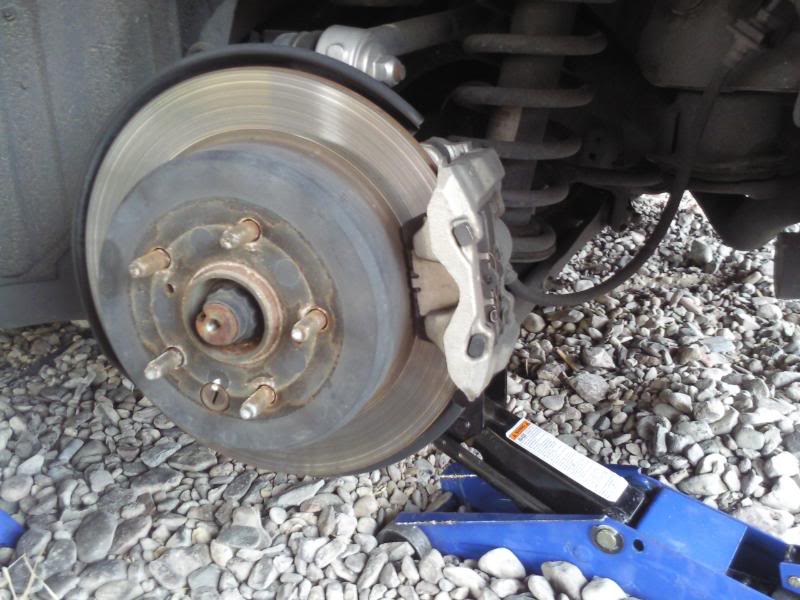
start by lifting one side of vehicle first and remove wheel.
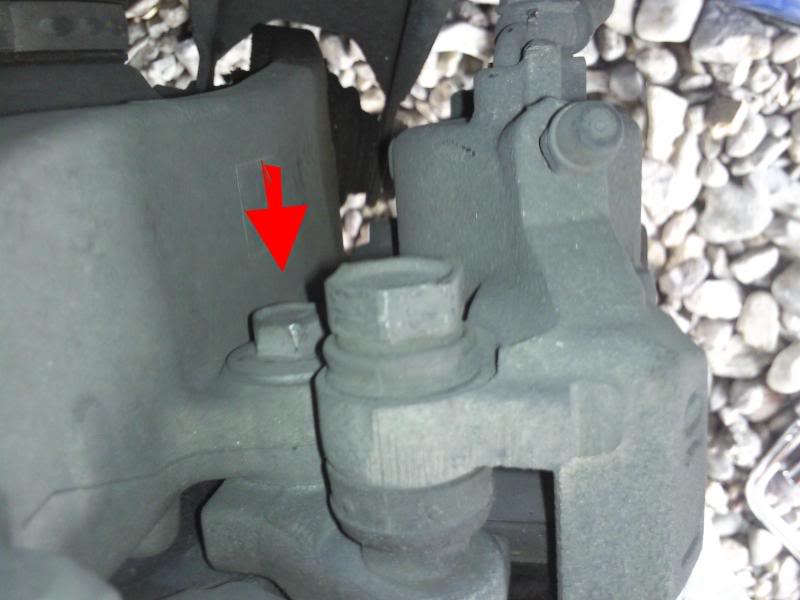 romove 14mm bolt, and a second 14mm bolt on the bottom side
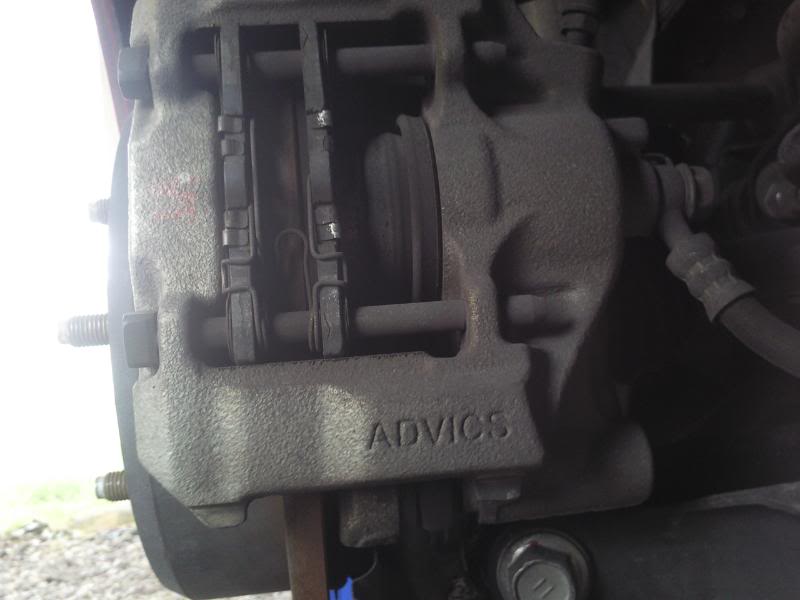
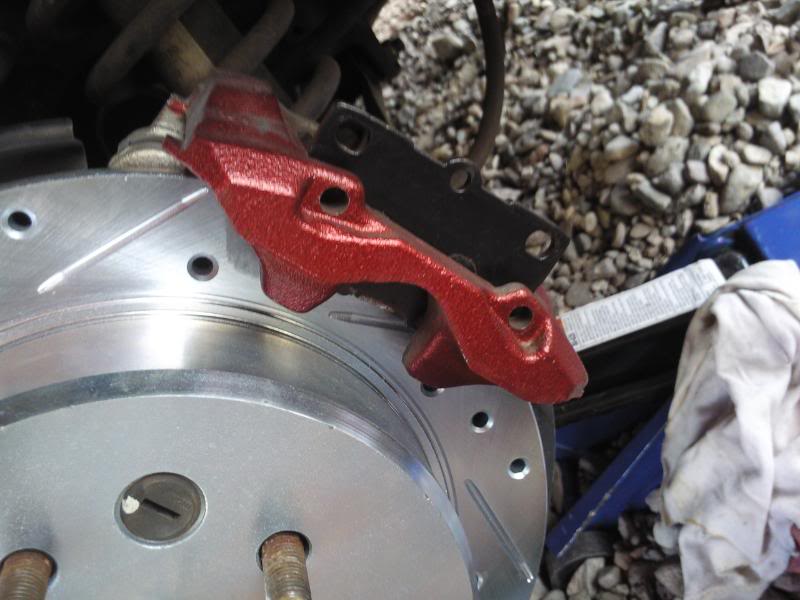
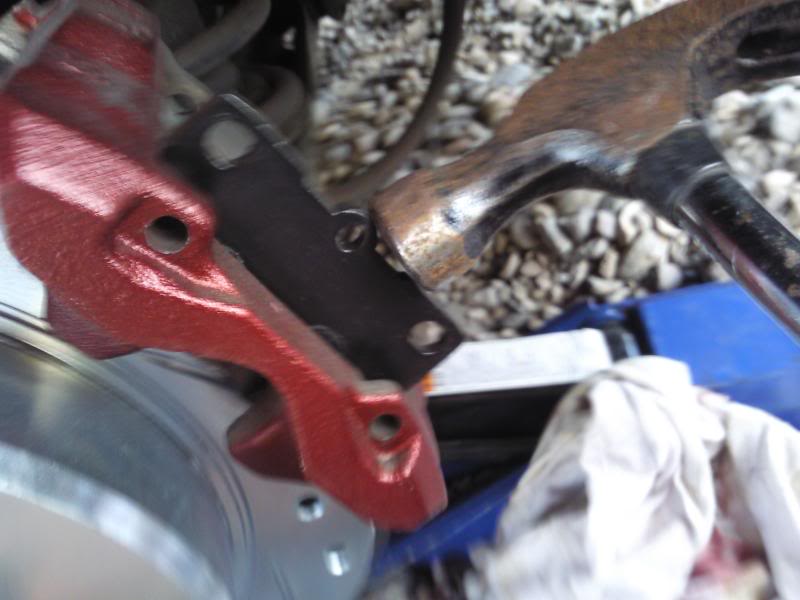
now u can remove the whole brake caliper.

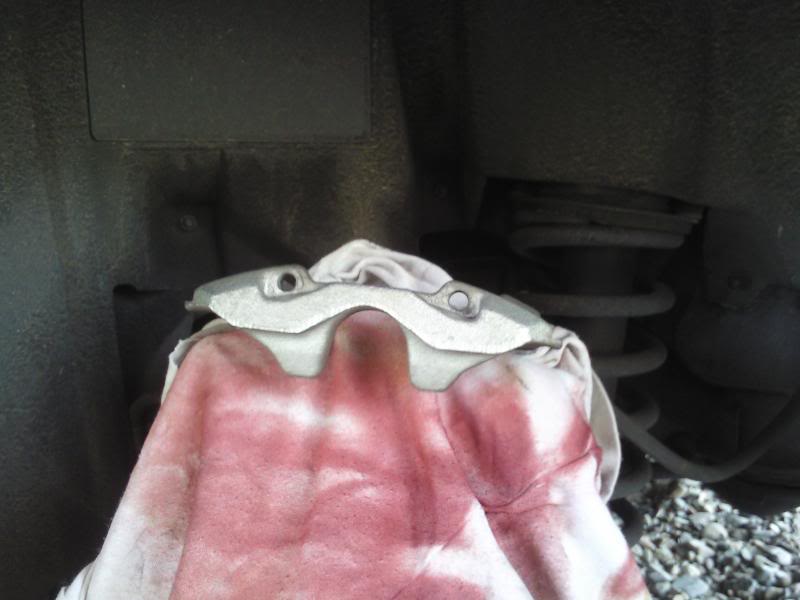
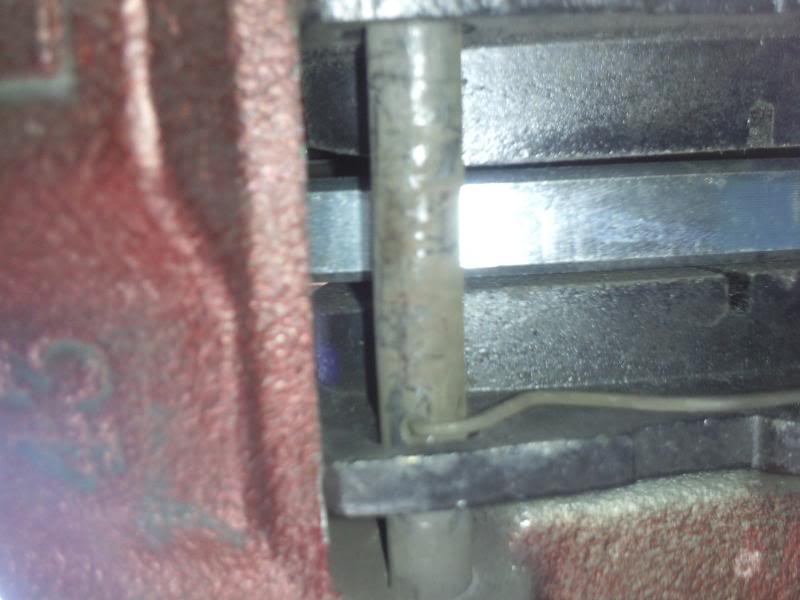
now with the caliper removed u can remove the brake pad slide pins retainer pins and brake pads
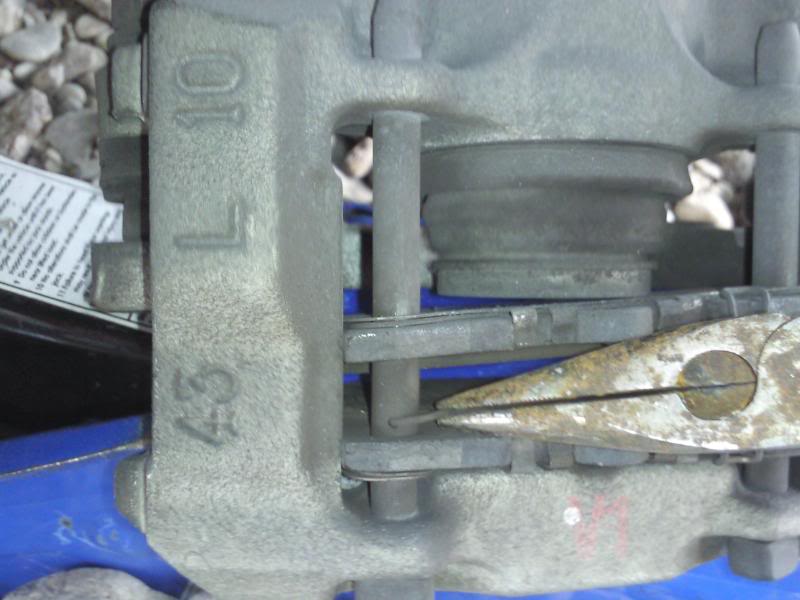
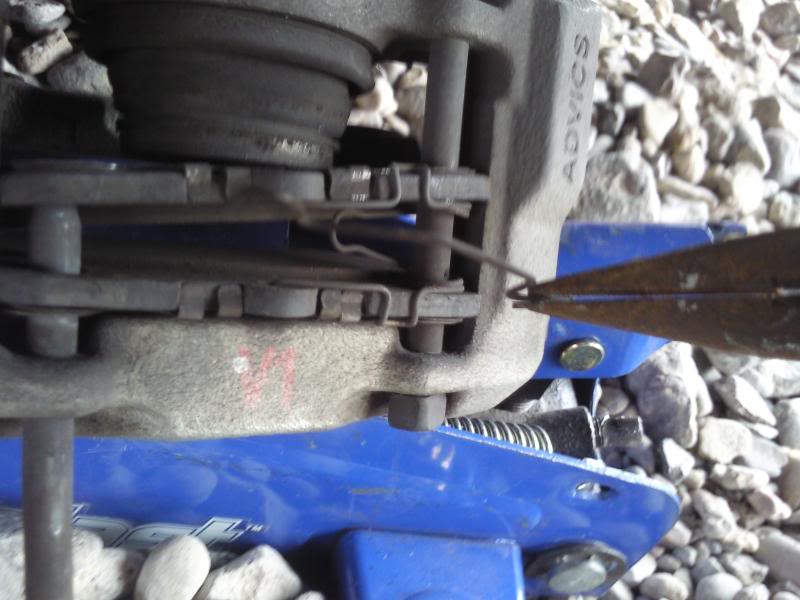
you will need the needle nose pliers to remove the retainer pins.
now that the those pins are removed the sliding pins will slide out
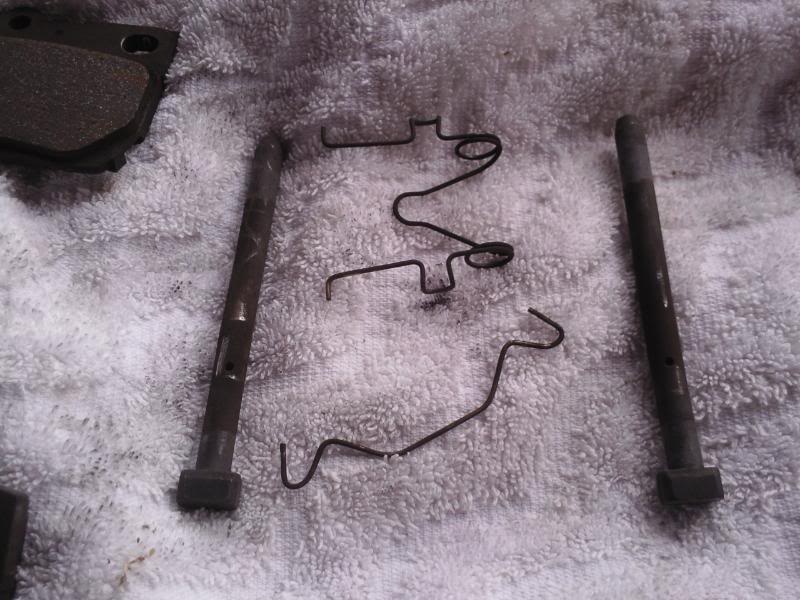
make sure u keep these pins and do not brake them or discard them
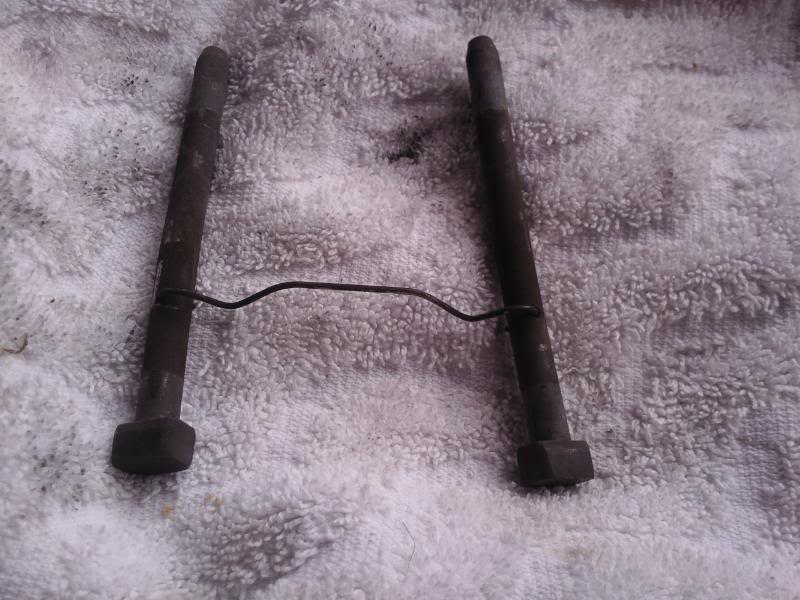
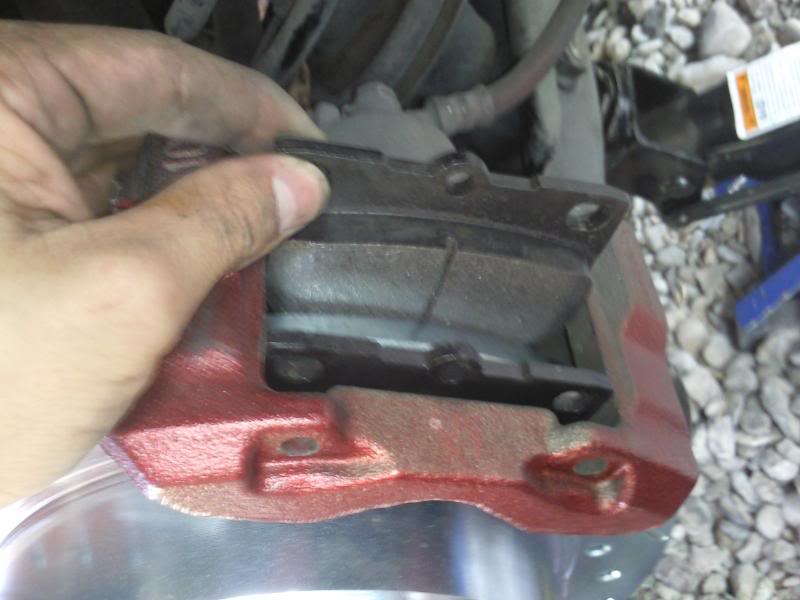
 here are some other angles on how they go together for more reference.
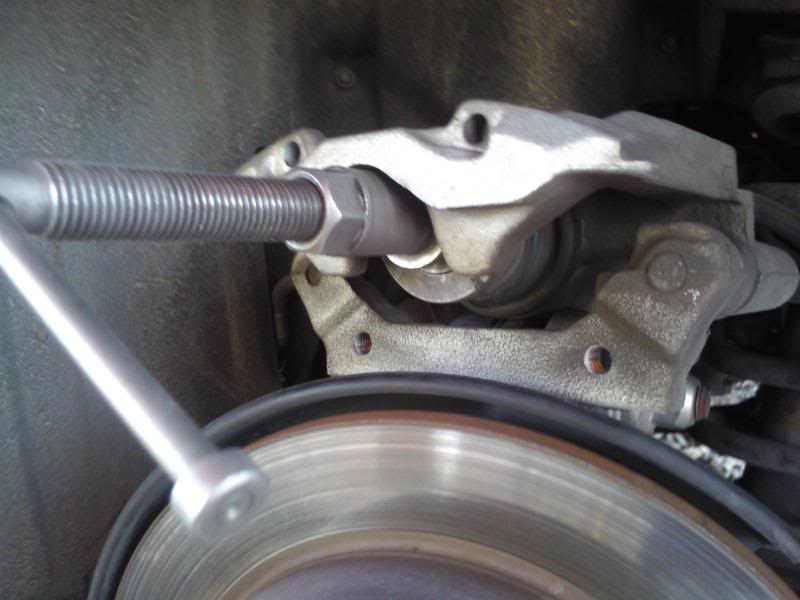
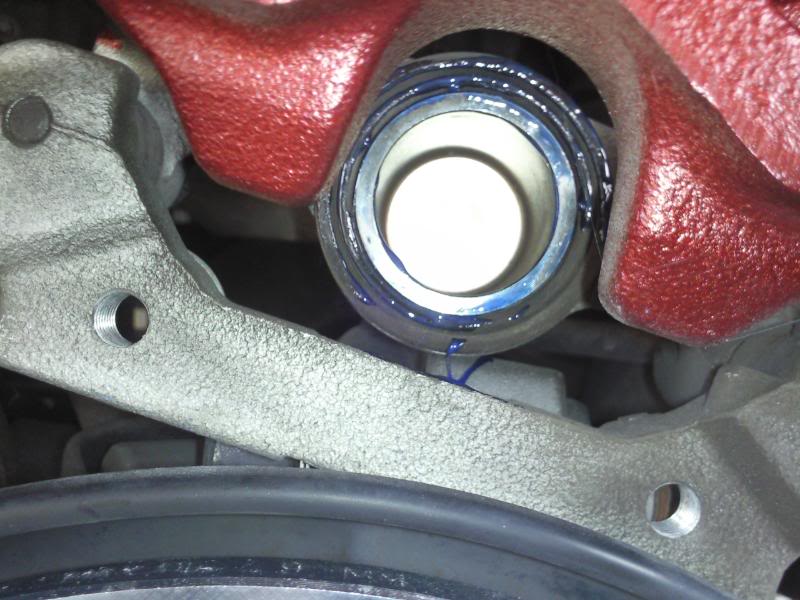
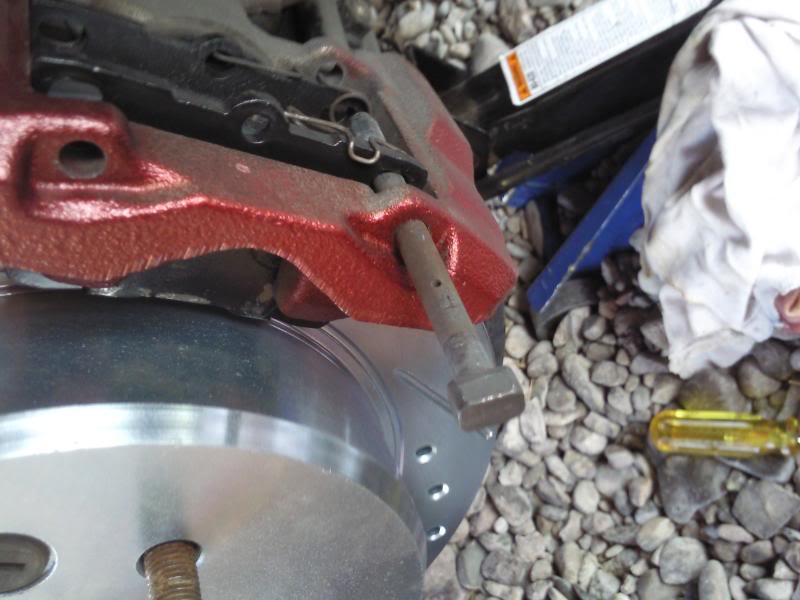
now u will need the caliper tool or c clamp to push the piston back into place.
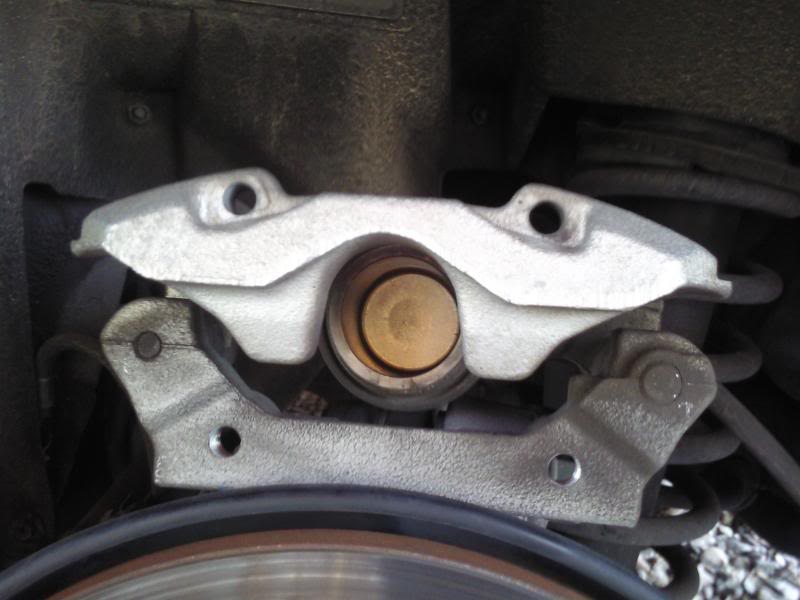
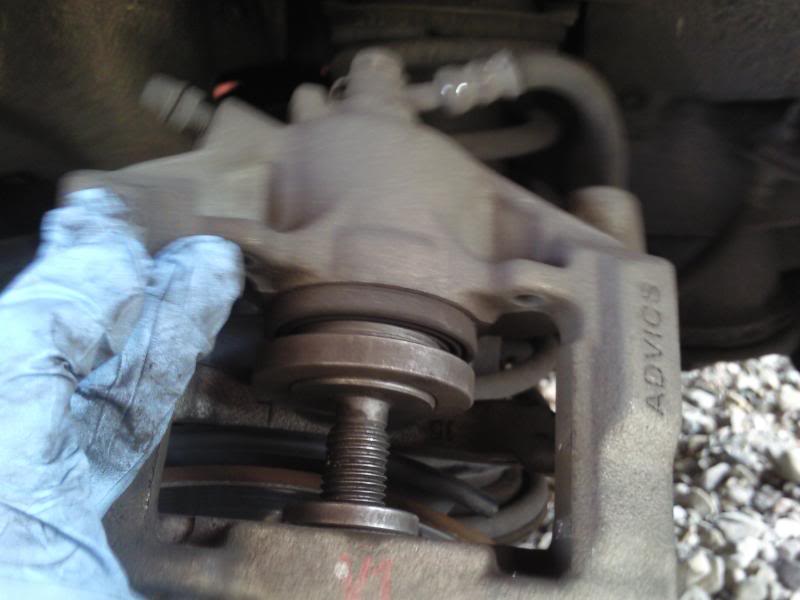
now with the piston back in place u can take this time to paint your caliper if so choose to. use a towel to cover up the inside of the piston and moving parts before you start to paint.
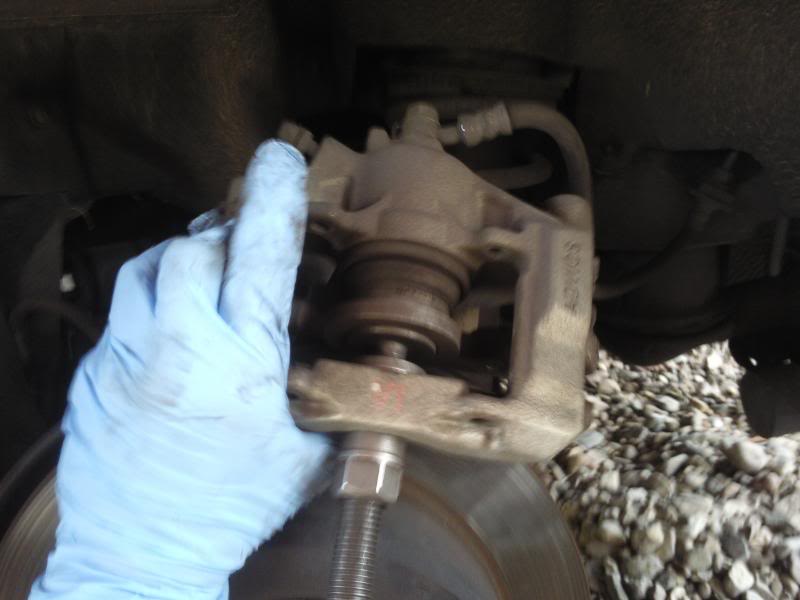
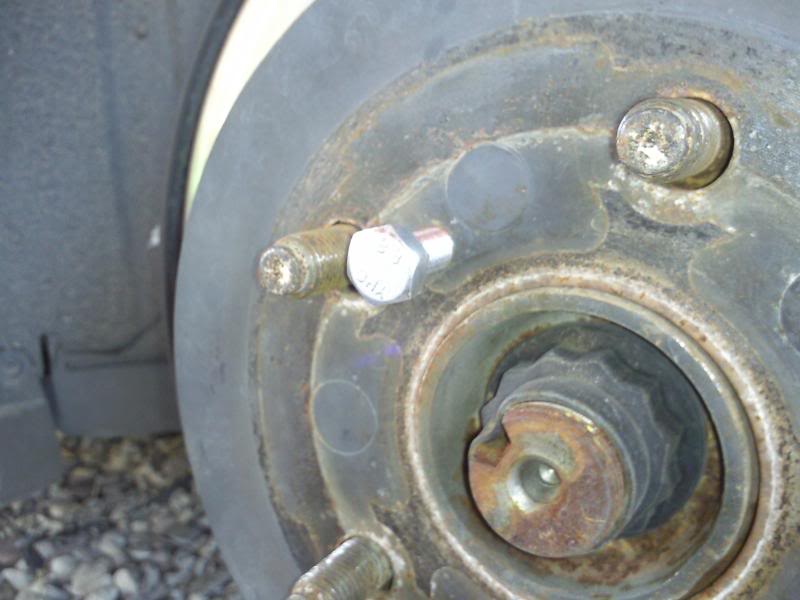
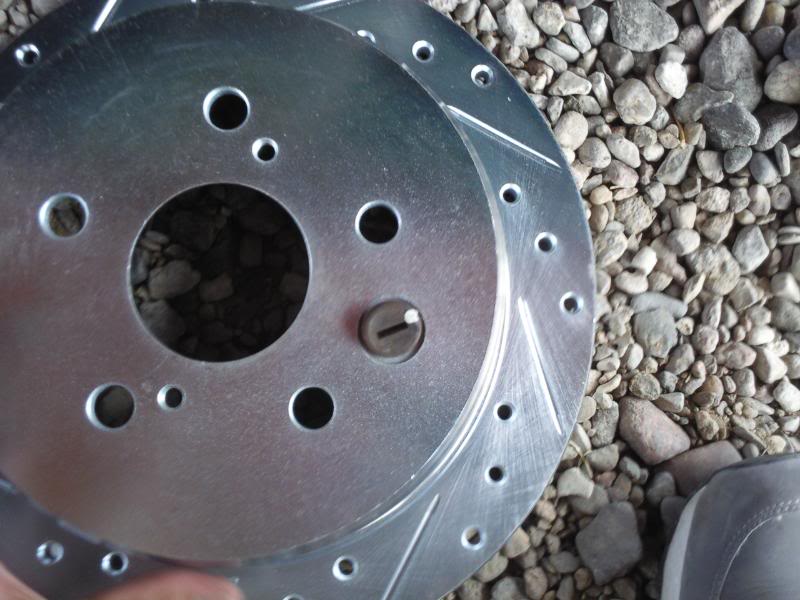
now with all that out of the way, now u will remove the disc by using that m-8 screw. thread that screw in and keep threading until the disc pops off. NOTE not all discs need to be poped off some will come right off after the caliper is removed.
now with the disc removed, if you are going to replace the disc remove the rubber groment from the old disc.
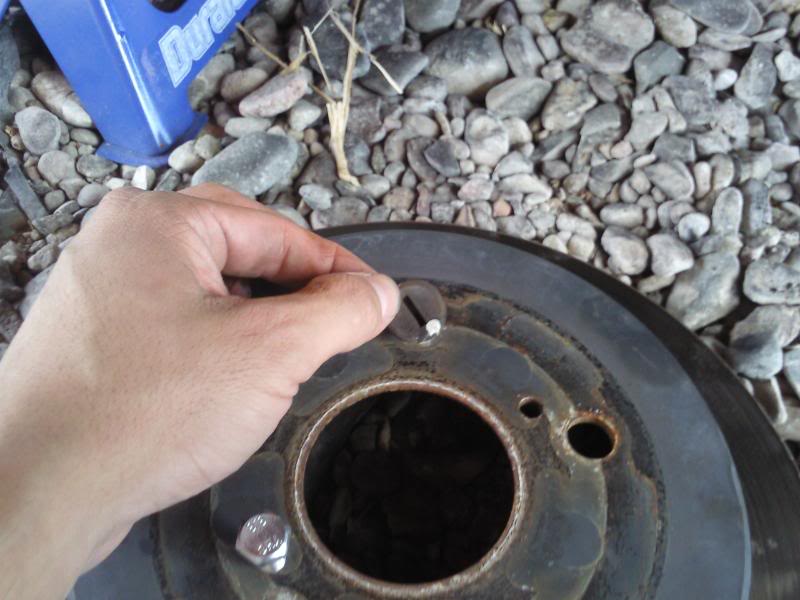

you will take this and place it on the new disc and put the new disc on. it should just slide on no screwing on or pressure needed to put the disc back on.
now with the disc on u will take some disc brake quiet and place some on the piston and inner walls of the caliper.
now you will bolt the caliper back on into place without the new pads in.
after you bolt it back on you will place the new outer pad in.
with the new pad a few love taps should get it to slide into place.
now that the pad is in u can slide the inner pad into place.
when you slide the pads in try keeping them lined up for the pins to slide in.
sorry not enough room to finish on this page. look for part 2.
here are some things you will need. 14mm deep socket and regular socket, needle nose pliers, flat head screw driver, brake cleaner, disc brake quiet, hammer, c clamp or a brake caliper tool, equipment to lift vehicle and remove wheel, and a m-8 1.25 screw.this screw will be used to remove rotors.
start by lifting one side of vehicle first and remove wheel.
romove 14mm bolt, and a second 14mm bolt on the bottom sidenow u can remove the whole brake caliper.
now with the caliper removed u can remove the brake pad slide pins retainer pins and brake pads
you will need the needle nose pliers to remove the retainer pins.
now that the those pins are removed the sliding pins will slide out
make sure u keep these pins and do not brake them or discard them
here are some other angles on how they go together for more reference.now u will need the caliper tool or c clamp to push the piston back into place.
now with the piston back in place u can take this time to paint your caliper if so choose to. use a towel to cover up the inside of the piston and moving parts before you start to paint.
now with all that out of the way, now u will remove the disc by using that m-8 screw. thread that screw in and keep threading until the disc pops off. NOTE not all discs need to be poped off some will come right off after the caliper is removed.
now with the disc removed, if you are going to replace the disc remove the rubber groment from the old disc.
you will take this and place it on the new disc and put the new disc on. it should just slide on no screwing on or pressure needed to put the disc back on.
now with the disc on u will take some disc brake quiet and place some on the piston and inner walls of the caliper.
now you will bolt the caliper back on into place without the new pads in.
after you bolt it back on you will place the new outer pad in.
with the new pad a few love taps should get it to slide into place.
now that the pad is in u can slide the inner pad into place.
when you slide the pads in try keeping them lined up for the pins to slide in.
sorry not enough room to finish on this page. look for part 2.
 07-09-09, 12:28 PM
#2
Driver School Candidate
Thread Starter
Join Date: Jul 2009
Location: TX
Posts: 3
Likes: 0
Received 0 Likes
on
0 Posts
part 2.
start with the retaining pin first.

when you get this pin in you can place the sliding pin in.
once you slide that pin in you now place the other pin in. when that pin is in place you will place the other retaining pin in.
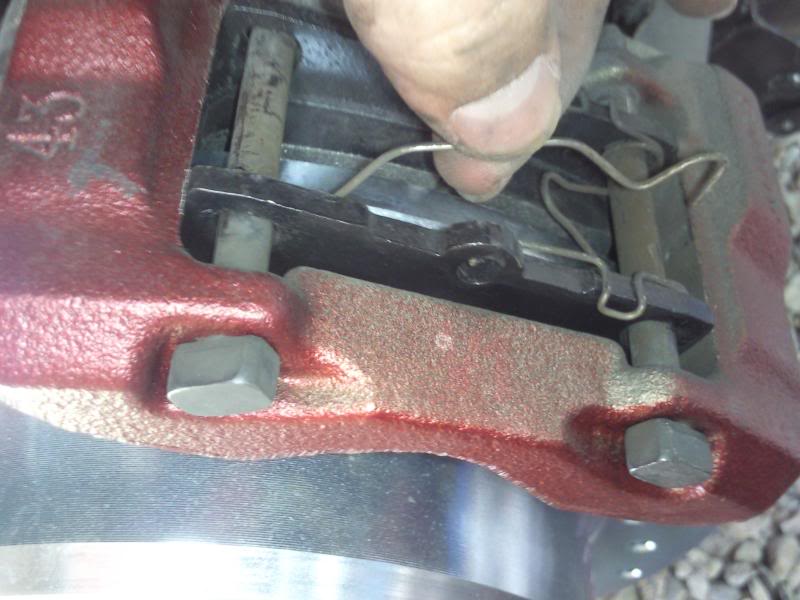
once the pins are in place you are done with the caliper.

now go in your vehicle and press on the brake pedal and keep pumping untill its a firm feel.
i did this job myself in about 2 hours and i bought the the cross drilled slotted and vented discs and creamic pads from brake labs on ebay
if you have any questions feel free to ask and i will respond as soon as i can.
start with the retaining pin first.
when you get this pin in you can place the sliding pin in.
once you slide that pin in you now place the other pin in. when that pin is in place you will place the other retaining pin in.
once the pins are in place you are done with the caliper.
now go in your vehicle and press on the brake pedal and keep pumping untill its a firm feel.
i did this job myself in about 2 hours and i bought the the cross drilled slotted and vented discs and creamic pads from brake labs on ebay
if you have any questions feel free to ask and i will respond as soon as i can.
07-09-09, 04:39 PM
#3
Tech Info Resource

iTrader: (2)
Nice DIY! Thanks for the pics, it makes all the difference and I know it's a PITA to remember to shoot every detail. Good job!
You might want a part three to include adjusting the parking brake...
You might want a part three to include adjusting the parking brake...
07-09-09, 08:13 PM
#7
Lead Lap

Join Date: Jun 2009
Location: CA
Posts: 773
Likes: 0
Received 0 Likes
on
0 Posts
Very nice DIY. You should give a review about the rotors. I am interested in them also. Also, which one did you buy?
I didn't know there is a jack point under the wheel. Mind explaining?
I didn't know there is a jack point under the wheel. Mind explaining?
Trending Topics
07-09-09, 08:17 PM
#8
Lexus Test Driver
Is it safe to jack up your car on gravel!?


 07-11-09, 03:33 AM
#14
Driver
Join Date: Oct 2007
Location: CA
Posts: 126
Likes: 0
Received 0 Likes
on
0 Posts
Guys, jacking a car on gravel is a bad idea, also jack stands should be used, its not fun to drop a car on the ground because of a faulty jack.
Also, if you don't need to replace the rotors, you can just pull the spring clips and use a big screw driver to push in the piston.
Also, if you don't need to replace the rotors, you can just pull the spring clips and use a big screw driver to push in the piston.
