When you click on links to various merchants on this site and make a purchase, this can result in this site earning a commission. Affiliate programs and affiliations include, but are not limited to, the eBay Partner Network.
Use this guide at your own risk. I nor Club Lexus assume no responsibility for any damage to your vehicle or personal injury as a result of following this guide.
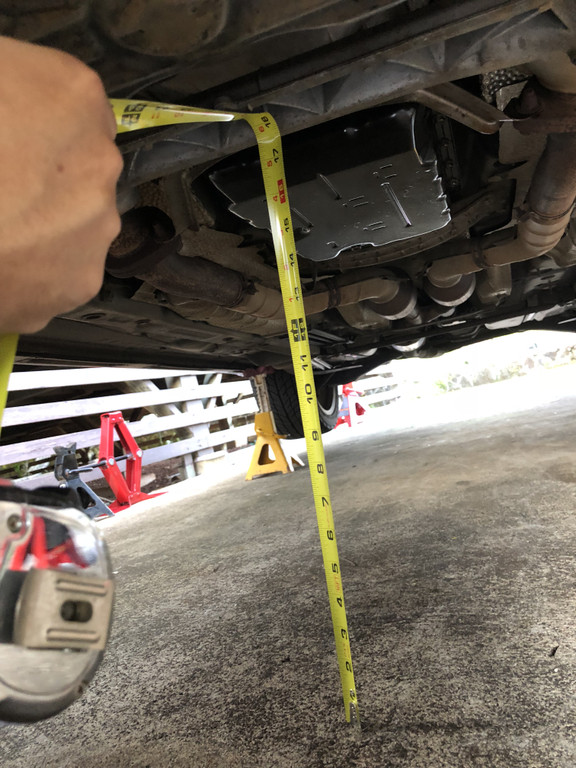
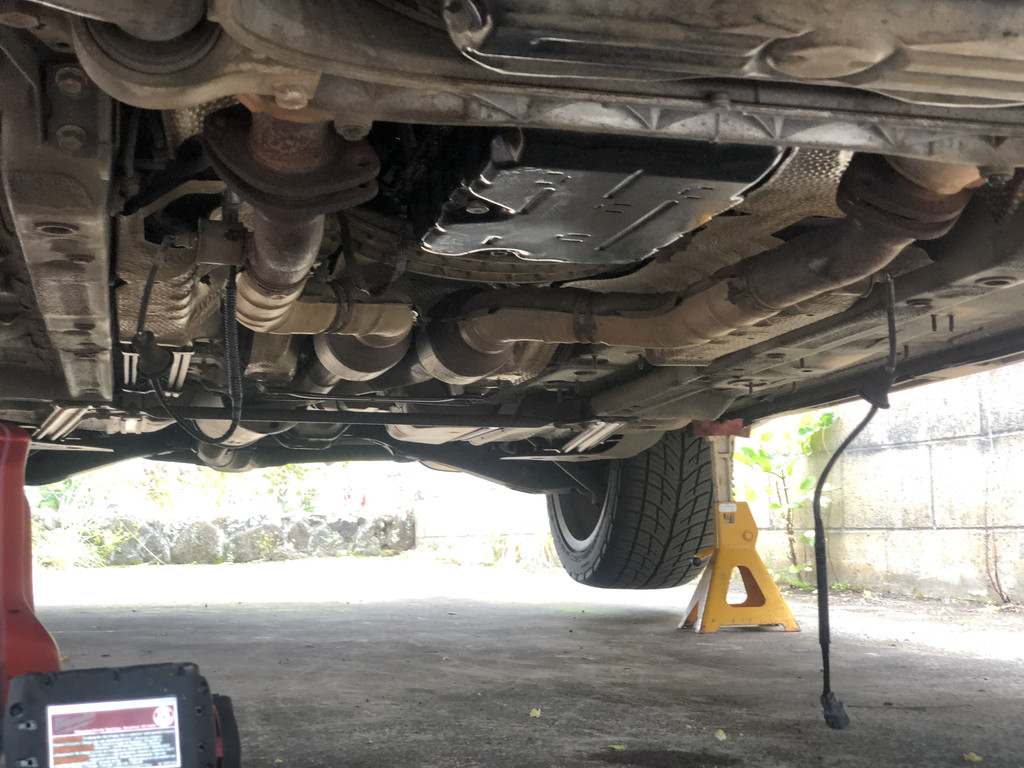
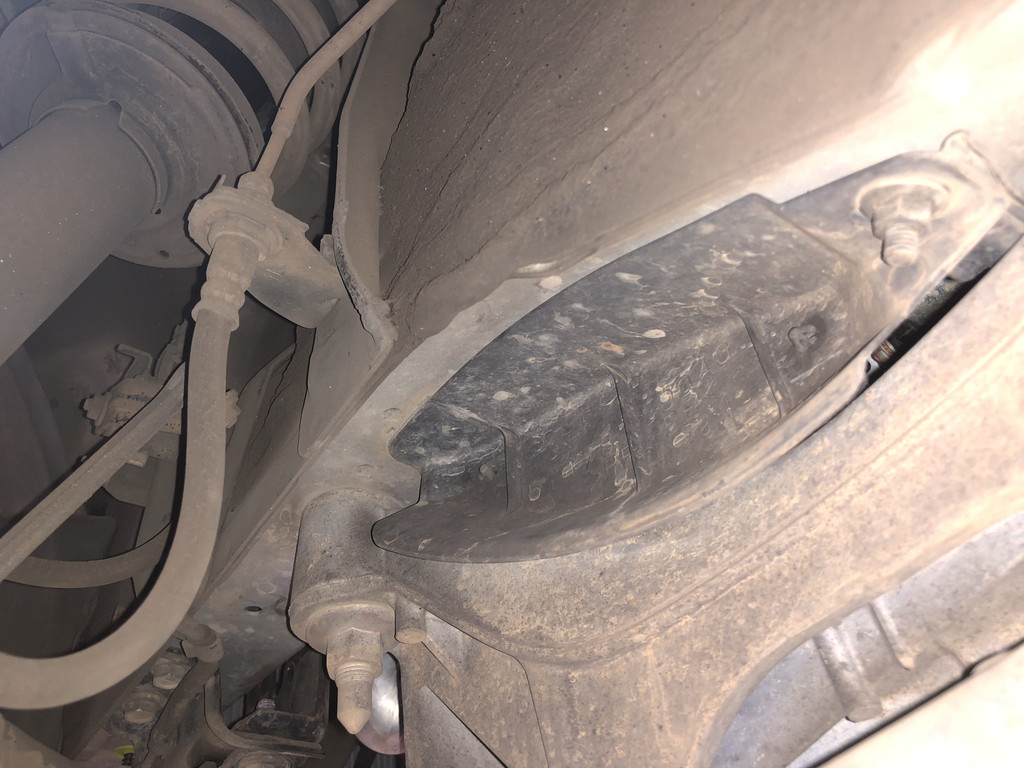
Anyhow, Let's get down to the method I went. I did things a little weird order. Basically you need to do these things from the top of my head in a nutshell. Raise the car enough. RAISE FRONT UP then rear, use wheel clogs or something. You WILL need something very near the 20" of space underneath space. Rear doesn't have to be as high, but I chose to be the same height. Either 6-ton jack stands (they go up much higher than 20") or a quick-jack like application. You will need ideally a low profile jack otherwise you'll going to have to raise the car a bit before putting your regular jack to the lift points. QuickJack
The more space you have the better. I actually got another 1-2 inches from the picture above because I bought a rubber block used for the jack pinch welds which gave another 2" to my maxed out floor hydraulic jack at around 19.75".
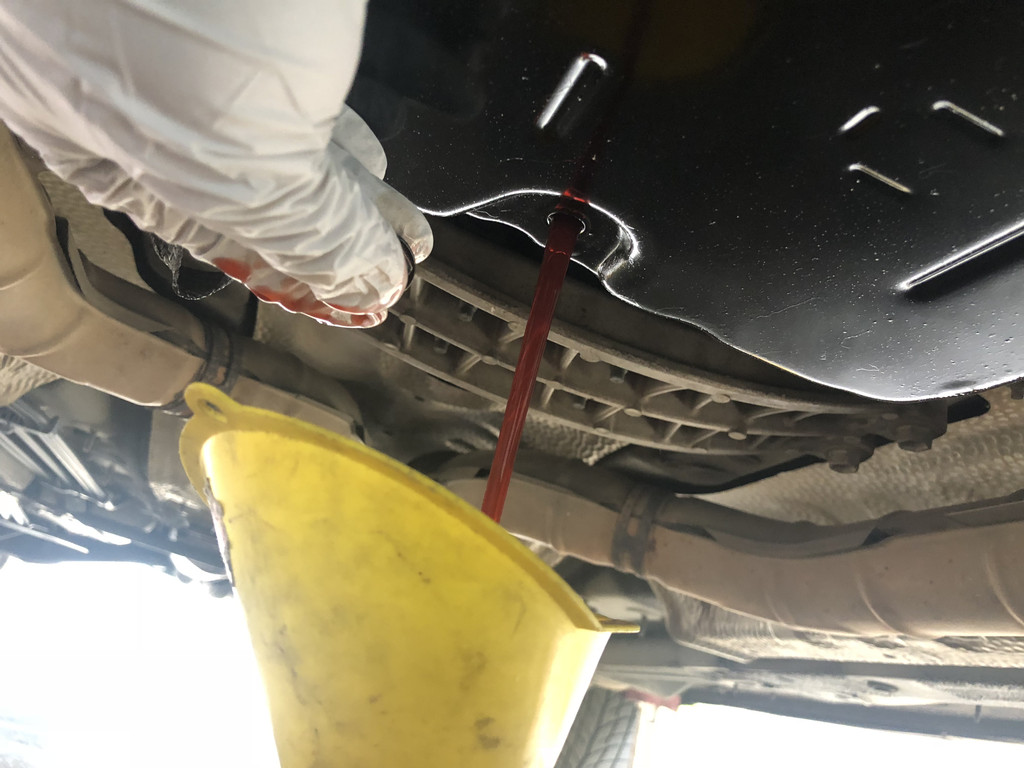
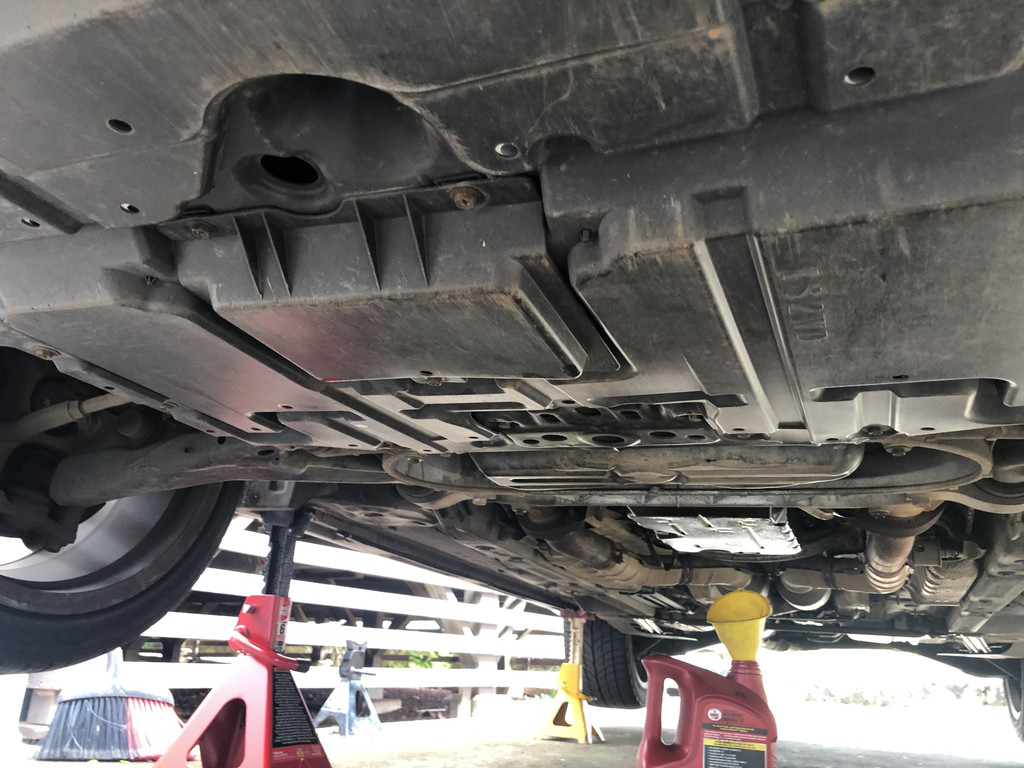
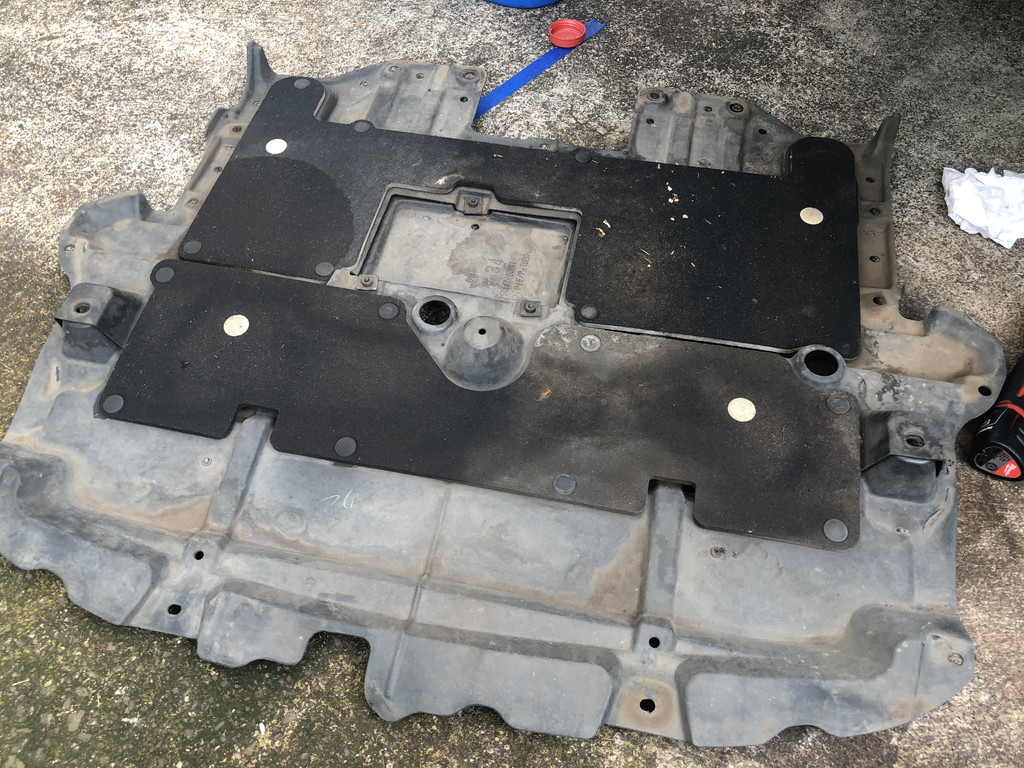
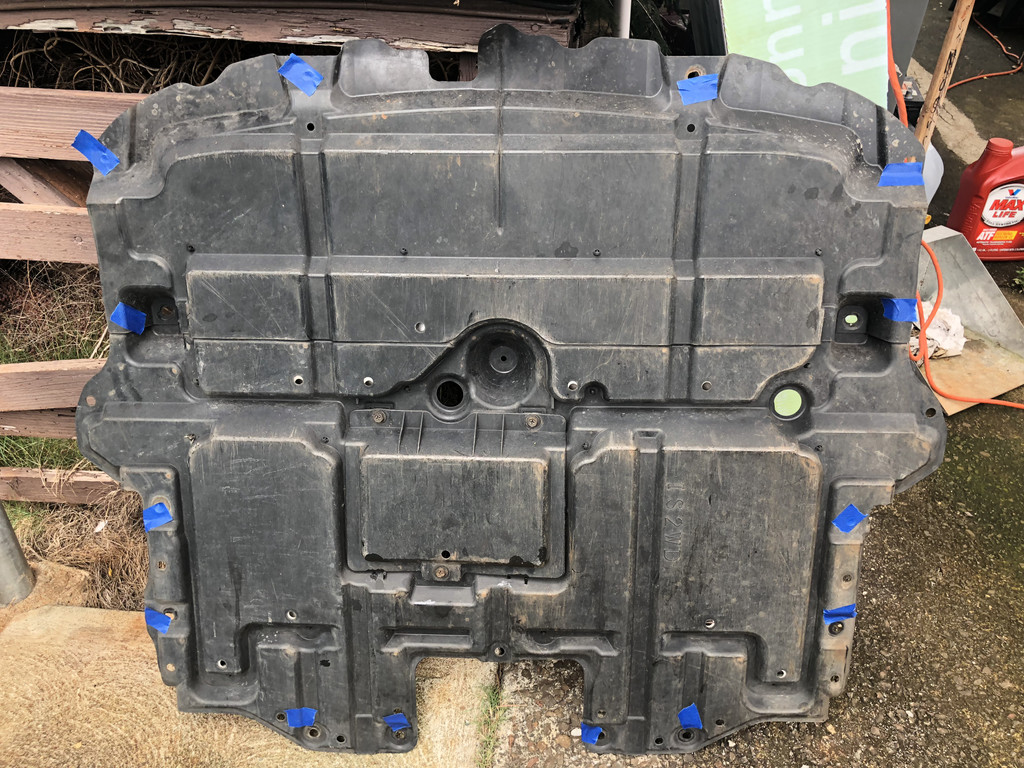
Drain the ATF is recommended to lower weight on the transmission and to prevent everything from gushing out. Remove lower covers.
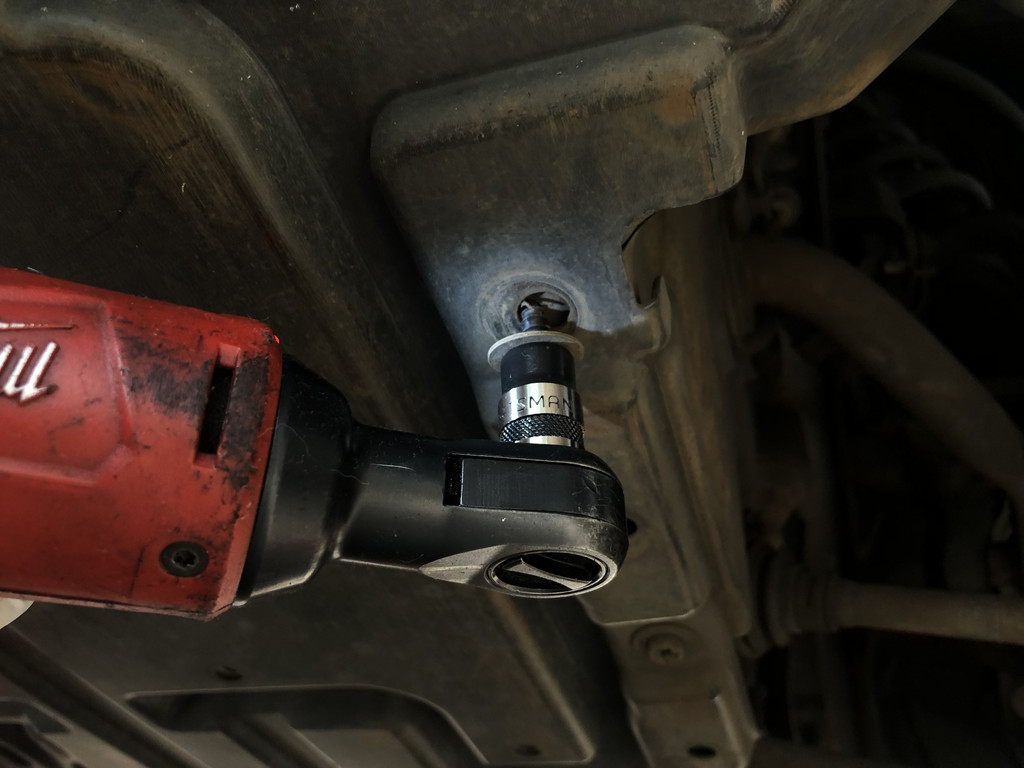
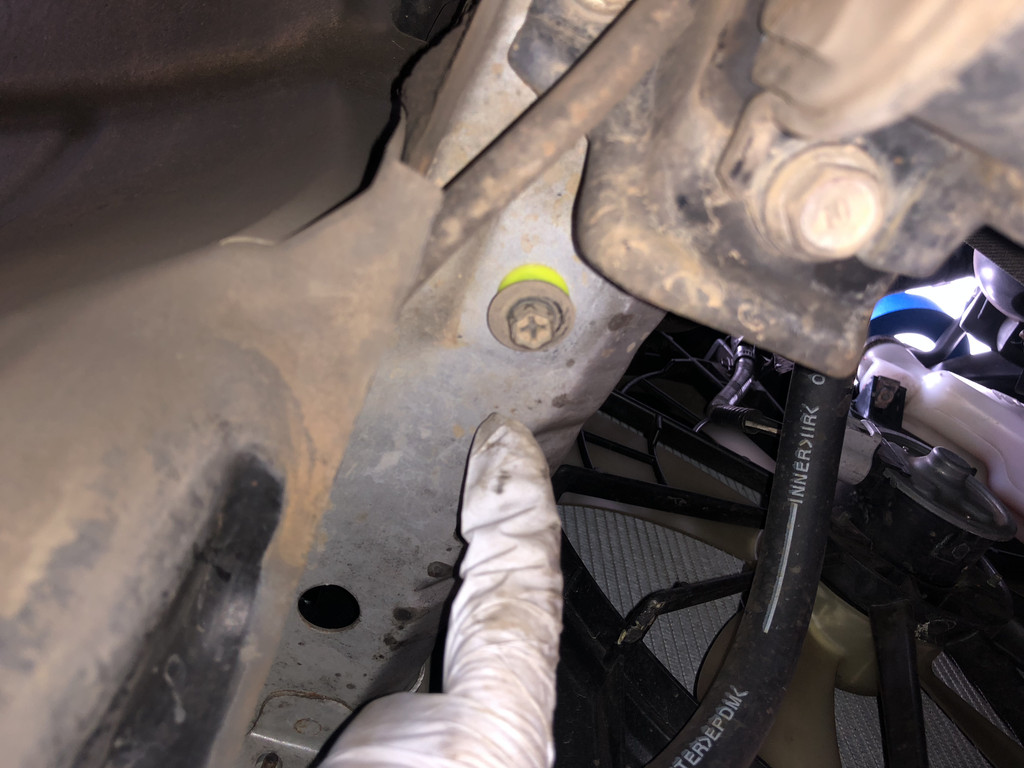
Probably best to mark where the screws from. Note it with take. I use masking tape. Normally I use neon green so easier to see when reassembly, but I only had the blue.
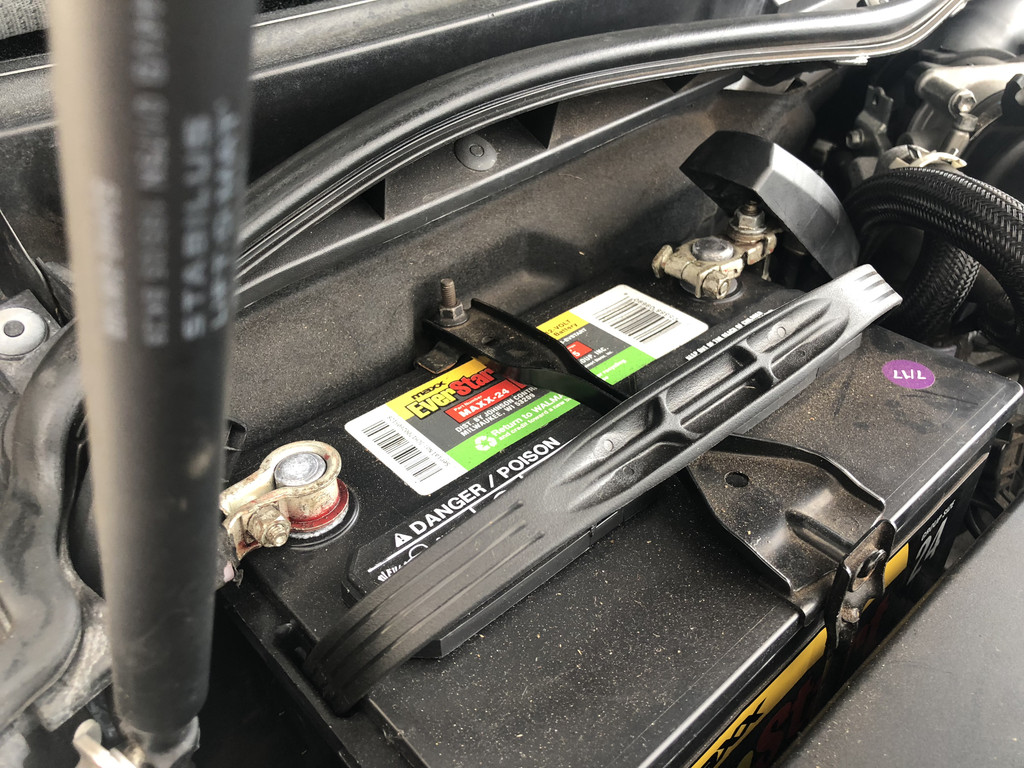
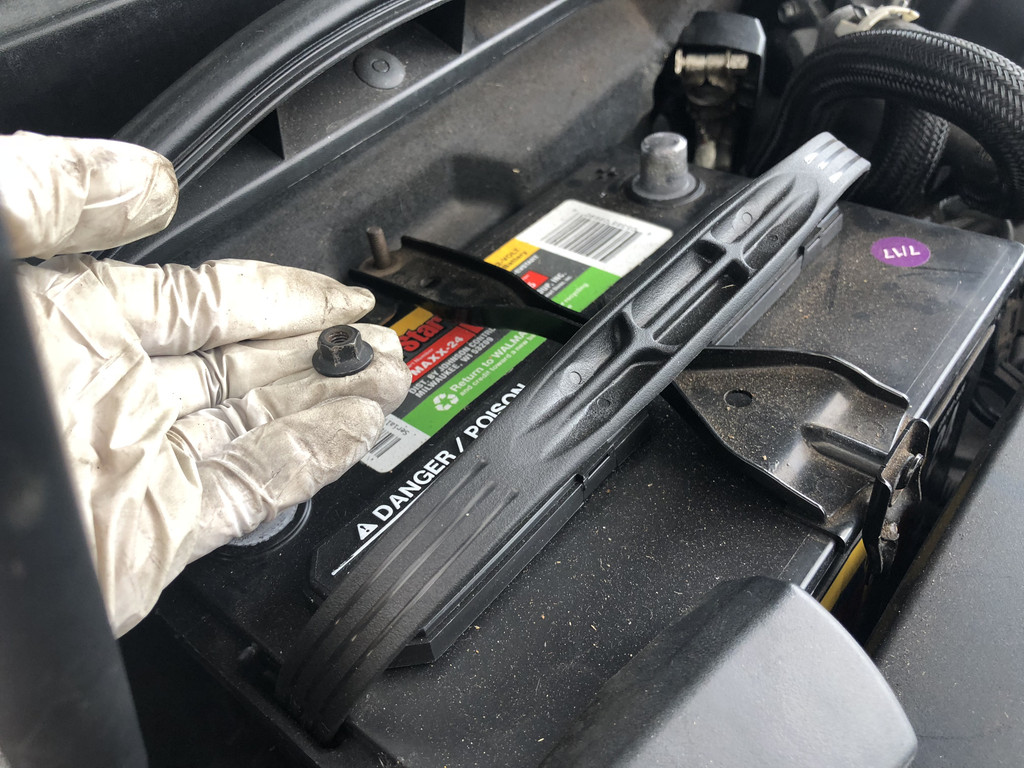
Disconnect battery. I removed it completely as to have more space.
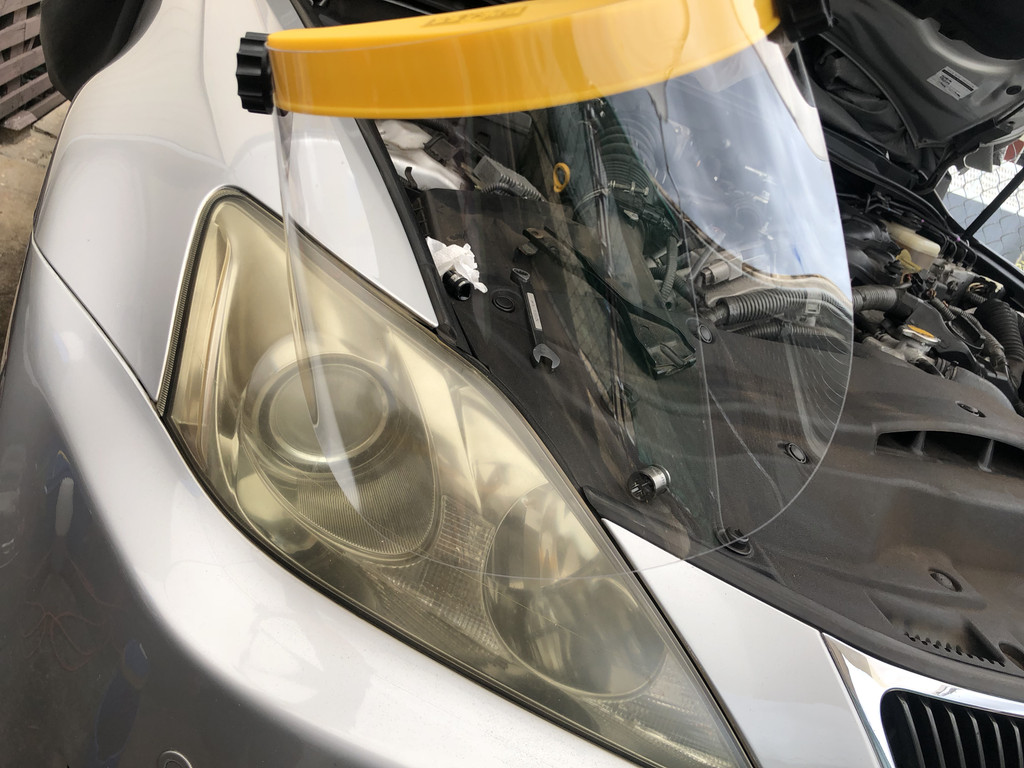
Good to get a face mask of some sort. Getting dirt and rust from the exhaust in your eyes is not good.
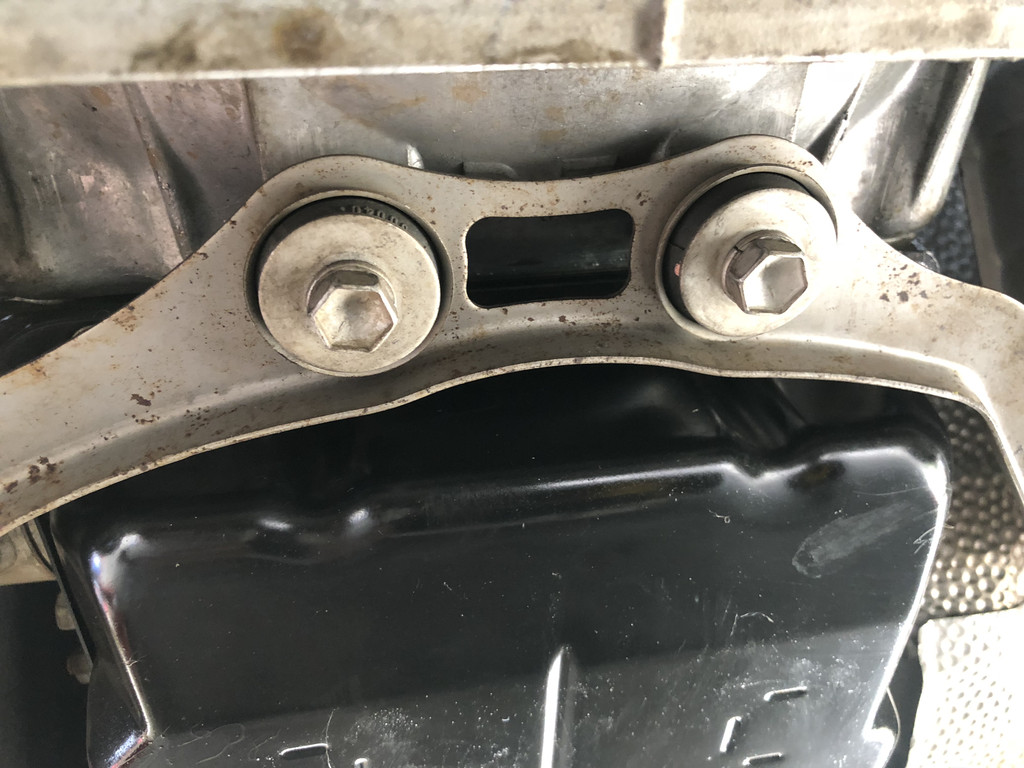
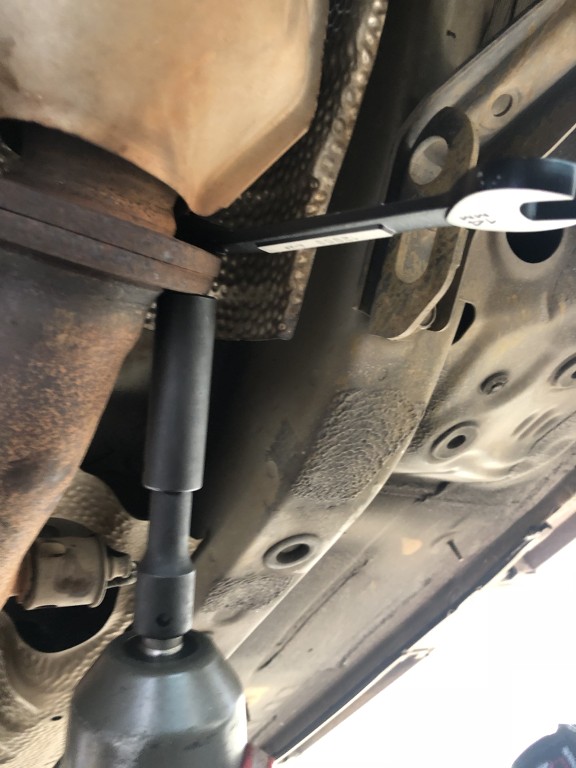
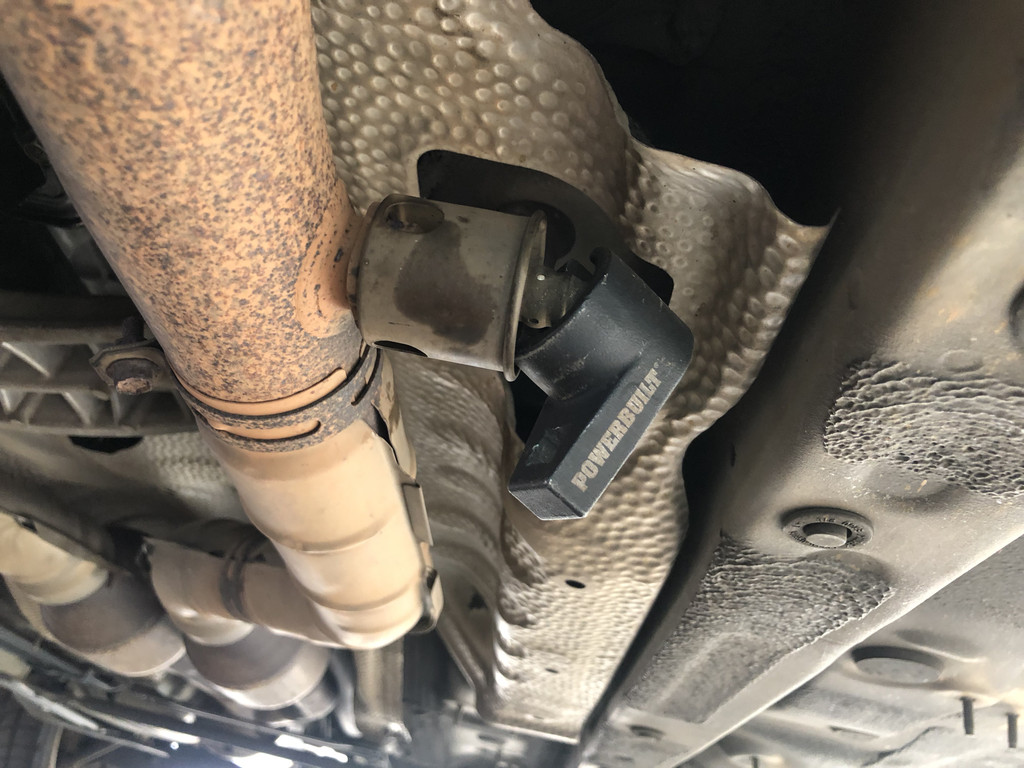
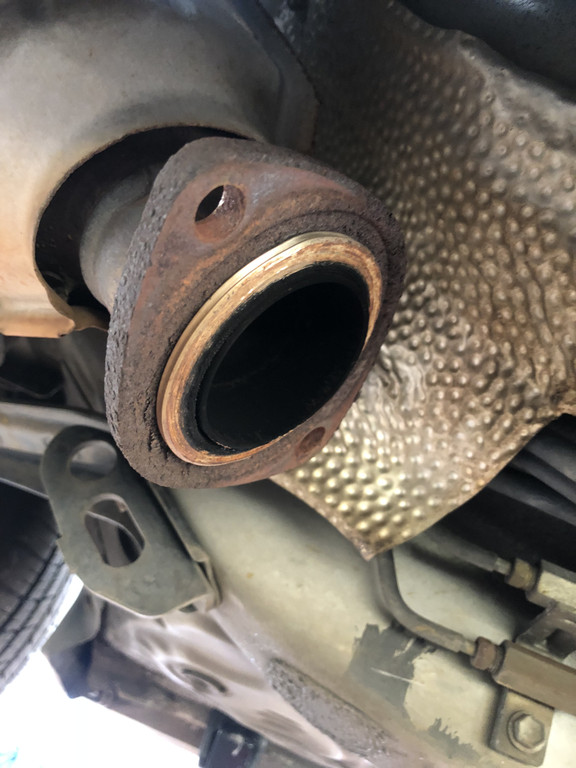
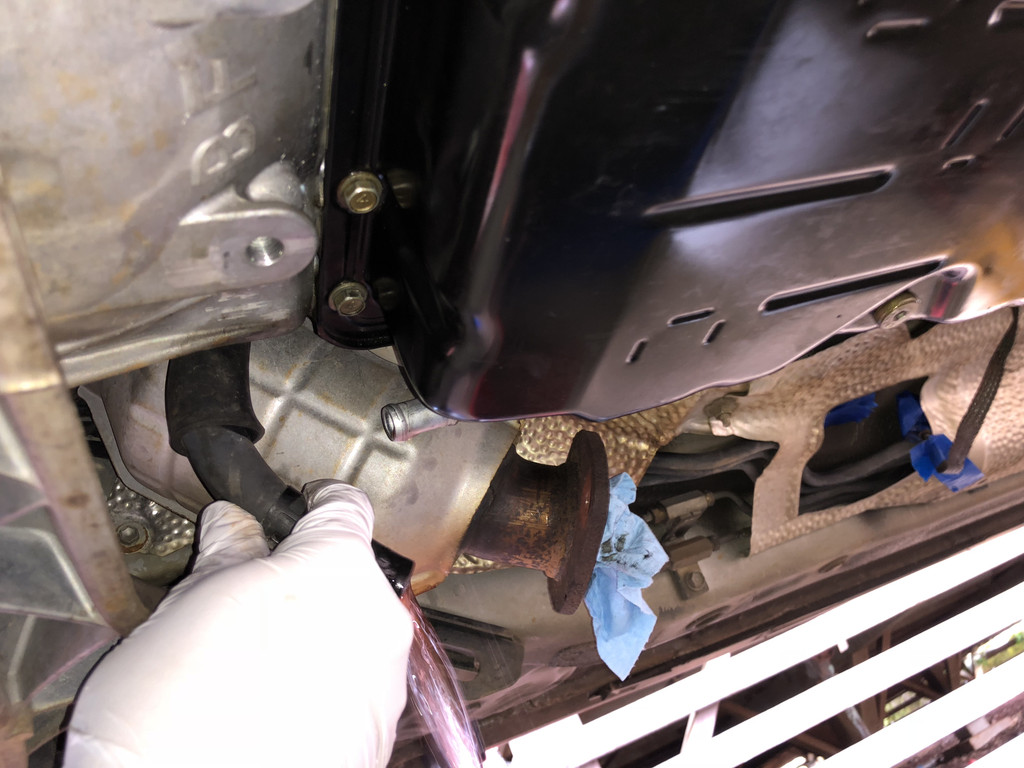
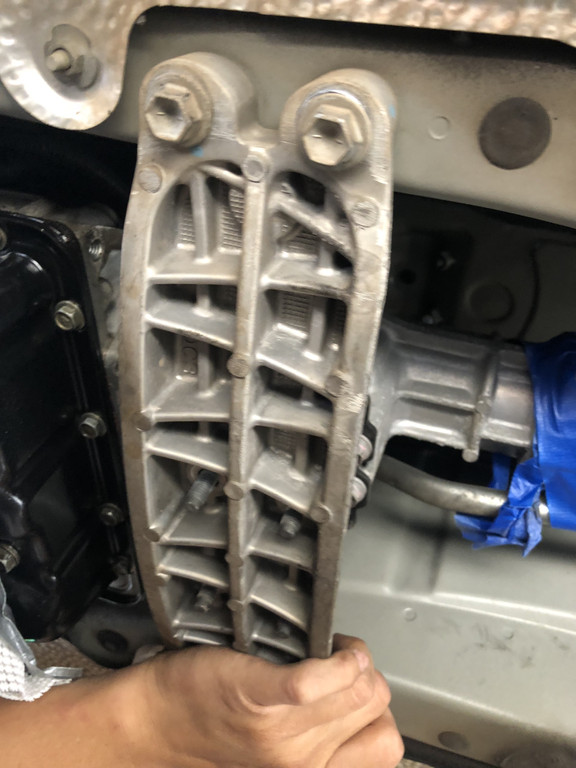
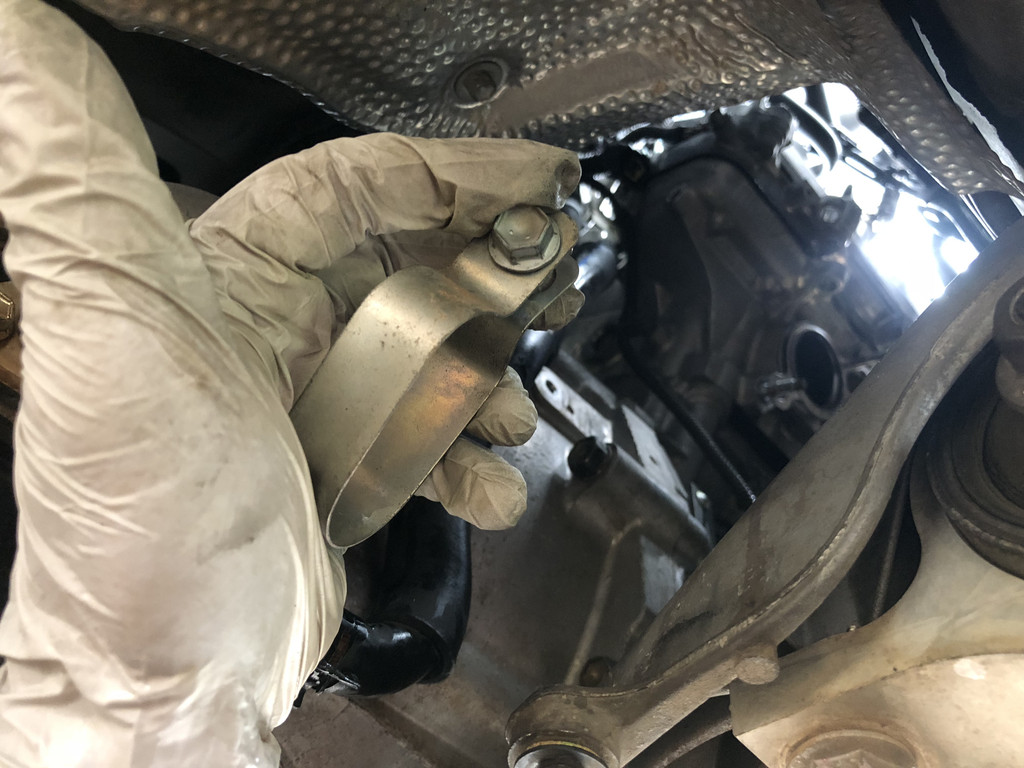
I first started to remove the exhaust manifold bolts to the front exhaust pipe assembly and the Y bracket mounted on the transmission to the exhaust. You'll need to hold down the nut while zipping off the bolt for the exhaust manifold. TORQUE:
Bolts/nuts going from the Front Exhaust Pipe Assembly 29ft.lbf. Recommended to use new gaskets. I used FEL-PRO 60906 (x2)
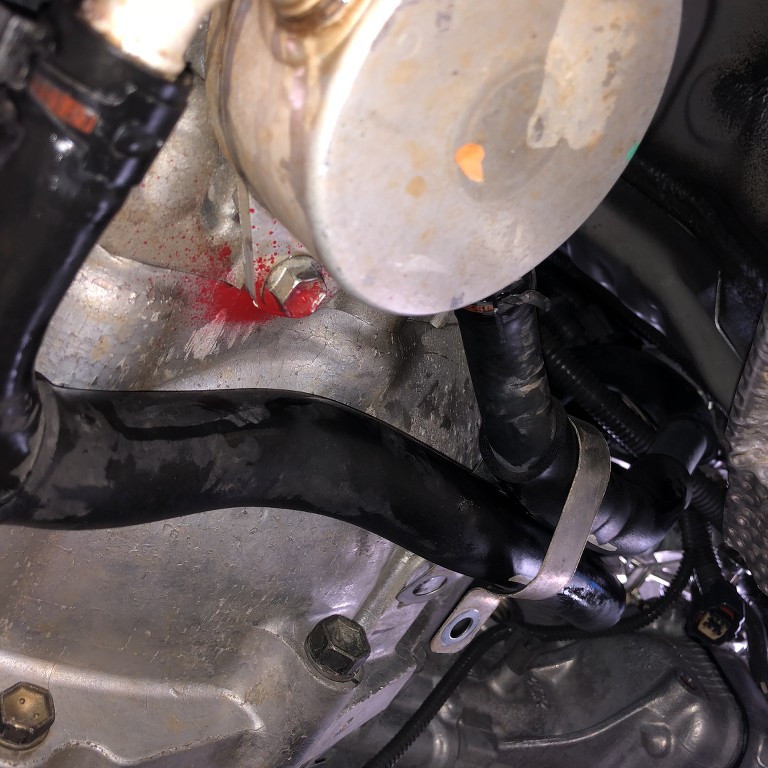
Bolts going to the NO. 1 Exhaust Pipe Support Bracket Sub-Assembly 32 ft.lbf
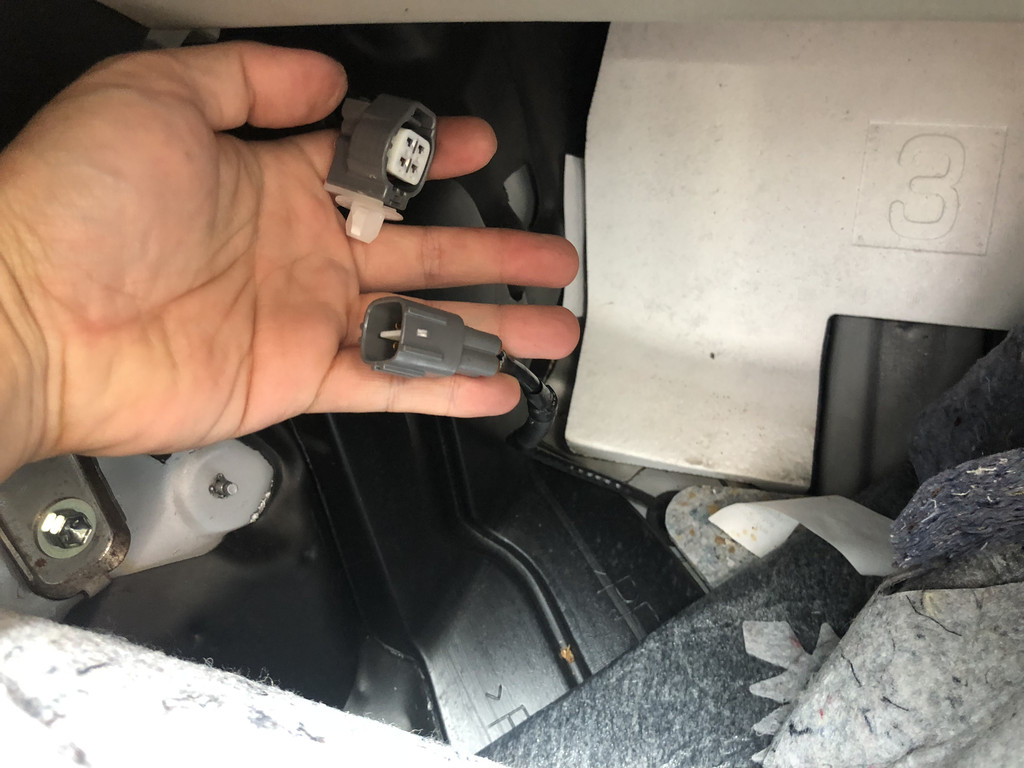
I was going to try remove the O2 downstream sensors...but I didn't have the tools. I'll just disconnect them from inside the car.
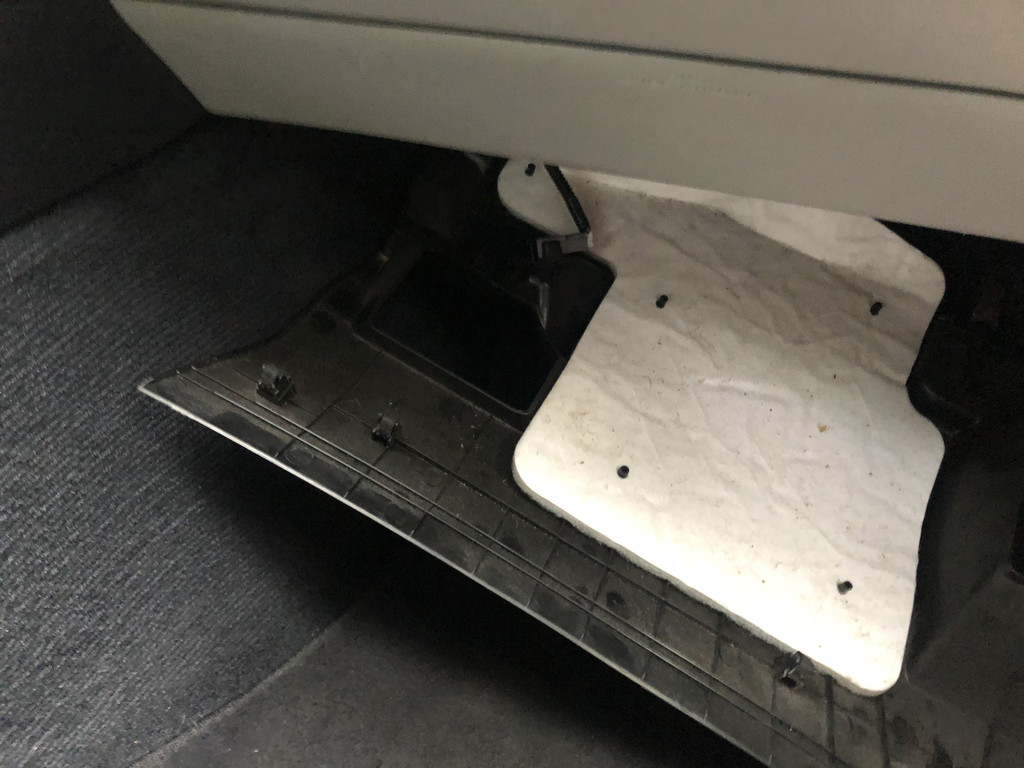
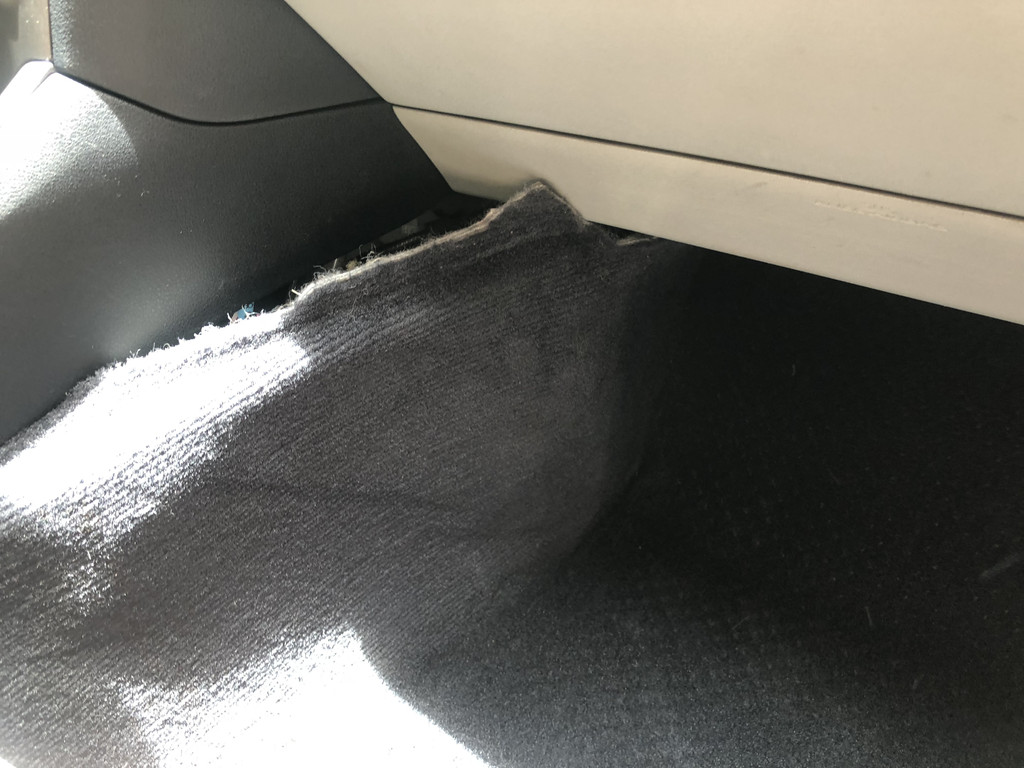
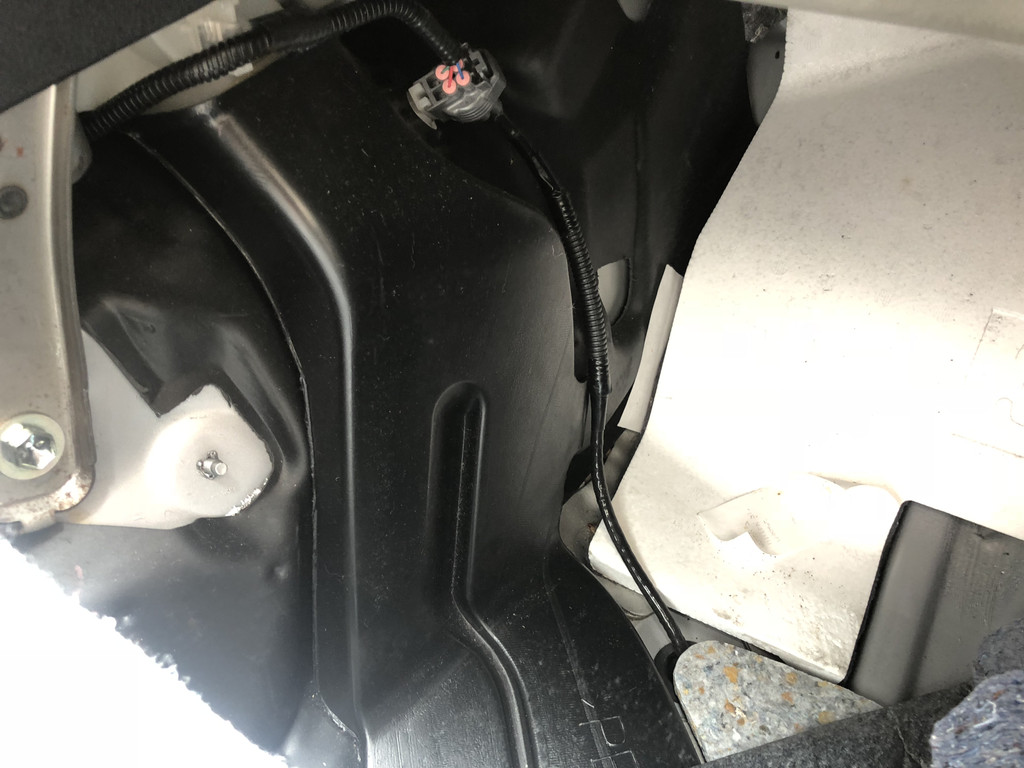
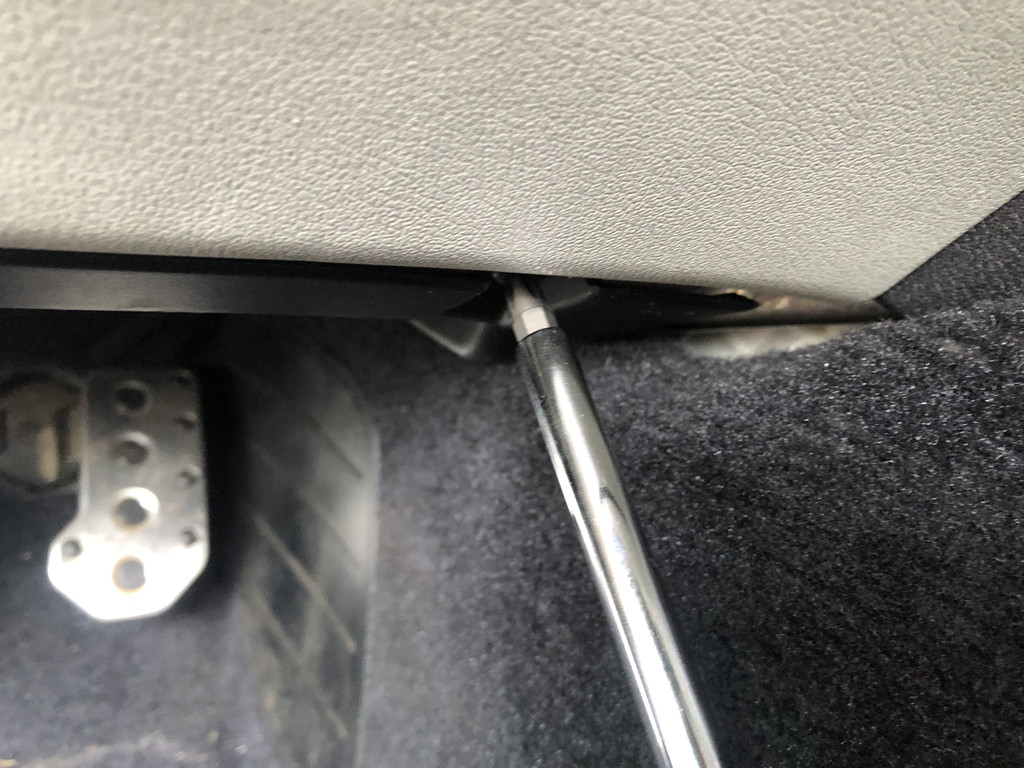
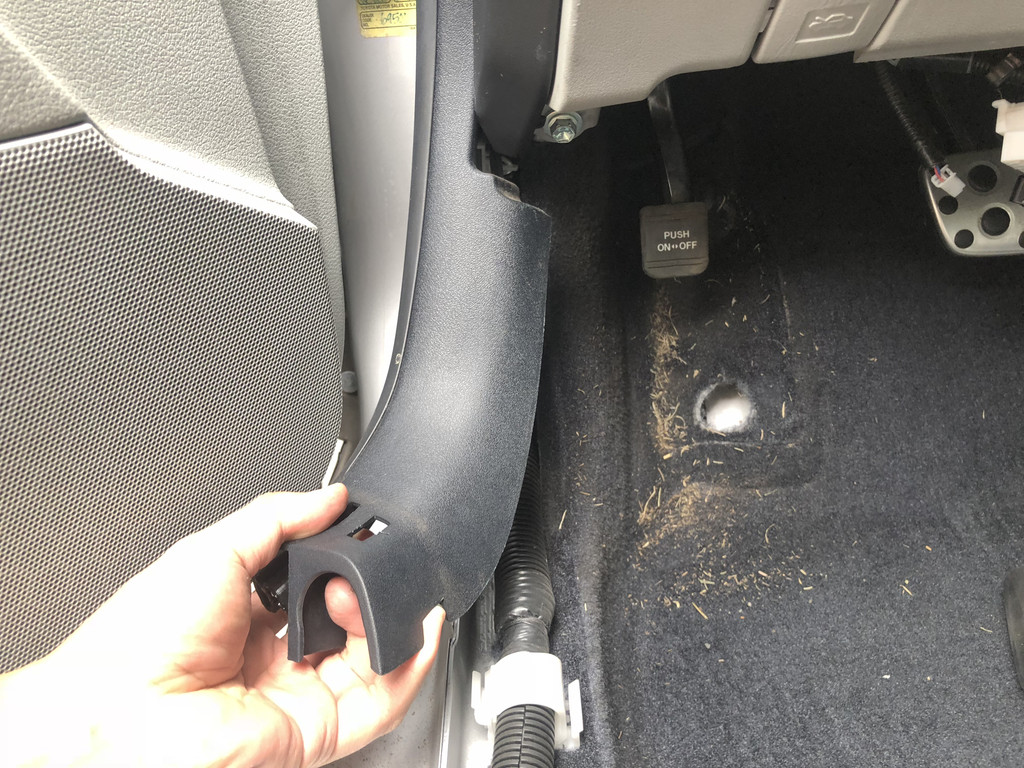
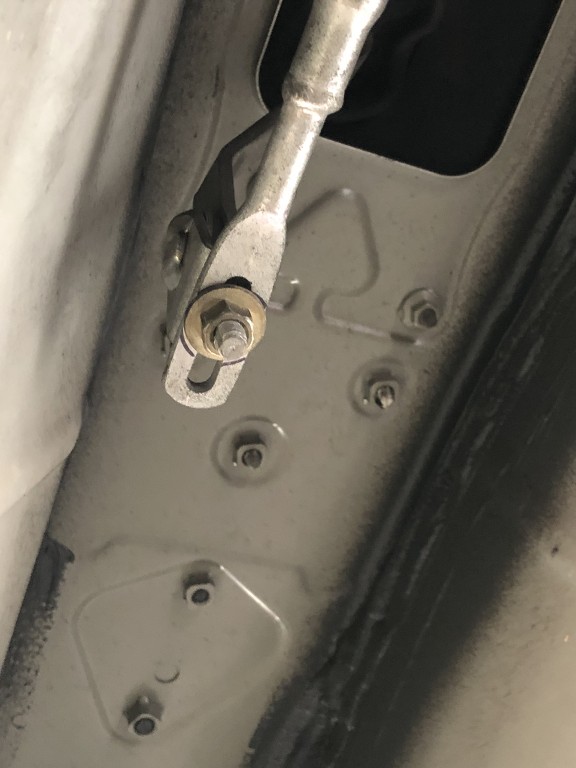
Passenger side wasn't too hard. Remove the lower trim and disconnect night driving foot light. Peal back carpet. Disconnect O2 Sensor.
Use this guide at your own risk. I nor Club Lexus assume no responsibility for any damage to your vehicle or personal injury as a result of following this guide.
Use this guide at your own risk. I nor Club Lexus assume no responsibility for any damage to your vehicle or personal injury as a result of following this guide.
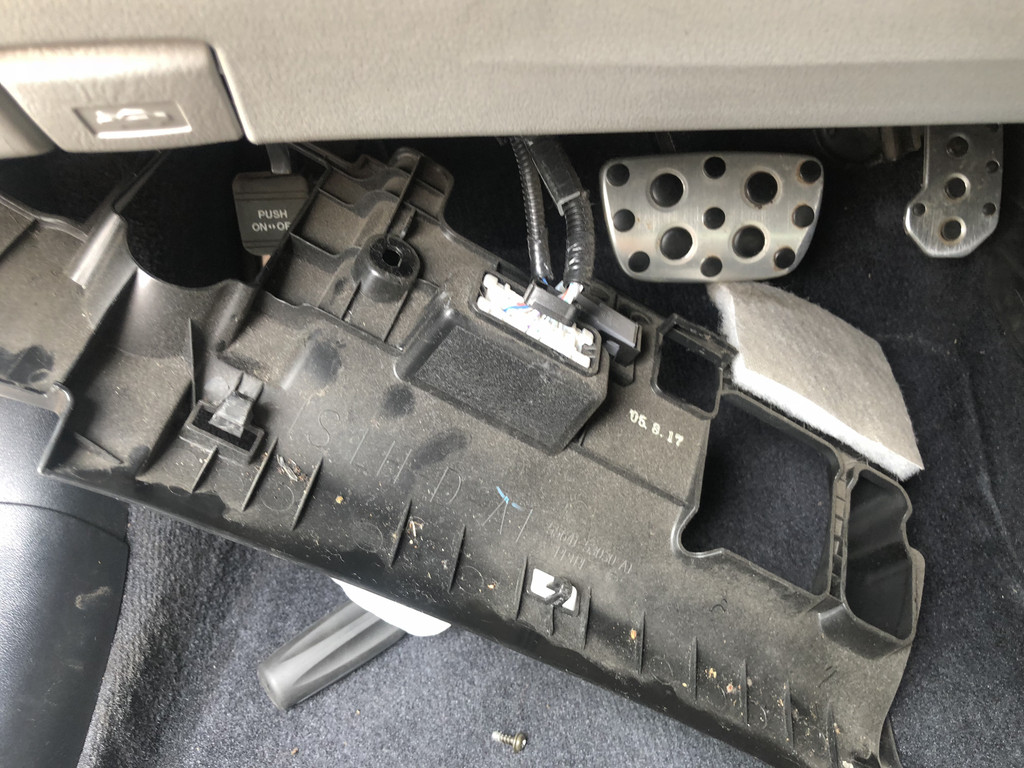
I cracked one of the two 'clips' holding this piece down. Oh well....
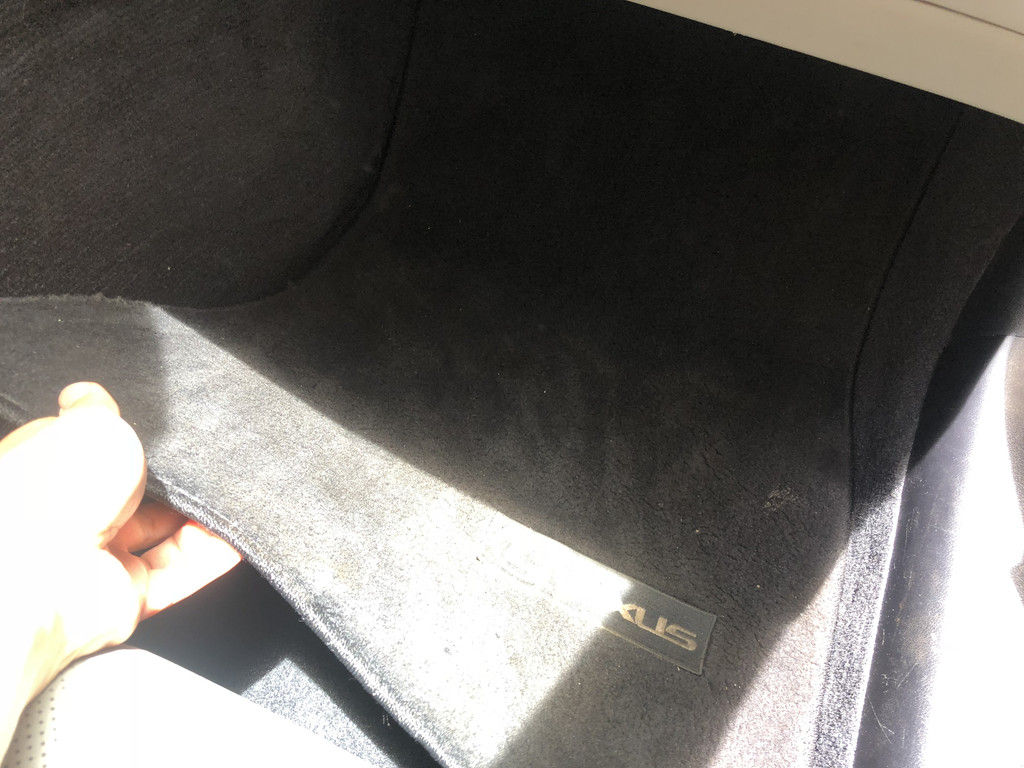
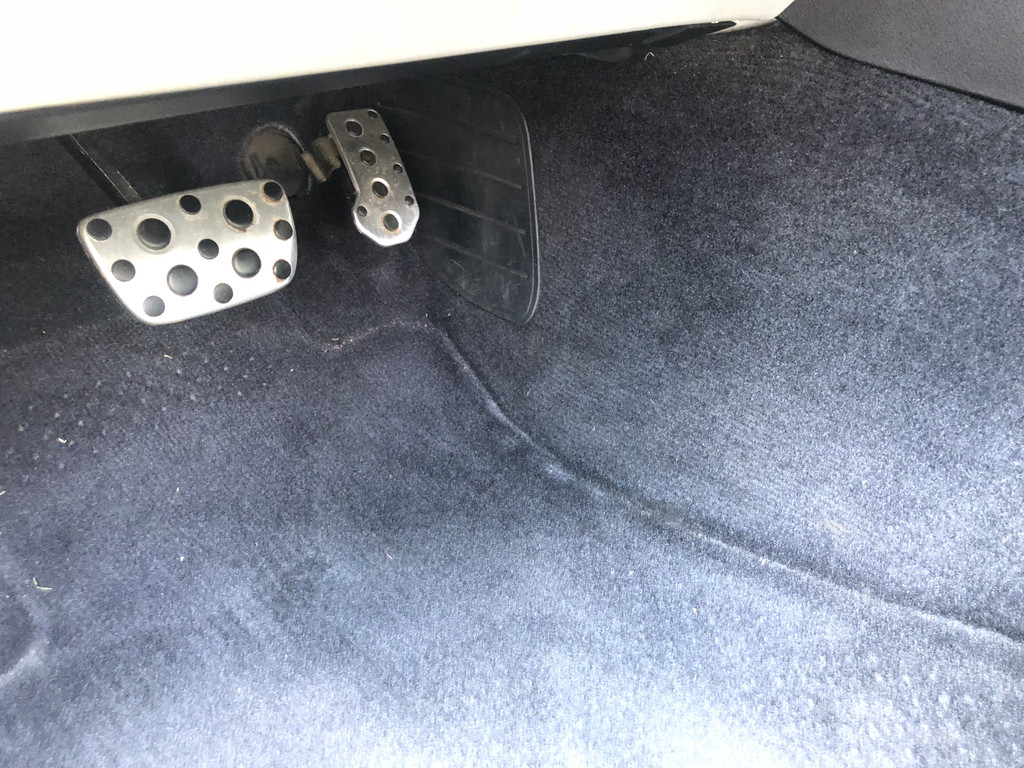
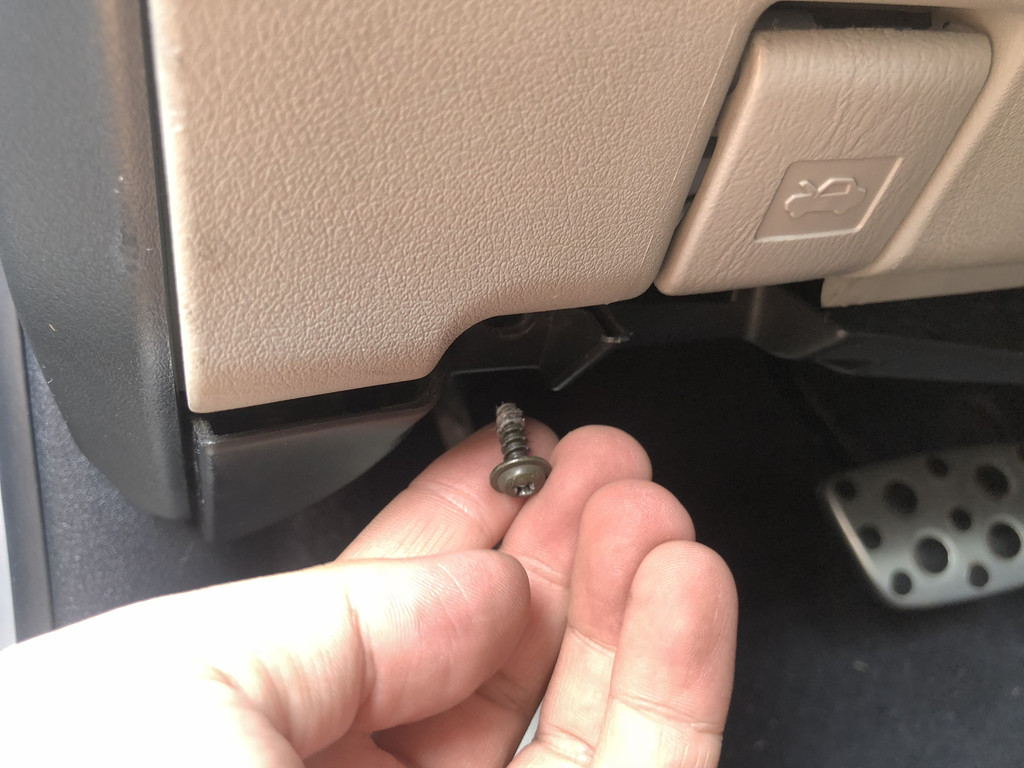
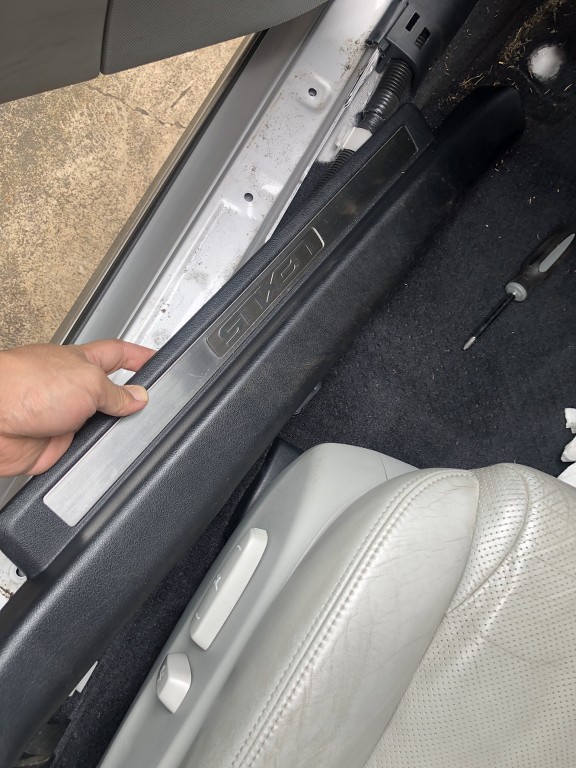
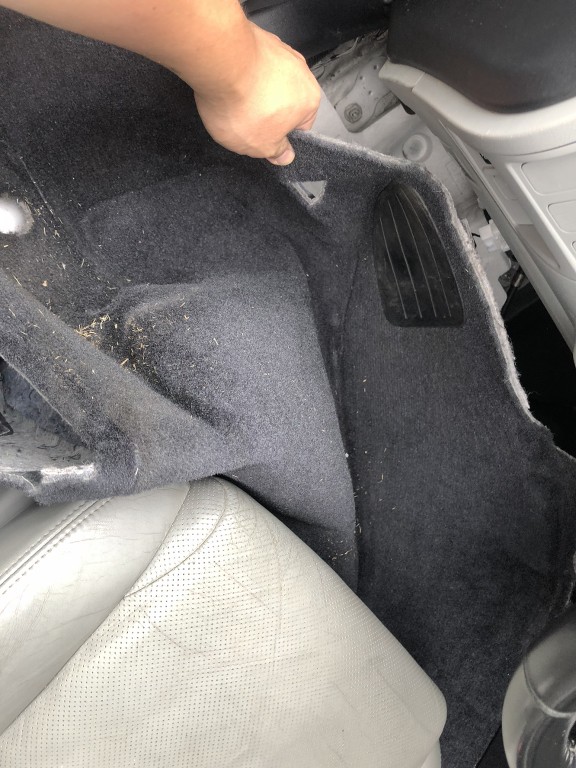
Driver side was a bit more intense. You peal back the carpet, I removed the lower trim where the ODB port is after removing two philips. I also removed the side trim so I could pull back the carpet more easier. This carpet is thick!
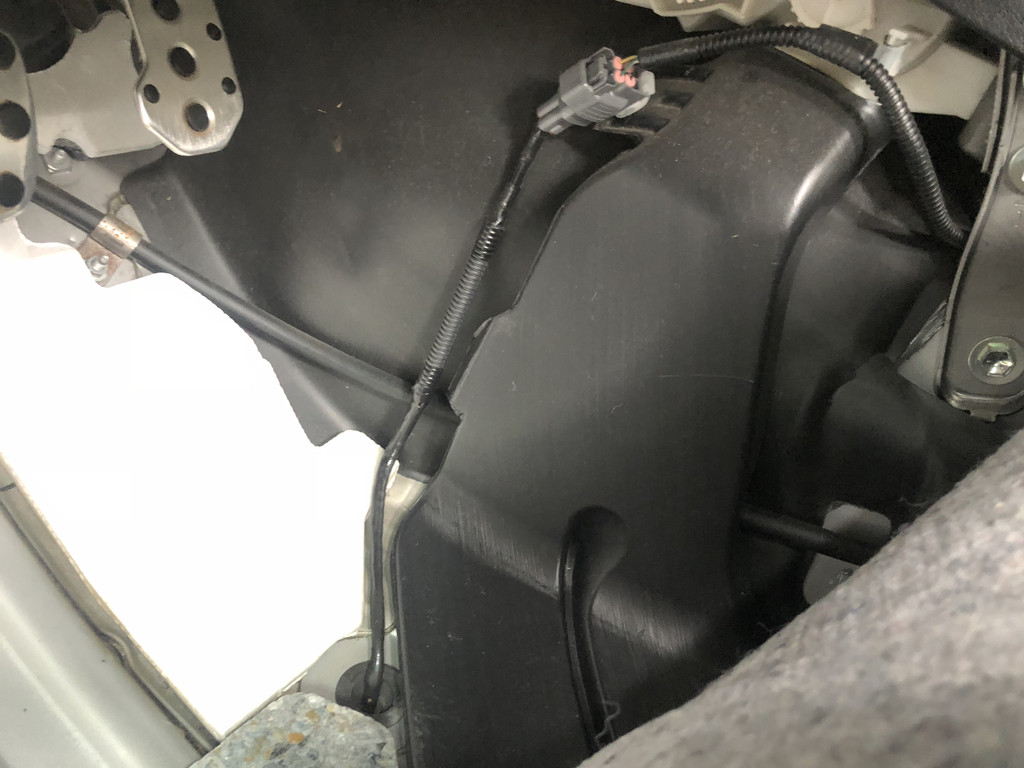
It should look like this afterwards.. Make sure to run those O2 Sensor wire harness completely outside the car, otherwise the carpet when put down will prevent them from being pulled out (ask me how I know)
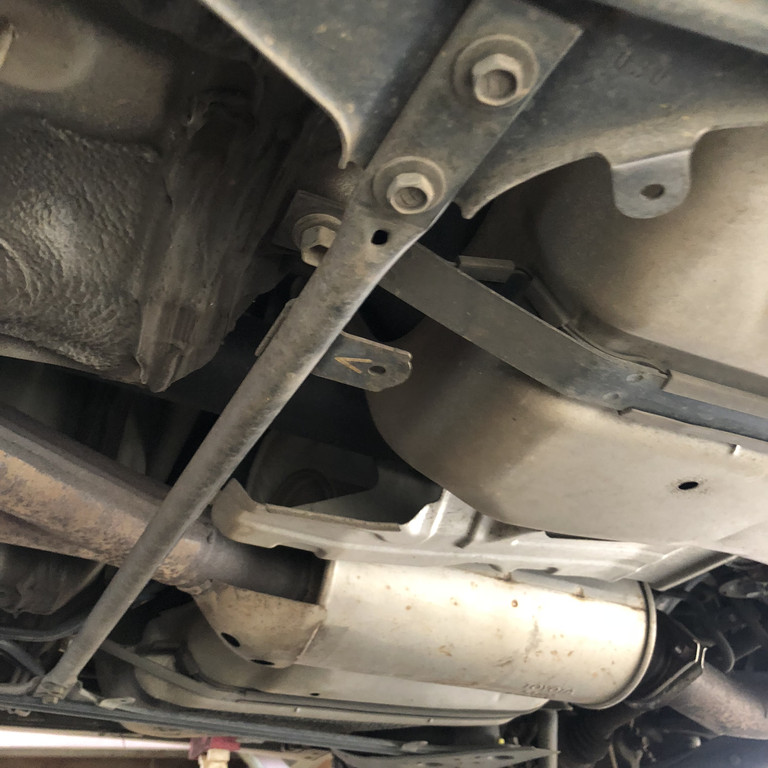
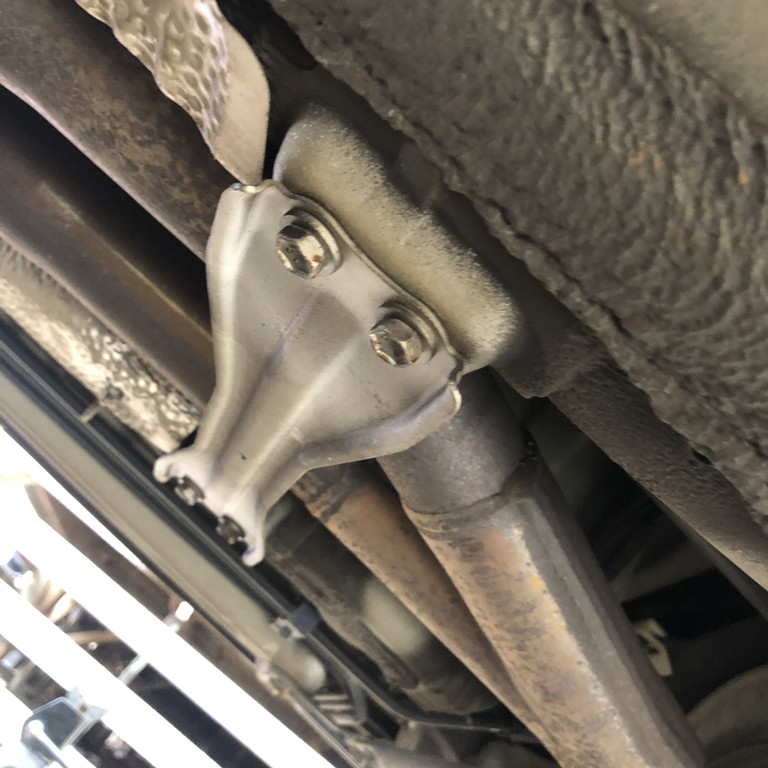
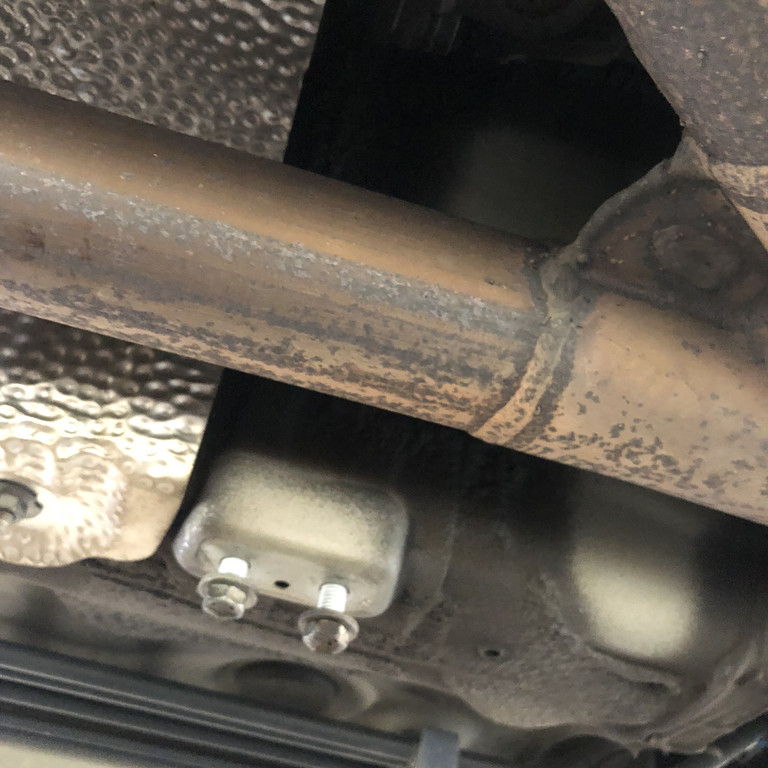
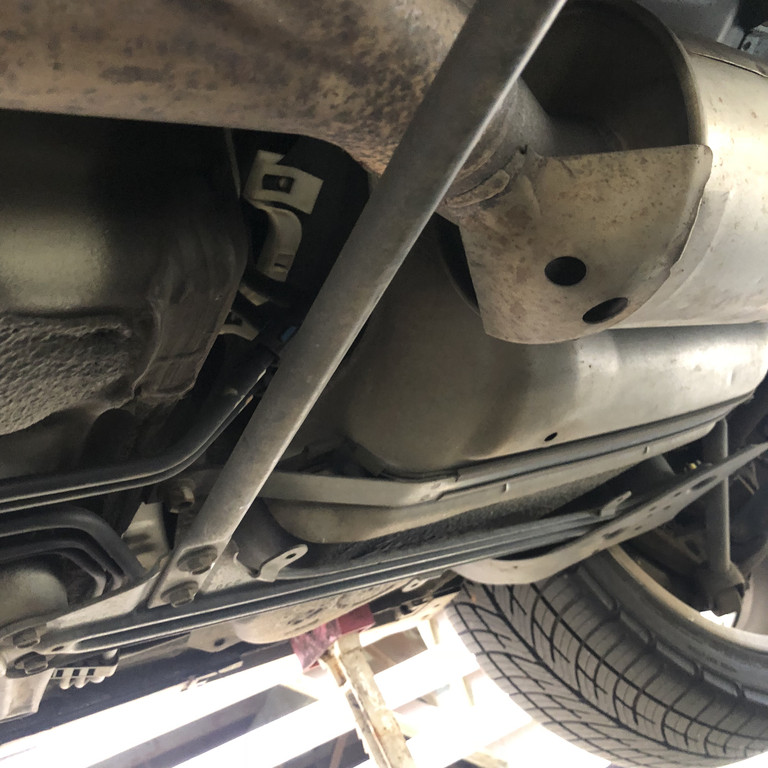
Next remove the following
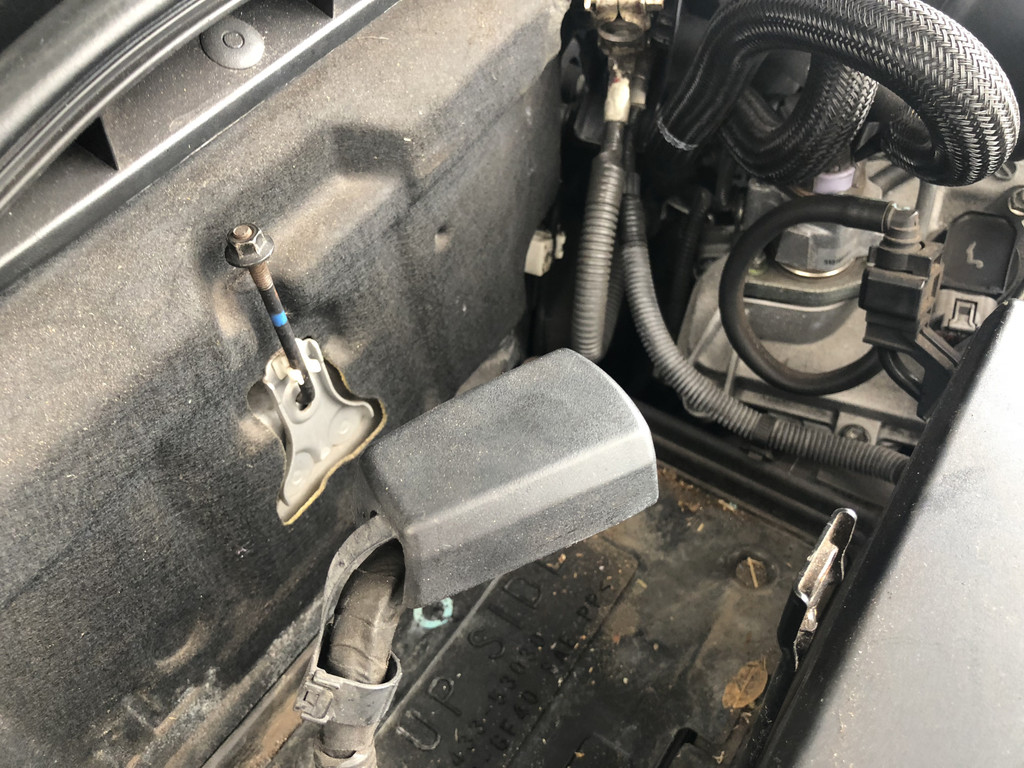
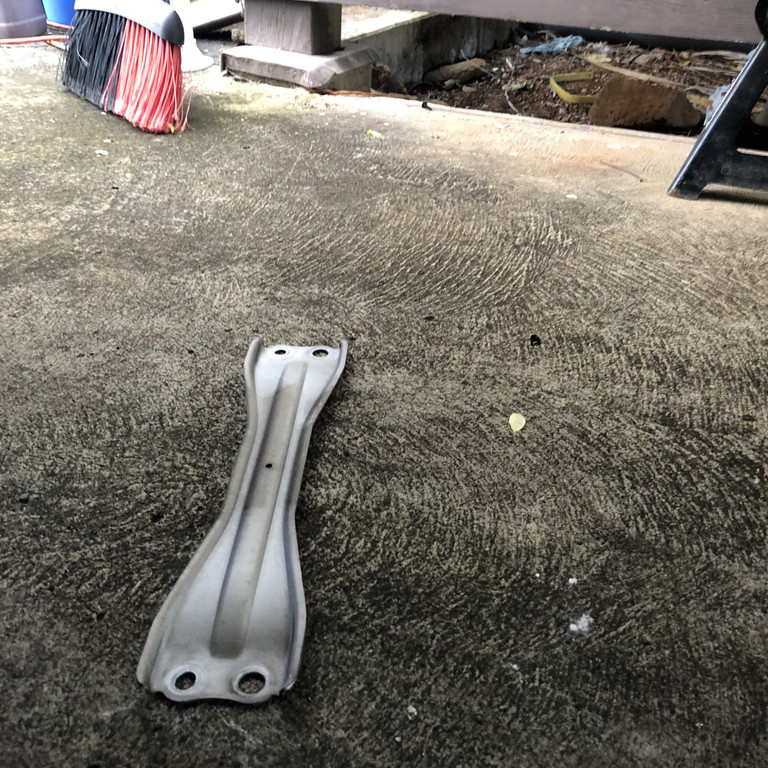
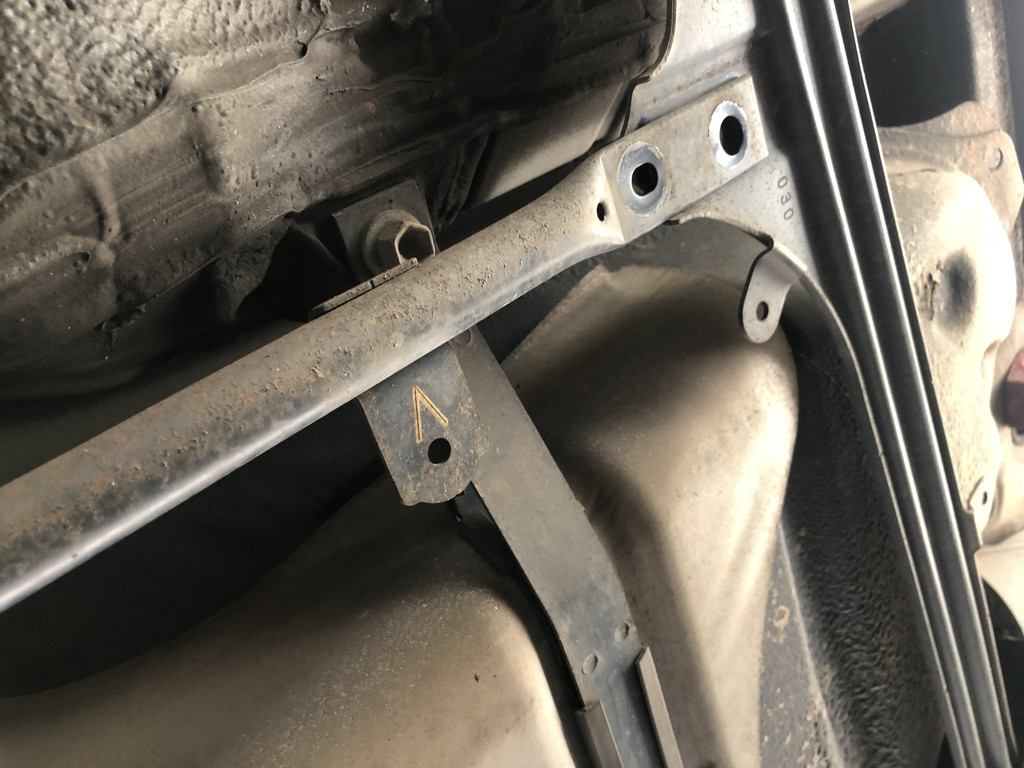
The smaller (shorter one) is called the front center floor brace. The one in the rearwards by the muffler is called the NO. 1 Rear Floor Panel Brace. Please take note on the direction. The pole looking one has an arrow. I would recommend marking the other piece too before removal on which way is 'front'.
Note the 'Arrow'. The 'pole' looking one is marked.
TORQUE:
The shorter length silver one bolts are torque some insanely low amount. 65 in. lbf
The 'pole' looking one NO.1 Rear Floor Panel Brace is 14 ft. lbf.
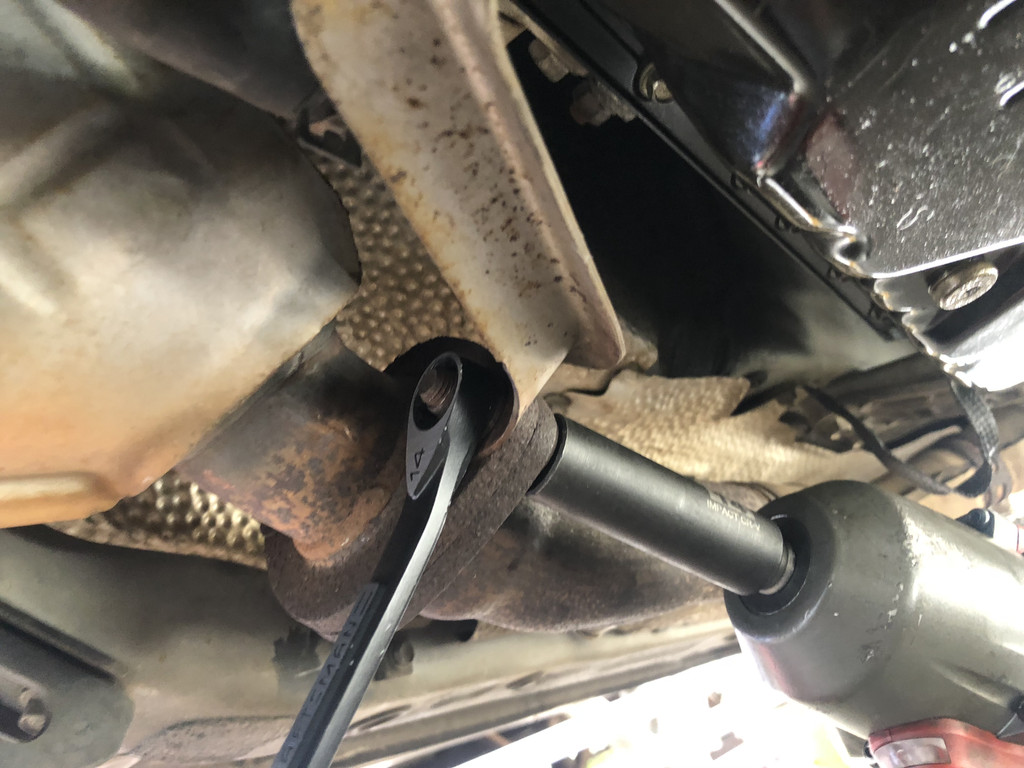
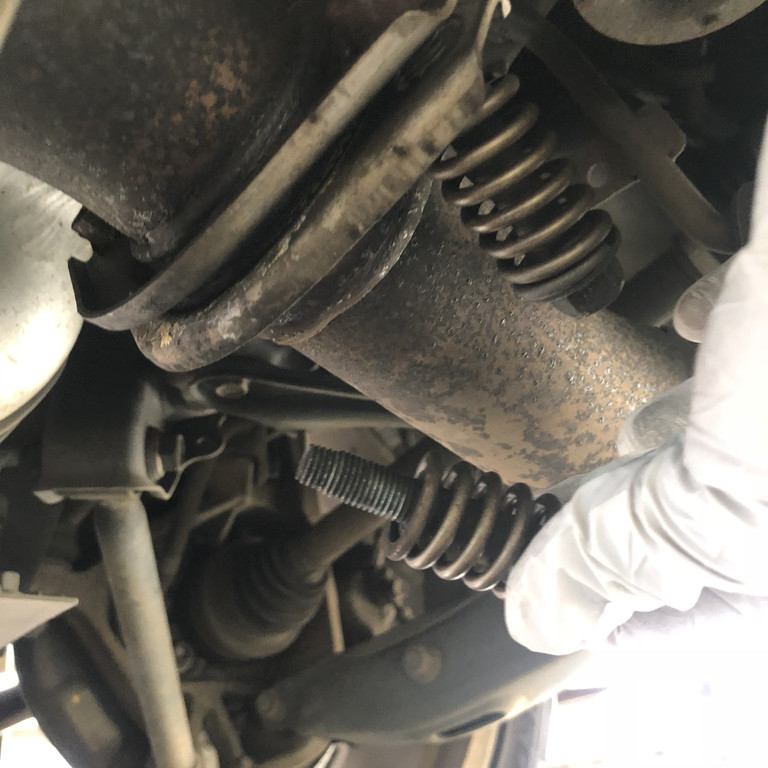
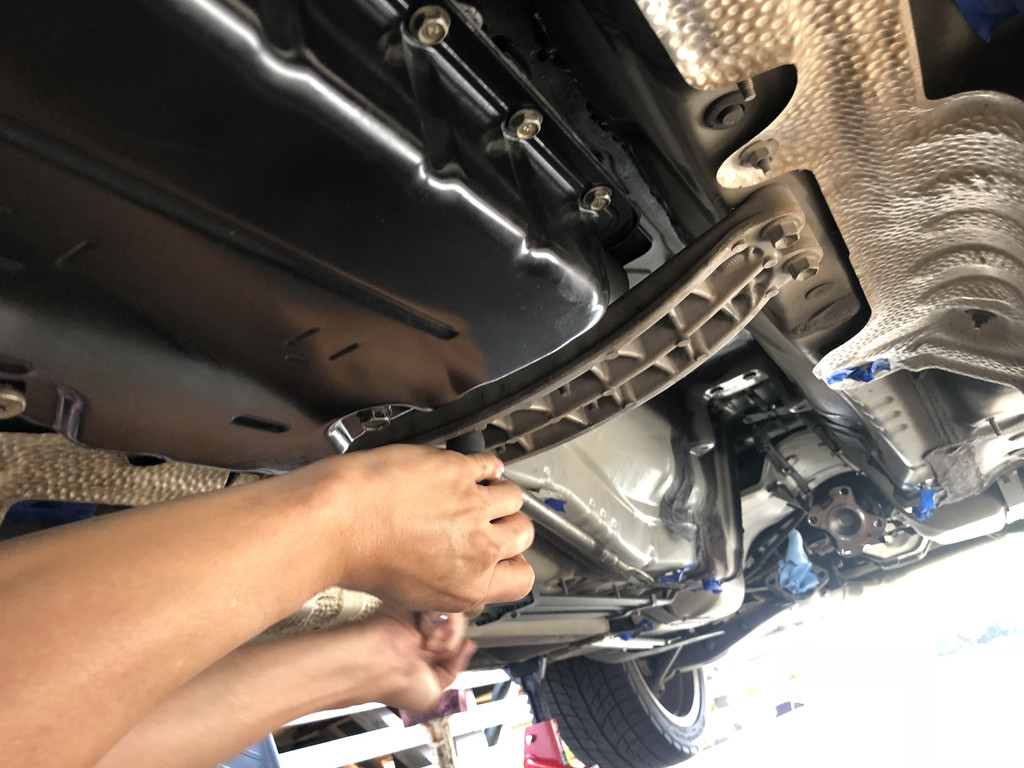
Careful remove the bolts on the rear of the front exhaust pipe assembly to the mufflers.
It is a bit hard to hold without dropping it. Consider getting a friend to help you lower it, otherwise you'll be using your body. KEEP YOUR EYES SAFE, THERE MIGHT BE RUST PARTICLES FLYING OFF.
TORQUE:
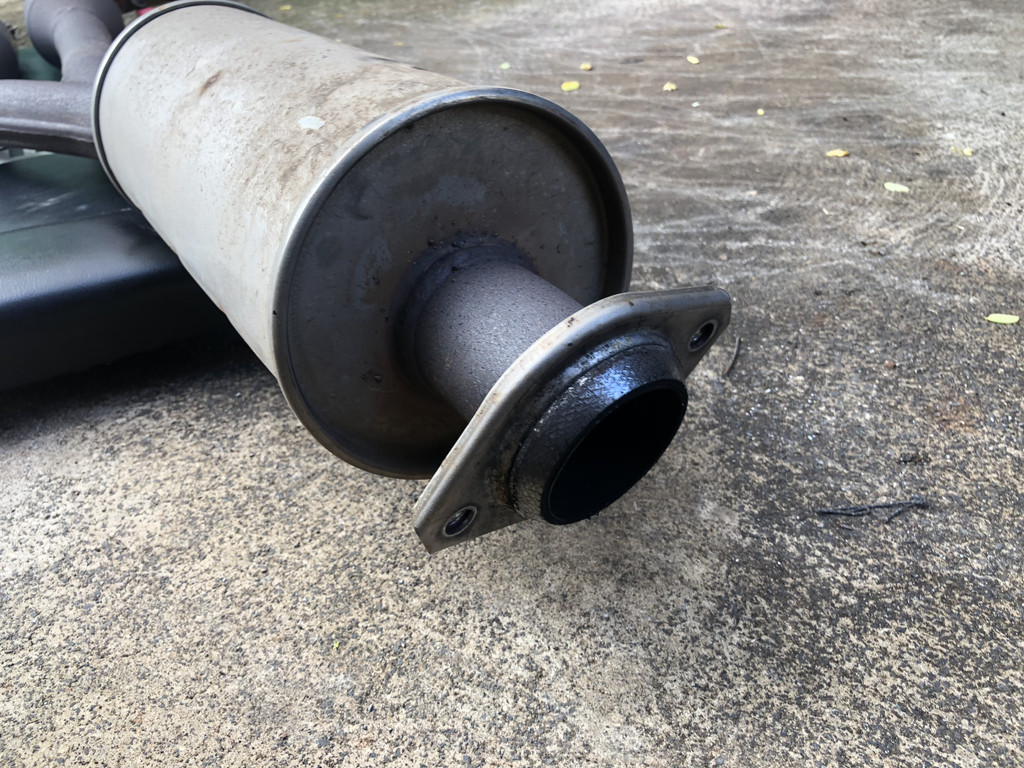
Front Exhaust Pipe Assembly to mufflers 32 ft.lbf. Consider replacing this Gasket. I used FEL-PRO 61460 (x1)
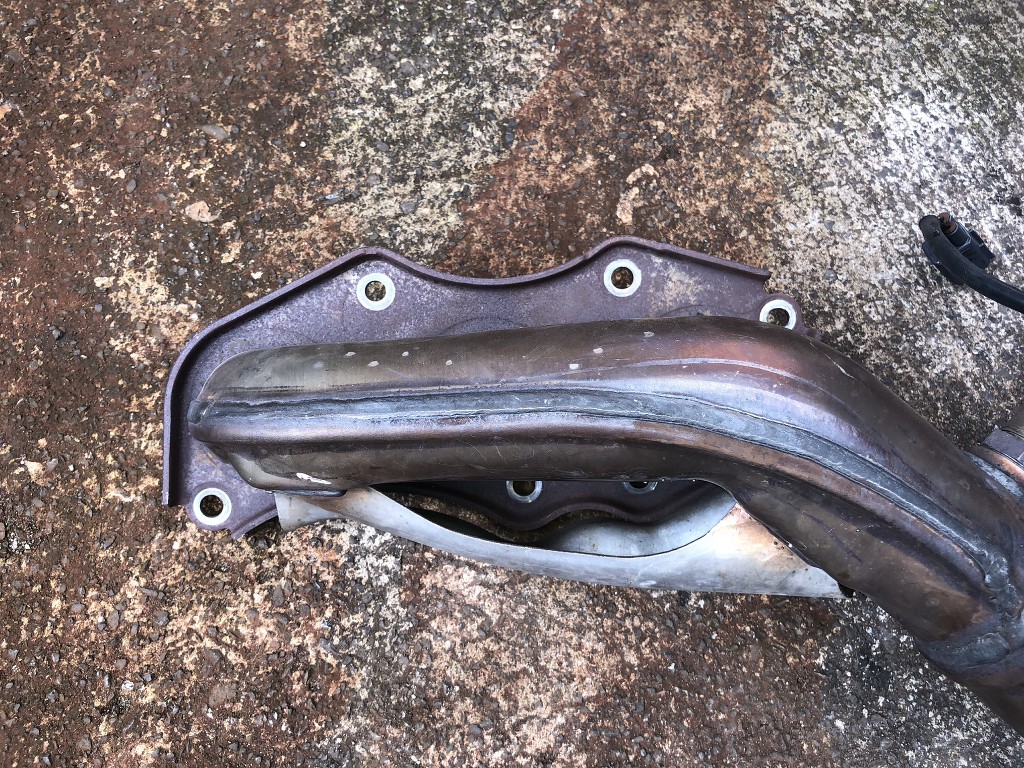
Two shots of the gaskets you'll be replacing.
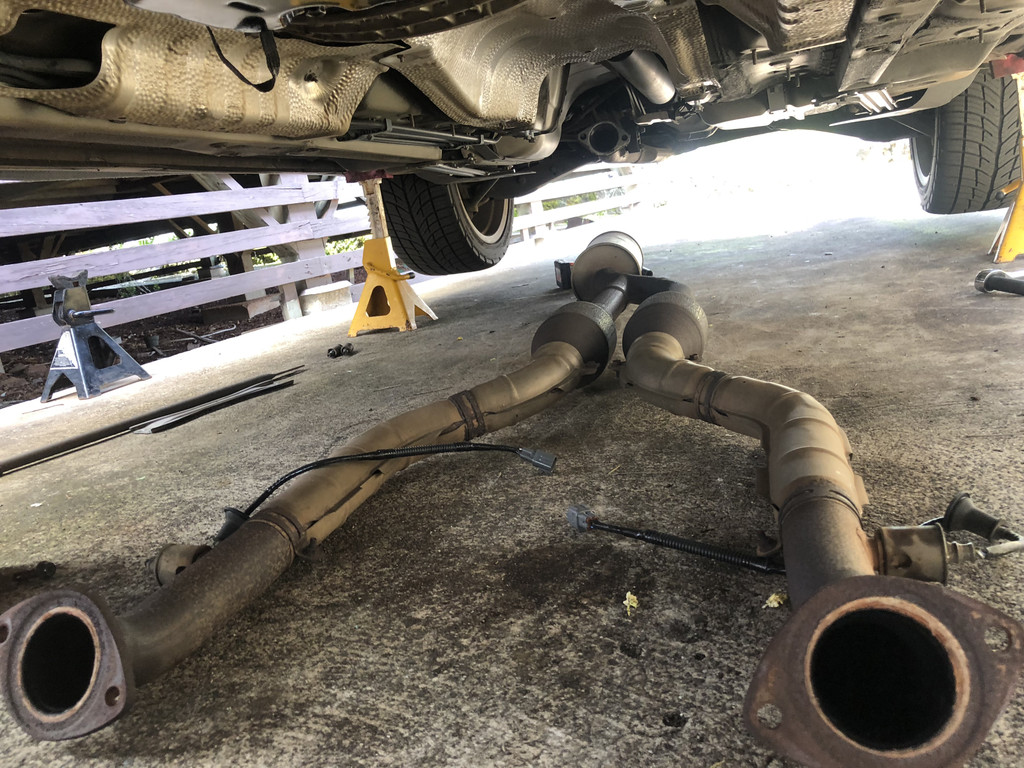
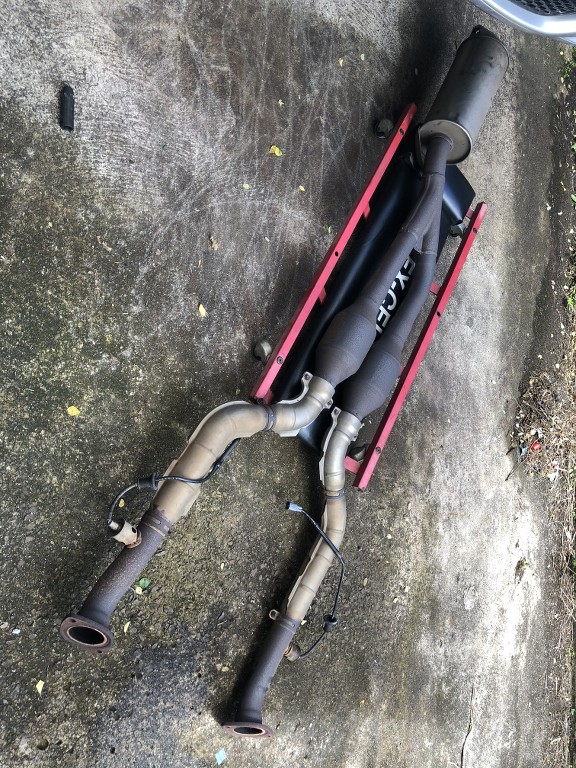
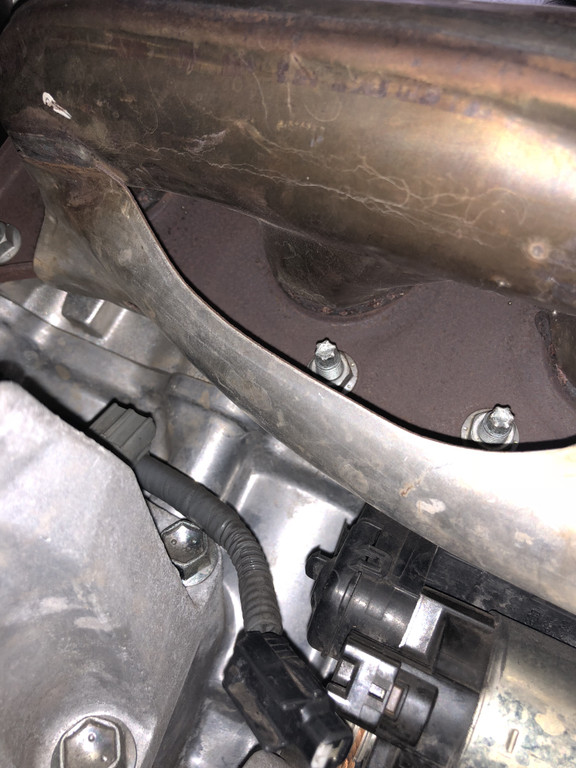
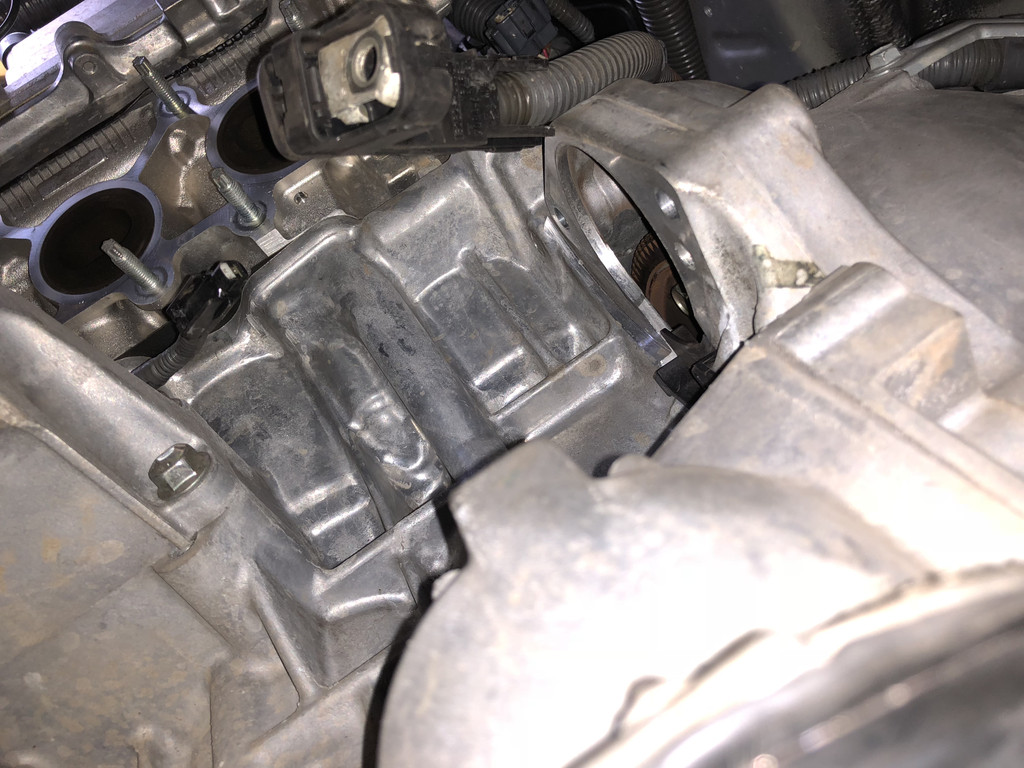
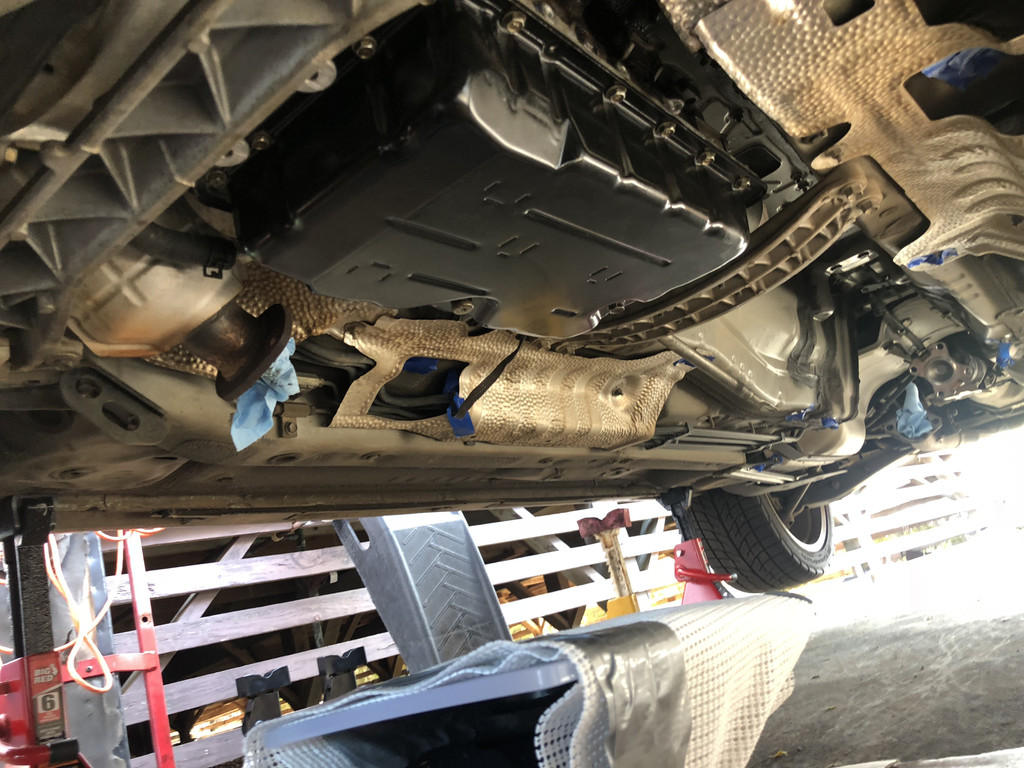
Shot with the exhaust removed.
Use this guide at your own risk. I nor Club Lexus assume no responsibility for any damage to your vehicle or personal injury as a result of following this guide.
Use this guide at your own risk. I nor Club Lexus assume no responsibility for any damage to your vehicle or personal injury as a result of following this guide.
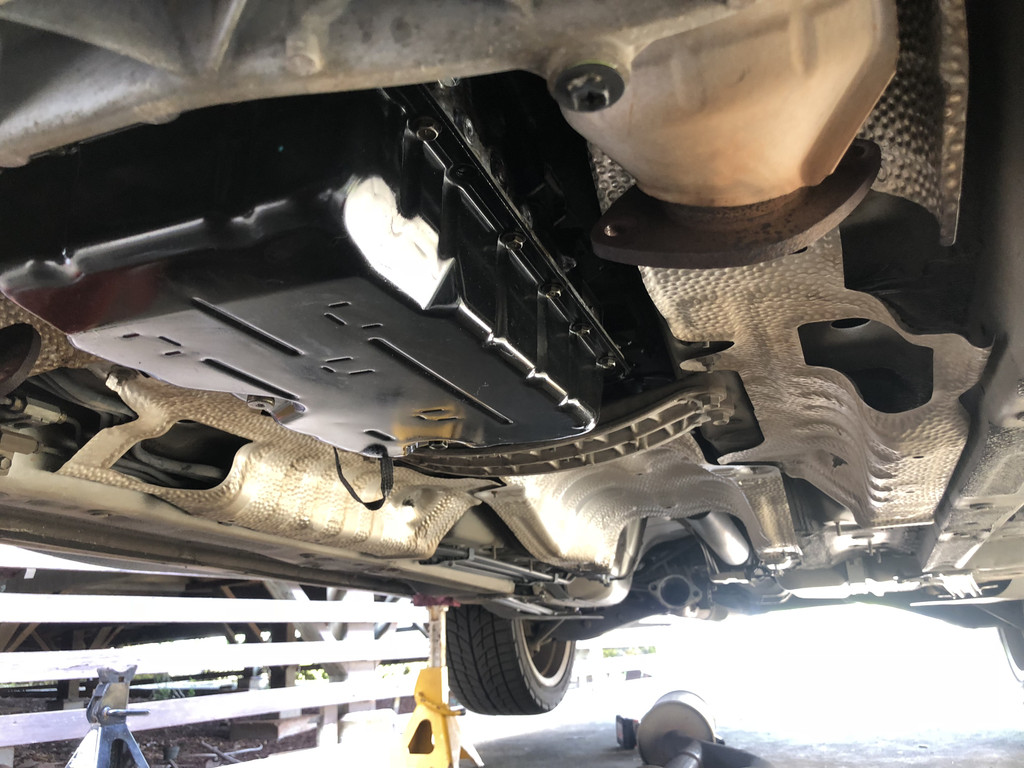
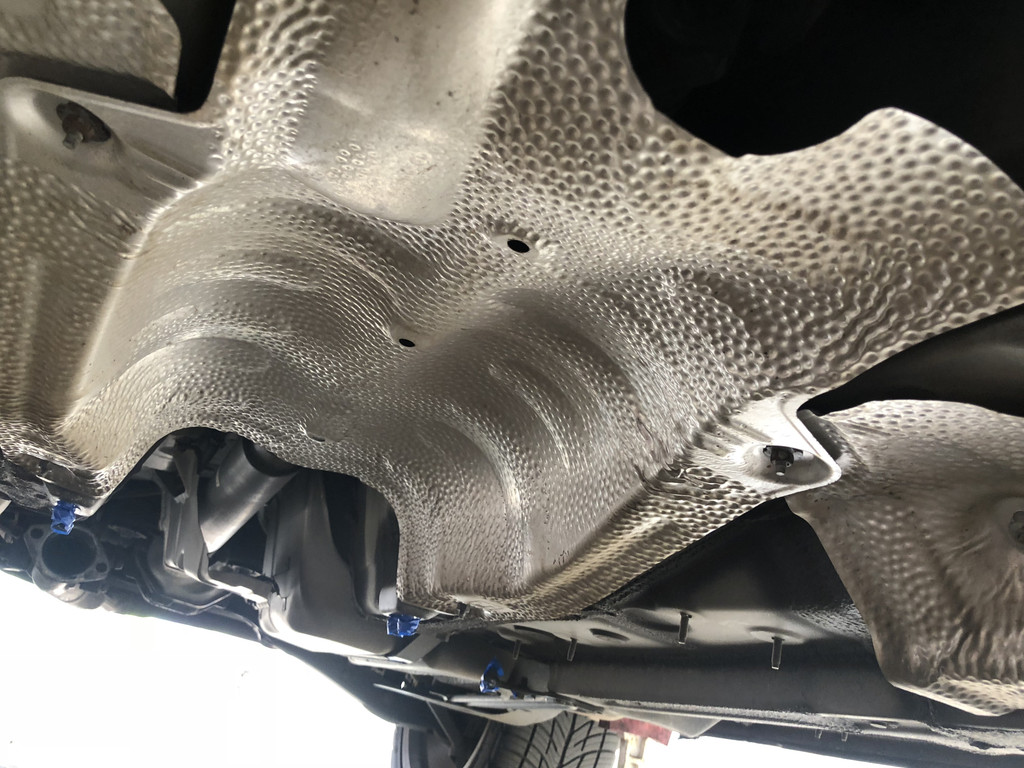
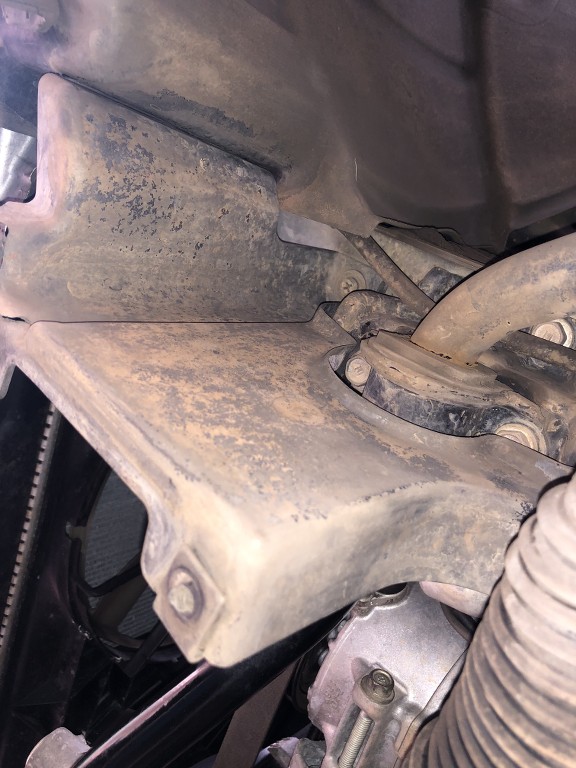
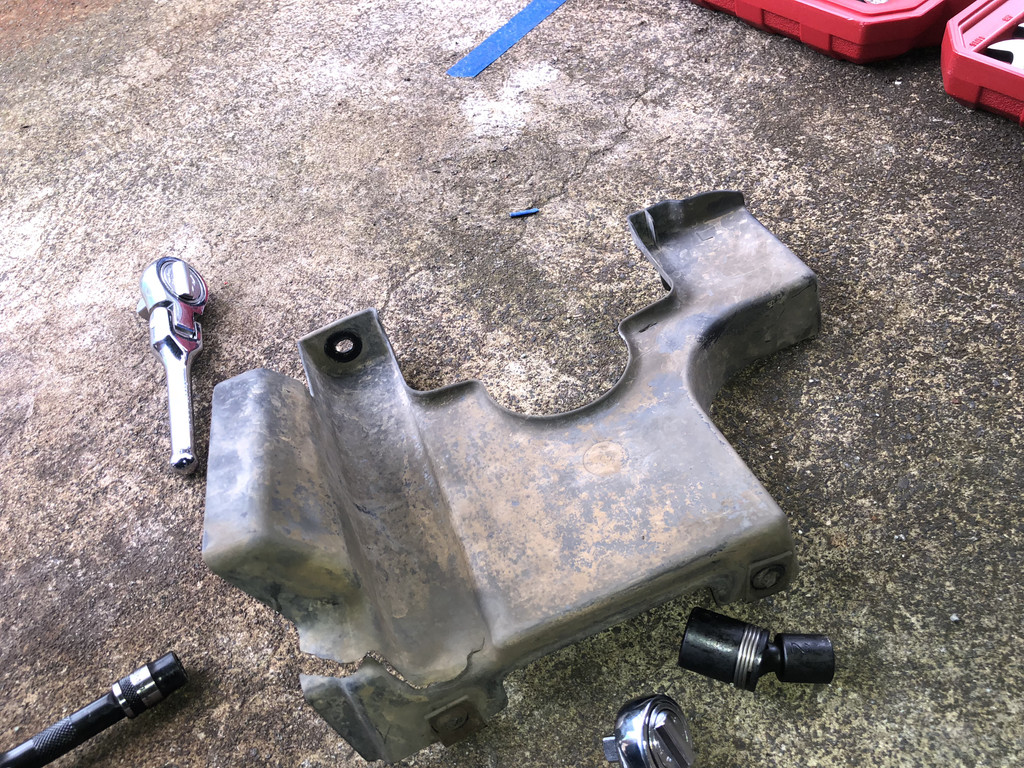
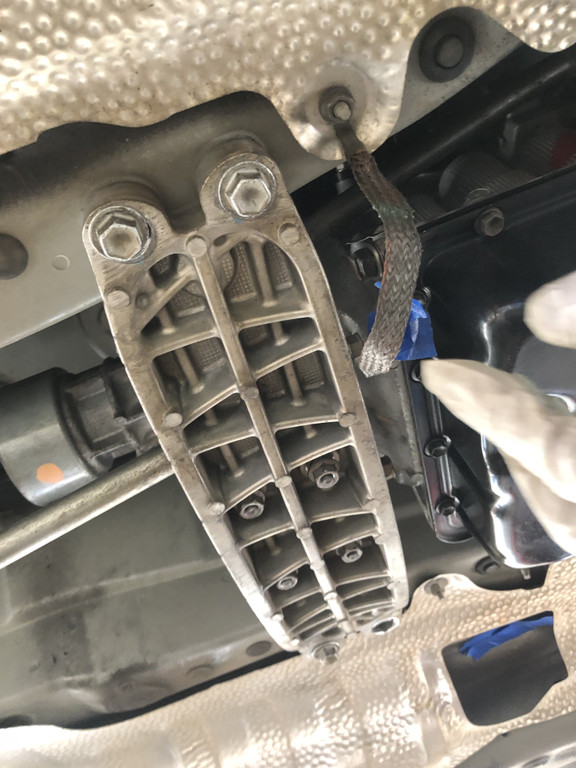
Shot of the FRONT FLOOR NO.1 HEAT Insulator. Looks like a metal chicken skin aluminum shield plate LOL.
TORQUE:
Those nuts are held down some insane low torque. Hand tight should be enough. 48 in lbf.
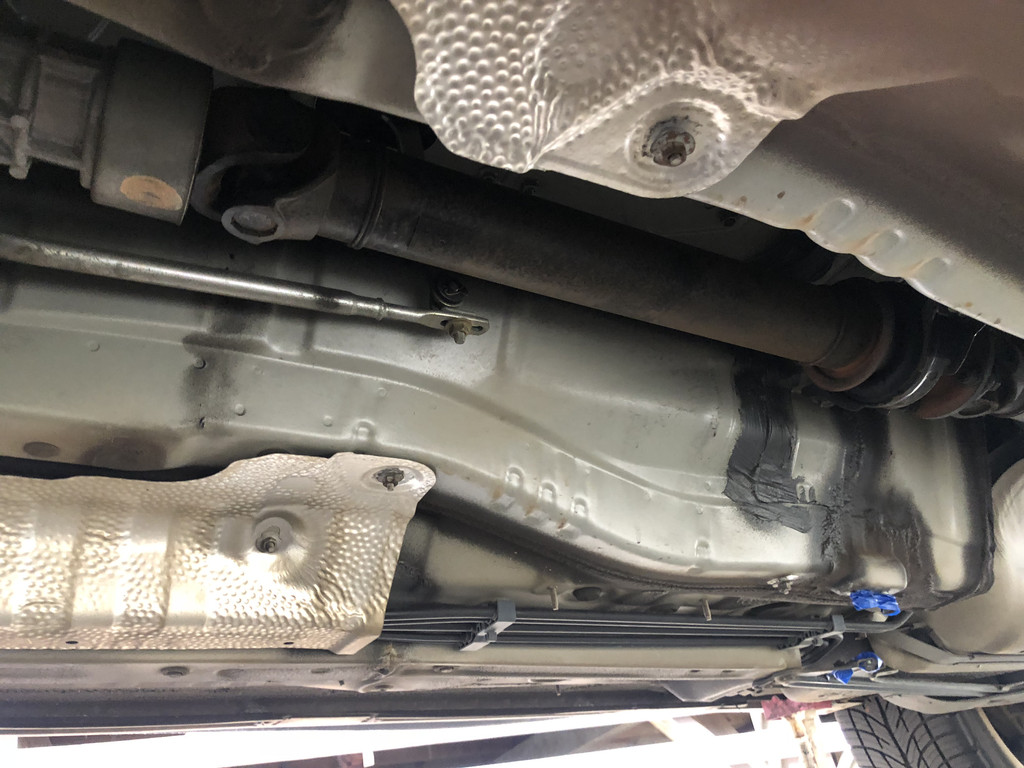
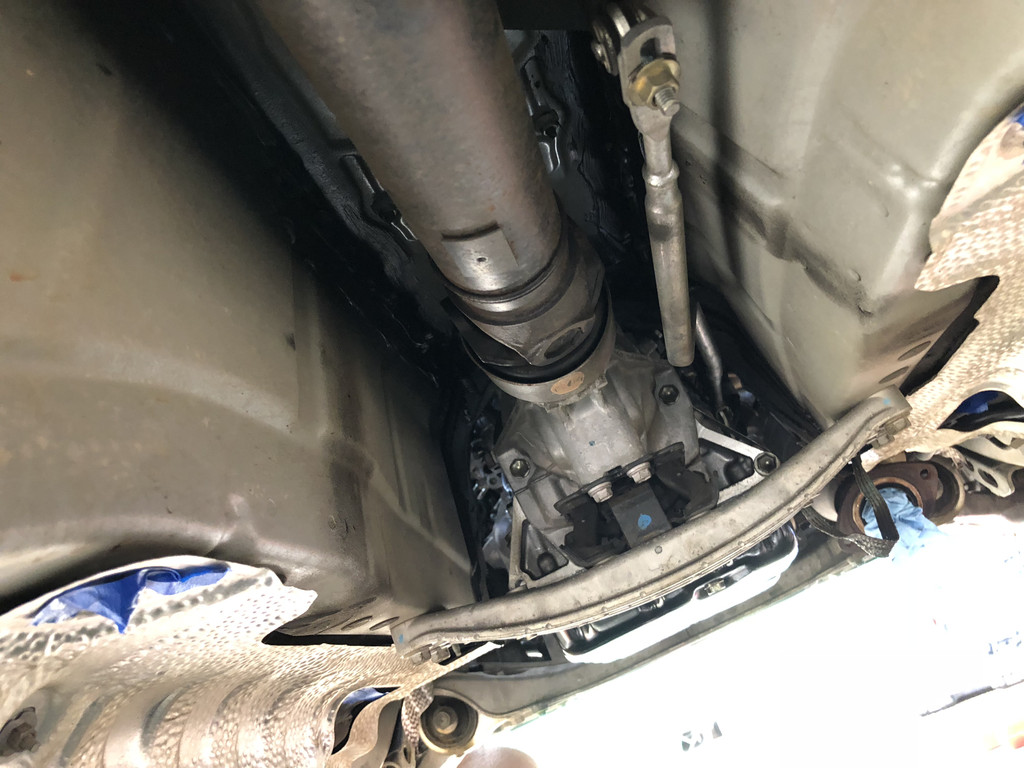
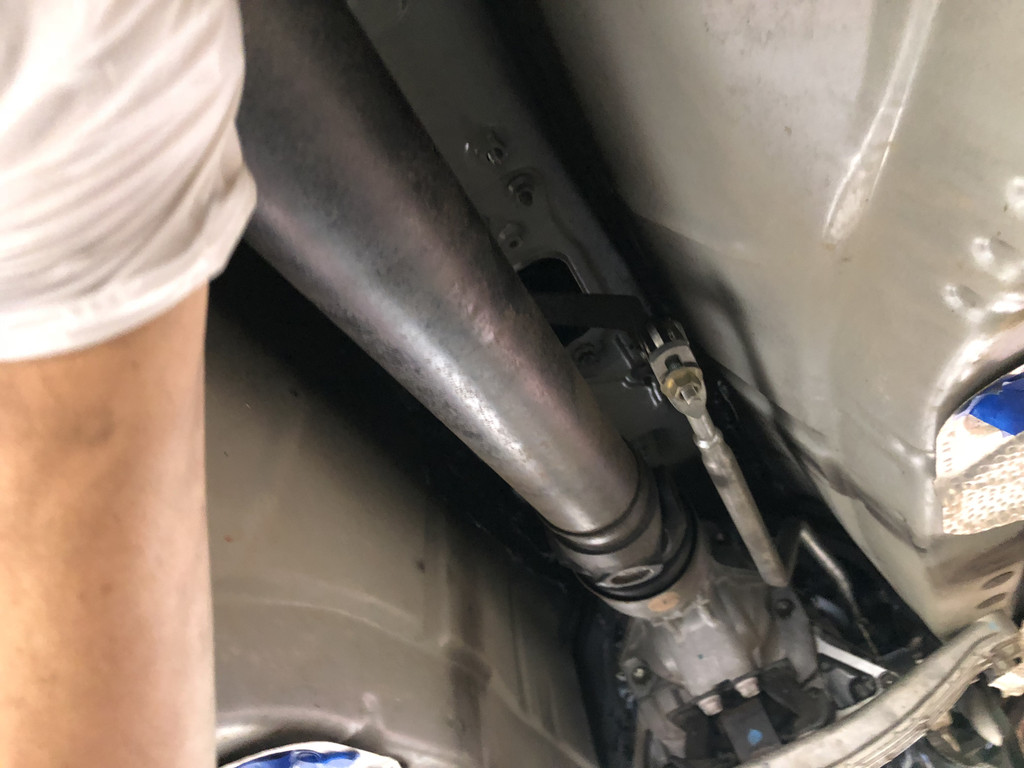
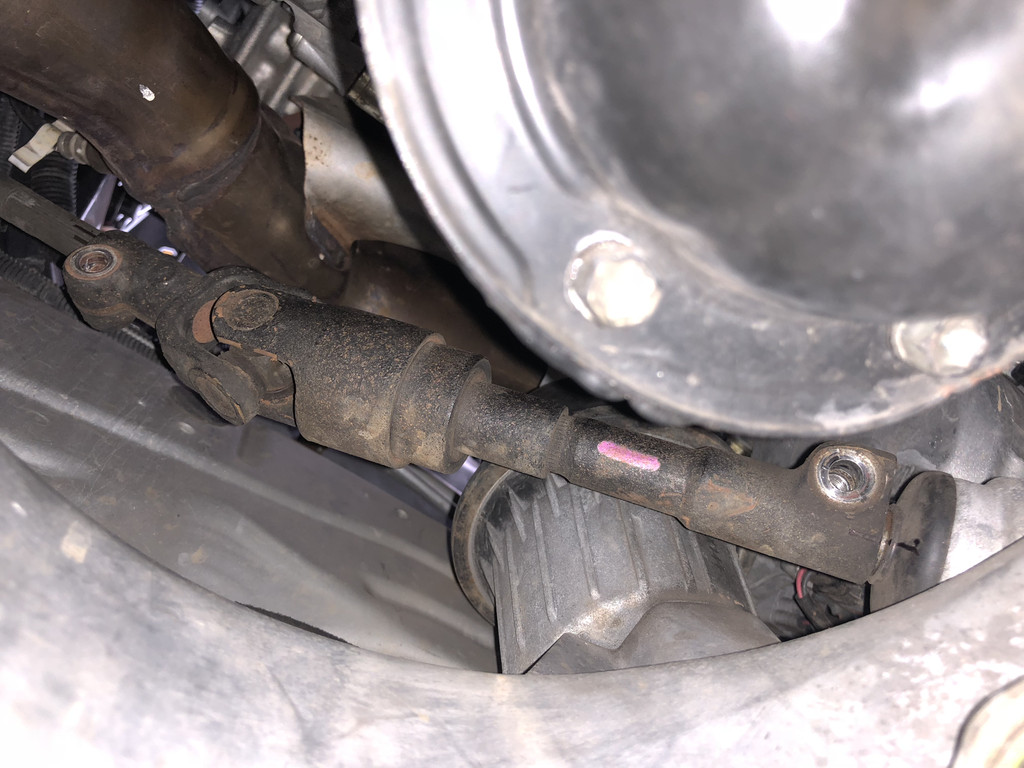
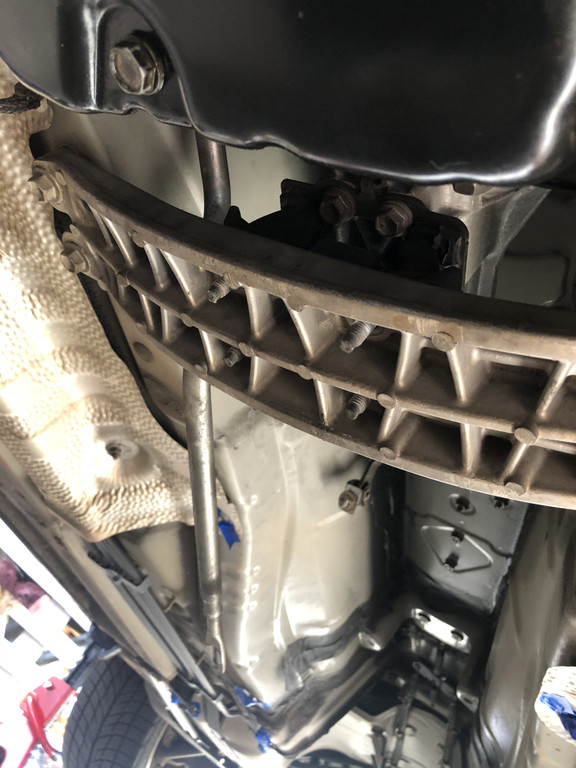
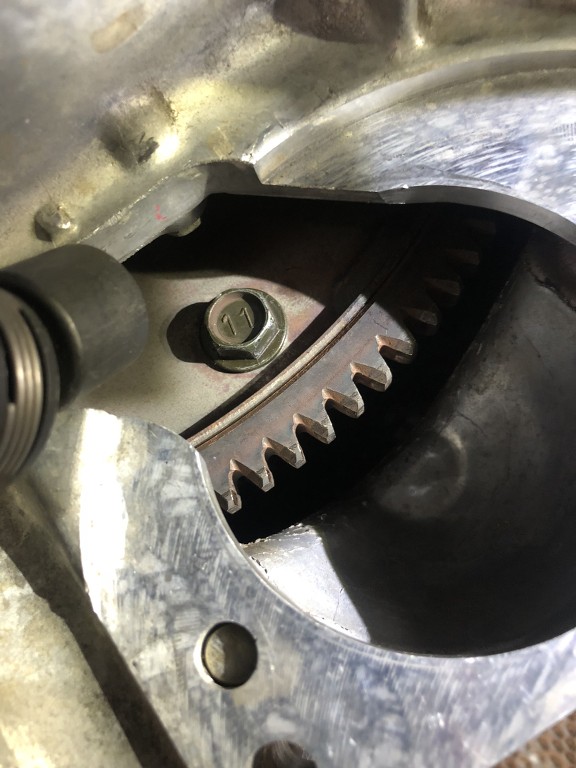
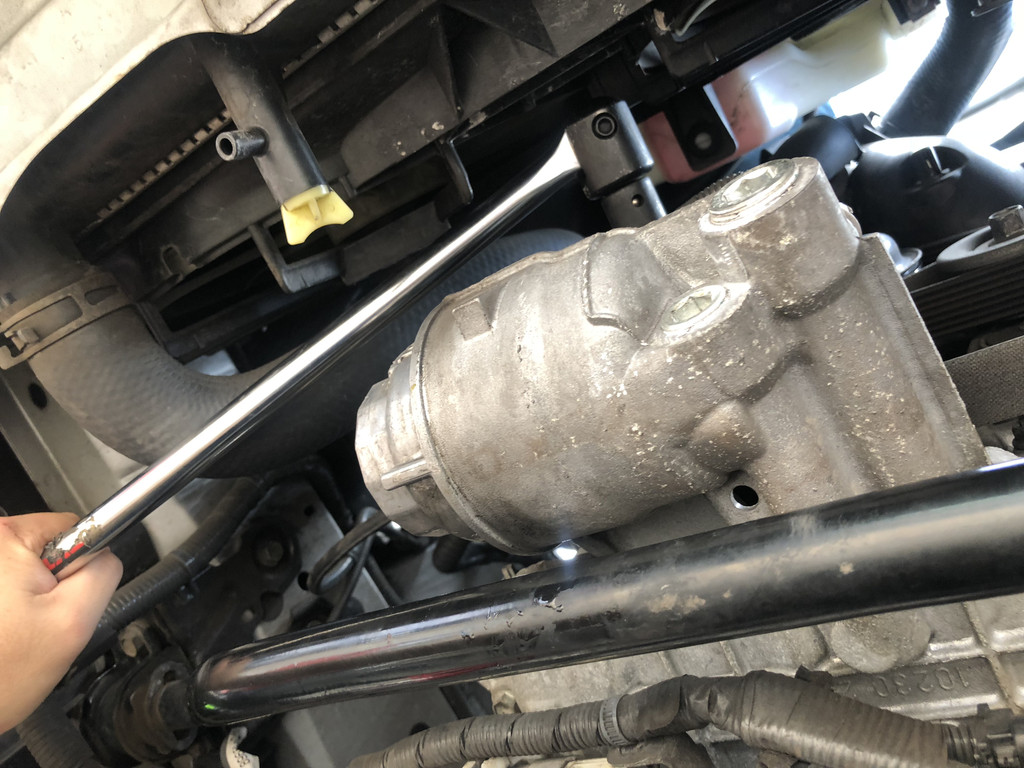
With that out of the way, your Propeller shaft with center bearing assembly is visible.
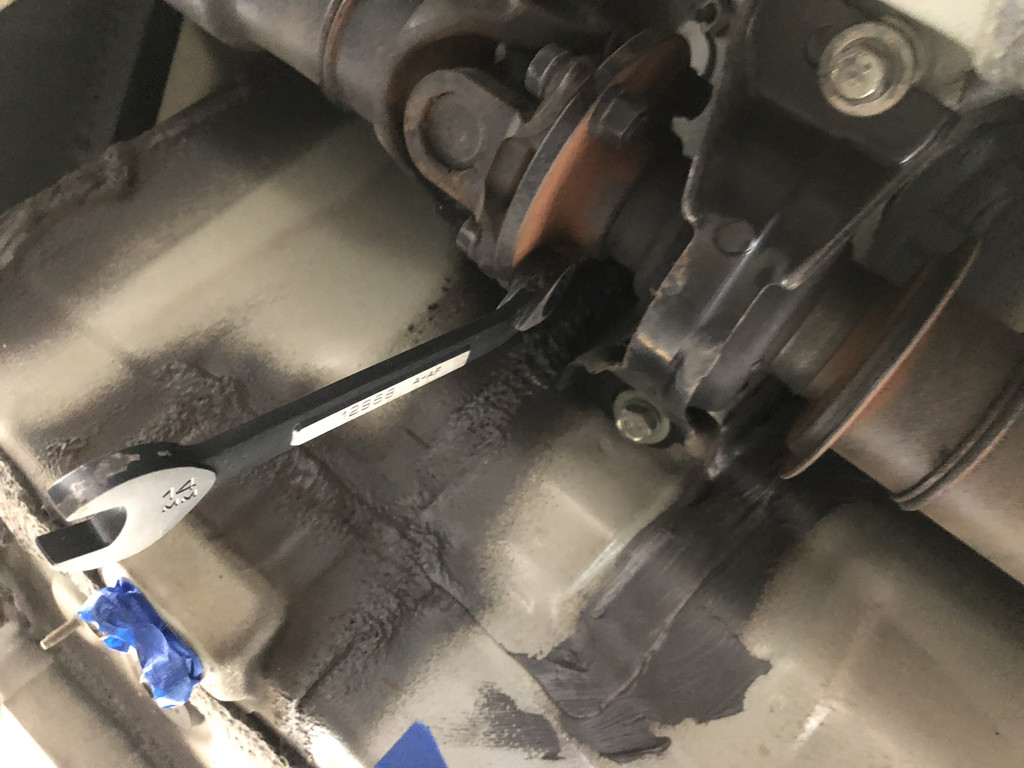
Suggested to mark the shaft with the other half (I don't know the name) before unbolting.
Don't use black marker...I could bearly see mines. I had to use a wrench to 'hammer' it loose. Hardly impossible to get anything on it. Use another box wrench to hold the other side down if needs to.
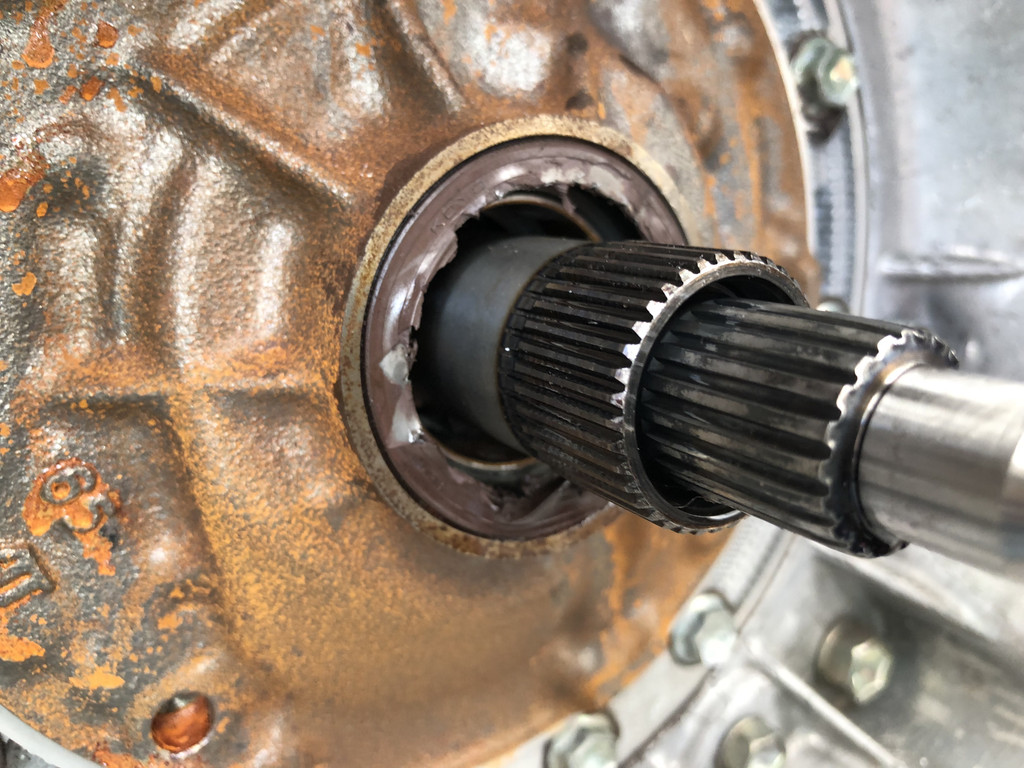
This part goes into the back end of the transmission spindle.
It's on a bit tight.
TORQUE:
**Crud, I forgot the torque spec. I'll find it**
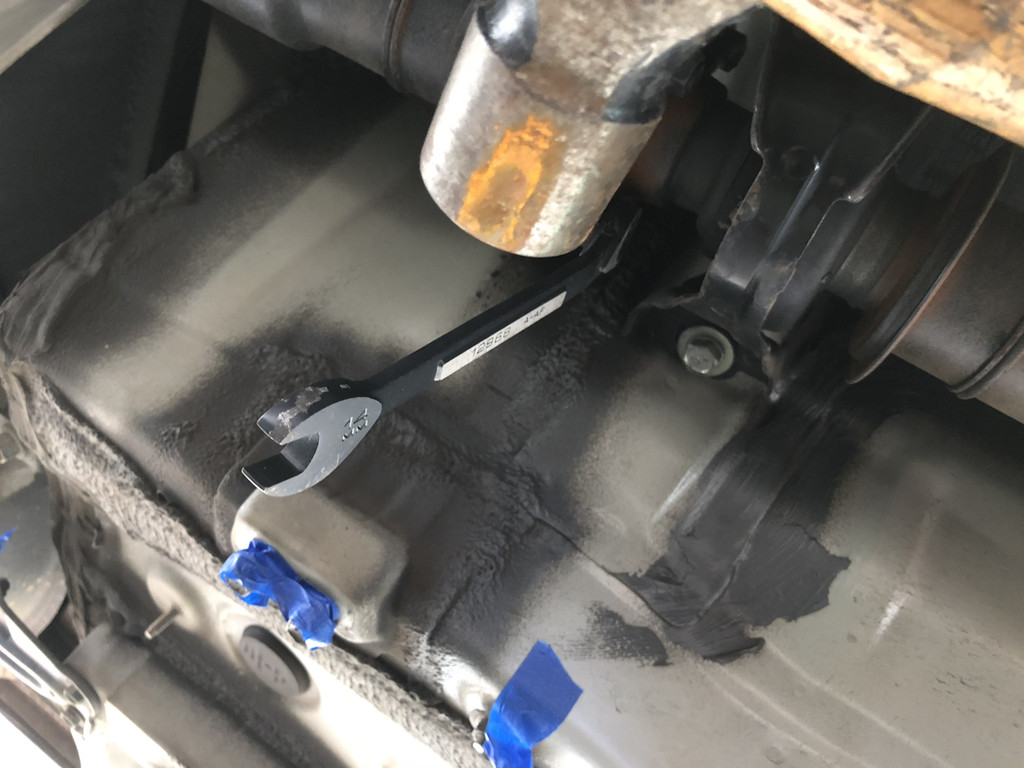
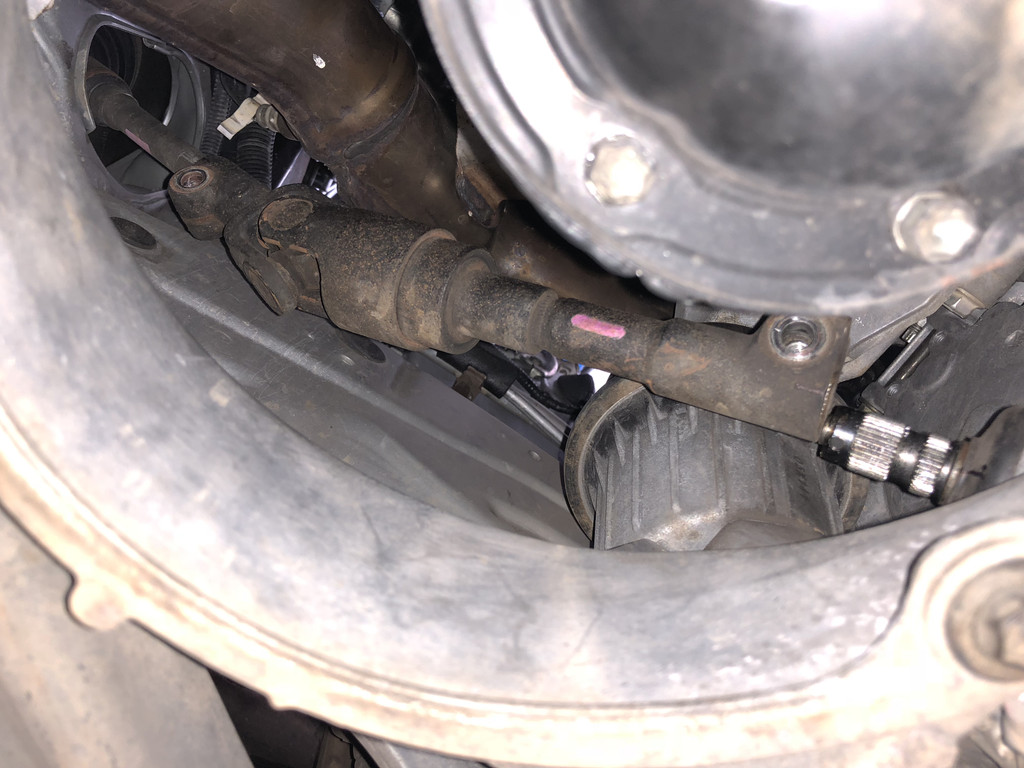
Once you hand loosen the two. You will have to put the car in netural so you can turn the shaft to expose the other two nut/bolts. Handbrake down and then repeat.
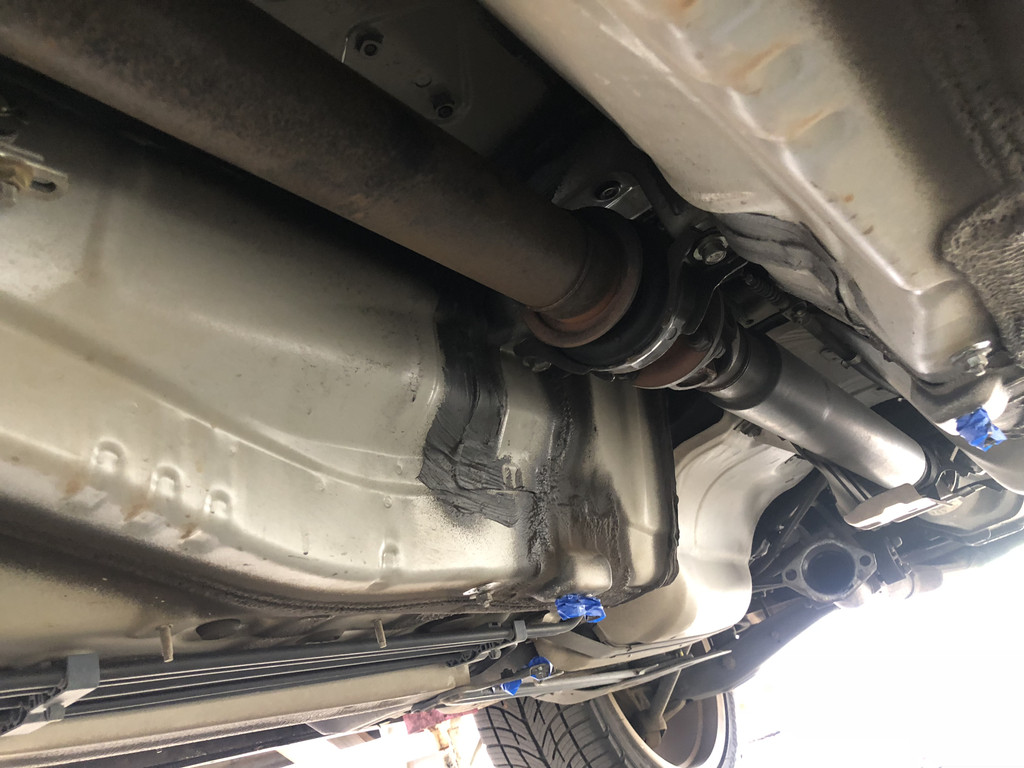
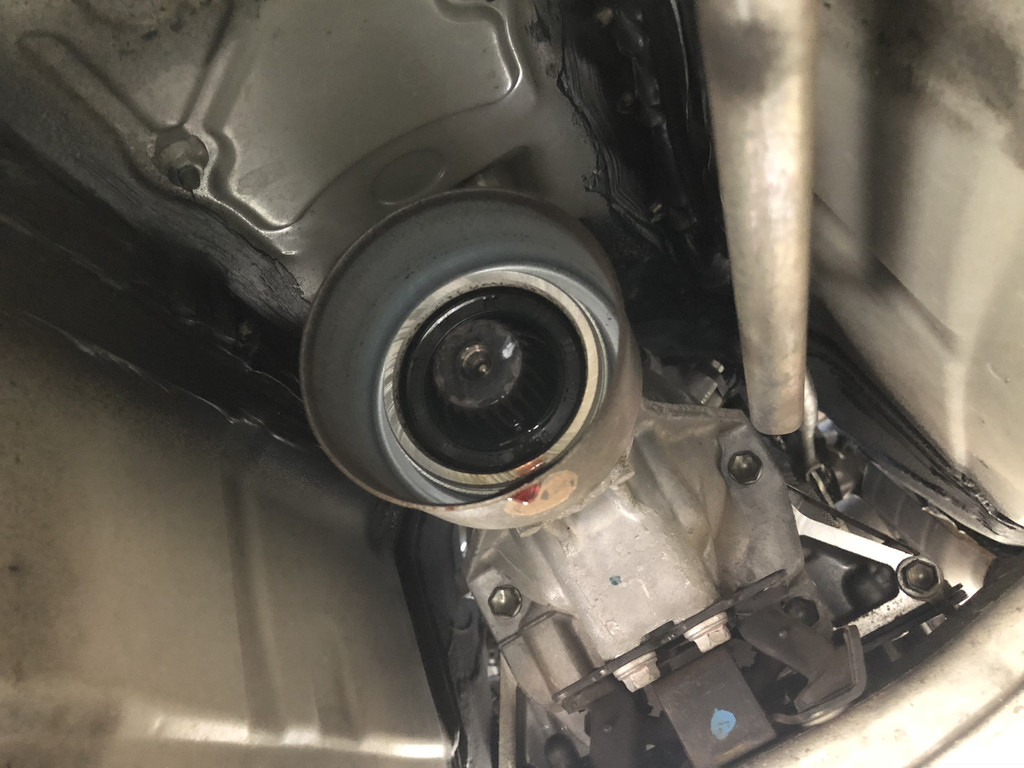
Now, let the other half of the drive shaft rest of the outside guide plate RH (where the drive shaft is on the axle/differential side and start loosening the bolts holding the propeller shaft to the car.
TORQUE:
36 ft.lbf. IMPORTANT: The washer goes ONTOP of the bracket and the bolts go underneath the bracket. Basically it should be bolt>Center bearing assembly>washer
.Once you disconnect it, you can angle the axle and pull out of the transmission. Fluid WILL come out. You'll get soaked if you were under the car.
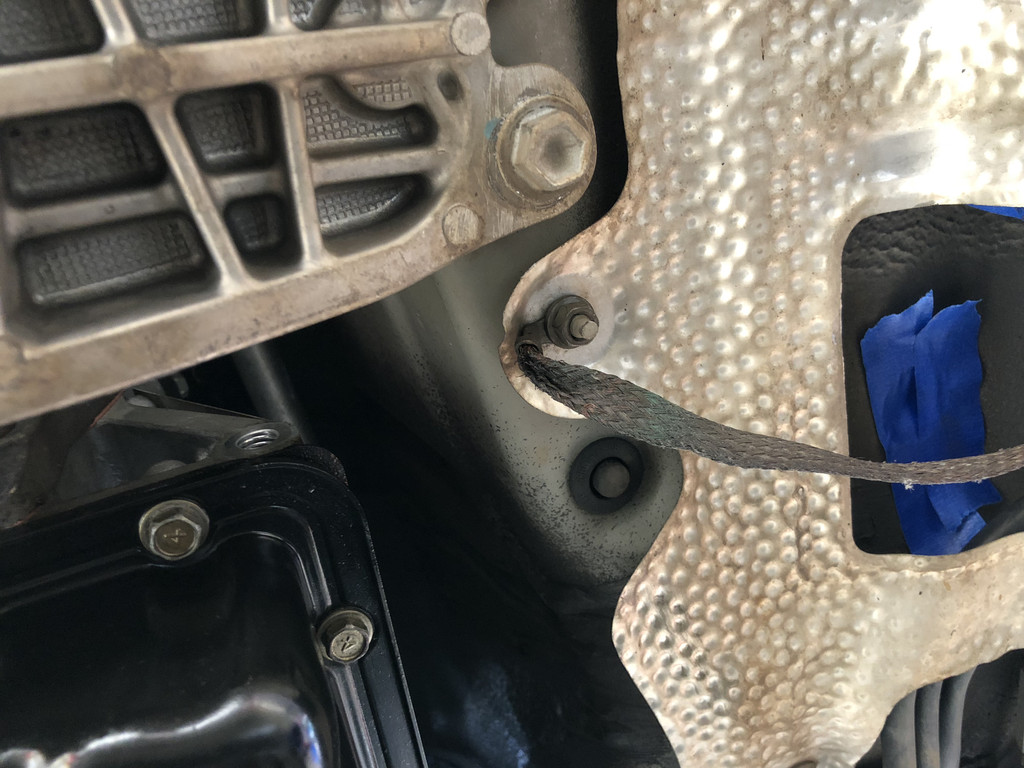
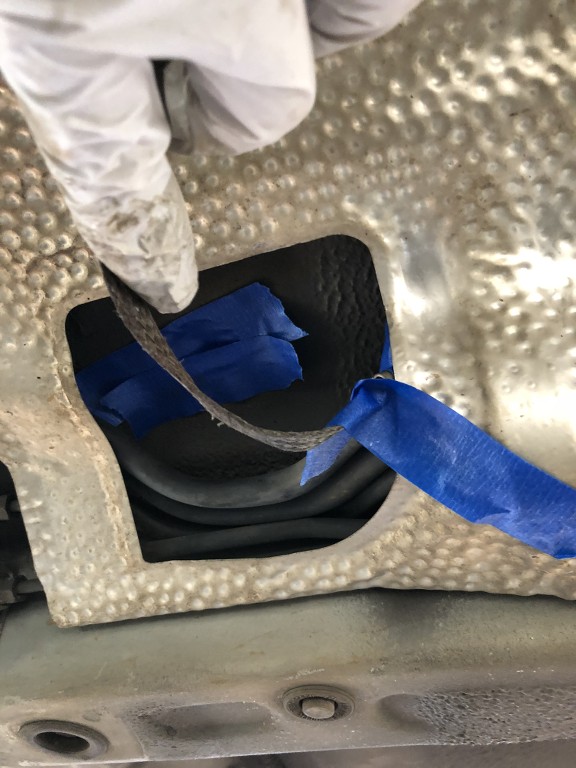
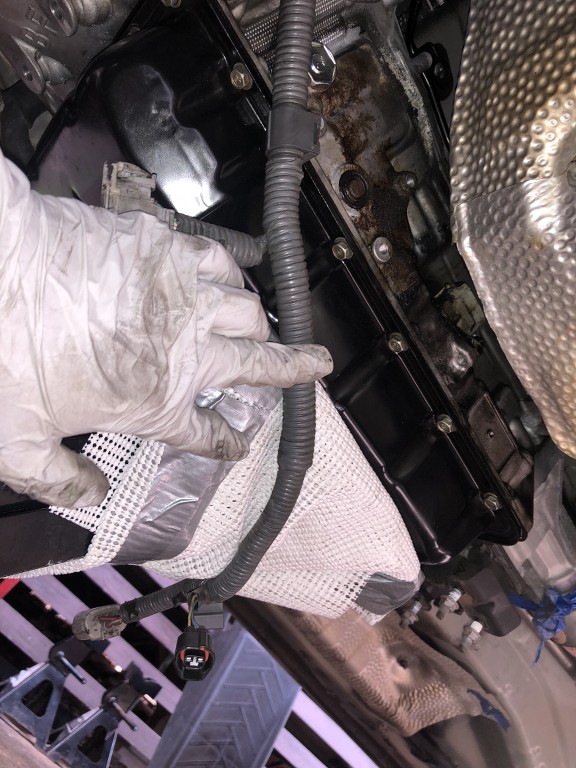
Disconnect the ground cable from the transmission....I put tape and tapped it on the side heat shield.
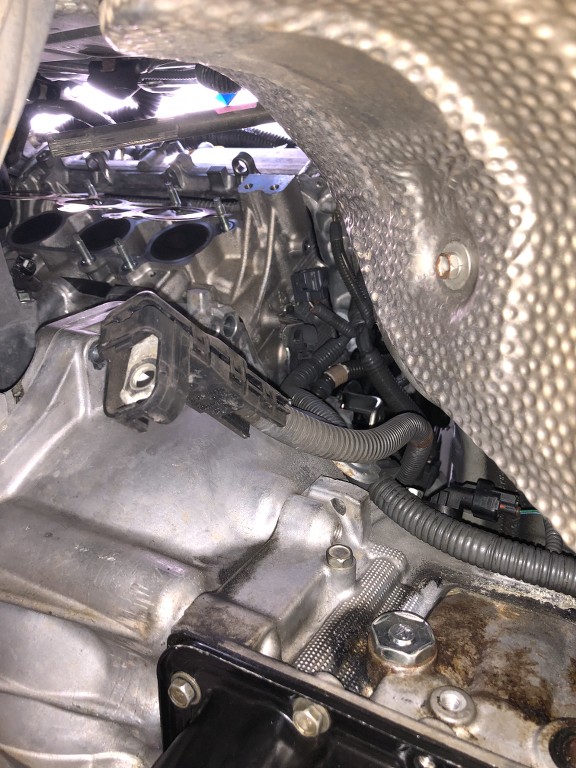
Now it is a good time to start working on the engine side now.
Use this guide at your own risk. I nor Club Lexus assume no responsibility for any damage to your vehicle or personal injury as a result of following this guide.
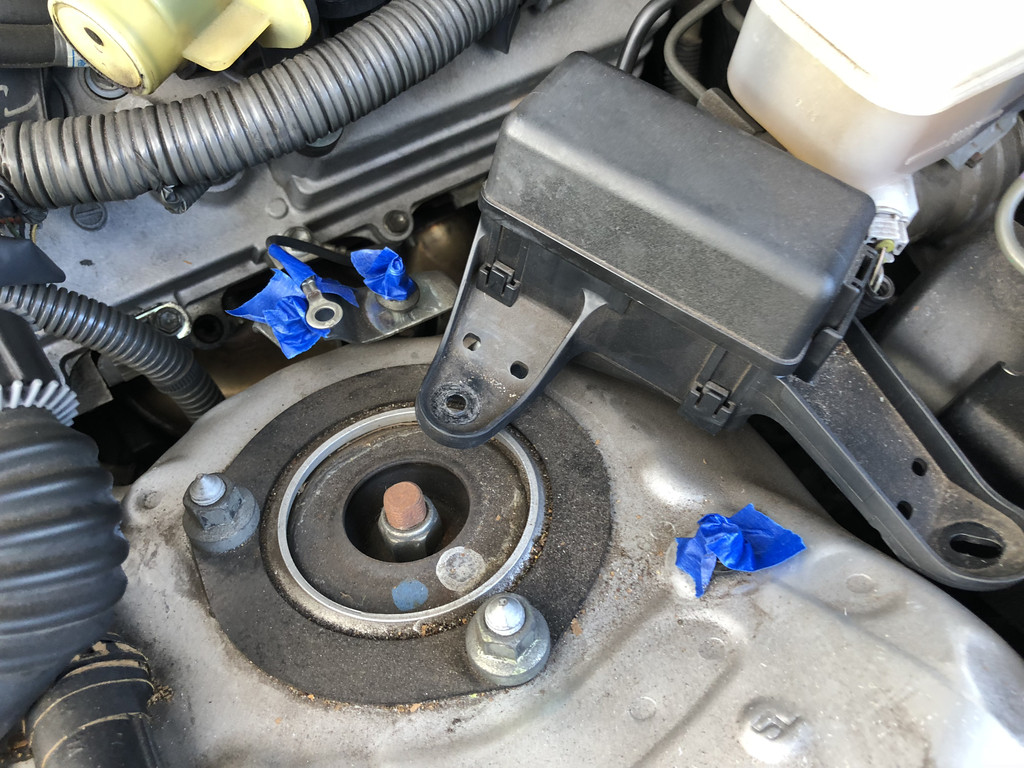
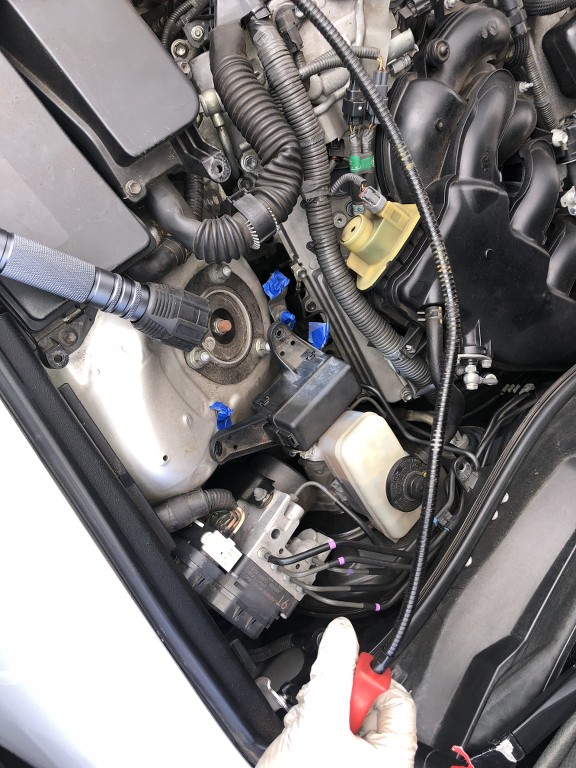
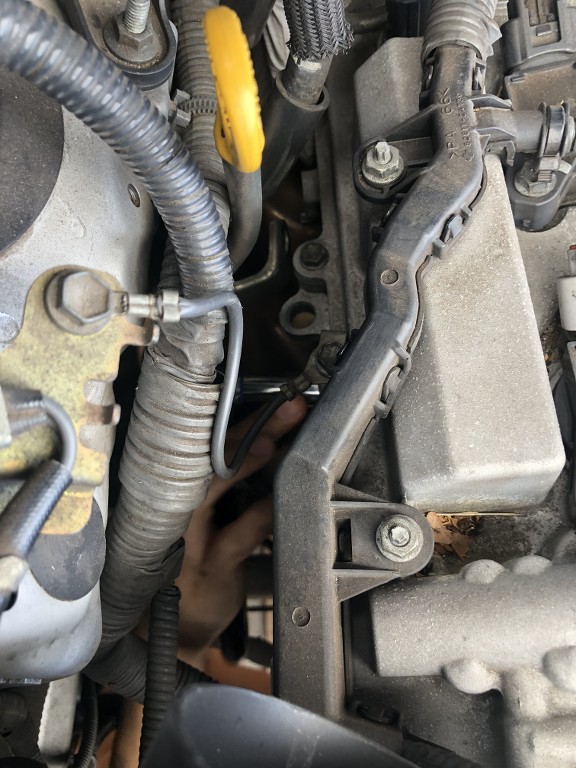
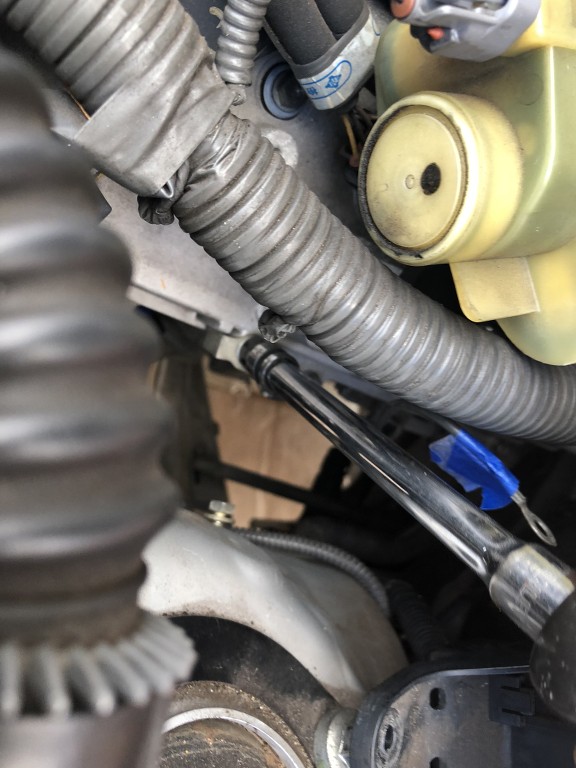
Start removing the driver side manifold nuts. You can also instead focus on getting the starter and the rack U-joint out too. No wrong order really.
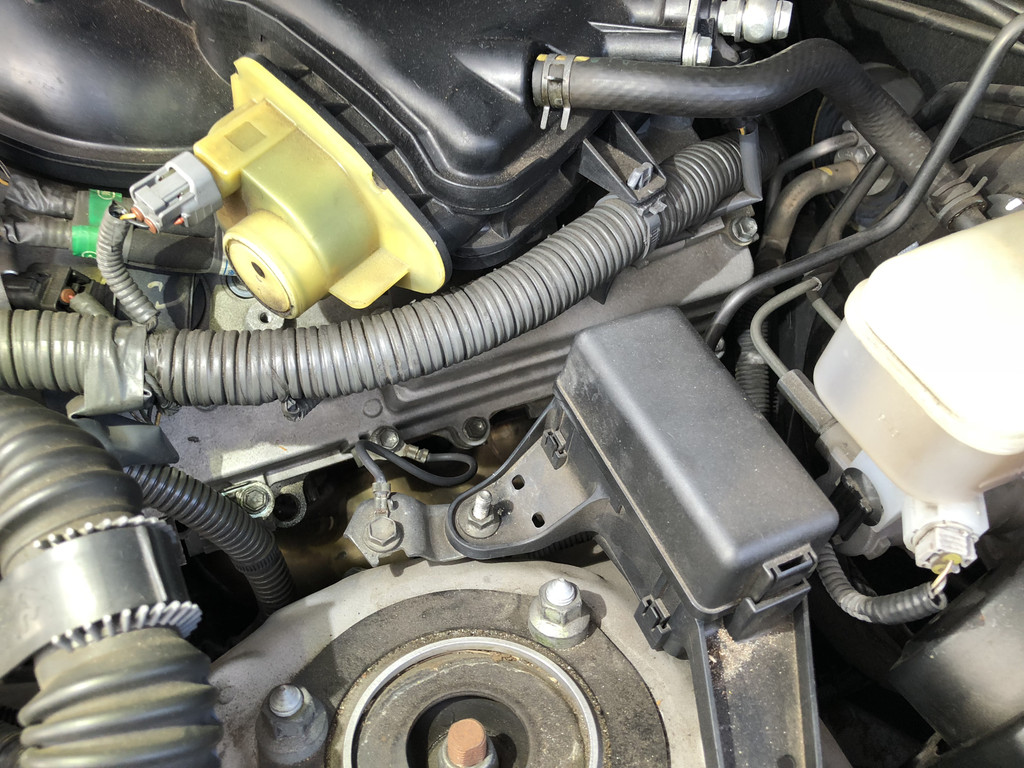
You will need to remove that fuse box and re-tighten the screws back to where they came for. It has to be able to move to fit your hands.
I was able to hit all the driver side manifold bolts from the top. Remove the grounding cable and re-install the nut to the location. Tape it so you don't forget it.
I ended up then working on the bottom 3 bolts. You can not get the starter out without the manifold out.
This has to be out.
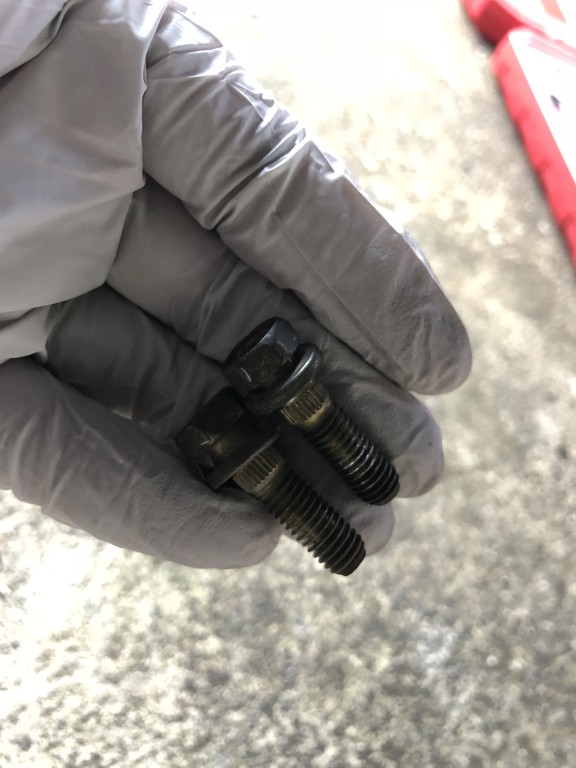
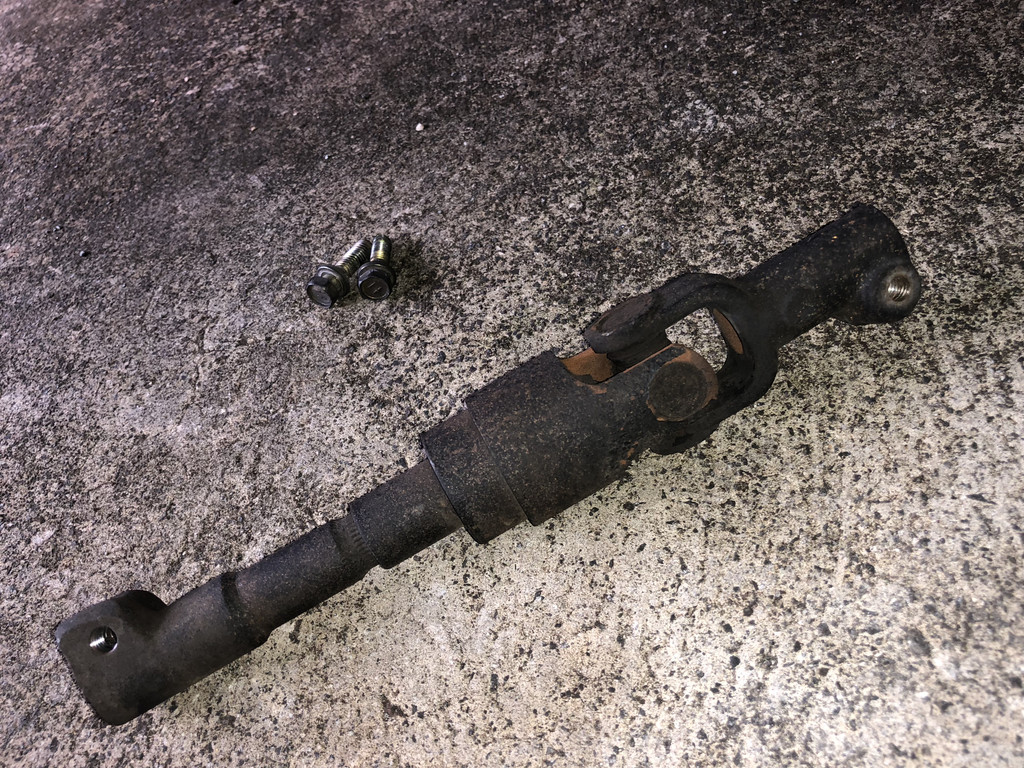
Loosen the bolts COMPLETELY. They are the same
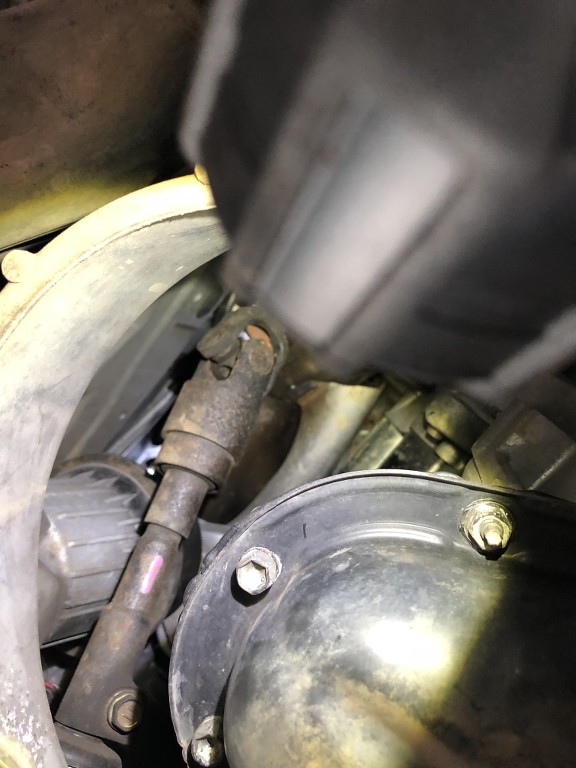
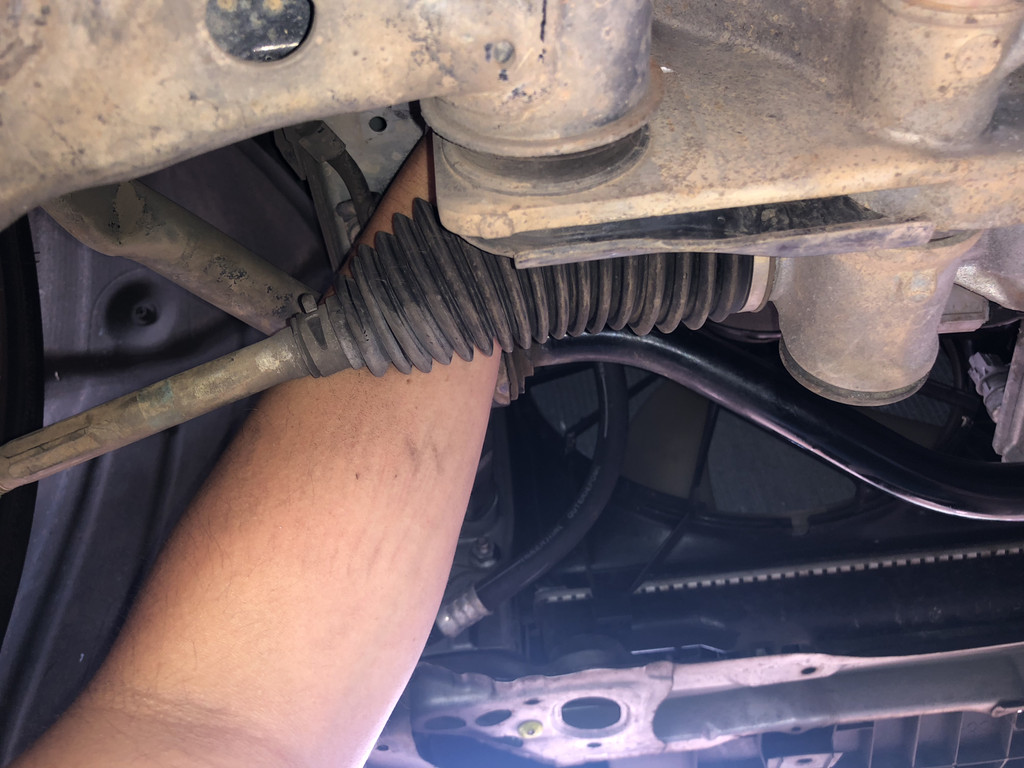
You will pull upwards towards the steering wheel before you can pull down to remove it.
TORQUE:
*I don't have the torque spec...I'll find it.
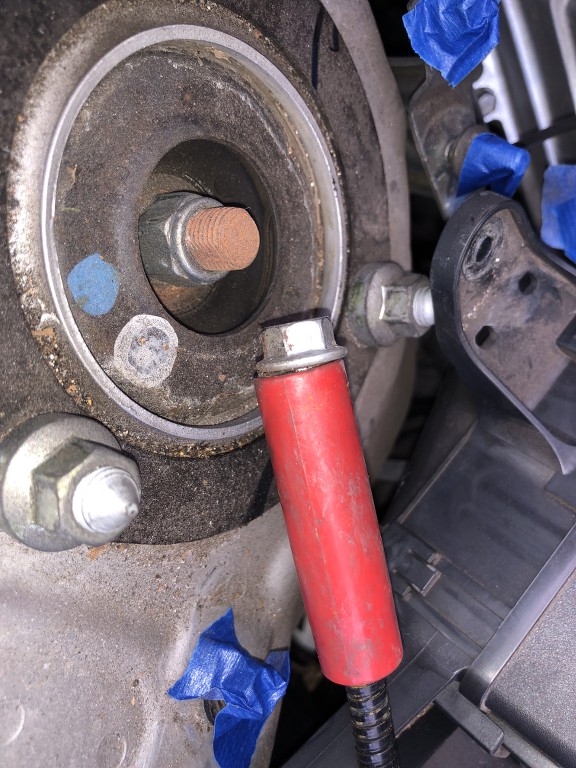
**IMPORTANT**: You should MARK the rack side and the upper shaft side before removing it. I think it's due to the electric steering, but the front wheels don't move to easily when compared to the hydraulic power steering. With this said, I didn't have issue with the steering wheel not being centered with the rack. Steering wheel was in a steering lock and the wheels wasn't pulled to make them turn. If you do accidentally move either the steering wheel OR/AND the front wheels with the U-Joint shaft thingy removed, you will need to RECENTER both items. Again, MARK them where they were matched up and avoid moving either components!
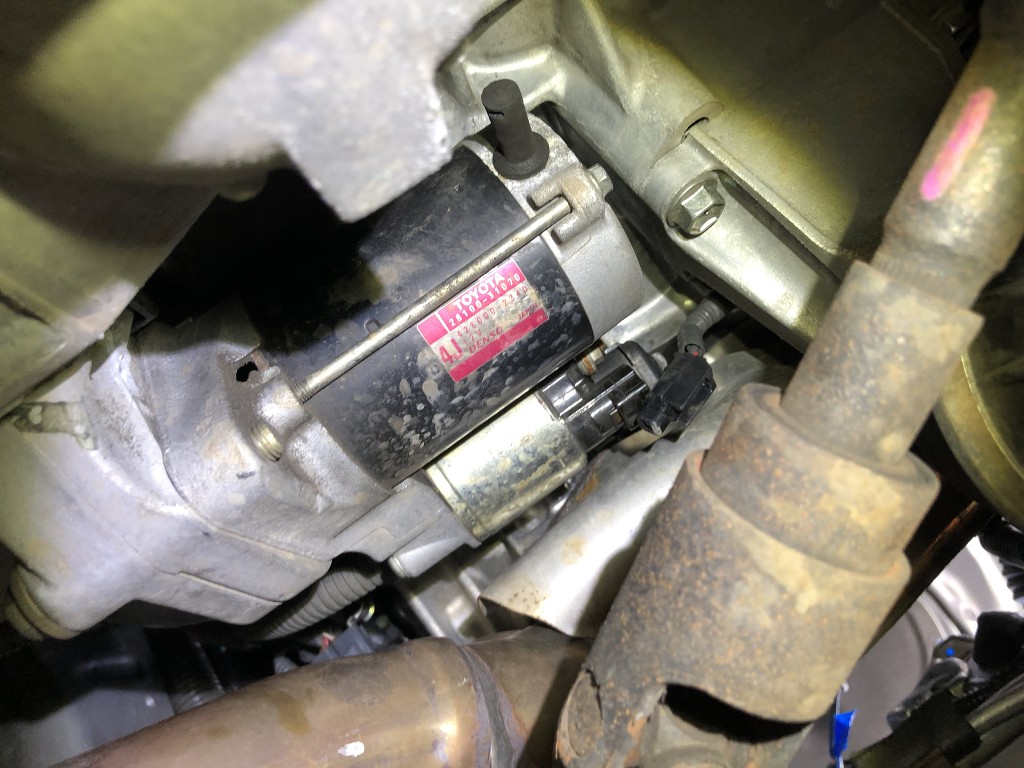
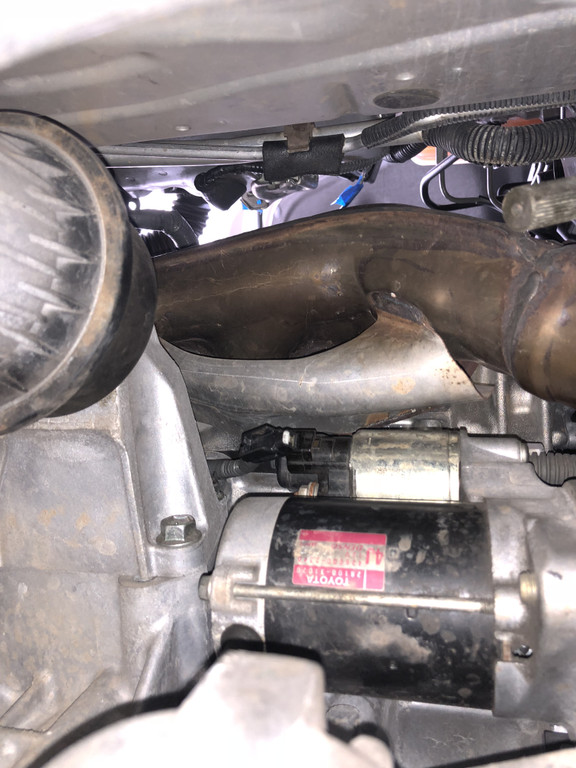
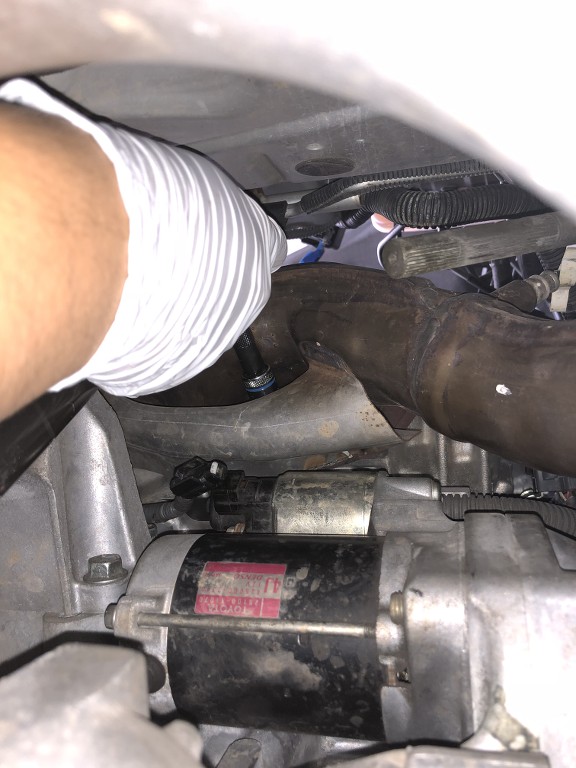
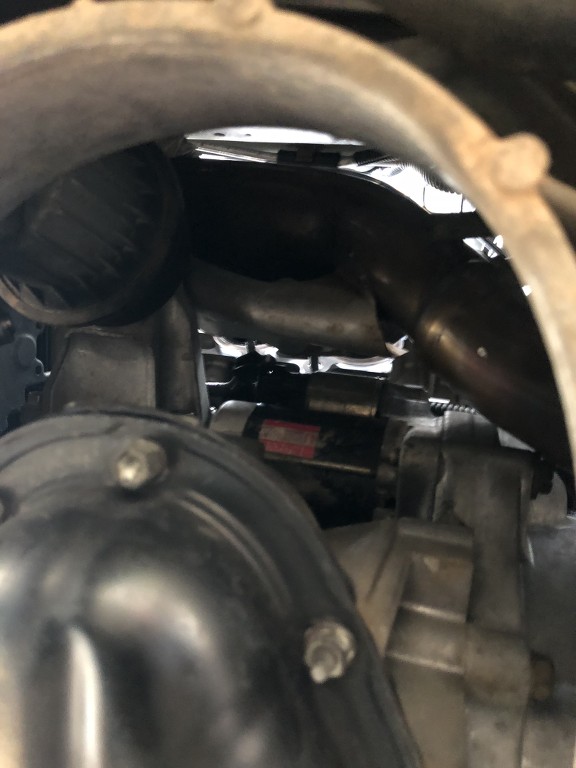
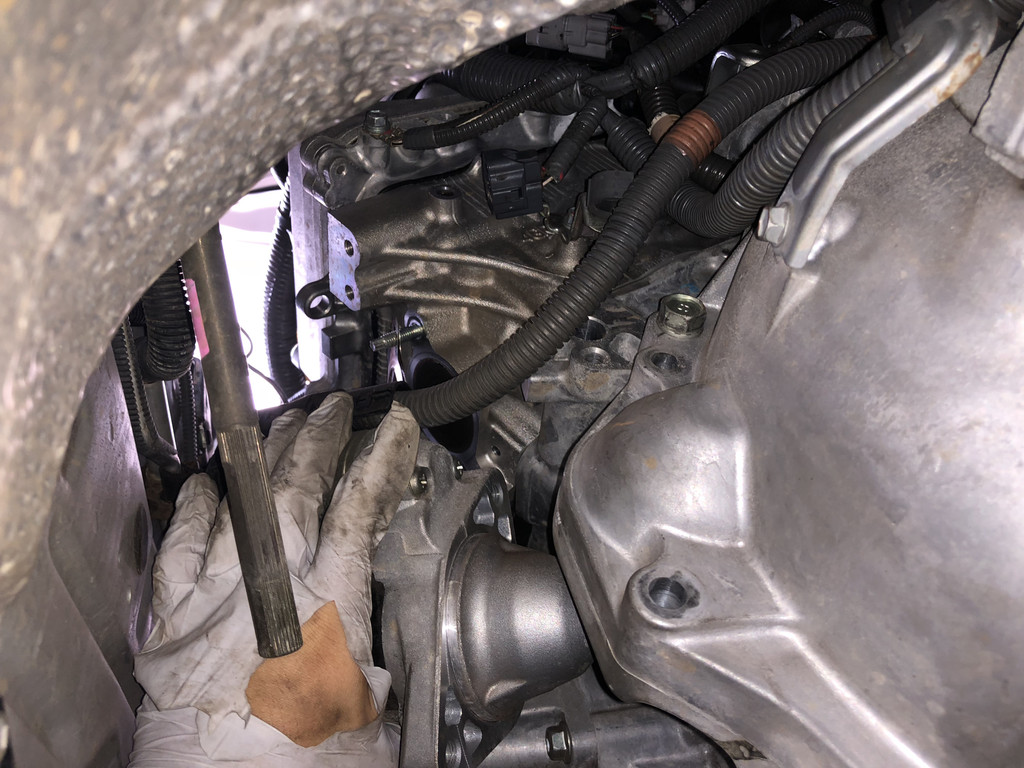
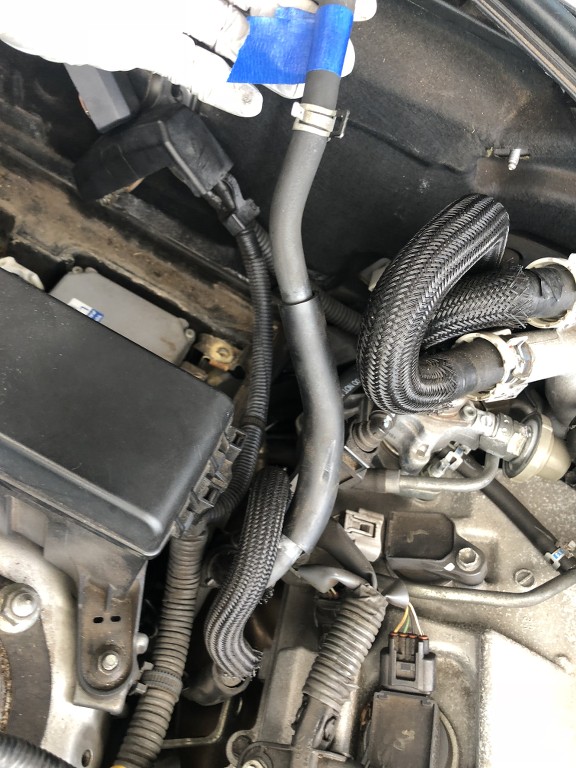
The starter is in a tight place.
There's this service panel. You'll need to remove it so it'll be *less* of a nightmare.
See, just a bit easier...
It gives you this extra space to tackle the lower nuts.
It's such a PITA area.
Maybe a set of 3/8" swivel sockets might be helpful. Don't get confused with a universal joints. Those things are terrible.
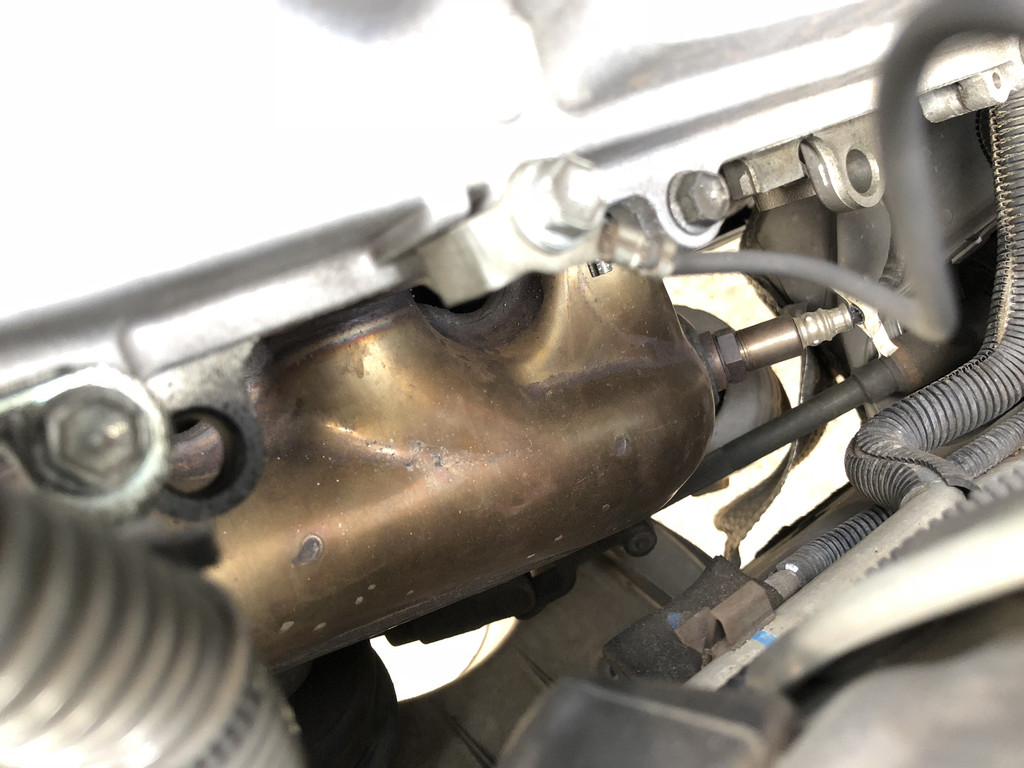
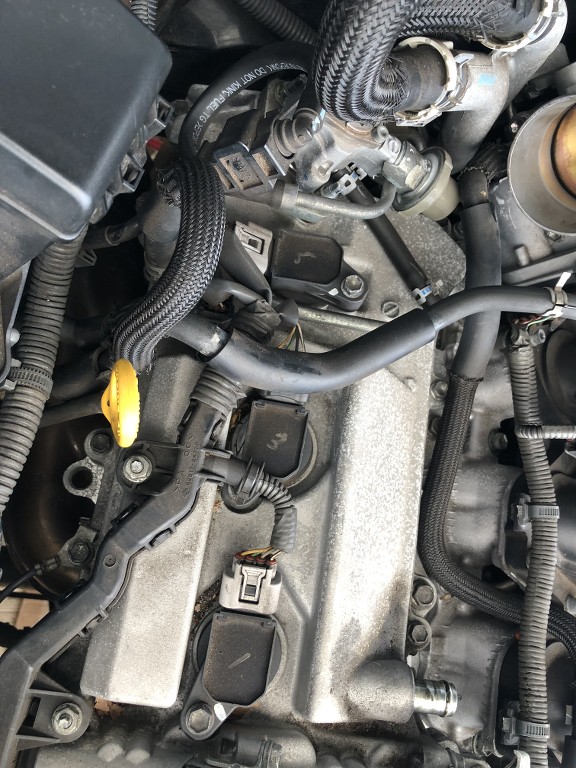
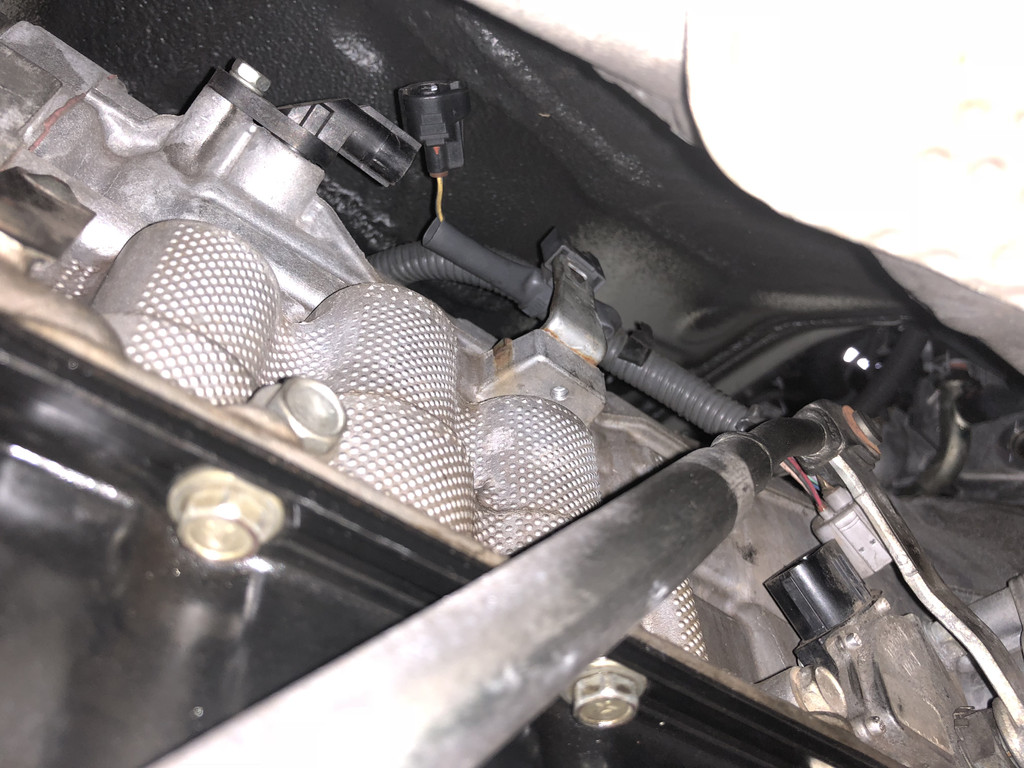
Once you got the manifold out without dropping a nut... you got to disconnect the O2 sensor. Such a PITA area.
Push the clip in and then it should release. Easier to do this one from the bottom of the car. Top end you have the brake booster in the way along with the ABS lines trying to amputate your arm.
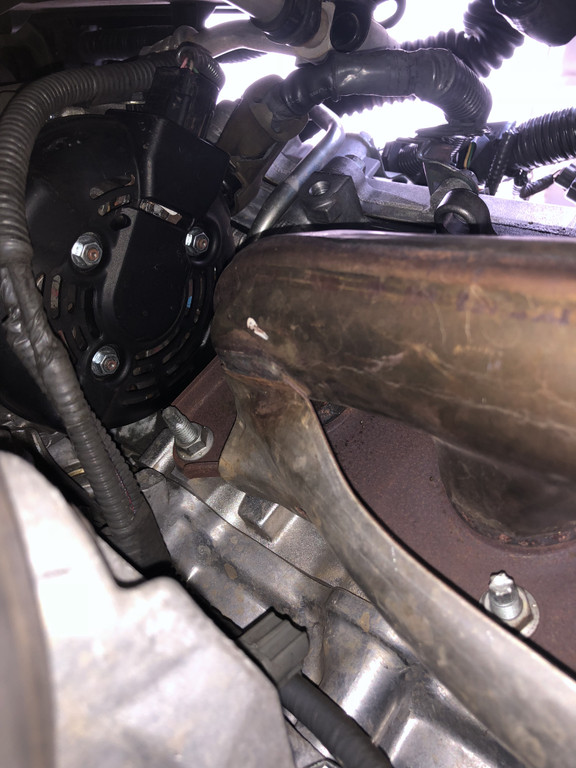
Shot of the manifold (driver side) and the holes.
TORQUE: Manifold nuts are held by 15 ft.lbf. New manifold gaskets should be used. FEL-PRO MS96795 worked good. (x1 set)
Use this guide at your own risk. I nor Club Lexus assume no responsibility for any damage to your vehicle or personal injury as a result of following this guide.
Use this guide at your own risk. I nor Club Lexus assume no responsibility for any damage to your vehicle or personal injury as a result of following this guide.
So yea, I drop a nut. Make sure you have a magnetic tool grabber!
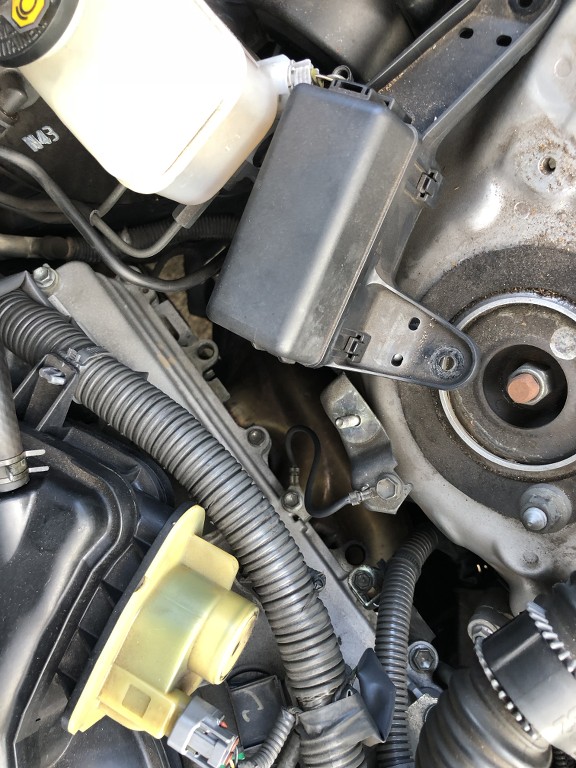
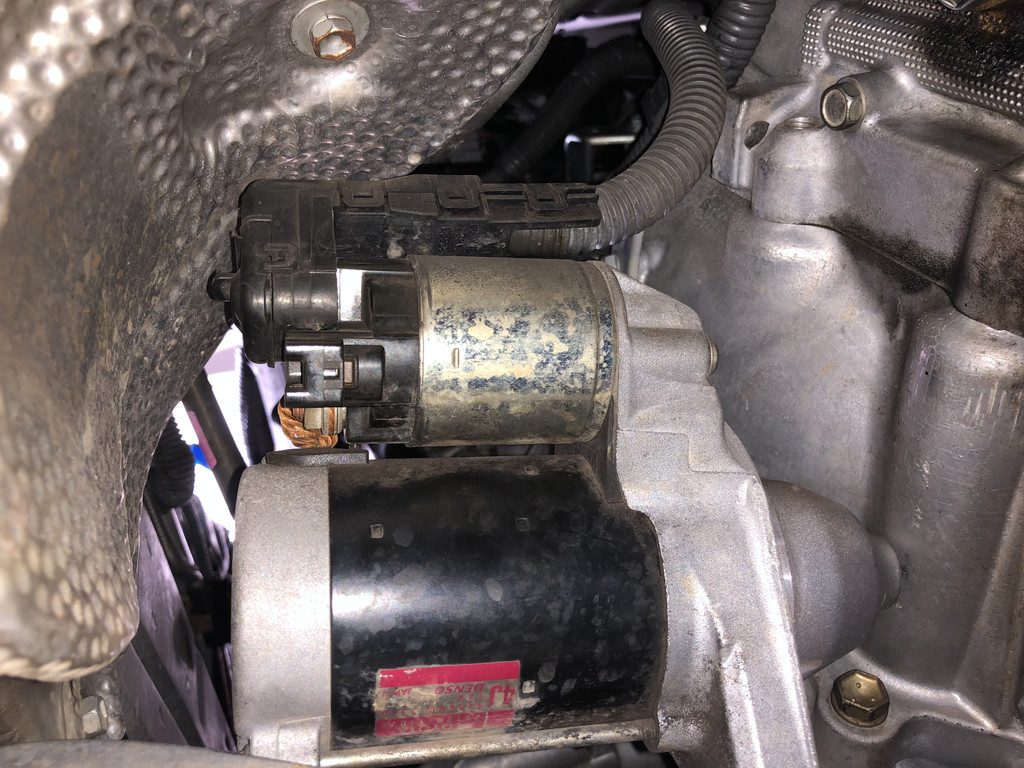
There's this other service panel on the driver side. You should use it.
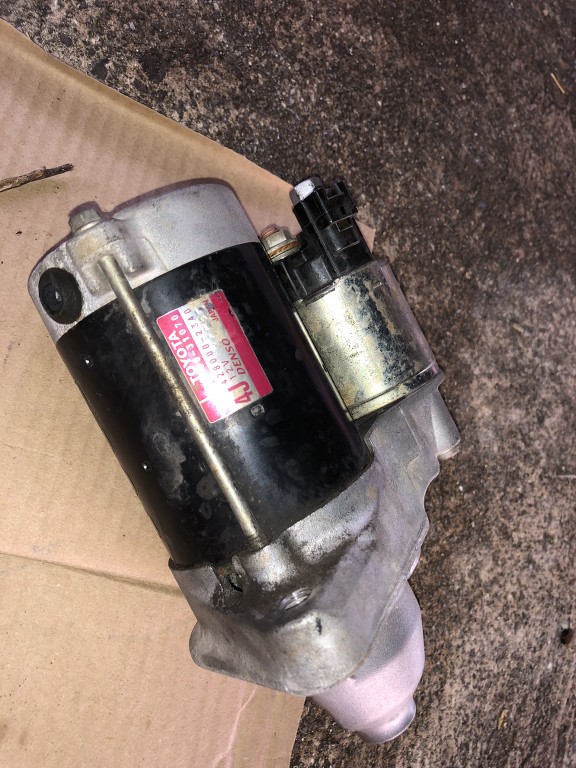
Break loose the starter bolts. Makes sure the socket is on SQUARED otherwise you risk shearing the head.
TORQUE: Starter bolts are 43 ft.lbf
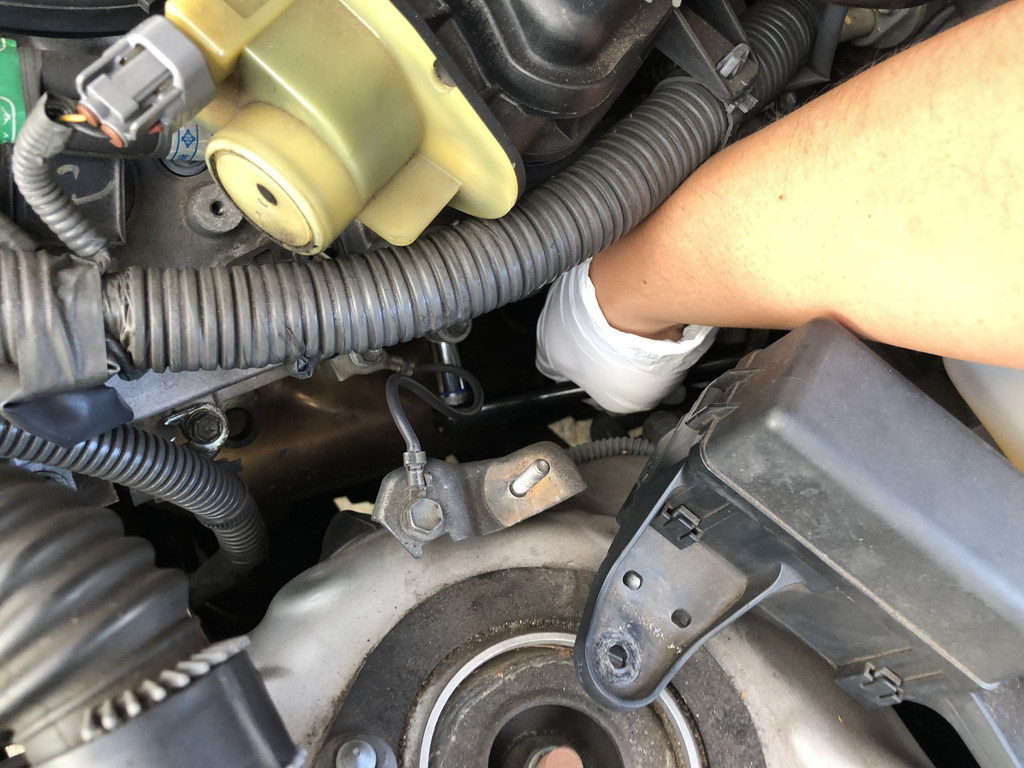
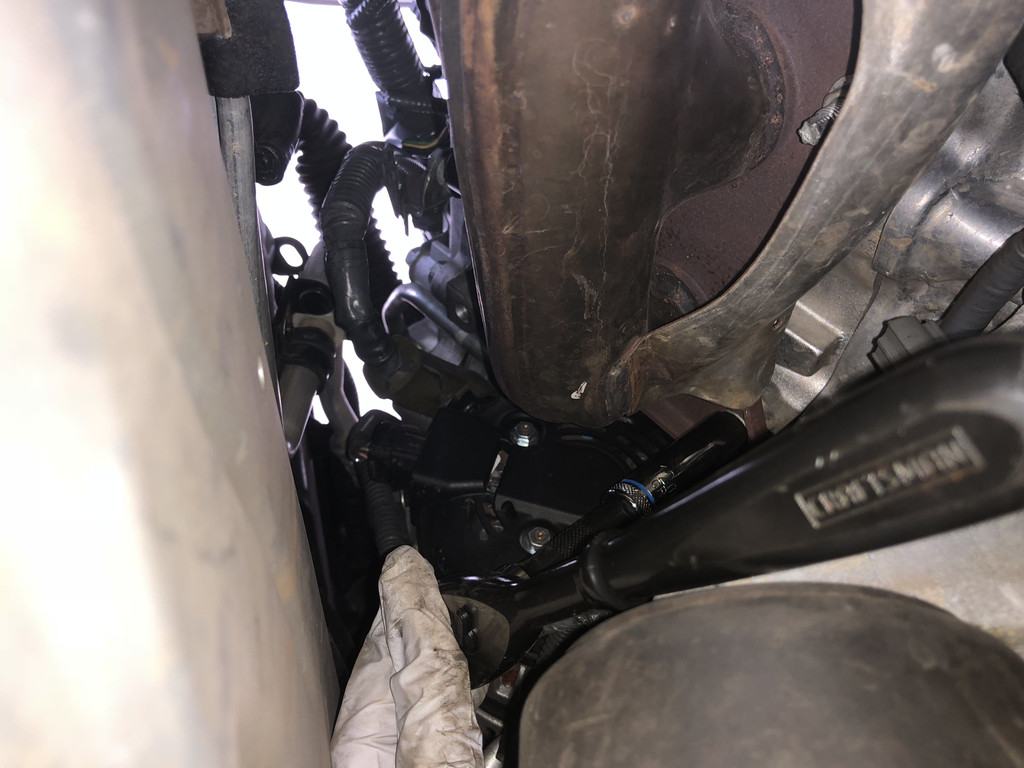
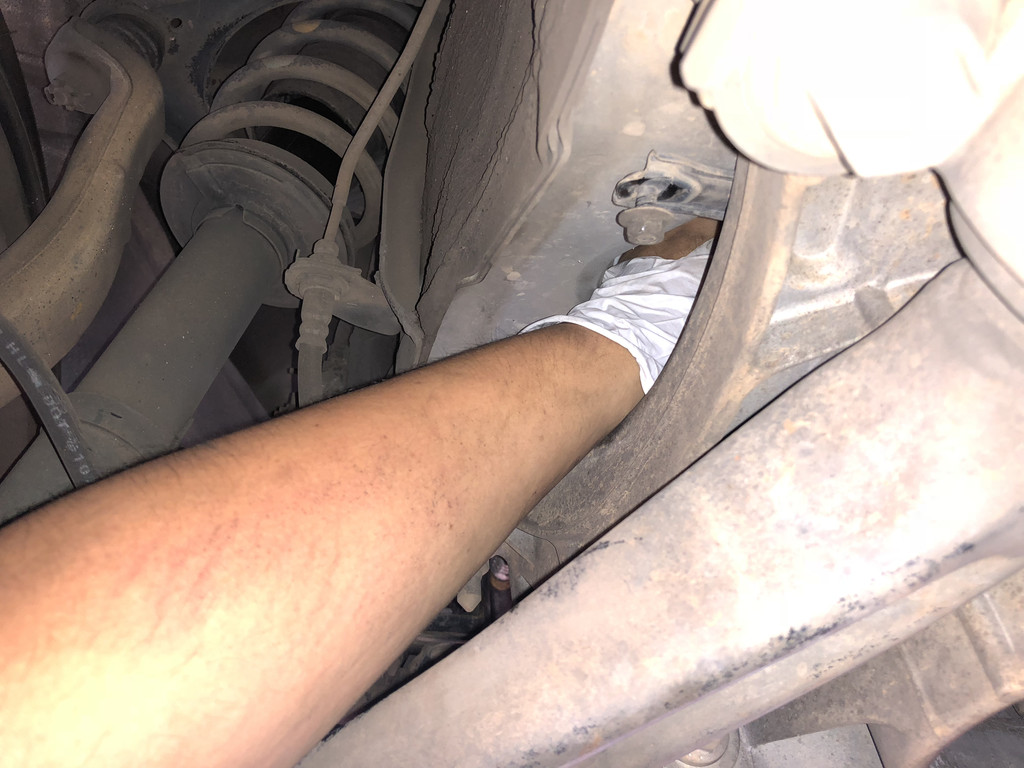
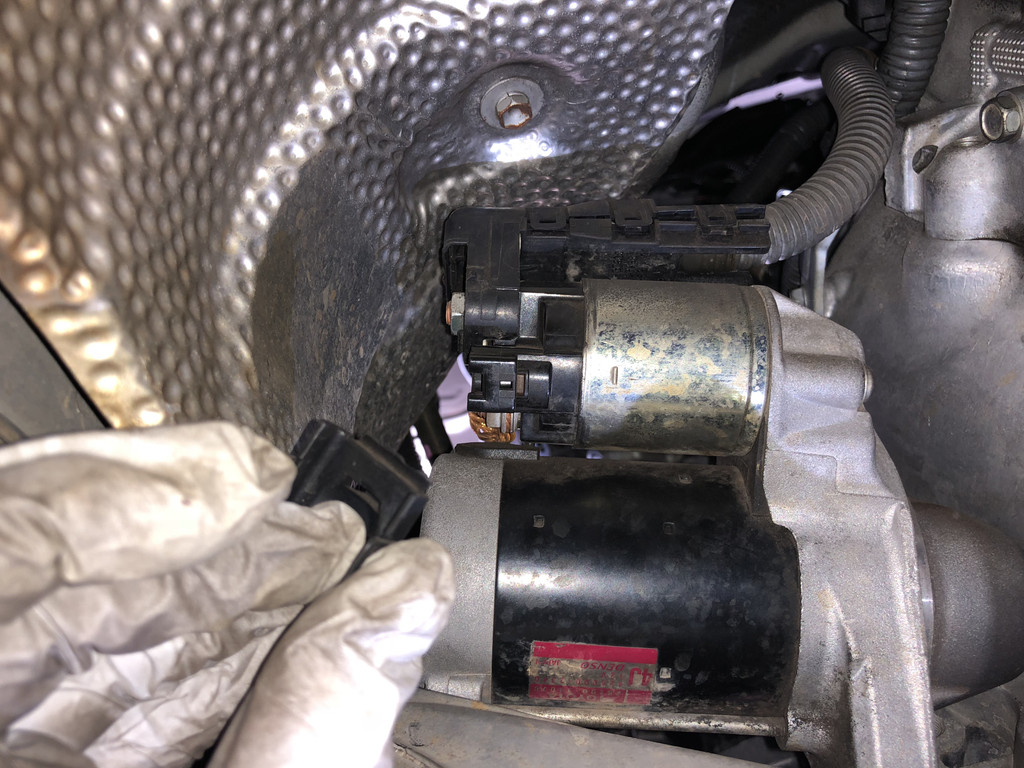
This access spot will give you the ability to put your hand thru here.
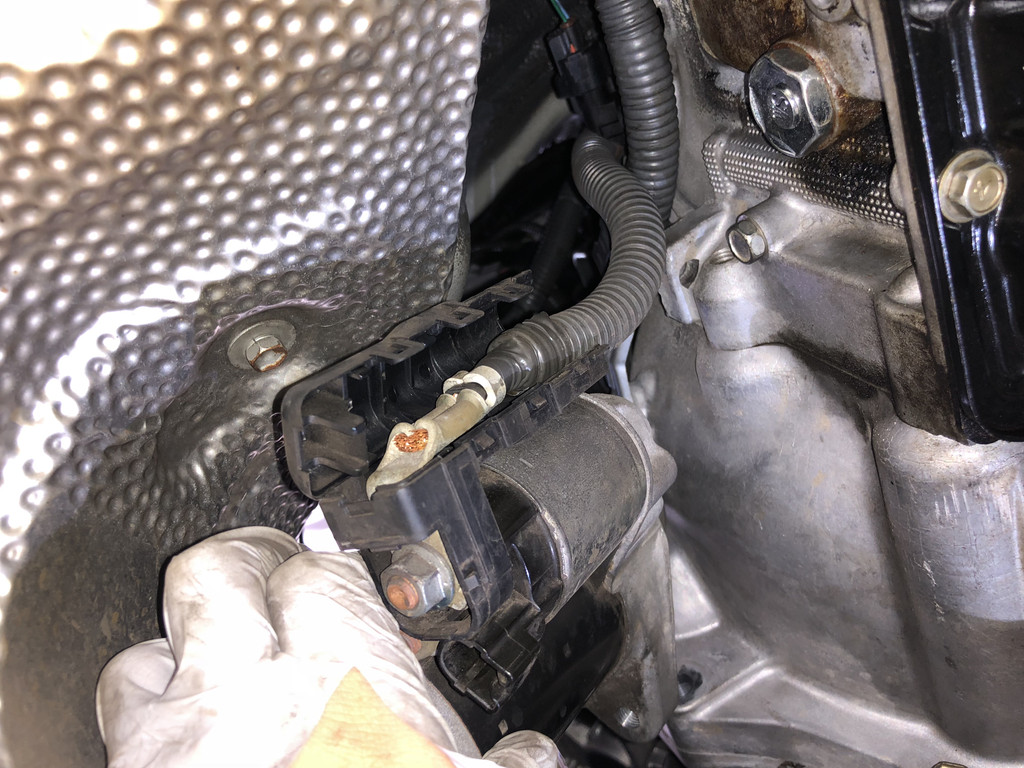
You will find a clip holding the wire harness for the starter keeping you from pulling it. Unclip it....
Disconnect the nut holding the harness in tact.
You'll need a set of picks to unclip the plastic cover/mold thingy.
Move the harness away and lay the starter out somewhere.
Such a pita for just the starter!
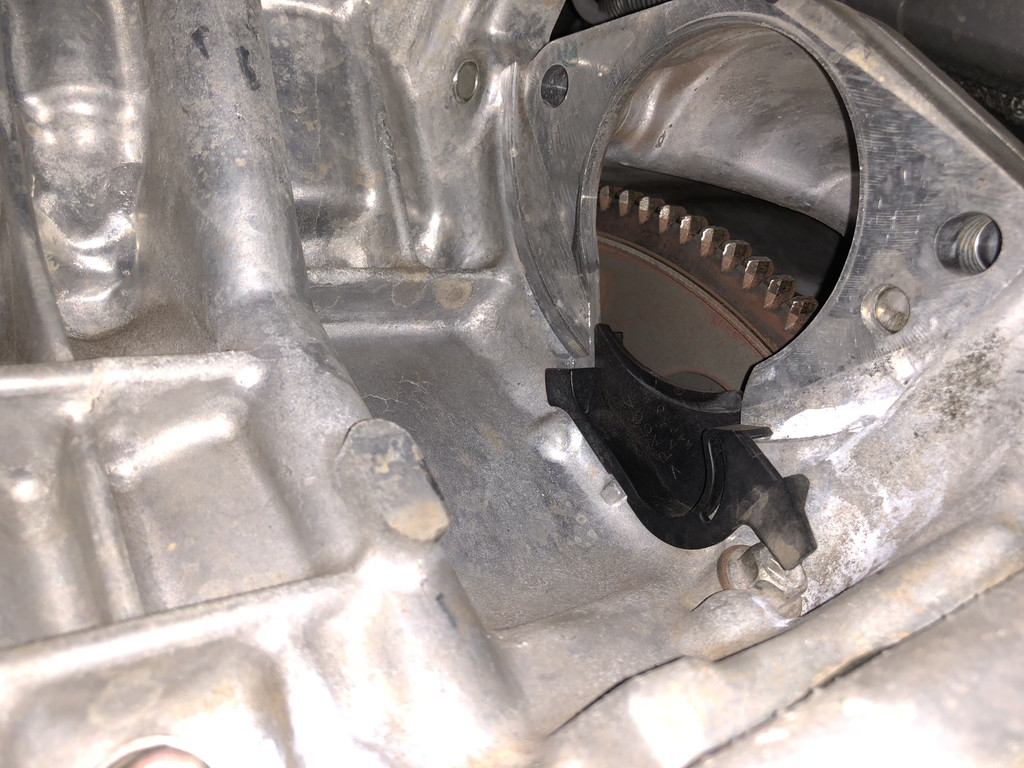
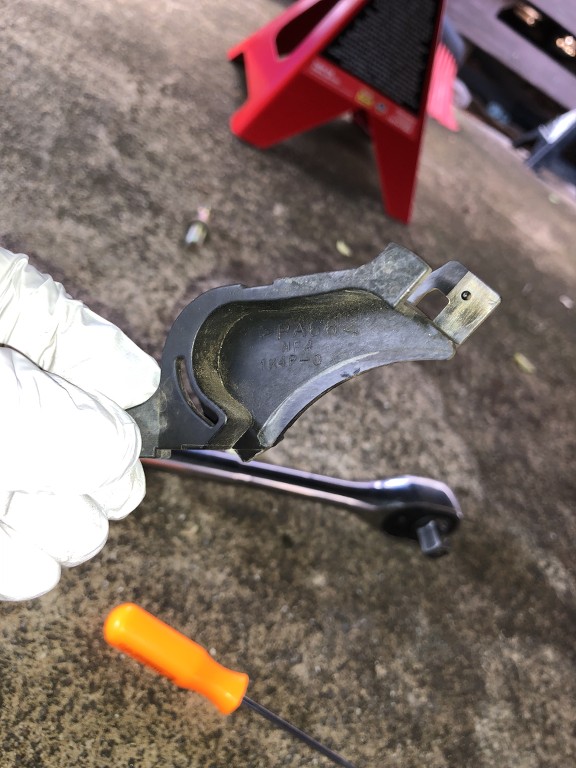
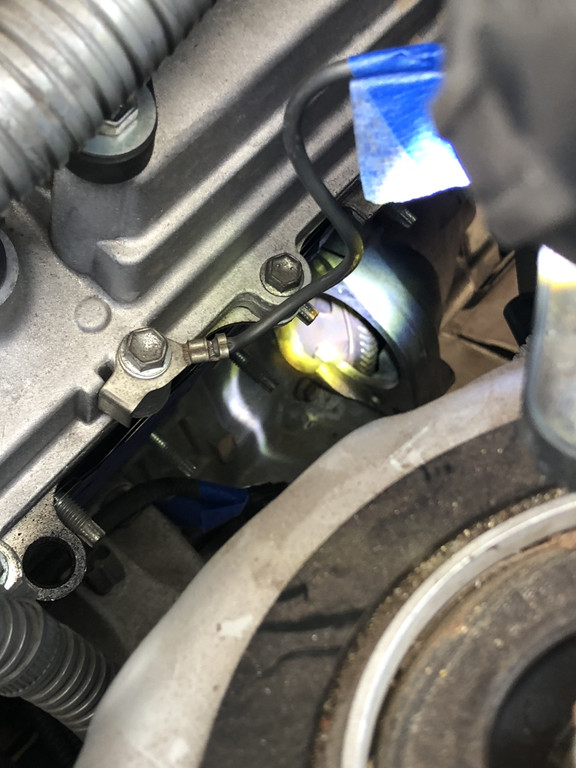
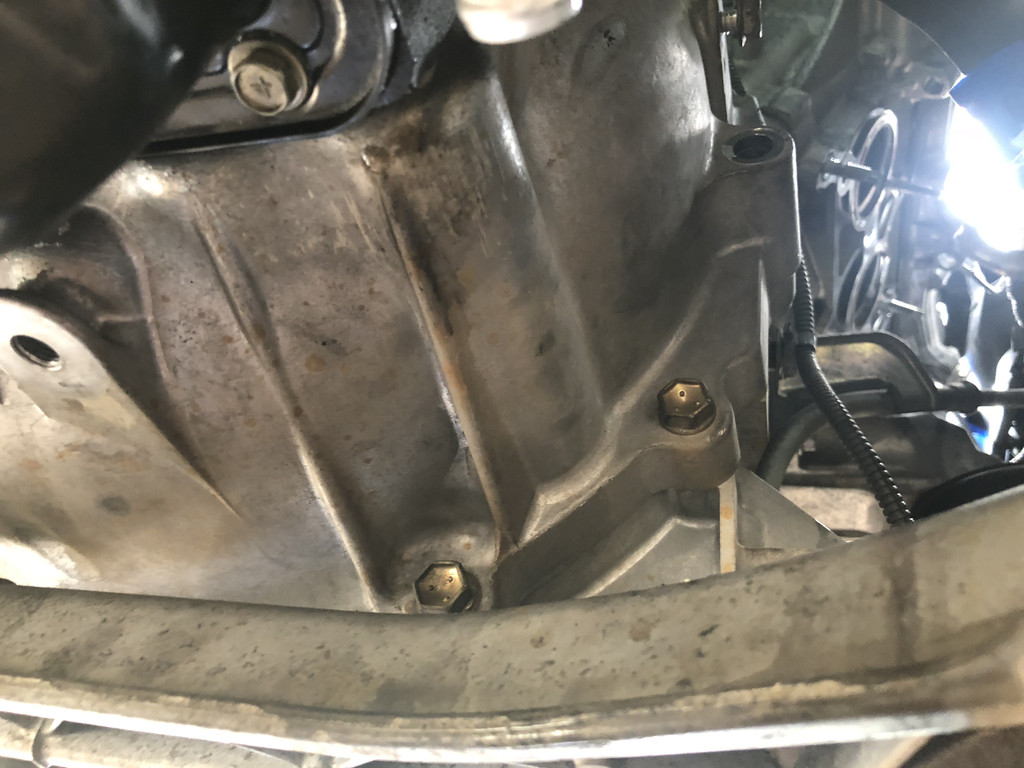
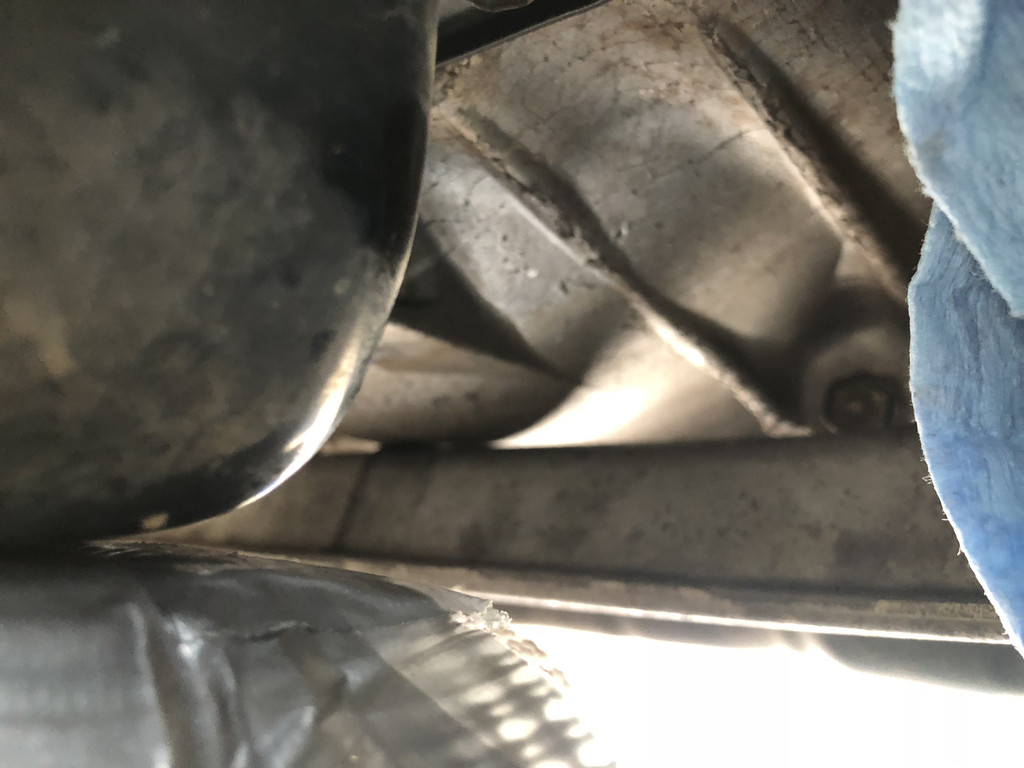
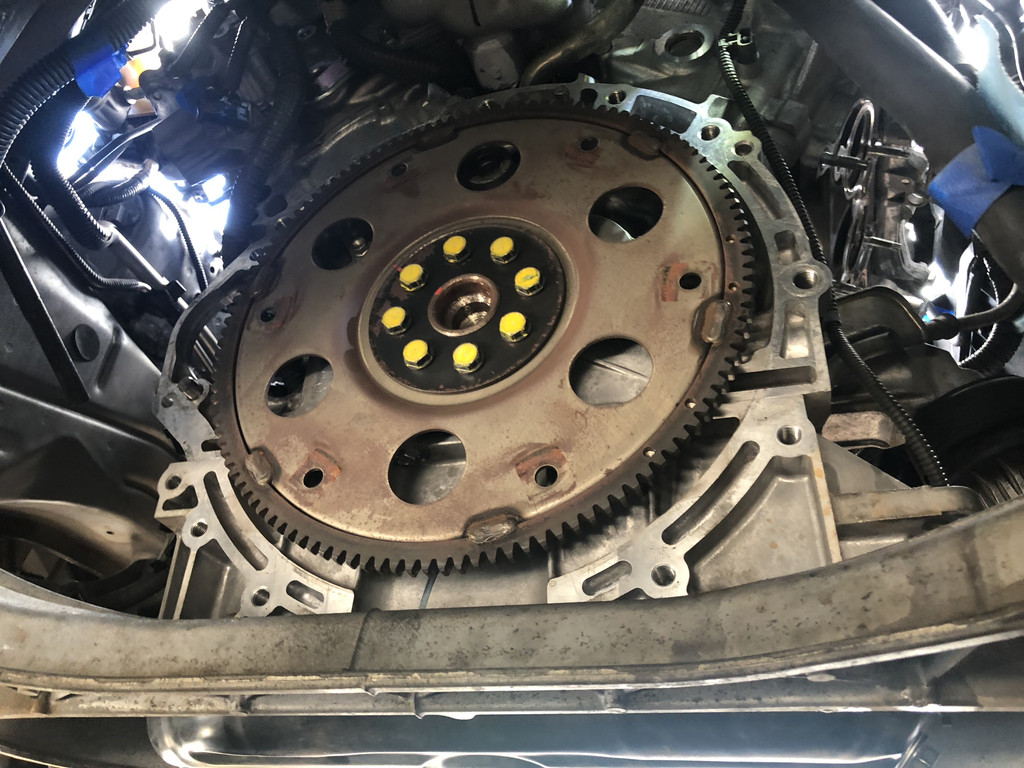
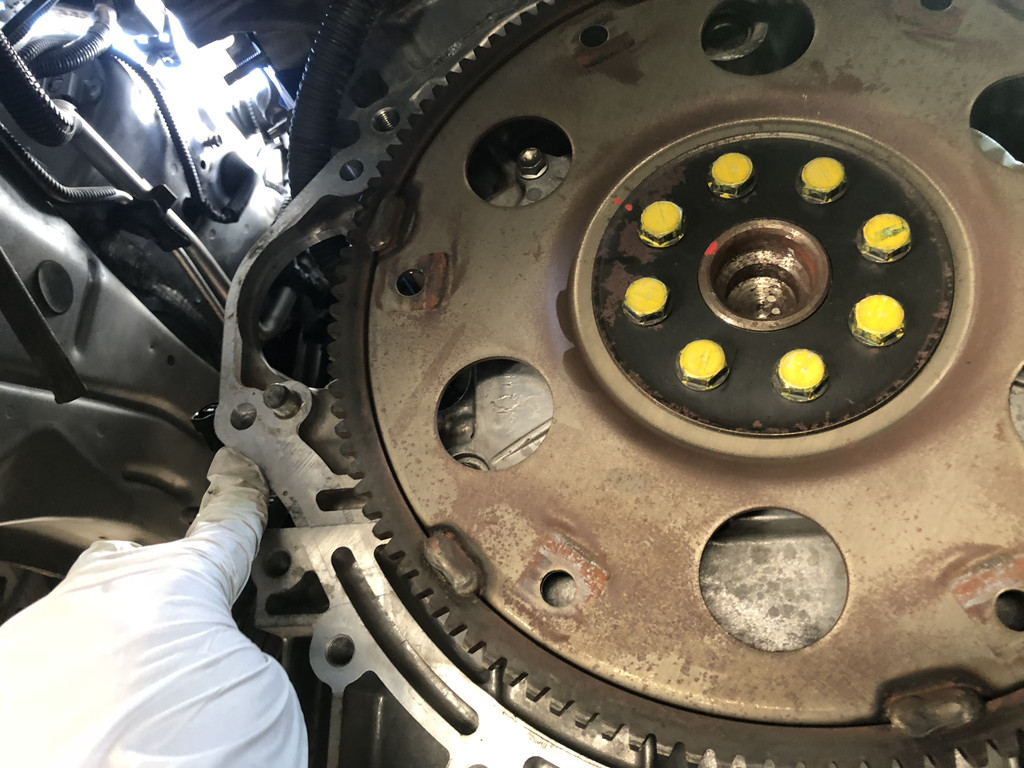
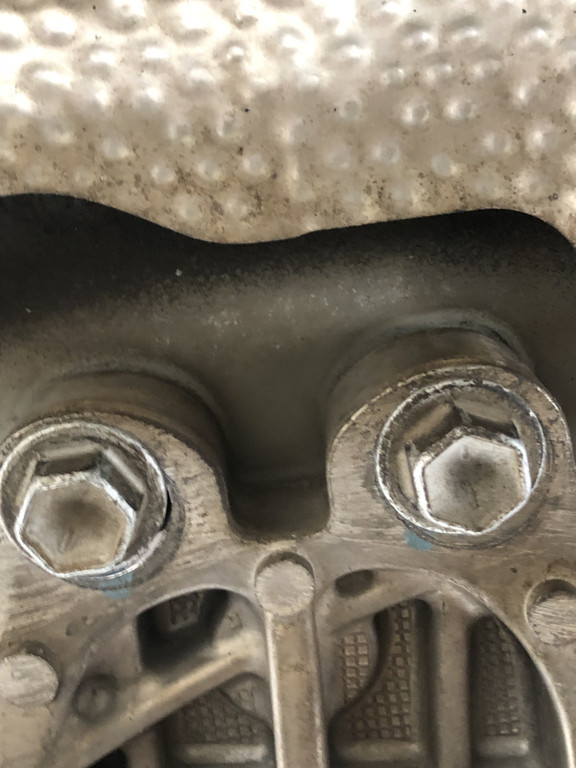
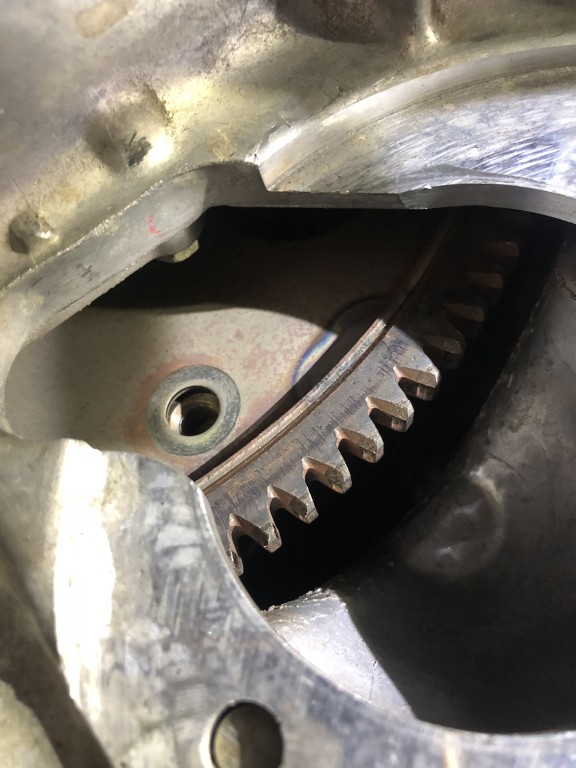
Now, take a peak at the flexwheel.
Can't get to the bolt, eh? Remove this cover.
For the love of not killing kittens, MAKE SURE TO PUT THIS BACK ON WHEN REASSEMBLY. I HAD TO REDO THE ENTIRE DRIVER SIDE MANIFOLD WHEN I FORGOT TO PUT THIS COVER BACK ON AFTER I INSTALLED THE STARTER, SHAFT, and MANIFOLD> OMFGBBQ! You can't put it on if the starter is even nearly installed. I tried to force it in but I didn't want to risk having to remove the transmission all over again if it fell INTO between the engine and transmission!!
Anyhow your view should be something like this now.
Use this guide at your own risk. I nor Club Lexus assume no responsibility for any damage to your vehicle or personal injury as a result of following this guide.
Use this guide at your own risk. I nor Club Lexus assume no responsibility for any damage to your vehicle or personal injury as a result of following this guide.
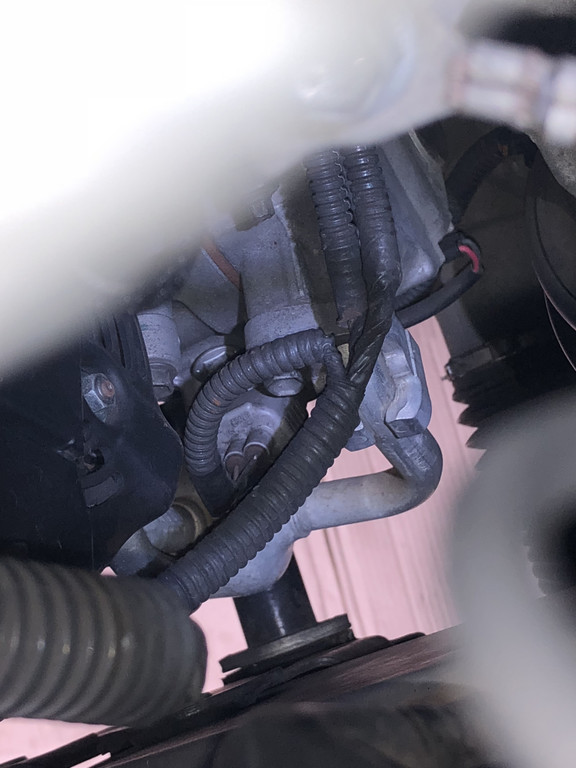
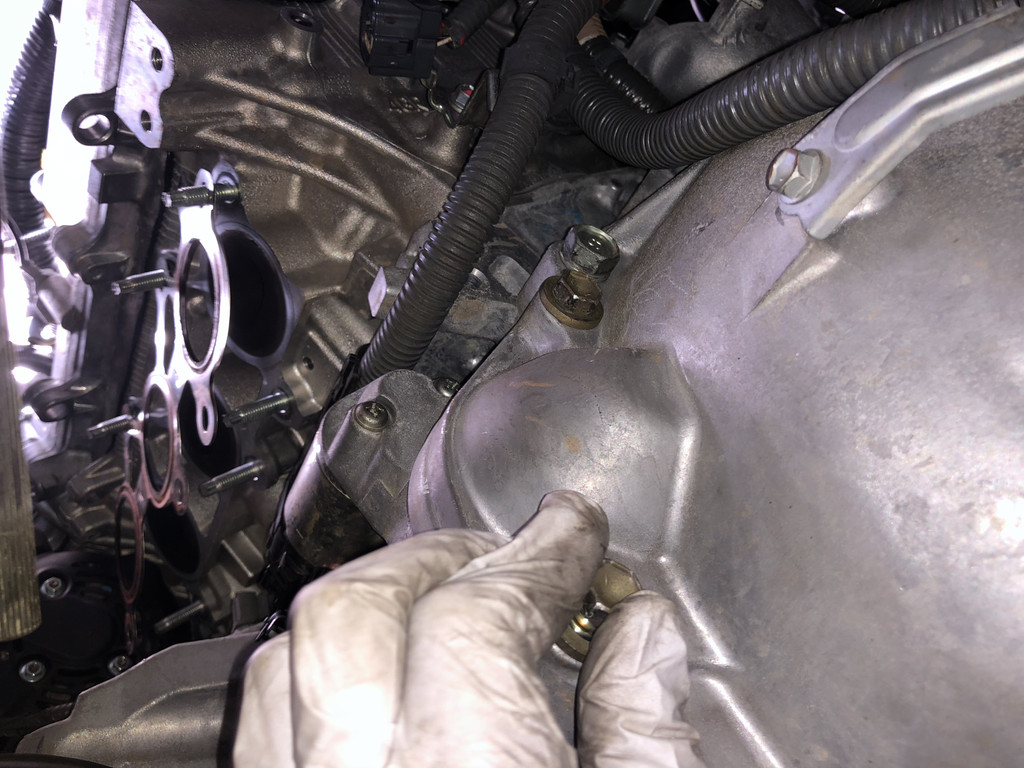
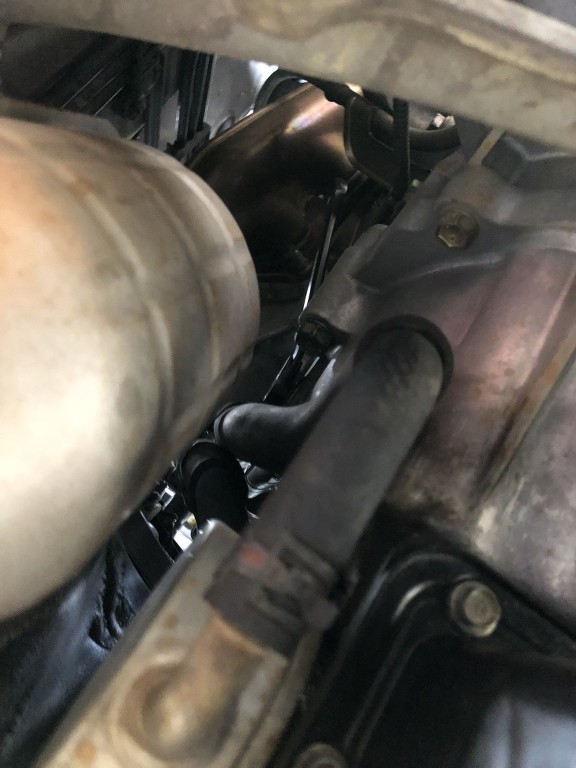
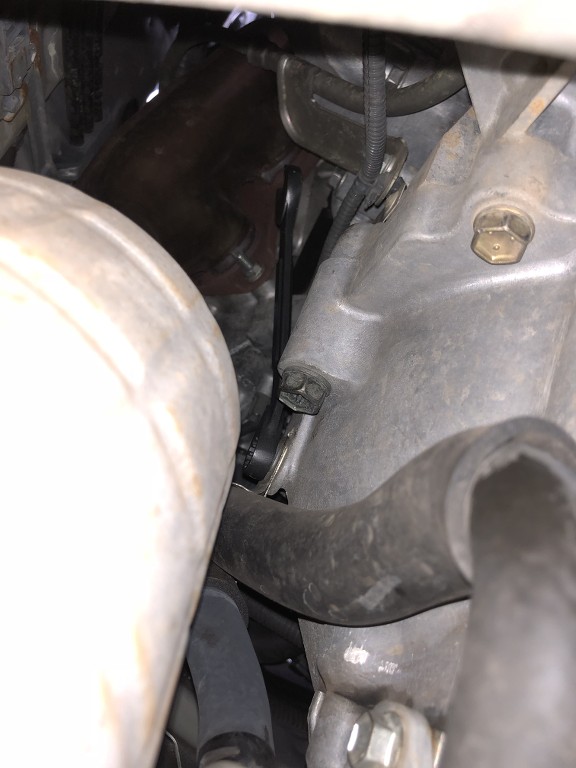
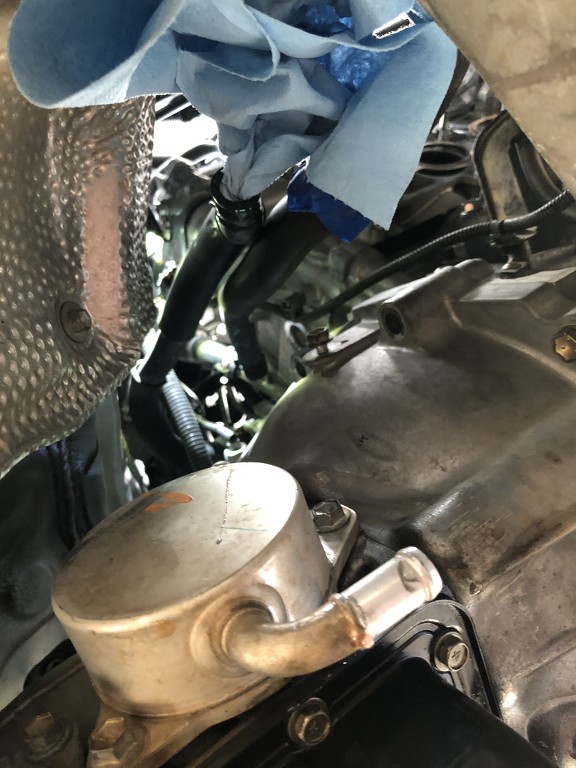
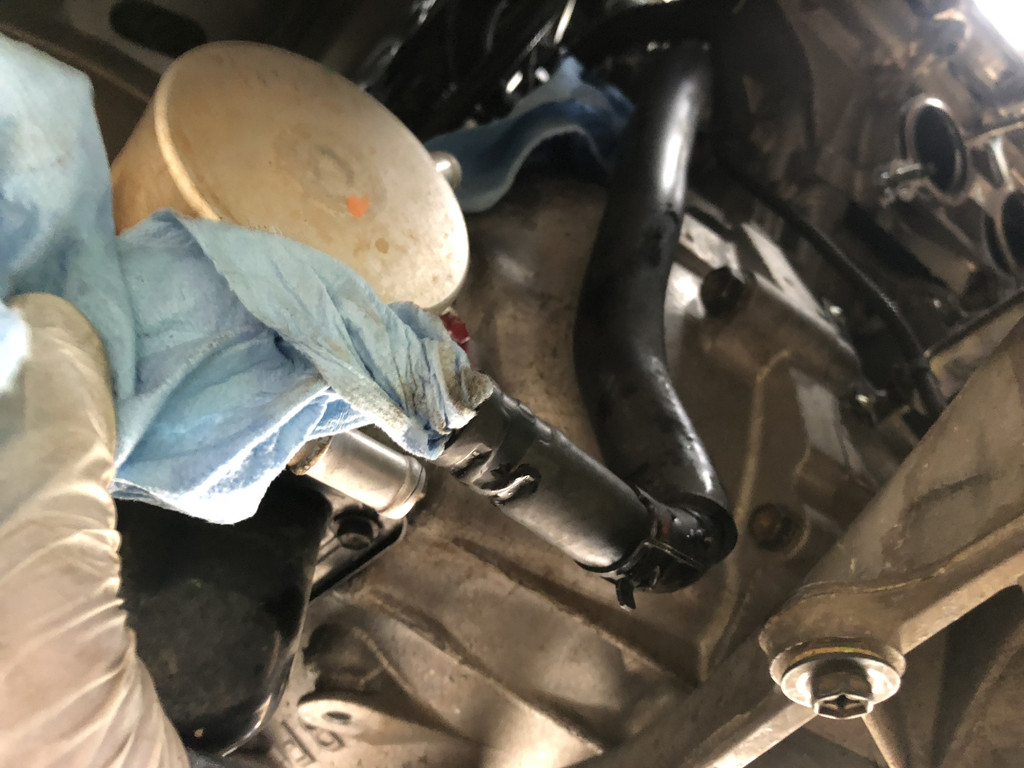
The passenger side manifold didn't really need to come off, but I had the hell of all times trying to reach the bell housing bolts and the coolant line. I decided to take it off. Working a lot from a V6 Camry, it's better to take that extra step to give you more room when removing stuff otherwise you will be suffering the entire time and/or cause more pain if something breaks or drops.
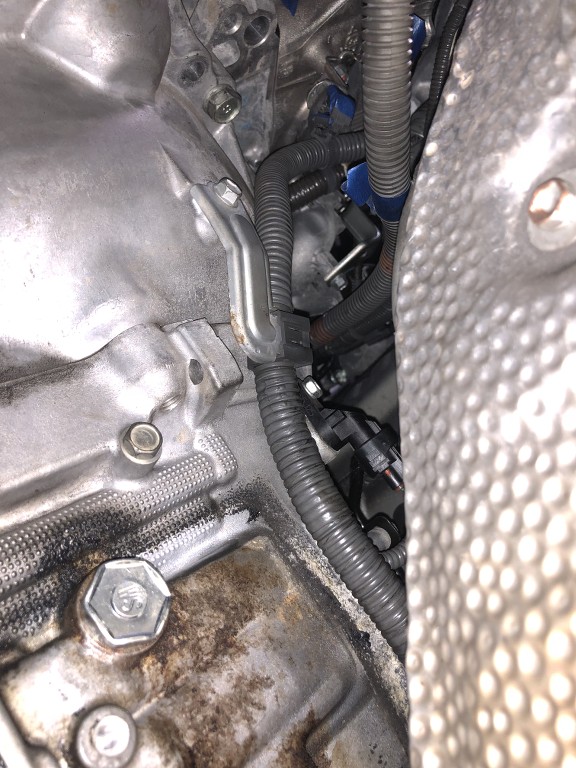
There's a coolant line bracket holding the hoses down. It's this one.
TORQUE: 15 ft.lbf
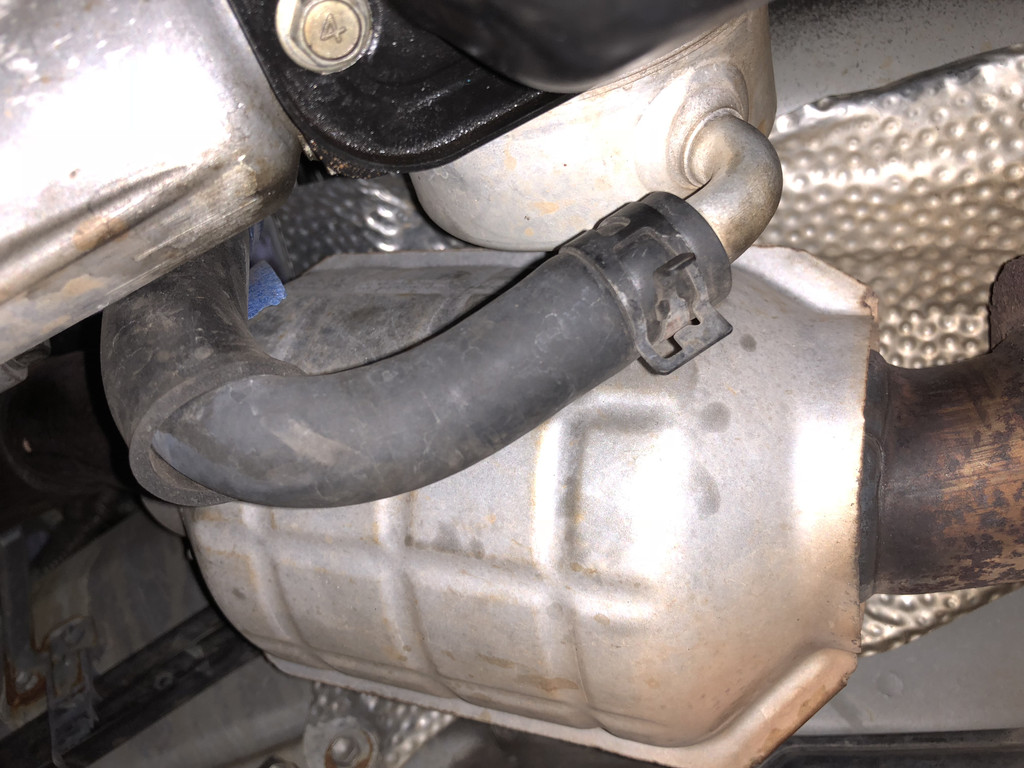
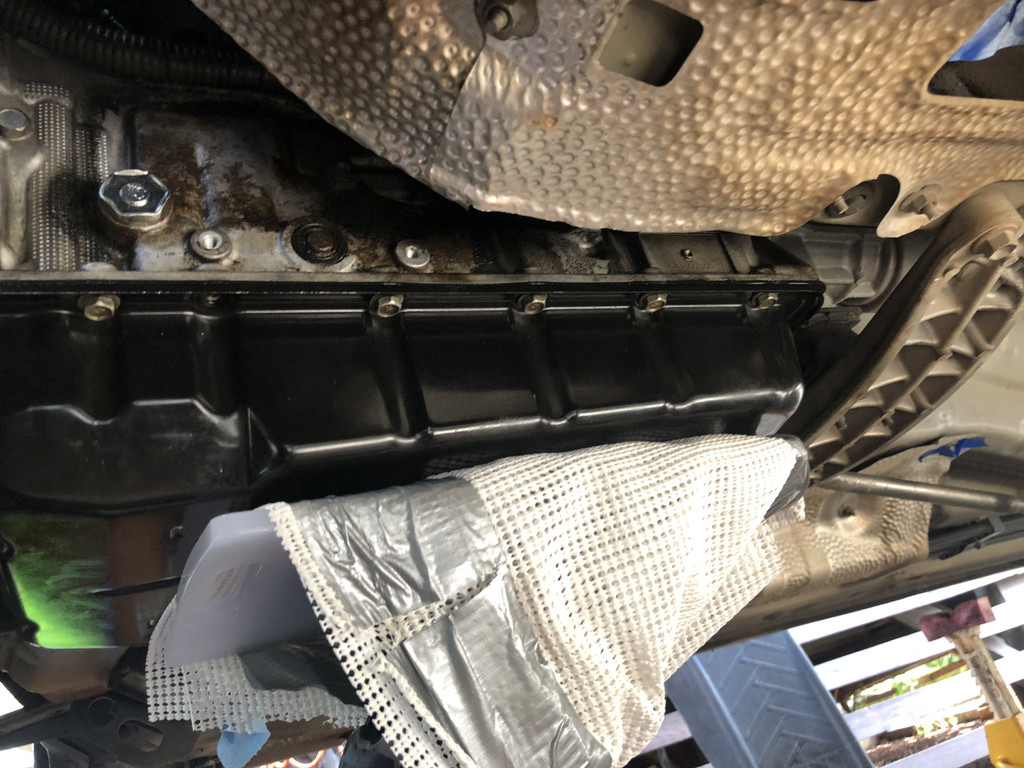
Unclamp the hose....get a drain bucket ready...
Made a mess! This was even when I had pre-drained it the previous day AND drained the coolant via radiator peacock.
I didn't take a too much picture of it, but I removed the passenger manifold as well. It was a last minute call for me. I didn't feel it was worth the struggle of not removing it. I couldn't get a pair of any kind of pliers on the coolant line for the upper water by-pass on the transmission oil cooler (aka coolant puck). No way. So I removed the passenger manifold. All nuts were accessible via bottom of the car actually including the top, although a bit more tricky. I didn't remove the oil dip stick (theres a bolt holding it down), but once the bolt is removed, the dip stick pipe will move around giving enough room to remove the manifold.
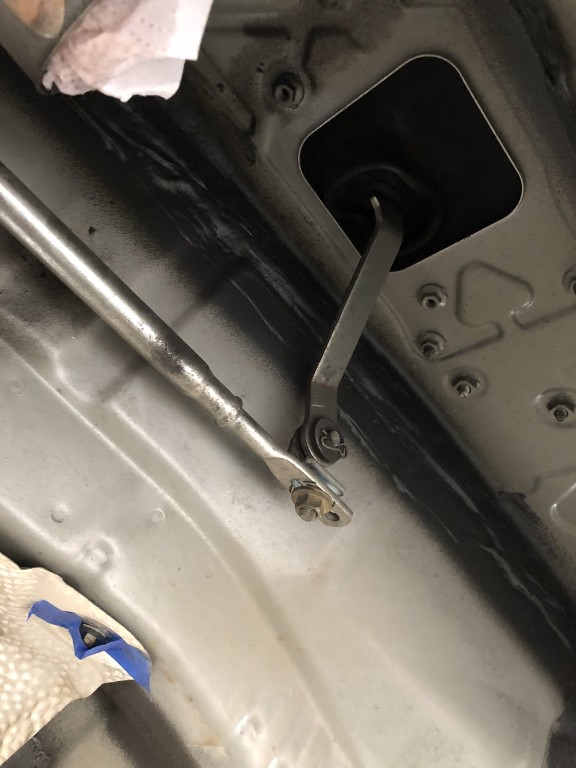
I marked the gear selector on the linkage.
Use this guide at your own risk. I nor Club Lexus assume no responsibility for any damage to your vehicle or personal injury as a result of following this guide.
Use this guide at your own risk. I nor Club Lexus assume no responsibility for any damage to your vehicle or personal injury as a result of following this guide.
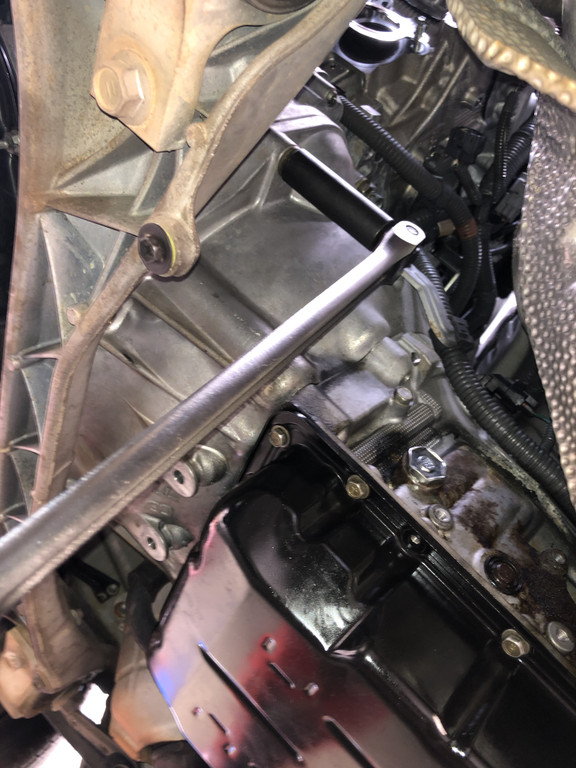
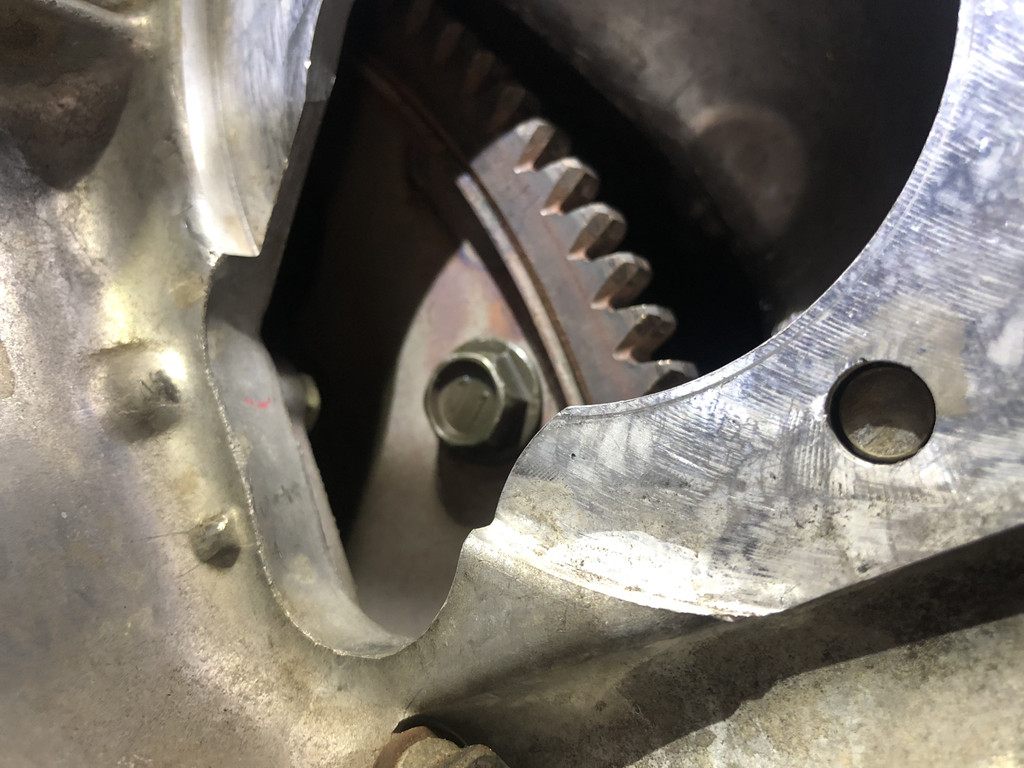
Time to remove the torque converter bolts from the flexwheel.
There's two ways you can do this. Two person or one person. Two person, one person can be underneath the car with a breaker bar on the crank (I know its not a breaker bar below...). Second person from above can break the bolt loose.
Second person would pull up to loosen the bolt.
I found when re-installing, you can do it single man. I'm sure I could had done it solo removing, but would had been more time consuming.
TORQUE 6x 30 ft.lbf. INSTALL the black bolt first THEN the remaining. FSM does not specify threadlocker, but I use blue on this.
Misc bracket had to be removed on the driver side along with the ground cable. They were in the way.
At this point, nothing much should be left with the transmission. Only the wiring harness, the bell housing bolts, and the bracket/mount.
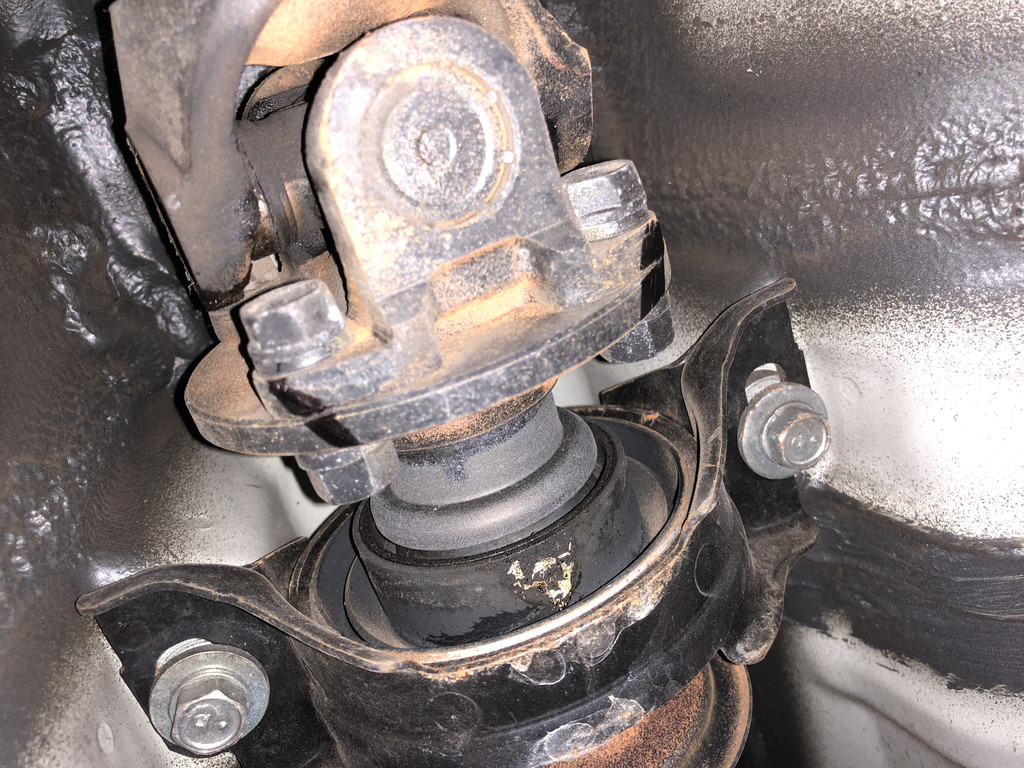
Loosen the bolts that goes across the Engine Rear Mounting Member and the REAR No.1 Engine mount insulator (aka transmission mount).
TORQUE:
Engine Rear Mounting Member 19 ft.lbf
Rear NO.1 Engine Mounting Insulator 9ft.lbf
MAKE SURE to mark orientation. Apparently the mounting member has TWO ways it can go on. MARK which way goes 'forward' prior to removal.
Position a jack underneath. I ghetto setup a cutting board with those kitchen non-slip thingy from Walmart. It worked OK.
I know the mounting bracket is still on, forgot to take a picture with the transmission on the jack without the mounting.
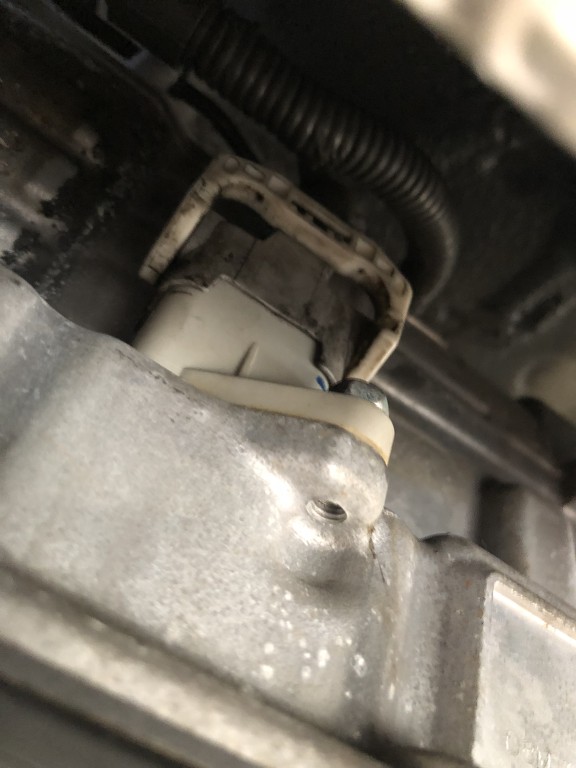
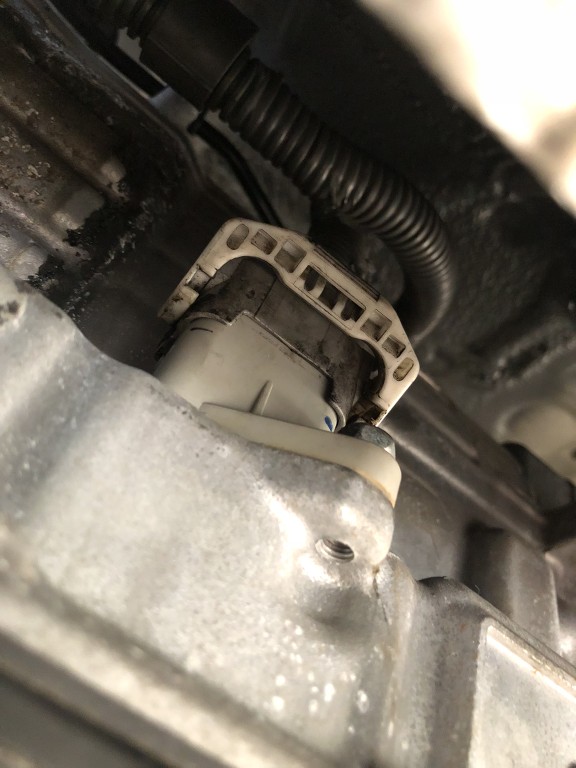
Now slowly let the jack down JUST a bit. The transmission bell housing will rest against the lower frame. Have enough pressure to keep it just a tad off it though so not the entire weight is on the frame of the car. Now undo the wire harness for the transmission.
Passenger side
Use this guide at your own risk. I nor Club Lexus assume no responsibility for any damage to your vehicle or personal injury as a result of following this guide.
Use this guide at your own risk. I nor Club Lexus assume no responsibility for any damage to your vehicle or personal injury as a result of following this guide.
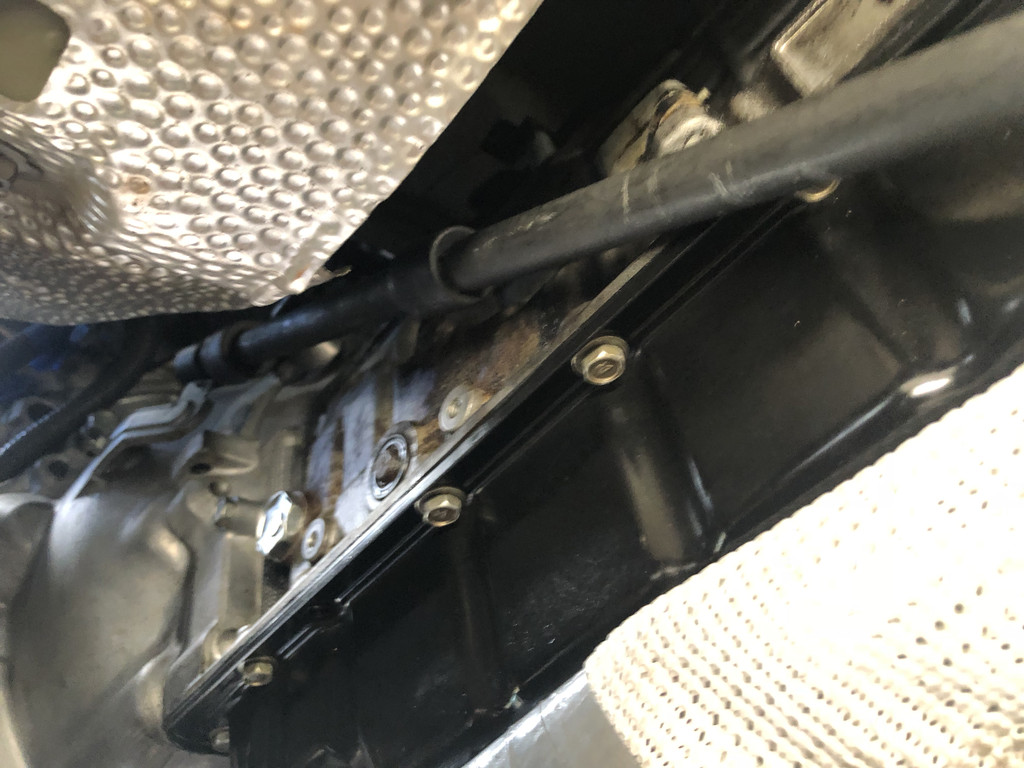
The lower gold bolts can be attacked last.
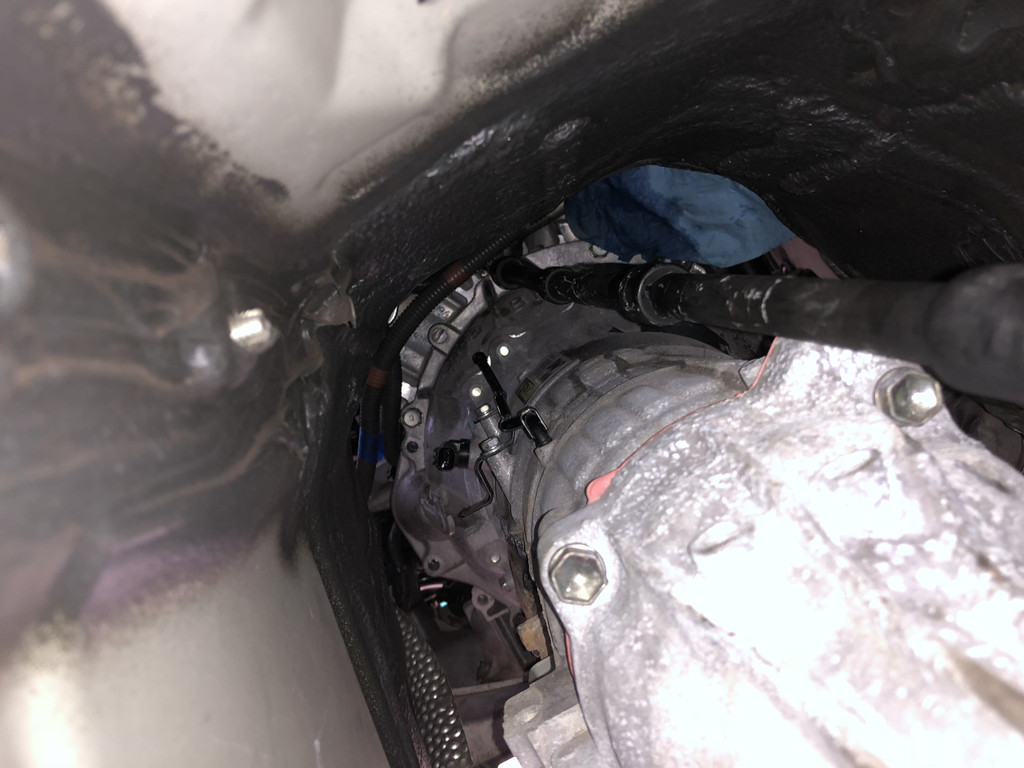
Focus on the upper bolts. Have the transmission resting a tiny bit but not completely. on the lower frame.
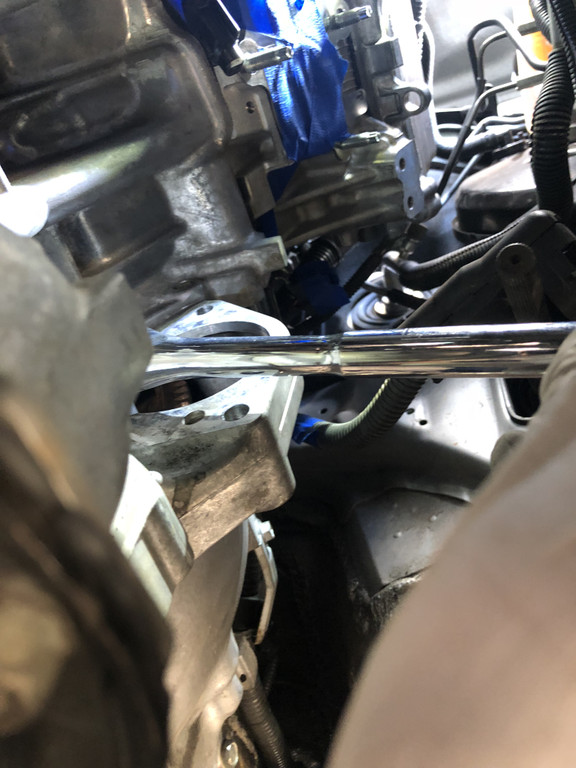
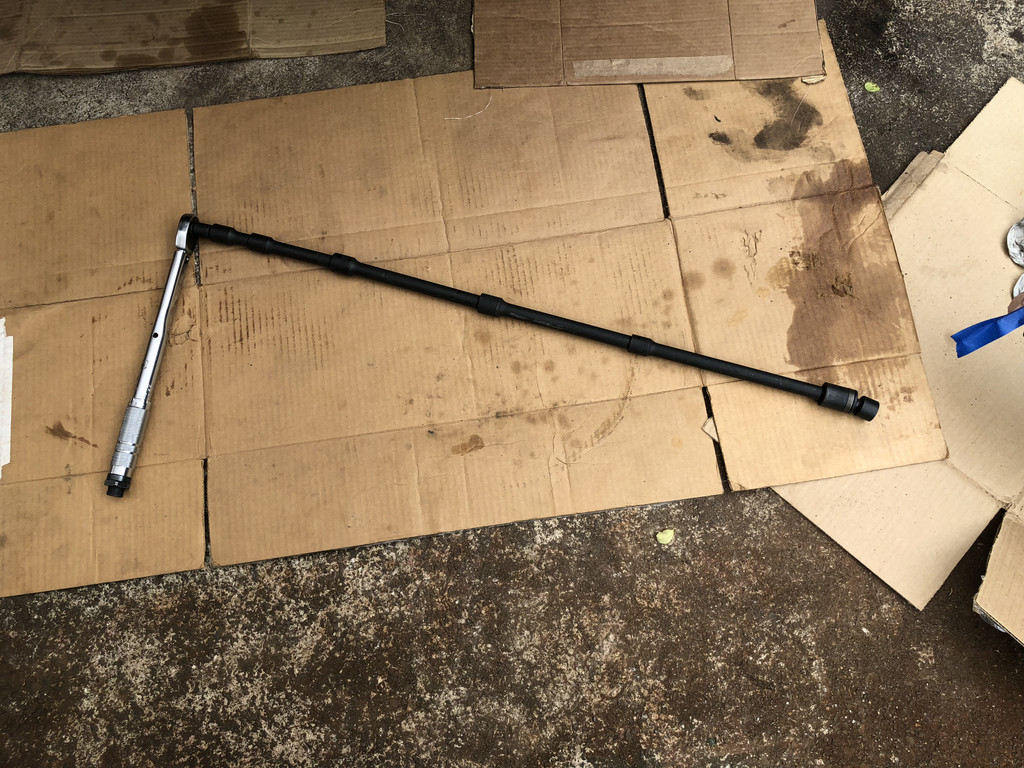
With the transmission tilted downwards a tad bit, access the top bell housing bolts are possible. Highly recommend to use an impact and a LONG set of impact rated extensions and sockets. Swivel socket is your best friend here.
Here's a shot. Don't mind the torque wrench. This was taken during re installation.
Has to be long enough.
On both sides (passenger and driver), the bolts can be attacked as such.
At this time, I had a lot of trouble attacking the passenger side. I removed the exhaust manifold for the passenger side. Access to the coolant hoses were a lot more easier. To disconnect the O2 sensor from the passenger side manifold, you can attack it from the top. The coolant by-pass hose will be drippy....clog them with rags...
I would loosen all the bolts first, bottom up a tiny bit then finger tighten then lower the transmission to loosen and remove the top. When this happens, rasie the transmission up again and remove the remaining four. Then you will need to make sure you can 'push' the transmission towards the back of the car and it should slide right out the engine. Then lower the jack/transmission jack slowly while holding on the transmission. DO NOT LET IT FALL ON YOUR FINGERS.
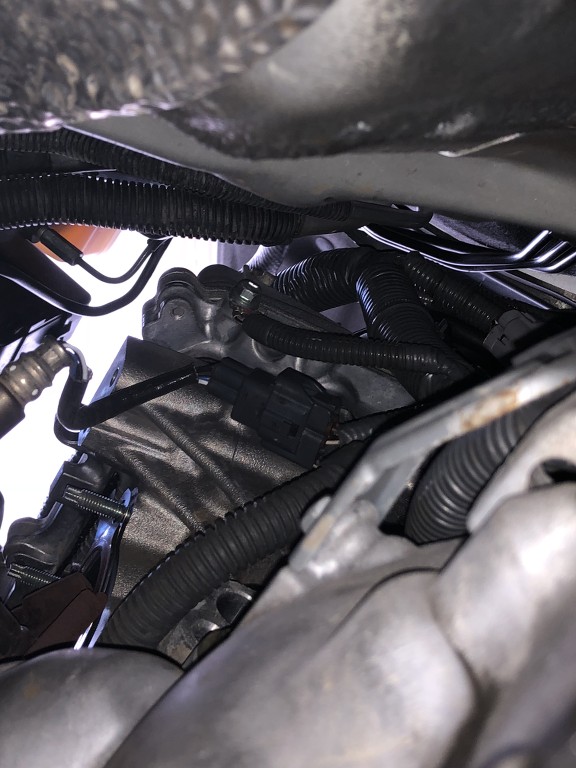
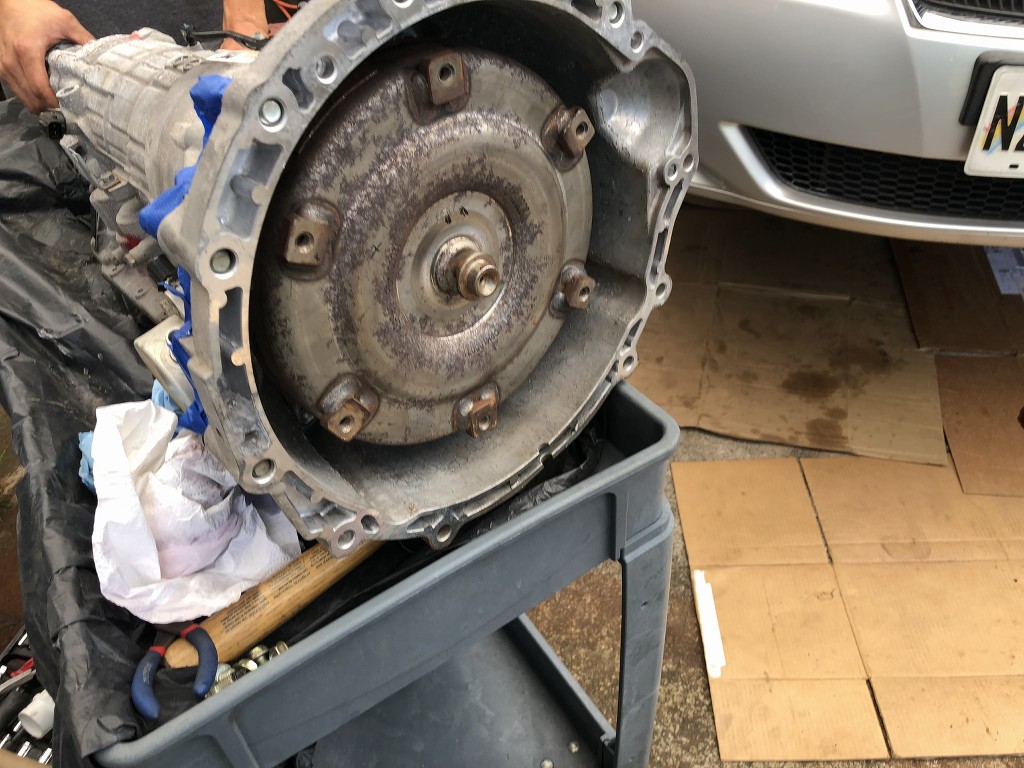
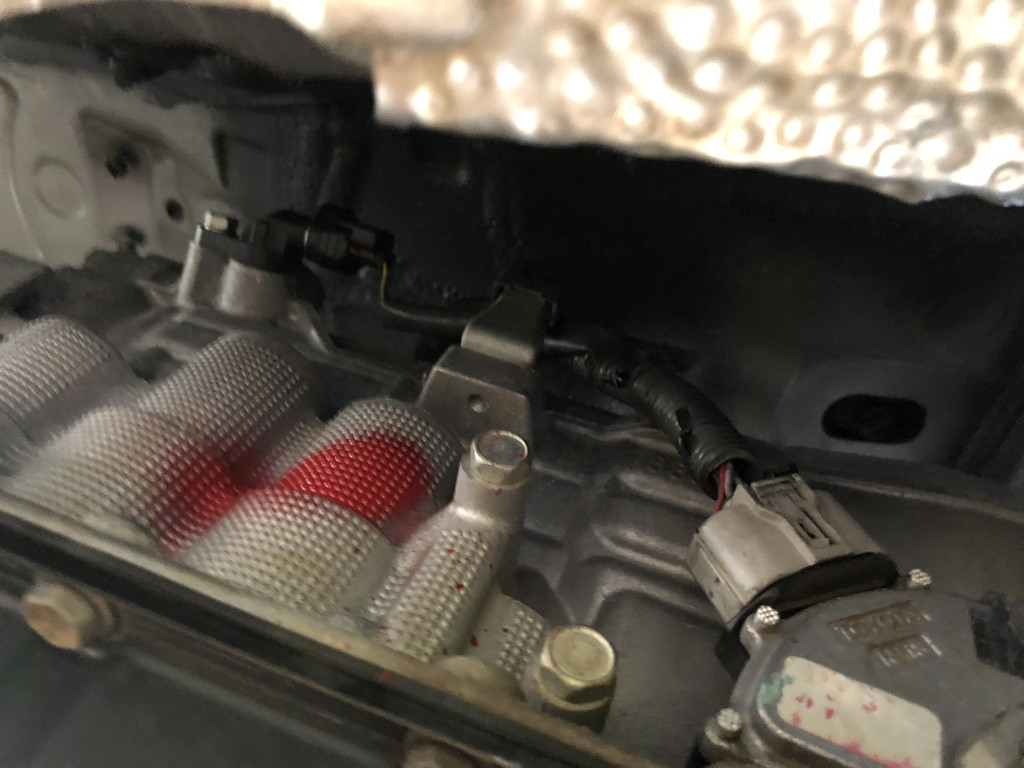
You will see this once the transmission is drop and removed.
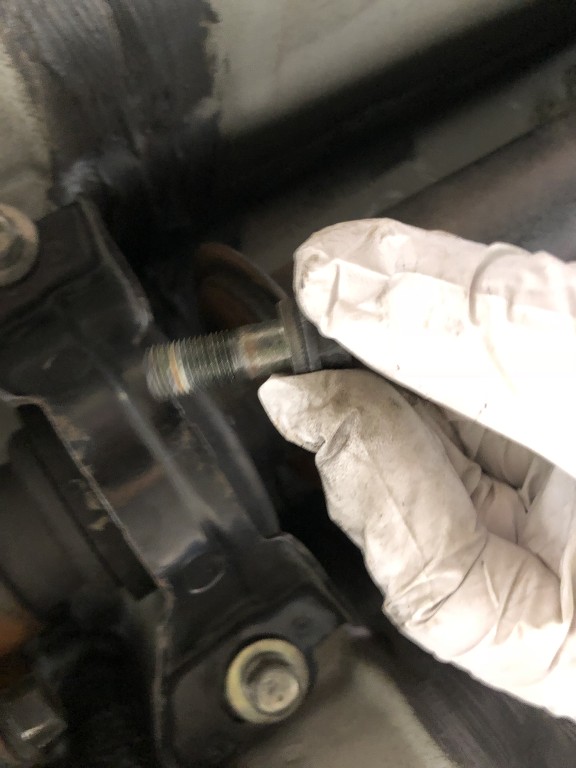
Note the alignment pins. They should BOTH be here. If they are not, make sure you can find them, otherwise you will run into alignment problems.
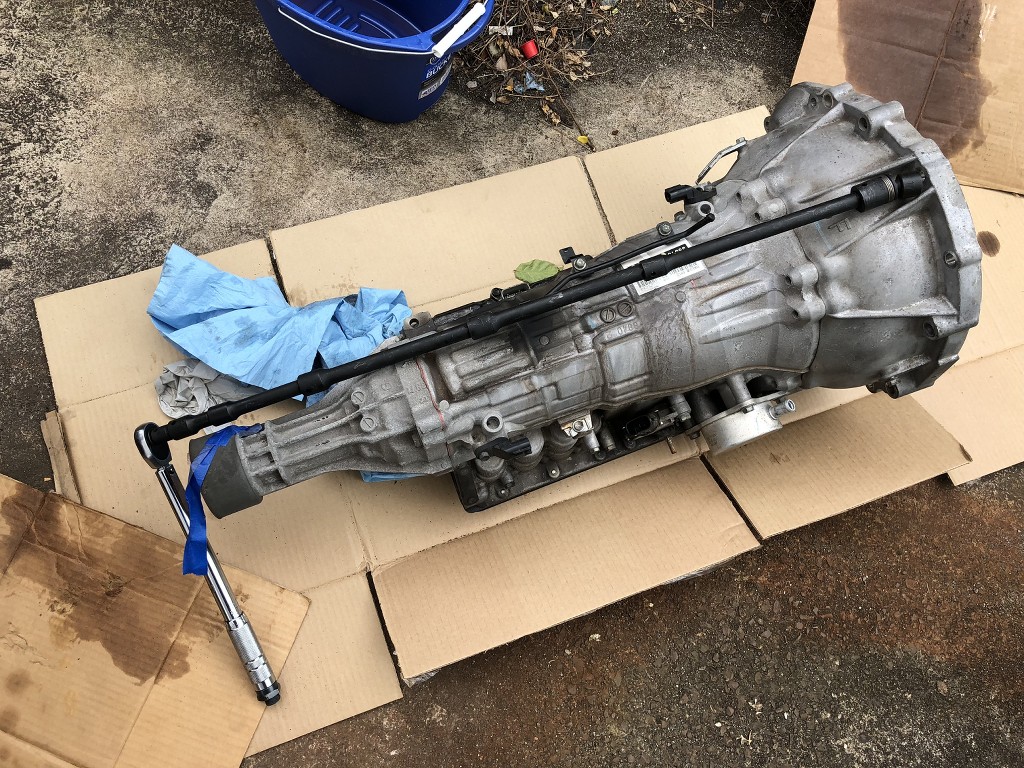
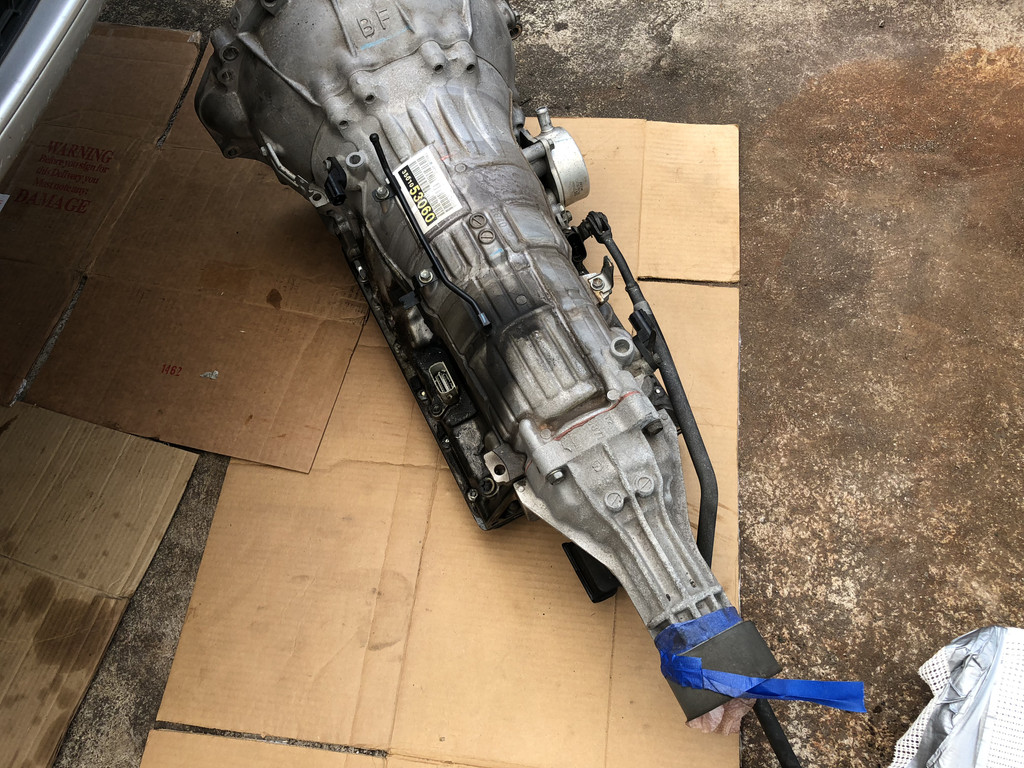
Old transmission was then pushed off the jack and then push across cardboard. The transmission would NOT clear the lower frame with it on the jack. Transmission is about 16" height w/ oil pan.
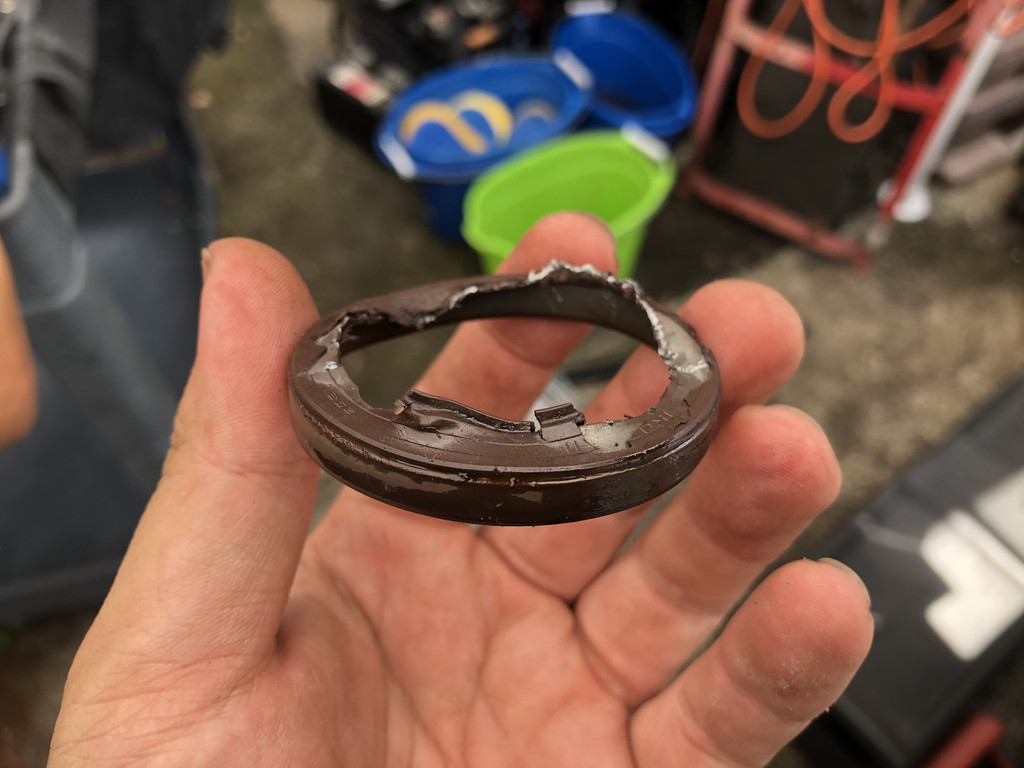
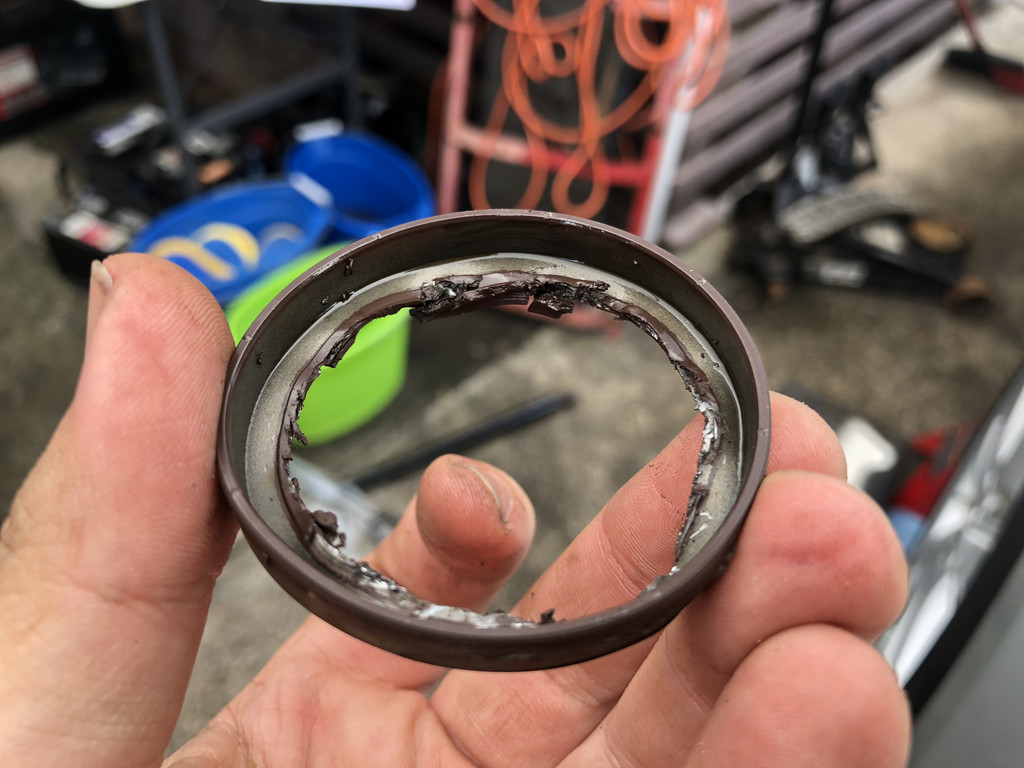
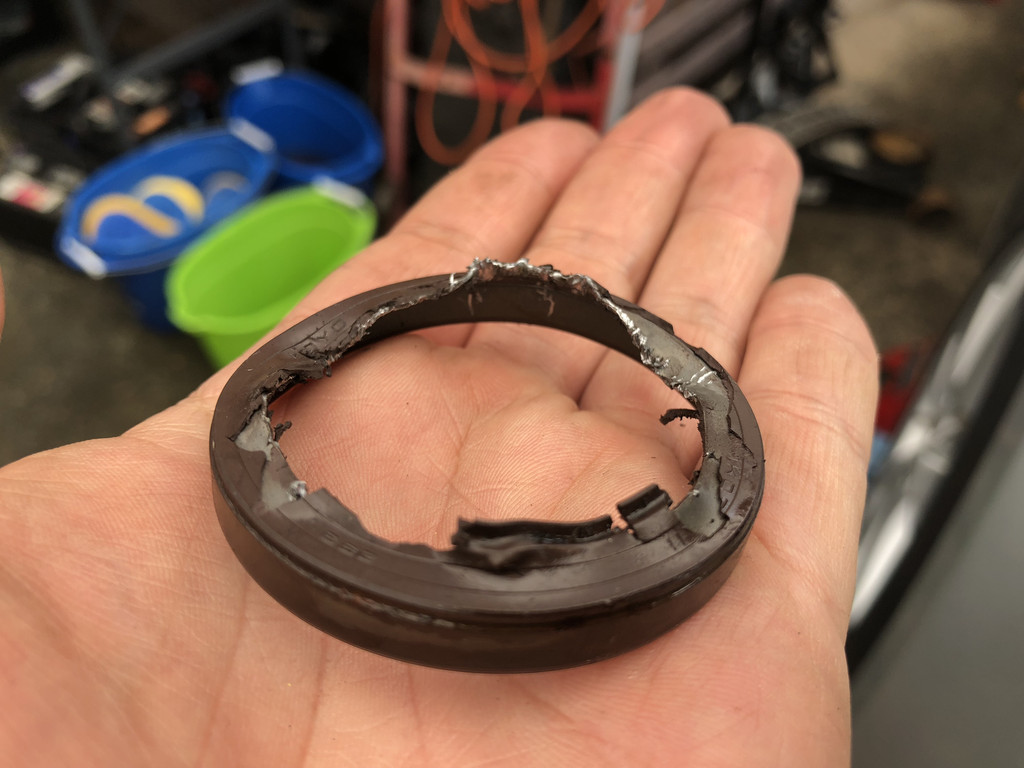
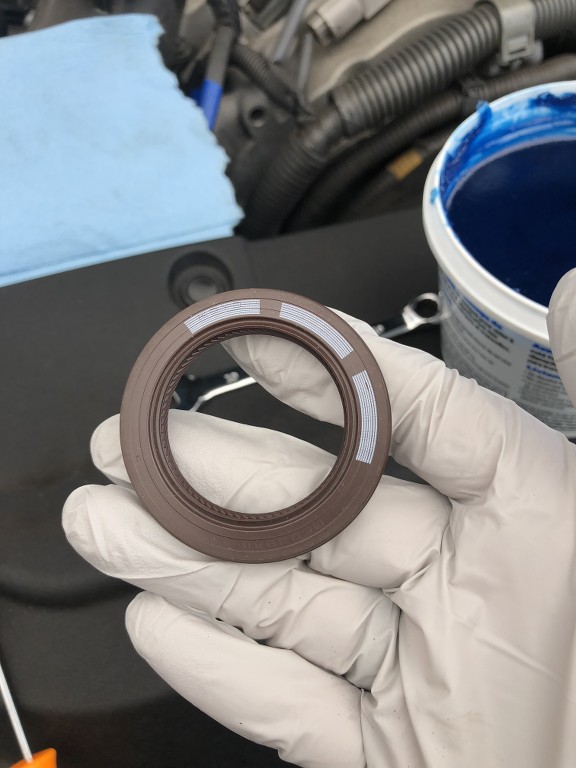
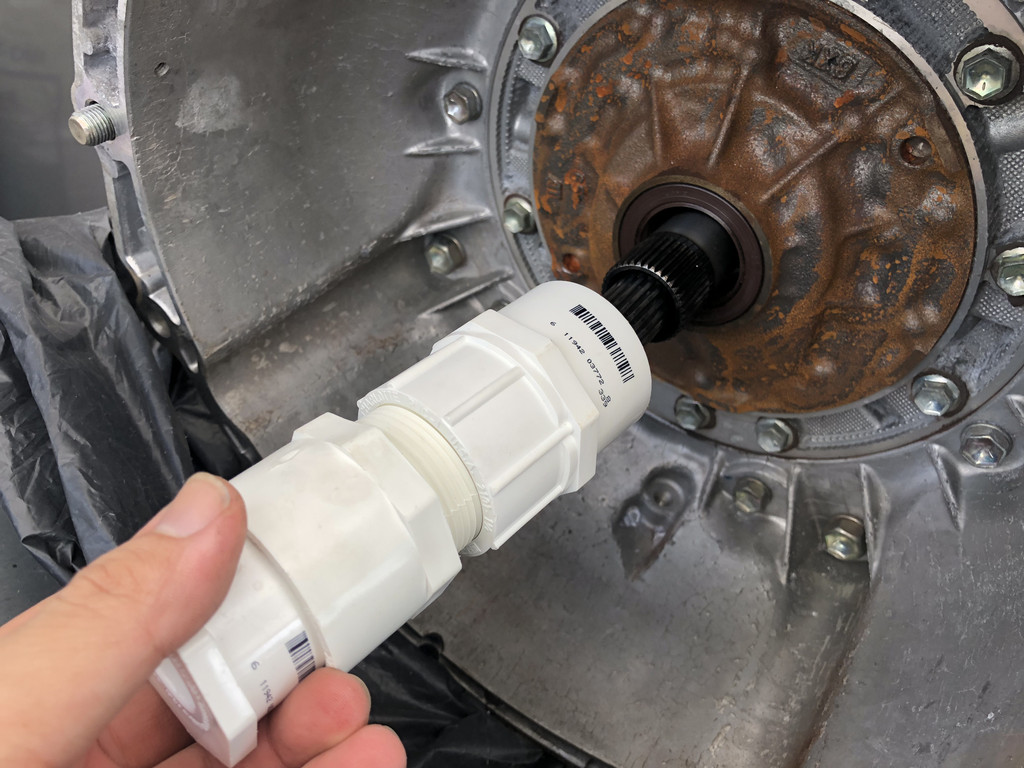
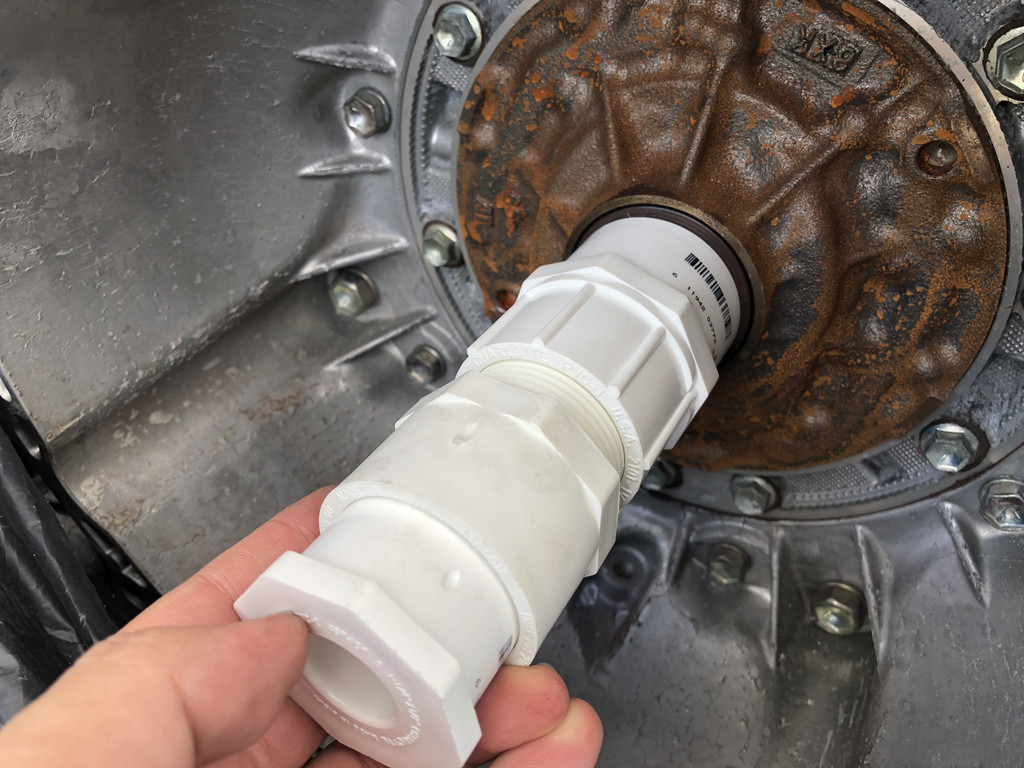
With the 'new' transmission, I replaced the oil pump seal. It was a PITA job....almost got it stuck. I had to use pliers (L shaped one) and was able to use the pump housing to pry the seal out.
New seal was installed.
Use ATF or Trans lube. Per @nsghtbrwry . Works great.
Lubegard 19260 Dr. Tranny Assemblee Goo, Blue, Light Tack.
It was almost perfect but not completely. The seal went in a little crocked. I did the best to align it up. The seal should sit FLUSHED. In my case, it was sitting flush after tapping it with an extension (not the best way), but it had a hair length from the surround base to the seal. So far it is okay. PART NUMBER FOR SEAL: 90080-31068
This part is used in a LOT of Toyota/Lexus/Scion models.
Use this guide at your own risk. I nor Club Lexus assume no responsibility for any damage to your vehicle or personal injury as a result of following this guide.
Use this guide at your own risk. I nor Club Lexus assume no responsibility for any damage to your vehicle or personal injury as a result of following this guide.
When installing the torque converter, MAKE SURE IT 'DROPS' 3 times inside. When mounting the torque converter, make sure to 'jiggle'/shake while turning the torque converter clockwise. It should 'drop' in. The first initial drop is quick. It is the 2nd and 3rd one that you need to make sure.
FAILURE to do this job MAY damage the transmission pump and internals. If mating the transmission to the engine and you are UNABLE TO FREELY TURN TORQUE CONVERTER WHEN MOUNTED, YOU DID NOT SEAT THE TORQUE CONVERTER ALL THE WAY DOWN. If there is a GAP between the transmission and engine when mounting that won't seat FLUSH, STOP and double...triple check! This part I was so paranoid on!!
Basically if when mounting the transmission to the engine...and it doesn't sit flush, DO.NOT.FORCE.THEM.DOWN.VIA.TIGHTENING.BELLHOUSING.BOLTS.
Some links that might help. Not for a Lexus/Toyota, but concept the same.
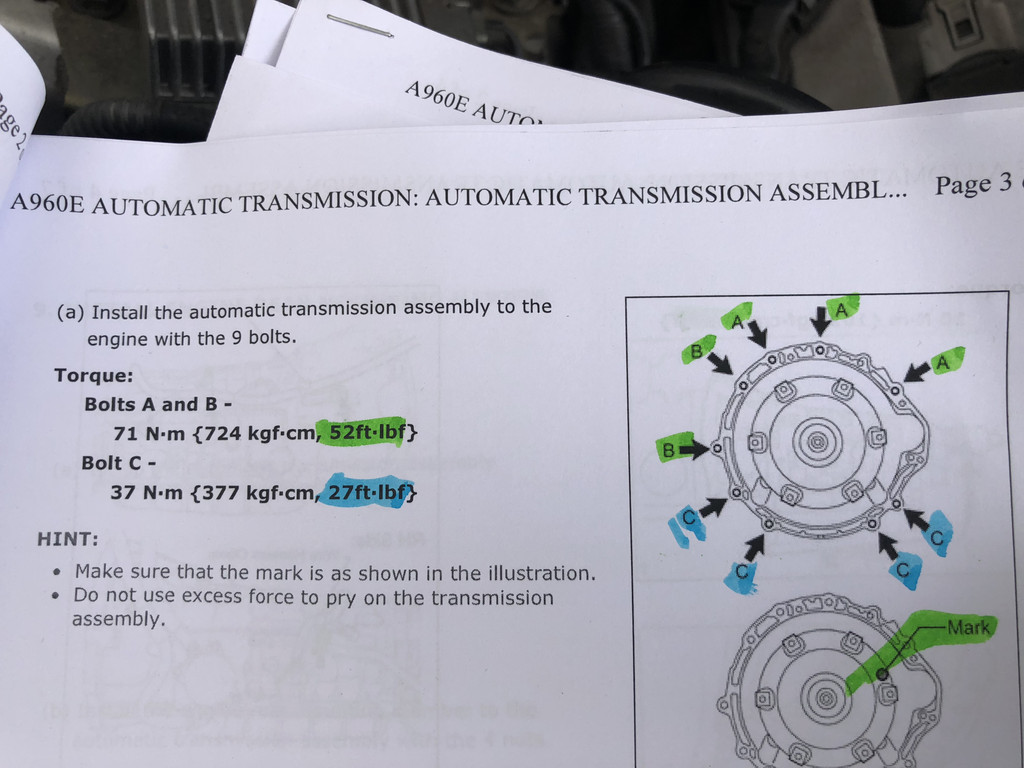
Torque Spec and order of the bolts. There's two types of bolts for torque spec
After hand tightening all the bolts down, tilt the transmission just a tiny bit so you can connect all the wiring to the transmission. Once this is done, TORQUE the upper bell housing bolts to SPEC so you can raise the transmission to reinstall the engine rear mounting member (transmission mount/bracket)
------------------------------------------------------------------------
Re-installation of the transmission, follow the order backward. Use common sense. The following post is random pictures I took after the work. I was trying to get it done before the weather got worst. Some things to take note.
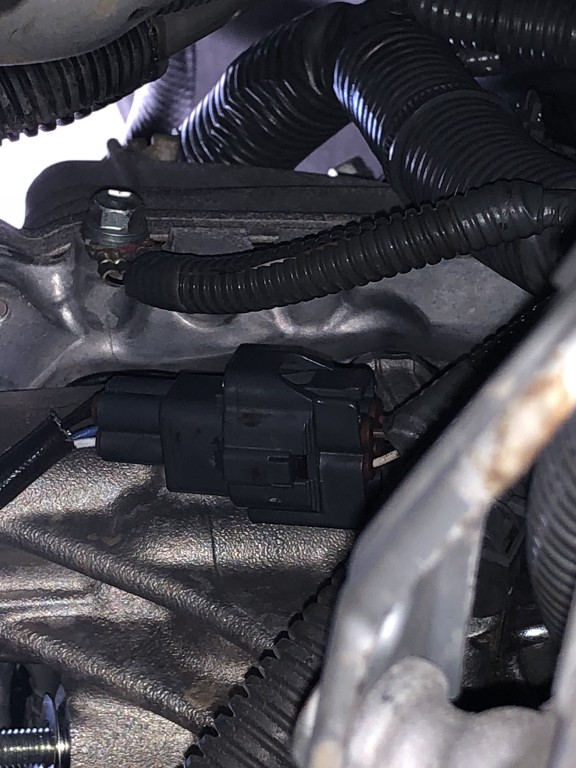
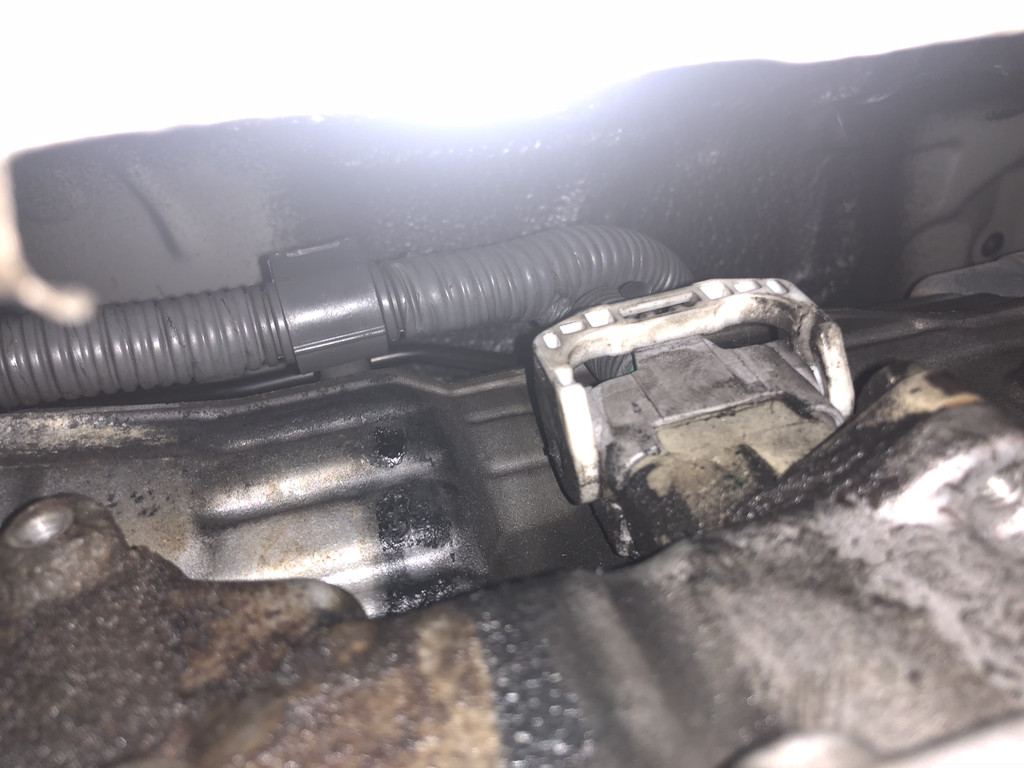
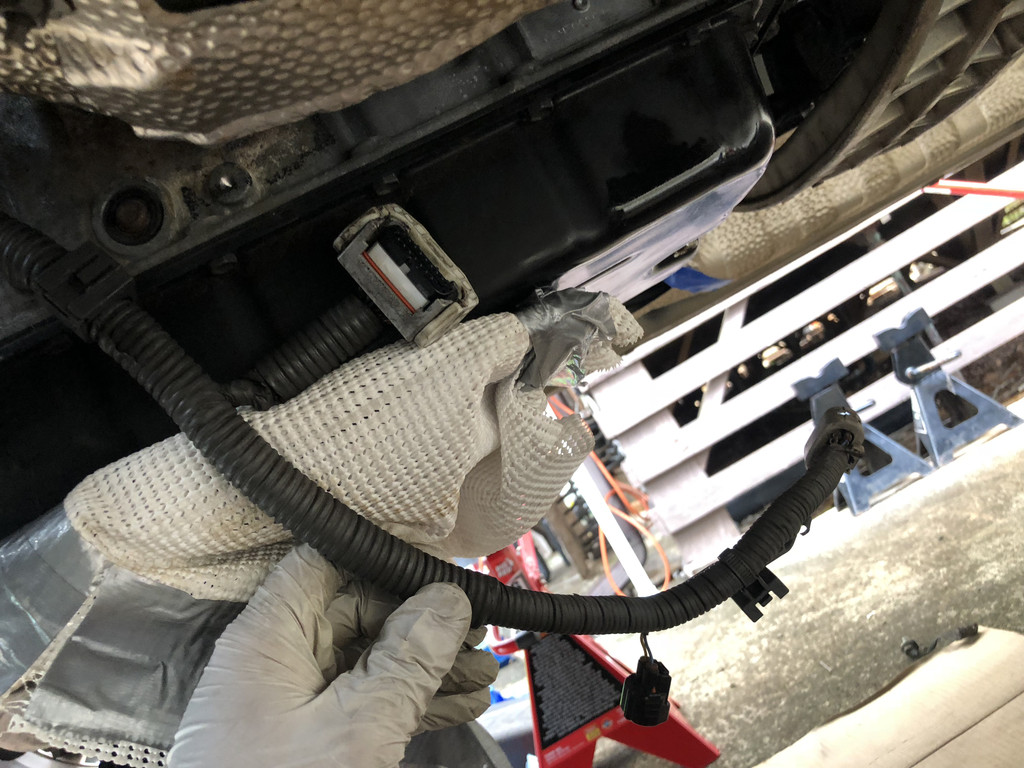
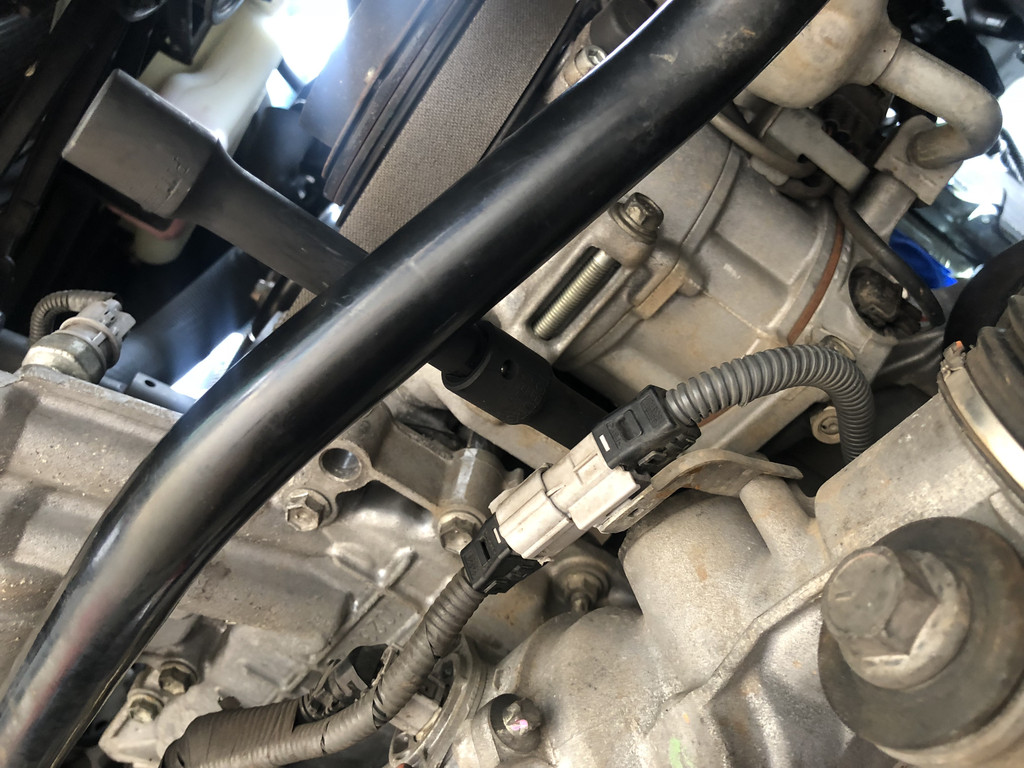
This claw connector works by sliding down the connector then 'snap' it in.
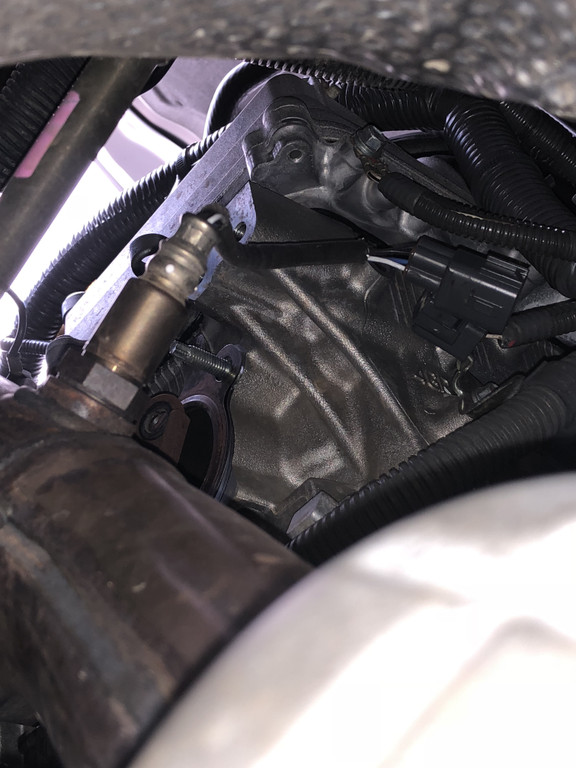
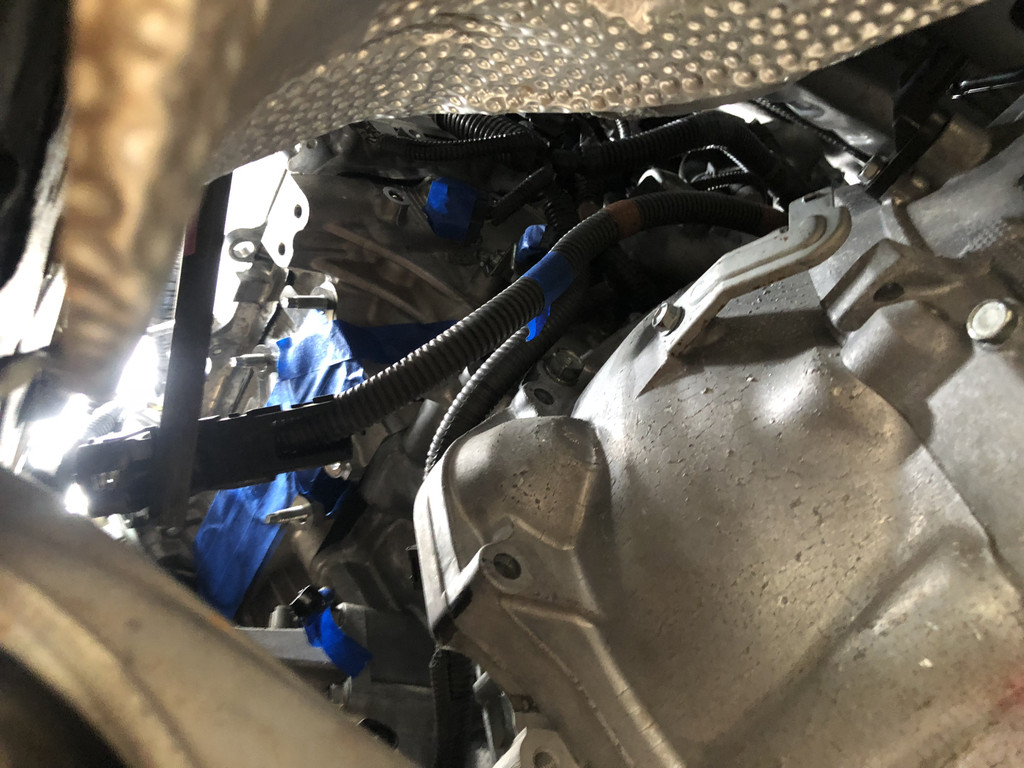
Passenger side
Make sure you connect the coolant by-pass lines and the metal bracket.
It should look something like this.
I had to replace the shift linkage. The one that came from the junkyard transmission was bent.
Reconnect the linkage.
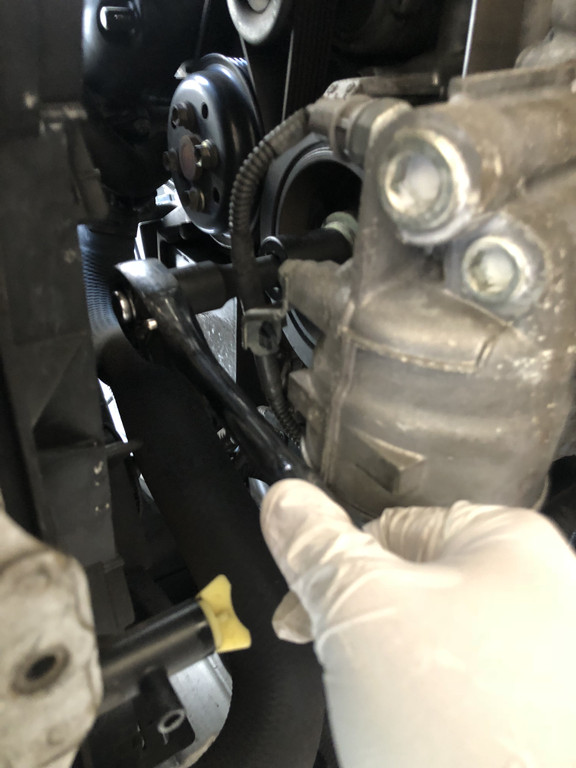
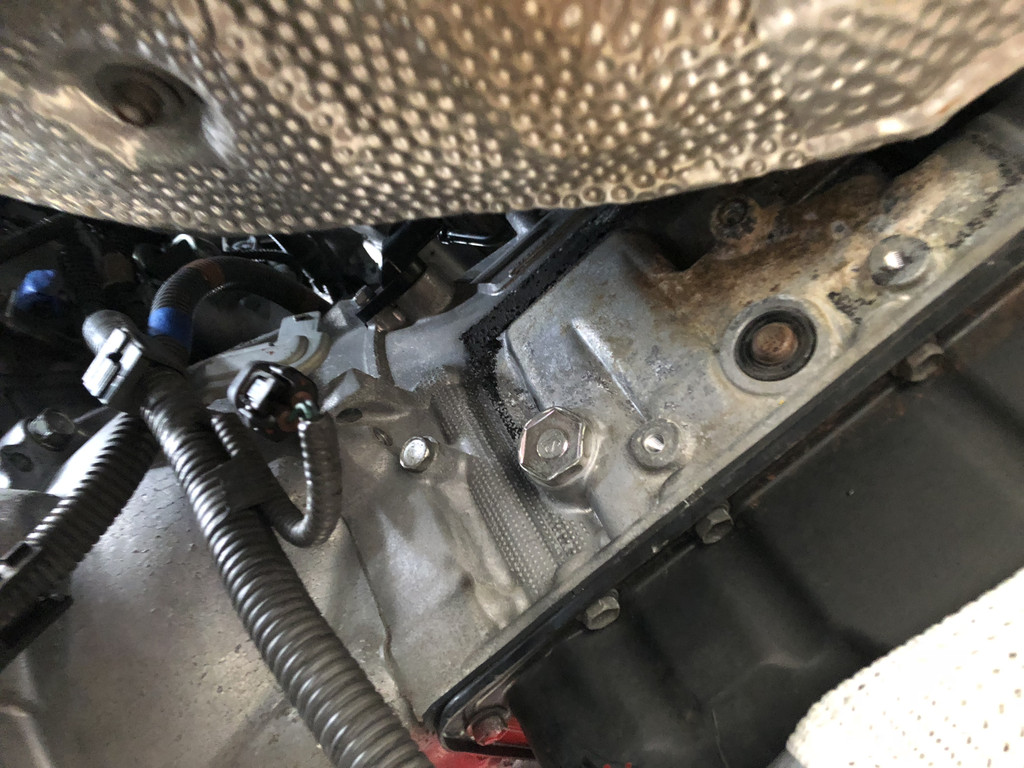
Reconnect the ground cable. In this picture. I already had TORQUE down the bolts to spec for the bell housing and the mount.
If you put the engine rear mounting member wrong, the hose won't match. in this case, the 'stains' from the dirt matched the bracket holes.
Use this guide at your own risk. I nor Club Lexus assume no responsibility for any damage to your vehicle or personal injury as a result of following this guide.
Use this guide at your own risk. I nor Club Lexus assume no responsibility for any damage to your vehicle or personal injury as a result of following this guide.
Next it is to do the torque converter bolts. Line up the flexplate with the torque converter. You should be able to put your hand behind the torque converter or at least on the side to 'turn' it. If it turns freely, it should be fine.
Line up the flexplate with a hole on the torque covnerter. I would set the flexplate to a good position and then turn the torque converter to see if you can match them up. As for which hole, it does not matter. what matters is you using the alignment bolt (black/gray) bolt.
I was single man doing this part. Laying on my back, I was facing upwards towards the engine. I was able to turn/hold the crank while torque to spec the torque converter bolt.
Breaker bar on the crank and a torque wrench.
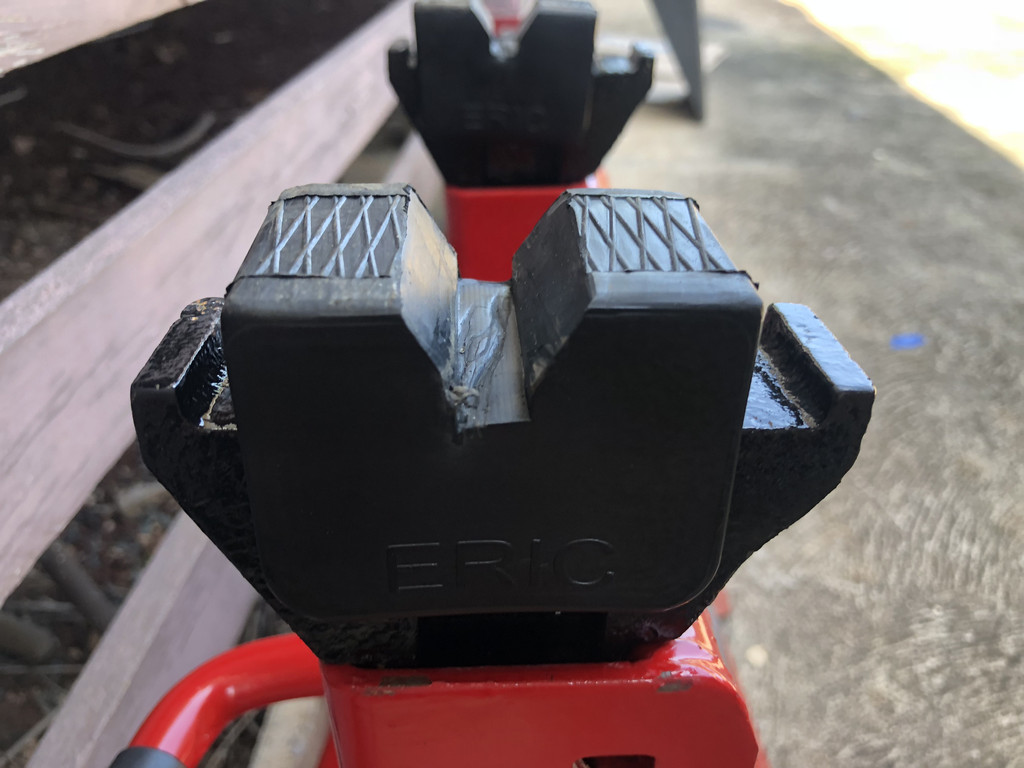
This was the 4x jacks I used. Tekton 6-ton w/ the second lock and some pads I found. These pads were compatible with the 3-ton but seems to fit the 6-ton fine.
Use this guide at your own risk. I nor Club Lexus assume no responsibility for any damage to your vehicle or personal injury as a result of following this guide.
Reinstall all other items using common sense and paying attention to the torque. I would recommend to have two people for this job. No idea how someone can do this by themselves. Also highly recommended to get a set of swivel sockets. No way around some of the bolts on the transmission. I estimate this job to take me about 24hr when counting all the time when working in between.
I may had forgotten something. I'll revisit this page later to doublecheck. Let me know if you have any questions,
Did you end up using the "3rd gen" trans or a 2nd gen?
thanks so much for the write up! Makes me more confident in doing mine. Just need to find the donor or trans.
Hopefully this will be helpful to many. The A960e automatic transmission in the 06-15 Lexus IS and also the GS from similar years is also found in the Scion/Subaru/Toyota BRZ/FRS. The benefit of this is that the same transmission can be found for a lot cheaper in those vehicles than for Lexus vehicles because of sport vs luxury vehicle and because the auto is not in high demand on the 2 door sports car.
It is the exact same transmission, the A960e, do your research if you like. I bought a used one with only 10k miles on it from a wrecked BRZ and had a trusted mechanic install it on my 2006 Lexus GS300. Just make sure to save the output shaft from your old transmission because you will have to transfer it to new unit. Good luck.
 07-23-18, 03:11 AM