When you click on links to various merchants on this site and make a purchase, this can result in this site earning a commission. Affiliate programs and affiliations include, but are not limited to, the eBay Partner Network.
Hey Guys,
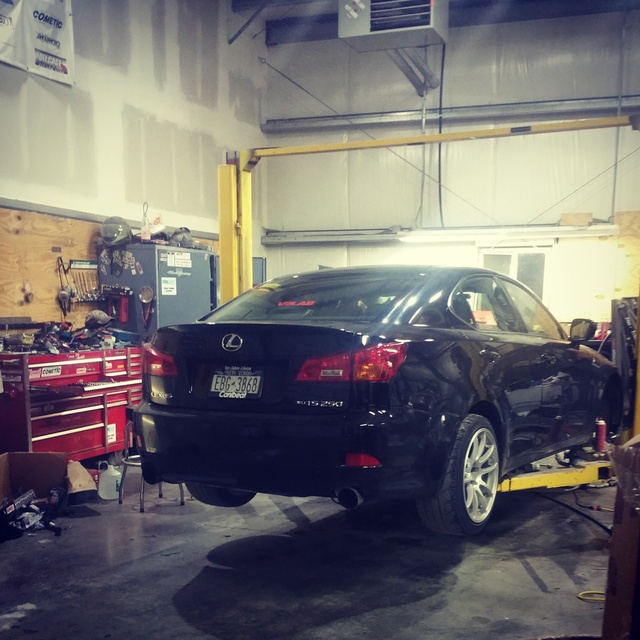
Since there wasn't much information on how to change an Axle, and I just recently changed mine, I figured I'd help everyone out. Before if our front axles went bad, we had to get a dealership to replace them but now there are tons of companies that sell aftermarket axles. I got mine for $99 shipped
Unfortunately i thought of the DIY when I was finished with the job but I took pictures and I will do my best to explain it all... Also be patient as I will go back and update some pics
Tools Needed:
1/2 inch Socket Wrench
1/2 inch Breaker Bar
30MM 12 Point Socket
17mm Socket
Needle Nose Pliers
Hammer punch tool
Steel Hammer
Rubber mallet
If you have air tools (Makes your Life so much easier)
Air Hammer
Air gun
Also I went trough about 5 bottles of brake cleaner and a bottle of PB Plaster/Penetrating Lubricant
If your fortunate to have access to a lift, then by all means USE IT!! If not expect it to take twice as long.
Since this was the first time I was changing an axle on this car, it took me a little longer to figure things out so it was a 3-4 hour job and I work on cars a lot (not professionally) but at maybe an intermediate Expert level it will be shorter
Step 1
The easiest thing to do at first is to try to loosen the axle nut while you have everything assembled. I learned from mistake and took everything off before I started and I didn't need to take things off. On the Center of the Axle nut, it is pinched to the axle so use your air hammer OR hammer punch to lift the Pinched part of the Nut. (you can use a heavy duty flat head screw driver how ever 4 broken screw drivers later, i opted for the hammer punch)
Step 2
Use the 30 MM 12 point to get the nut free and spinning. Be careful here because here is the difference between it spinning and you destroying all the threads on the axle. If you are replacing a boot, I suggest get it freely moving first. If you are replacing the whole axle, then you can air gun the Crap out of it.
Step 3.
Once you get the axle nut off a little bit, spin it to the edge. Use your steel hammer to tap the axle forward enough get it sliding back and forth. Hard enough to exert energy but not enough to break and un-thread the nut
Step 4
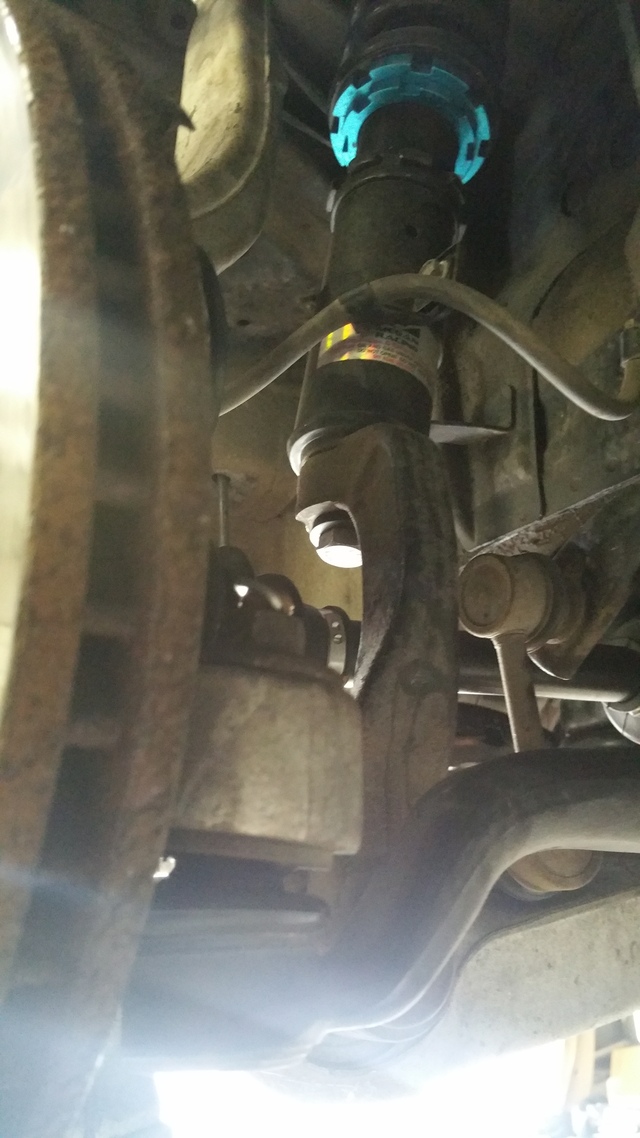
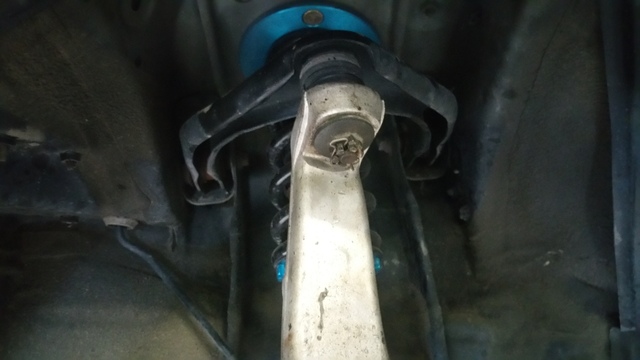
You DONT have to take apart the brakes, caliper or rotor. I left it all on. Remove your steering Tie rod cotter pin and castle nut . Here you would need your needle nose for the cotter pin and the 17 to remove the nut. Take your hammer and hammer down lightly to remove the tie rod. (if you have a Tie rod puller even better but not really 100% necessary)
** New pic Coming soon**
Step 5
Remove the Upper control arm Cotter pin and Castle nut same as the Tie Rod
Step 6.
With the UCA and Tie rod removed, it should give you enough room to remove the axle from the hub. Sorry No Pics but its self explanatory on how it should look
Step 7
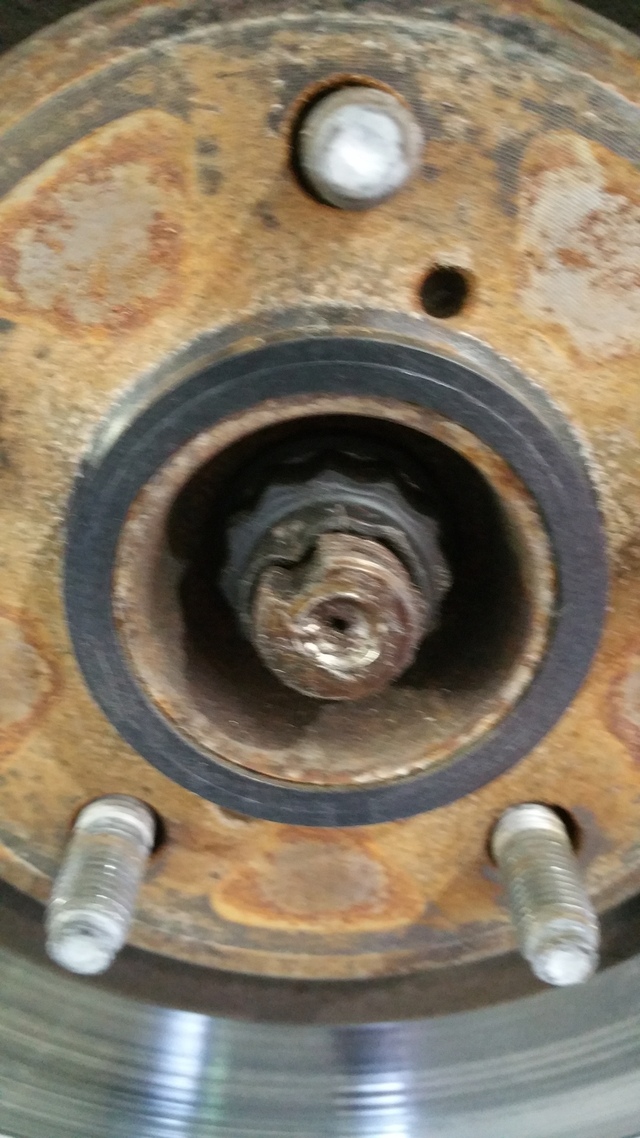
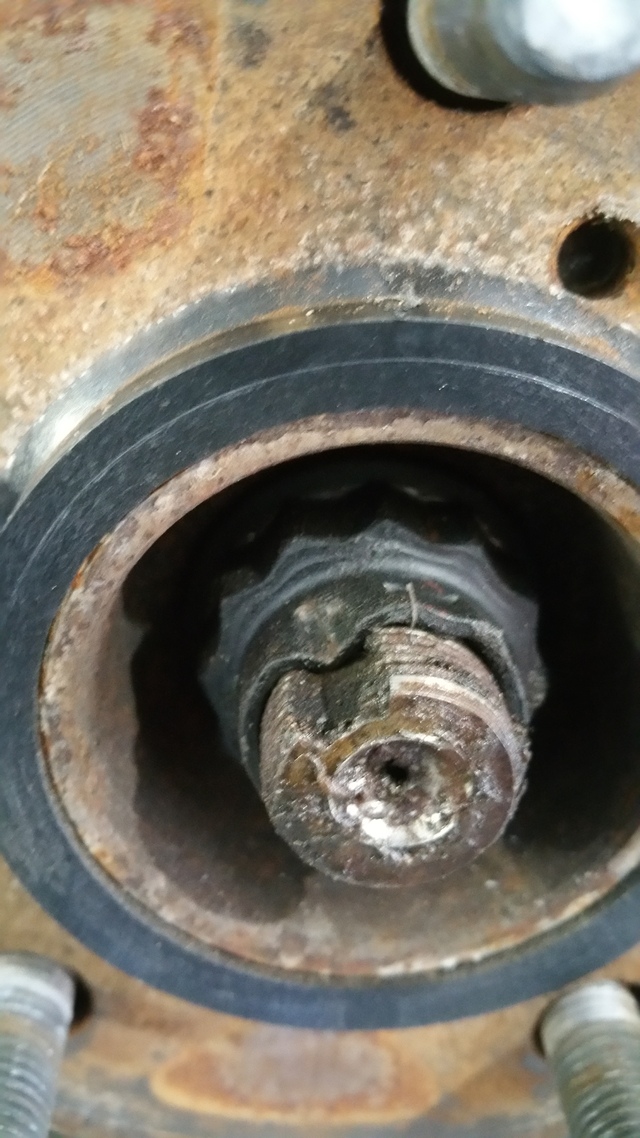
Under the car where the axle meets the engine/oil pan there is a large axle pin that holds the axle in that can me removed with a large needle nose. Behind that, there is a bolt that holds the axle bearing seal in place. If your a northern US car like me, it might be best to remove it and throw some anti-sieze on it. I had to remove it because it was rusted shut to the axle and had to hammer it off.
If you can get the axle out with out removing it then KUDOS!!
Step 8
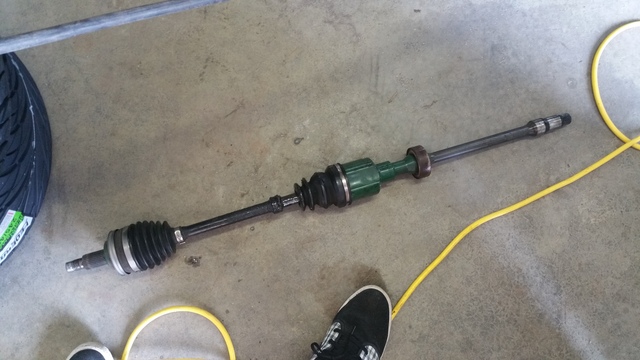
Your going to need something with leverage to hammer or pull this axle out. If you are successful you should be looking at your full axle by the end of this step [/URL]
For installation, do everything in the reverse order.
VERY IMPORTANT!! when pushing the axle back in to its input shaft, be careful NOT TO USE A STEEL HAMMER ON THE HUB END. I made that mistake and destroyed the end threads which are EXTREMELY brittle. I had to end up grinding down the shaft to the next available thread
I also messed up the 30mm 12 point axle nut on multiple attempts to get it back on. They DO NOT SELL THEM AT ANY AUTO STORE AS WELL AS THE DEALERSHIP TOLD ME THAT PART IS NOT AVAILABLE FOR PURCHASE. HOWEVER A 6 POINT FROM ANY OTHER FWD/AWD LEXUS/TOYOTA CAR WILL WORK. I was able to use one from a 92-96 ES300
As you can see
Feel free to add notes and comments on what I could have done differently. I will say that this has been one of the MOST ANNOYING axle jobs EVER so patience is necessary. A good 2 hours of the time was hammering in and out. And obviously use PB Blaster or Penetrating Lubricant where ever you can. My Car is a DD so its exposed to all weather conditions. Brake cleaner helps with the mess from the old axle grease.
Nice work! Would love to hear how the car feels with the aftermarket axle. Where in NY are you?
I am in the New Paltz/Poughkeepise. I am right smack dab in the middle between albany and NYC.
As for the feel, the car feels a lot smoother to drive but then again I had a bad axle to begin with. I got the axle so cheap I thought about doing both driver and passenger side. It how ever was extremely annoying to do because of the length of the axle and how Lexus positions its front lower subframe for the AWD
Could u pliz tell me in more details how u pull the axle out cuz i been trying on my 2008 gs 350 and i cant get it out. I did everything n loose everthing. Pliz help
QUOTE=NYKnick101;9140776]Hey Guys,
Since there wasn't much information on how to change an Axle, and I just recently changed mine, I figured I'd help everyone out. Before if our front axles went bad, we had to get a dealership to replace them but now there are tons of companies that sell aftermarket axles. I got mine for $99 shipped
Unfortunately i thought of the DIY when I was finished with the job but I took pictures and I will do my best to explain it all... Also be patient as I will go back and update some pics
Tools Needed:
1/2 inch Socket Wrench
1/2 inch Breaker Bar
30MM 12 Point Socket
17mm Socket
Needle Nose Pliers
Hammer punch tool
Steel Hammer
Rubber mallet
If you have air tools (Makes your Life so much easier)
Air Hammer
Air gun
Also I went trough about 5 bottles of brake cleaner and a bottle of PB Plaster/Penetrating Lubricant
If your fortunate to have access to a lift, then by all means USE IT!! If not expect it to take twice as long.
Since this was the first time I was changing an axle on this car, it took me a little longer to figure things out so it was a 3-4 hour job and I work on cars a lot (not professionally) but at maybe an intermediate Expert level it will be shorter
Step 1
The easiest thing to do at first is to try to loosen the axle nut while you have everything assembled. I learned from mistake and took everything off before I started and I didn't need to take things off. On the Center of the Axle nut, it is pinched to the axle so use your air hammer OR hammer punch to lift the Pinched part of the Nut. (you can use a heavy duty flat head screw driver how ever 4 broken screw drivers later, i opted for the hammer punch)
Step 2
Use the 30 MM 12 point to get the nut free and spinning. Be careful here because here is the difference between it spinning and you destroying all the threads on the axle. If you are replacing a boot, I suggest get it freely moving first. If you are replacing the whole axle, then you can air gun the Crap out of it.
Step 3.
Once you get the axle nut off a little bit, spin it to the edge. Use your steel hammer to tap the axle forward enough get it sliding back and forth. Hard enough to exert energy but not enough to break and un-thread the nut
Step 4
You DONT have to take apart the brakes, caliper or rotor. I left it all on. Remove your steering Tie rod cotter pin and castle nut . Here you would need your needle nose for the cotter pin and the 17 to remove the nut. Take your hammer and hammer down lightly to remove the tie rod. (if you have a Tie rod puller even better but not really 100% necessary)
** New pic Coming soon**
Step 5
Remove the Upper control arm Cotter pin and Castle nut same as the Tie Rod
Step 6.
With the UCA and Tie rod removed, it should give you enough room to remove the axle from the hub. Sorry No Pics but its self explanatory on how it should look
Step 7
Under the car where the axle meets the engine/oil pan there is a large axle pin that holds the axle in that can me removed with a large needle nose. Behind that, there is a bolt that holds the axle bearing seal in place. If your a northern US car like me, it might be best to remove it and throw some anti-sieze on it. I had to remove it because it was rusted shut to the axle and had to hammer it off.
If you can get the axle out with out removing it then KUDOS!!
Step 8
Your going to need something with leverage to hammer or pull this axle out. If you are successful you should be looking at your full axle by the end of this step [/URL]
For installation, do everything in the reverse order.
VERY IMPORTANT!! when pushing the axle back in to its input shaft, be careful NOT TO USE A STEEL HAMMER ON THE HUB END. I made that mistake and destroyed the end threads which are EXTREMELY brittle. I had to end up grinding down the shaft to the next available thread
I also messed up the 30mm 12 point axle nut on multiple attempts to get it back on. They DO NOT SELL THEM AT ANY AUTO STORE AS WELL AS THE DEALERSHIP TOLD ME THAT PART IS NOT AVAILABLE FOR PURCHASE. HOWEVER A 6 POINT FROM ANY OTHER FWD/AWD LEXUS/TOYOTA CAR WILL WORK. I was able to use one from a 92-96 ES300
As you can see
Feel free to add notes and comments on what I could have done differently. I will say that this has been one of the MOST ANNOYING axle jobs EVER so patience is necessary. A good 2 hours of the time was hammering in and out. And obviously use PB Blaster or Penetrating Lubricant where ever you can. My Car is a DD so its exposed to all weather conditions. Brake cleaner helps with the mess from the old axle grease.[/QUOTE]
Could u pliz tell me in more details how u pull the axle out cuz i been trying on my 2008 gs 350 and i cant get it out. I did everything n loose everthing. Pliz help
If you have a breaker bar of some type of short bar, I put it behind the axle under the car and with a sledge hammer, I was able to hammer it out. If your car has some rust on the bearing like mine did , it might take some to hammer it out. Would pick a spot, hammer, rotate axle hammer again, rotate axle, and again until the entire thing comes out. Be careful that you may take out the oil seal with the axle. If you did, it's okay because it's metal and you can put it back in. (at least I did). Make sure you use antiseize in there because it will make it much easier if you have to take it out again
If you have a breaker bar of some type of short bar, I put it behind the axle under the car and with a sledge hammer, I was able to hammer it out. If your car has some rust on the bearing like mine did , it might take some to hammer it out. Would pick a spot, hammer, rotate axle hammer again, rotate axle, and again until the entire thing comes out. Be careful that you may take out the oil seal with the axle. If you did, it's okay because it's metal and you can put it back in. (at least I did). Make sure you use antiseize in there because it will make it much easier if you have to take it out again
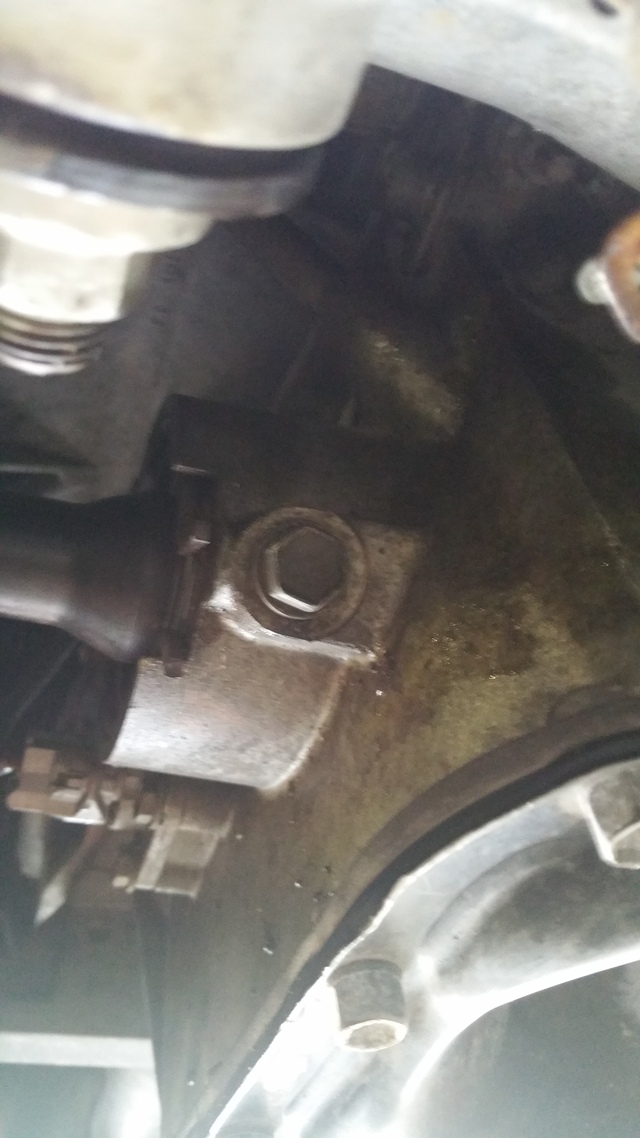
Im having a issue..... I already got the axle out of mine. 2008 Gs350 awd. Front passenger side. The issue is, my carrier bearing support brace came out with the axle. Im trying to get the support brace back into the differential housing. I can put the brace on the new axle bearing with a few taps of a hammer, but can not install it back into to differential. . Ive tried to put the brace back into the differential 1st, but i cant hammer it in, theres no room. Im not sure if there's a specific way of doing this . Does anyone have a suggestion. A picture of the bearing and support brace that the bearing goes into
This is theinner axle bearing im assuming
This is the support brace that the bearing sits in. While its in the differential
Like I mentioned in your other post, you have to spin the axle to engage the splines into the differential.
If it were mine; fit the axle w out the bearing cup. It should slide in to depth with no resistance. If this true and you said the cup fits over the axle bearing, well it like you need to clean the cup and the pan and squarely drive the cup into the pan and secure it with that bolt.
I would grease both the pan register (where the cup goes) and both sides of the cup.
Slide axle in spinning it until it engages the side gear in the differential. You need to have the car in park and maybe even hold the other axle from spinning. Could be as simple as sticking a screw driver in the rotor vent.
 08-06-15, 01:32 PM


 [/URL]


 [/URL]