Best products for Full headlight restoration (sanding, clear coat etc.).
 02-04-13, 01:53 PM
#1
Greetings,
I am replacing the ebay headlights that came on my car.
I purchased stock headlights and they came today, but need restoration.
After reading ALL of the DIY guides, I have decided to fully refinish inside and out (including projectors) I am confused as to what products would work best.
I went to Home Depot expecting to easily find everything but ran into some issues.
I have the headlights
I purchased a sander/buffer.
I found the black silicon.
I found the Helmsman Spar Urethane (clear gloss) and Mineral spirits.
However......
I asked HomeDepot for the best plastic polish and they had no clue about any at all.
I asked for 400, 600, 800, 1000, 1200, 1500 round sand paper for the sander and they had no clue.
(where does one get the fine sandpaper cut round for a 6" sander)
What pad do I buy for the buffer portion of the job?
I read about a sanding lubricant made for plastic, HD had no clue either.
Plast-X or 3M rubbing compound? What is better?
Am I forgetting something that would help?
 02-04-13, 02:02 PM
#2
Lead Lap
iTrader: (28)
Join Date: Sep 2011
Location: az
Posts: 707
Likes: 0
Received 0 Likes
on
0 Posts
almost none of this matters; a few tips ive picked up in refinishing a bunch of friends headlights etc;
NEEEEEEEEEEEEVER work with the back side of the lens (just throwing that other there since youve said inside and out);
unless you have some MAJOR damage, start with 800; end at 2000, or 2500 if youre obsessive; plasticx works great as a finisher.
be sure that your sand paper is 3m, and do everything possible to end up with some sort of clear coat or protective coating. If you have to , sherman williams or a local paint store may put clear coat in a aerosol can.
02-04-13, 02:04 PM
#3
Lead Lap
iTrader: (28)
Join Date: Sep 2011
Location: az
Posts: 707
Likes: 0
Received 0 Likes
on
0 Posts
OH and to answer your question, any autobody paint store will have everything you need, shapes/sizes/etc for sand paper.
edit as well: my process is usually 800 -1000-1200 - aluminum polish -- plastic polish.
end result
edit as well: my process is usually 800 -1000-1200 - aluminum polish -- plastic polish.
end result
02-04-13, 02:10 PM
#4
It's not rocket science.
You DO NOT need a buffer to sand the outside of the lenses. In fact, if you use a DA to sand them and you have no experience, you will likely cause more damage. It's super easy to create pigtails and other buffer marks by not knowing when to change out the sanding discs, how to operate the machine (ie. sanding at an angle). Long story short, just do it by hand. I did mine by hand in an hour both lenses.
Next, you do not need any plastic polish, or any polish at all for that matter if you are sanding and coating them. The Mineral Spirits with the Urethane will not hold up as well as automotive clearcoat. It is better than nothing, but it's not going to be permanent from my experience. It's also very soft and will get etched easily in the summer when you get bug splatter on the coating which will ruin the whole thing and require re-application.
The best and easiest way of doing this is going to be something like 320>400>600>800>1000. After you have done that, wash the lens with dish soap, rinse thoroughly, and do a few prep solvent or IPA alcohol wipedowns. Bring it to a bodyshop and ask them to clearcoat the lens. I am not a painter and don't know the technical terms for some of the products they use, but when I gave my lights to my dad, he said his painter first put some sort of clearcoat base (adhesion promoter) before the actual clearcoat. The clearcoat will fill in your sand marks and stick to the lens better. If you are dead set on using the Spar method, than use the same sanding process and prep. Lay it on very thin....it's not clear in color it's yellowish so if you put it on too thick the lenses will not look crystal clear.
02-04-13, 04:00 PM
#6
1JZ Single SC400
iTrader: (59)
Join Date: Jan 2009
Location: Alabama, Roll Tide!
Posts: 8,518
Likes: 0
Received 15 Likes
on
12 Posts
The only thing I have done to my headlights that I thought it needed was wetsand at 1500 then 1000. I used a cutting compound with a wool pad, then used a high dollar polish with a foam polishing pad, then waxed. After this they started to leak after about a year on the car. I took them apart and buffed the inside of them using the Motherspower ball and resealed with 100% black silicone and allowed to dry with zip ties. No more leaky, leaky, plus I bought new vent tubes for the bottom. Good luck with your method.
02-04-13, 04:11 PM
#7
Lead Lap
iTrader: (28)
Join Date: Sep 2011
Location: az
Posts: 707
Likes: 0
Received 0 Likes
on
0 Posts
Since we're on the topic of resealing headlights; does anyone have input on what sort of adhesive to hold them together in high temp weather?
100% silicone doesnt hold up strong to 110+ degree temps in arizona...figured id ask about that as well
100% silicone doesnt hold up strong to 110+ degree temps in arizona...figured id ask about that as well
Trending Topics
02-04-13, 07:12 PM
#9
NEEEEEEEEEEEEVER work with the back side of the lens (just throwing that other there since youve said inside and out);
be sure that your sand paper is 3m, and do everything possible to end up with some sort of clear coat or protective coating. If you have to , sherman williams or a local paint store may put clear coat in a aerosol can.
be sure that your sand paper is 3m, and do everything possible to end up with some sort of clear coat or protective coating. If you have to , sherman williams or a local paint store may put clear coat in a aerosol can.

It's not rocket science.
You DO NOT need a buffer to sand the outside of the lenses. In fact, if you use a DA to sand them and you have no experience, you will likely cause more damage. It's super easy to create pigtails and other buffer marks by not knowing when to change out the sanding discs, how to operate the machine (ie. sanding at an angle). Long story short, just do it by hand. I did mine by hand in an hour both lenses.
Next, you do not need any plastic polish, or any polish at all for that matter if you are sanding and coating them. The Mineral Spirits with the Urethane will not hold up as well as automotive clearcoat. It is better than nothing, but it's not going to be permanent from my experience. It's also very soft and will get etched easily in the summer when you get bug splatter on the coating which will ruin the whole thing and require re-application.
The best and easiest way of doing this is going to be something like 320>400>600>800>1000. After you have done that, wash the lens with dish soap, rinse thoroughly, and do a few prep solvent or IPA alcohol wipedowns. Bring it to a bodyshop and ask them to clearcoat the lens. I am not a painter and don't know the technical terms for some of the products they use, but when I gave my lights to my dad, he said his painter first put some sort of clearcoat base (adhesion promoter) before the actual clearcoat. The clearcoat will fill in your sand marks and stick to the lens better. If you are dead set on using the Spar method, than use the same sanding process and prep. Lay it on very thin....it's not clear in color it's yellowish so if you put it on too thick the lenses will not look crystal clear.
You DO NOT need a buffer to sand the outside of the lenses. In fact, if you use a DA to sand them and you have no experience, you will likely cause more damage. It's super easy to create pigtails and other buffer marks by not knowing when to change out the sanding discs, how to operate the machine (ie. sanding at an angle). Long story short, just do it by hand. I did mine by hand in an hour both lenses.
Next, you do not need any plastic polish, or any polish at all for that matter if you are sanding and coating them. The Mineral Spirits with the Urethane will not hold up as well as automotive clearcoat. It is better than nothing, but it's not going to be permanent from my experience. It's also very soft and will get etched easily in the summer when you get bug splatter on the coating which will ruin the whole thing and require re-application.
The best and easiest way of doing this is going to be something like 320>400>600>800>1000. After you have done that, wash the lens with dish soap, rinse thoroughly, and do a few prep solvent or IPA alcohol wipedowns. Bring it to a bodyshop and ask them to clearcoat the lens. I am not a painter and don't know the technical terms for some of the products they use, but when I gave my lights to my dad, he said his painter first put some sort of clearcoat base (adhesion promoter) before the actual clearcoat. The clearcoat will fill in your sand marks and stick to the lens better. If you are dead set on using the Spar method, than use the same sanding process and prep. Lay it on very thin....it's not clear in color it's yellowish so if you put it on too thick the lenses will not look crystal clear.
I am in the middle of doing them right now. I DID NOT sand with the sander. I am doing them by hand. (Great Save)


The only thing I have done to my headlights that I thought it needed was wetsand at 1500 then 1000. I used a cutting compound with a wool pad, then used a high dollar polish with a foam polishing pad, then waxed. After this they started to leak after about a year on the car. I took them apart and buffed the inside of them using the Motherspower ball and resealed with 100% black silicone and allowed to dry with zip ties. No more leaky, leaky, plus I bought new vent tubes for the bottom. Good luck with your method.
I don't see any vent tubes, perhaps I need them as well. I'll look again.
Thank You.
I'm just starting the DIY lifestyle and I felt I'd better go in a little harder.
(It (3M) sure was calling me lightly from the shelf.)
02-04-13, 11:33 PM
#10
Driver School Candidate

Join Date: Dec 2008
Location: MI
Posts: 6
Likes: 0
Received 0 Likes
on
0 Posts
i wet sanded and polished mine. they look like new. if you keep wax on them and keep them clean you wont need to have a shop clear coat them however its not a bad idea.
if you want to prevent moisture in the lense just pop in a silica packet from any shoe store shoe box lol. i had one that would get moisture in the lense but i poped in some silica packets and no more foggy moisture.
if you want to prevent moisture in the lense just pop in a silica packet from any shoe store shoe box lol. i had one that would get moisture in the lense but i poped in some silica packets and no more foggy moisture.
02-04-13, 11:39 PM
#11
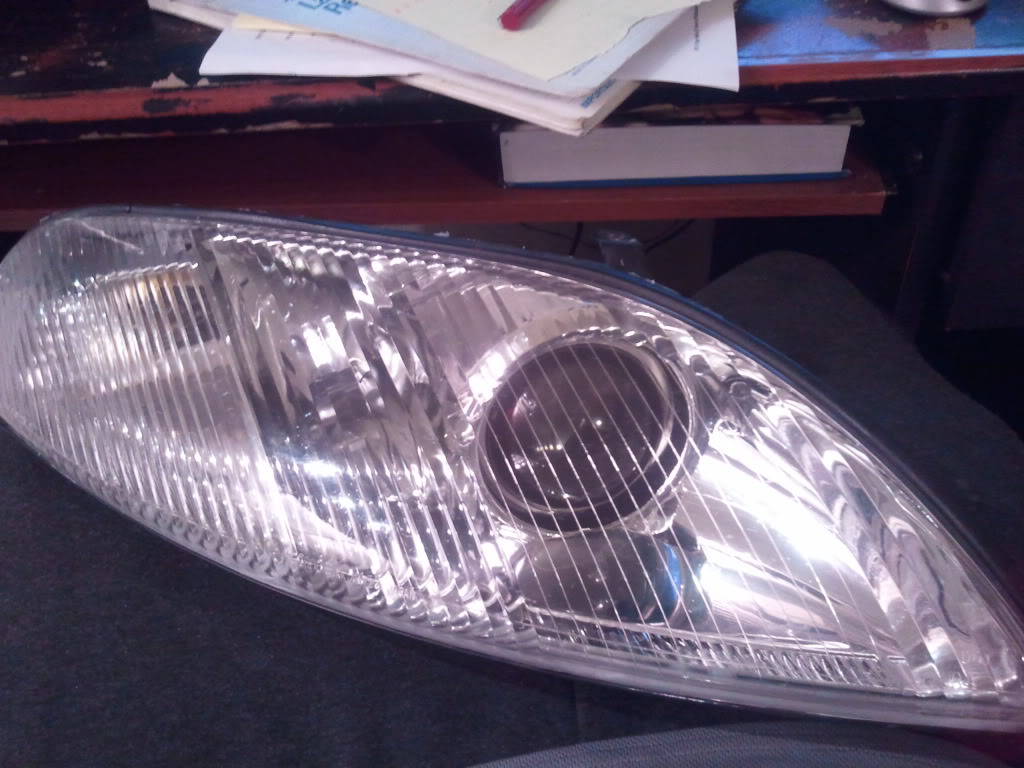
I went slightly obsessive on the 2000 grit, over an hour.
Too late to use the noisy buffer so I hand rubbed some plastx in by hand for a quick preview.
I think they look good already!
Thanks For The Help!
Power Buff tomorrow morning.

Too late to use the noisy buffer so I hand rubbed some plastx in by hand for a quick preview.
I think they look good already!
Thanks For The Help!
Power Buff tomorrow morning.
Last edited by Studiogeek; 02-05-13 at 07:50 AM.


