
Cheap Climate control LCD fix, Steps/Pictures!!!!


You're showing me pics of the original solder bro, I know toyota flux.... but to be straight with ya, you're camera is calling your bluff. That pic is the pic you took before you desoldered it (IMG_3191) and the one you took after you desoldered it above is (IMG_3194).
 Put back together is (IMG_3195).
 Good try though........
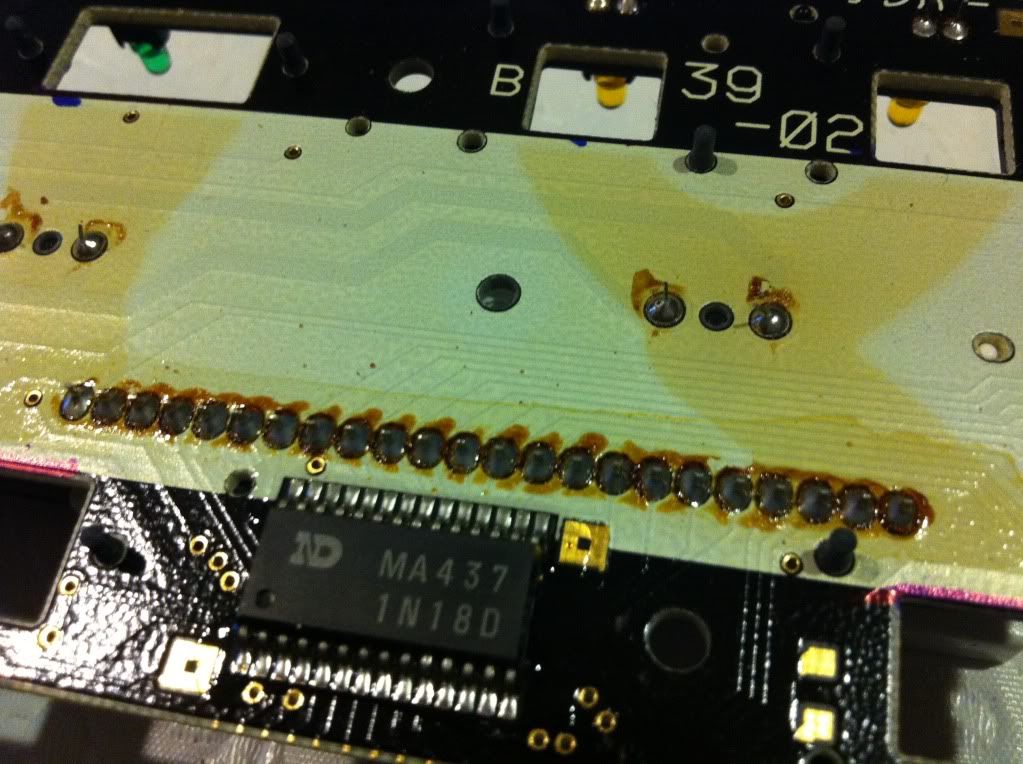
Each side has a connection to each side of the mobo. I've seen people only solder one side and the screen half function, that's why it's important.
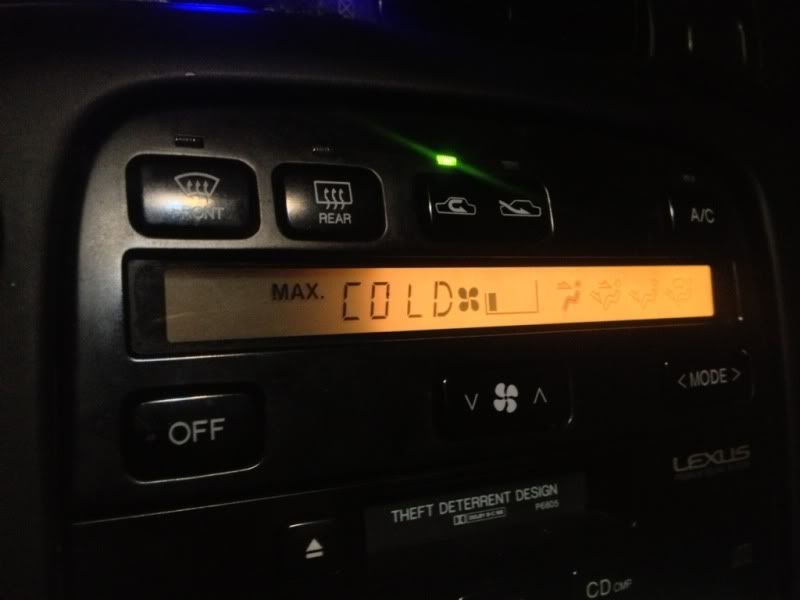
 I'm glad yours is working, and it looks good.
It's nice to get a blackened screen out and a nice fresh one in. I think that is one of the biggest eye sores of the SC's.
Last edited by O. L. T.; Jan 31, 2012 at 06:18 PM.
Thread Starter
Pole Position
Joined: Sep 2011
Posts: 294
Likes: 0
From: NW- federal way
@O. L. T. Ye man i had to be playing the guessing game all the time at what temp is set and where its blowing at. Feels better than burned out one Plus i dont like the backlight of the lcd- theres 3 regular small bulbs installed and im thinking about soldering some led's in there since my speedo is white and everything else is also white
Plus i dont like the backlight of the lcd- theres 3 regular small bulbs installed and im thinking about soldering some led's in there since my speedo is white and everything else is also white
doing this today.
I think as long as your thorough, I dont see how this could be that hard. Plus if you have a desoldering bulb and maybe an extra hand to hold the screen in place, it shouldnt take to long.
I also believe the best plan of attach is to snip off the old screen before desoldering so you dont have to desolder the entire unit at once, you can go prong by prong. Either way will work, i think this would make for a cleaner desolder though.
Last edited by bryan767; Oct 2, 2012 at 07:11 AM.
I bought my LCD over three years ago off of Ebay and it cost 125 shipped to the door. I sent mine off to OLT and he soldered it for me for a measly 40 bucks. I couldn't be so much happier now with the screen being lit and no black anywhere on it.
You did a great job, at the time I decided to something, I thought it was more to it than what I just read on here. Again it looks good and glad it worked out for you.
You did a great job, at the time I decided to something, I thought it was more to it than what I just read on here. Again it looks good and glad it worked out for you.


doing this today.
I think as long as your thorough, I dont see how this could be that hard. Plus if you have a desoldering bulb and maybe an extra hand to hold the screen in place, it shouldnt take to long.
I also believe the best plan of attach is to snip off the old screen before desoldering so you dont have to desolder the entire unit at once, you can go prong by prong. Either way will work, i think this would make for a cleaner desolder though.
I think as long as your thorough, I dont see how this could be that hard. Plus if you have a desoldering bulb and maybe an extra hand to hold the screen in place, it shouldnt take to long.
I also believe the best plan of attach is to snip off the old screen before desoldering so you dont have to desolder the entire unit at once, you can go prong by prong. Either way will work, i think this would make for a cleaner desolder though.
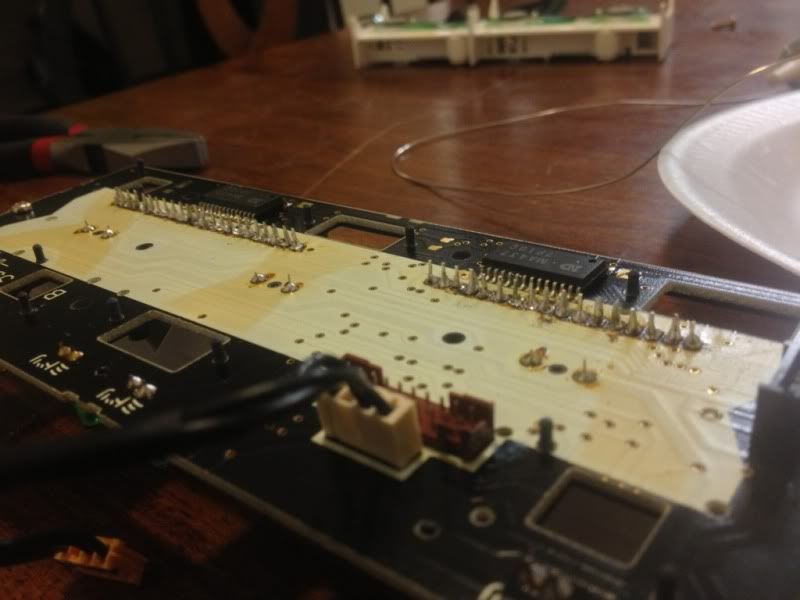
Pretty simple if you have a desoldering iron or a suction bulb. A second person helps a lot so they can hold the board while you get the remaining solder out. I used my method of cutting the pins then desoldering each one. Works a lot better. I held onto one side with a pair of dykes.
Desoldered!
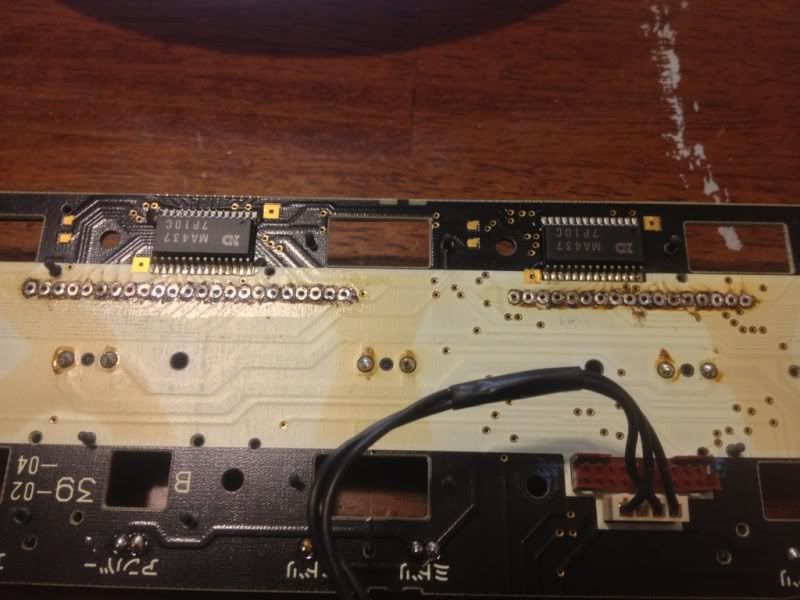
Backside

Resoldered!
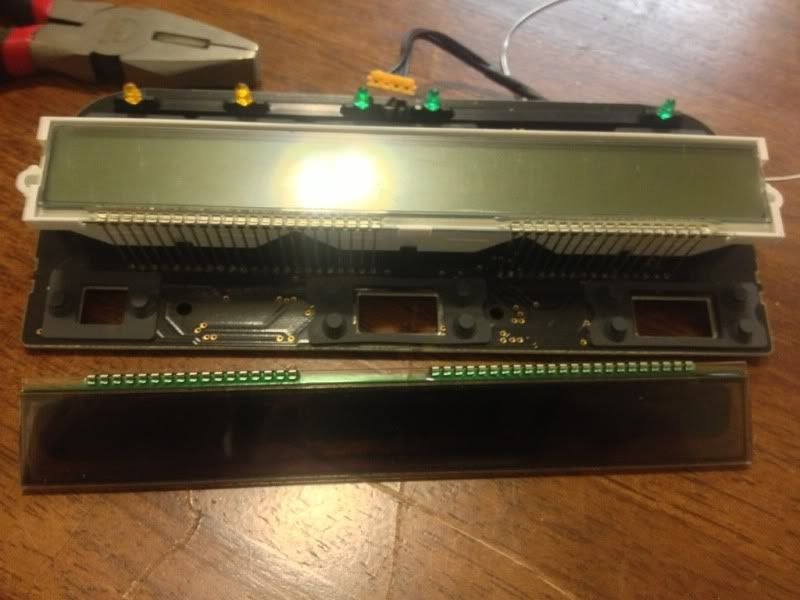
Look how dead this screen was :/
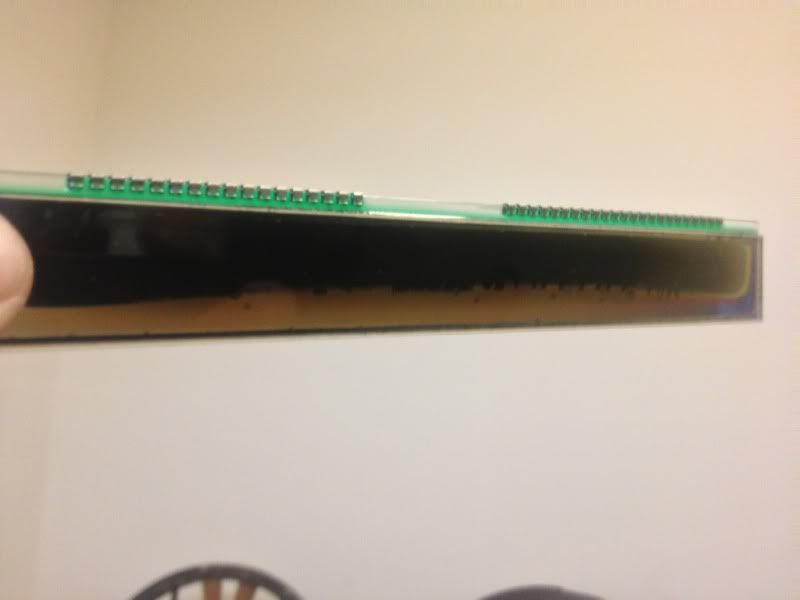
All done. Took about a hour to do. In all honesty, unless you literally know what micro solder is, and implys. I personally wouldn't attempt it yourself. I bought a 15/30watt soldering iron new from RadioShack, that had the finest tip I could find. This wil help you get into the whole of the board to get the heat further down.
Desoldered!
Backside
Resoldered!
Look how dead this screen was :/
All done. Took about a hour to do. In all honesty, unless you literally know what micro solder is, and implys. I personally wouldn't attempt it yourself. I bought a 15/30watt soldering iron new from RadioShack, that had the finest tip I could find. This wil help you get into the whole of the board to get the heat further down.
Last edited by bryan767; Oct 2, 2012 at 04:44 PM.

Thread
Thread Starter
Forum
Replies
Last Post