
Any Mods for the Headlights?


The best upgrade is to seal your stock ones as best you can lol.
I've had my first experience with condensation in one of them. I can't
get the water out. How in the hell do you even remove these headlights?
Sorry to thread jack but I see the top bolt, and checked around with a flashlight
around the sides and stuff. Do you need to remove the front bumper and
fender? I can't find any other bolts to remove in the back so I'm assuming
it's along the side or bottom some where.
My headlights are not quite completed as you can see in this pic. But they are nearly done, and will have all the details finished up within the next couple of weeks.
Fabricated Second Projector
Fabricated Signal Flasher/DOT Compliant Amber Reflector
Audi HID Retrofit
Gloss Black Painted Housing
Fabricated LED's
Supermade Clear Lens cover
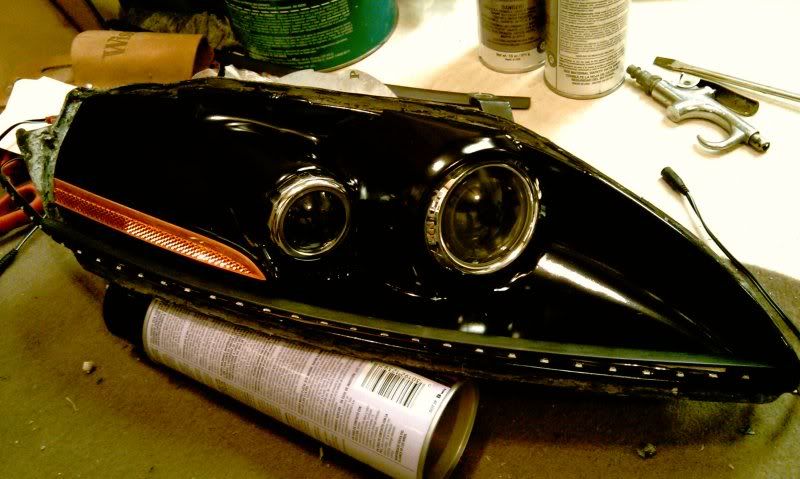
Ryan
Fabricated Second Projector
Fabricated Signal Flasher/DOT Compliant Amber Reflector
Audi HID Retrofit
Gloss Black Painted Housing
Fabricated LED's
Supermade Clear Lens cover
Ryan
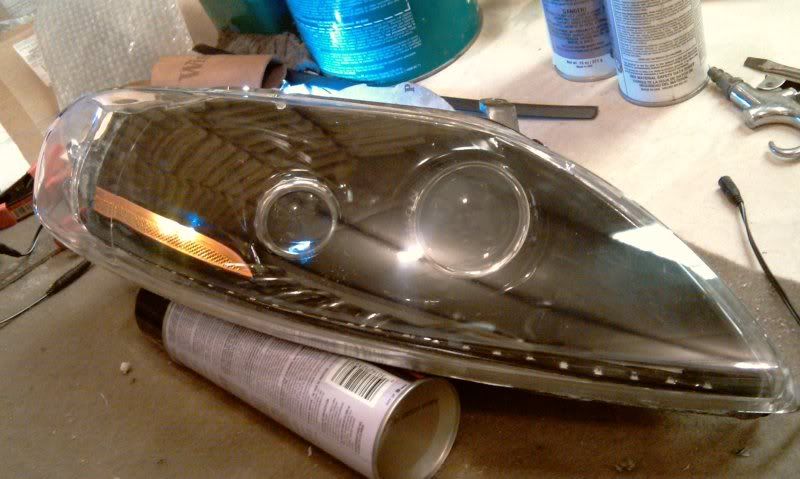
Second, the edges of the clear lenses will be painted an opaque black so that they are not clear as in the pic you see of the Supermade lens.
Also, the Supermade lens does fit very well. So, after the light is completely assembled, and everything glued in place, as well as the rubber moldings attached to the top edge of the headlights, they should look quite good.
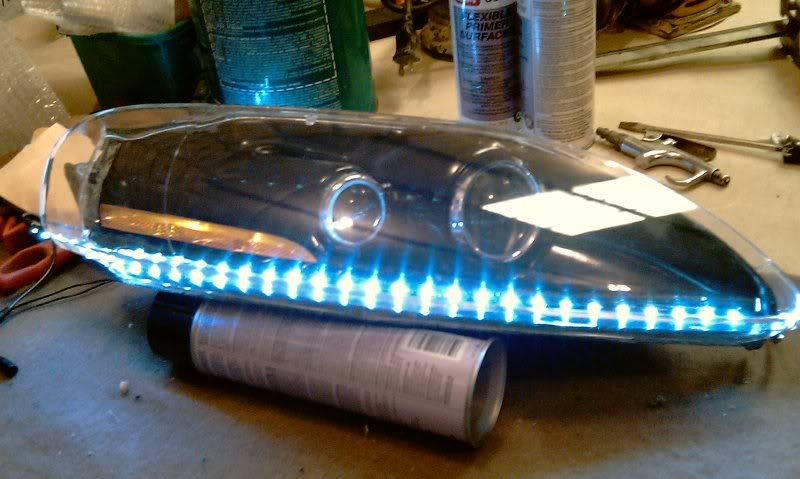
I saw them today...almost done...They look totally BADA$$, IMHO.
Ryan
Ryan
Oh okay cool- wasn't sure if the outside of the housing was modified. Yes, this is going to look just awesome when it's done! I REALLY like the signals. The whole thing is very modern looking and will accent the car well 
The best upgrade is to seal your stock ones as best you can lol.
I've had my first experience with condensation in one of them. I can't
get the water out. How in the hell do you even remove these headlights?
Sorry to thread jack but I see the top bolt, and checked around with a flashlight
around the sides and stuff. Do you need to remove the front bumper and
fender? I can't find any other bolts to remove in the back so I'm assuming
it's along the side or bottom some where.
I've had my first experience with condensation in one of them. I can't
get the water out. How in the hell do you even remove these headlights?
Sorry to thread jack but I see the top bolt, and checked around with a flashlight
around the sides and stuff. Do you need to remove the front bumper and
fender? I can't find any other bolts to remove in the back so I'm assuming
it's along the side or bottom some where.
Ryan

Thread
Thread Starter
Forum
Replies
Last Post
nothomex17
CT 200h Model (2011-2017)
18
Feb 21, 2019 11:05 AM