SC- 1st Gen (1992-2000)
Old 12-12-14, 04:39 PM
How-Tos on this Topic
Last edit by: IB Advertising
See related guides and technical advice from our community experts:

Browse all: Steering and Suspension

Browse all: Tires and Wheels Guide
Print Wikipost

****Official Wheel & Tire Fitment Guide for SC300/SC400****

Thread Tools
 
Search this Thread
 
Old 06-06-10, 10:53 PM
  #2716  
TakiSlice
Rookie
 
TakiSlice's Avatar
 
Join Date: Feb 2009
Location: Florida
Posts: 67
Likes: 0
Received 0 Likes on 0 Posts
Default

Name:  DSC_0682.jpg
Views: 642
Size:  62.9 KB

Name:  DSC_0699-1.jpg
Views: 1469
Size:  119.2 KB

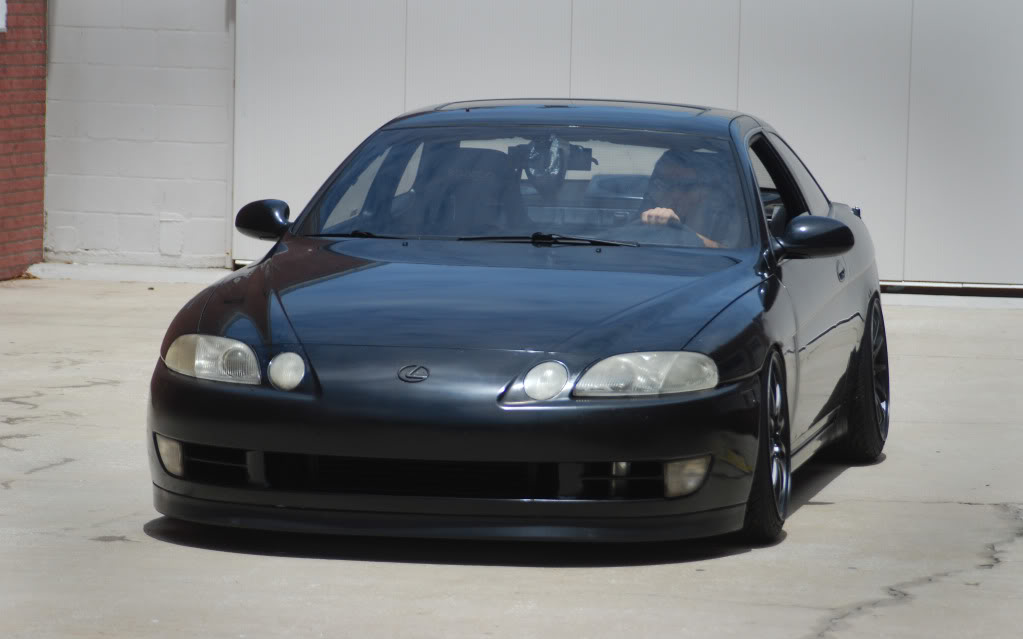
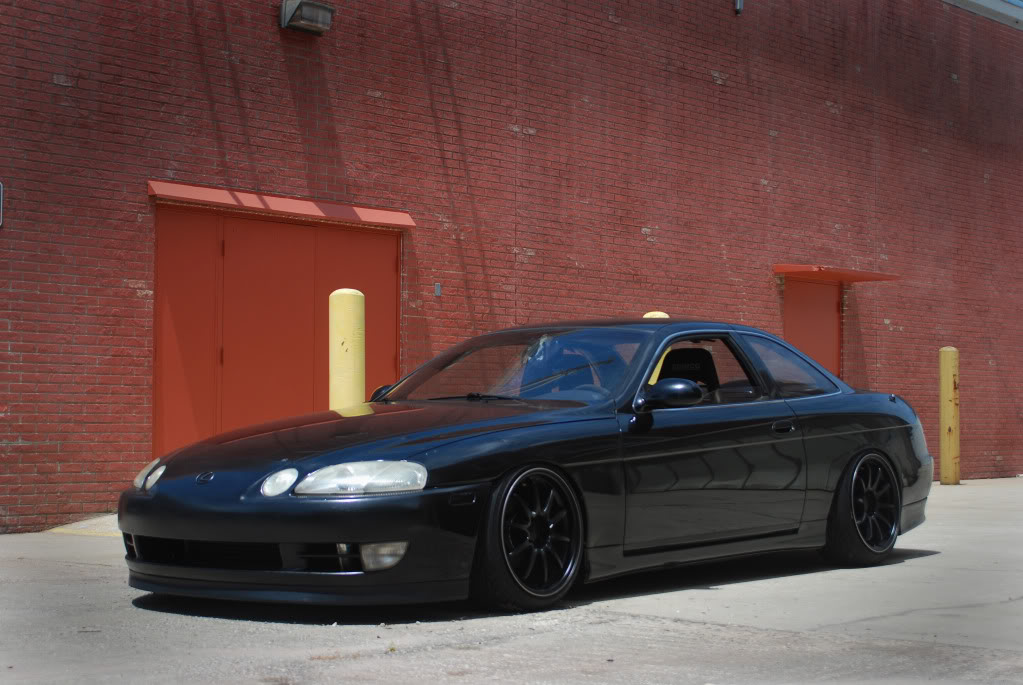
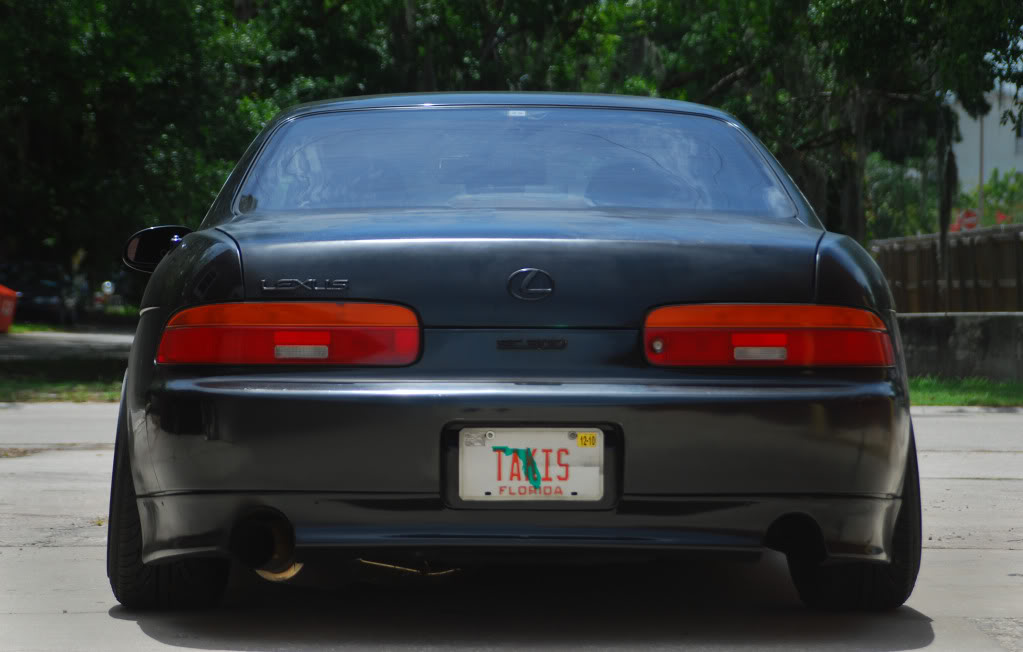
front 18 by 9 et -5
rear 18 by 10 et 5
Old 06-06-10, 11:23 PM
  #2717  
ArodDaLob
Lexus Test Driver
iTrader: (14)
 
ArodDaLob's Avatar
 
Join Date: Jun 2009
Location: CA
Posts: 1,072
Likes: 0
Received 0 Likes on 0 Posts
Default

^that fitment is SPOT on. great job man, looks good
do you know how much camber you're running?
Old 06-06-10, 11:31 PM
  #2718  
TakiSlice
Rookie
 
TakiSlice's Avatar
 
Join Date: Feb 2009
Location: Florida
Posts: 67
Likes: 0
Received 0 Likes on 0 Posts
Default

Originally Posted by ArodDaLob
^that fitment is SPOT on. great job man, looks good
do you know how much camber you're running?
no im not sure, idk if this helps

Name:  DSC_0692.jpg
Views: 658
Size:  77.1 KB
Old 06-07-10, 01:05 AM
  #2719  
Kaydee
Hacked CL to become a Mod
 
Kaydee's Avatar
 
Join Date: Jun 2007
Location: Vancouver >> Hong Kong
Posts: 6,713
Received 9 Likes on 8 Posts
Default

I'm guessing somewhere around 3-4 degrees
Old 06-07-10, 03:39 PM
  #2720  
simplgreen
Pole Position
iTrader: (2)
 
simplgreen's Avatar
 
Join Date: Apr 2009
Location: Nv
Posts: 283
Likes: 0
Received 0 Likes on 0 Posts
Default

Originally Posted by TakiSlice


front 18 by 9 et -5
rear 18 by 10 et 5
car is sick man! what size tires you running?
is that natural camber?
Old 06-07-10, 06:11 PM
  #2721  
SCrollinSD
Pole Position
 
SCrollinSD's Avatar
 
Join Date: Mar 2010
Location: California
Posts: 375
Likes: 0
Received 0 Likes on 0 Posts
Default

^^ looks very much attainable under stock arms, so I'm going to say yes, natural camber.

i agree! that thing is tasty!
Old 06-07-10, 06:14 PM
  #2722  
TakiSlice
Rookie
 
TakiSlice's Avatar
 
Join Date: Feb 2009
Location: Florida
Posts: 67
Likes: 0
Received 0 Likes on 0 Posts
Default

^^

front 18 by 9 et -5 215/40/18
rear 18 by 10 et 5 235/40/18

yeah natural camber, I adjusted it as much as it would let me, with out a camber kit
Old 06-07-10, 07:43 PM
  #2723  
Trevstuh
Lexus Test Driver
 
Trevstuh's Avatar
 
Join Date: Feb 2008
Location: Tx
Posts: 1,089
Likes: 0
Received 0 Likes on 0 Posts
Default

I need to figure out how to adjust the camber bolts,I know about the tie rods but what is the other parts I need to mess with.
Old 06-07-10, 09:02 PM
  #2724  
simplgreen
Pole Position
iTrader: (2)
 
simplgreen's Avatar
 
Join Date: Apr 2009
Location: Nv
Posts: 283
Likes: 0
Received 0 Likes on 0 Posts
Default

Originally Posted by TakiSlice
^^

front 18 by 9 et -5 215/40/18
rear 18 by 10 et 5 235/40/18

yeah natural camber, I adjusted it as much as it would let me, with out a camber kit
do you have pics of the stretch? im changing my rear tires out n i wanted to see how a 235 is stretched.
Old 06-07-10, 10:00 PM
  #2725  
simplgreen
Pole Position
iTrader: (2)
 
simplgreen's Avatar
 
Join Date: Apr 2009
Location: Nv
Posts: 283
Likes: 0
Received 0 Likes on 0 Posts
Default

oh n where did you relocate your hood latch cable?
Old 06-07-10, 10:12 PM
  #2726  
TakiSlice
Rookie
 
TakiSlice's Avatar
 
Join Date: Feb 2009
Location: Florida
Posts: 67
Likes: 0
Received 0 Likes on 0 Posts
Default

^^
no I dont have any pics of the 235 stretch, I had to relocate the hood latch through the top I the wheel well in the engine bay.
Old 06-07-10, 10:38 PM
  #2727  
simplgreen
Pole Position
iTrader: (2)
 
simplgreen's Avatar
 
Join Date: Apr 2009
Location: Nv
Posts: 283
Likes: 0
Received 0 Likes on 0 Posts
Default

so you hooked it from the latch?
Old 06-07-10, 10:53 PM
  #2728  
SCrollinSD
Pole Position
 
SCrollinSD's Avatar
 
Join Date: Mar 2010
Location: California
Posts: 375
Likes: 0
Received 0 Likes on 0 Posts
Default

^^ if it's anything like on a DC chassis, you just unhook it from the latch in the kicker panel, feed the wire back through all the way out, then re-route it into the firewall, cut a slit in one of the rubber couplings, and re-attatch it.

at least i think that's what you're talking about? hood-cable relocation right?
Old 06-08-10, 10:25 AM
  #2729  
simplgreen
Pole Position
iTrader: (2)
 
simplgreen's Avatar
 
Join Date: Apr 2009
Location: Nv
Posts: 283
Likes: 0
Received 0 Likes on 0 Posts
Default

Originally Posted by SCrollinSD
^^ if it's anything like on a DC chassis, you just unhook it from the latch in the kicker panel, feed the wire back through all the way out, then re-route it into the firewall, cut a slit in one of the rubber couplings, and re-attatch it.

at least i think that's what you're talking about? hood-cable relocation right?
yea, i gotta give that a try. cus my wheel ate it at one point n i couldnt open the hood. now its sandwiched in between the roll of my front fender still kinda unsure about it being there.
Old 06-08-10, 10:50 AM
  #2730  
SCrollinSD
Pole Position
 
SCrollinSD's Avatar
 
Join Date: Mar 2010
Location: California
Posts: 375
Likes: 0
Received 0 Likes on 0 Posts
Default

well the good thing is that it's just a cord. so at least it's not like the stock wiring that's above the fender liner (if you havent relocated that yet do that as well).

it takes all of ten or fifteen minutes to do the hood cable.


Quick Reply: ****Official Wheel & Tire Fitment Guide for SC300/SC400****


All times are GMT -7. The time now is 01:51 AM.