The complete headlight HOW TO clean DIY + projector refinishing
 10-16-05, 12:24 AM
#16
Keeper of the light
Thread Starter
iTrader: (17)
It's all good Goose 
Now onto resealing. Take some 100% pure black silicone (I used ace hardware brand - $6 per tube). You will set the reflector into the face glass and run a bead of silicone around it to keep it in place.
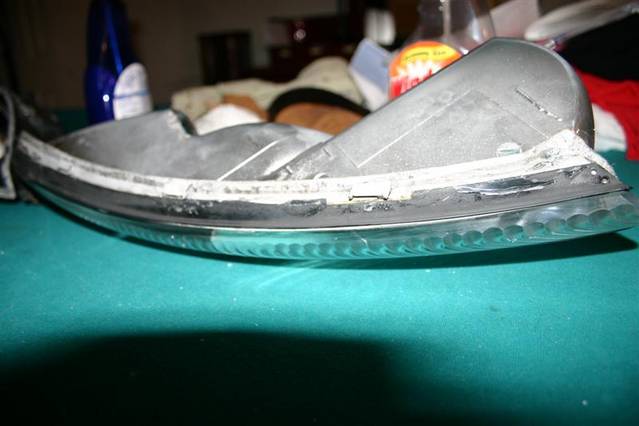
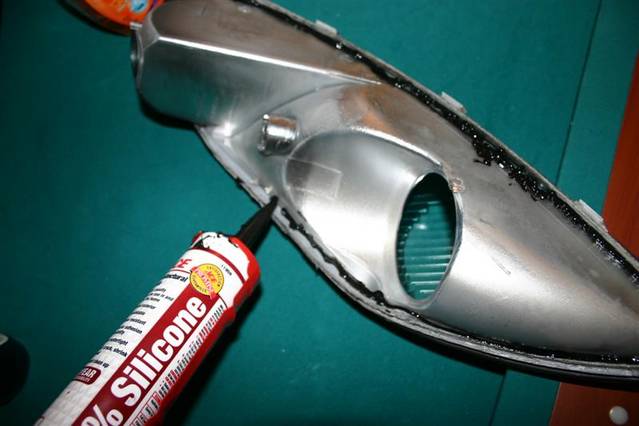
Then you'll do the same thing to the black headlight housing. Time is of the essence here guy's..... this stuff dries fairly quick.
Now onto resealing. Take some 100% pure black silicone (I used ace hardware brand - $6 per tube). You will set the reflector into the face glass and run a bead of silicone around it to keep it in place.
Then you'll do the same thing to the black headlight housing. Time is of the essence here guy's..... this stuff dries fairly quick.
 10-16-05, 12:26 AM
#17
Keeper of the light
Thread Starter
iTrader: (17)
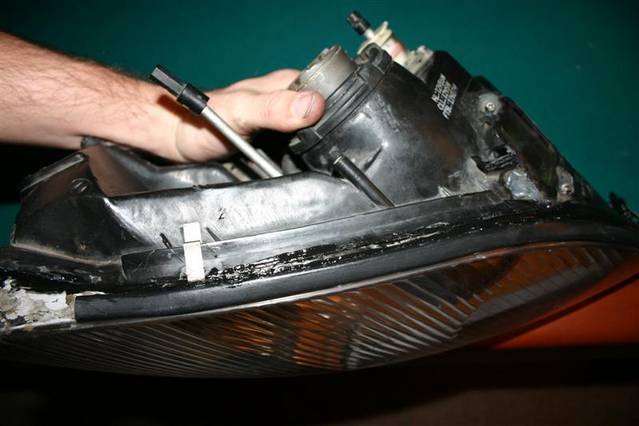
Now put the two halves together and put the factory clamps back on that hold it together.
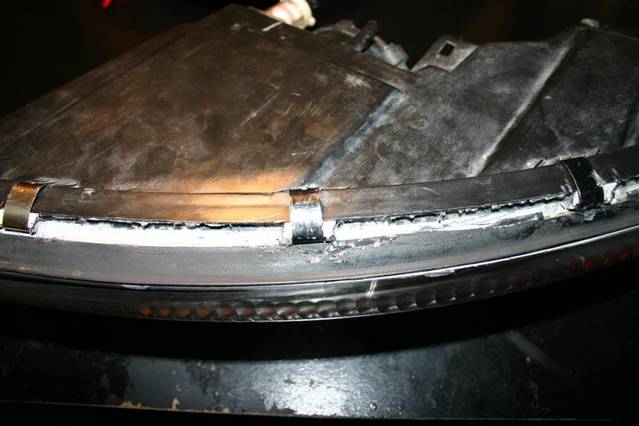
Run another bead of silicone around the outside and rub it smooth to make certain the seal is good.
Run another bead of silicone around the outside and rub it smooth to make certain the seal is good.
10-16-05, 12:31 AM
#18
Keeper of the light
Thread Starter
iTrader: (17)
YOU are DONE!
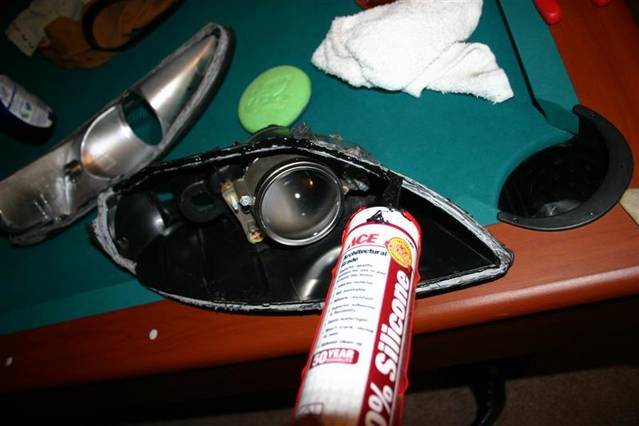
NOW let's look through the glass at that projector
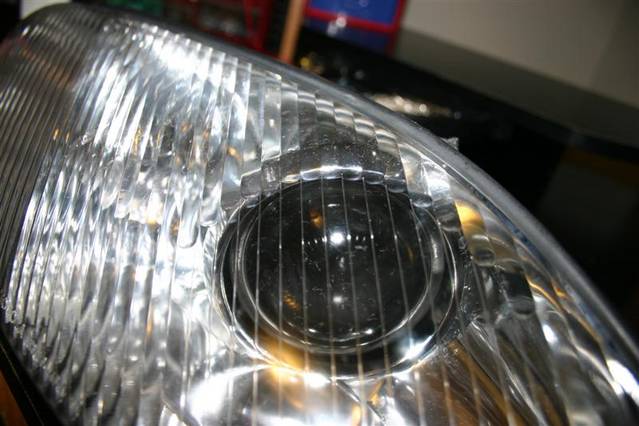
I'll stick a air hose in there tommorrow and remove the excess lint from the towel. Now you have completed the steps to a fresh new set of headlights with clean projectors. Enjoy your new found cut off line in your headlights and extra bright output!
Side note: once you are assembled, there are two tubes on the back that help vent the assembly. check to see if there is a filter stuck in there in each tube and if not until you can get a sponge and cut it up, just stick some cotton in there to act as a filter.
NOW let's look through the glass at that projector
I'll stick a air hose in there tommorrow and remove the excess lint from the towel. Now you have completed the steps to a fresh new set of headlights with clean projectors. Enjoy your new found cut off line in your headlights and extra bright output!
Side note: once you are assembled, there are two tubes on the back that help vent the assembly. check to see if there is a filter stuck in there in each tube and if not until you can get a sponge and cut it up, just stick some cotton in there to act as a filter.
10-16-05, 12:40 AM
#20
Lexus Test Driver
Join Date: Jun 2004
Location: Florida
Posts: 1,074
Likes: 0
Received 0 Likes
on
0 Posts
A little off topic but the piece below. Is that the actual bulb or is the bulb seated in that. The clear part on the end of mine is melted or something from what I can see outside of the headlights.

10-16-05, 12:45 AM
#21
 10-16-05, 12:49 AM
#23
Lexus Test Driver
Join Date: Jun 2004
Location: Florida
Posts: 1,074
Likes: 0
Received 0 Likes
on
0 Posts
Originally Posted by O. L. T.
That's just a cover. Odd looking one too. Everything on this dang car from the city light cover to the shifter looks like a...............
10-16-05, 12:51 AM
#24
Keeper of the light
Thread Starter
iTrader: (17)
I wanted to take advantage of having a DSLR Digital Rebel to do as many DIY's as I can so we can begin to have good pics with each DIY we have.
On a side note, This may be one of the few cars that do not depend on the chrome headlight housing to produce light. Once it comes out the projector it fires directly into the lens and the only thing the chrome seems to effect is the intensity of the city light's ability to light the housing. SOOOOOOOO if you wanna paint the chrome black, go right ahead.
On a side note, This may be one of the few cars that do not depend on the chrome headlight housing to produce light. Once it comes out the projector it fires directly into the lens and the only thing the chrome seems to effect is the intensity of the city light's ability to light the housing.
SOOOOOOOO if you wanna paint the chrome black, go right ahead.
Last edited by O. L. T.; 10-16-05 at 01:06 AM.
10-16-05, 12:51 AM
#25
Keeper of the light
Thread Starter
iTrader: (17)
Originally Posted by boobstar
So if that cover is melted or whatever. How can I replace it? Or should I just cut that part off???
 10-16-05, 12:54 AM
#26
Originally Posted by O. L. T.
I wanted to take advantage of having an DSLR Digital Rebel to do as many DIY's as I can so we can begin to have good pics with each DIY we have.
On a side note, This may be one of the few cars that do not depend on the chrome headlight housing to produce light. Once it comes out the projector it fires directly into the lens and the only thing the chrome seems to effect is the intensity of the city light's ability to light the housing. SOOOOOOOO if you wanna paint the chrome black, go right ahead.
On a side note, This may be one of the few cars that do not depend on the chrome headlight housing to produce light. Once it comes out the projector it fires directly into the lens and the only thing the chrome seems to effect is the intensity of the city light's ability to light the housing.
SOOOOOOOO if you wanna paint the chrome black, go right ahead.
10-16-05, 02:42 AM
#27
Originally Posted by O. L. T.
That's just a cover. Odd looking one too. Everything on this dang car from the city light cover to the shifter looks like a...............


 10-16-05, 06:31 AM
#29
Lexus Test Driver
Holy good writeup batman  Nice Job OLT
Can someone tell me what grit sandpaper to use to sand down the vertical lines in the headlights? Also is there anything else that is involved with sanding down those lines other than just using sandpaper? If I open the headlights to clean my projector (which looks a lot like OLT's did, even though my headlights are barely a year and half old) I want to do the sanding all at once, rather than reopen them later.
Nice Job OLT Can someone tell me what grit sandpaper to use to sand down the vertical lines in the headlights? Also is there anything else that is involved with sanding down those lines other than just using sandpaper? If I open the headlights to clean my projector (which looks a lot like OLT's did, even though my headlights are barely a year and half old) I want to do the sanding all at once, rather than reopen them later.
