*MERGED THREADS*: Headlight Condensation includes DIY instructions (See Post #19)


 03-20-09, 04:29 PM
#19

Finally tackled the head lamp condensation. Printed the bumper and head lamp removal from the manual. Pretty straightforward.
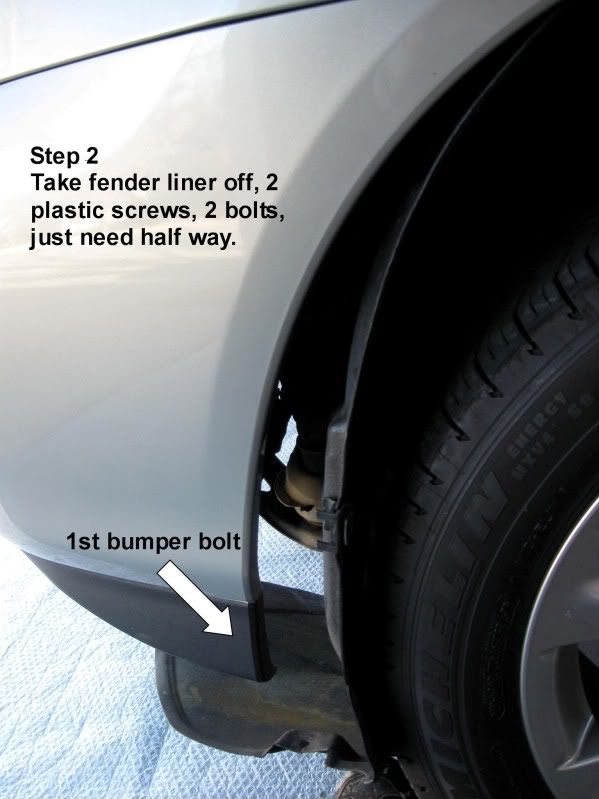
Note: You do not need to remove the whole fender liner, just half way, you just want to access the bolt and to unclaw the bumper. You do not need to remove the whole bumper, just the side you want to work on.
Here's the DIY:
Step 1: Remove Engine Cover 1, same cover when you change your filter.
Step 2: Remove 2 bumper bolts, 3 plastic snaps. Remove fender liner.
03-20-09, 04:31 PM
#20
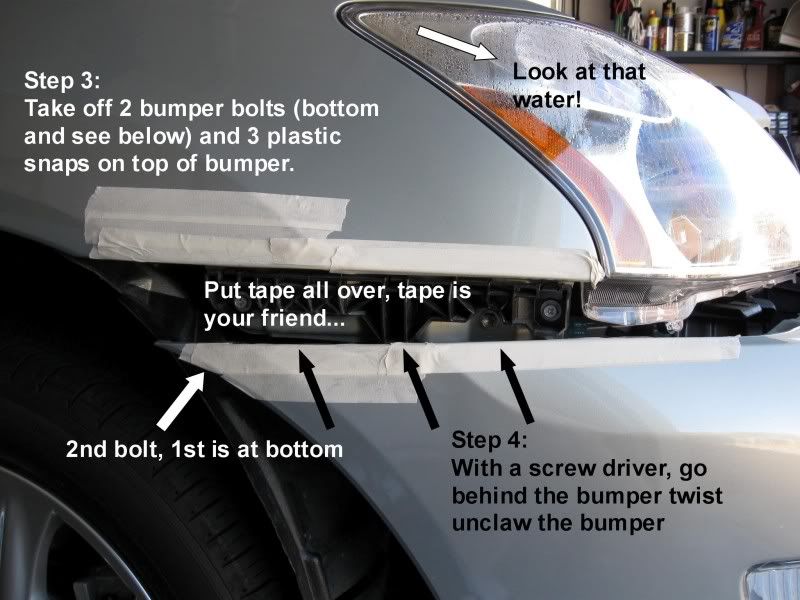
Step 3 and 4:
03-20-09, 04:33 PM
#21
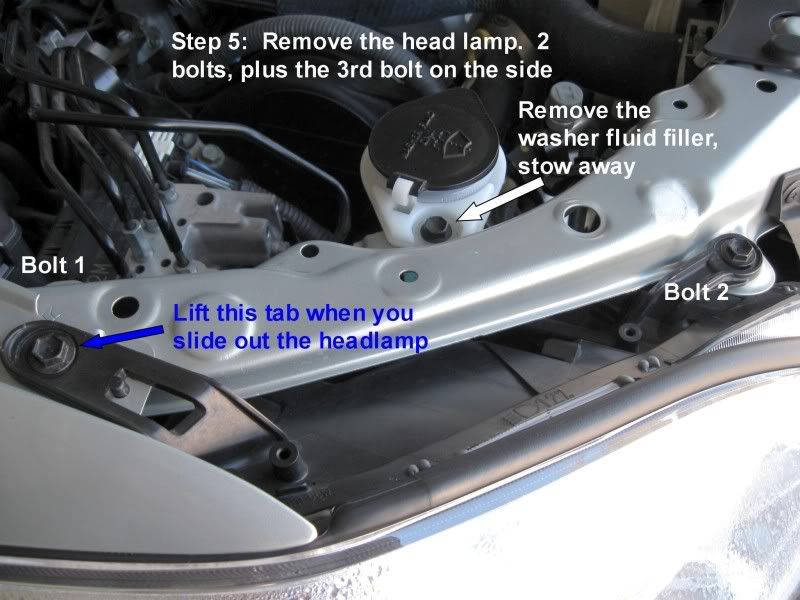
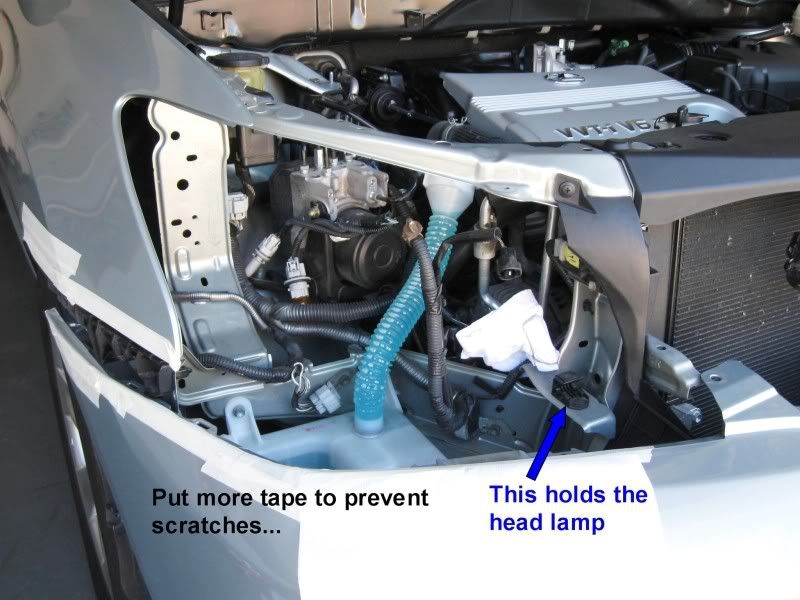
Step 4.5: Remove all connectors.

Step 5:
3rd bolt:
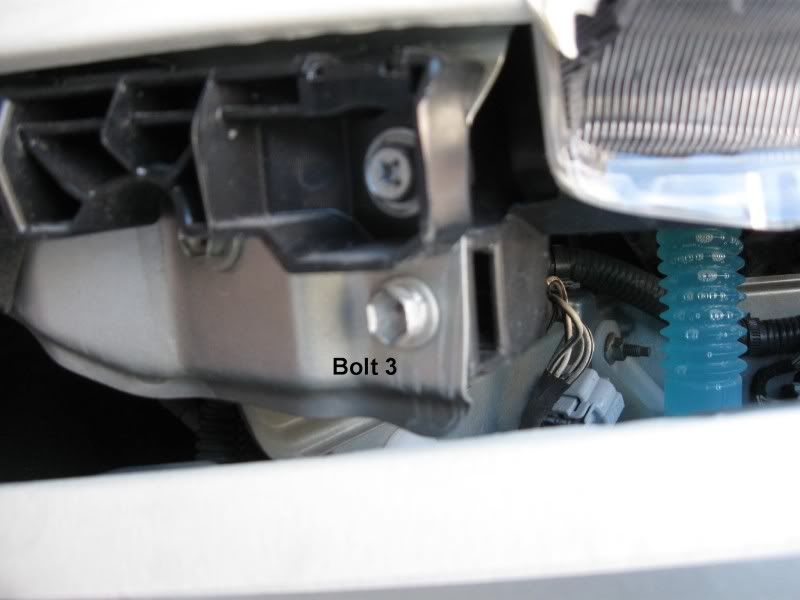
Step 5:
3rd bolt:
Last edited by mandyfig; 03-20-09 at 04:47 PM.
03-20-09, 04:34 PM
#22
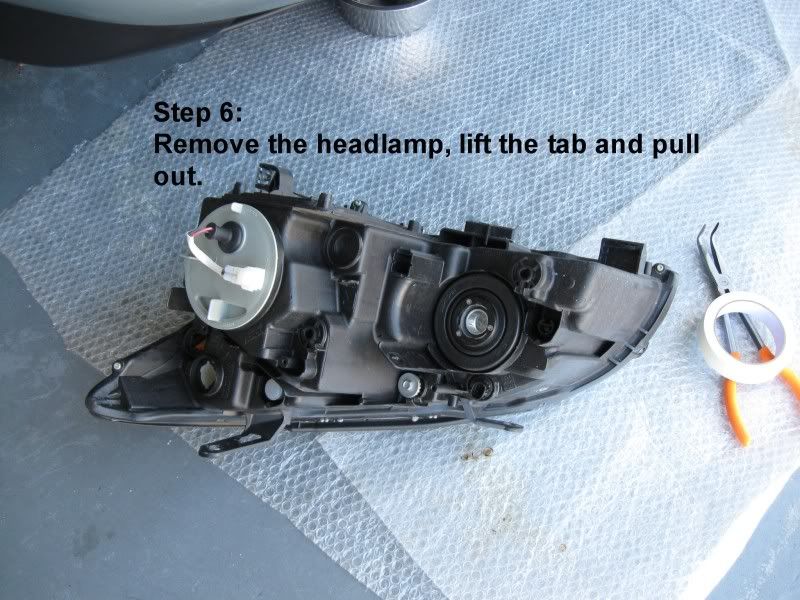
Step 6:
03-20-09, 04:36 PM
#23
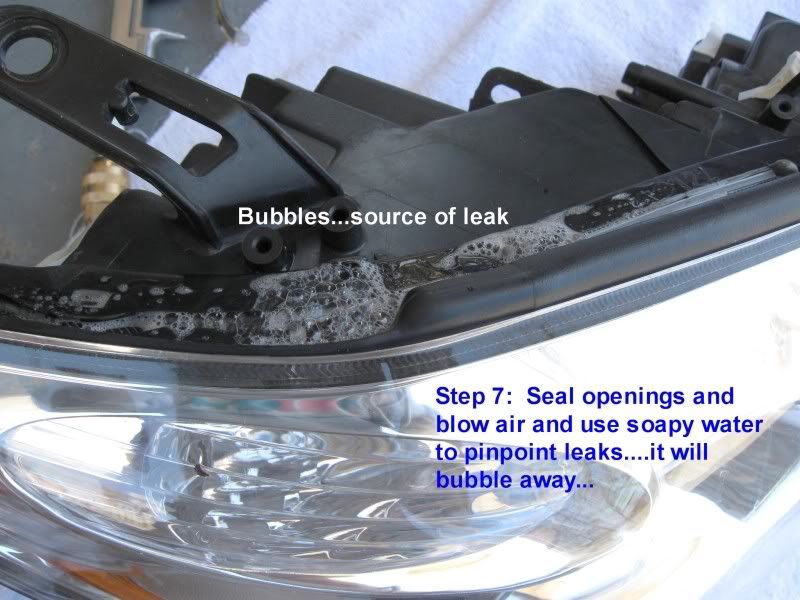
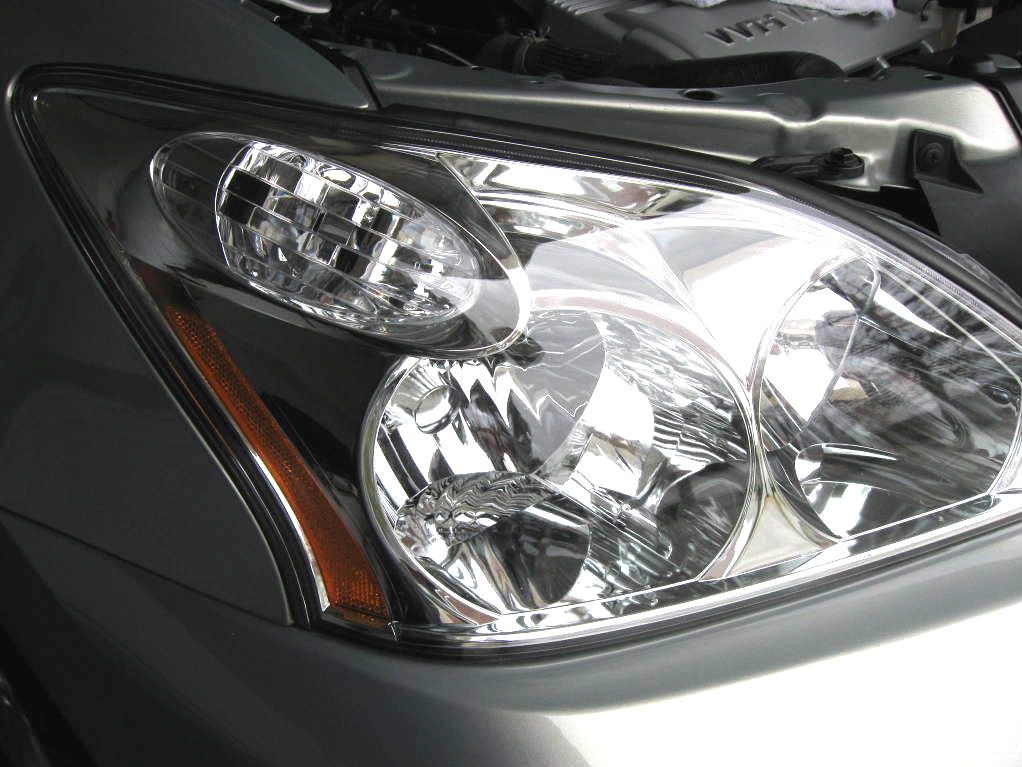
Step 7: Trace the source of the leak.
Step 8: Seal and re-assemble!
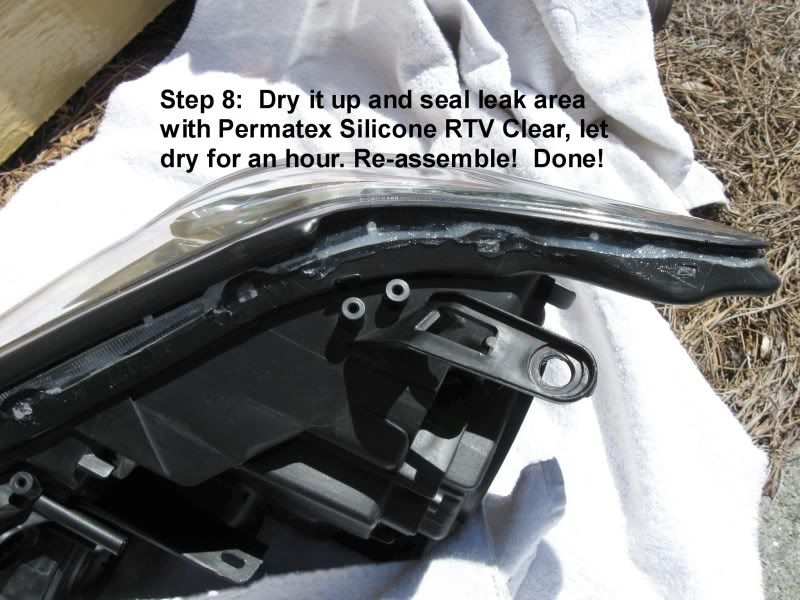
Step 8: Seal and re-assemble!
03-20-09, 04:37 PM
#24
Final step: Re-assemble the head lamp, connectors, bulbs. The bumper, fender liner and washer fluid filler.
Done!
Done!
Last edited by mandyfig; 03-20-09 at 04:42 PM.
The following users liked this post:
spinellib (07-06-19)
03-20-09, 04:42 PM
#25
Mods....sticky?
03-20-09, 05:10 PM
#26
Lexus Test Driver

Join Date: Jun 2008
Location: Ca
Posts: 1,431
Likes: 0
Received 0 Likes
on
0 Posts
great work, i have an LS and i think the bass from my subs has ruined the seal in my tail lights.. they have some condensation, but i'll be using the same method.. thanks!
edit: sorry, could you explain step 7 further? you pour the soapy water over the assembly and where it bubbles that's where the leak is?
edit: sorry, could you explain step 7 further? you pour the soapy water over the assembly and where it bubbles that's where the leak is?
03-21-09, 04:56 AM
#27
Yes, use soapy water or the bubble maker toy. You must have access to air. I taped all the holes and added air pressure. The leak area/s will make the bubbles.
03-26-09, 11:27 AM
#28
Update: After 2 days of heavy rain here in ATL, the head lamp is holding up, no condensation so far....keeping fingers crossed!
03-28-09, 06:13 AM
#29
4 days of rain...not a hint of condensation! And I was shopping for a new head lamp already!
