When you click on links to various merchants on this site and make a purchase, this can result in this site earning a commission. Affiliate programs and affiliations include, but are not limited to, the eBay Partner Network.
I wish Lexus would look at stuff like this and realize they messed up by removing it. Or more people complain..lol. I don't think they sell enough of the model honestly though for people to even notice. I know last year I was only one of the 293 RCF's sold in the USA. I'd have to get numbers for the rest of the RC line.
You can really see yours during the day time! What do you think at night? Too bright, just right..etc? I noticed that they don't seem bright to me at all and it isn't a strain of being blinded by them in the dark.
-Nigel
iPhone 12 Pro takes really nice pictures - especially at dawn lol. They are not too bright at night. Honestly, I like them the way they are. It would be cool for the rare occasion to be able to dim them down or even change their color - but they are sick and add such a nice dimension to the car. And for sure one of my easier mods. You really did help in making this such an easy project.
In terms of having second option. Ambient lighting turning on with the headlights or in the auto mode meaning. If you have the switch in the auto mode and it gets dark your interior lights come on when your headlights do and also the ambient light will come on. They can mainly be turned on or off if you take it out of auto mode or manually put it into the headlight mode above auto (I hope that makes sense). In layman's terms the ambient lighting will come on just like the normal lighting in the car when the headlights come on so you can see them at night, during the day when the headlights are off you won't see the interior lighting or the ambient lighting because they're not turned on.
It's actually very simple I have already probed all the wires in the harness so I already know which wires turn live whenever the headlights turn on. I'll list pictures below but it is the thicker green wire I believe that is only on the one side of the driver's harness switch. (There's more than one green wire but the other green wires I believe are signal wires and they're much thinner you can't miss this thick green wire on the other side of the plug). And the ground is the white wire with black stripe. (I believe above I said it was a black wire with white stripe that is incorrect as you can see in the picture, I wasn't looking when I made the post I just assumed from memory, but I had it backwards..lol)
I can take pictures of how to spice into the wires. It's not a too difficult job and you can go about it many ways. Most shops will probably just use those tap connectors and then wrap it with electrical tape and call it a day. I prefer not to use those type of connectors because they normally fail and or with a vibration of a car they either start to wear away at the wire. I keep my cars for at least 10 years I prefer not to have the car catch on fire.
I will either do two things. First method would be cutting the wire completely in half and then attaching the harness wire onto it and resoldering the wire back together. That way it is one complete wire in a sense and I can completely cover the solder joint in one piece of heat shrink tubing. After that, I would normally wrap it with either the electrical tape or the felt type electrical tape from the factory giving it an OEM appearance look and feel.
The second way is slightly stripping away the insulation from that same wire (if you don't go with method one) and wrapping and soldering the wire around it. This is the least evasive however you cannot put heat shrink tubing on it because there's no way to slide the heat shrink over it. In this method you would use electrical tape to wrap around the solder joint and then you could then use electrical tape or the felt tape around the entire harness again. I did it the first method only because if you pull back all the electrical tape and felt tape you still have heat shrink tubing covering the solder joint which to me is the proper way of doing it. Zero way of wiring getting rubbed through or having a bear solder joint. You don't want bear wires touching metal obviously that's how a car catches fire..lol. Some people just are not comfortable cutting wires in half and I don't blame them. I've had the car for less than a month and I already cut some wires to do some things but you never know unless you took everything apart. Everything I've done looks completely OEM. In fact I dare say if someone removed my door panel and saw the harness they would think that it just came from the factory like that. It doesn't look janky in the least or like some backyard mechanic splice and wires together using those tap lock connectors and called it a day.
Those part numbers you listed are correct and as you can see they are expensive AF! There was no way I wanted to spend $600 on something not knowing if it was even going to work. It would have been a complete kick in the nuts buying those, removing my door panels only to find out that there was no removable insert and the door panels were completely changed. Tere'd be no way of even returning the modules since it's an electrical part, and I doubt if you tried to sell them here on the forum anyone would buy them honestly, not at that cost. I even specifically looked on eBay if I could find just the LED module thinking "oh I'm sure people take these off and sell them because they know what they are". The fact is they aren't, buy they're selling the entire door panel. You can buy the entire door panel way cheaper than just buying the LED module which is crazy. You could in theory even buy the door panel if it's in any decent condition, remove the LED module, sell the door panel and you actually make out in the deal. I thought about that for the first panel, since it was in such pristine condition when I got it from eBay but I just don't have the time to list things and wait for them to sell, etc.
I have to go back to my passenger door on Monday remove the wire that's connected to the pink and attach it to that white wire with a black stripe and then that will come on when the headlights come on. Shouldn't be a hard fix honestly since I already know which wires and what needs to be corrected. I just wish I didn't have to do that I'd love to have them dim with the rest of lights but if it's causing a small quirk then it's not worth it. At first all I wanted was ambient lighting to turn on and off with the interior lights and I accomplished this the first time but then I kept probing and when I found the dimming feature I was like oh this would be nice. I'm bummed but at the same time I shouldn't be because I had no ambient lighting at all now I will have ambient lighting. and in fact when you read the forums in Facebook most people want the ambient lighting to stay at the bright setting all the time rather than dimming down to about 50% and being hardly able to see it at night. These aren't bright even in the bright mode but I think I will enjoy having them stay at their normal brightness since the rest of the interior lights are brighter than these by far especially the gauge cluster. so I'm actually getting a feature that most people want that don't have but they could change it if they wanted to and then they could also have it stay at the single brightness all the time.
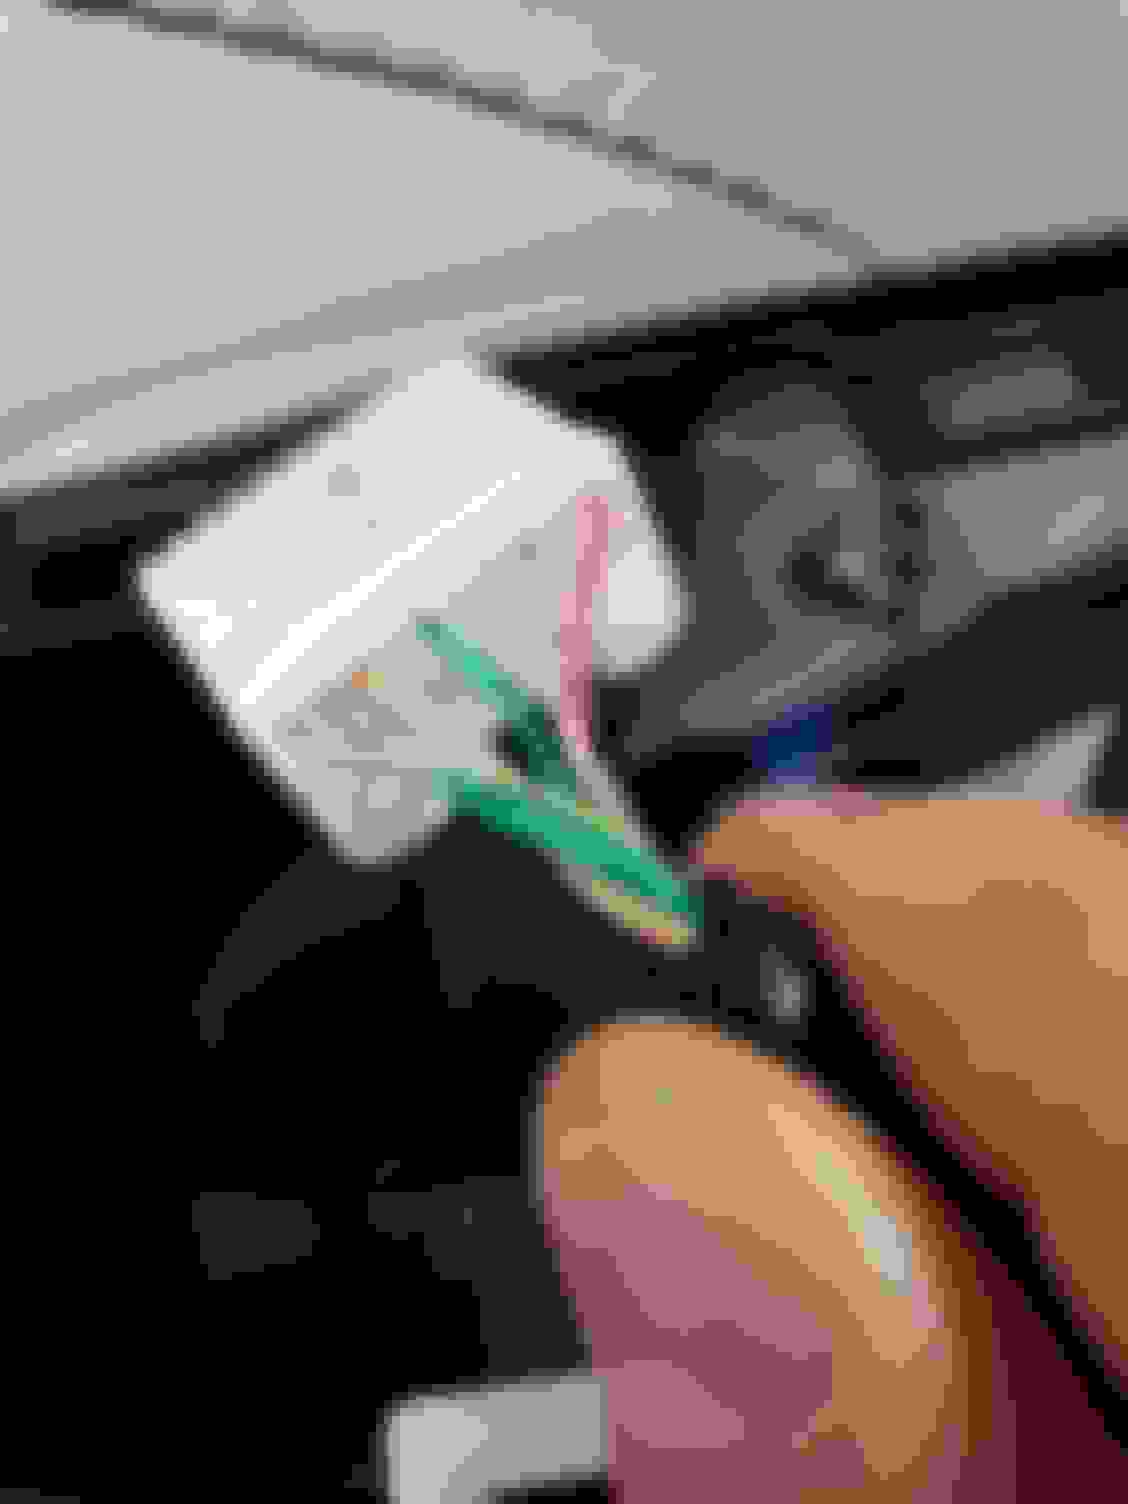
Here are some pictures that I have.
Here is the window switch connector on the driver side. On the top row the second wire on the left is the ground. That pinkish wire to the right of the ground is the dimming wire. This is what I initially had tapped and wish it would work however it's creating interference making the clock come on when the car is off. Such a bummer because ideally this is the wire that you would be tapping to get the cool dimming feature. Just a little bit closer picture second wire top left row. White wire with black stripe is the ground. This is the same connector except turn so that you can see the other side. Here you will see the thicker green wire notice it's the only wire on this side. This is the 12-volt wire that will become live when you have your headlights on. Disappear to be the same wires going out to the mirror which I can assume is probably powering the auto dim feature on the driver side mirror I have not probe these yet I'm only showing the colors but these colors match the colors as well in the harness. I can post more information once I probe these as well so this would be also be a possible tap point if you did not want to have to undo some electrical tape. This is the part number on the driver's side. LED module.
-Nigel
Hi, I�m currently doing this to my RC, following every step and I have completed it. I tapped int9 the thicker ground and thick green cable coming out of the door like you did. My ambient lighting is not turning off with headlights off or with car completely off. It�s just always on no matter what position the headlights are at. Can you show which wires you tapped into again? I might have got lost looking at all these replies.
Those are the wires you want to tap. Make sure you are taking a multimeter to verify the correct wires being tapped. This is as simple as probing the wires, there should be 0 volts with the headlights off. Then when you turn the headlights on you will see your meter read 12v. If you don't see this you tapped the incorrect wires.
Looks like from your other threads you are having issues with the ambient lighting from not turning on, and now it's constantly on... you might have something else going on TBH. I'd sort that first before trying to bypass/add something. This is for 2020+, but I can assume most if not all of the wiring is going to be the same for previous years with the exception of having another wire that is for the ambient lighting. IE: When you are in park the ambient door lighting is on and bright, but when you put it in drive it dims down 50%. Where as the 2020+ don't have any wiring for the ambient lighting, so we tapped off existing wiring.
-Nigel
Got it. Works perfect now. Thank you.
Last edited by Is200tieu; Oct 26, 2021 at 08:46 PM.
Those are the wires you want to tap. Make sure you are taking a multimeter to verify the correct wires being tapped. This is as simple as probing the wires, there should be 0 volts with the headlights off. Then when you turn the headlights on you will see your meter read 12v. If you don't see this you tapped the incorrect wires.
Looks like from your other threads you are having issues with the ambient lighting from not turning on, and now it's constantly on... you might have something else going on TBH. I'd sort that first before trying to bypass/add something. This is for 2020+, but I can assume most if not all of the wiring is going to be the same for previous years with the exception of having another wire that is for the ambient lighting. IE: When you are in park the ambient door lighting is on and bright, but when you put it in drive it dims down 50%. Where as the 2020+ don't have any wiring for the ambient lighting, so we tapped off existing wiring.
-Nigel
Okay slight dilemma,
driver side worked flawlessly, the ambient would turn on and off with headlights as I wanted.
I then moved on to the passenger side and tapped into the same wires, did not work, the ambient would not turn on but I knew it works because I went and tested it to make sure. I tried it one more time and now the climate control lights, window switch light, drive mode selector and every interior backlight doesn�t work anymore.
Did you probe/verify the passenger side wiring? Again, you want to test to make sure 12v comes on when the headlights are on and when the headlights are off there should be no reading. From what you described it sounds like you blew a fuse. I did this (accidently touched the wrong wife with a 12v source probing things) and freaked out thinking that I fried something on my new car, turns out it was just the fuse..lol. Look under the driver foot well and you will see a bunch of fuses. Check to see which one is blown and replace. More than likely you either shorted something or touched a wire where it shouldn't have been and that's what cause the fuse to blow.