When you click on links to various merchants on this site and make a purchase, this can result in this site earning a commission. Affiliate programs and affiliations include, but are not limited to, the eBay Partner Network.
Ordered headers before working out the steering linkage to the rack? Or did you already get that all worked out?
I thought the hooker manifolds would clear the steering shaft but they actually interfere by about an inch. I ordered 2 new universal joins and some dd steering shaft and I think by changing the angles a little I should be able to clear. Part will be here either tomorrow or Friday.
Coming along VERY nicely!!! Do you plan to dress up the engine with nice shiny or colored parts?
No plans right now. I purposely stuck with mostly black and silver to see how factory I could keep it looking. I'll see how I am feeling as the build progresses and I start bolting on the outer engine accessories.
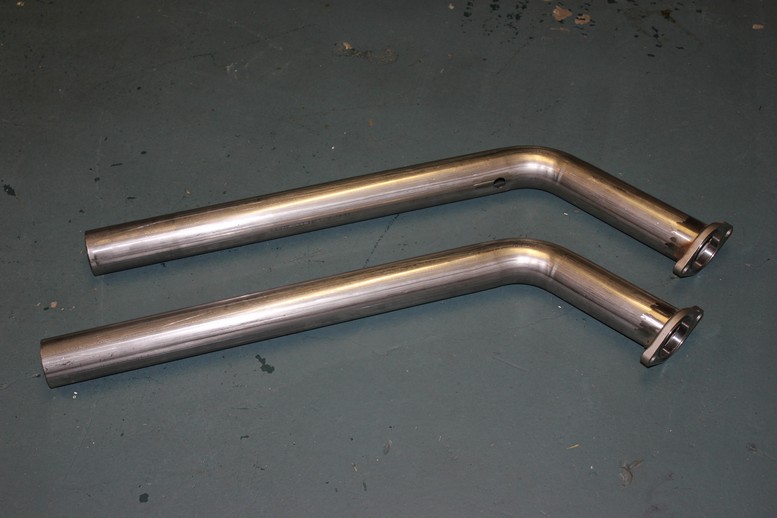
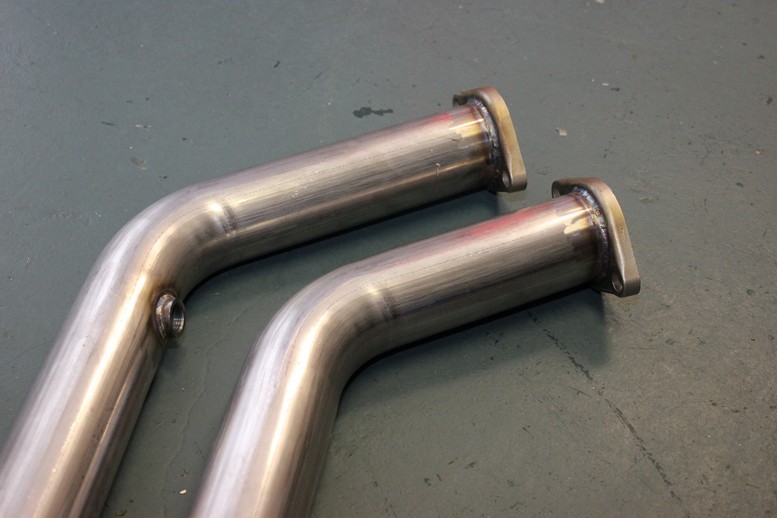
I started the long weekend out with cutting, fitting and tacking my downpipes.
Back from the welder.
I also threw some VHT flame proof flat black spray paint on the exhaust manifolds. Luckily I have some industrial ovens at work and I was able to use them for the curing cycles because it is definitely not something you want to do in your home oven. In retrospect I should have just spent the extra $100 on the ceramic coated manifolds but as you can imagine this project is sucking me dry so at this point I am saving wherever possible. They don't look great but it will keep them from rusting and once they are installed you will barely see them (at least that's my story until I get over the fact that I didn't get the ceramic ones)
Next on the list was the PCV system. LS1's are notorious for consuming oil (at least that's what I have heard) so I took 2 steps to resolve the problem. The first step was to upgrade to the LS6 valley cover which has a better baffle than the LS1. I also installed an air oil separator so if some oil does get out through the PCV valve I don't start coating the inside of the intake manifold. Again I opted for the baseline separator even though I was really tempted to go with the tig welded stainless steel version.
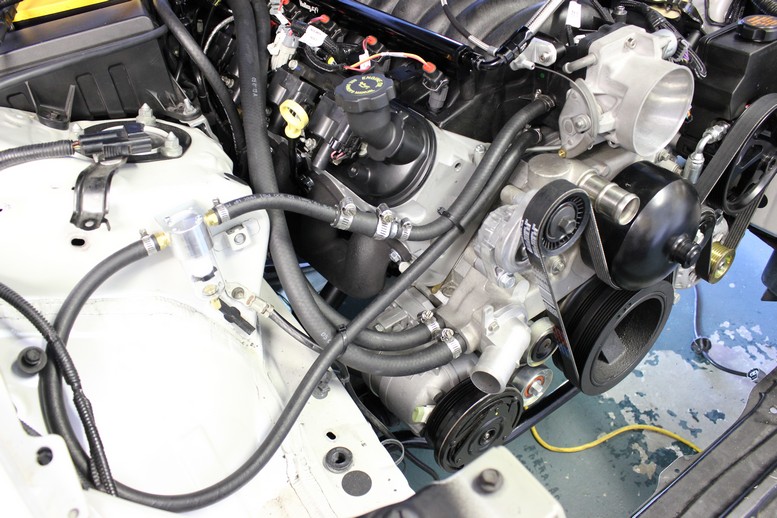
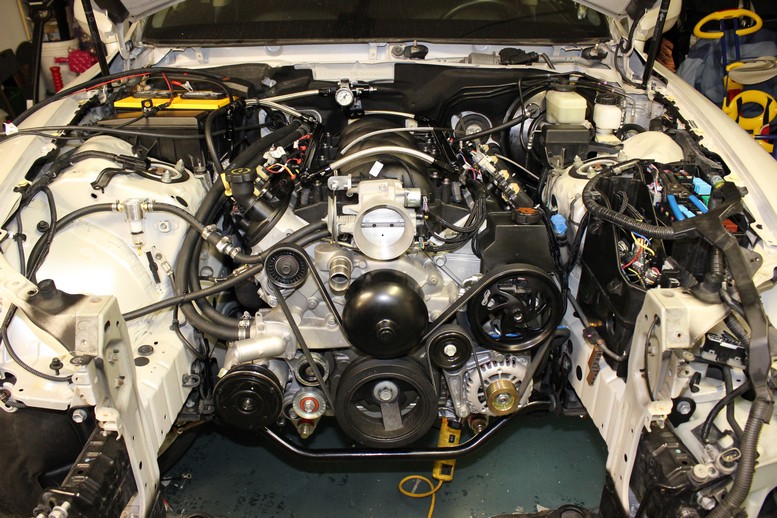
This was a shot of the engine bay after installing the belt and before I installed the radiator. I tried to get everything on that would be harder once the radiator was in.
Here's a shot of the completed fuel system. You can follow the flow from the hard line on the left hand side of the engine bay, through the fuel rails, through the fuel pressure regulator, and back to the return line with some basic fuel hose. I set the pressure at 60 psi.
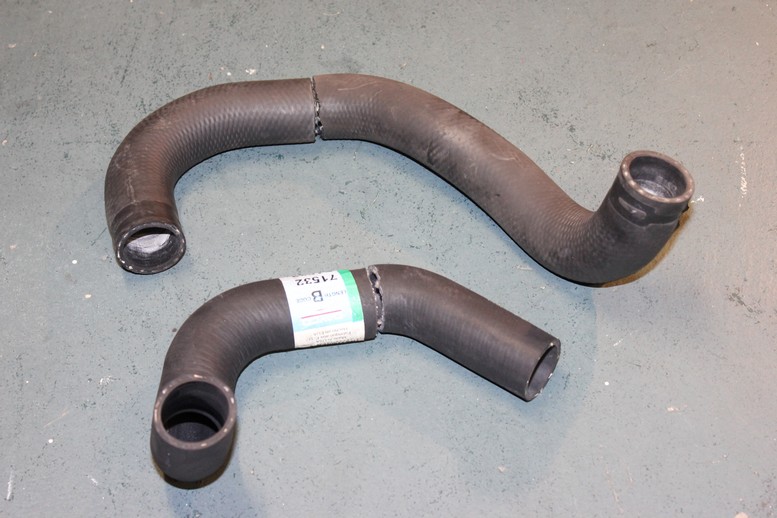
The guys at my Advanced Auto Parts were nice enough to let me browse through all the radiator hoses in the back. I ended up buying 3 hoses that I was going to use along with the stock hoses to make up the upper and lower hoses.
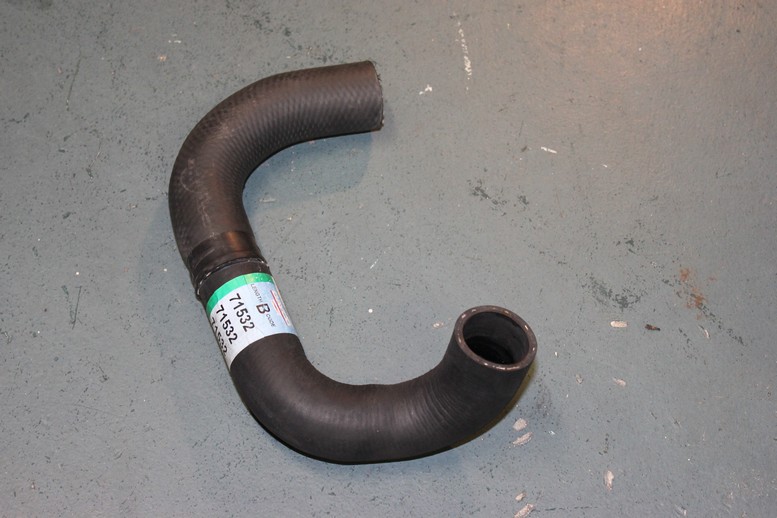
Here is the lower Lexus hose along with one of the new ones that I cut and will splice together to make the new lower hose.
Here it is together pieced together and it fits like a glove, more pictures to come.
So now is when things got a little crazy. I had a work marathon on Friday night and worked almost through the night but was really bad about taking pictures. I ended getting the engine completely ready to start with the exception of adding fluids and programming the ECU.
On Saturday morning I filled the fluids, programmed the ECU, and attempted to start (with video running). I got the engine to turn over a few times without fuel or spark to get the oil flowing but my battery was just not cutting it. After hooking up an additional battery and attempting a few more starts I still wasn't having any luck. I finally realized that I had not hooked up the ground wire to the ECU. By now I had completely depleted the charge in the battery and I was mentally defeated. So after a night out with some friends and some sleep I returned on Sunday morning and finally had a successful start. Grabbing the video camera each time I attempted was a PITA but was eventually worth it. Here's the video:
As you may have noticed the engine was idling very high. Somewhere around 2500 rpm. I probably should not have let it run as long as I did but I was so overwhelmed that I wasn't thinking straight. Lucking this should be pretty easy to trouble shoot. I think I either have a bad IAC valve or one of the several hoses going to the intake manifold is letting air by (possibly the brake booster or the PCV setup). Either way I should have this resolved shortly and then I'll go back and take some pictures of the progress that I missed as well as a new video.
Sorry for shaky video but between my nerves and the loud as hell exhaust in my garage it was very challenging to keep a steady hand.
BTW, I still have not finished the steering but I have the pieces cut that just barely clear the exhaust manifold and I should have them fabbed up by Wednesday or so. I also have to replace an o-ring on the steering pump reservoir because I have a small leak which I'll take considering there were no other fluid leaks.
Amazing work bro. I know the feeling you get when you fire it up for the first time, i had it when i dropped an LS1 into an FD RX7. Nothing beats that sound... congrats on the great work.
I'll post some cost information once the work settles down and I get a change to catch up on bill of material. I am a little scared to add everything up right now, it's always the last minute parts at the end of the build that blow the budget.
 07-02-13, 08:23 PM


 My hat's off to you guy


