Ls1 swap in my is300 lots of pics
 04-14-10, 07:52 AM
#1
Rookie
Thread Starter

Join Date: Nov 2008
Location: Texas
Posts: 66
Likes: 0
Received 0 Likes
on
0 Posts
I recently swapped a ls1 T56 six speed combo out of a 2002 WS6 trans am into my 2001 lexus Is300. Here is the build thread I had posted in some other forums.
I do plan to do some mild mods to the engine later. I am also in the process of making a kit so other people can enjoy this amazing combination as much as I do.
Yes I'm aware DGR makes some motor mounts for the sc300 that should work in the is300.
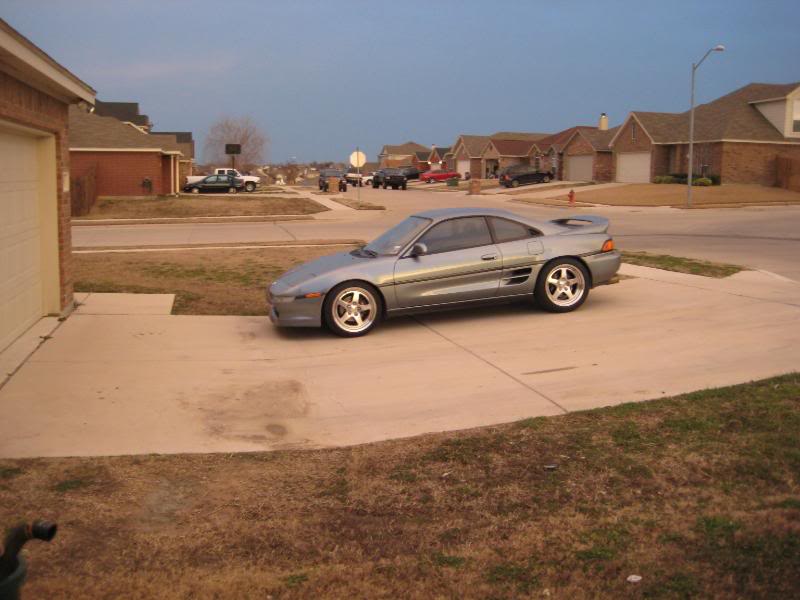
This year will be my fith year in a row attending the supra nationals. Last year it was the 700hp mr2 the year before that I was running 9's in black hardtop supra. This year I'm attemping something new. I plan to be the first with an LSX powered IS300. I've been daily driving this lexus for the last year and honestly its a fun car in 100% stock form. You can drift around turns with ease or beat the local honda turd in a drag race. But when it comes to having ***** it has NONE.
I plan to change that and do it in less than 30 Calender days. Wish me luck!
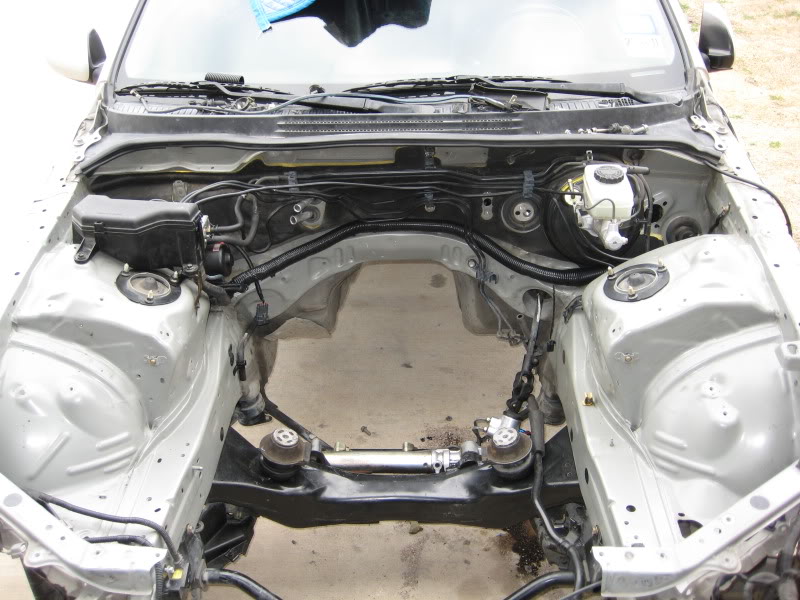
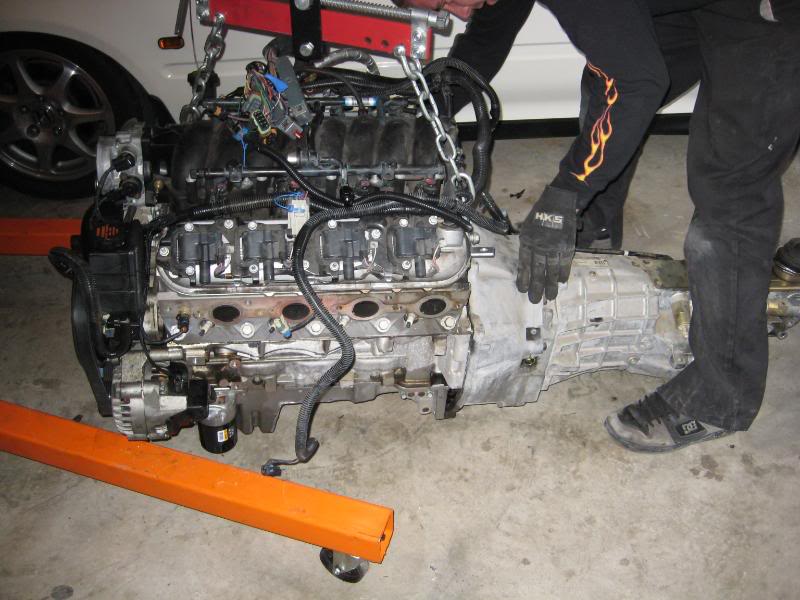
Old motor is out.....now I need somewhere to put it.

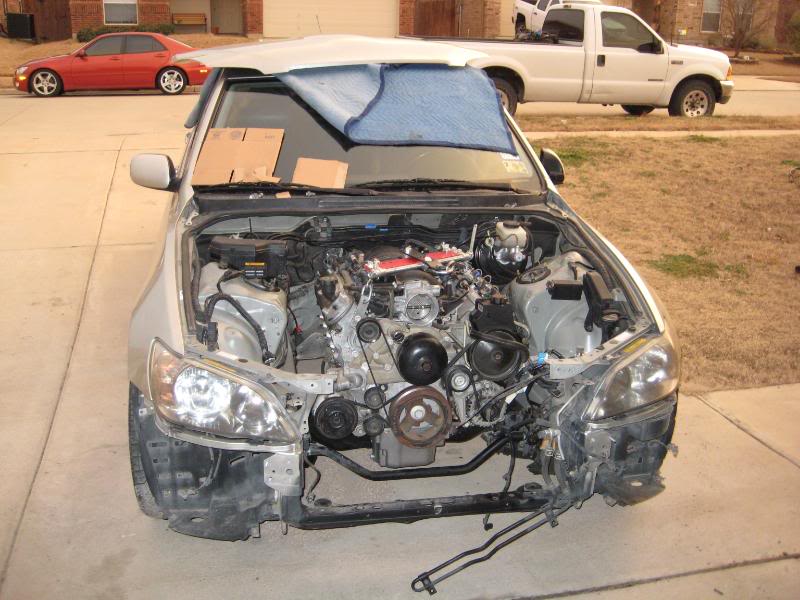
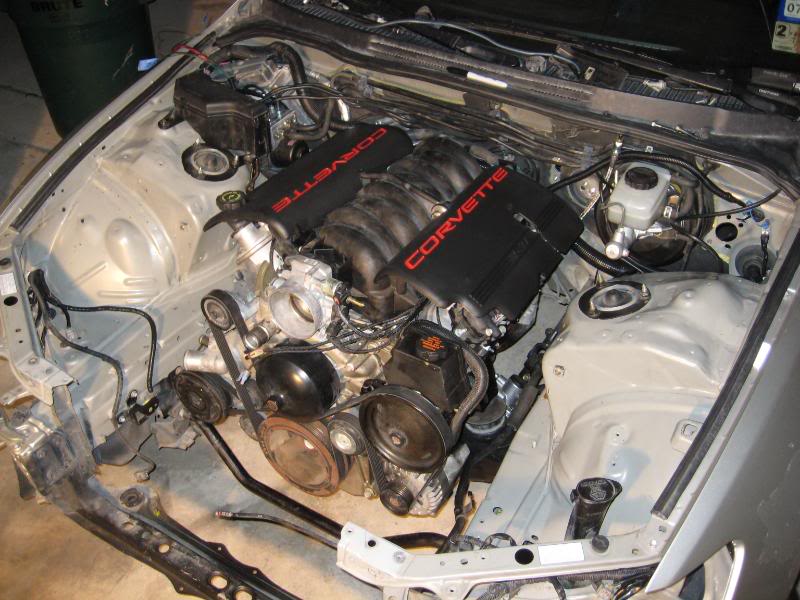
Engine Fits but needs a GTO oil pan and some cutting
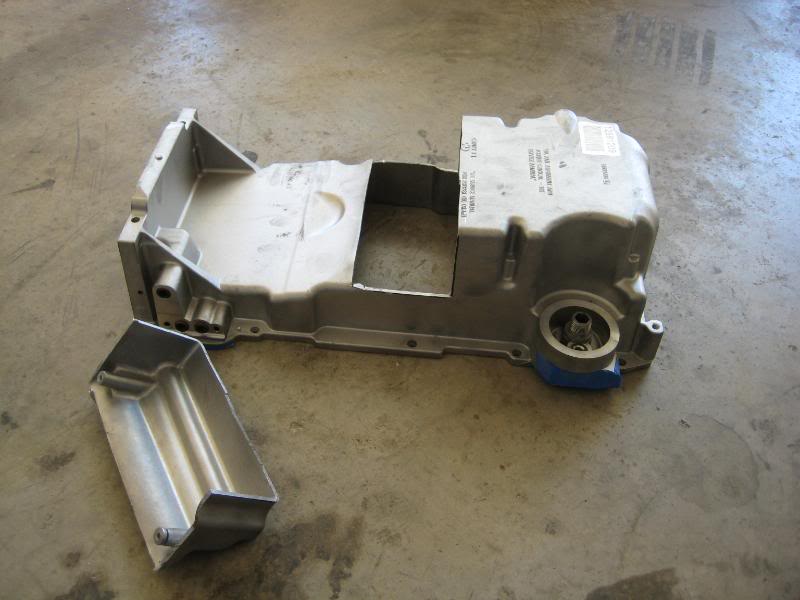
Fits pretty damn good
Found some time this weekend to weld the oil pan. Inside and out

Fabbed up some mounts today. Now I still need to do the trans mount.
The Mr2 looking sad waiting to be picked up.
I do plan to do some mild mods to the engine later. I am also in the process of making a kit so other people can enjoy this amazing combination as much as I do.
Yes I'm aware DGR makes some motor mounts for the sc300 that should work in the is300.
This year will be my fith year in a row attending the supra nationals. Last year it was the 700hp mr2 the year before that I was running 9's in black hardtop supra. This year I'm attemping something new. I plan to be the first with an LSX powered IS300. I've been daily driving this lexus for the last year and honestly its a fun car in 100% stock form. You can drift around turns with ease or beat the local honda turd in a drag race. But when it comes to having ***** it has NONE.
I plan to change that and do it in less than 30 Calender days. Wish me luck!
Old motor is out.....now I need somewhere to put it.
Engine Fits but needs a GTO oil pan and some cutting
Fits pretty damn good
Found some time this weekend to weld the oil pan. Inside and out
Fabbed up some mounts today. Now I still need to do the trans mount.
The Mr2 looking sad waiting to be picked up.

 04-14-10, 07:53 AM
#3
Rookie
Thread Starter
Join Date: Nov 2008
Location: Texas
Posts: 66
Likes: 0
Received 0 Likes
on
0 Posts
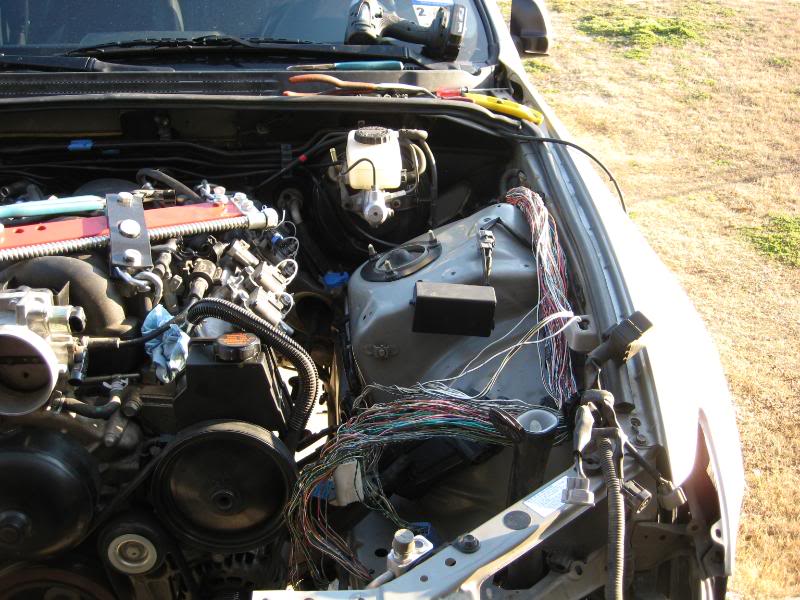
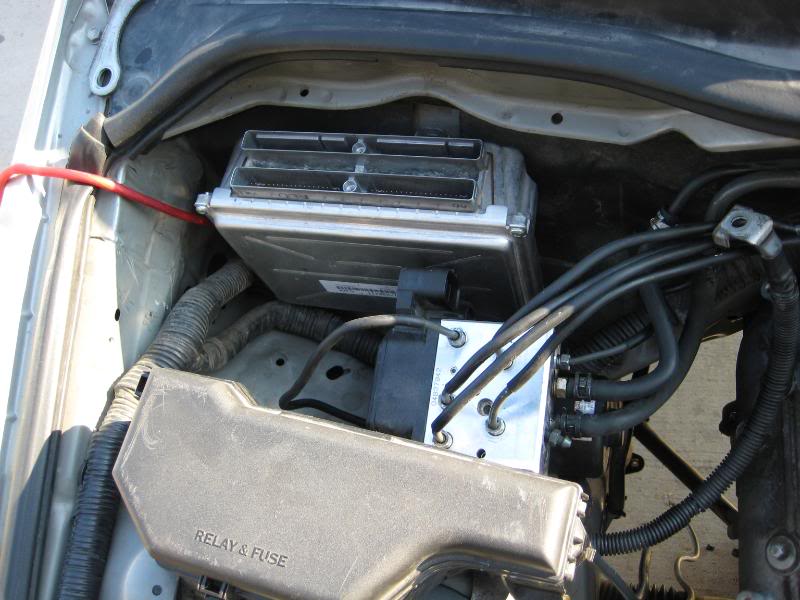
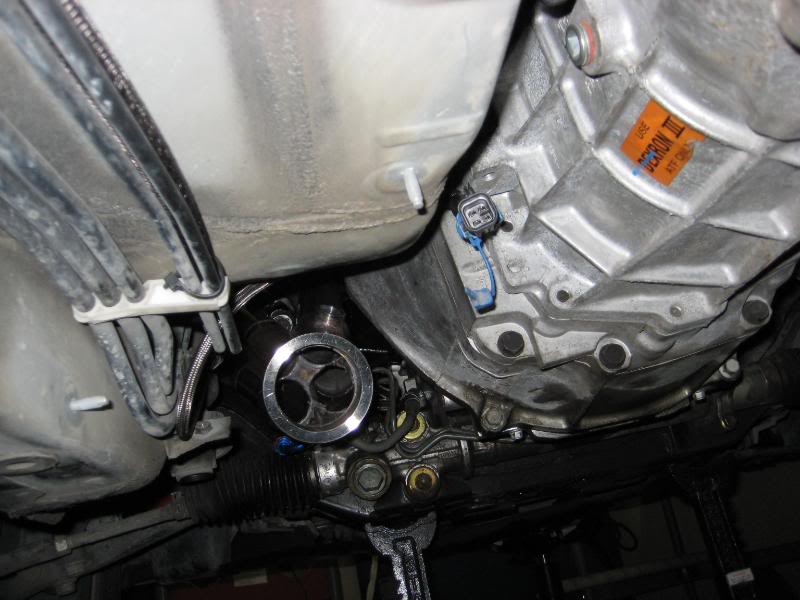
Today I made some brackets for the abs unit I relocated and found a spot to hide teh ecu. I also dove into the wiring a little. It looks bad but it should be easy and just really time consuming. I plan to spend 3-4 days on wiring alone. Good news is it looks like the stock radiator will work and the fans run on their own circuit.
Its a ton of wires on the wrong side of the engine bay. (the stock ecu was here)
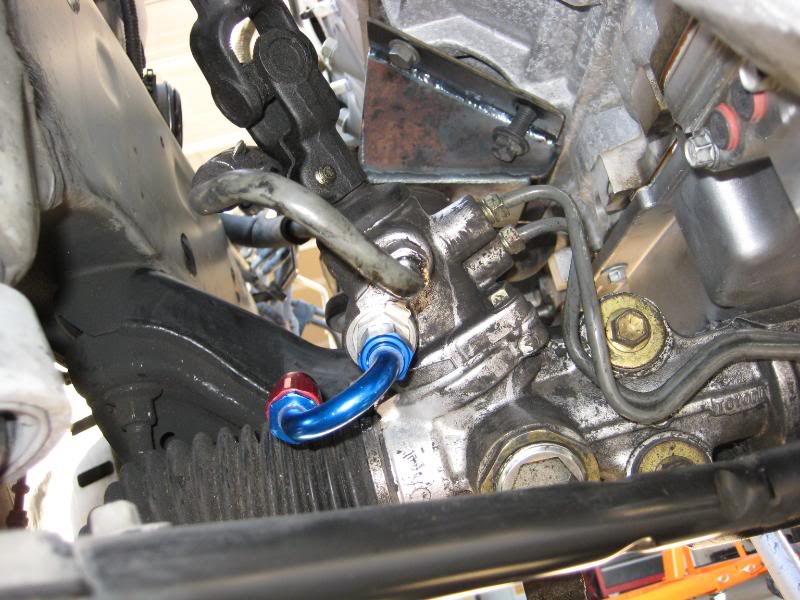
Lucky me...I had some fitting left over from the ls1 rx7 that will work. russel makes these 16mm fittings for a camaro.
I plan to make a nice cover to hide all this stuff
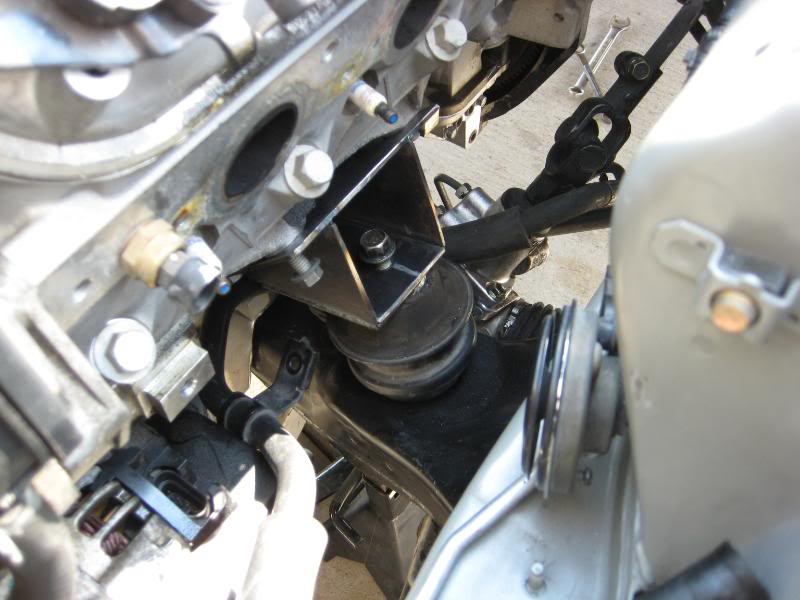
Pray for me....headers will be a fun 30+ hours of fab. BTW those are the stock IS mounts
With less than 1 inch to spare
Its a ton of wires on the wrong side of the engine bay. (the stock ecu was here)
Lucky me...I had some fitting left over from the ls1 rx7 that will work. russel makes these 16mm fittings for a camaro.
I plan to make a nice cover to hide all this stuff
Pray for me....headers will be a fun 30+ hours of fab. BTW those are the stock IS mounts
With less than 1 inch to spare
04-14-10, 07:54 AM
#4
Rookie
Thread Starter
Join Date: Nov 2008
Location: Texas
Posts: 66
Likes: 0
Received 0 Likes
on
0 Posts
More parts cam in. I have the stainless head flanges now I just need the pipe!
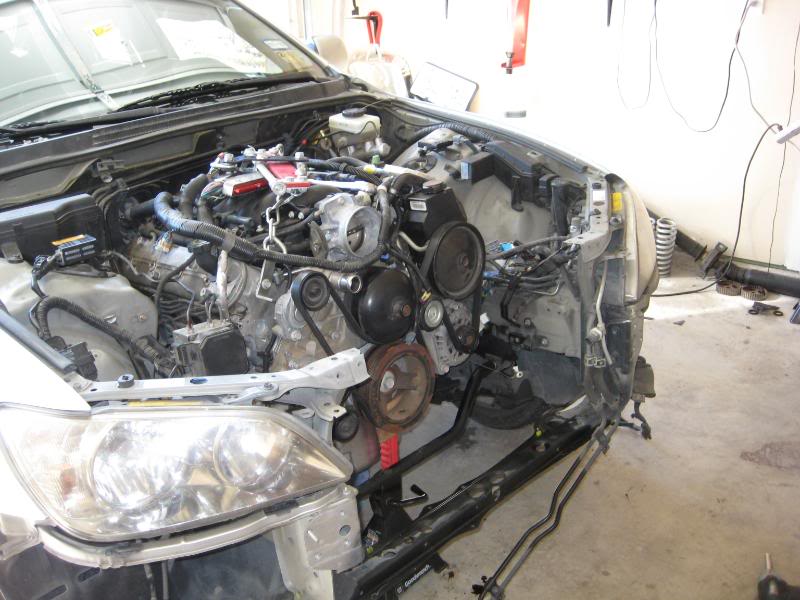
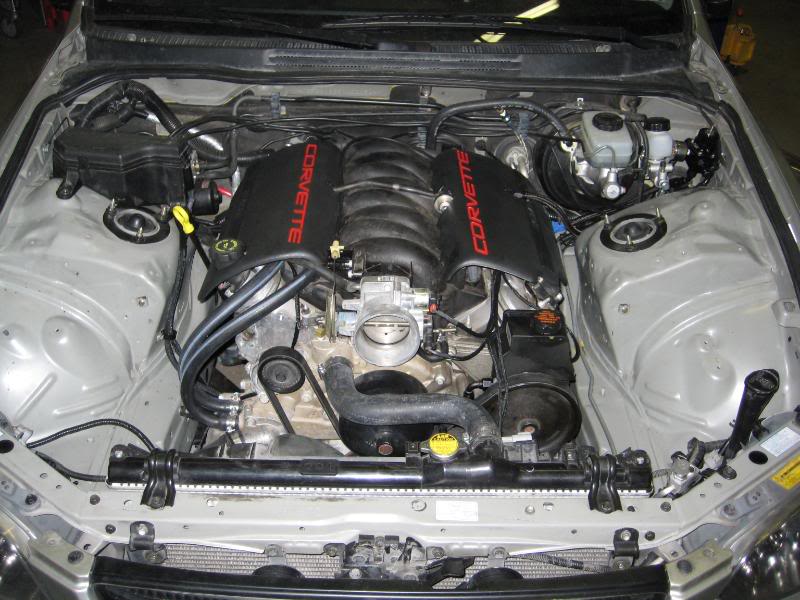
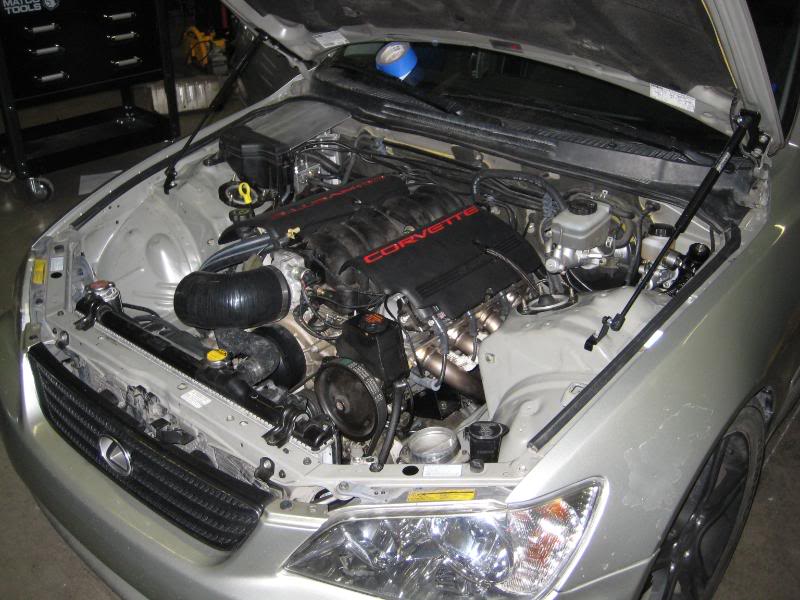
Consider my engine bay tucked. That was a long day of hard work.
I've lived by a Naval Air Force base most of my life so I've always seen jets and other cool aircraft flying over but its been a long time since I've spent 10 hours in the driveway. I took some cool pics of a low flying plane. I could almost walk to the air force base from my house.
04-14-10, 07:54 AM
#5
Rookie
Thread Starter
Join Date: Nov 2008
Location: Texas
Posts: 66
Likes: 0
Received 0 Likes
on
0 Posts
I've got another treat for ya. My friend "who passed at the first of the year" made this video after the 2008 nationals. This is what I took to houston YouTube - Qb2productions Tx2k8 - Episode 1 "ATSMATT"
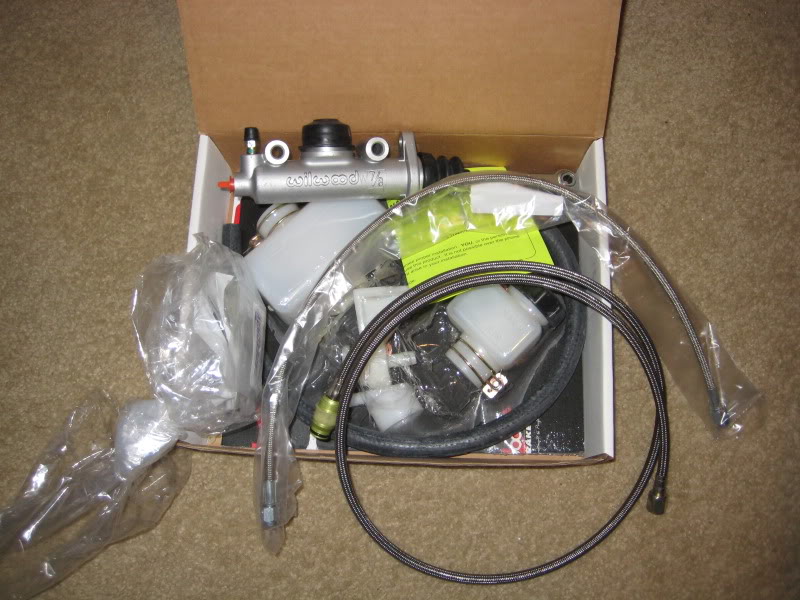
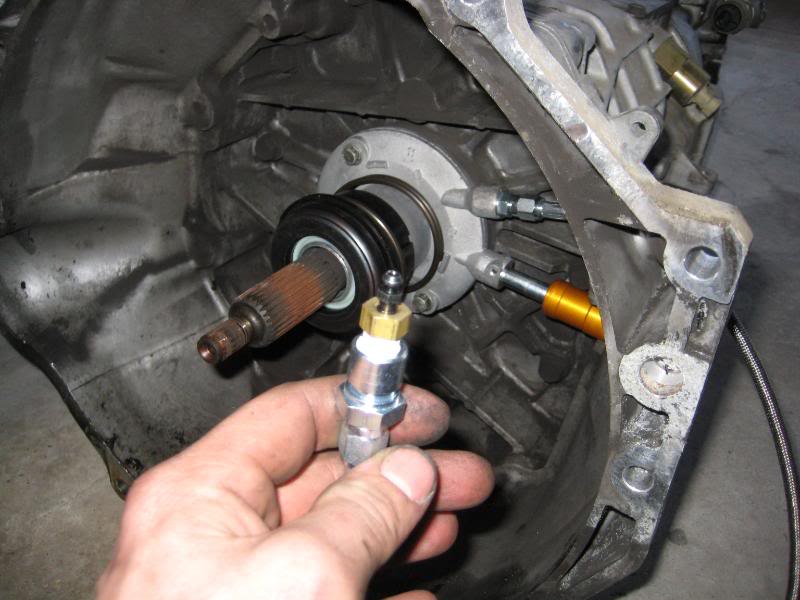
I pulled the transmission to inspect the clutc, install a new release beaing and a remote bleeding system.
Cleaned up some of the visible wiring.

Motor is back in with all the wiring installed. I need to send 2-3 wires inside and wirng will be done. The heater lines might suck. Not sure what to do about that yet.
I pulled the transmission to inspect the clutc, install a new release beaing and a remote bleeding system.
Cleaned up some of the visible wiring.
Motor is back in with all the wiring installed. I need to send 2-3 wires inside and wirng will be done. The heater lines might suck. Not sure what to do about that yet.
04-14-10, 07:55 AM
#6
Rookie
Thread Starter
Join Date: Nov 2008
Location: Texas
Posts: 66
Likes: 0
Received 0 Likes
on
0 Posts
I built the transmission mount today but no pics yet.
Mounted the clutch master and fuel pressure regulator today. Gotta love that prolite hose and black fittings.

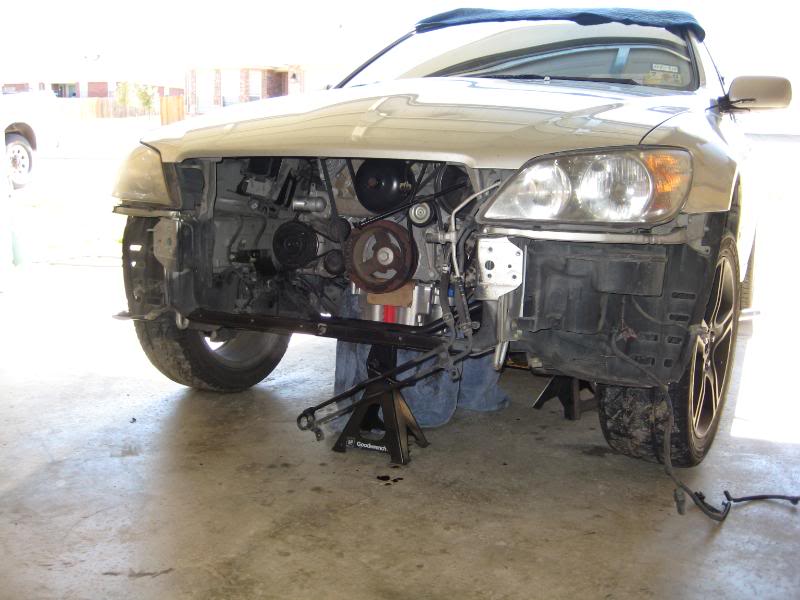
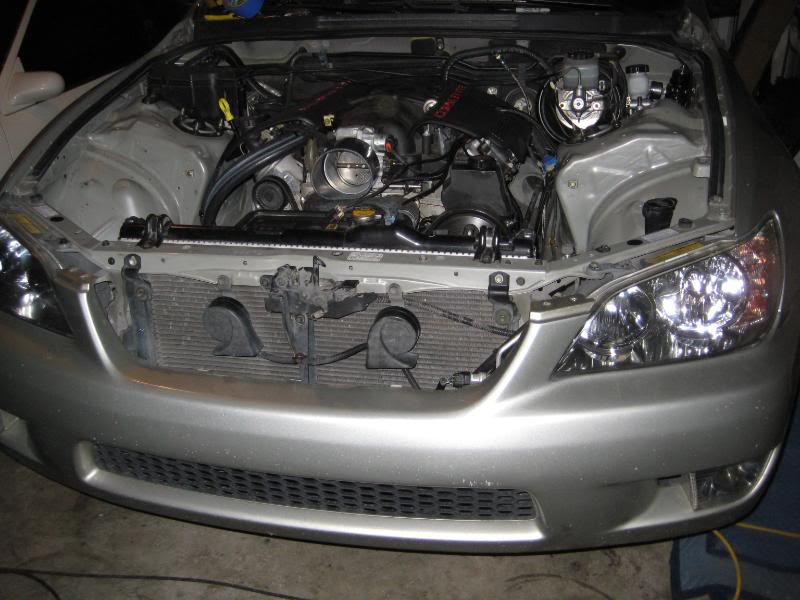
In case any of you were wondering about hood clearance. Oh and the oil pan is not lower then the front K member.

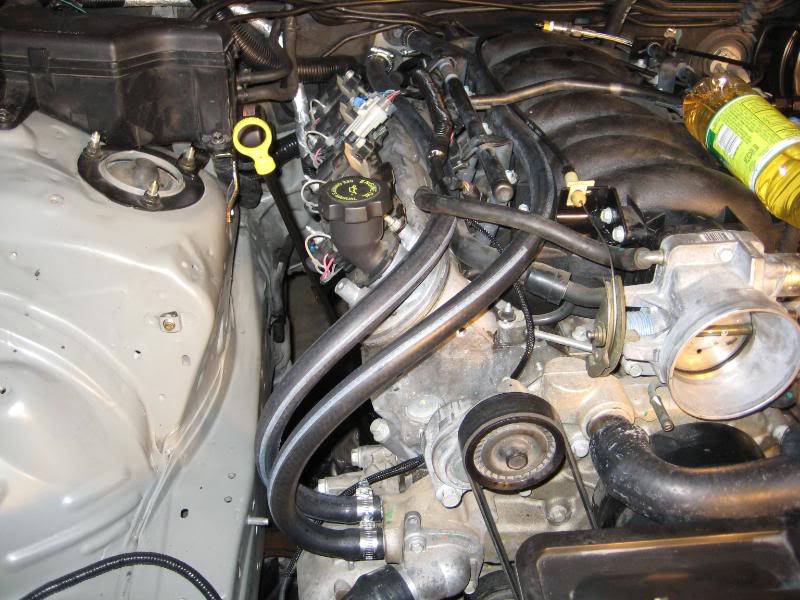
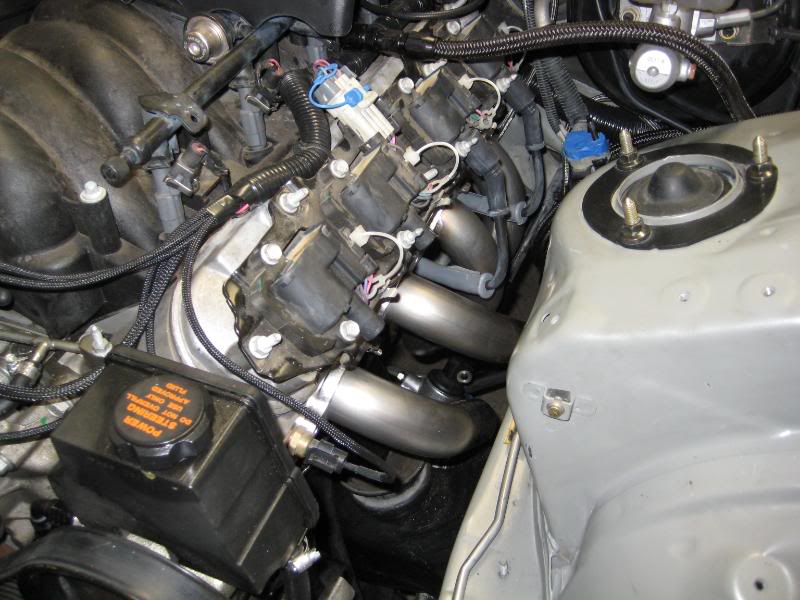
Heater lines, radiator hoses, GTO dipstick, throttle cable and power steering lines are all done.
Mounted the clutch master and fuel pressure regulator today. Gotta love that prolite hose and black fittings.
In case any of you were wondering about hood clearance. Oh and the oil pan is not lower then the front K member.
Heater lines, radiator hoses, GTO dipstick, throttle cable and power steering lines are all done.
04-14-10, 07:56 AM
#7
Rookie
Thread Starter
Join Date: Nov 2008
Location: Texas
Posts: 66
Likes: 0
Received 0 Likes
on
0 Posts
I made some real progress today. I finished the fuel pump install and return setup. Main power wiring and engine grounds are finished. I also did a bunch of small stuff here and there but I feel it was a very productive day.
Battery box is installed and solid.

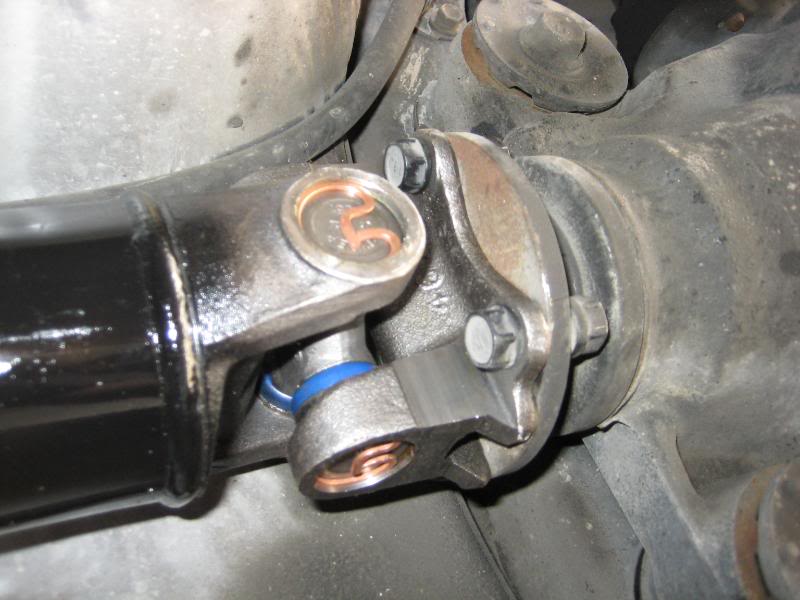
Thanks to Fort worth gear and axle my driveshaft was built with a 24 hour turn around time.

This rear joint is off some Toyota truck. It looks beefy as hell. Plus with 3inch tube this shaft should be Viagra strong.
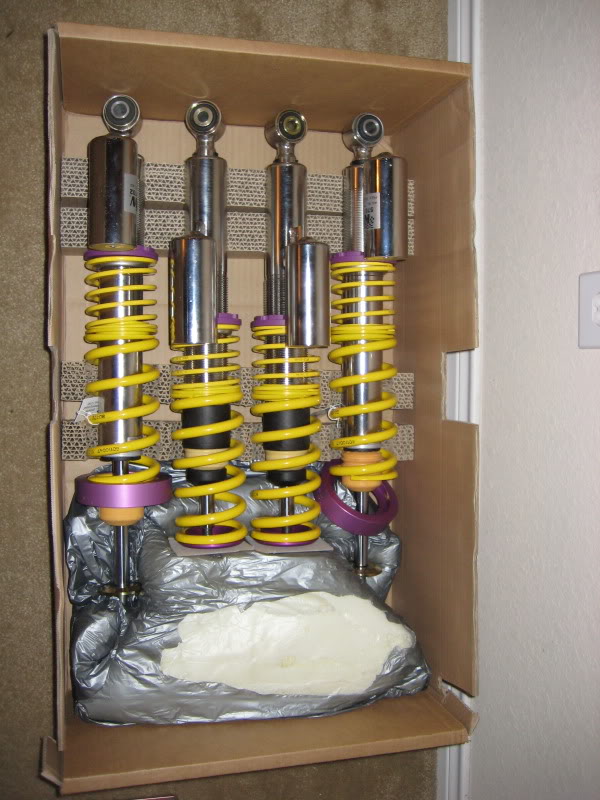
I installed coilovers on all four corners, sway bars and new ball joints. The old ones had almost a quarter inch of play...eek!

Installed all the fender liners and the front bumper. I also did a quick buff on my headlights, they were getting pretty nasty.
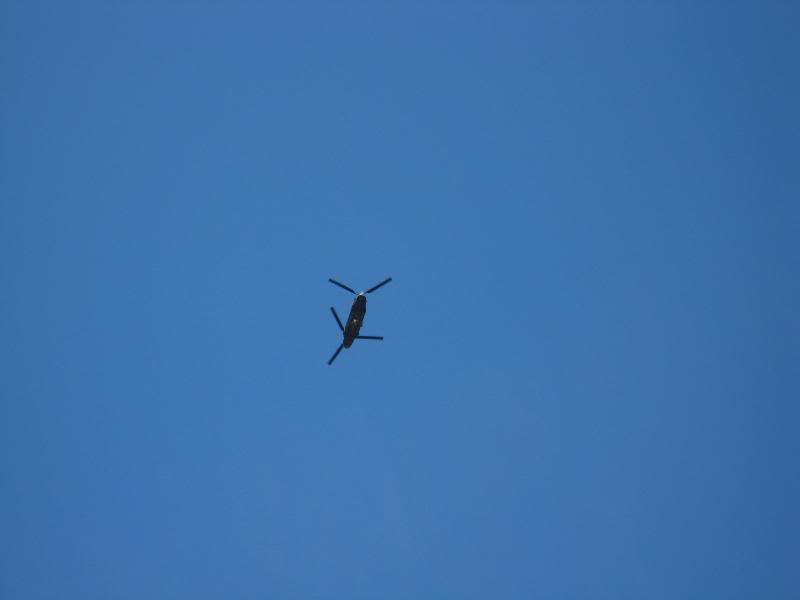
Not much flying around today. This transport helicopter flew over. I used to see these a lot as a kid.
Battery box is installed and solid.
Thanks to Fort worth gear and axle my driveshaft was built with a 24 hour turn around time.
This rear joint is off some Toyota truck. It looks beefy as hell. Plus with 3inch tube this shaft should be Viagra strong.
I installed coilovers on all four corners, sway bars and new ball joints. The old ones had almost a quarter inch of play...eek!
Installed all the fender liners and the front bumper. I also did a quick buff on my headlights, they were getting pretty nasty.
Not much flying around today. This transport helicopter flew over. I used to see these a lot as a kid.
Trending Topics
04-14-10, 07:57 AM
#8
Rookie
Thread Starter
Join Date: Nov 2008
Location: Texas
Posts: 66
Likes: 0
Received 0 Likes
on
0 Posts
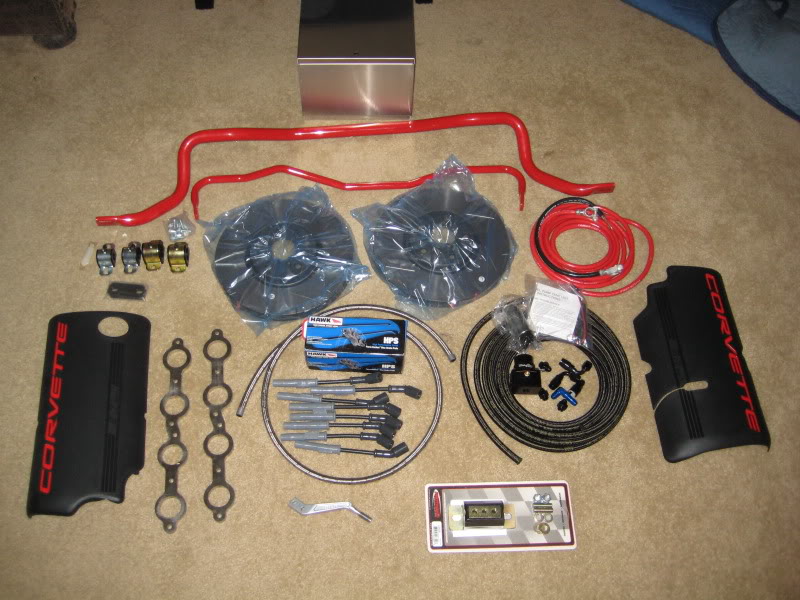
Another day and some more progress. The beginning of my day was spent tying up loose ends here and there. Then I received a box of parts from Figs engineering so I installed the DBA SupraTT rotors, Figs Big Brake Brackets and some hawk pads.

Ruturn line from the FPR

After loading the lexus on the trailer I hauled it to Protuningperformance.com where I keep my Tig welder and other fab tools. I will be working for ptp after the Texas meet.
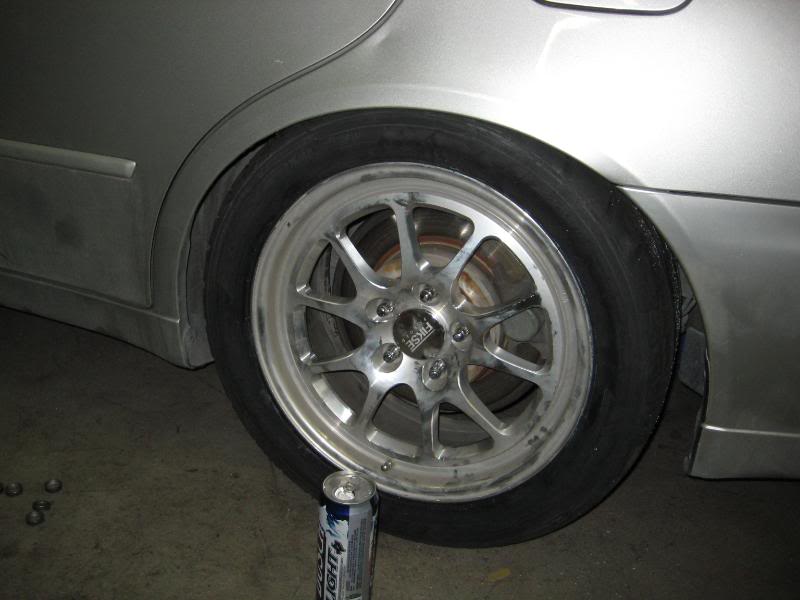
275/40/17 Nitto NT05s installed. Sorry for the bad pic....more will come.
Have faith this will be headers soon
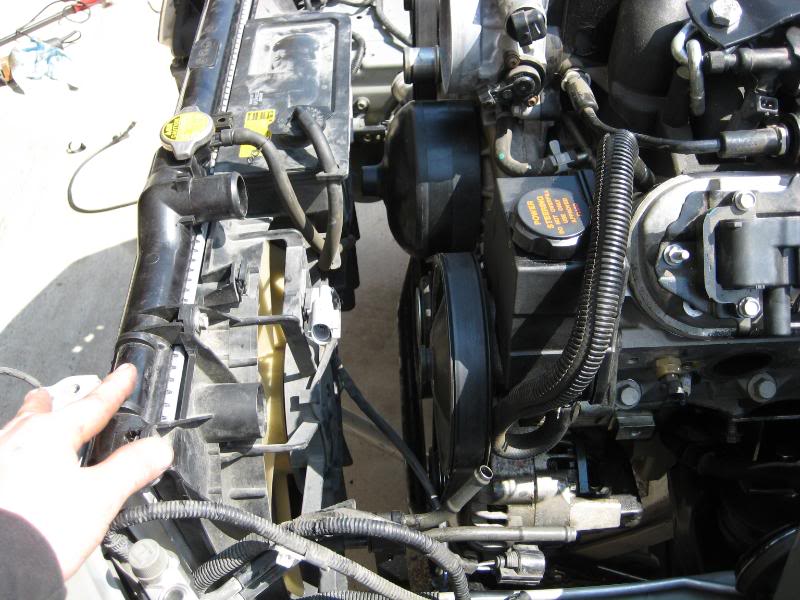
The radiator hose was very close to the water pump pulley since it was resting against the coolant reservoir. I dicided to cut the reservoir off of the Fan shroud. I will build a aluminum reservoir in its place. You can also see where I drilled and tapped the water pump for the steam vent.
Rolled the fenders and a beer ended the night.
Ruturn line from the FPR
After loading the lexus on the trailer I hauled it to Protuningperformance.com where I keep my Tig welder and other fab tools. I will be working for ptp after the Texas meet.
275/40/17 Nitto NT05s installed. Sorry for the bad pic....more will come.
Have faith this will be headers soon
The radiator hose was very close to the water pump pulley since it was resting against the coolant reservoir. I dicided to cut the reservoir off of the Fan shroud. I will build a aluminum reservoir in its place. You can also see where I drilled and tapped the water pump for the steam vent.
Rolled the fenders and a beer ended the night.
04-14-10, 07:58 AM
#9
Rookie
Thread Starter
Join Date: Nov 2008
Location: Texas
Posts: 66
Likes: 0
Received 0 Likes
on
0 Posts
Most of my day was spent fabbing the drivers side header. It was really my fist time making headers around a steering shaft. Clearances were verytight. It was a time consuming job but I think they turned out ok. The passenger side should be much easier.
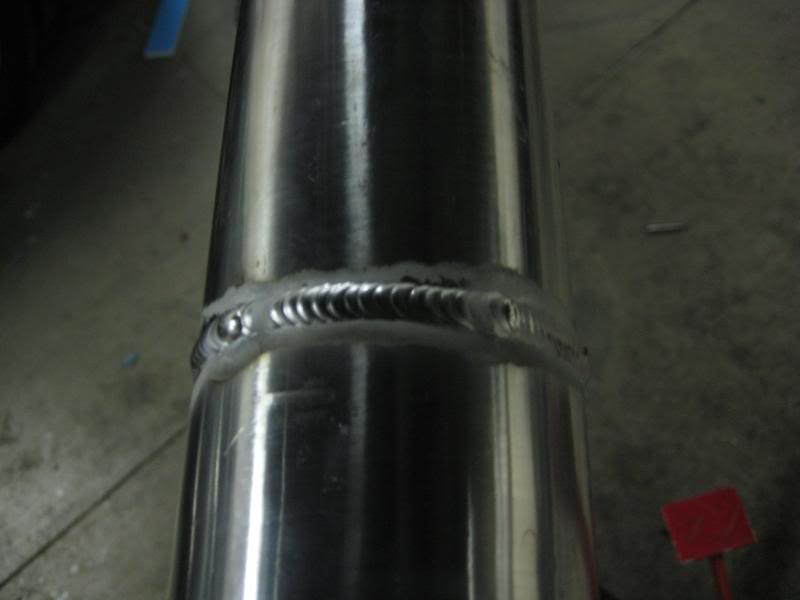
Welds turned out good. I'm a little out of practice.
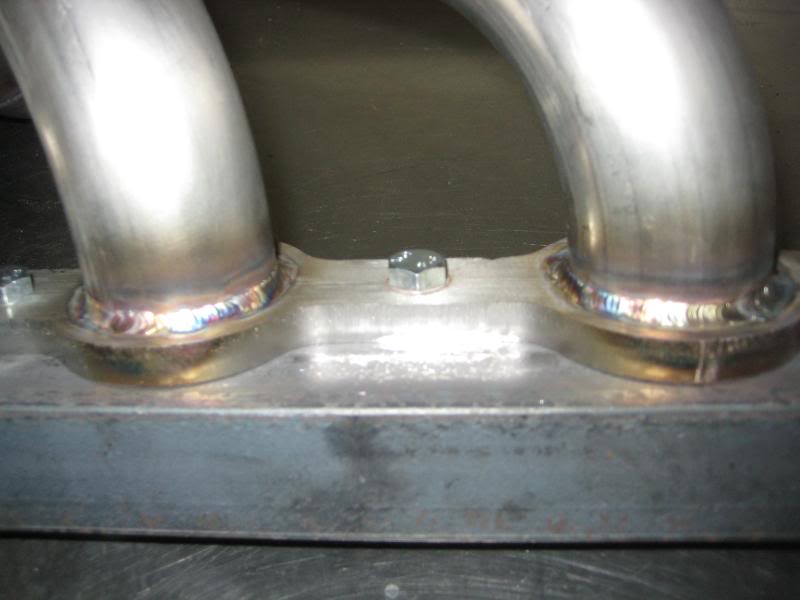
Just before I started the collector welding.
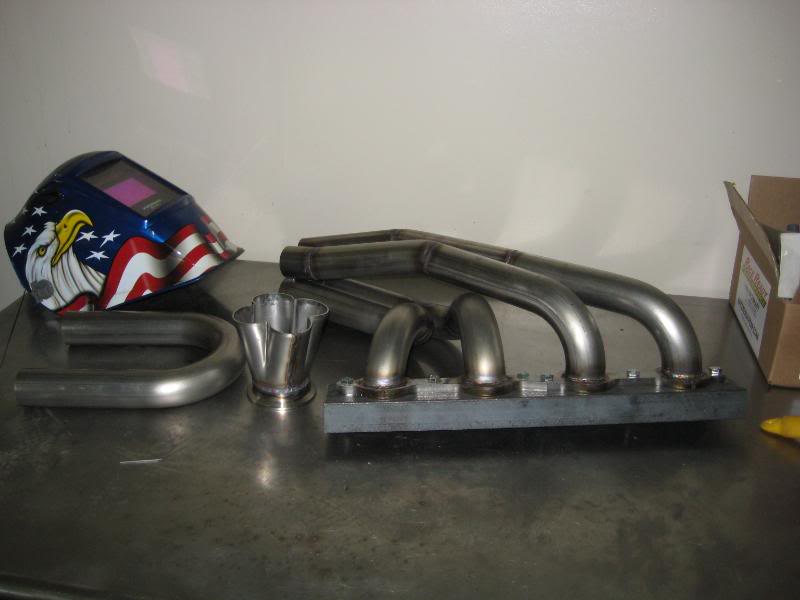
Seems like the exhaust should be somewhat easy.
Welds turned out good. I'm a little out of practice.
Just before I started the collector welding.
Seems like the exhaust should be somewhat easy.
 04-14-10, 07:59 AM
#11
Rookie
Thread Starter
Join Date: Nov 2008
Location: Texas
Posts: 66
Likes: 0
Received 0 Likes
on
0 Posts
Today I was at the shop for 18 hours straight. I'm dedicated to getting this car to houston and I want it to look professonal at the same time.
During my 18 hour lock in I filled all the fuilds and changed the rear diff fluid out with some Royal Purple 75w 90. Between both headers and the full exhaust I have over 30 hours invested and keep in mind I did it in 3 days.
After filling all the fuilds I built a coolant tank and cut up a mr2 TRD radiator cap for the fill. I also make the aluminum weld on cap fittings for the mr2 .
.

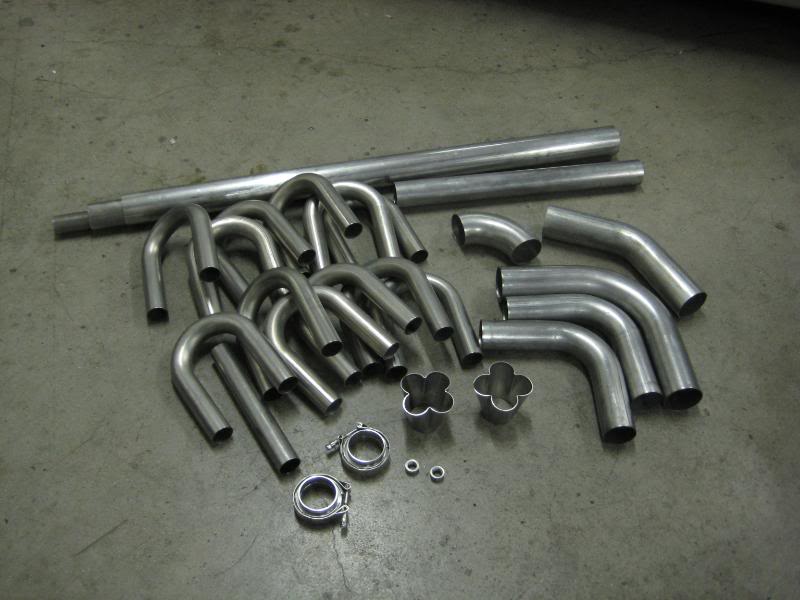
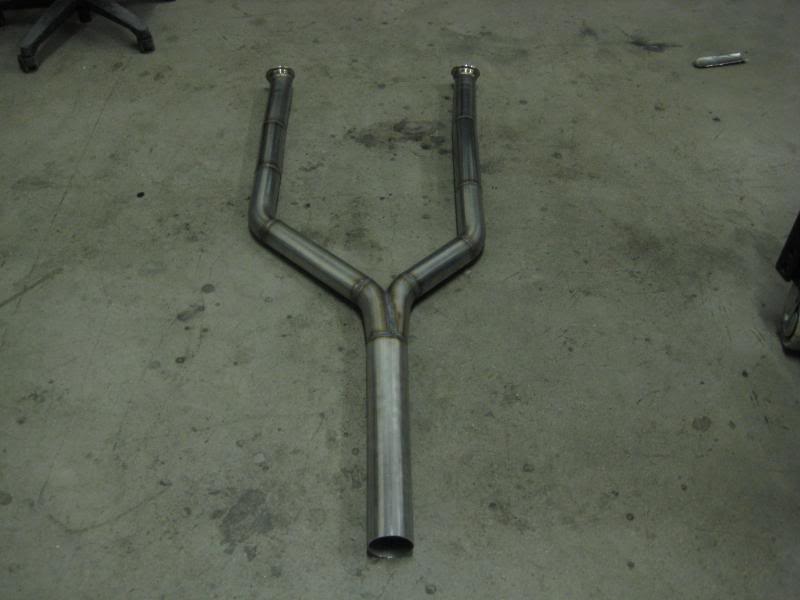
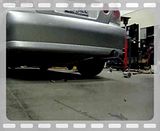
304 stainless Y-pipe. 2.5 to 3 inch this actually took a really long time.
Little hanger for the muffler. This slips into a stock rubber mount.

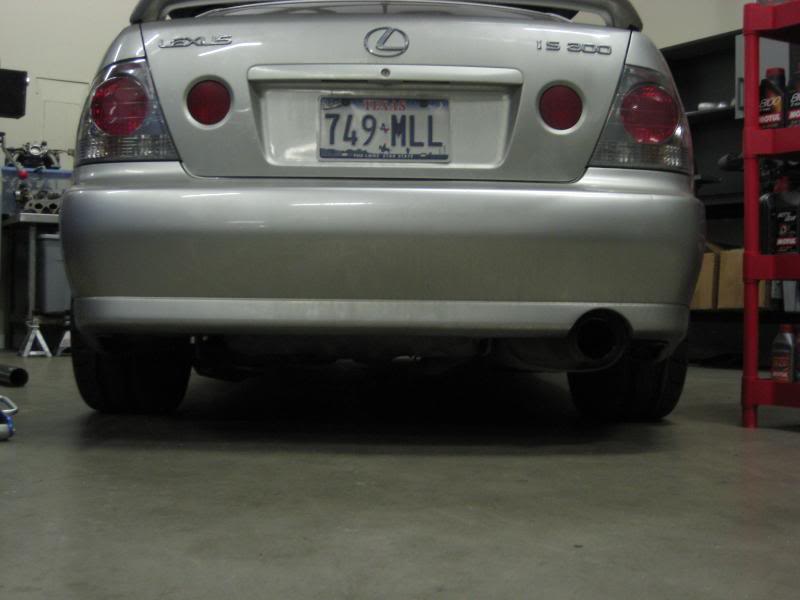
Just before I finished the last weld on the exhaust I realized I was breaking tradition. The last four years I've ran an aluminum exhaust on my cars in houston. I couldnt forget my signature move so I made a new rear section out of some intercooler piping I had at the shop.


Not bad for 2:00 in the morning.
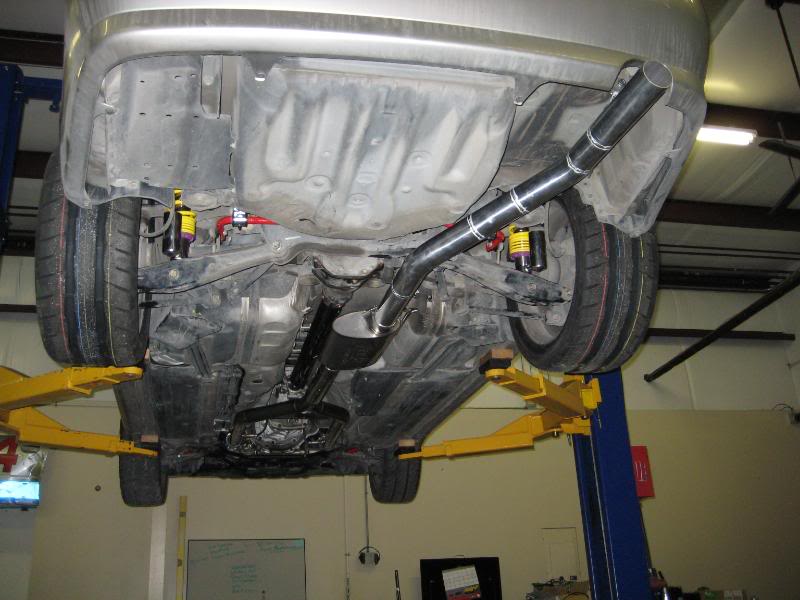
During my 18 hour lock in I filled all the fuilds and changed the rear diff fluid out with some Royal Purple 75w 90. Between both headers and the full exhaust I have over 30 hours invested and keep in mind I did it in 3 days.
After filling all the fuilds I built a coolant tank and cut up a mr2 TRD radiator cap for the fill. I also make the aluminum weld on cap fittings for the mr2
.304 stainless Y-pipe. 2.5 to 3 inch this actually took a really long time.
Little hanger for the muffler. This slips into a stock rubber mount.
Just before I finished the last weld on the exhaust I realized I was breaking tradition. The last four years I've ran an aluminum exhaust on my cars in houston. I couldnt forget my signature move so I made a new rear section out of some intercooler piping I had at the shop.
Not bad for 2:00 in the morning.

 04-14-10, 08:00 AM
#14
Rookie
Thread Starter
Join Date: Nov 2008
Location: Texas
Posts: 66
Likes: 0
Received 0 Likes
on
0 Posts
Well today was all about tying up loose ends. Bleed the brake and clutch. I made a ecu/abs cover leaving the ends open for air flow. Made a quick shifter hole filler. I finished wiring up the the obd-2 port, CEL, tach converter and started playing with the scan gauge. I also installed the Figs hood prop kit and I must say the install was a breeze, it took me about 10 minutes. I was watching the scan gauge when the radiator fans kicked on. It looks like lexus has them set to come on at 205 F.
Hopfully I will get my front tires for the other fiske wheels and some piping to make an intake with. I plan to get the car aligned and corner balance tomorrow. Wednesday I plan to take it to the dyno for a couple pulls. My 5 speed brake pedal should be here at noon. Looks like I'll be cutting it close. Hope I dont have any issues.......I guess it will be a test of my build quality. I trust myself enough to where I plan to drive it to houston on thrusday. I trailer my cars every year so this will be a first.


Hopfully I will get my front tires for the other fiske wheels and some piping to make an intake with. I plan to get the car aligned and corner balance tomorrow. Wednesday I plan to take it to the dyno for a couple pulls. My 5 speed brake pedal should be here at noon. Looks like I'll be cutting it close. Hope I dont have any issues.......I guess it will be a test of my build quality. I trust myself enough to where I plan to drive it to houston on thrusday. I trailer my cars every year so this will be a first.
04-14-10, 08:01 AM
#15
Rookie
Thread Starter
Join Date: Nov 2008
Location: Texas
Posts: 66
Likes: 0
Received 0 Likes
on
0 Posts
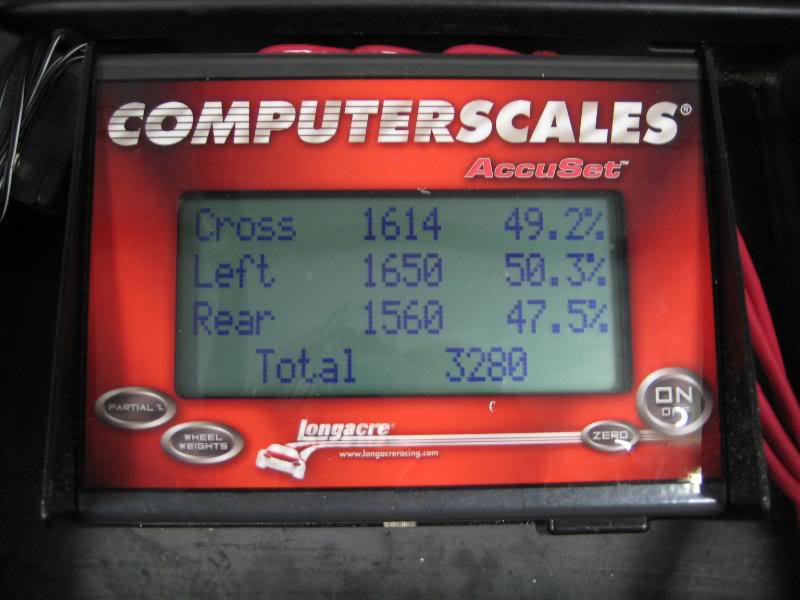
So I put the car on the scales last night and did a corner balance. I was suprized by how light it was 3280 with a half tank of gas.
I also made a nice 4 inch intake. Since the MAF is 3.5 inch I welded some 4 inch aluminum to it.....with a welder you can do anything.


I also made a nice 4 inch intake. Since the MAF is 3.5 inch I welded some 4 inch aluminum to it.....with a welder you can do anything.

