HOW TO: Tap Oil Pan for NA-T Turbo Return
 05-07-14, 11:39 PM
#1
Taking off the oil pan is the recommended option, but if you absolutely don't want to, you can resort to tapping the oil pan while it's on the car. You just have to avoid at all costs of metal shavings getting into your oil pan when drilling. You need to use lots of grease and drill millimeters at time, grease bit, drill, wipe off bit and hole, grease bit, drill, wipe off bit and hole.....etc. After you're finished, be sure to change your oil a couple times in case shaving got in your oil pan.
I am not responsible if you ruin your motor if metal shavings get in your pan.
Tools/stuff used:
I am not responsible if you ruin your motor if metal shavings get in your pan.
Tools/stuff used:
- Angle Drill
- M8 x 1.25 tap
- 17/64" drill bit
- 1/2" drill bit (larger one would be better)
- 90080-17242 (nuts) x2
- 90116-08348 (studs) x2
- 15472-46010 (gasket)
- AN10 Turbo Return Flange for 2JZ
- AN10 Block off (if you will stay NA temporarily)
- Grease
- Car Lift

The following users liked this post:
CaliMike (03-12-22)
05-07-14, 11:40 PM
#2
It is recommended that the hole is bigger than 1/2". But since that's the outlet size of the flange is 1/2", I left it as it is.
Tip: a 5MM? socket can be used to screw in the studs with the special reverse torx tips.
Tip: a 5MM? socket can be used to screw in the studs with the special reverse torx tips.
Last edited by Luxor; 05-07-14 at 11:47 PM.
The following users liked this post:
yick99 (12-01-22)
05-08-14, 05:36 AM
#4
Lead Lap

Join Date: Aug 2013
Location: ohio
Posts: 476
Likes: 0
Received 0 Likes
on
0 Posts
this is an excellent write up!
maybe this should get stickied?
Any reason why you used a regular drill bit instead of a hole bit?
also what are the advantages of using studs instead of a self taping bolt for the the flange?
maybe this should get stickied?
Any reason why you used a regular drill bit instead of a hole bit?
also what are the advantages of using studs instead of a self taping bolt for the the flange?
05-08-14, 09:21 AM
#5

hole bit the drilled circle piece can fall in when pulling the bit out, very risky.
I use a step bit so I don't have to change out bits and they are generally much shorter.
looks good that basically the just of it but use lots of grease and keep wiping.
I used bolts but studs are great it makes for holding a gasket in place easier and just easier to get it tightened on and off later on, also with studs there is less chance of stripping out the holes in the future when you go to untighten. remember its soft aluminum do everything very softly. I will be changing mine out soon.
Last edited by Ali SC3; 05-08-14 at 09:55 AM.
05-08-14, 04:31 PM
#7
hole bit the drilled circle piece can fall in when pulling the bit out, very risky.
I use a step bit so I don't have to change out bits and they are generally much shorter.
looks good that basically the just of it but use lots of grease and keep wiping.
I used bolts but studs are great it makes for holding a gasket in place easier and just easier to get it tightened on and off later on, also with studs there is less chance of stripping out the holes in the future when you go to untighten. remember its soft aluminum do everything very softly. I will be changing mine out soon.
I use a step bit so I don't have to change out bits and they are generally much shorter.
looks good that basically the just of it but use lots of grease and keep wiping.
I used bolts but studs are great it makes for holding a gasket in place easier and just easier to get it tightened on and off later on, also with studs there is less chance of stripping out the holes in the future when you go to untighten. remember its soft aluminum do everything very softly. I will be changing mine out soon.
Thanks!
Trending Topics
05-08-14, 06:32 PM
#8
Very nice, this is the one part of my build that I'm dreading.
There was another thread I had found, I'll have to dig it up now that drilled into another part of the pan that was more vertical. Would that be better or does it really matter? This being the OEM location makes it 100% fine but if there's any benefit to drilling and tapping the top portion instead, be interested in knowing the difference.
There was another thread I had found, I'll have to dig it up now that drilled into another part of the pan that was more vertical. Would that be better or does it really matter? This being the OEM location makes it 100% fine but if there's any benefit to drilling and tapping the top portion instead, be interested in knowing the difference.
05-09-14, 10:22 AM
#10
Do yourself a favor and go out to lowes and get a 7/8" hole saw and make that oil drain as large as you can.
What happened to me was I initially was very scared of using the hole saw and used a step drill bit instead. I slowly made the hole larger and larger using alot of grease and patience but I ended with a hole size about the same as yours. Being **** and freaked out about drilling any more and shavings getting into the pan I stopped there and cleaned the shaving out as much as I could using bent q-tips with grease on them and swabbing out as much as possible and then flushing oil down the hole and draining it.
What happened to me was the return line hole was not large enough to allow the oil to drain and what eventually happened was the oil would back up into the turbo and it started draining oil out the rear seal. I ended up sending the turbo to Kurt at Boostlab to get a rebuild. He said there was def signs of charred caked oil on the seals from insufficient return line.
I then re-drilled with a hole saw and was very careful in my process and was able to clear out a pretty ridiculous sized hole the 2nd time. I'm 100% confident that this will solve the return line issue and you can visually see how restrictive the prior hole was.
The key to the hole saw is that you have to let the pilot drill bit protrude through, the center drill bit is what keeps the "coin" in the bit after it punches through. There is a risk involved with this piece falling in, but after what happened to me with my turbo rebuild I was willing to try anything to avoid ruining another center cartridge.
My original hole I made using a step bit, look familiar?
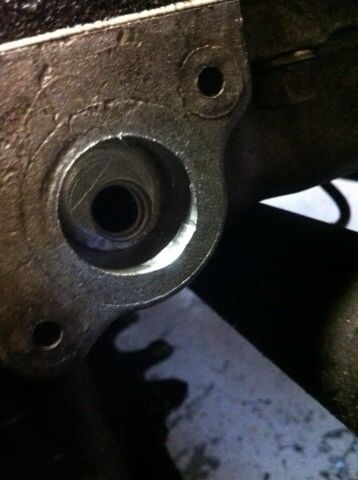
Oil was rolling down the downpipe into the exhaust from the rear seal:
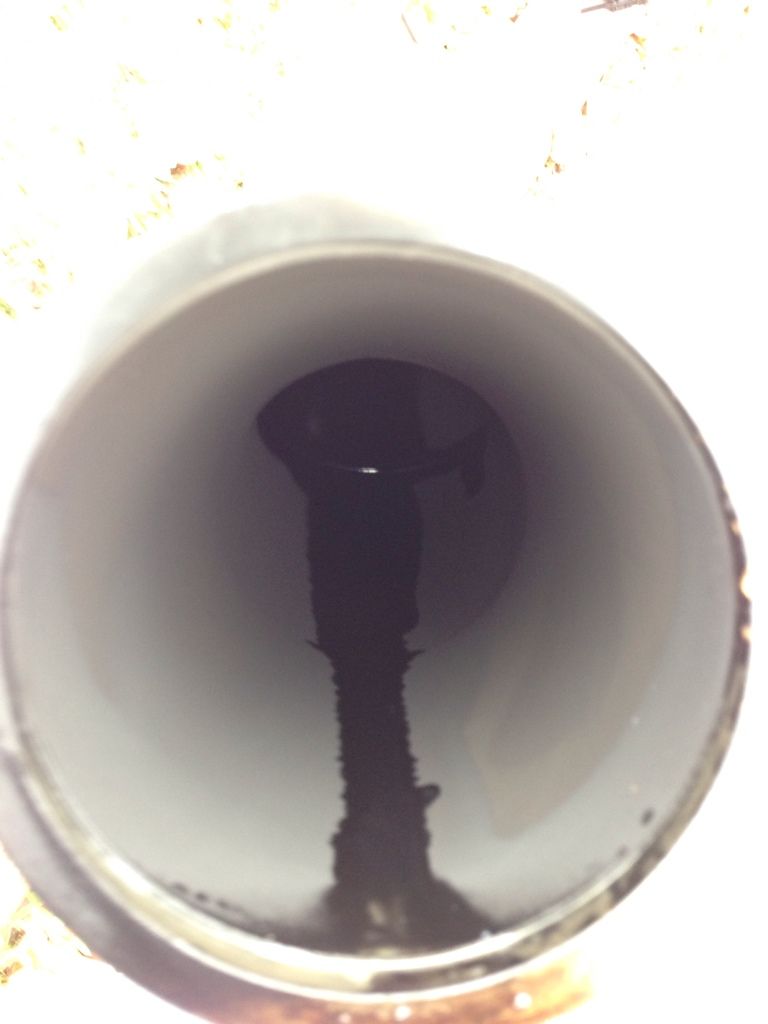
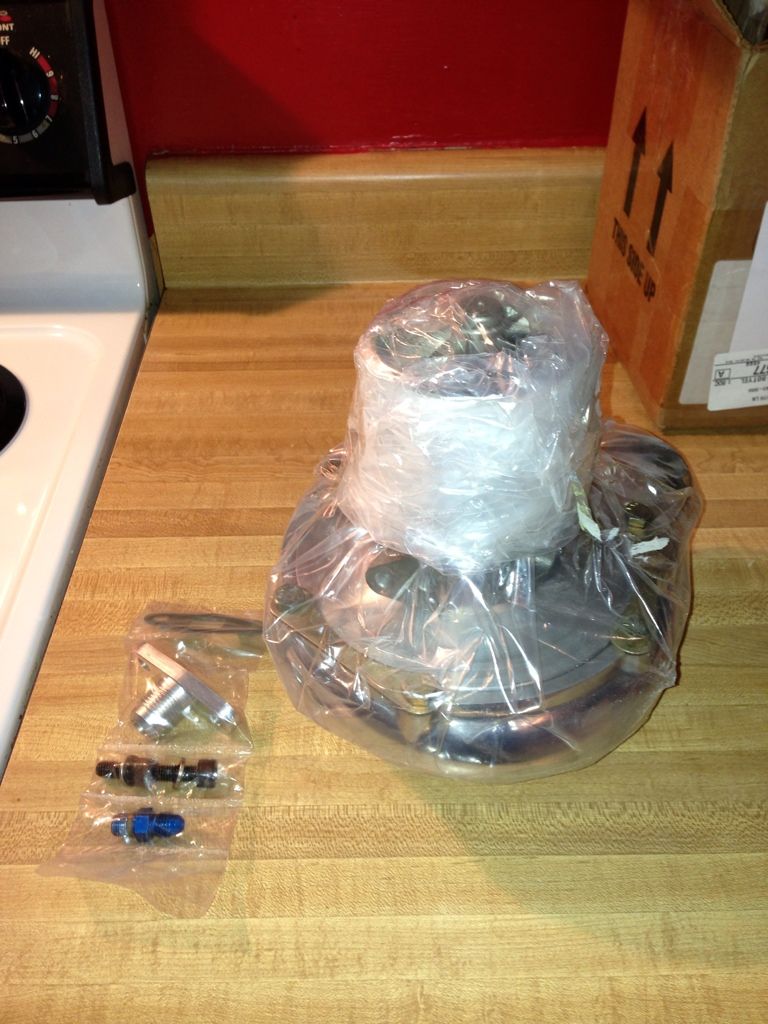
Turbo rebuild, Yay $450 later!:
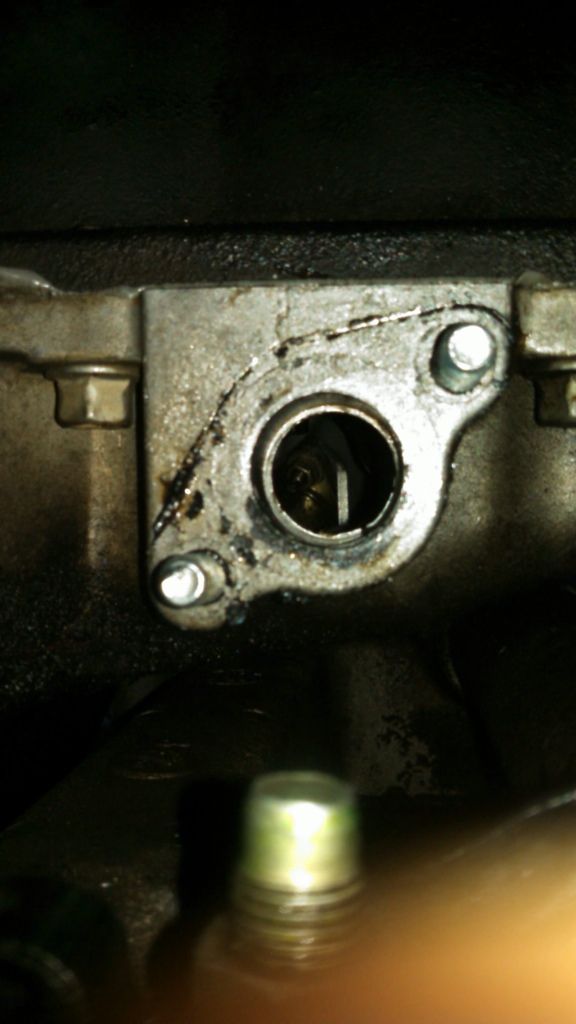
New hole using 7/8" hole saw:
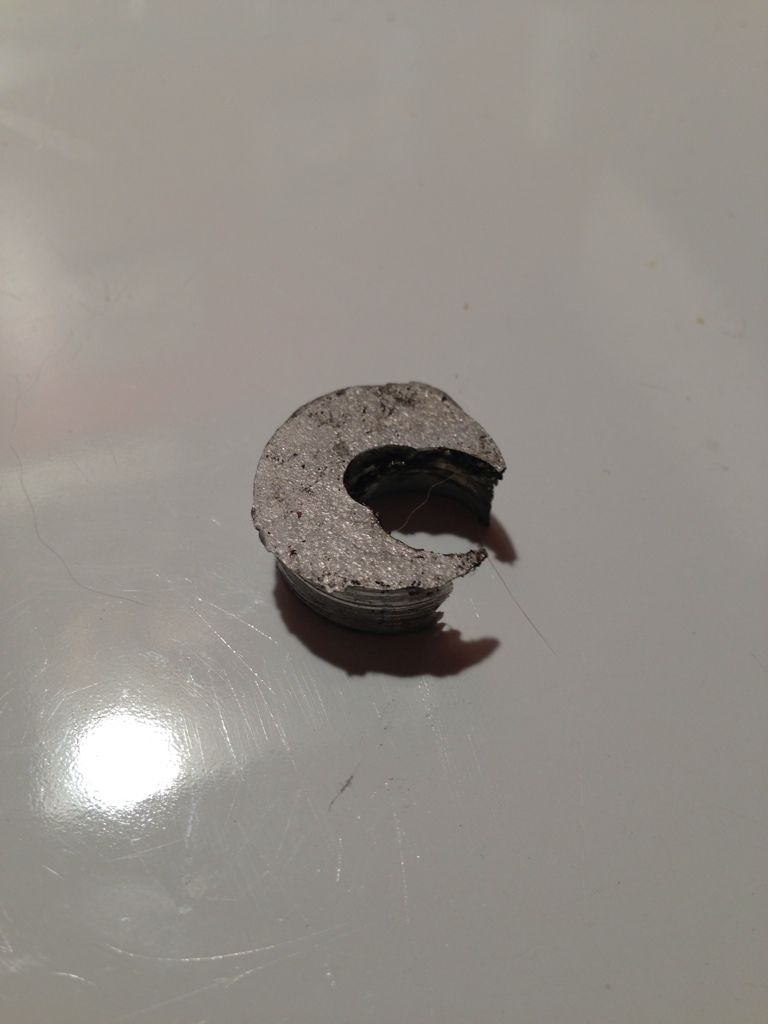
Piece that was removed showing the size difference of old hole and new:
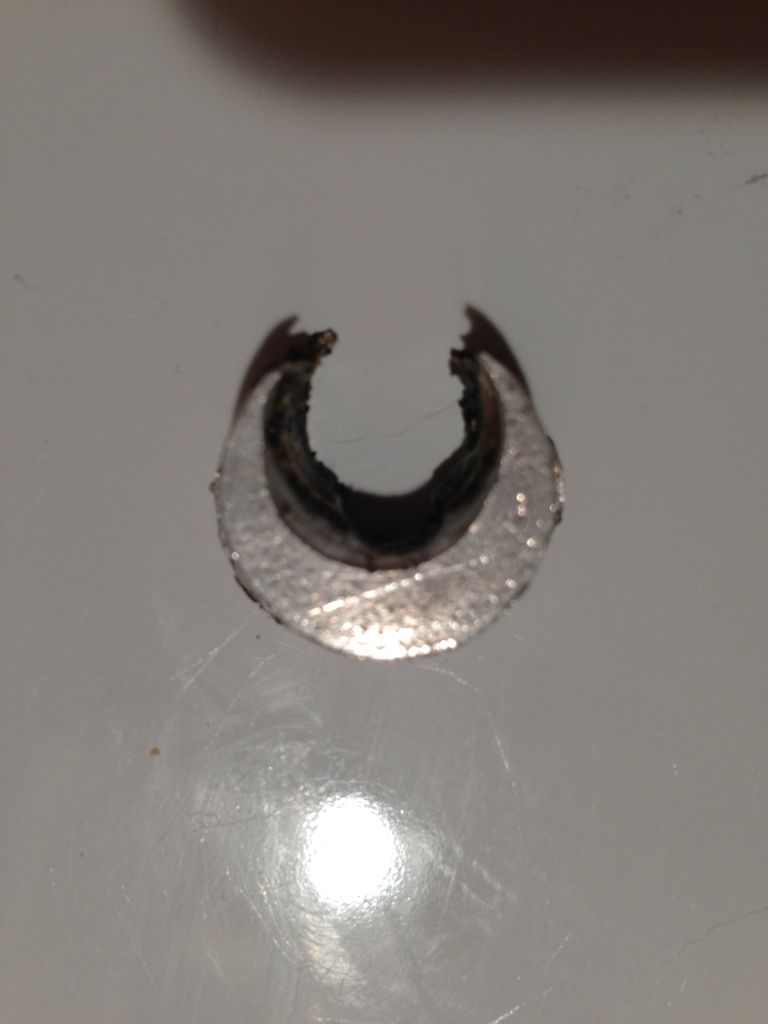
Moral of the story is make your return line drain as high flowing as possible! It's a gravity drained line not pressure so it has to flow well.
Ever changed your oil and poured the new oil in using a small funnel? What happens? You have to wait for the oil to drain through the funnel before adding more oil because of the orifice size can only allow so much through at a time.
Just wanted to give a heads up to help avoid future problems.

What happened to me was I initially was very scared of using the hole saw and used a step drill bit instead. I slowly made the hole larger and larger using alot of grease and patience but I ended with a hole size about the same as yours. Being **** and freaked out about drilling any more and shavings getting into the pan I stopped there and cleaned the shaving out as much as I could using bent q-tips with grease on them and swabbing out as much as possible and then flushing oil down the hole and draining it.
What happened to me was the return line hole was not large enough to allow the oil to drain and what eventually happened was the oil would back up into the turbo and it started draining oil out the rear seal. I ended up sending the turbo to Kurt at Boostlab to get a rebuild. He said there was def signs of charred caked oil on the seals from insufficient return line.
I then re-drilled with a hole saw and was very careful in my process and was able to clear out a pretty ridiculous sized hole the 2nd time. I'm 100% confident that this will solve the return line issue and you can visually see how restrictive the prior hole was.
The key to the hole saw is that you have to let the pilot drill bit protrude through, the center drill bit is what keeps the "coin" in the bit after it punches through. There is a risk involved with this piece falling in, but after what happened to me with my turbo rebuild I was willing to try anything to avoid ruining another center cartridge.
My original hole I made using a step bit, look familiar?

Oil was rolling down the downpipe into the exhaust from the rear seal:

Turbo rebuild, Yay $450 later!:

New hole using 7/8" hole saw:

Piece that was removed showing the size difference of old hole and new:


Moral of the story is make your return line drain as high flowing as possible! It's a gravity drained line not pressure so it has to flow well.
Ever changed your oil and poured the new oil in using a small funnel? What happens? You have to wait for the oil to drain through the funnel before adding more oil because of the orifice size can only allow so much through at a time.
Just wanted to give a heads up to help avoid future problems.
Last edited by HiPSI; 05-09-14 at 10:32 AM.
The following users liked this post:
CaliMike (03-12-22)
05-09-14, 12:09 PM
#11
Those pictures are a bit large. You can also just use an appropriately sized step bit, like the pack that has 3 sizes the medium one will drill the hole out completely. the smallest one yeah those usually stop just over 1/4" or so you do need the right sized one.

The following users liked this post:
LEXXIUM (12-07-16)
05-14-14, 11:26 AM
#13
Lead Lap
Join Date: Aug 2013
Location: ohio
Posts: 476
Likes: 0
Received 0 Likes
on
0 Posts
i know this is going to be a complete noob question but since im doing this part of the project this weekend or next
you don't have to make the holes any deeper for the studs? you only have to tap the holes that are already there for the suds. Correct?
you don't have to make the holes any deeper for the studs? you only have to tap the holes that are already there for the suds. Correct?
07-08-14, 09:27 AM
#15
Lead Lap
Join Date: Aug 2013
Location: ohio
Posts: 476
Likes: 0
Received 0 Likes
on
0 Posts
just out of curiosity, where does everyone get the flange from?
I see them for like 50 bucks... for a flange that seems outrageous?
also, for the stud holes did you drill all the way through the pan? or did you stop about halfway?
I see them for like 50 bucks... for a flange that seems outrageous?
also, for the stud holes did you drill all the way through the pan? or did you stop about halfway?