DIY: TT Mishimoto Radiator Install with JZ swap and Soarer fan shroud
 08-28-13, 02:53 PM
#1
1JZ Single SC400
Thread Starter
iTrader: (59)
Join Date: Jan 2009
Location: Alabama, Roll Tide!
Posts: 8,518
Likes: 0
Received 15 Likes
on
12 Posts
Since I concurred the radiator install today, I thought I would do a detailed right up. "There are many like it, but this one is mine." 
I have a 1JZ swap, which the 2JZ swap should be the same. After reading many reviews, there were different opinions on which radiator to use, their preference and their findings of each. This one is for the Mishimoto style, which fits the TT MKIV manual transmission. Keep in mind Mishimoto only makes the manual ones for this car. Some say the fan shroud has to be modified, the battery tray has to be cut for clearance, and so on. I, on the other hand didn't have to modify but the shroud and it was only a few places. Some also say the mounts or radiator itself, needs to be adjusted and raised one inch, maybe not that much, with this type. Other research says the temp sensor needs to be saved, not the case here, it comes with two plugs. One for the drain, the other for the sensor. They both come with a seal and Teflon tape. I didn't take many photographs of the install, since it has been done so many times before, the same way. The last thing is that you need to order, is one that comes with a cap, some do, some don't.
First remove the battery and tray. You then need to drain the coolant, if a flush is needed, then don't save it, if you wan to reuse it, then save it. Remove the top two side mounts, held in by two 14mm bolts. If you don't have the rubber supports, then you will have to find some or make something up. Remove the top fan shroud bolts on both sides or you can wait till the unit is out of the car. Under the car, remove the bottom fan shroud piece. Undo the top overflow rubber hose from nipple. Remove the bottom radiator hose, remove the top hose. Everything should be loose and removed by now. Pull up on the radiator and fan shroud. NO need to remove the fan.
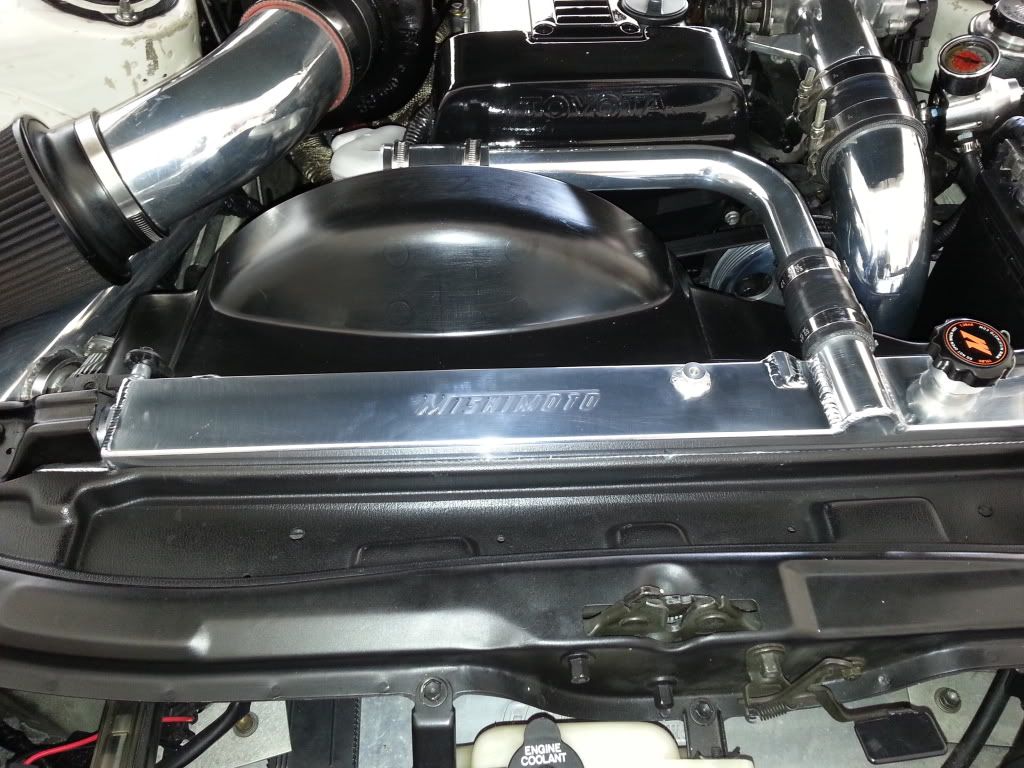
Remove the fan shroud. I had the Soarer 1JZ one, NOT the stock SC300 or TT one. Once it is loose, you will need to trim a little plastic around the drain tube, and trim around the bottom radiator hose, just enough to apply hose. For this method, I used a pair of wire cutters. Worked great. Lay new radiator on the work bench and secure it with only the top bolts and washers, if needed. The bottom ones didn't have any to go to on the shroud itself. Once the top ones are tight, then pull slightly on the bottom of it, and pull over the aluminum studs on the radiator. It will go, and will fit snug. This method will secure the fan shroud at the bottom. Once this is done, use an 10mm bolt and install halfway down on the middle stud, then use a zip tie and run it through the other fan hole and under the 10mm bolt, pull tight, and then finish tightening down the screw. This secures the zip tie twice. Once this is done, make sure the two plugs are tight. For the factory bottom rubber plugs, turn them around and install, or put them on upside down. This makes up the difference for the 1 inch or less on top. Install and do a trial run. Look at each side and see if it is hitting anything or touching anything. Mine didn't touch nothing, also rested on the thin metal tray on the bottom and also cleared the 3 inch intercooler piping with ease. Once it looks good in there, then under the car, start to bend the stock metal holes up toward the new radiator. Be careful and not miss. I used a metal wedge and a hammer. The metal bends pretty easy. This secures it in place and will not allow movement. If in the event you want to reuse them, then bend them back in place. Connect the bottom hose and tighten clamp. Reinstall the bottom trim fan shroud piece. On top, install the top mounts with the oem rubber pieces under them. Be sure to pull back on the radiator to secure it in place. Do other side. It should give more than enough clearance for the stock 1JZ fan. I turned it several times, to assure it cleared w/o touching. I also had to trim 1 inch off the chrome metal upper radiator hose. The side I trimmed was the one that goes into the water neck, NOT the one that goes into radiator. This method assured me that the hose looked straight and even, looking left and right. Once cut, blow out shavings, and reinstall. I used soap to be able to move the plastic couplings back and forth and makes easier install. Once this is done, go ahead and put the rubber overflow line on and secure it. Put the battery tray back in and install battery. Get a funnel and fill up the system with new or old antifreeze. Turn car on and heat on full blast and and on the floor only. Let car idle until the fluid start to come out, while monitoring your thermostat and needle. This means the thermostat has opened. Once opened, put top on and make sure there are no bubbles still coming out. Allow to cool, and top if needed. I hope I didn't miss anything. Pretty straight forward. Here are some pictures. The top mount looks even, no gaps, and better cooling now.
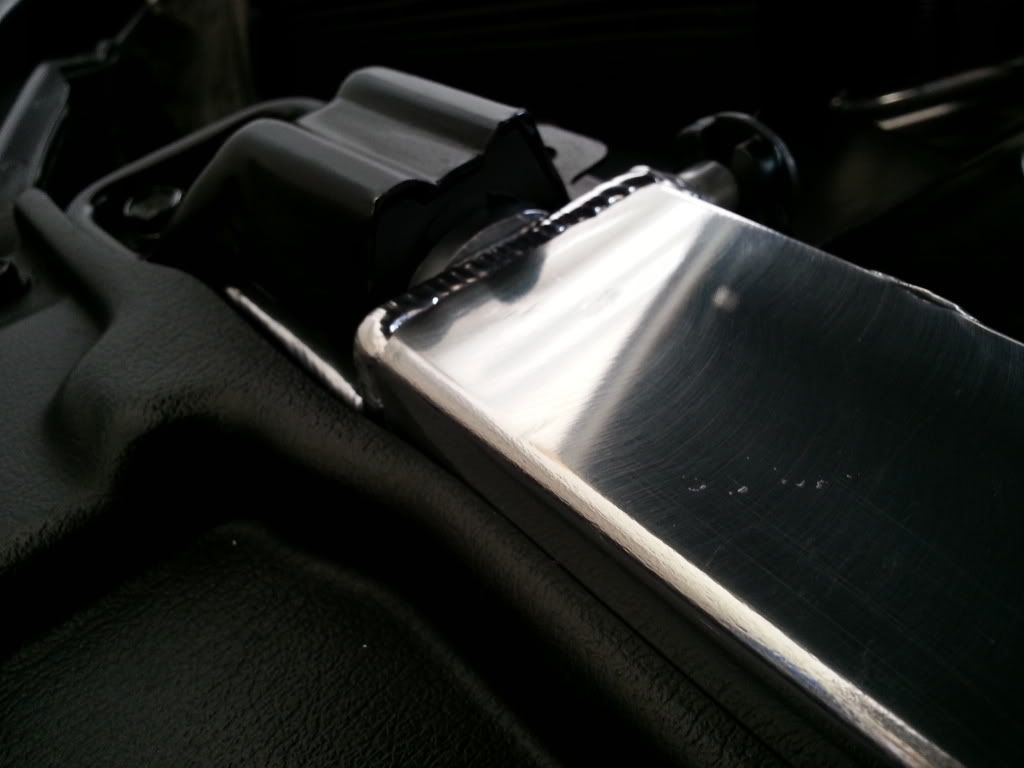
The plastic is flush and looks great, no gaps.
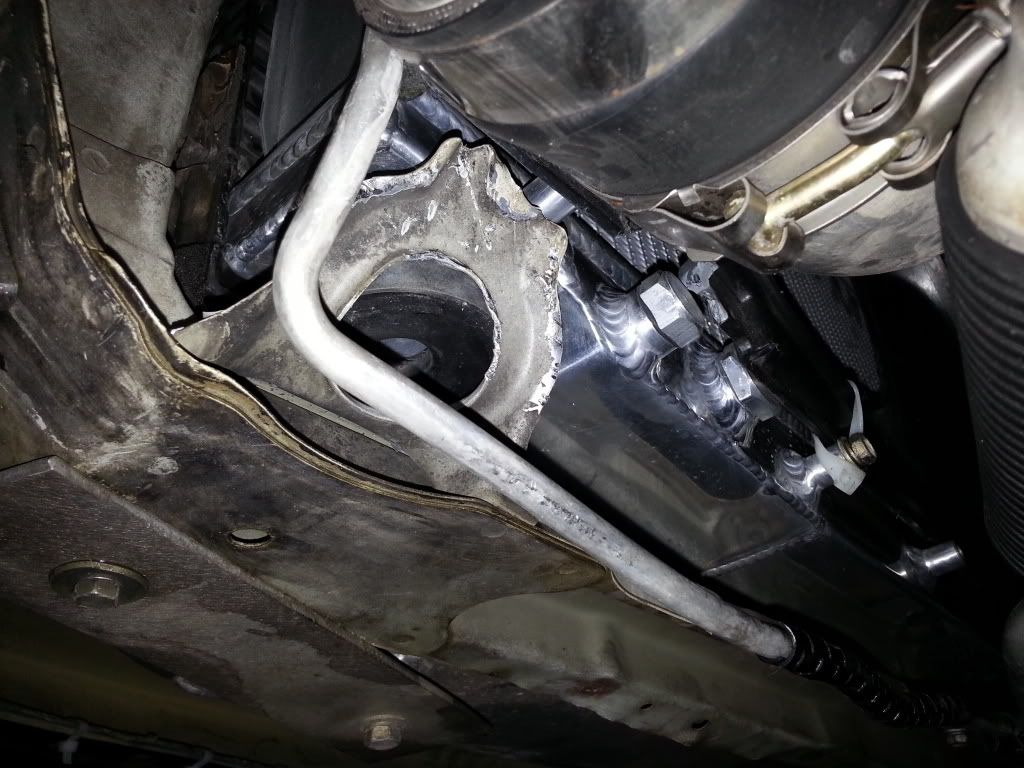
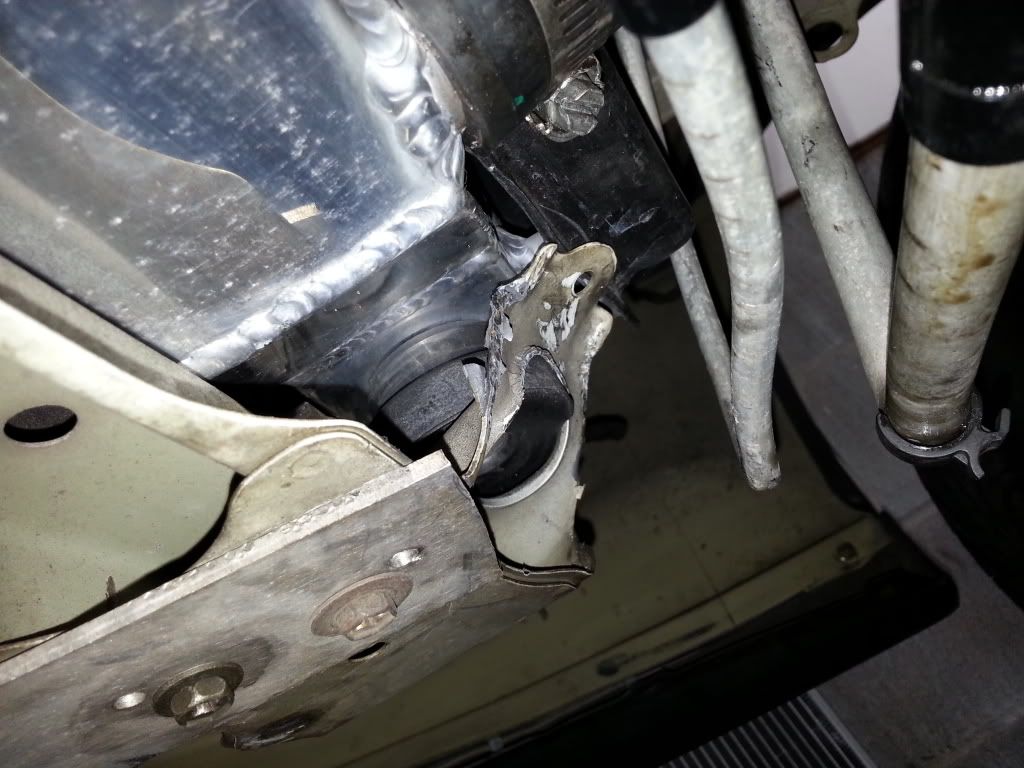
Bent tab on driver side, cleared intercooler piping also. Also you can see the rubber mounts are upside down.
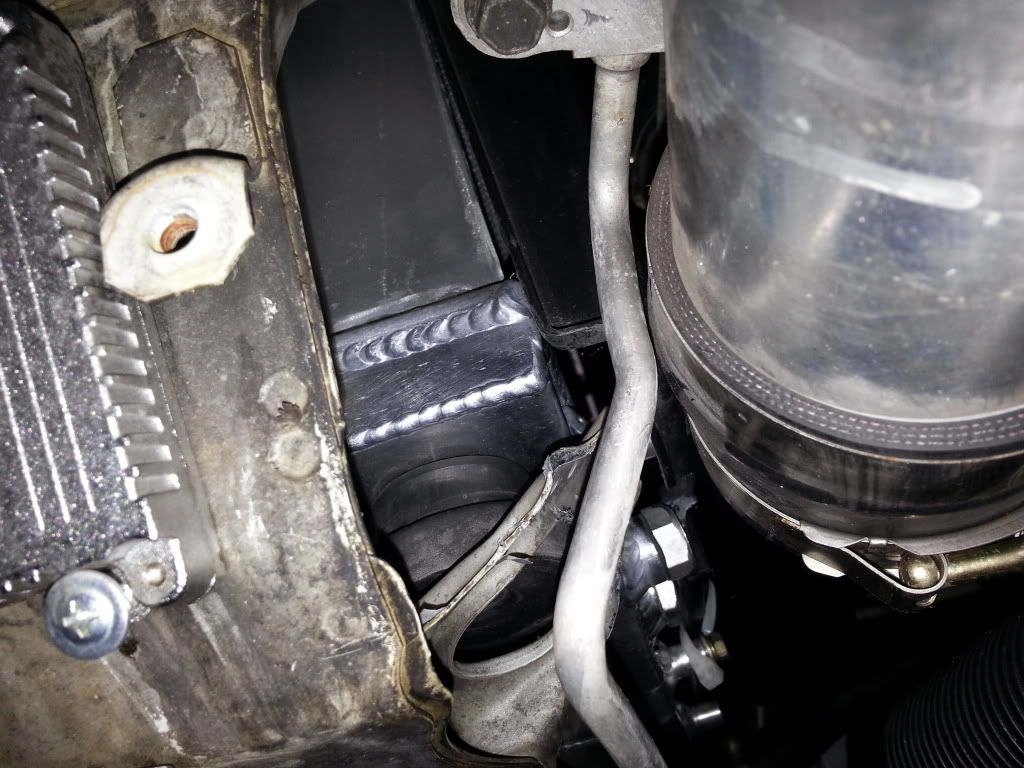
Another shot of the bent tab, and if you look closely, you can also see where I trimmed around the drain plug. Also see the 10mm bolt with the ziptie ran through it and secured.
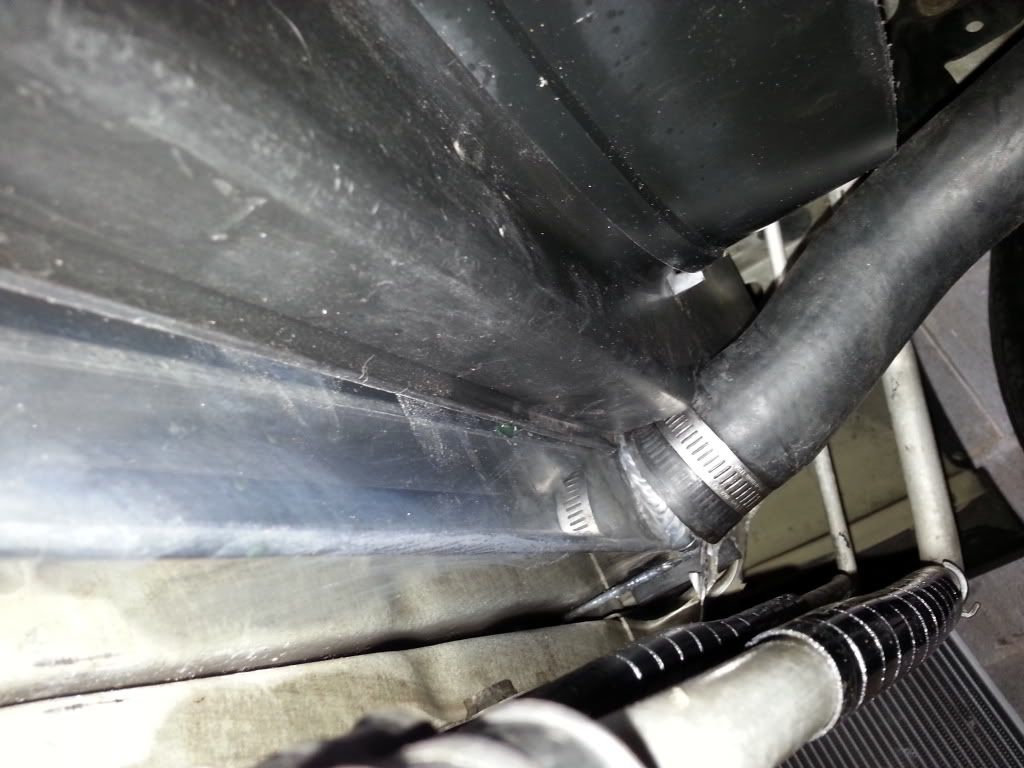
The bottom hose is connected, and see how the radiator rest in the thin metal tray.
Another shot of the smoothness and it being flushed and level.
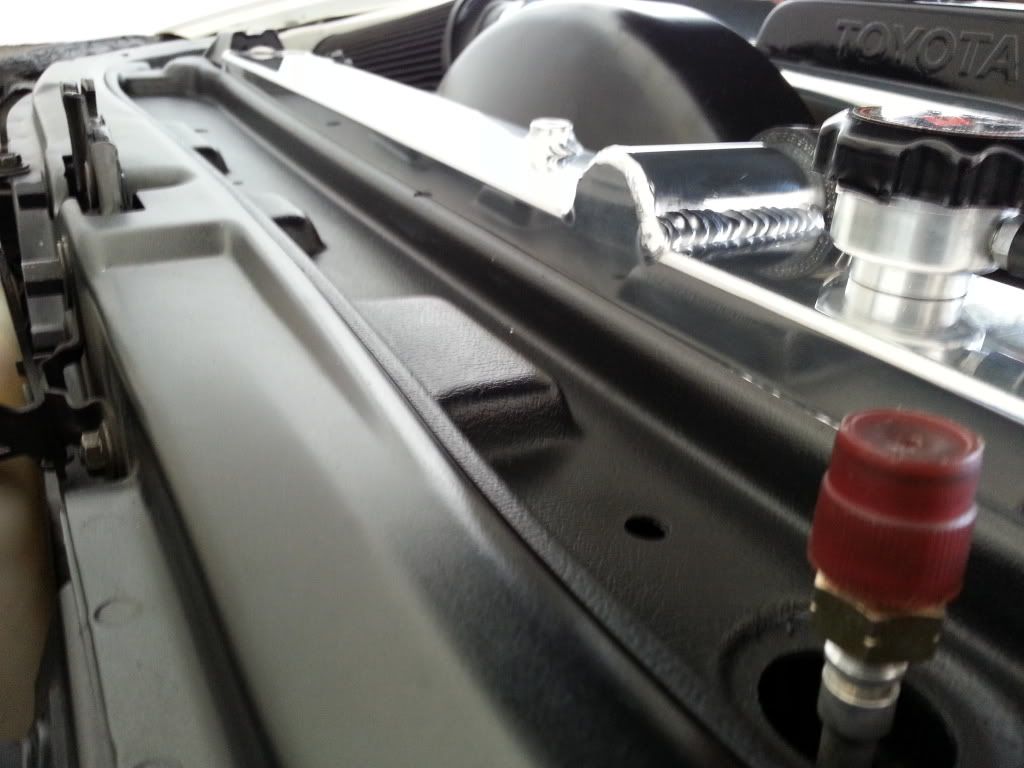
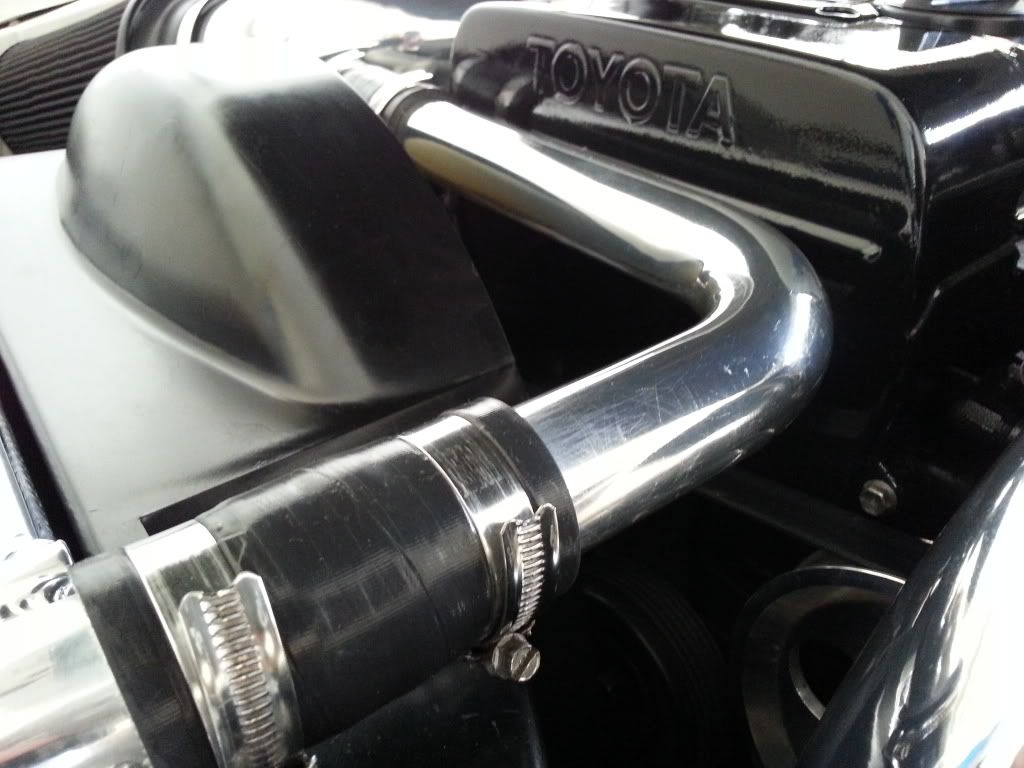
The upper metal hose installed. Again, I had to trim 1 inch of the side going to water neck.
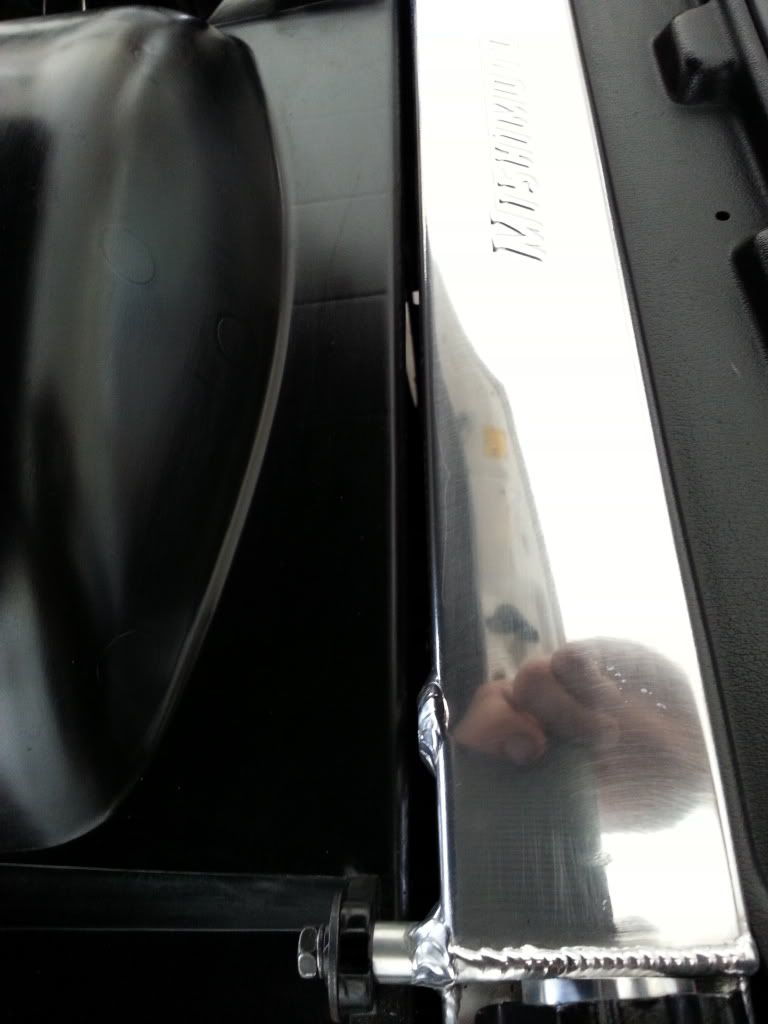
Slight gap in between the fan shroud and radiator. Better cooling efficiency.
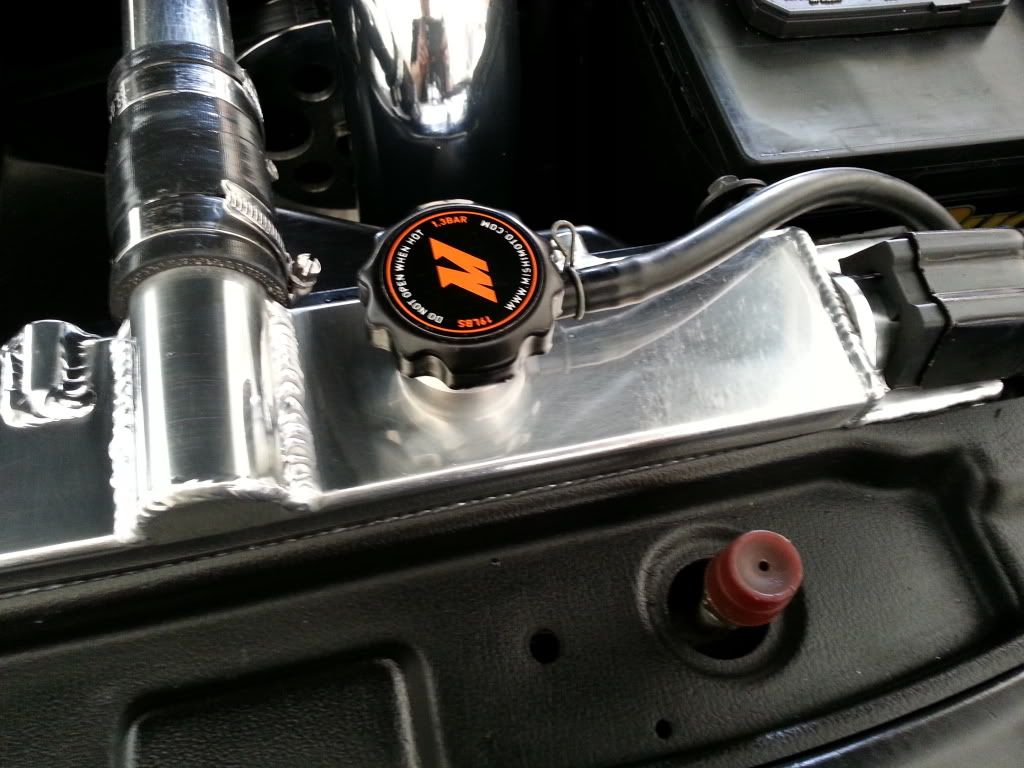
Installed.....
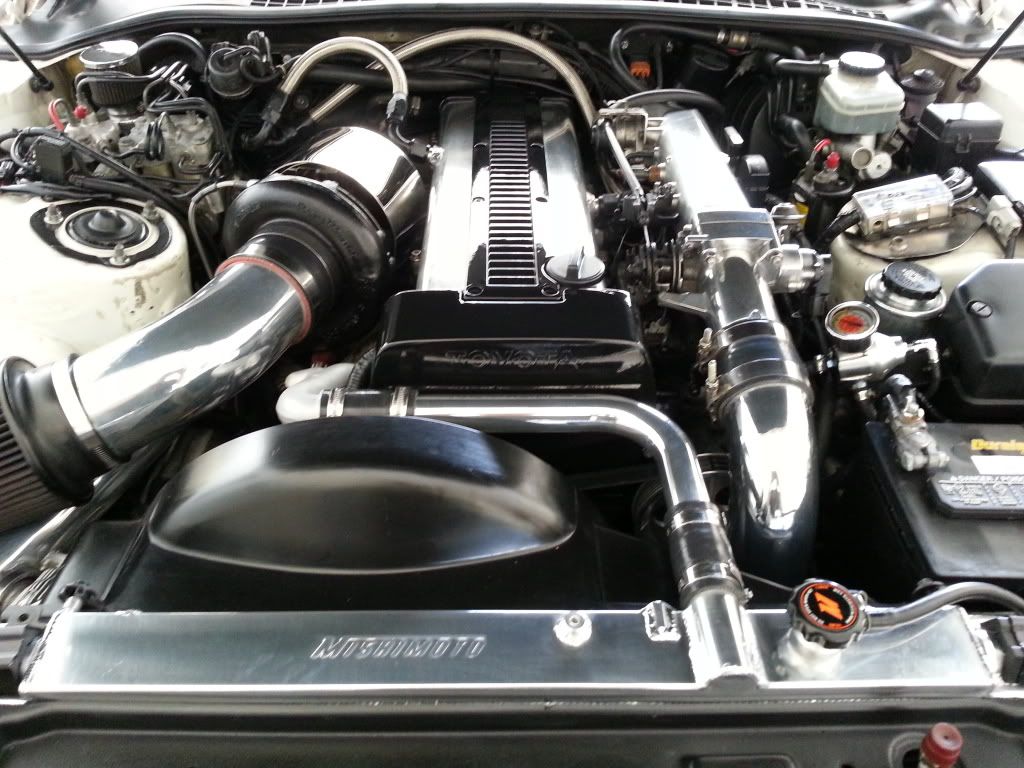
ENJOY YOUR NEW COOLING ENGINE AND INSTALLED RADIATOR!!!!
I have a 1JZ swap, which the 2JZ swap should be the same. After reading many reviews, there were different opinions on which radiator to use, their preference and their findings of each. This one is for the Mishimoto style, which fits the TT MKIV manual transmission. Keep in mind Mishimoto only makes the manual ones for this car. Some say the fan shroud has to be modified, the battery tray has to be cut for clearance, and so on. I, on the other hand didn't have to modify but the shroud and it was only a few places. Some also say the mounts or radiator itself, needs to be adjusted and raised one inch, maybe not that much, with this type. Other research says the temp sensor needs to be saved, not the case here, it comes with two plugs. One for the drain, the other for the sensor. They both come with a seal and Teflon tape. I didn't take many photographs of the install, since it has been done so many times before, the same way. The last thing is that you need to order, is one that comes with a cap, some do, some don't.
First remove the battery and tray. You then need to drain the coolant, if a flush is needed, then don't save it, if you wan to reuse it, then save it. Remove the top two side mounts, held in by two 14mm bolts. If you don't have the rubber supports, then you will have to find some or make something up. Remove the top fan shroud bolts on both sides or you can wait till the unit is out of the car. Under the car, remove the bottom fan shroud piece. Undo the top overflow rubber hose from nipple. Remove the bottom radiator hose, remove the top hose. Everything should be loose and removed by now. Pull up on the radiator and fan shroud. NO need to remove the fan.
Remove the fan shroud. I had the Soarer 1JZ one, NOT the stock SC300 or TT one. Once it is loose, you will need to trim a little plastic around the drain tube, and trim around the bottom radiator hose, just enough to apply hose. For this method, I used a pair of wire cutters. Worked great. Lay new radiator on the work bench and secure it with only the top bolts and washers, if needed. The bottom ones didn't have any to go to on the shroud itself. Once the top ones are tight, then pull slightly on the bottom of it, and pull over the aluminum studs on the radiator. It will go, and will fit snug. This method will secure the fan shroud at the bottom. Once this is done, use an 10mm bolt and install halfway down on the middle stud, then use a zip tie and run it through the other fan hole and under the 10mm bolt, pull tight, and then finish tightening down the screw. This secures the zip tie twice. Once this is done, make sure the two plugs are tight. For the factory bottom rubber plugs, turn them around and install, or put them on upside down. This makes up the difference for the 1 inch or less on top. Install and do a trial run. Look at each side and see if it is hitting anything or touching anything. Mine didn't touch nothing, also rested on the thin metal tray on the bottom and also cleared the 3 inch intercooler piping with ease. Once it looks good in there, then under the car, start to bend the stock metal holes up toward the new radiator. Be careful and not miss. I used a metal wedge and a hammer. The metal bends pretty easy. This secures it in place and will not allow movement. If in the event you want to reuse them, then bend them back in place. Connect the bottom hose and tighten clamp. Reinstall the bottom trim fan shroud piece. On top, install the top mounts with the oem rubber pieces under them. Be sure to pull back on the radiator to secure it in place. Do other side. It should give more than enough clearance for the stock 1JZ fan. I turned it several times, to assure it cleared w/o touching. I also had to trim 1 inch off the chrome metal upper radiator hose. The side I trimmed was the one that goes into the water neck, NOT the one that goes into radiator. This method assured me that the hose looked straight and even, looking left and right. Once cut, blow out shavings, and reinstall. I used soap to be able to move the plastic couplings back and forth and makes easier install. Once this is done, go ahead and put the rubber overflow line on and secure it. Put the battery tray back in and install battery. Get a funnel and fill up the system with new or old antifreeze. Turn car on and heat on full blast and and on the floor only. Let car idle until the fluid start to come out, while monitoring your thermostat and needle. This means the thermostat has opened. Once opened, put top on and make sure there are no bubbles still coming out. Allow to cool, and top if needed. I hope I didn't miss anything. Pretty straight forward. Here are some pictures. The top mount looks even, no gaps, and better cooling now.
The plastic is flush and looks great, no gaps.


Bent tab on driver side, cleared intercooler piping also. Also you can see the rubber mounts are upside down.

Another shot of the bent tab, and if you look closely, you can also see where I trimmed around the drain plug. Also see the 10mm bolt with the ziptie ran through it and secured.


The bottom hose is connected, and see how the radiator rest in the thin metal tray.

Another shot of the smoothness and it being flushed and level.

The upper metal hose installed. Again, I had to trim 1 inch of the side going to water neck.

Slight gap in between the fan shroud and radiator. Better cooling efficiency.

Installed.....

ENJOY YOUR NEW COOLING ENGINE AND INSTALLED RADIATOR!!!!
 08-28-13, 04:12 PM
#4
1JZ Single SC400
Thread Starter
iTrader: (59)
Join Date: Jan 2009
Location: Alabama, Roll Tide!
Posts: 8,518
Likes: 0
Received 15 Likes
on
12 Posts
Thanks man. I did the best I could to combine all the other types of radiators, into this one. I should have taken more pictures of the trimming, but I didn't, it was pretty straight forward. According to the other ones, this one fit the best w/o many modifications.
 08-28-13, 04:23 PM
#6
1JZ Single SC400
Thread Starter
iTrader: (59)
Join Date: Jan 2009
Location: Alabama, Roll Tide!
Posts: 8,518
Likes: 0
Received 15 Likes
on
12 Posts
I think I have a typo error. It is 12mm or 14mm for the upper support brackets on both sides of the radiator. Oooopppssss.... My bad. Lol
I did this out of my memory.....
I did this out of my memory.....

Thread
Thread Starter
Forum
Replies
Last Post
Deegee
SC- 1st Gen (1992-2000)
11
10-31-15 02:40 PM