When you click on links to various merchants on this site and make a purchase, this can result in this site earning a commission. Affiliate programs and affiliations include, but are not limited to, the eBay Partner Network.
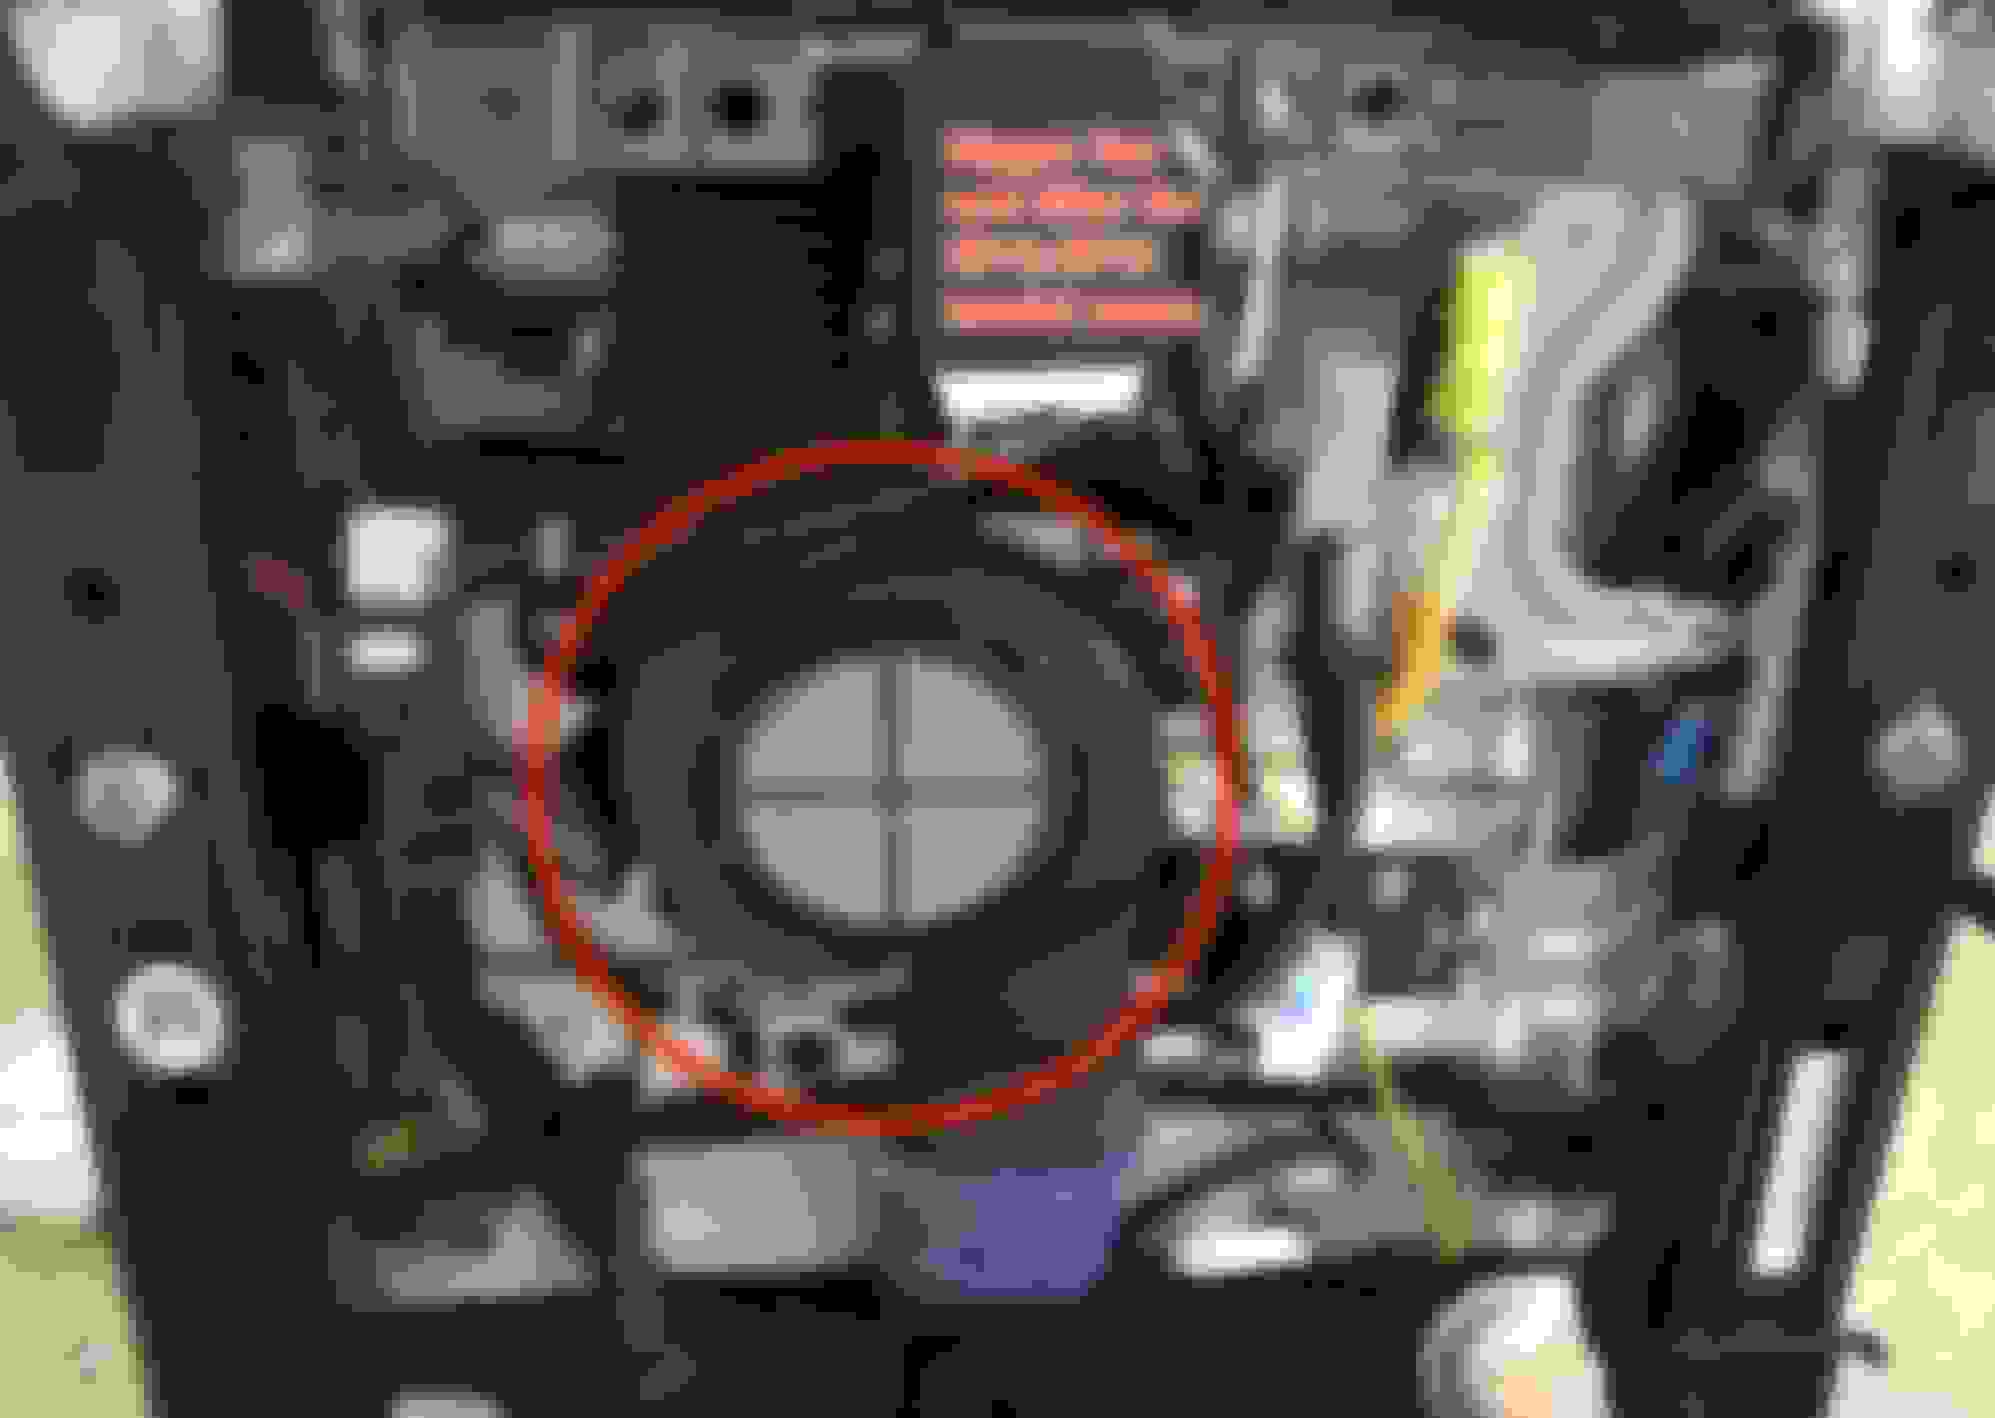
Hi, 7. swap out the 2007-2015 4-spoke steering wheel with the 2016-2017 3-spoke steering (all buttons working)
For this step, how is wiring? Any tips? Do we need to do something for airbag?
Thanks in advance.
Let me find you the part number for the new steering wheel module with airbag. It cost me roughly 1000usd to buy from a local seller who got it from Japan. It could be cheaper if you order from UAE.
As for the wiring, it is a 30minute job if I can help you identify the necessary lead jumpings involved. But always remember to disconnect the battery first before you hook/unhook the two independent black and red airbag cables (in some countries, they could be black and green). I don't want to read about any injury in the news.
getting lazier lately after the interior refurbishing. It's like hiring a contractor for any home improvement projects. He/she will get 90-85% work done. But the last 5-10% works drag on forever. Let me clear my thoughts on what's remaining.
- Upgrading to the US spec 4-2-1 stainless steel manifolds involves quite a few parts from manifolds to oxygen sensors to CAT pipes. And I fear a simple swap might trigger the check engine light. I've never done this kind of swap before.
- A brand new Middle East oil filter/cooler assembly is more expensive than I am willing to pay. I might get a salvaged part from a US tundra and rebuild it with fresh gaskets/o-rings. Also most US junk yards do not ship overseas so I might need a friend in the US do a routing for me.
- AP racing 9040/9202 caliper kits have no available stock at this moment. I am also NOT quite certain about the rotor choice and bridge adaptors, especially the material choice. Are aluminum rotor center hubs and aluminum caliper adaptors strong enough for this 6000lb truck?
- Two T-shape heater hoses need to be replaced. I keep forgetting to order them
- the 2007-2011 front row seat ventilation is weak, even after I replaced the seat foam and fan intake filter. After a direct comparison with another 2014 model at a local shop, I realized that truck has a different fan. The newer fan has a distinctively larger intake and thinner filter cap. So I might need to get that fan. But what about the computer? ducts? I don't know.
wow.. what a project..
i figure it would cost much higher in north america given labour is so much more exp..
One purpose of my post is to introduce a feasible way for the average 4x4 enthusiast to afford and enjoy a good quality LX470/570 at 30-50% of the MSPR. Most overhaul items are DIY friendly. Some require 2 people and a complete tool kit. Hiring someone to do it for you in the US or Canada probably will wash away some of the intended savings. But if you grew up repairing your own vehicles and listening to NPR Car Talk, I don't imagine too much difficulty.
The following items are a little DIY un-friendly
- cab mount replacement requires two jacks and two metal pipes with wood blocks. But definitely no need to separate the body and chassis.
- taking apart the dashboard to apply high quality insulators requires two people, patiences and taking pictures as you goes along.
- rear shock replacement is difficult due to tight space.
- exhaust manifold removal is difficult due to tight space. good news is that US LX570s come with stainless steel manifolds so no need to do this.
- the bad news is the two rubber engine mounts sit under the exhaust manifolds... You might still need to remove the manifolds to get to the engine mounts.
- rear wheel bearings replacement require special press operation. Check with your local machine shops.
- carpet and floor cleaning requires a decent size backyard to sunbath the carpet for more than 48hours after cleaning it with detergent and disinfectant.
- replacing the radiator upper plastic cover is not DIYable without special shop tools. Get a new radiator assembly. A new unit costs less than 400 bucks anyway.
- Steering wheel replacement requires patience and knowing what you are doing.
Have a good mechanic friend and a paint shop a phone call away. As I said, I always treat my mechanic friends as my family members. I buy them lunch and I send cards with gifts. I introduce more business to them whenever I can. I never blame them if they break any trim clips, slightly scratch a surface or misdiagnose a problem initially. Nobody is perfect. If I have to do what I want them to do, I would have done worse.
Yes, very in-depth thread, thank you. Can you tell us, for the 2008 - 2012 front end conversion to 2013, what the P/N required are? Is in just 52119A (I think that's it) and, of course, the lamp assy's? Or, are there other substructure parts needed?
And, as a follow question (for anyone that may know), regarding the 2013 - 2015 projector hi beams - are they just as bright as the larger "reflectored" 2008 - 2012 lamps (w HID in the hi beam).
THere are quite alot of parts involved from the major items such as headlamps, front bumper, bumper inner foam, chrome grille, lower grille, down to the small items such as sonar sensor clips and headlamp washer cap.
Let me get the list for you over the weekend. The total cost is about 3500USD for the front and 1300USD for the rear. I only did the front so far. I am saving up for the supercharger.
That�s amazing that you are doing this. Hope to see more
I will also share the first ever post on how to fine tuning the AHC suspension with with one set square ruler (roughly 30cm long). I managed to set the left/right/front/back corner height to within 0.5cm (1/5 inch) deviation. Lots of calculations / iterations and the techstream software are required. Please stay tuned.
I will also share the first ever post on how to fine tuning the AHC suspension with with one set square ruler (roughly 30cm long). I managed to set the left/right/front/back corner height to within 0.5cm (1/5 inch) deviation. Lots of calculations / iterations and the techstream software are required. Please stay tuned.
They say that they only fit 2012-2015, but they look the same? I have heard some people say that there would be a gap? Did you encounter this issue?
Also, I was wondering if you have ever seen anyone swap the 2017 triple LED headlights. I assume those wouldn't fit with the body work but was curious about it.
THere are quite alot of parts involved from the major items such as headlamps, front bumper, bumper inner foam, chrome grille, lower grille, down to the small items such as sonar sensor clips and headlamp washer cap.
Let me get the list for you over the weekend. The total cost is about 3500USD for the front and 1300USD for the rear. I only did the front so far. I am saving up for the supercharger.
try $1800 for just one headlight assy, it costs about $19500 parts, labor to replace. The entire part from the hood forward
ask me how I know
 10-12-17, 03:34 PM