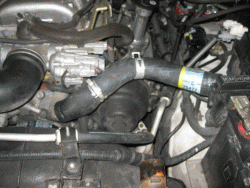
2001 LX470 Radiator Replacement
#1
Driver School Candidate
Thread Starter
Join Date: Sep 2011
Location: ca
Posts: 2
Likes: 0
Received 0 Likes
on
0 Posts
My 2001 has 150k on it, and I just had the following done by Lexus:
-New ac condensor
-sway bar bushings
-control arm bushings
-front shocks
I just got the car back, and now the radiator is leaking. I just can't see another $1,000 repair, so I want to do it myself.
I can't find a DIY for this anywhere on the web.
Questions:
1. how hard is this on this truck? I've replaced two on my 528i, and that process only takes a few hours and is pretty straightforward.
2. should I buy only oem parts?
3, anyone have a step-by-step?
Thanks.
#3
Forum Administrator

iTrader: (2)
Perhaps the forum isn't to blame, but this type of response from you certainly won't be a great incentive for many people to help you out 
I suspect very few have had to to this.... Very seldom do I see a radiator replacement thread on any Lexus model. Have done two on my wife's M3, two on her previous BMW as well.
I'd suggest searching for a similar-year Land Cruiser thread on another forum, might have better luck if you've searched here and found nothing.
#6
#7
While I haven't replaced the radiator on the LX yet, on my 4runner, it was pretty easy. Just drain, remove the hoses, the fan shroud (clips), and unbolt from the inside. Your radiator should not have corroded unless either tap water was used to mix the coolant or someone mixed green & red coolant (big no-no). At either rate, if either of these is true, I'd recommend flushing your entire cooling system including the heater cores. Fill the system up with distilled water (leave radiator cap off), run engine w/ both heaters on full. After the cold water in the radiator enters the engine and the warm water from the block enters the radiator, stop the engine, drain the radiator, refill, and repeat until the water coming out is clear. Use ONLY steam distilled water. You can speed up the process by draining the left block bolt (easier to access than the right block bolt). IIRC, the radiator capacity is roughly 6.5 qts, each block is about 4 qts each, and each heater core is about 1 qt (~16 qts total). You'll need 2 gall of toyota red coolant.
Usually, I drain the left block and radiator (11 qts together). Then after it's flushed (only 5 qts of water in the system), I drain them once more, then I add 2 full gal of coolant and top off the rest with water. The coolant should be replaced every 2.5 yrs. If you keep up the intervals and use distilled water, you shouldn't have to completely change all the coolant next time. If you just drain & fill like the lazy dealer does, mix the coolant 50-50 with distilled water and fill 'er up. When I had the dealer replace my timing belt, I brought my own Toyota coolant and distilled water and had them use it. Radiator still looks new inside.
Usually, I drain the left block and radiator (11 qts together). Then after it's flushed (only 5 qts of water in the system), I drain them once more, then I add 2 full gal of coolant and top off the rest with water. The coolant should be replaced every 2.5 yrs. If you keep up the intervals and use distilled water, you shouldn't have to completely change all the coolant next time. If you just drain & fill like the lazy dealer does, mix the coolant 50-50 with distilled water and fill 'er up. When I had the dealer replace my timing belt, I brought my own Toyota coolant and distilled water and had them use it. Radiator still looks new inside.
Trending Topics
#8
Radiator is a fixed non moving item, if it failed, one should have concerns that a thermostat that opens and closes all the time may be experiencing the effects of wear, aged coolant or the alike. Thermostat and gasket only costs about 20 bucks but is one of the top reasons for cars overheating.
#9
Driver School Candidate
iTrader: (1)
Join Date: Jan 2011
Location: GA
Posts: 30
Likes: 0
Received 0 Likes
on
0 Posts
The radiators in these trucks are not too horrible to replace the hardest part IMO is getting the four 12mm nuts off the cooling fan. Once that is done you can just lift the radiator out pulling the should and fan out with it. After you have taken all your hoses and trans cooler lines off of course.
#10
Driver School Candidate
Hi guys,
I couldn't find a step by step on this so snapped some pics while I was replacing my wife's radiator today. Wife's started overheating and I found a hairline crack at the very top almost invisible especially since it sprayed all over the place by the time I got it home, so made finding the issue more difficult. Bought a new radiator on Amazon (Spectra Premium CU2282 Complete Radiator) for about $215 bucks.
Step 0: unpack the new one and make sure there are no obvious holes or other defects. No reason to go through a bunch of work if it got damaged.
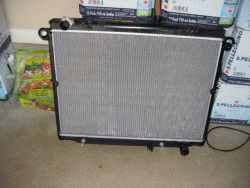
Step 1-3:
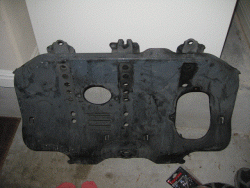
Take off the underpan... its a few bolts and I use an old soccer ball to kind of support it as I'm taking all the 12mm bolts off. Its a little heavy and easier to control that way.
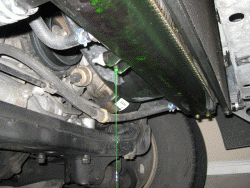
Start draining the fluid left in the radiator. Also notice that the jackwads that did some work on my car earlier this year used some cheap green fluid instead of the Toyota Red stuff. Not saying that's the cause of my problem, but another reason I'm not taking it in anymore for others to work on... its better to just do it yourself.
Finally, take off the negative battery terminal.
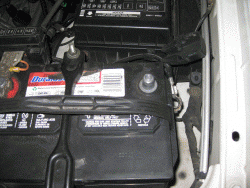
I couldn't find a step by step on this so snapped some pics while I was replacing my wife's radiator today. Wife's started overheating and I found a hairline crack at the very top almost invisible especially since it sprayed all over the place by the time I got it home, so made finding the issue more difficult. Bought a new radiator on Amazon (Spectra Premium CU2282 Complete Radiator) for about $215 bucks.
Step 0: unpack the new one and make sure there are no obvious holes or other defects. No reason to go through a bunch of work if it got damaged.

Step 1-3:
Take off the underpan... its a few bolts and I use an old soccer ball to kind of support it as I'm taking all the 12mm bolts off. Its a little heavy and easier to control that way.
Start draining the fluid left in the radiator. Also notice that the jackwads that did some work on my car earlier this year used some cheap green fluid instead of the Toyota Red stuff. Not saying that's the cause of my problem, but another reason I'm not taking it in anymore for others to work on... its better to just do it yourself.
Finally, take off the negative battery terminal.


Last edited by dctex; 09-20-15 at 07:00 PM. Reason: Adding pics
#11
Driver School Candidate
#12
Driver School Candidate
Steps 9-12
Take off the airbox to give you room to work. There are two bolts one obvious near the front, the other is near the back of the engine... don't forget that one like I did... doesn't sound nice when you almost break the box. Take off all 2 hoses in the back and one near the front under neath it (step12 pic).
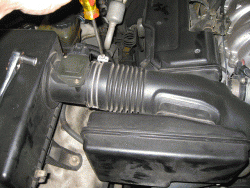
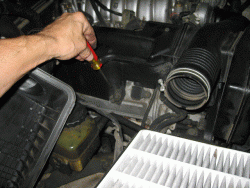
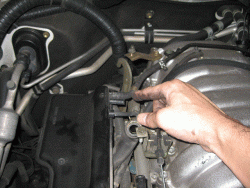
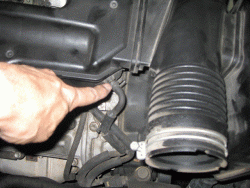
Step 13
Lower radiator hose is easy to get to now and plenty of room to work for the rest of the steps.
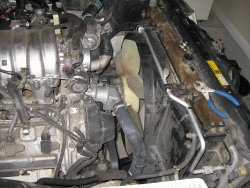
Take off the airbox to give you room to work. There are two bolts one obvious near the front, the other is near the back of the engine... don't forget that one like I did... doesn't sound nice when you almost break the box. Take off all 2 hoses in the back and one near the front under neath it (step12 pic).


Step 13
Lower radiator hose is easy to get to now and plenty of room to work for the rest of the steps.

#13
Driver School Candidate
Steps 14-15
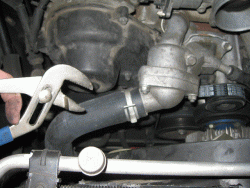
Make sure you have some paper towels... lower radiator hose poured out more fluid than I expected and soaked me... glad to have my shop glasses on.
Steps 16-17
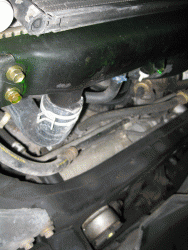
Take off the two 12mm bolts holding the silver AC line to the Radiator. I also immediately fit them on the new radiator so I don't lose track of where they go. Saves time later.
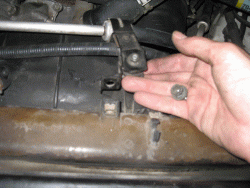
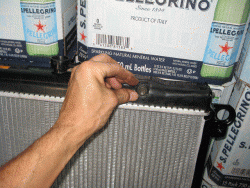
Step 18
There are two 12 mm bolts on top that attach the fan shroud to the old radiator. I opted to not take off the fan at all. I figured there was enough room to do it by taking off the shroud. This pic is just another example of why you should do work yourself. The guys that worked on my car the last go around broke the driver side clip that holds the fan shroud to the radiator. I used Quicksteel to rebuild and put it back together... just takes more time and is frustrating.
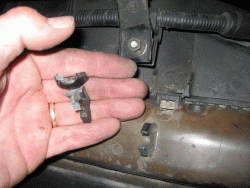
Make sure you have some paper towels... lower radiator hose poured out more fluid than I expected and soaked me... glad to have my shop glasses on.


Steps 16-17
Take off the two 12mm bolts holding the silver AC line to the Radiator. I also immediately fit them on the new radiator so I don't lose track of where they go. Saves time later.


Step 18
There are two 12 mm bolts on top that attach the fan shroud to the old radiator. I opted to not take off the fan at all. I figured there was enough room to do it by taking off the shroud. This pic is just another example of why you should do work yourself. The guys that worked on my car the last go around broke the driver side clip that holds the fan shroud to the radiator. I used Quicksteel to rebuild and put it back together... just takes more time and is frustrating.

#14
Driver School Candidate
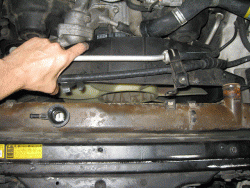
Step 19
There is 12 mm one bolt on the passenger side of the shroud once that's off the shroud is loose. If you crawl underneath you can see the shroud sits in the bottom in two grooves on the radiator so no screws down there.
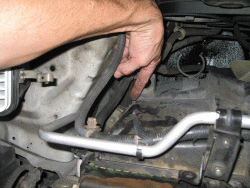
Step 20
Shroud is now completely loose and you can wiggle out the radiator past it when its time. No need to remove the fan which looked like a pain in the *** to me so I didn't touch that.
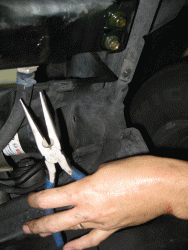
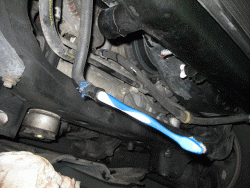
Step 21-22
Take off the two smaller hoses (transmission). I used two old toothbrush to shove in the hoses to stop any leaking. Not exactly a Nascar fix... but where there is a will there is a way!
There is 12 mm one bolt on the passenger side of the shroud once that's off the shroud is loose. If you crawl underneath you can see the shroud sits in the bottom in two grooves on the radiator so no screws down there.

Step 20
Shroud is now completely loose and you can wiggle out the radiator past it when its time. No need to remove the fan which looked like a pain in the *** to me so I didn't touch that.

Step 21-22
Take off the two smaller hoses (transmission). I used two old toothbrush to shove in the hoses to stop any leaking. Not exactly a Nascar fix... but where there is a will there is a way!


#15
Driver School Candidate
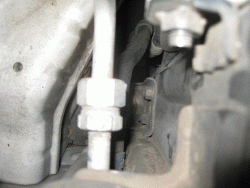
Steps 23-27
This was probably the most time consuming step for me. I opted to take off the brackets completely off the passenger side of the radiator. There are two bolts on the radiator that go into a bracket and that bracket is held down by a big 12 mm bolt at the bottom. There are also two other bolts on the front of the car that come off. Once you take it all apart... the two brackets come off very easily as does the grommet it sits on. I did this so I could slide the radiator over to the passenger side when I removed it and that let me only take off the two bolts on the driver side and NOT take off those brackets. I did this because I didn't remove the battery and its harder to work on that side.
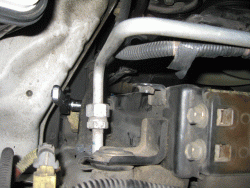
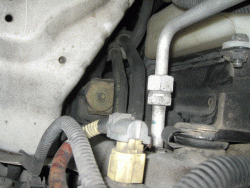
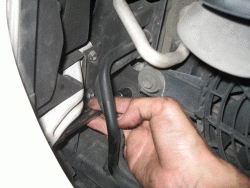
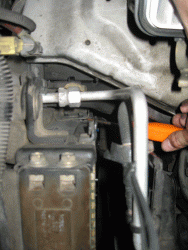
This was probably the most time consuming step for me. I opted to take off the brackets completely off the passenger side of the radiator. There are two bolts on the radiator that go into a bracket and that bracket is held down by a big 12 mm bolt at the bottom. There are also two other bolts on the front of the car that come off. Once you take it all apart... the two brackets come off very easily as does the grommet it sits on. I did this so I could slide the radiator over to the passenger side when I removed it and that let me only take off the two bolts on the driver side and NOT take off those brackets. I did this because I didn't remove the battery and its harder to work on that side.


