When you click on links to various merchants on this site and make a purchase, this can result in this site earning a commission. Affiliate programs and affiliations include, but are not limited to, the eBay Partner Network.
2008 LS460L Upper control arm bushing repair, a step-by-step guide
So I brought my first Lexus a few months ago. It is a 2008 LS460L, with 110k miles. 1-owner and perfectly maintained. As every LS owner already knows that the bushings break down over time, causing suspension noises and steering instability.The biggest symptom in my car was a wobbly steering wheel at speeds over 40 mph. It seemed as if the bushings became much more flexible during hot summer days, making highway driving quite annoying. So I decided to tackle replacing the upper control arm bushings on a beautiful Saturday morning, and took some pictures along the way to share it with the rest of Lexus owner family.
When I looked up service manuals to replace the upper control arms, they all recommended removal of the air suspension. I thought this was a bit excessive and unnecessary. I was able to figure out a way to remove the control arms without messing with the air suspension whatsoever. The bushings I bought were PSB bushings from Amazon.com $125 (PSB 460). I also bought the upper busing removal kit, PSB 460T, for $80. I think the removal kit was worth the money. And I also rented a Powerbuilt 648604 Kit 25 Upper Control Arm Bushing Service Tool Set from the local Advance Auto Parts store.
So here's the step-by-step instruction to replace the upper control arm bushings. The pictures show the right side upper bushings being replaced.
1. Place the front end on jack stands, and bring the wheels to a comfortable working height. Don't forget the wheel chocks in the rear to prevent inadvertent movements!
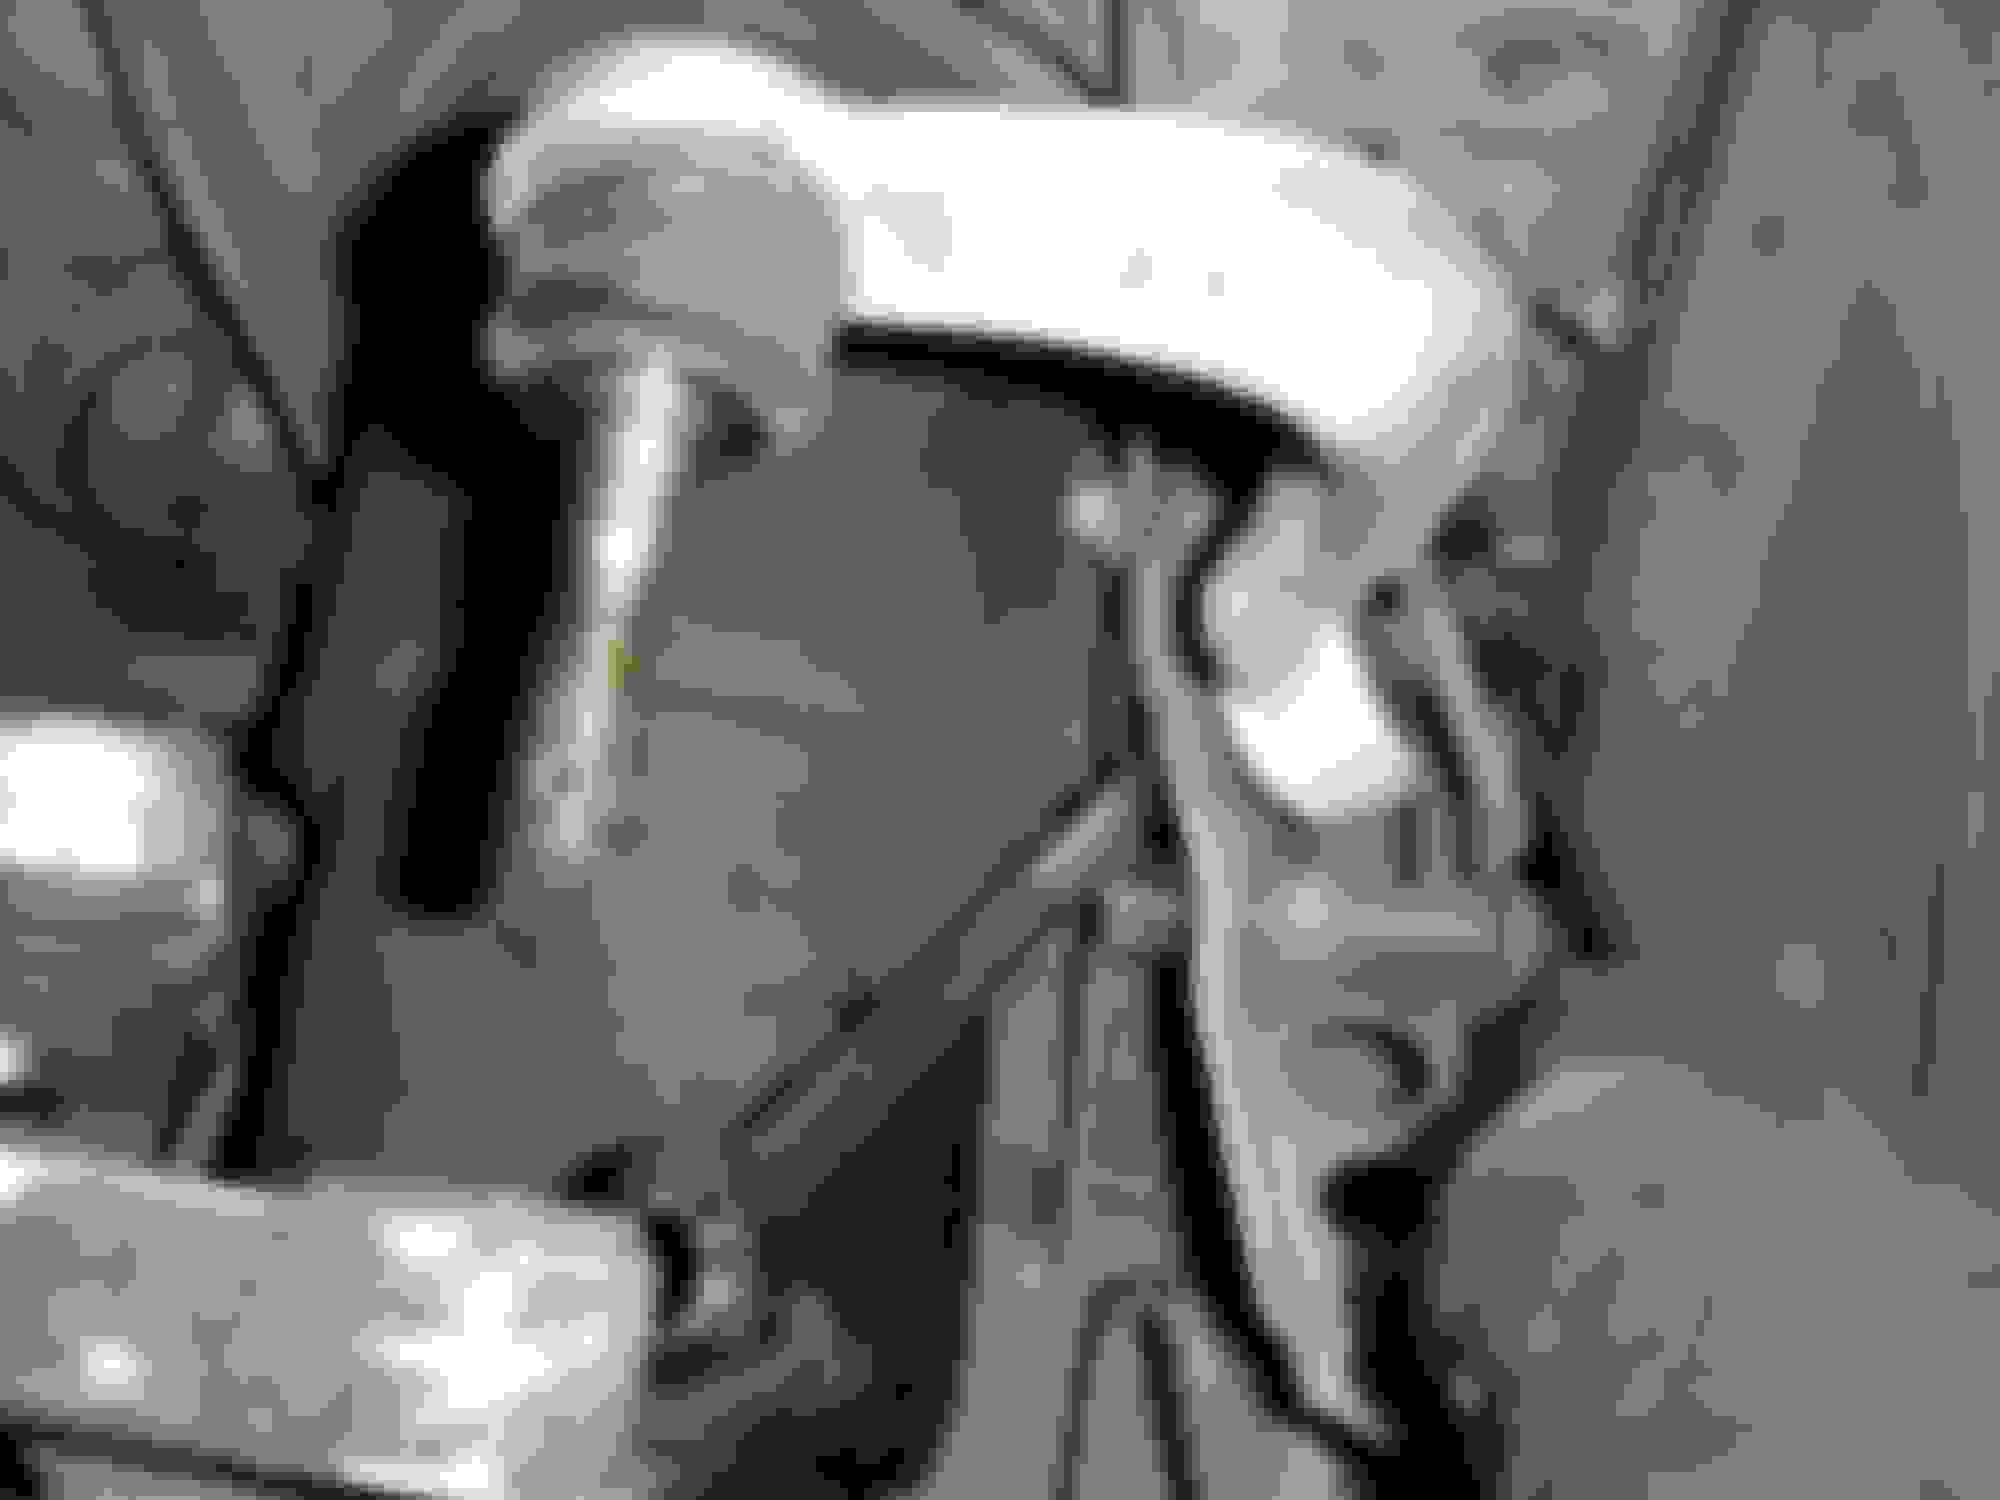
2. Remove the cotter pins from both the front and rear control arms. Please disregard the zip ties holding the brake caliper. Removing the break caliper is not necessary to service the upper control arms.
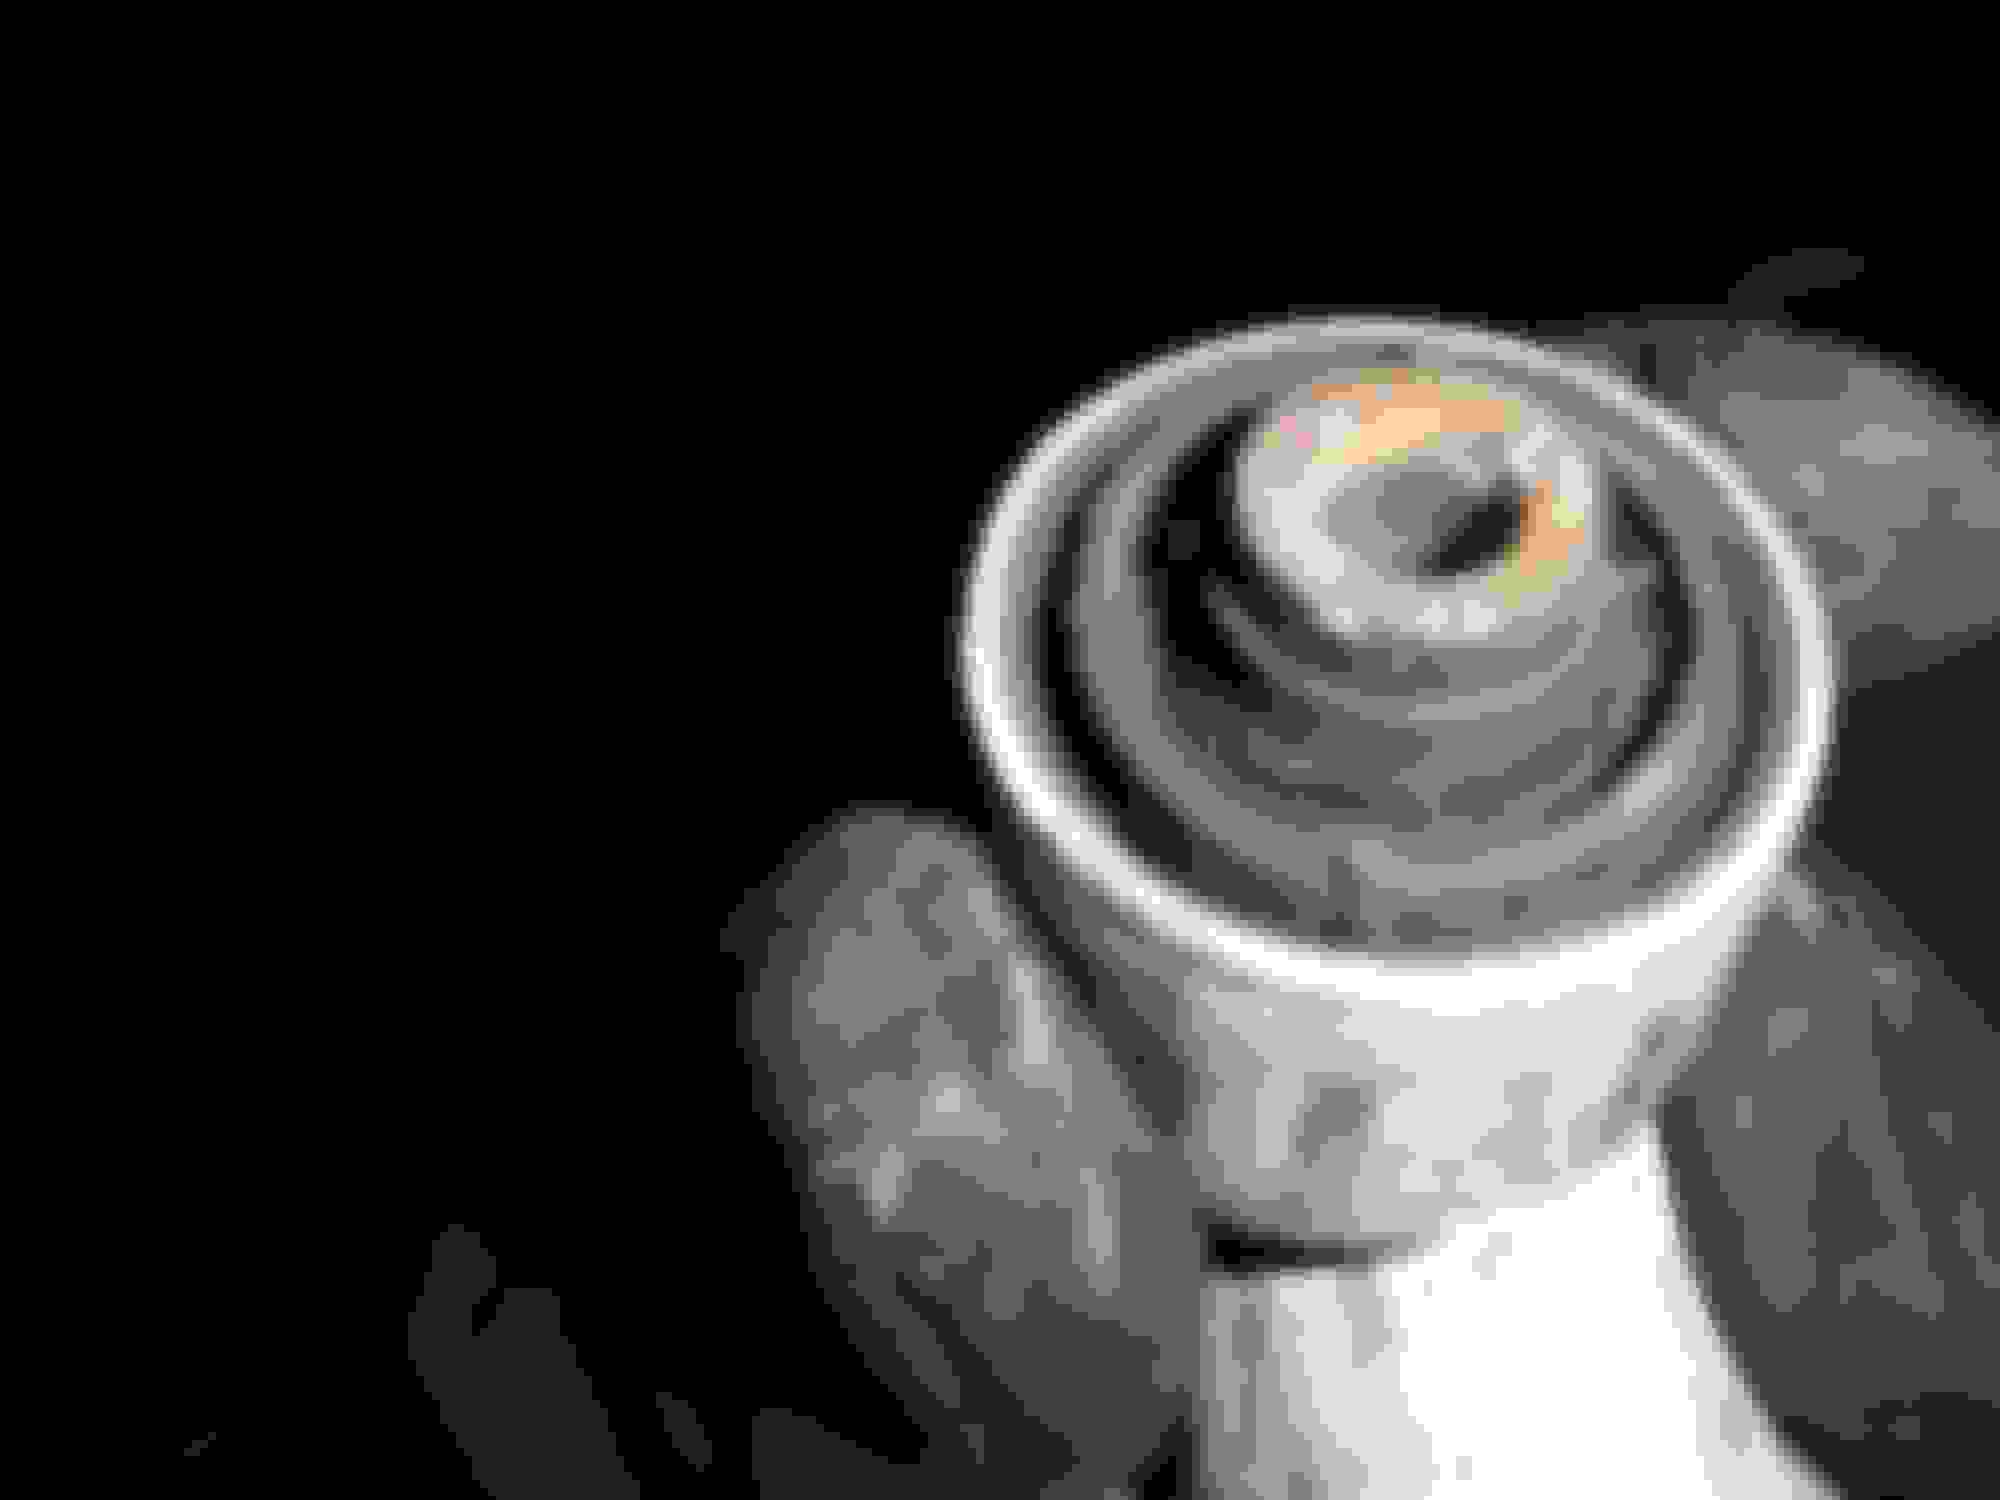
3. Remove the Castle nut from the front control arm
4. Spin the Castle nut back on the other way around so the flanged portion is facing down. The surface will allow you to hammer the control arm loose from the steering knuckle without damaging the threads.
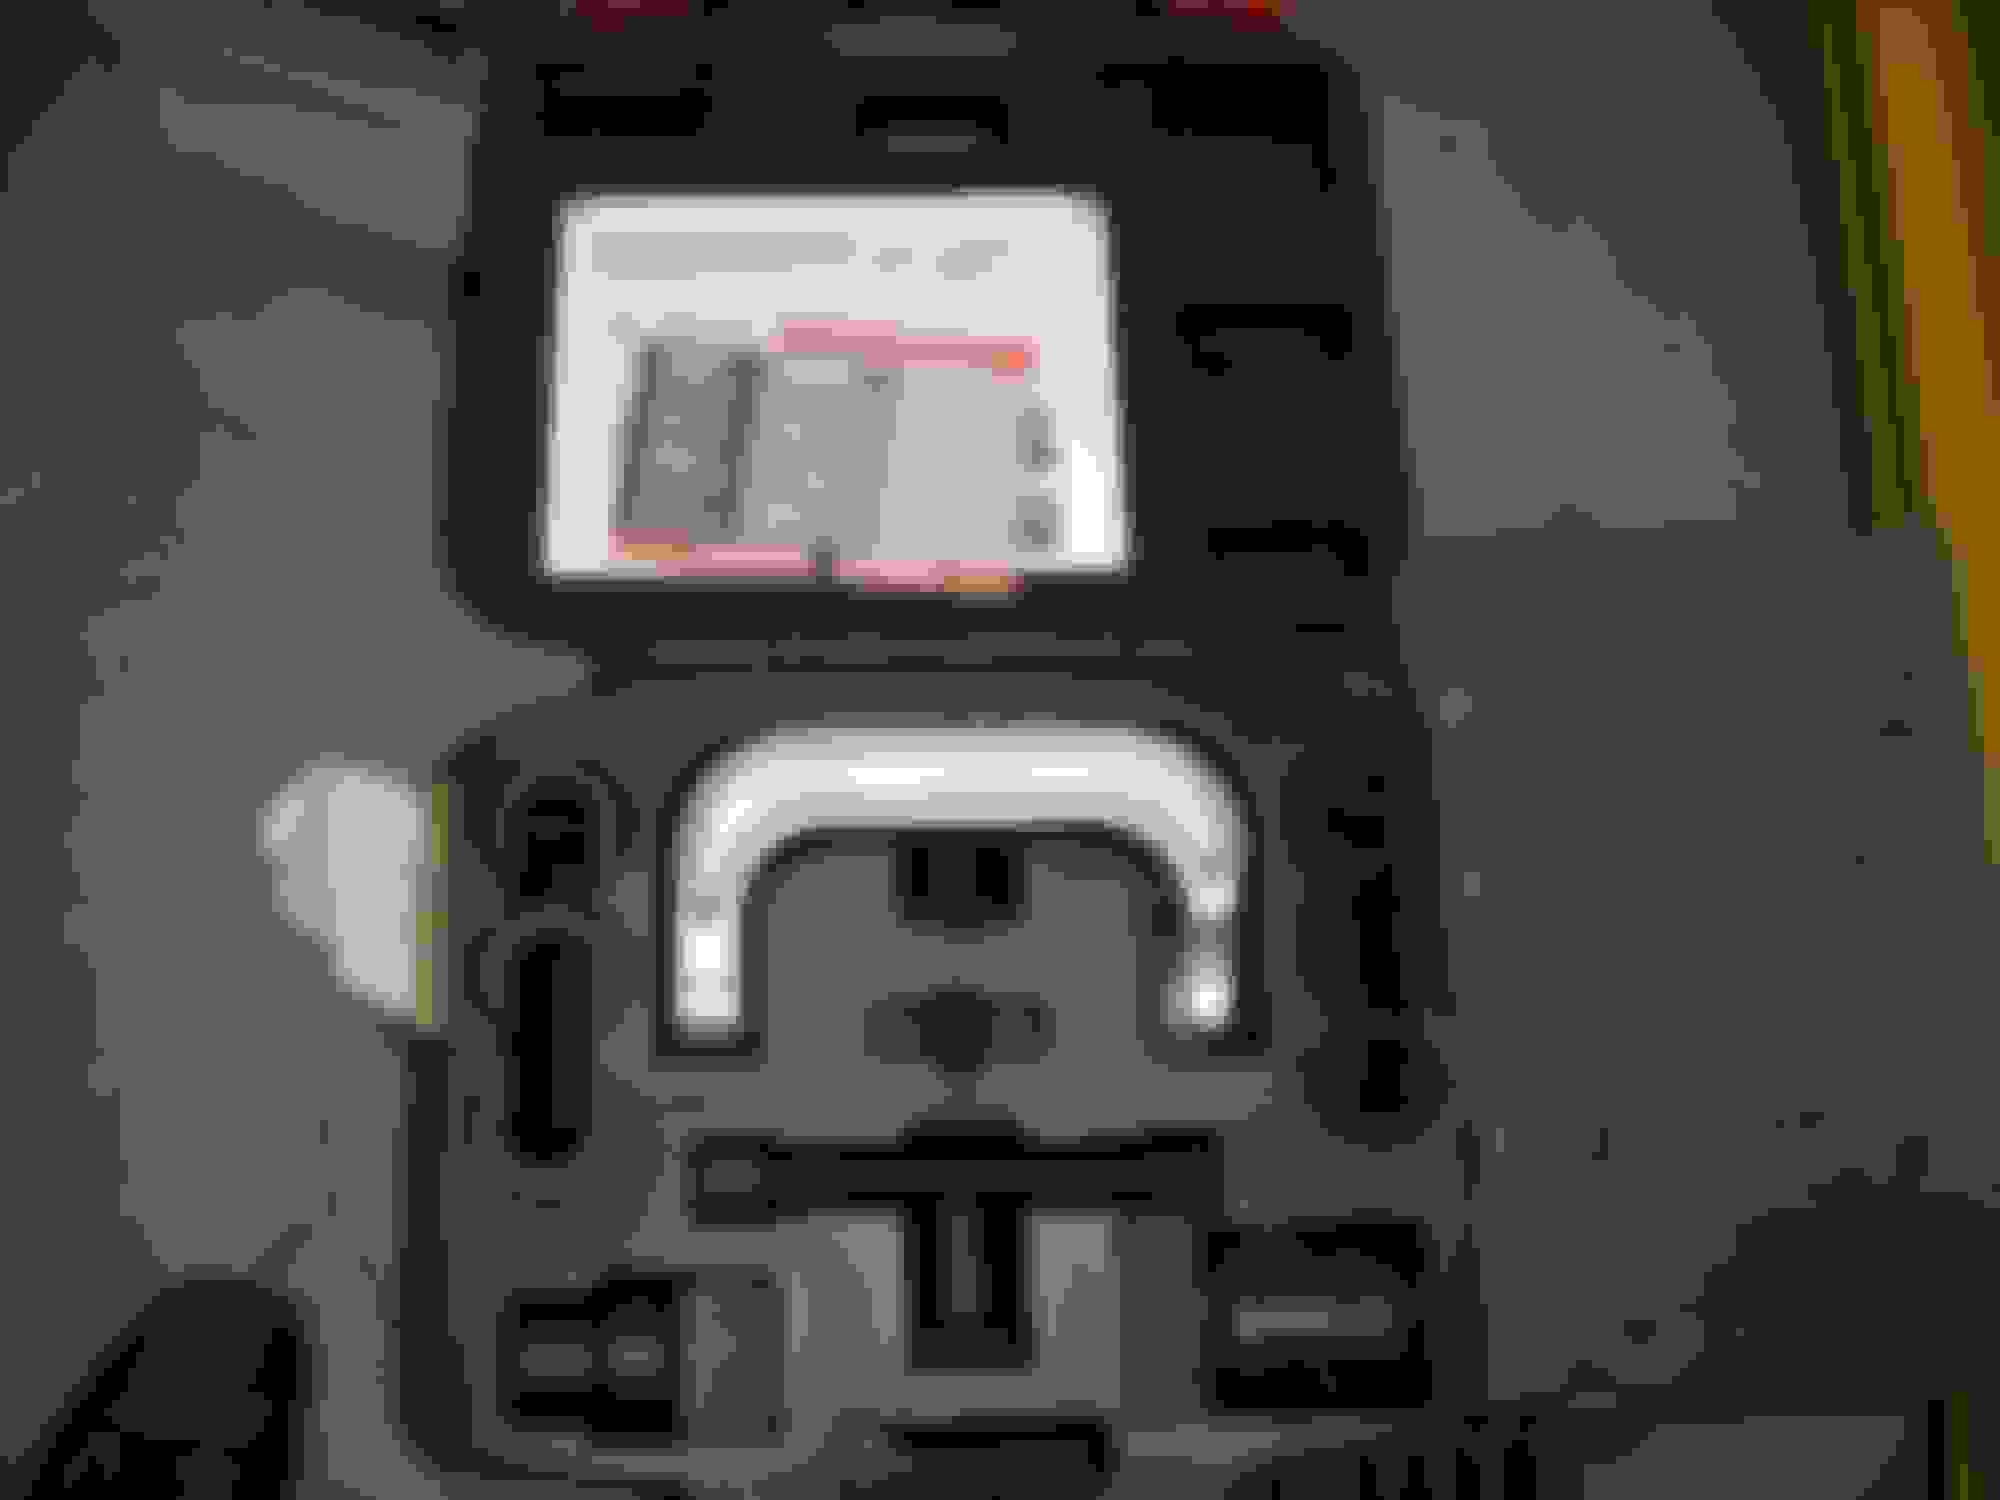
5. Use a ratcheting wrench to remove the middle screw completely out of the bracket
6. Then use the same wrench to loosen the top screw from the bracket without completely removing it. This will allow the entire bracket to swing up, allowing you to fit a wrench to loosen the control arm
7. Now remove the bottom screw in the bracket, and now the bracket will easily swing out and up
8. Now a wrench will easily fit on the left side of the bracket. Use a 2nd wrench to loosen hold the net on the other side, giving you the ability to now remove the control arm from the bracket.
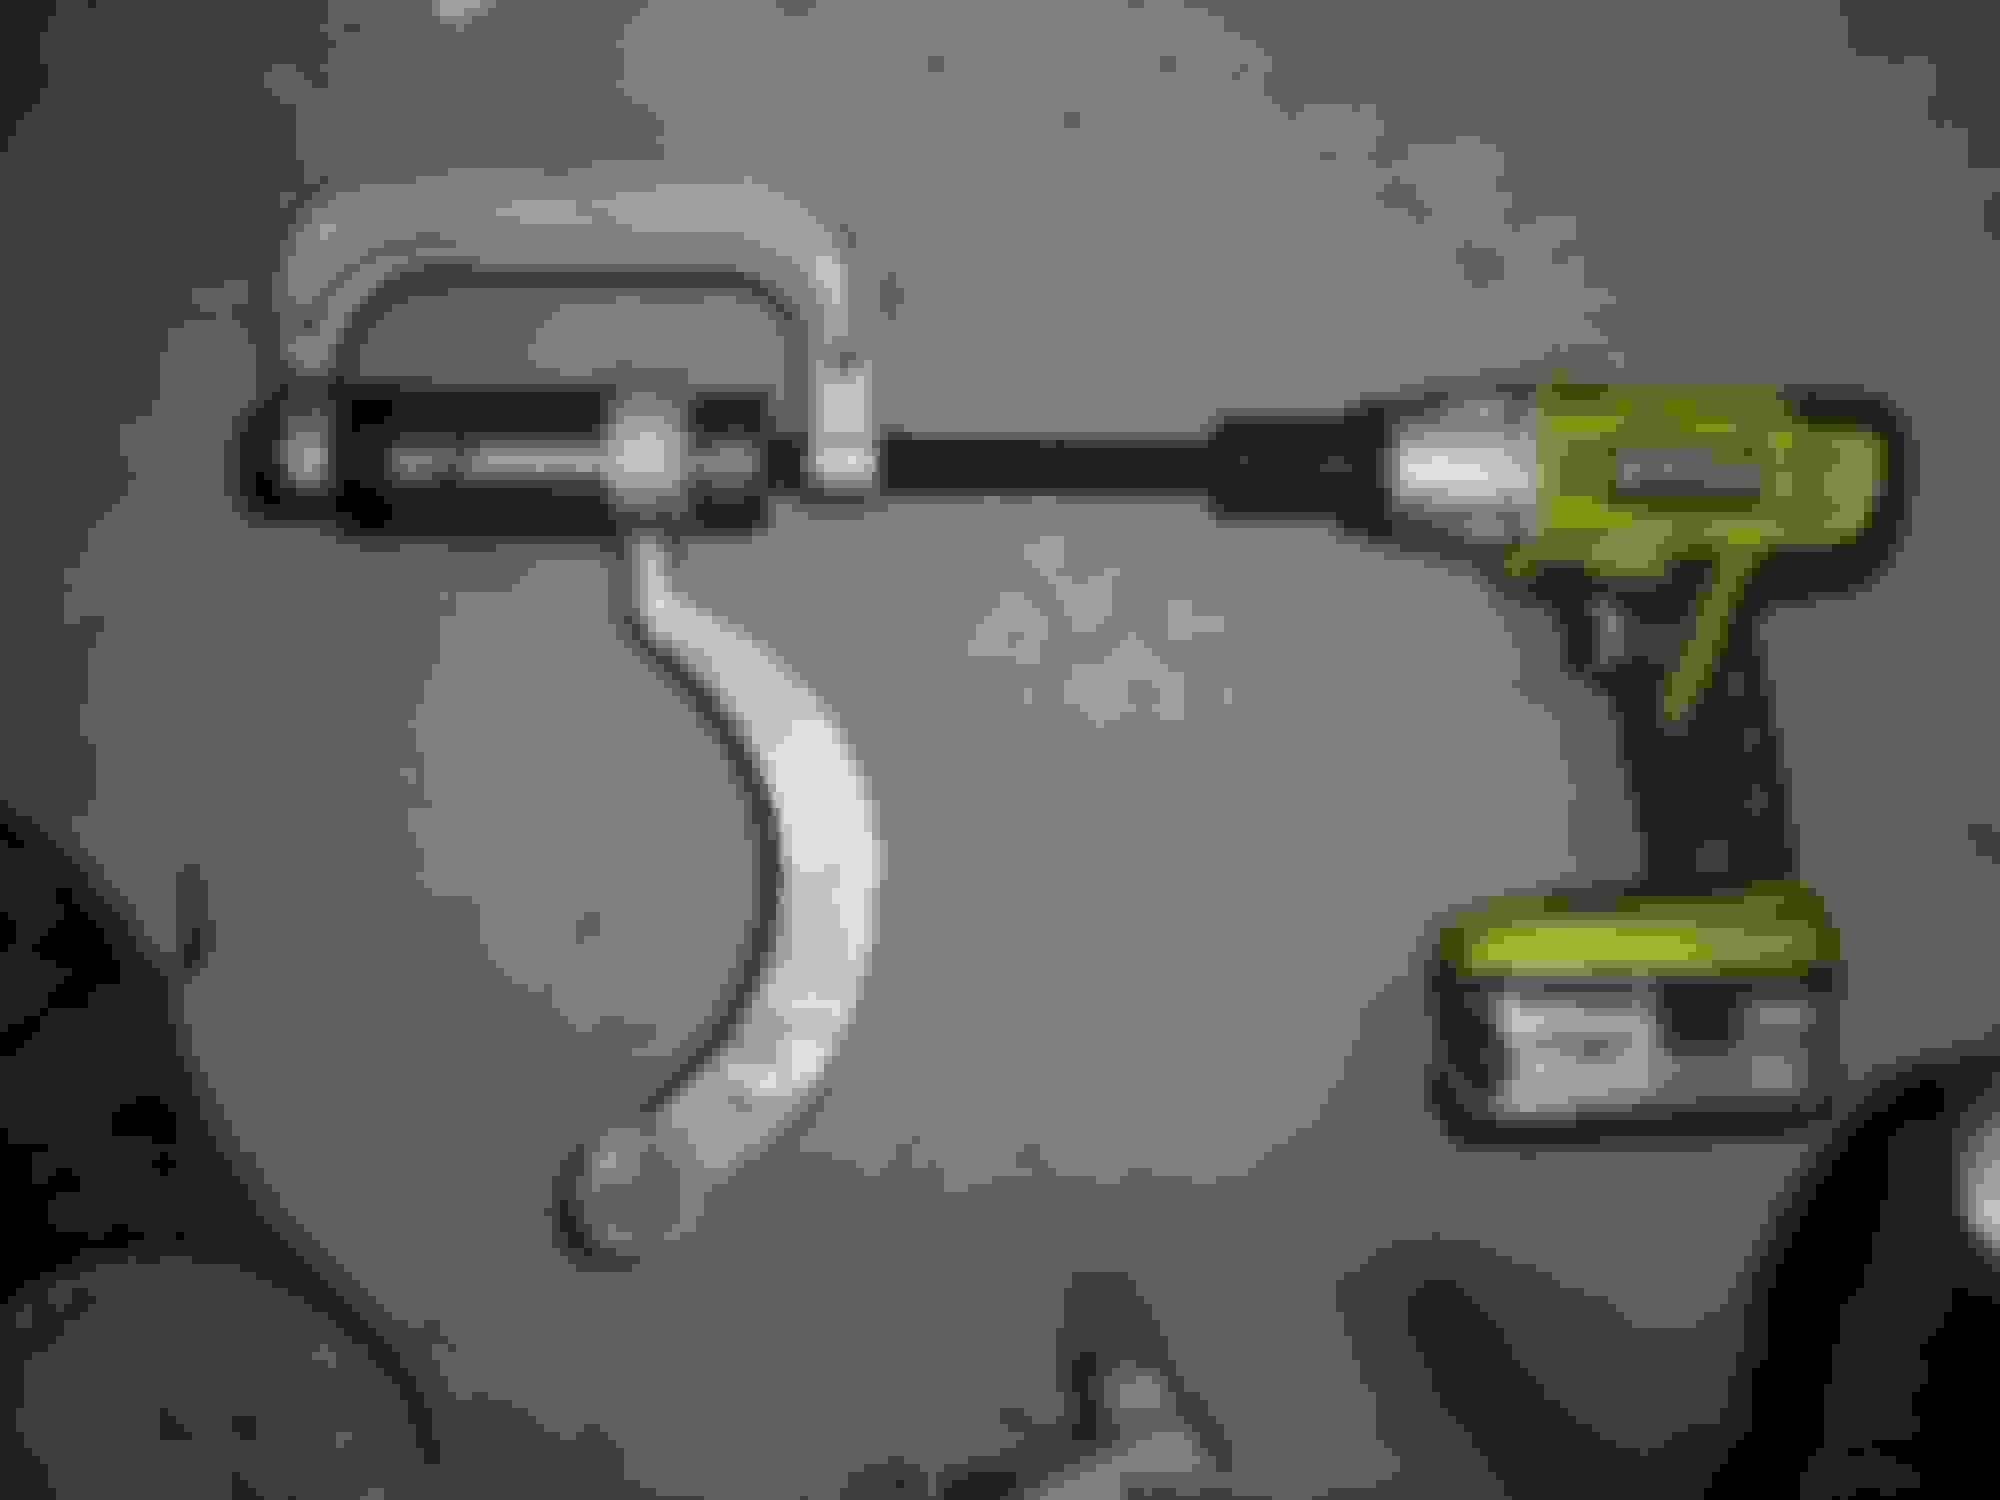
9. With the help of the upper bushing removal kit that I bought from Amazon, and a Powerbuilt 648604 Kit 25 Upper Control Arm Bushing Service Tool Set that I rented from advance auto parts, remove the old bushing. It doesn't matter if you use a socket wrench or an impact wrench to make this work. Personally, I recommend an impact wrench. My RYOBI pushed out the old bushing in under 3 seconds!
10. Use sandpaper clean the inside of the control arm
11. Grease the bushing generously supplied grease packets
12. Use of Bushing service tool to push the new bushing into the control arm. Procedure is similar to step 11.
13. Reinstallation is the exact reverse method of the removal that I just went through.
14. These steps can be used to remove the control arms from the right rear, left front and left rear upper control arms.
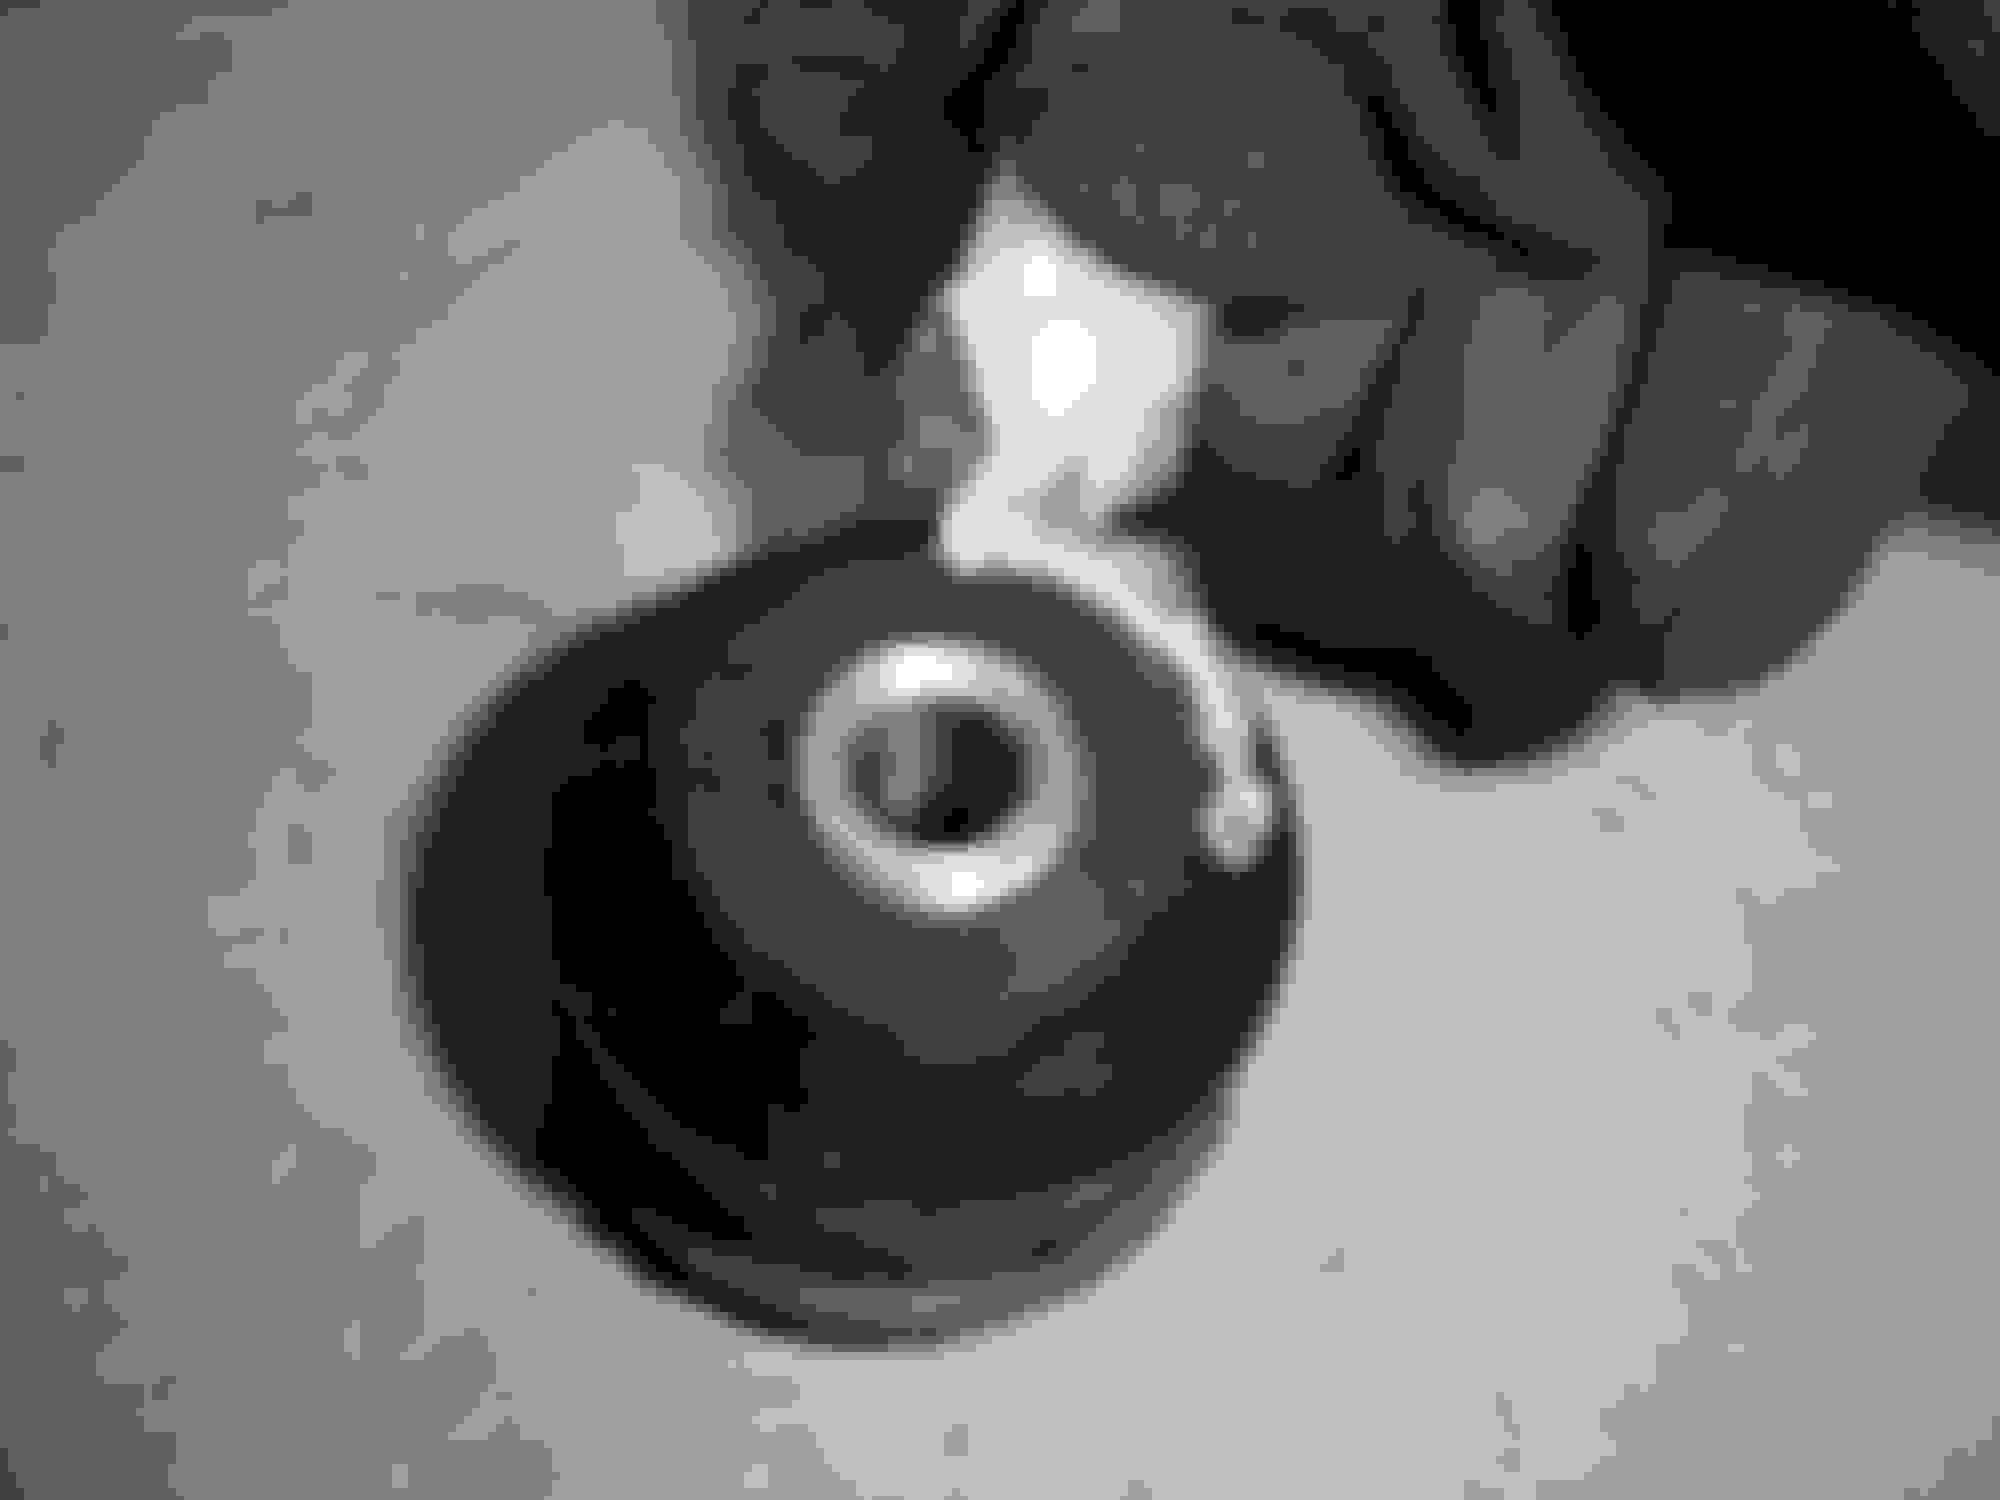
This is how bad my old bushings looked.
I will soon upload (on YouTube) a video of the bushings being removed and installed using the Powerbuilt service tool and my RYOBI impact wrench, just to show everyone how easy it was doing it at home. No commercial press needed or a trip to the shop.
My LS460 now drives amazing! Wow what a difference! Total cost for this project was $205 (bushings + removal kit). Some people on this forum have said they paid $2000 - $3500 for this same service
My next project will be to replace the lower control arm bushings and again share my experience with you guys.
UPDATE:
Video of upper control arm bushing removal:
Interesting, I removed my strut when I did mine...I like the way you lifted the bracket rather than removed the strut. Wish I had done that, would have saved myself probably a half hour. This means that a guy a tech at a Lexus dealer can probably change both sides in about forty minutes (the uppers). I'd be willing to bet there are guys at the Lexus dealer that can replace all 8 in around an hour and a half. Yet they charge almost $4,000 for this repair.
I've said it before, I'll say it again...the LS460 control arm "issue" is the most overblown topic on the entire internet. There could be video of Donald Trump making out with Hillary Clinton, and the 460 control arms would create more controversy.
I've said it before, I'll say it again...the LS460 control arm "issue" is the most overblown topic on the entire internet. There could be video of Donald Trump making out with Hillary Clinton, and the 460 control arms would create more controversy.
Could $4000 be that dealer like to replace the whole control arms instead of bushings? Maybe the mechanics don't like to check the bushings?
Could $4000 be that dealer like to replace the whole control arms instead of bushings? Maybe the mechanics don't like to check the bushings?
These arms I believe are of a alloy aluminum make, nothing overtly special.
The arms aren't traditionally the problem, its the bushings.
That to say, though the time to replace the entire arm(s) with new bushings in place is quicker than removing old arms, pressing old bushings out then pressing new ones in, THEN installing, that amount of time between the two procedures is negligible, especially when looking at the ratio of time:cost
This DIY as well as the thread Doublebase put together clearly shows that the job is not what Lexus makes it out to be. This is easily the case with not only Lexus but other dealerships who inflated upcharges to perform certain repairs on a vehicle. But in keeping this Lexus-based, others have said it before, but the $$ has to come from somewhere in order to maintain some of these utterly beautiful and high-end dealerships!
Case in point: There isn't a reason fathomable as to why Lexus would charge such a ridiculous amount of money for this repair. They do it simply because they can, and not everyone is willing to take their time to source the parts, have/obtain the tools and perform this task in their garage. They'd rather just pay the $$.
Me personally, I enjoy DIY and if there isn't another route to have them replaced (like the route that I took-thread on that is in existence), i'll be on the floor in my garage, underneath the LS.
Is any easy way to tell whether the bushing is bad without taking it apart? I see one video show torn bushing can make the tire wiggled?
With the knowledge we gain from this forum, if we tell the dealer �please check if the bushing is worn out, I don�t want to change the whole control arm if not necessary�, then will they be more due diligent and won�t blindly change the whole control arms?
Is any easy way to tell whether the bushing is bad without taking it apart? I see one video show torn bushing can make the tire wiggled?
With the knowledge we gain from this forum, if we tell the dealer “please check if the bushing is worn out, I don’t want to change the whole control arm if not necessary”, then will they be more due diligent and won’t blindly change the whole control arms?
There are many photos floating around this forum, specifically the LS area, where people, including myself, have taken photos of their bushings while in place, as well as once the arm has been removed.
If your looking at the bushing while its in application, you can usually tell by looking at the exterior condition of the bushing. If there is cracking/dry rotting on the exterior rubber. You can also use a crow bar the check for excessive play.
However, a visual inspection may not always serve as the indicator that they need to be replaced. caha14 has stated before that on his previous LS, he was having suspension issues and the CA bushings didn't appear that they were in bad shape. However, it was decided that the arms be replaced with new ones and once the tech put the old arm/bushings in a vice, they were shot internally.
Anyone, correct me if im wrong, however, the dealer is not open to simply changing the bushing, as they dont have the desire to spend time pressing bushings. I also think that what also comes into play is liability. Though the arm itself is fine and is typically undamaged, its usually the bushing that goes bad. So the dealership is better off from an liability standpoint, to simply replace the entire piece, instead of using/combining old/new parts.
So dealer don't just replace the bushings even if you insist? I will ask my Lexus service manager for that next week when replacing the seeping struts.
Control arm is strong and have no moving parts. Bushing is more easy to be worn out.
 10-12-16, 09:55 PM


 Wow what a difference! Total cost for this project was $205 (bushings + removal kit). Some people on this forum have said they paid $2000 - $3500 for this same service


