Vaistech Sirius SL2s & iPod SL2i install 2006 LS430 w/ navigation
 04-02-11, 03:19 PM
#1
To get Sirius radio and an iPod connection that both control through the Audio/Navigation screen,
I installed two interface units from Vaistech, an SL2s Sirius interface and an SL2i-UP iPod interface, in my 2006 LS430 with navigation (You also need a third unit, a Sirius SCC1 tuner to work with the SL2s interface. I also ordered this from Vaistech).
There was a great thread here that helped me start the project. ( at this link... https://www.clublexus.com/forums/ls4...vi-w-pics.html
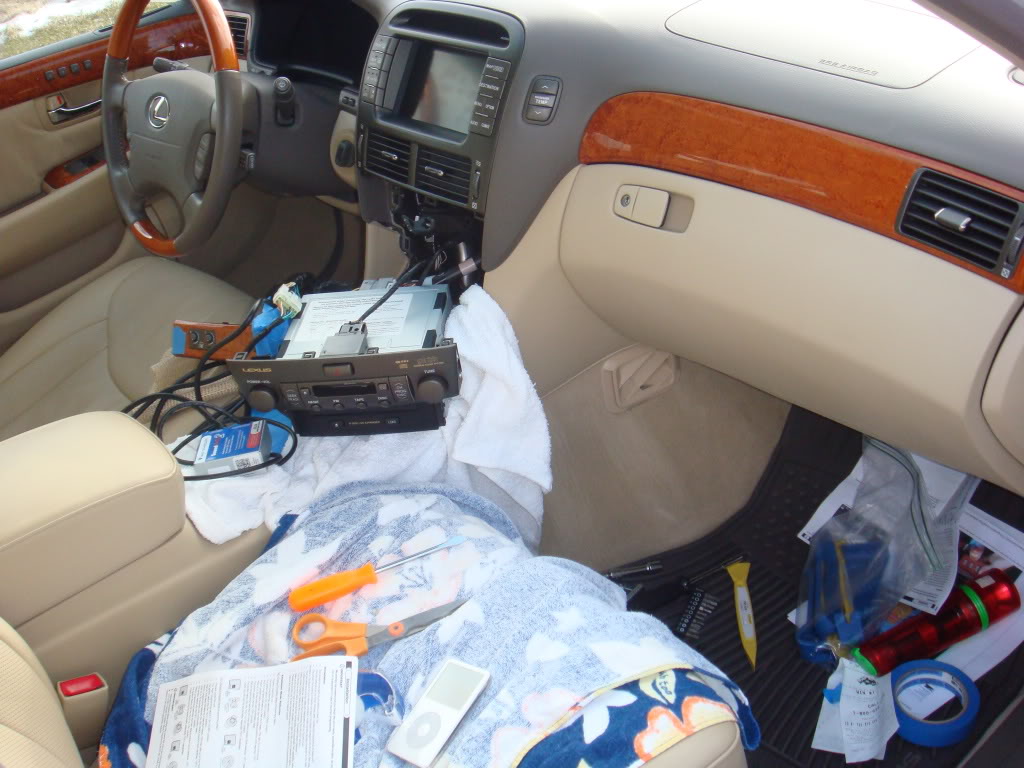
I thought I would add my own experience in the pictures below. The whole installation is really quite easy. The pictures make it appear ugly and involved, but there's really not much to it. Reserve a whole day, but it won't take more than a few hours.
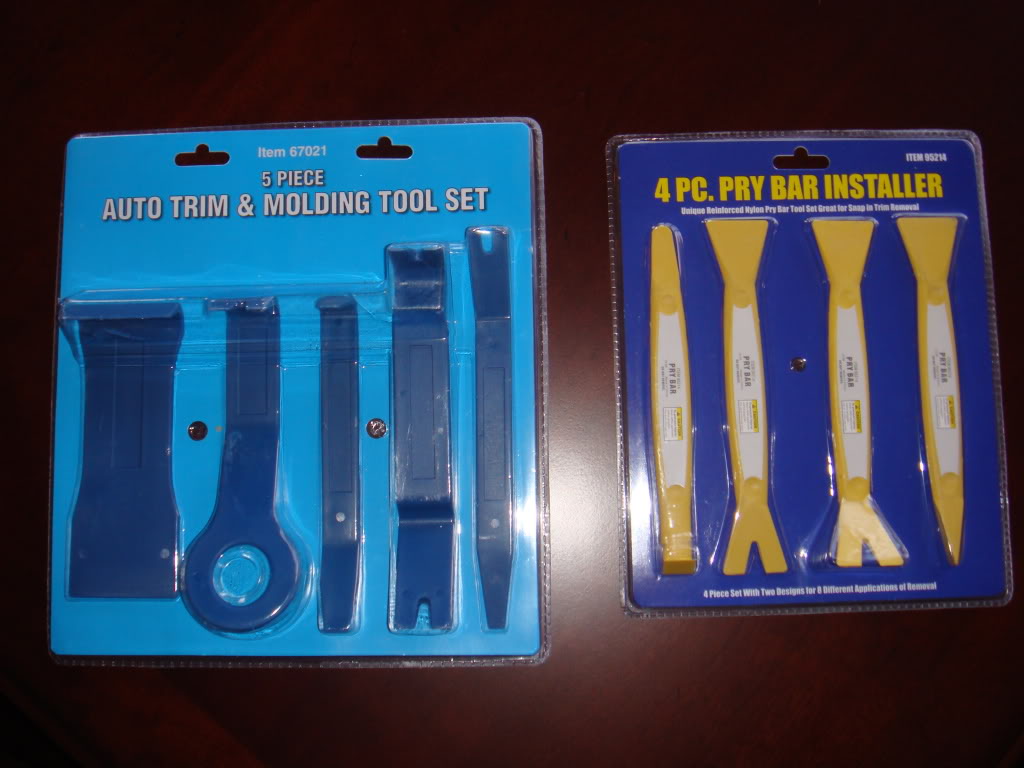
First step was to order some nylon pry bars from Harbor Frieght. (These were cheap...about $7 for each kit):
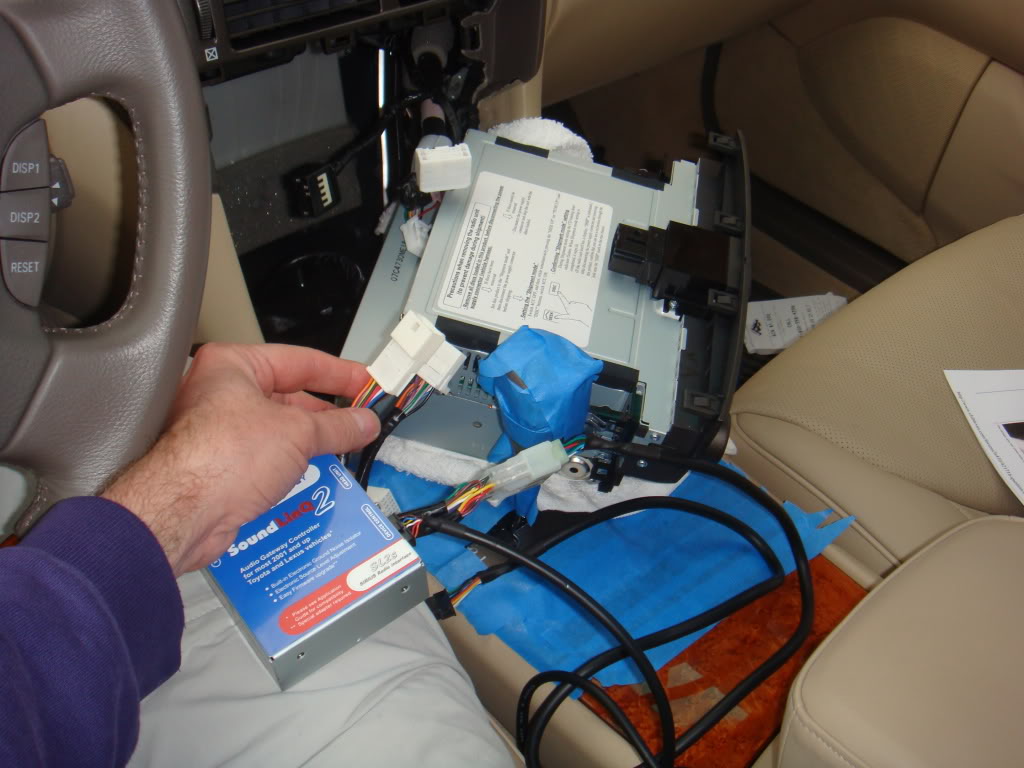
Then, I ordered an SL2s and SCC1 tuner from vaistech.com for the Sirius, as well as an SL2i-UP interface for the iPod. Again, both interfaces allow for control of the Sirius & iPod through the navigation/audio screen, or steering wheel controls, as if they were factory units.
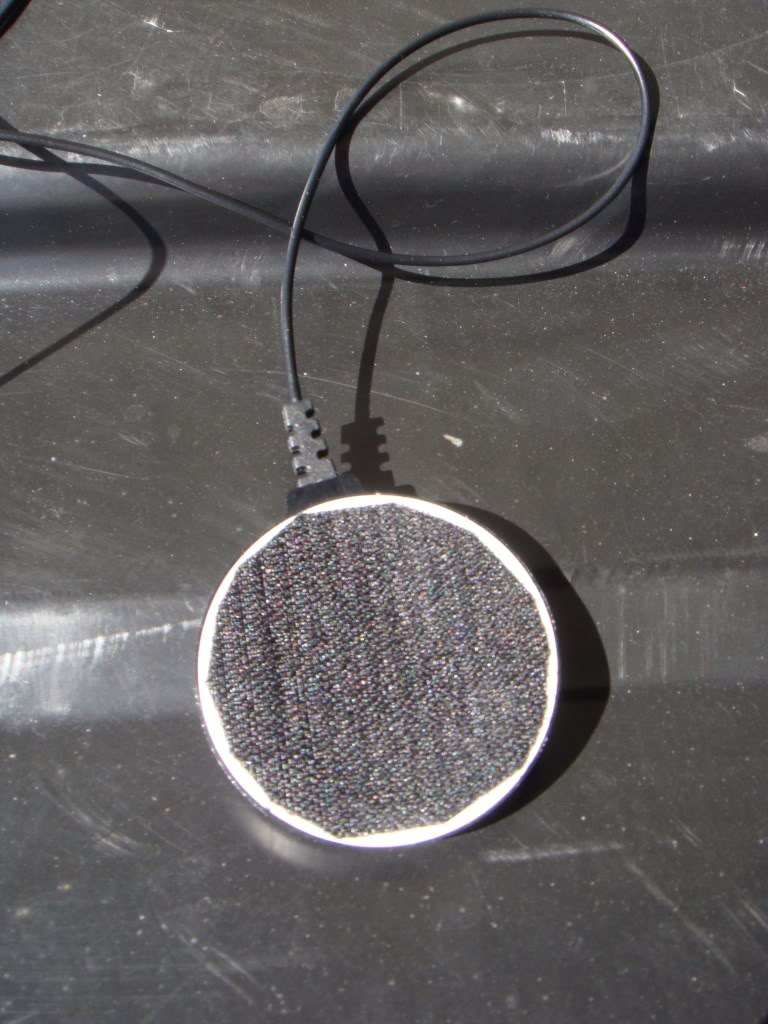
I ditched the taller satellite antenna that came with the SCC1 tuner and ordered the lower profile antenna you see in the pictures here. This thinner style was needed to fit the antenna in the rear high-mounted third brake light.
The antenna cost about $15 to $35, depending on where you find it...
Here's a link to "My Radio Store" for a refurbished antenna: http://www.myradiostore.com/sirius/s...ot-refurb.html
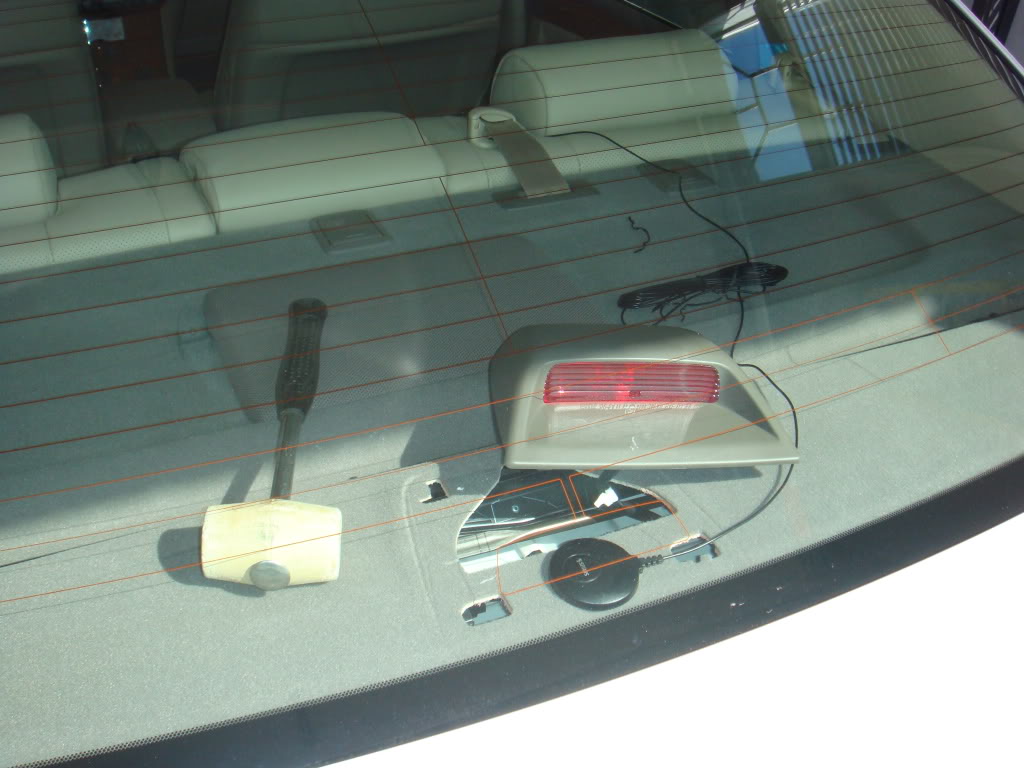
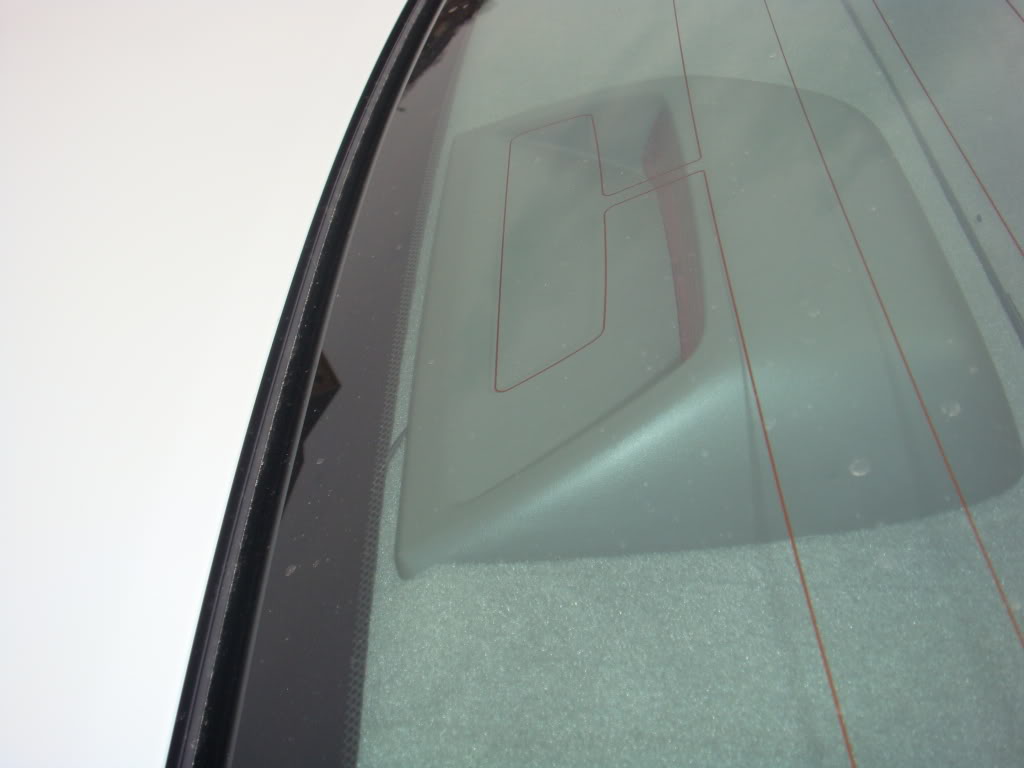
I started by removing the third brake light housing. I Pushed down on it while tapping it to toward the passenger side with a rubber mallet. Once it slides over a little less than half an inch, you can pull up on the housing to remove it.
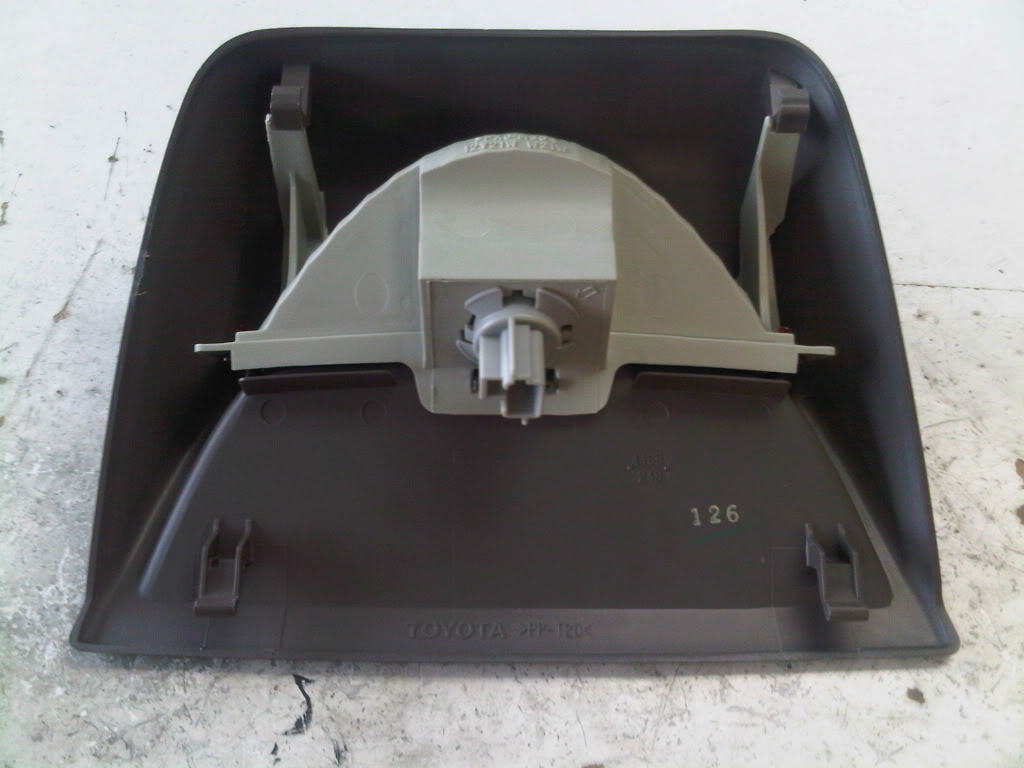
Here is a picture that I found on this site that shows the clips on bottom of the housing:
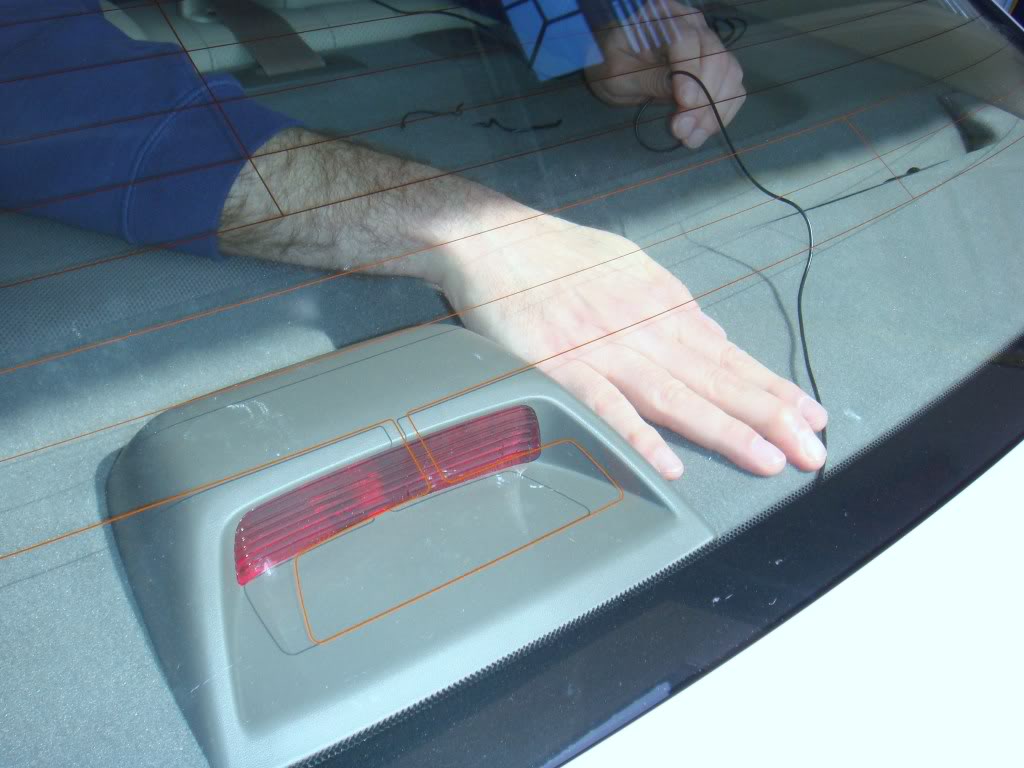
Before re-installing the brake light housing, I cut some velcro to fit the bottom of the antenna. I installed it as you see in the picture above, but with the tail wire pointed more toward the rear of the car:
I thought the antenna wire was completely hidden, but if you catch just the right angle looking into the back window you can see how it exits from under the high-mount third brake light. I have had no problems with reception with this location:
I installed two interface units from Vaistech, an SL2s Sirius interface and an SL2i-UP iPod interface, in my 2006 LS430 with navigation (You also need a third unit, a Sirius SCC1 tuner to work with the SL2s interface. I also ordered this from Vaistech).
There was a great thread here that helped me start the project. ( at this link... https://www.clublexus.com/forums/ls4...vi-w-pics.html
I thought I would add my own experience in the pictures below. The whole installation is really quite easy. The pictures make it appear ugly and involved, but there's really not much to it. Reserve a whole day, but it won't take more than a few hours.
First step was to order some nylon pry bars from Harbor Frieght. (These were cheap...about $7 for each kit):
Then, I ordered an SL2s and SCC1 tuner from vaistech.com for the Sirius, as well as an SL2i-UP interface for the iPod. Again, both interfaces allow for control of the Sirius & iPod through the navigation/audio screen, or steering wheel controls, as if they were factory units.
I ditched the taller satellite antenna that came with the SCC1 tuner and ordered the lower profile antenna you see in the pictures here. This thinner style was needed to fit the antenna in the rear high-mounted third brake light.
The antenna cost about $15 to $35, depending on where you find it...
Here's a link to "My Radio Store" for a refurbished antenna: http://www.myradiostore.com/sirius/s...ot-refurb.html
I started by removing the third brake light housing. I Pushed down on it while tapping it to toward the passenger side with a rubber mallet. Once it slides over a little less than half an inch, you can pull up on the housing to remove it.
Here is a picture that I found on this site that shows the clips on bottom of the housing:
Before re-installing the brake light housing, I cut some velcro to fit the bottom of the antenna. I installed it as you see in the picture above, but with the tail wire pointed more toward the rear of the car:
I thought the antenna wire was completely hidden, but if you catch just the right angle looking into the back window you can see how it exits from under the high-mount third brake light. I have had no problems with reception with this location:
Last edited by MDEC; 04-17-11 at 03:45 PM.
 04-02-11, 03:34 PM
#2
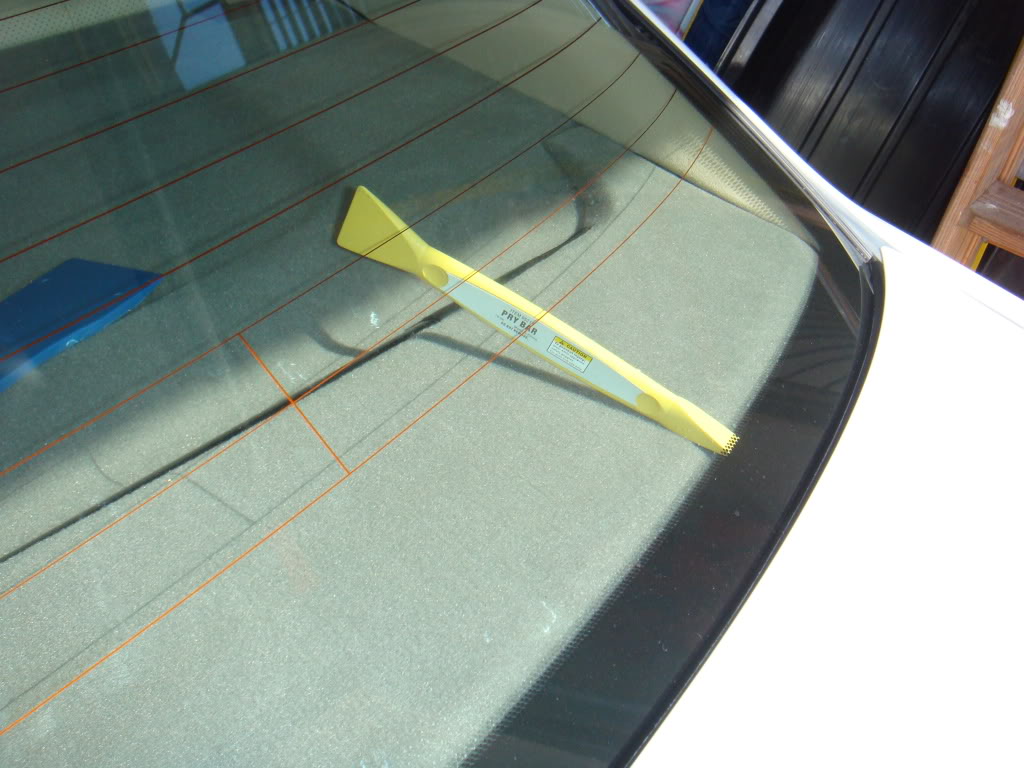
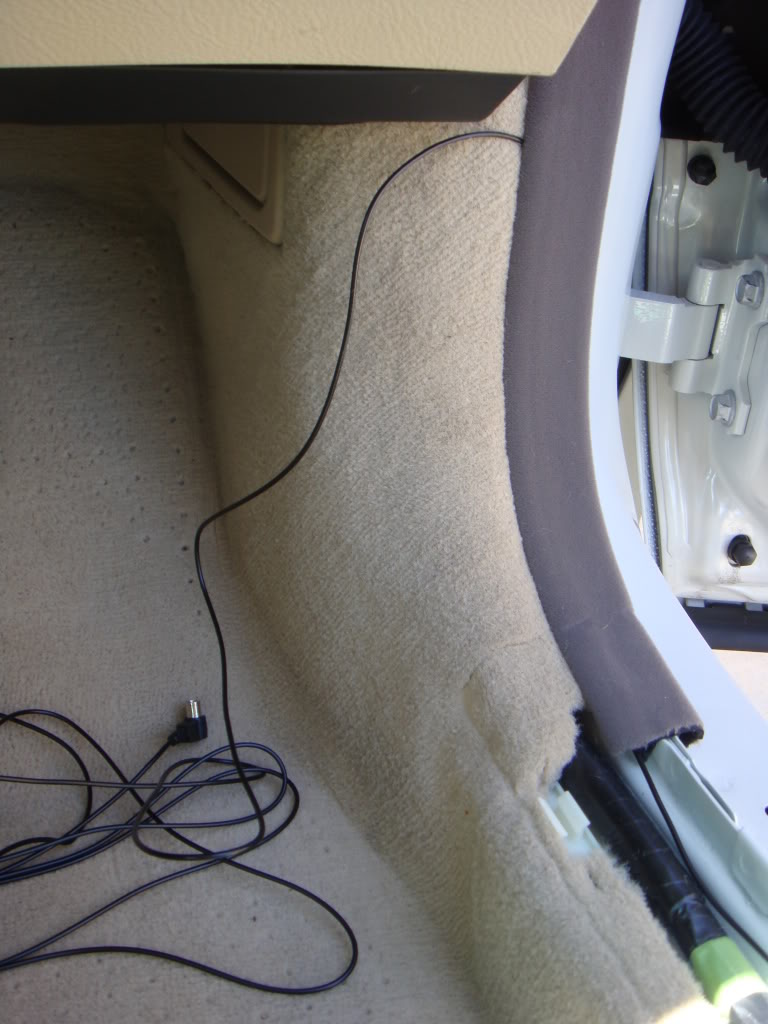
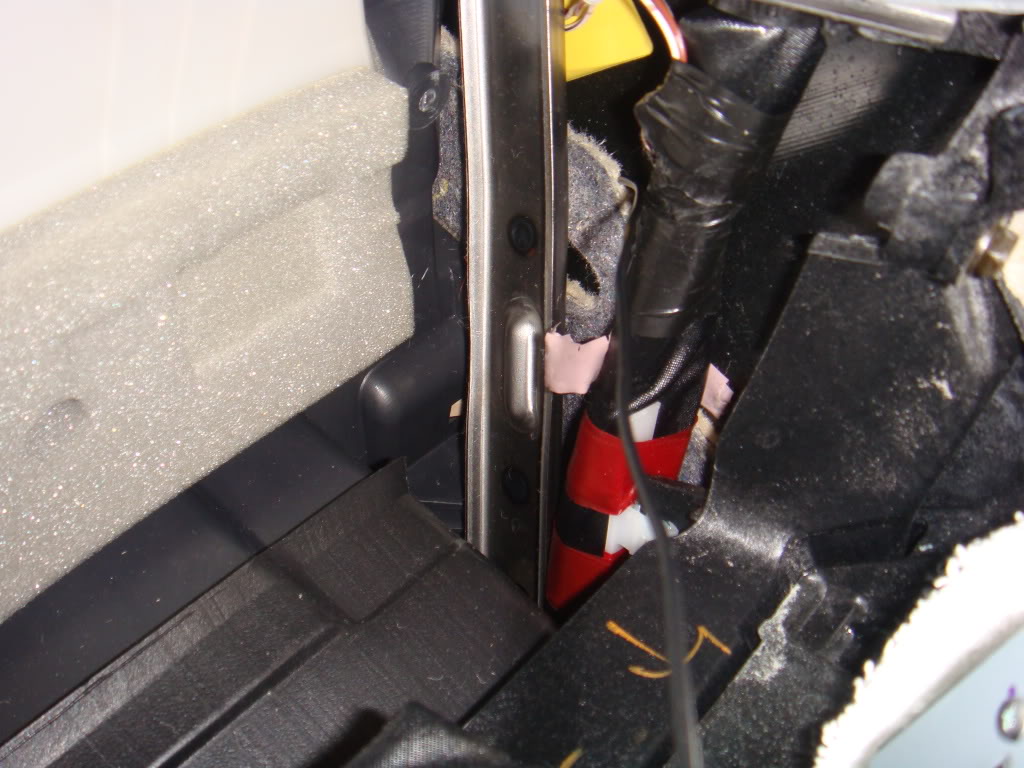
Next, I hid the antenna wire along the back edge of the rear package shelf, along the rear seat, under the sill plates, and up at the top of the passerger footwell carpet.
First, I hid the wire along the rear package shelf, using the nylon trim tools to help push it in:
First, I hid the wire along the rear package shelf, using the nylon trim tools to help push it in:
Last edited by MDEC; 04-17-11 at 03:43 PM.
04-02-11, 03:38 PM
#3
Then I ran the wire under the C-pillar panel by pushing it in along the bottom. The package shelf and the C-pillar panel both have a flexible mounting, so pusing them a little is easy:
Last edited by MDEC; 04-08-11 at 03:08 PM.
04-02-11, 03:42 PM
#4
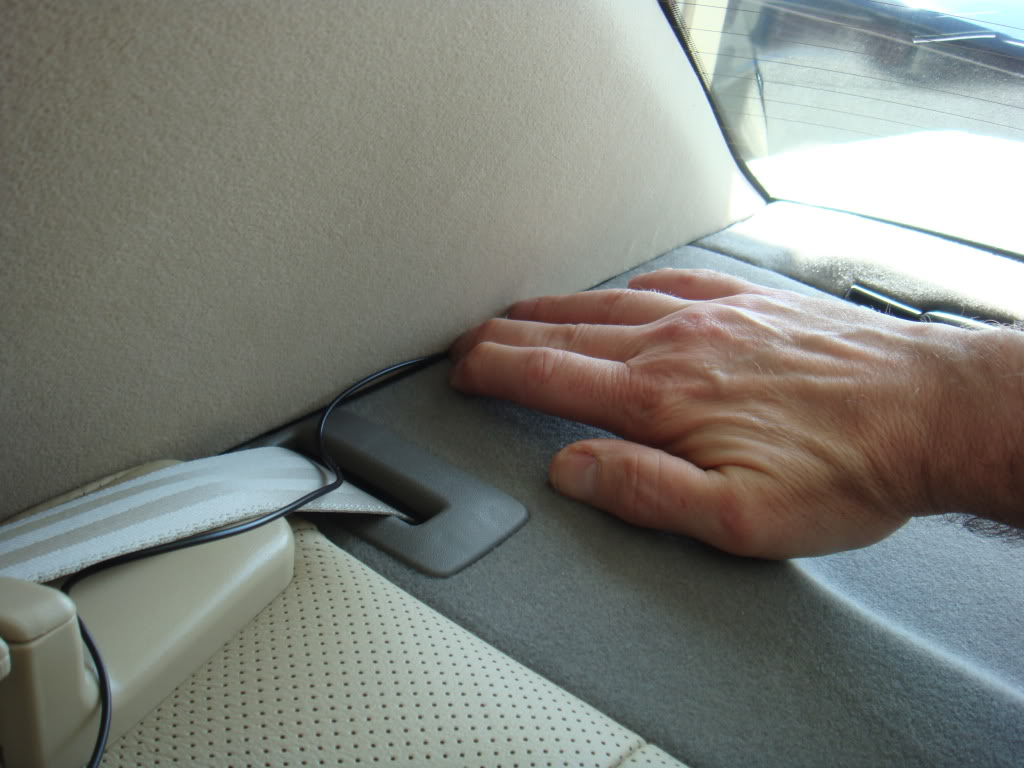
Next, I pushed the wire next to the rear passenger side seat, using the trim tools to help push it all the way in:

I popped the rear passenger side sill plate to hide the wire under it. The sill plates remove very easily, being held on with clips. They re-install just as easily. My picture shows the pry bar being used to lift the sill, but if you can get your fingers under a bit of the edge near the carpet, they pull right off.:
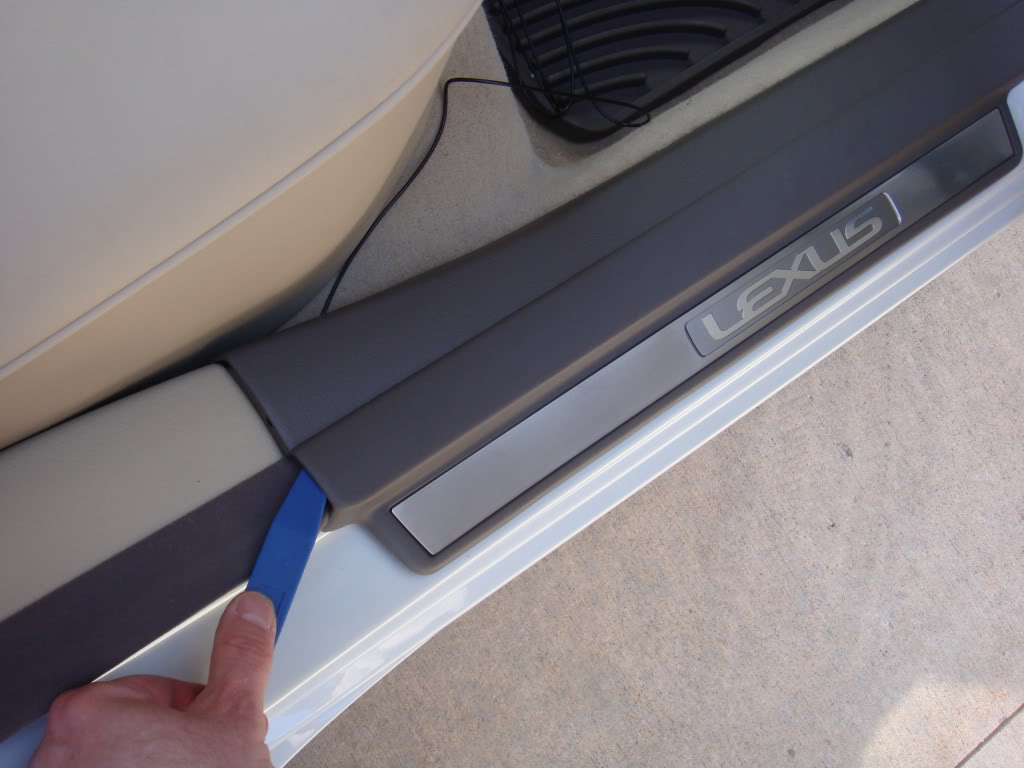
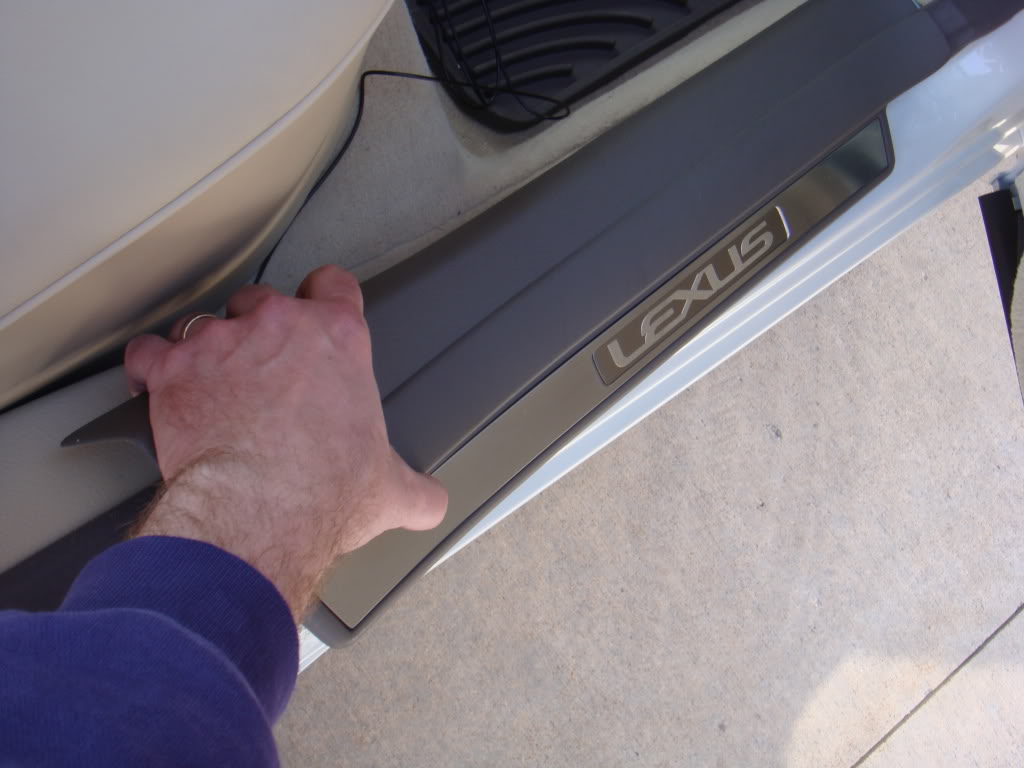
You can see the 6 clips that hold the sill on, 3 along the edge of the carpet, and 3 ball style clips along the middle that push into the metal body holes. Notice the antenna wire at the top left of the picture. I pushed the wire under the plastic trim piece at the left on the floor. I used the nylon trim tools:
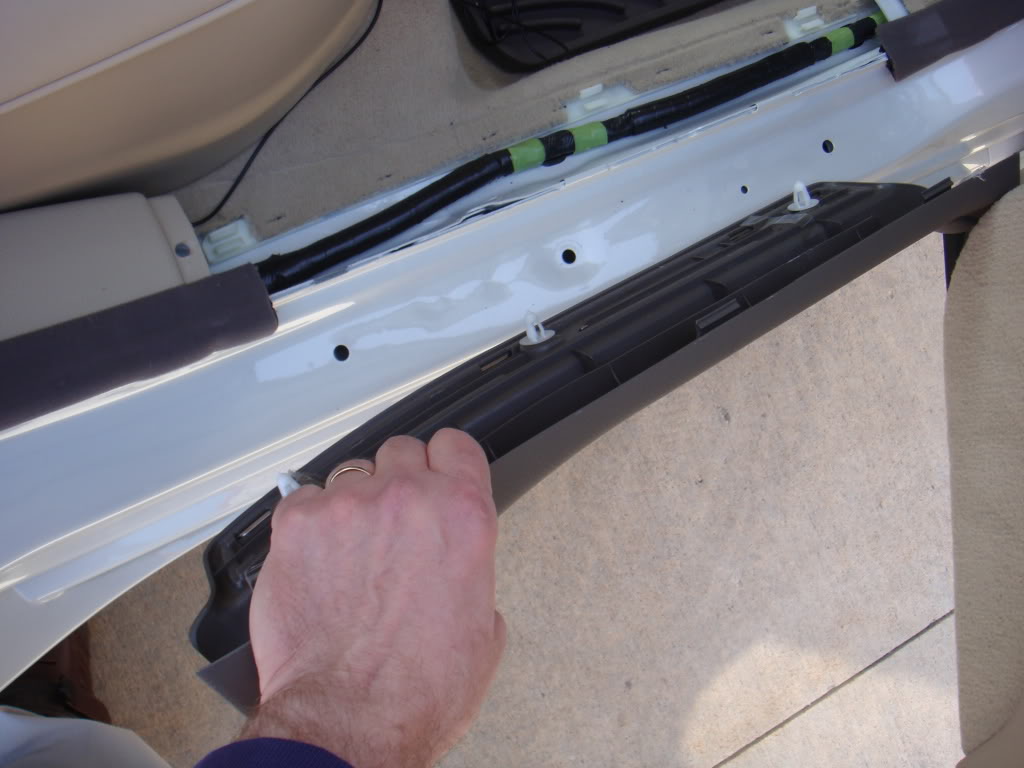
I popped the rear passenger side sill plate to hide the wire under it. The sill plates remove very easily, being held on with clips. They re-install just as easily. My picture shows the pry bar being used to lift the sill, but if you can get your fingers under a bit of the edge near the carpet, they pull right off.:
You can see the 6 clips that hold the sill on, 3 along the edge of the carpet, and 3 ball style clips along the middle that push into the metal body holes. Notice the antenna wire at the top left of the picture. I pushed the wire under the plastic trim piece at the left on the floor. I used the nylon trim tools:
Last edited by MDEC; 04-08-11 at 03:08 PM.
04-02-11, 04:00 PM
#5
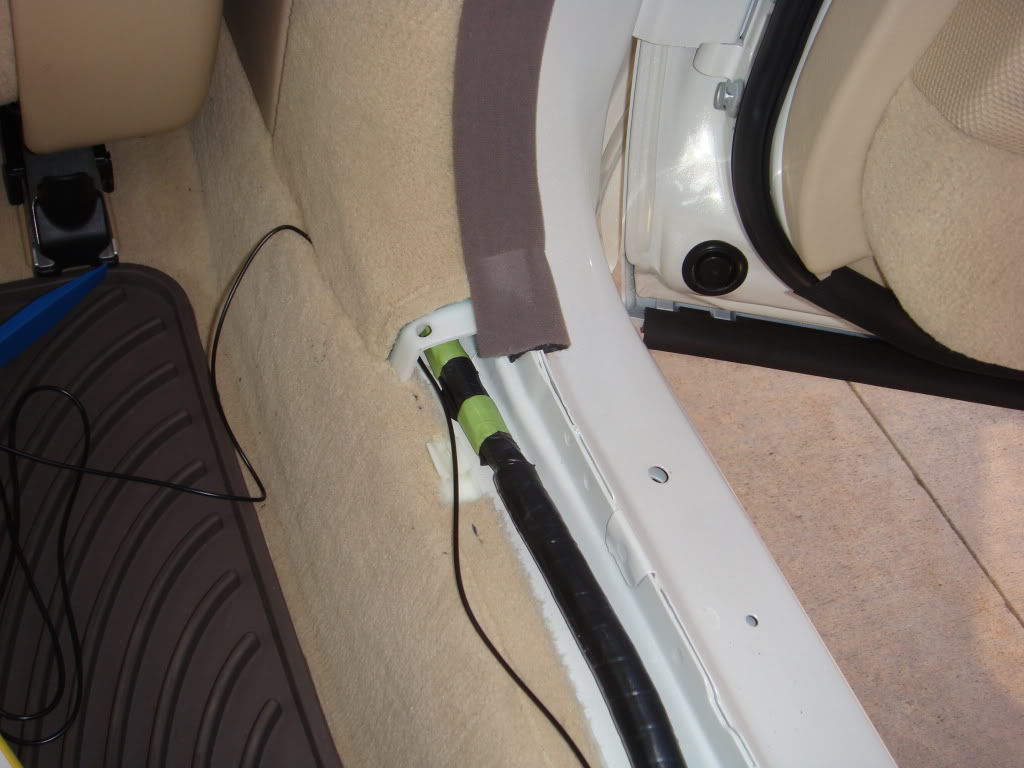
This is a picture of the rear passenger door looking toward the front of the car. I pushed the wire under the plastic trim piece at the floor (This is the trim separating the front and rear sill plates and covering the B-pillar at the floor). Man, those nylon pry bars were worth the $6.95 plus shipping! It made the job of pushing the wire under the trim a very easy task...Harbor Freight...search on "nylon pry bars"
Last edited by MDEC; 04-03-11 at 02:07 PM.
04-02-11, 04:08 PM
#6
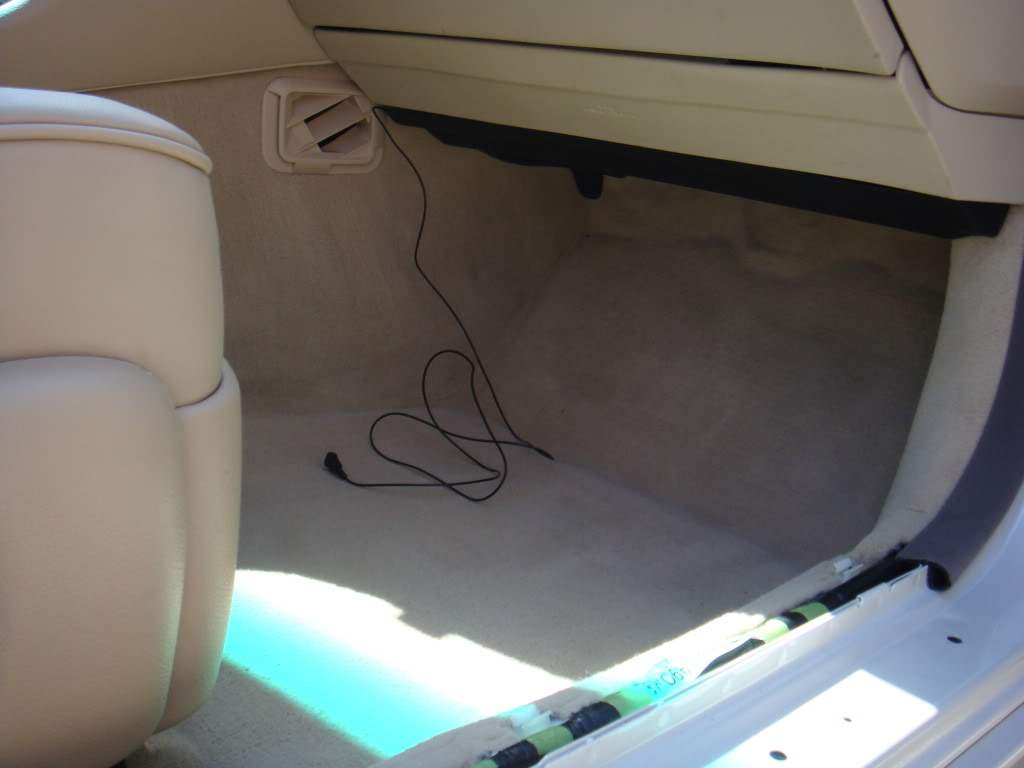
I removed the front passenger-side door sill plate in the exact manner as the rear, just pulling up after I got my fingers under the inside edge near the carpet. The wire was then run behind the soft trim as shown, and then along the top of the carpet at the front of the passenger side foot well. There is a knee airbag here, so be sure to not interfere with it, being sure to push the wire behind the top edge of the carpet and not in the path of the knee airbag:
This is the passenger side front, looking to the front of the car:
Run the wire along and behind the top of the carpet..Leave it here for now. Later, I'll show how to get it in behind the radio:
This is the passenger side front, looking to the front of the car:
Run the wire along and behind the top of the carpet..Leave it here for now. Later, I'll show how to get it in behind the radio:
Last edited by MDEC; 04-02-11 at 08:14 PM.
04-02-11, 04:28 PM
#7
Now came the bothersome part...removing the first piece of wood dash trim from my pristine Lexus...No guts, no glory! Get the women and children inside...There's probably going to be lots of cussing.
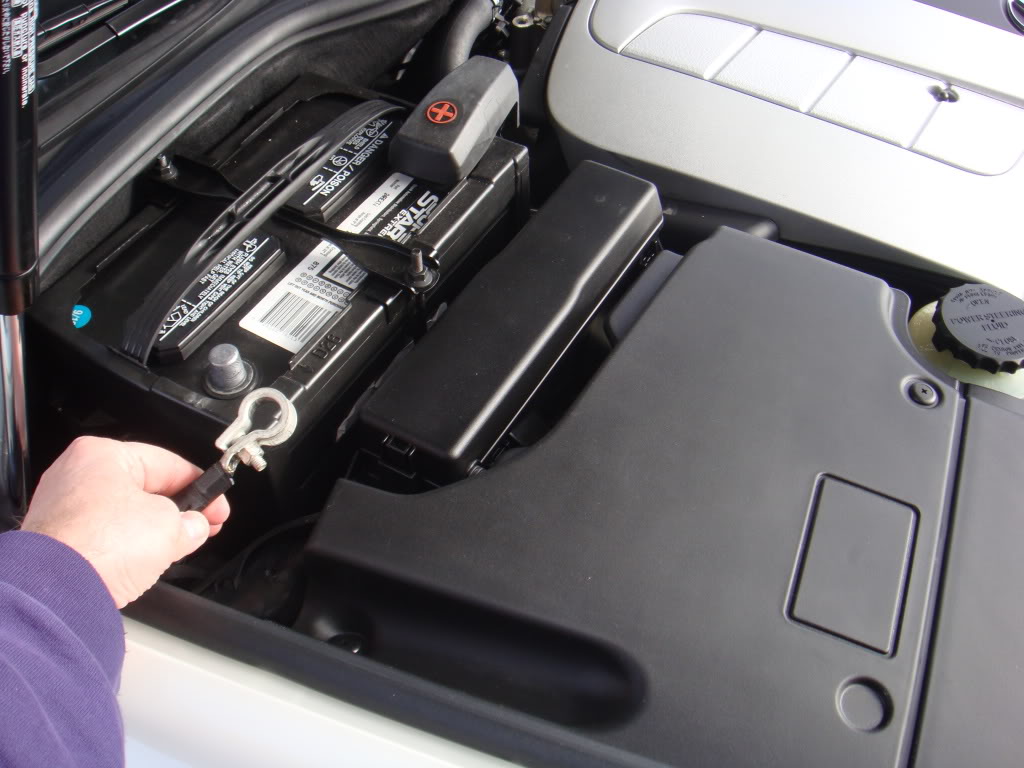
Notice the cleanliness of my engine compartment! ...2006 MY still under 12,000 miles. It won't be this way forever, but I wish it could be.
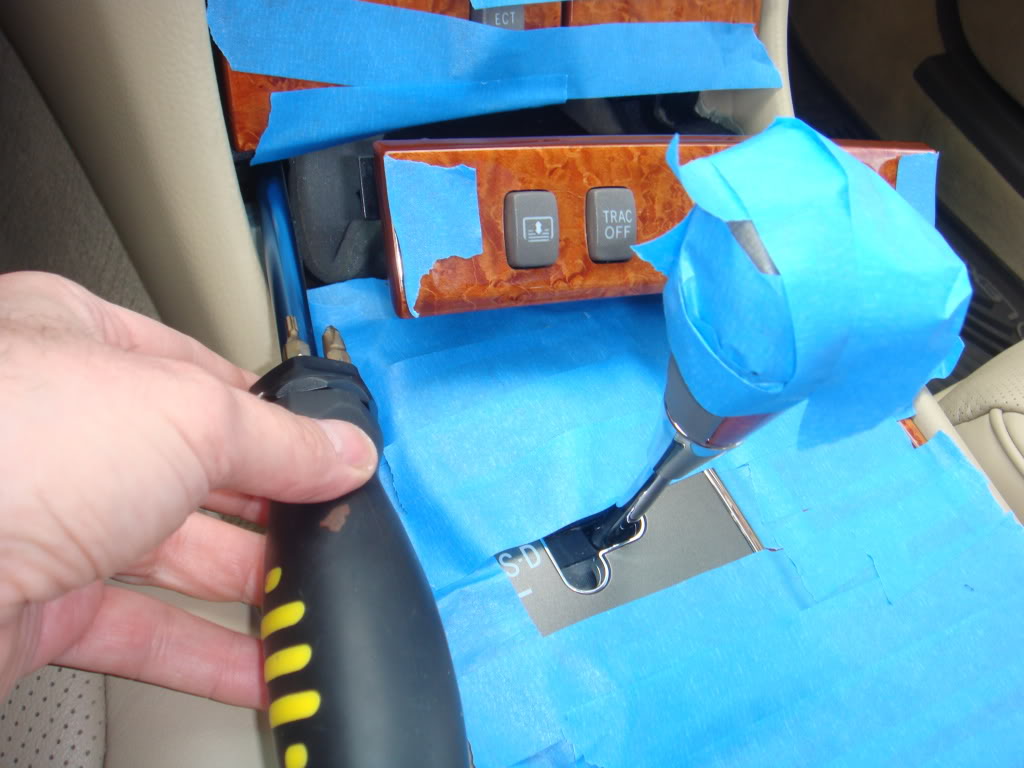
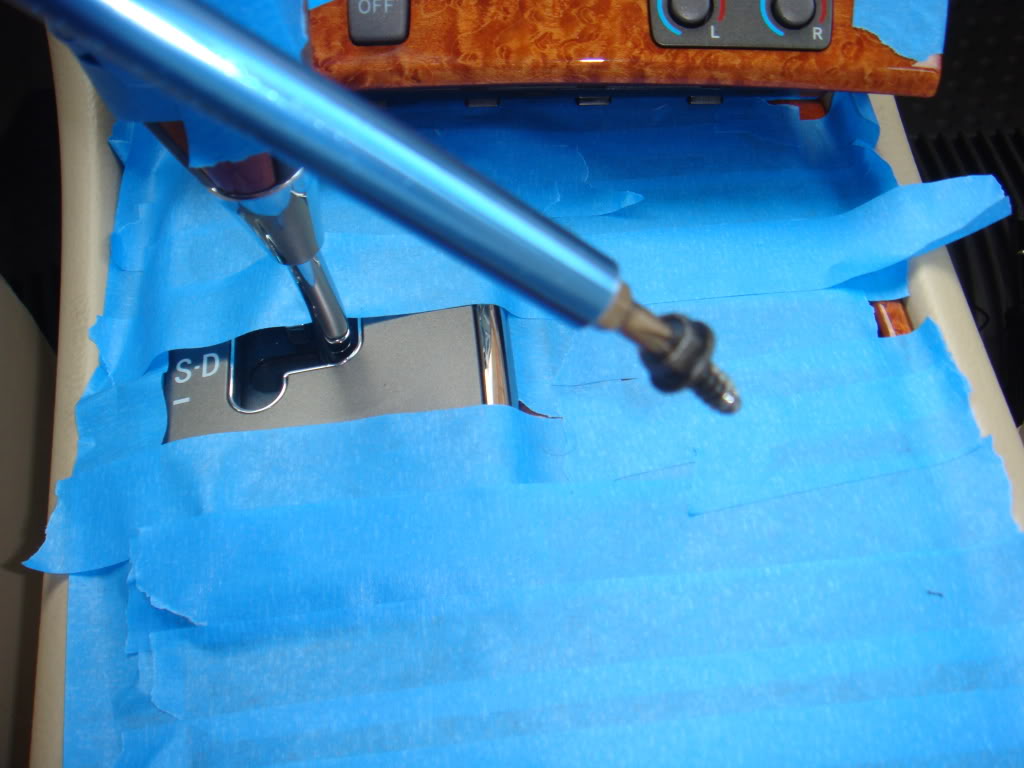
Next step... Pull out your 10mm box wrench and disconnect the negative battery terminal so you don't fry things as you pull them apart. But, before you do, it's probably a good idea to turn the ignition to "ON" and move the gearshift into Neutral (parking brake on, of course) You won't be able to move the shifter out of PARK once the battery is disconnected. This will keep the gear shift out of your way when you pull the radio. You could also disconnect the battery, then later use the little park-lock release access hole on the gearshift bezel to move the shifter out of PARK and out of the way (probably the better way).
DON'T MAKE MY MISTAKE! At least I think I made a mistake by using the smart key. When I was done, I re-connected the battery with the gearshift out of PARK and the ignition in LOCK...I think this confused things. The engine immobilizer was actived. The engine would start and then shut off after a second or two. I'm not exactly sure what the cause of all this was, but I had momentary thoughts of my car being towed to the Lexus dealer. I think it didn't help that my battery was also low on charge. Anyway, the happy ending is that I put the smart key away and inserted the valet key, putting the ignition position to "ON" with the shifter in NEUTRAL. I then connected the battery again. Perhaps coincidental, but the car started right up and I avoided the extreme shame of having to take other means of getting the car fixed.
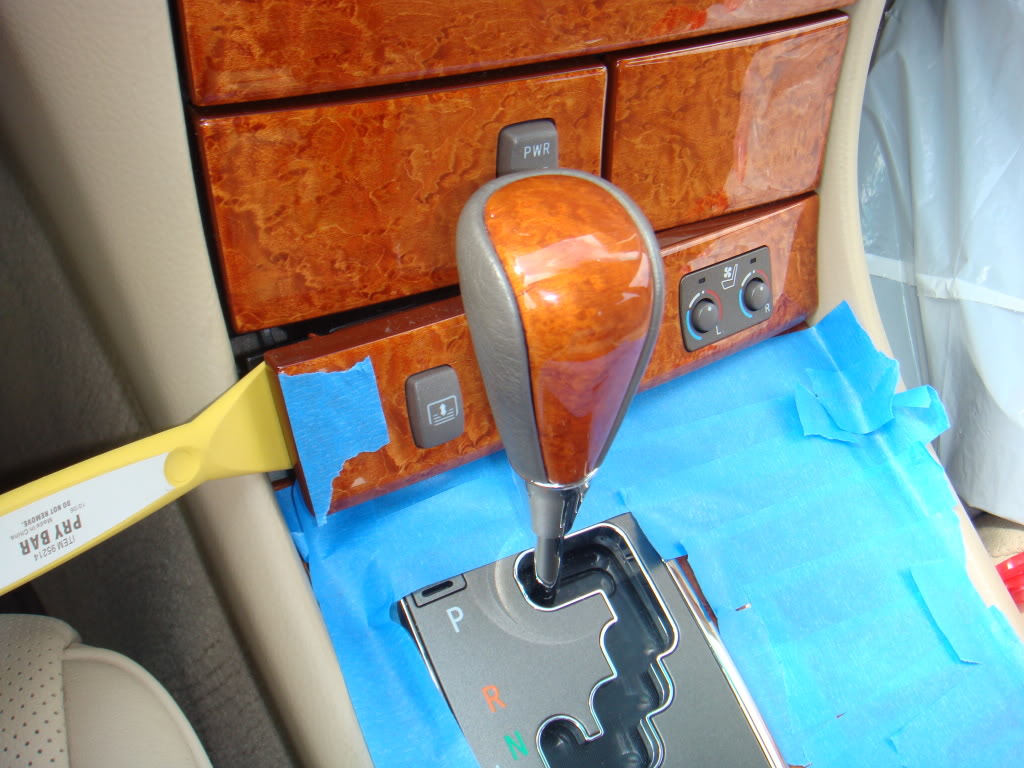
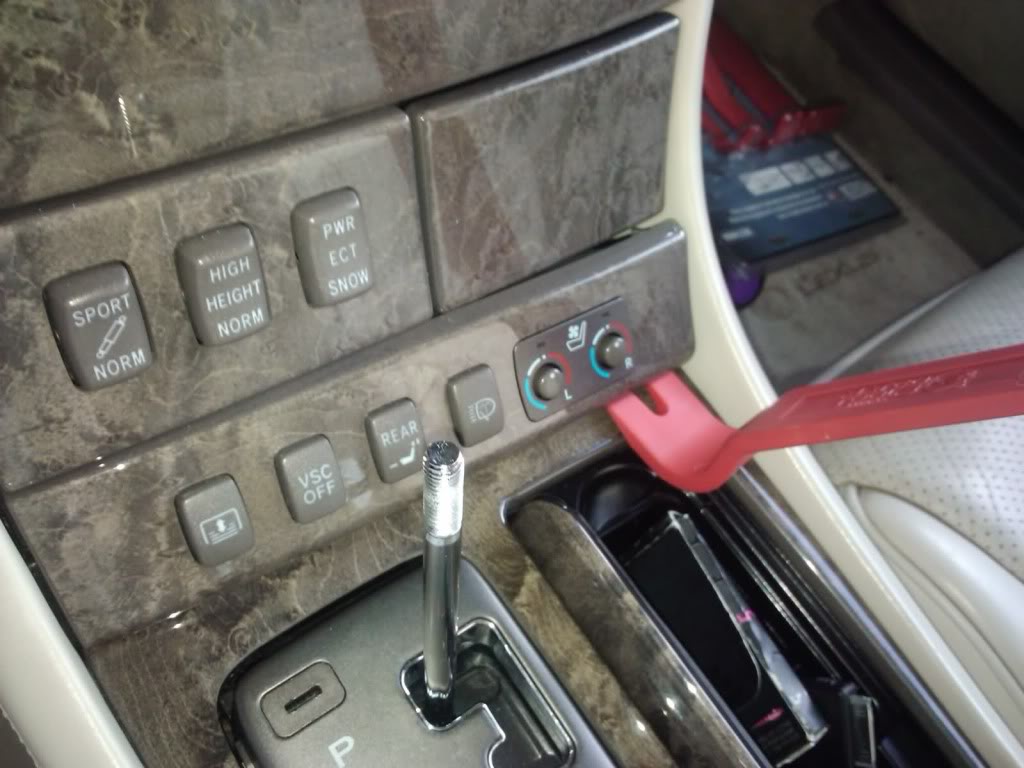
THE FIRST PANEL PULL: I lifted one side at a time with a flat nylon pry bar. Depress the soft vinyl console side padding with the pry bars, using them a the lever point as you pry off...The padding will bounce right back.
Here's a link from this forum that suggests prying from the bottom. This may be an alternate method if you have a CL or UL model with a leather trimmed console that you are afraid you may damage:
pry it from the bottom instead of the sides
Here are my pictures...(Notice my crazy use of blue painter's tape to avoid scratches on the wood...probably overkill, but I have no scratches):
Here's a picture I copied from a thread here at Club Lexus that suggests prying from the bottom (the "pry it from the bottom" link posted at the top of this #7 post).
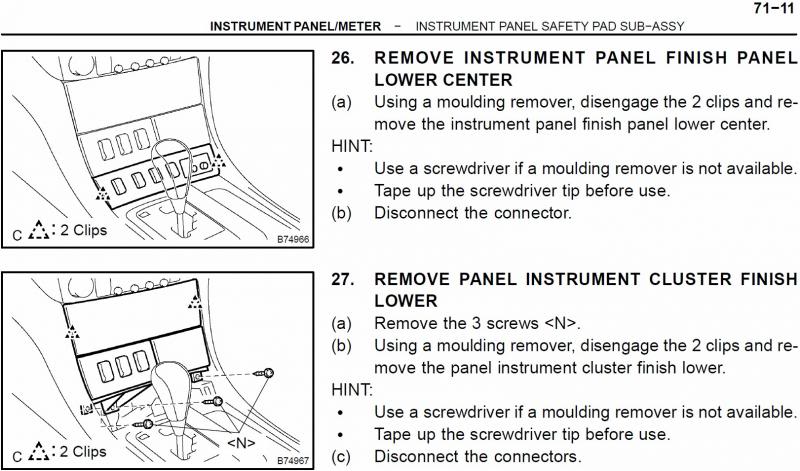
Here is a shot from a Lexus service manual that shows the basic idea of the clips and screws that will need to be removed:
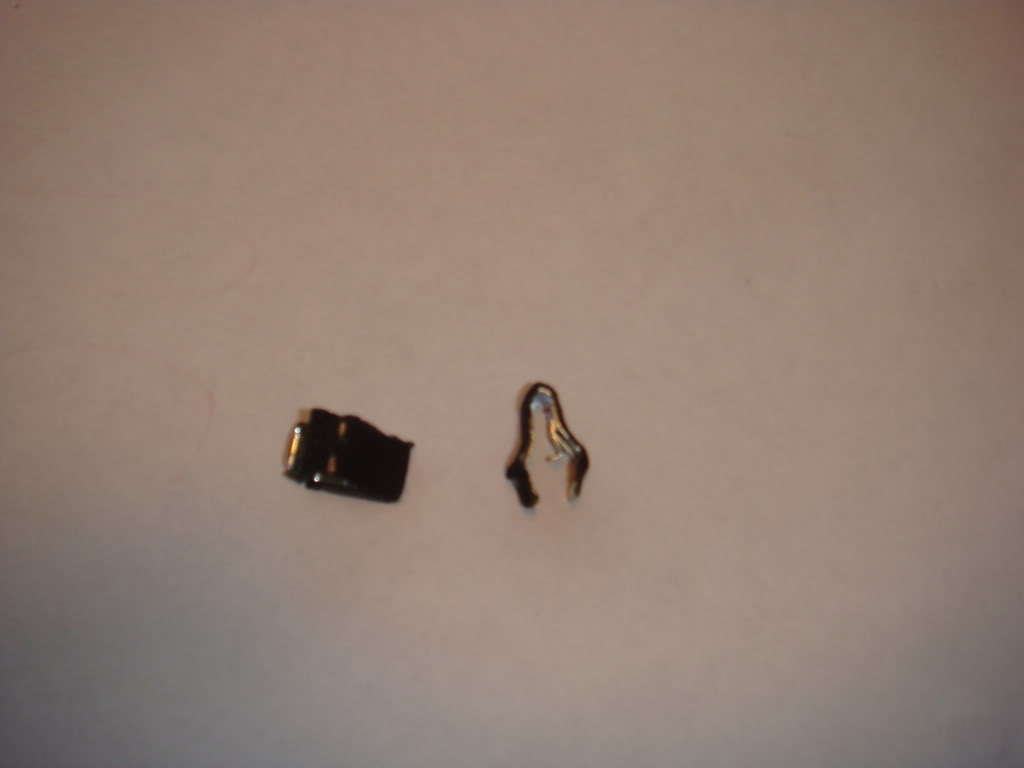
When I removed my seat heater control panel, I noticed there were no clips on the back. At first I thought they may have pulled off, but when I found replacement clips and installed them, I can see that there is no way these clips could have come off when prying off the panel.
My theory is that my car had a repair at the factory, and the clips were never replaced.
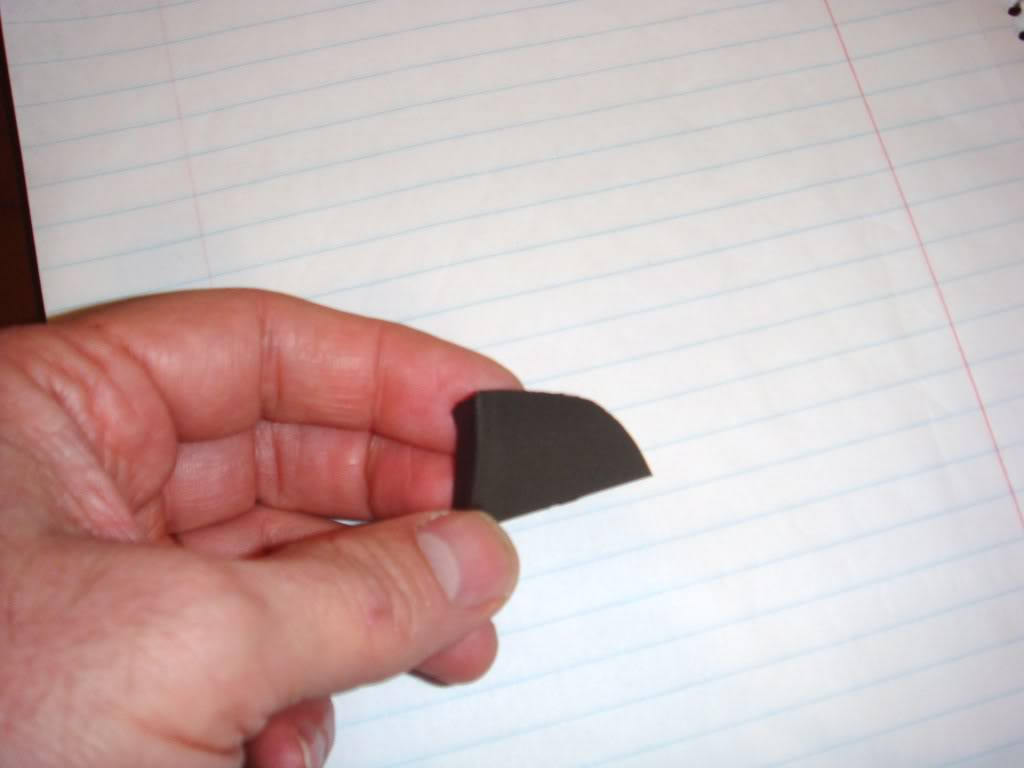
I found this broken piece of tape player bezel (or something) deep in the console.
There is no record of any radio or console work in the Lexus warranty history, and the previous owner had all work done at the dealer, even having the car detailed there (who has there car washed and vacuumed at the dealer?), so I'm thinking this broken piece was from the factory:
I came up with some replacement clips by buying an old seat heater panel on Ebay and using it as a clip donor for my seat heater panel. The clips were a bit of a chore to get off of the donor panel, so I think there's no way they pulled off when prying off the panel:
Notice the cleanliness of my engine compartment! ...2006 MY still under 12,000 miles. It won't be this way forever, but I wish it could be.
Next step... Pull out your 10mm box wrench and disconnect the negative battery terminal so you don't fry things as you pull them apart. But, before you do, it's probably a good idea to turn the ignition to "ON" and move the gearshift into Neutral (parking brake on, of course) You won't be able to move the shifter out of PARK once the battery is disconnected. This will keep the gear shift out of your way when you pull the radio. You could also disconnect the battery, then later use the little park-lock release access hole on the gearshift bezel to move the shifter out of PARK and out of the way (probably the better way).
DON'T MAKE MY MISTAKE! At least I think I made a mistake by using the smart key. When I was done, I re-connected the battery with the gearshift out of PARK and the ignition in LOCK...I think this confused things. The engine immobilizer was actived. The engine would start and then shut off after a second or two. I'm not exactly sure what the cause of all this was, but I had momentary thoughts of my car being towed to the Lexus dealer. I think it didn't help that my battery was also low on charge. Anyway, the happy ending is that I put the smart key away and inserted the valet key, putting the ignition position to "ON" with the shifter in NEUTRAL. I then connected the battery again. Perhaps coincidental, but the car started right up and I avoided the extreme shame of having to take other means of getting the car fixed.
THE FIRST PANEL PULL: I lifted one side at a time with a flat nylon pry bar. Depress the soft vinyl console side padding with the pry bars, using them a the lever point as you pry off...The padding will bounce right back.
Here's a link from this forum that suggests prying from the bottom. This may be an alternate method if you have a CL or UL model with a leather trimmed console that you are afraid you may damage:
pry it from the bottom instead of the sides
Here are my pictures...(Notice my crazy use of blue painter's tape to avoid scratches on the wood...probably overkill, but I have no scratches):
Here's a picture I copied from a thread here at Club Lexus that suggests prying from the bottom (the "pry it from the bottom" link posted at the top of this #7 post).
Here is a shot from a Lexus service manual that shows the basic idea of the clips and screws that will need to be removed:
When I removed my seat heater control panel, I noticed there were no clips on the back. At first I thought they may have pulled off, but when I found replacement clips and installed them, I can see that there is no way these clips could have come off when prying off the panel.
My theory is that my car had a repair at the factory, and the clips were never replaced.
I found this broken piece of tape player bezel (or something) deep in the console.
There is no record of any radio or console work in the Lexus warranty history, and the previous owner had all work done at the dealer, even having the car detailed there (who has there car washed and vacuumed at the dealer?), so I'm thinking this broken piece was from the factory:
I came up with some replacement clips by buying an old seat heater panel on Ebay and using it as a clip donor for my seat heater panel. The clips were a bit of a chore to get off of the donor panel, so I think there's no way they pulled off when prying off the panel:
Last edited by MDEC; 04-17-11 at 03:51 PM.
Trending Topics
04-02-11, 04:33 PM
#8
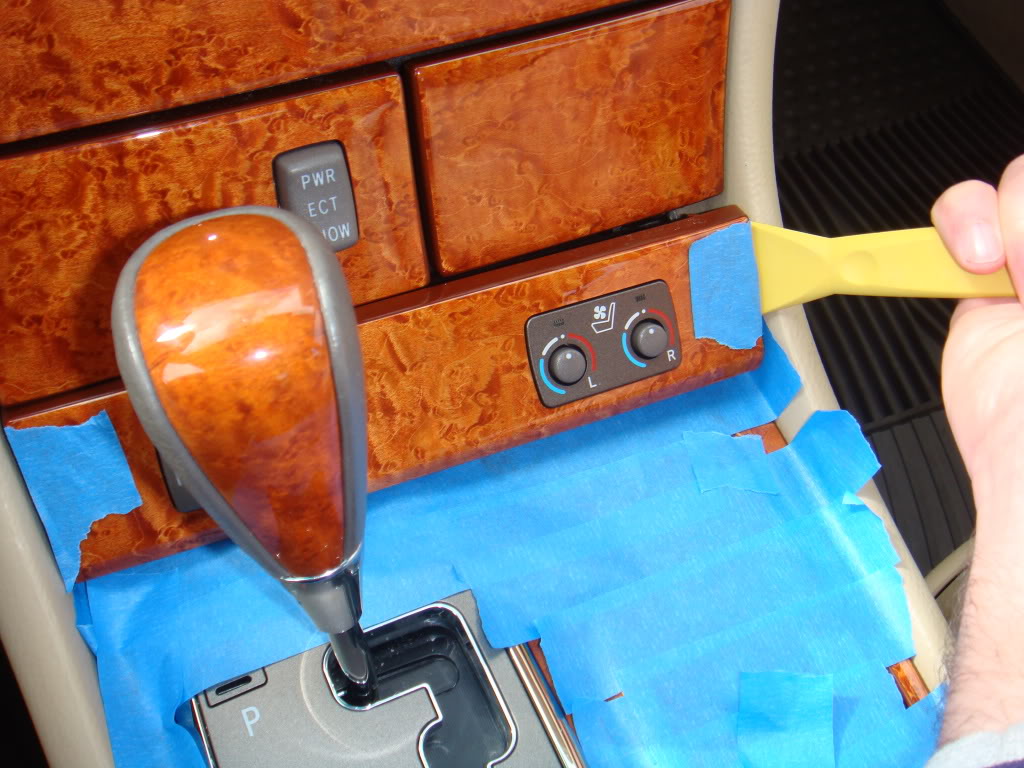
Now back to the Vaistech install...Next step: Disconnect the wiring connector from the back of the seat heater control panel. Hold down the locking clip and use a flat blade screw driver to help push the connector apart:
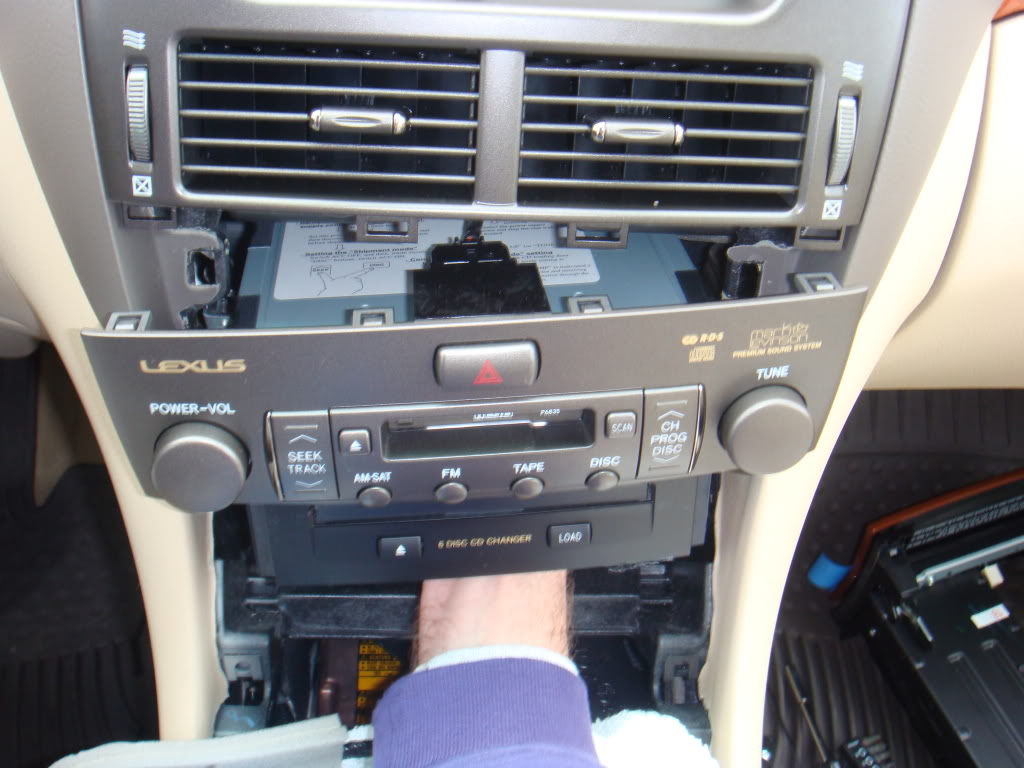
There are 3 phillips head screws along the bottom of the CD door panel (at each side and in the middle). Be sure to use a magnetic screw driver or these will certainly fall behind the radio and into the bottomless pit of the console:
There are 3 phillips head screws along the bottom of the CD door panel (at each side and in the middle). Be sure to use a magnetic screw driver or these will certainly fall behind the radio and into the bottomless pit of the console:
Last edited by MDEC; 04-06-11 at 11:26 AM.
04-02-11, 08:29 PM
#9
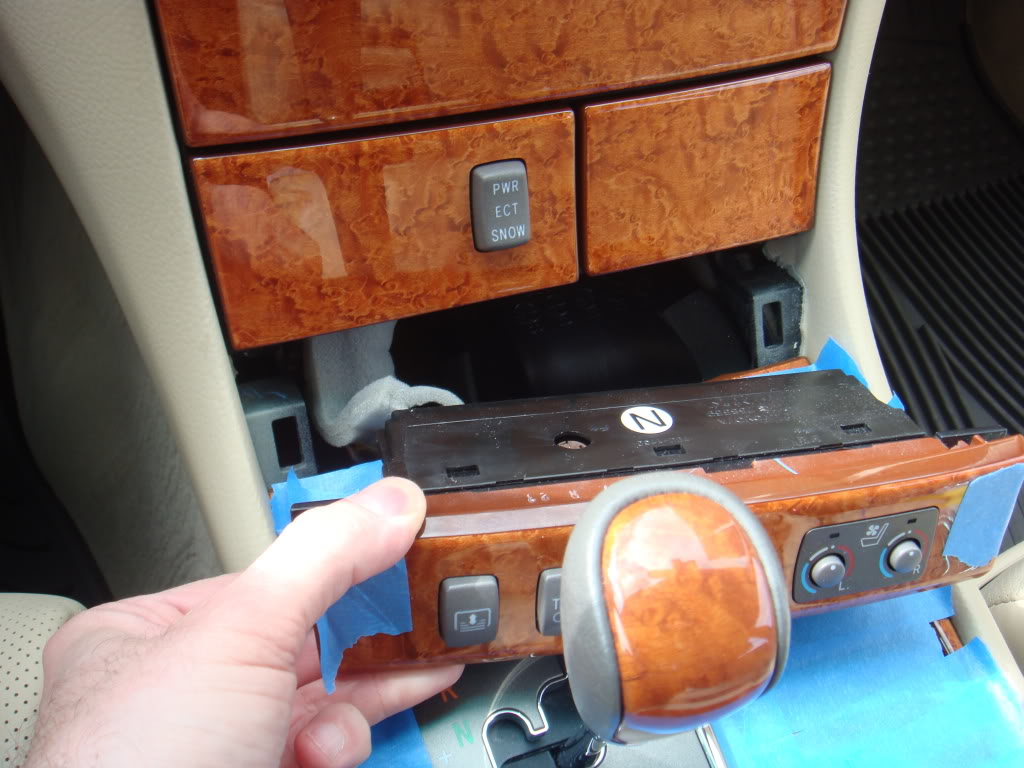
Pry off the CD door cover panel. This panel includes the transmission PWR/SNOW rocker switch and the slide out drawer that holds a cell phone:

There is a clip on each side where I am prying. I released one side at a time and had no problem:
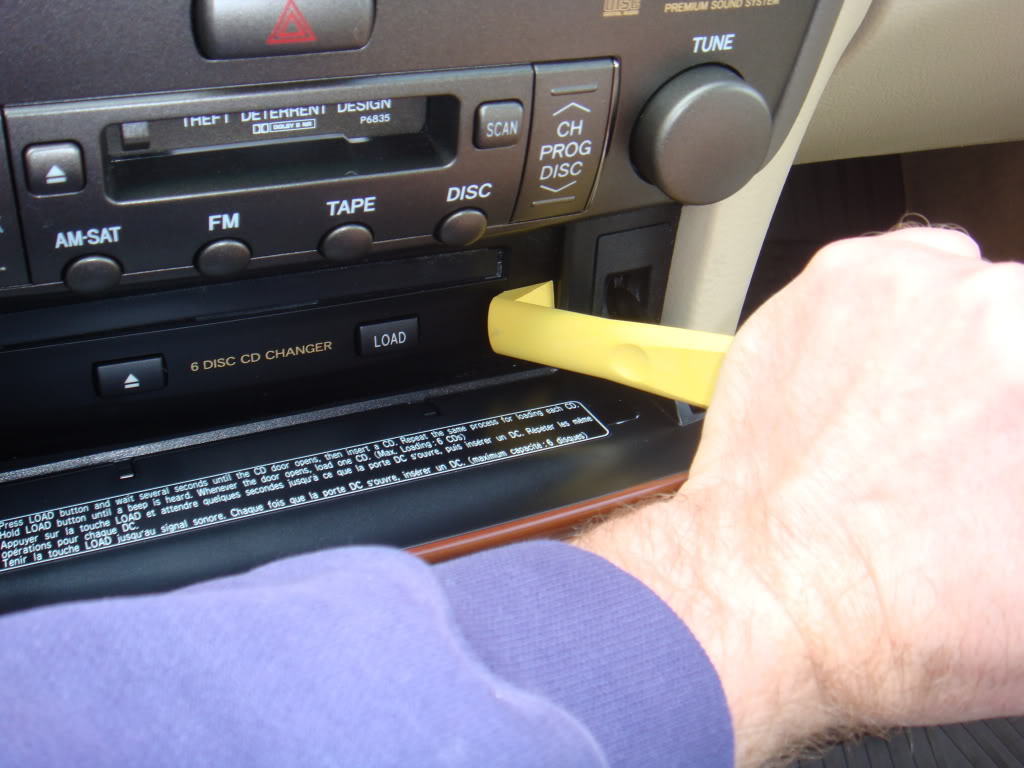
The cover then slides right out towards you:
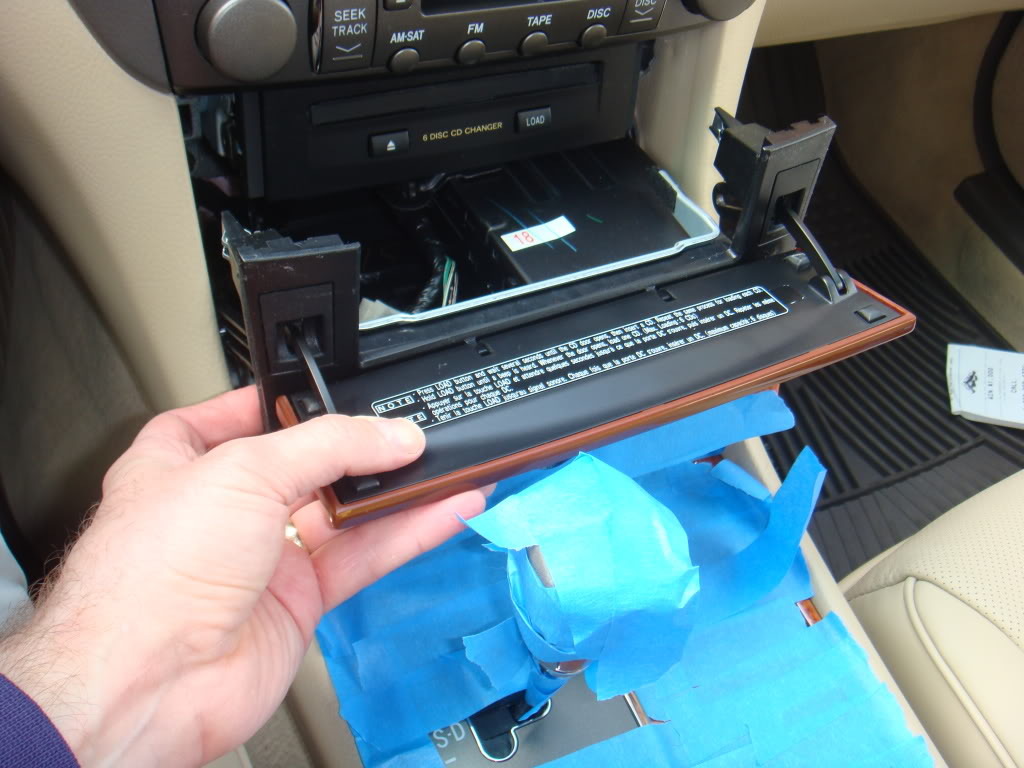
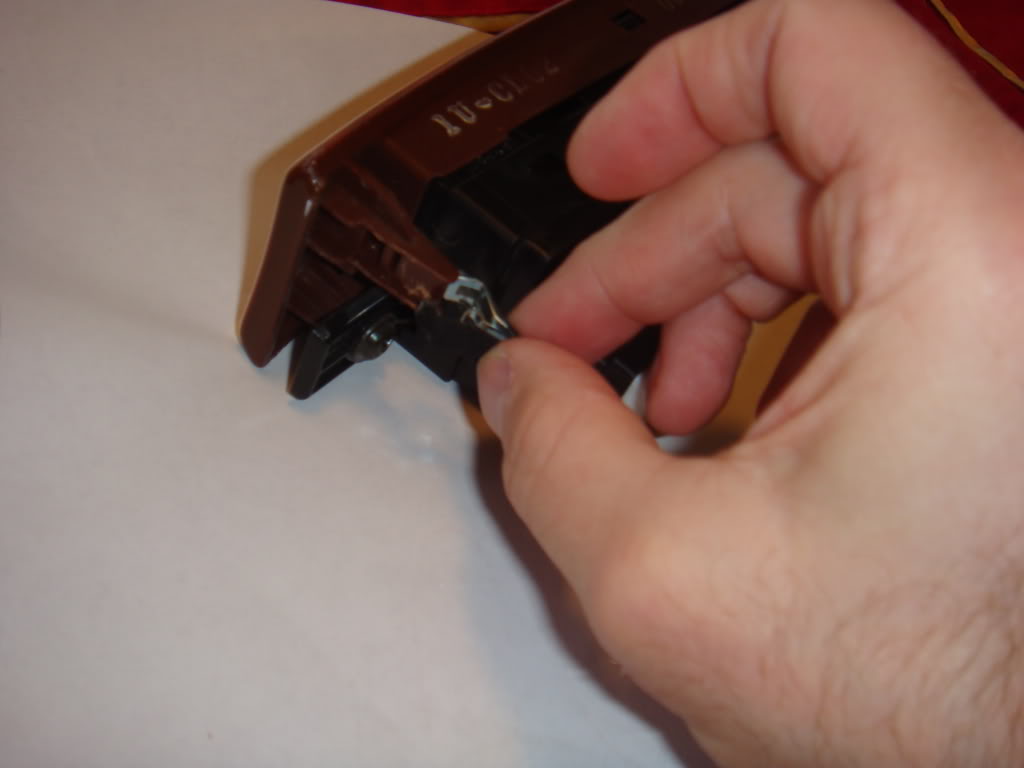
Release this wiring clip on the back of the CD door cover:
Remove this connector by holding the lock tang of the connector and prying with a screw driver:
There is a clip on each side where I am prying. I released one side at a time and had no problem:
The cover then slides right out towards you:
Release this wiring clip on the back of the CD door cover:
Remove this connector by holding the lock tang of the connector and prying with a screw driver:
Last edited by MDEC; 04-03-11 at 05:35 AM.
04-02-11, 08:51 PM
#10
After you complete the next step, you have the radio out. It will appear as though someone has brutally vandalized your car. Call your wife out to show her what a manly-man you are. She will ask, "Are you sure you know what you're doing?"... Just give her a crazy laugh in response. (My wife's next question: "When will you be done playing with your car so you can do the grocery shopping?")
Remove two 10mm bolts, one from each side, of the CD player
(This is actually a picture of me reinstalling...That's a 10mm tool, not a screwdriver I'm using...notice the bloody bandaid...more on that later. Also notice the rag stuffed under the radio to prevent screws and bolts from falling into the console...I dropped one of the 10mm bolts that hold the CD player. Despite attempting retrieval using a claw/grabber tool, it was gone. I ran up to the local hardware store and bought a "M 6 1.00" replacement...Maybe it was a "M 8 1.00"..I took the one bolt I had remaining to the hardware store and matched up its size and thread pitch...I'm almost sure it was a "M 6 1.00" ):
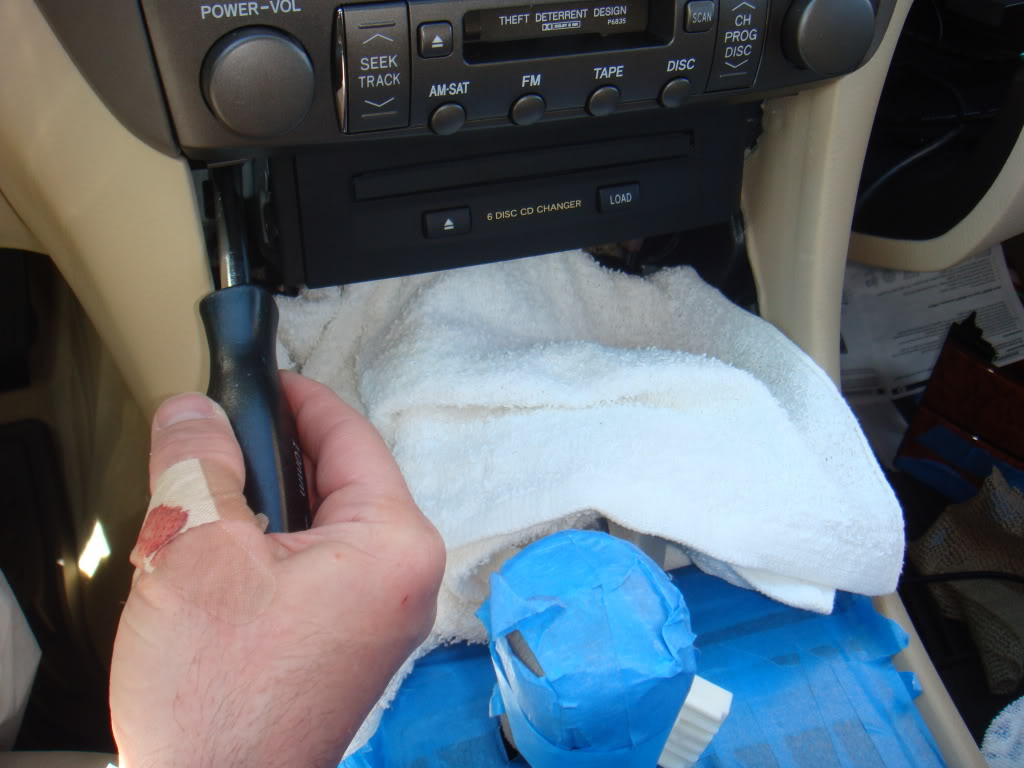
Reach under and behind the CD player (I used two hands, but had to hold the camera with one for this picture) and give a good pull. The whole mess releases quite easily and pulls straight out towards you:
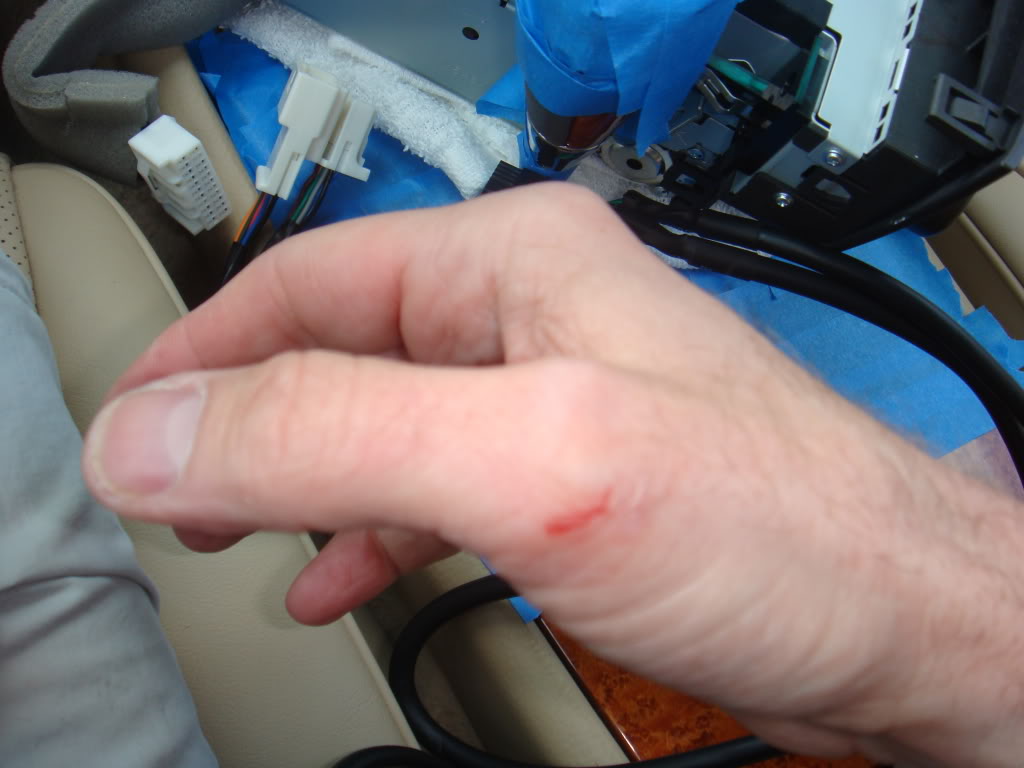
Reaching under the CD player inflicted the first of several wounds..Don't worry, chicks dig scars. Keep some bandaids handy so you don't bleed on your semi-analine leather:
Remove two 10mm bolts, one from each side, of the CD player
(This is actually a picture of me reinstalling...That's a 10mm tool, not a screwdriver I'm using...notice the bloody bandaid...more on that later. Also notice the rag stuffed under the radio to prevent screws and bolts from falling into the console...I dropped one of the 10mm bolts that hold the CD player. Despite attempting retrieval using a claw/grabber tool, it was gone. I ran up to the local hardware store and bought a "M 6 1.00" replacement...Maybe it was a "M 8 1.00"..I took the one bolt I had remaining to the hardware store and matched up its size and thread pitch...I'm almost sure it was a "M 6 1.00" ):
Reach under and behind the CD player (I used two hands, but had to hold the camera with one for this picture) and give a good pull. The whole mess releases quite easily and pulls straight out towards you:
Reaching under the CD player inflicted the first of several wounds..Don't worry, chicks dig scars. Keep some bandaids handy so you don't bleed on your semi-analine leather:
Last edited by MDEC; 04-08-11 at 03:27 PM.
 04-03-11, 06:00 AM
#13
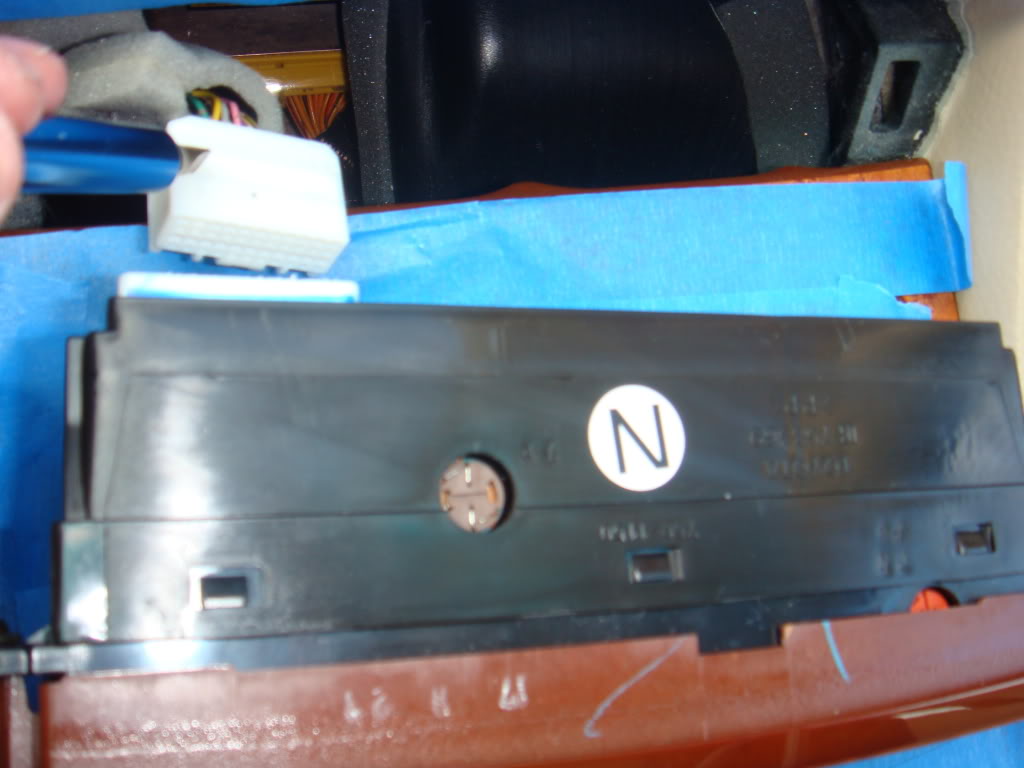
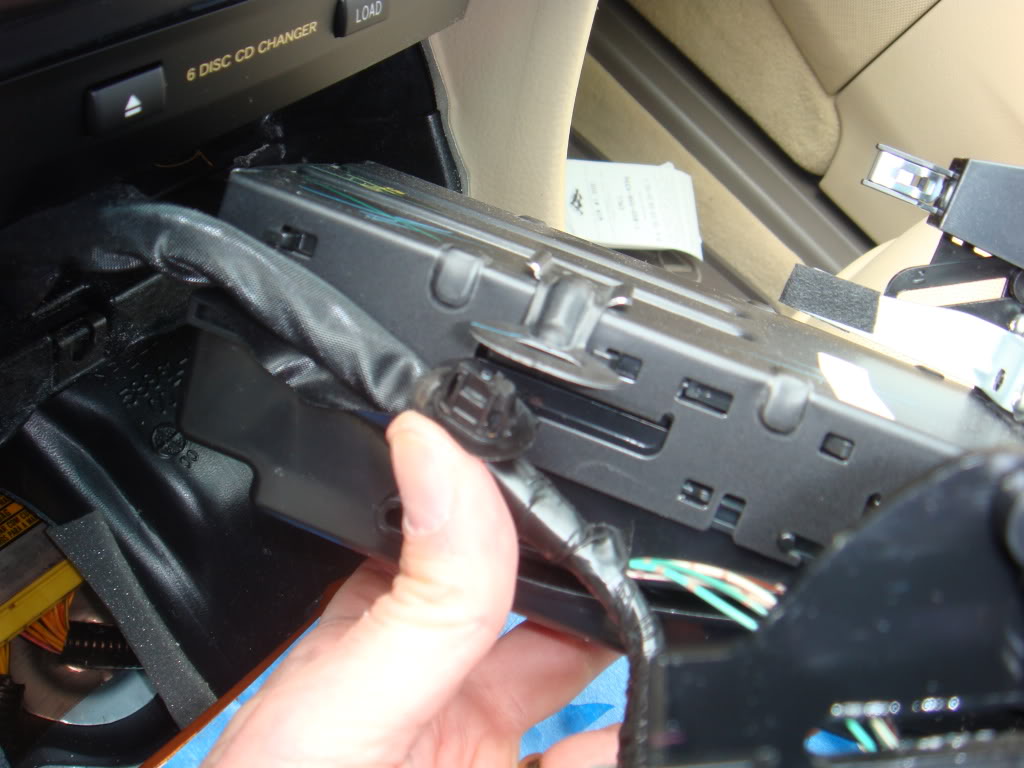
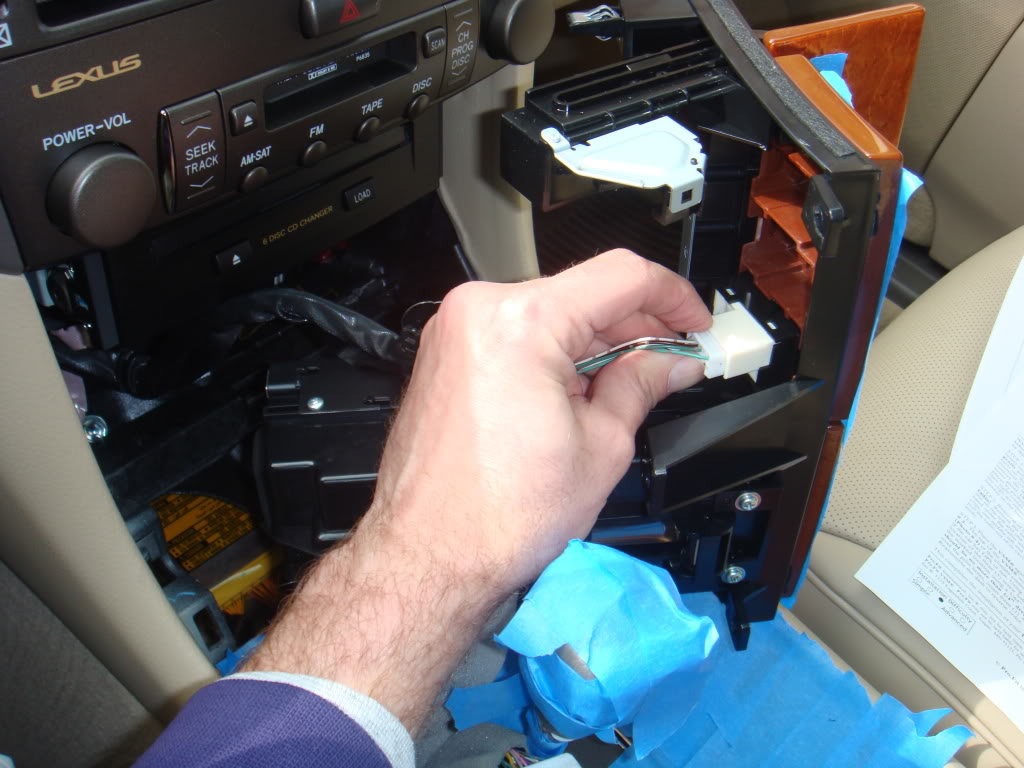
In the next set of pictures, note that my 2006 navigation has both a 20-pin and a 12-pin connector on the back of the CD player. The vaistech instructions show you how to connect up. I believe if you have a different system, you may only have a 12-pin connector. In this case, you can daisy-chain the vaistech harnesses together if you are installing multiple vaistech units. For me it was easy, only one way to connect everything.
Disconnect this to help pull the radio out farther:
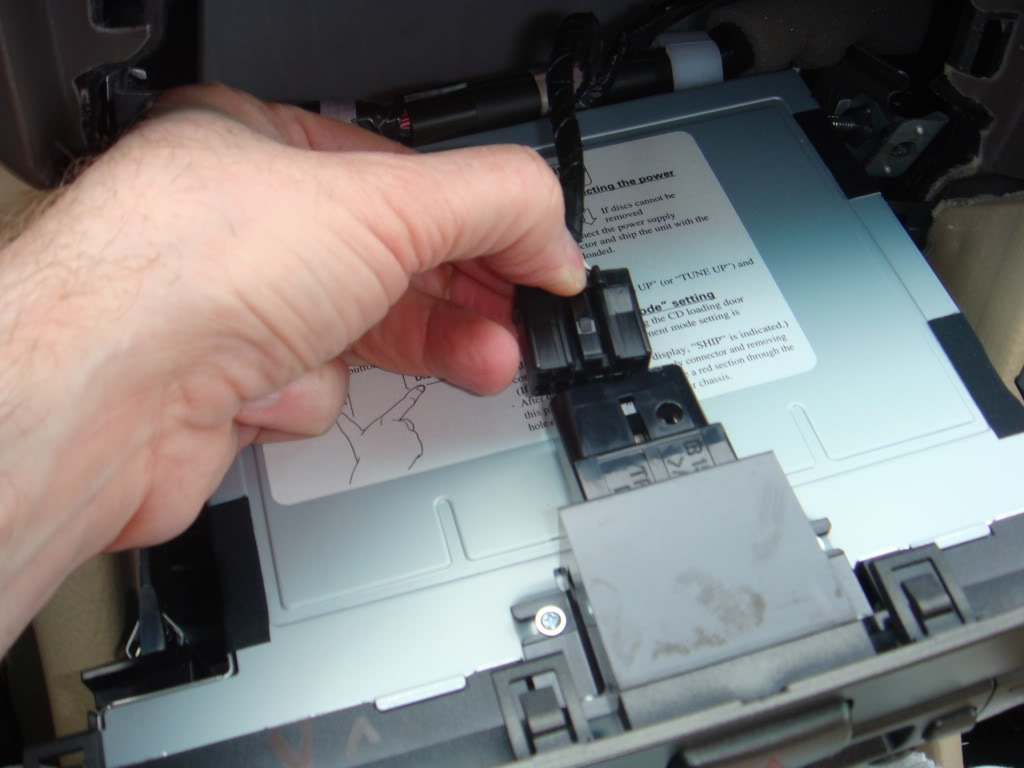
Pull the connectors from the back of the radio. Use a screw driver to help pry:
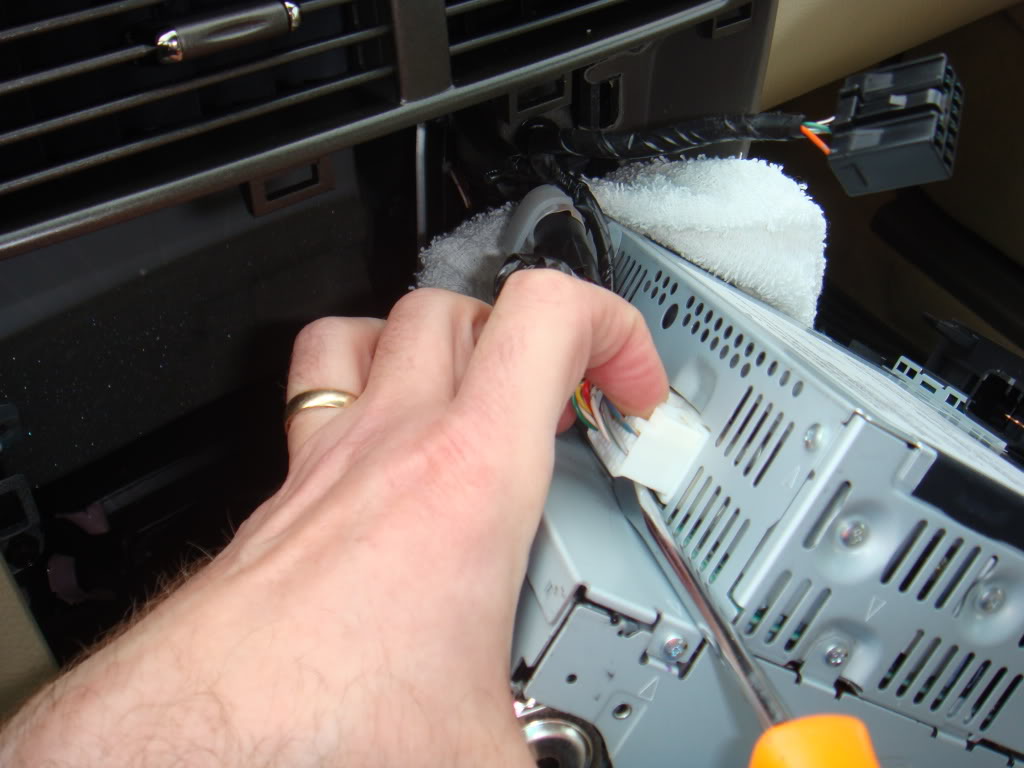
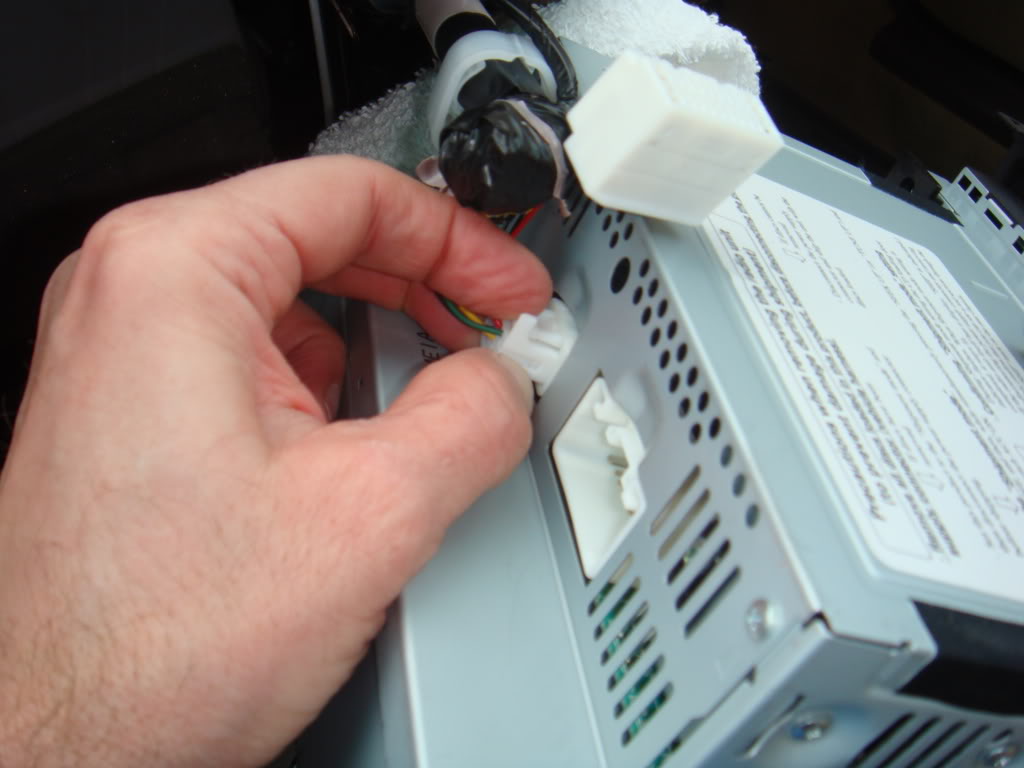
SCARY! Don't worry, it all goes back together and you will forget it looked this bad:
Disconnect this to help pull the radio out farther:
Pull the connectors from the back of the radio. Use a screw driver to help pry:
SCARY! Don't worry, it all goes back together and you will forget it looked this bad:
Last edited by MDEC; 04-03-11 at 07:22 AM.
04-03-11, 06:13 AM
#14
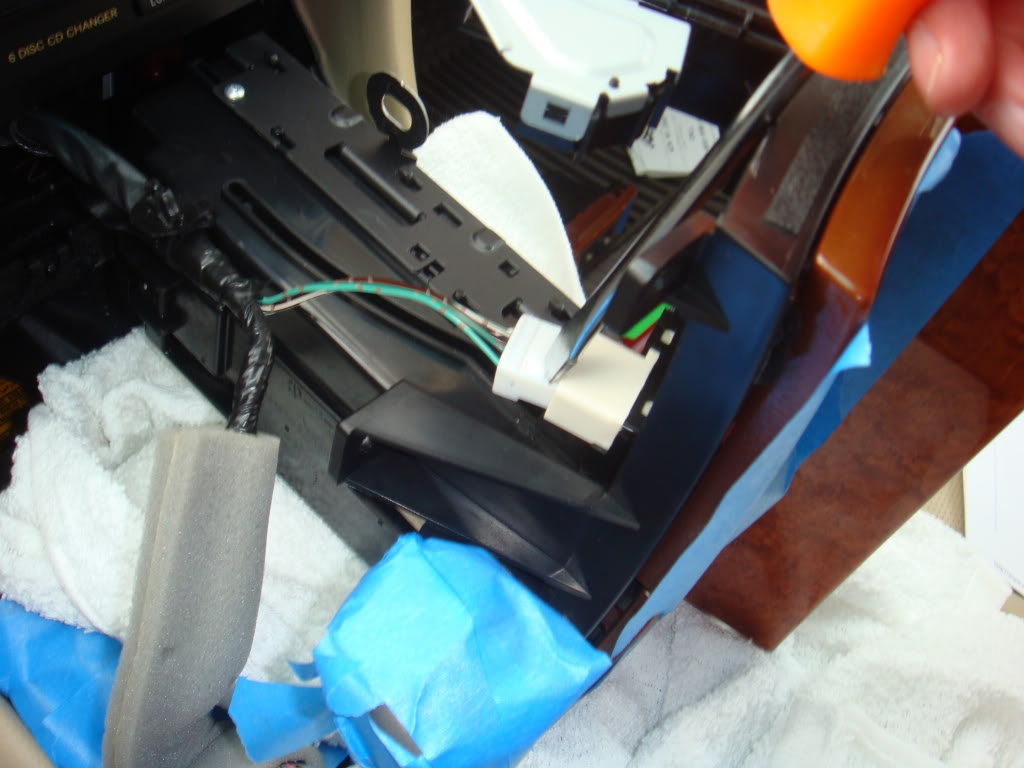
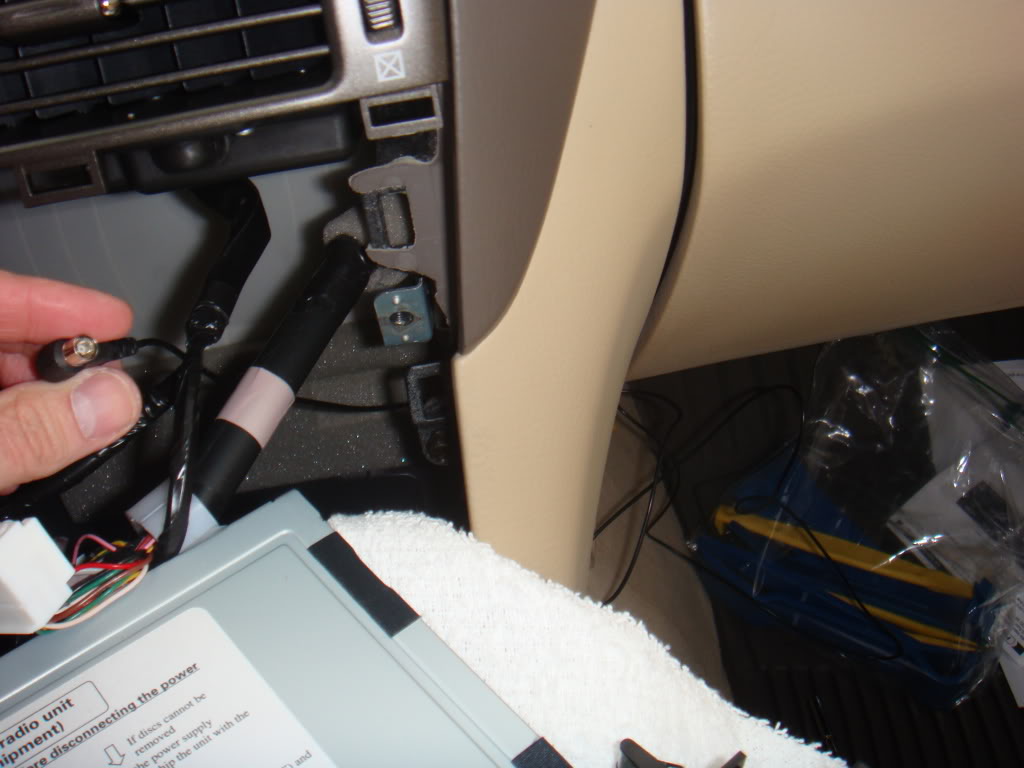
Now it's time to go back to the satellite antenna wire...
Shove it in under the console:
Pull it in to behind the CD player. Be gentle, you don't want to kink or cut it. This will go the the glove compartment in the method I used to install the unit, with the SCC1 mounted in the glove box :
Shove it in under the console:
Pull it in to behind the CD player. Be gentle, you don't want to kink or cut it. This will go the the glove compartment in the method I used to install the unit, with the SCC1 mounted in the glove box :
04-03-11, 06:20 AM
#15
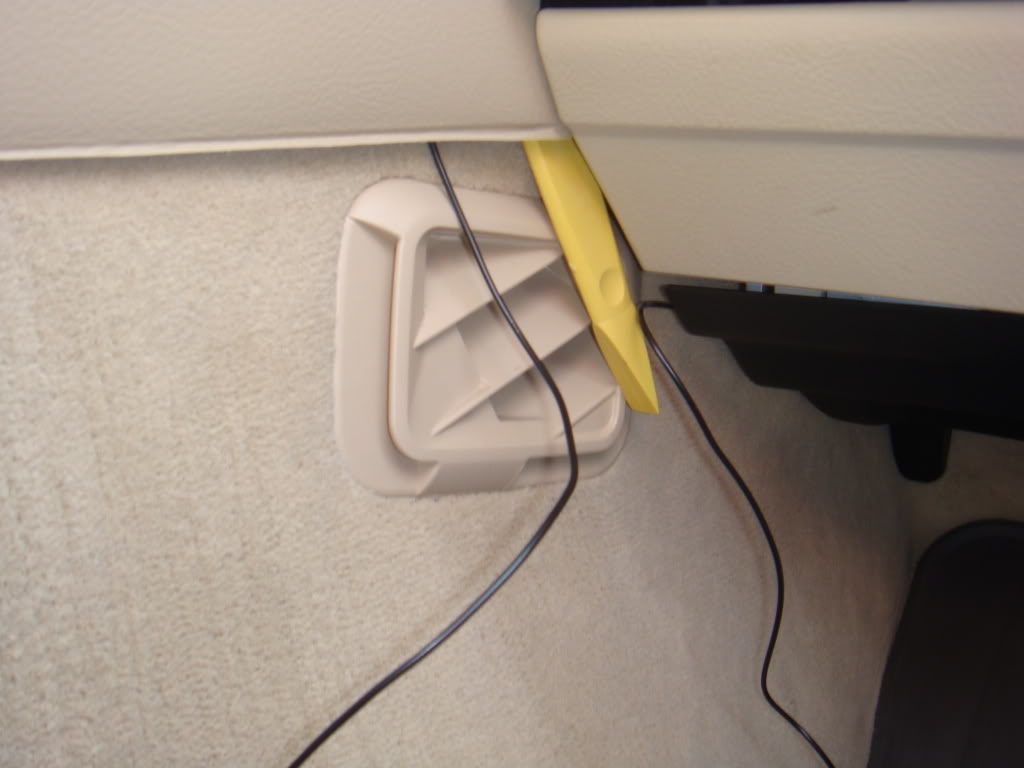
To route the iPod connector from behind the CD player to the glove box, I first looked for a path. Remove the air filter door at the back of the glove box. Use one of the nylon pry bars to see the path:
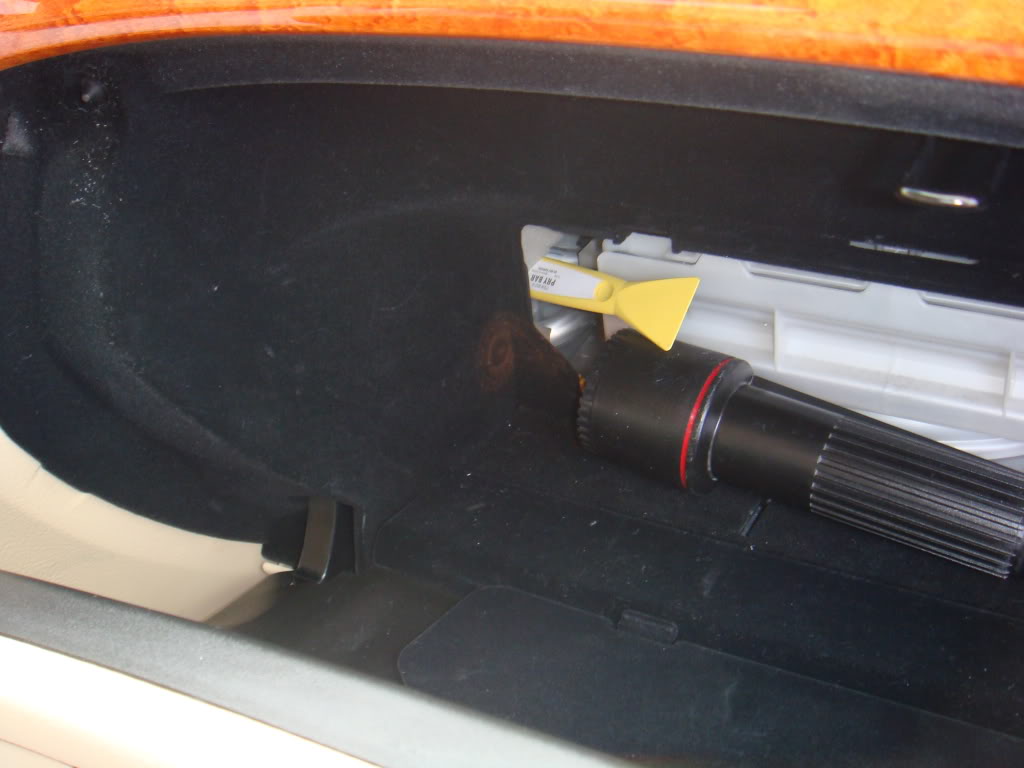
You can see where it pops out behind the CD player. This is where you will shove the iPod connector to push it to the glove box:
You can see where it pops out behind the CD player. This is where you will shove the iPod connector to push it to the glove box:
Last edited by MDEC; 04-07-11 at 06:56 PM.