LS - 1st and 2nd Gen (1990-2000) Discussion topics related to the 1990 - 2000 Lexus LS400

Some ABM paint correction work

Thread Tools
 
Search this Thread
 
Old 05-20-19, 06:24 PM
  #1  
Cptnslo
Rookie
Thread Starter
 
Cptnslo's Avatar
 
Join Date: Jan 2018
Location: Texas
Posts: 74
Likes: 0
Received 17 Likes on 8 Posts
Default Some ABM paint correction work

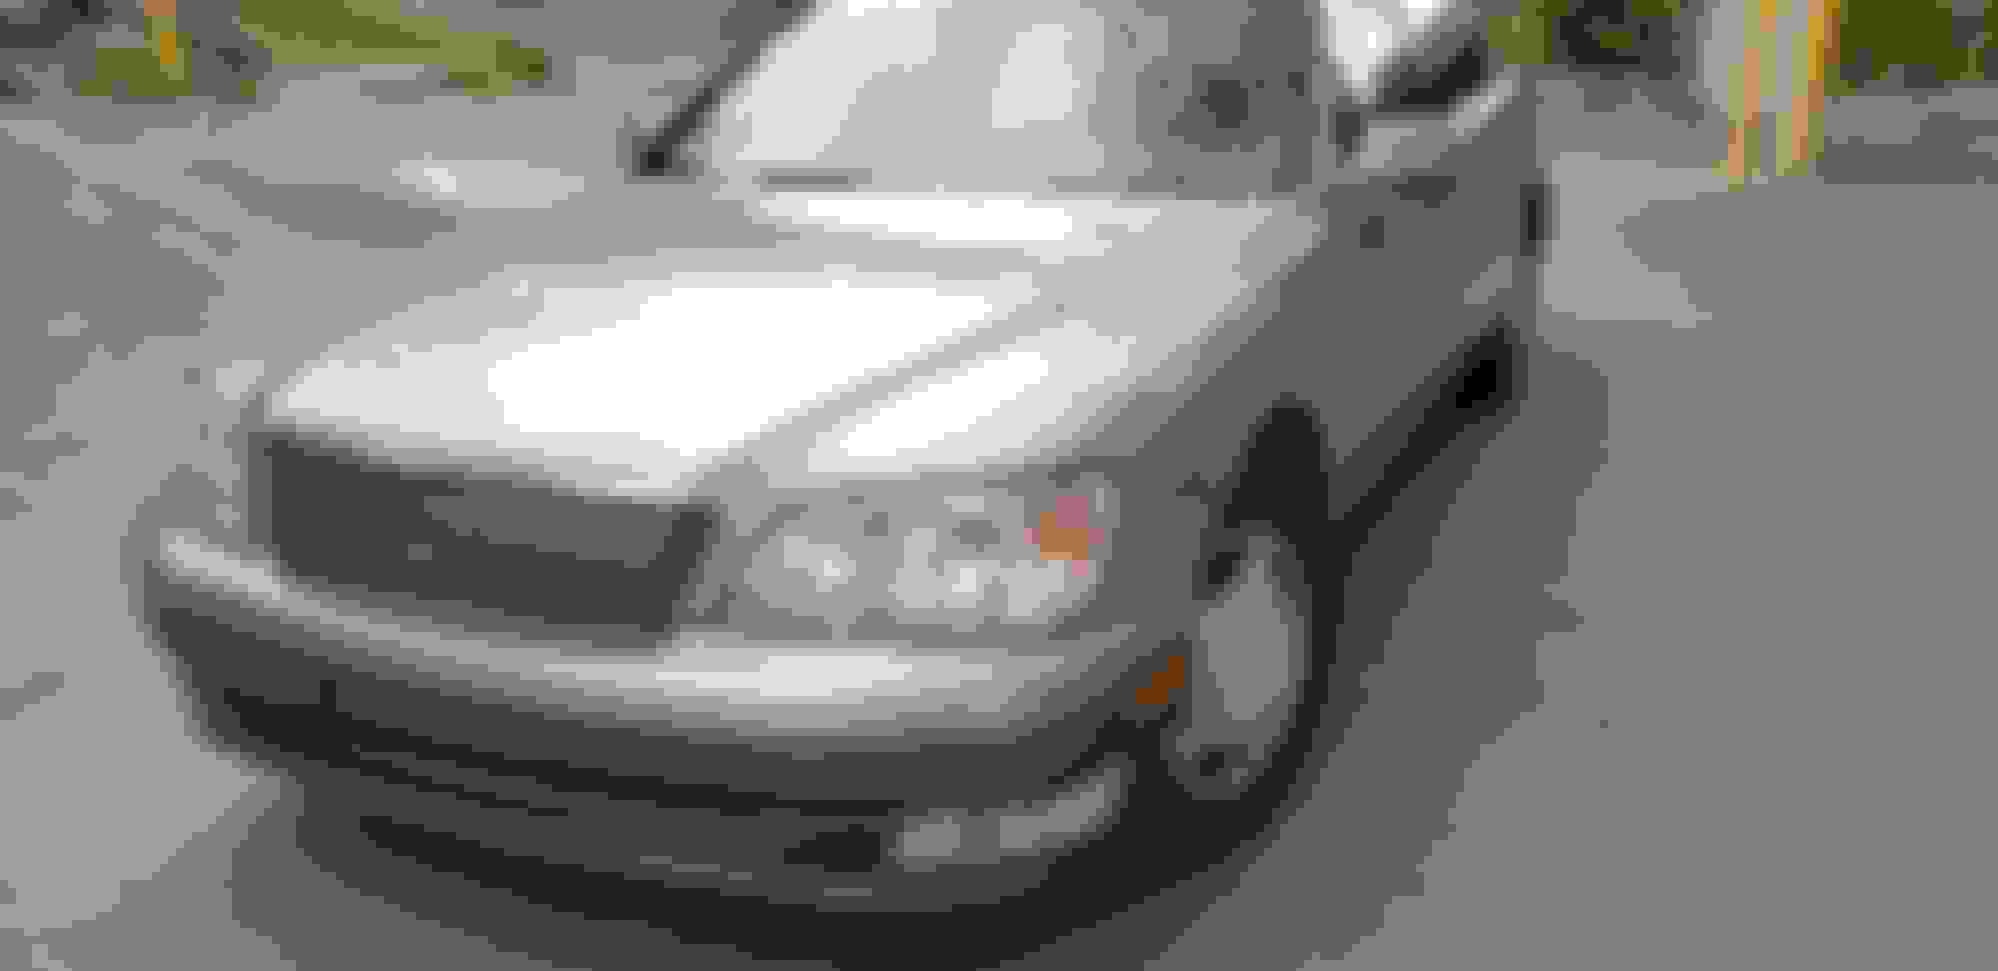
I thought some may appreciate this, I picked up my 98 LS400 about 3 months ago from a dealership in Colorado. The prior owner had been an older woman who had owned her for the last 17 years and only one owner prior to her. She had 213k miles and had been maintained at a Lexus dealer her entire life.
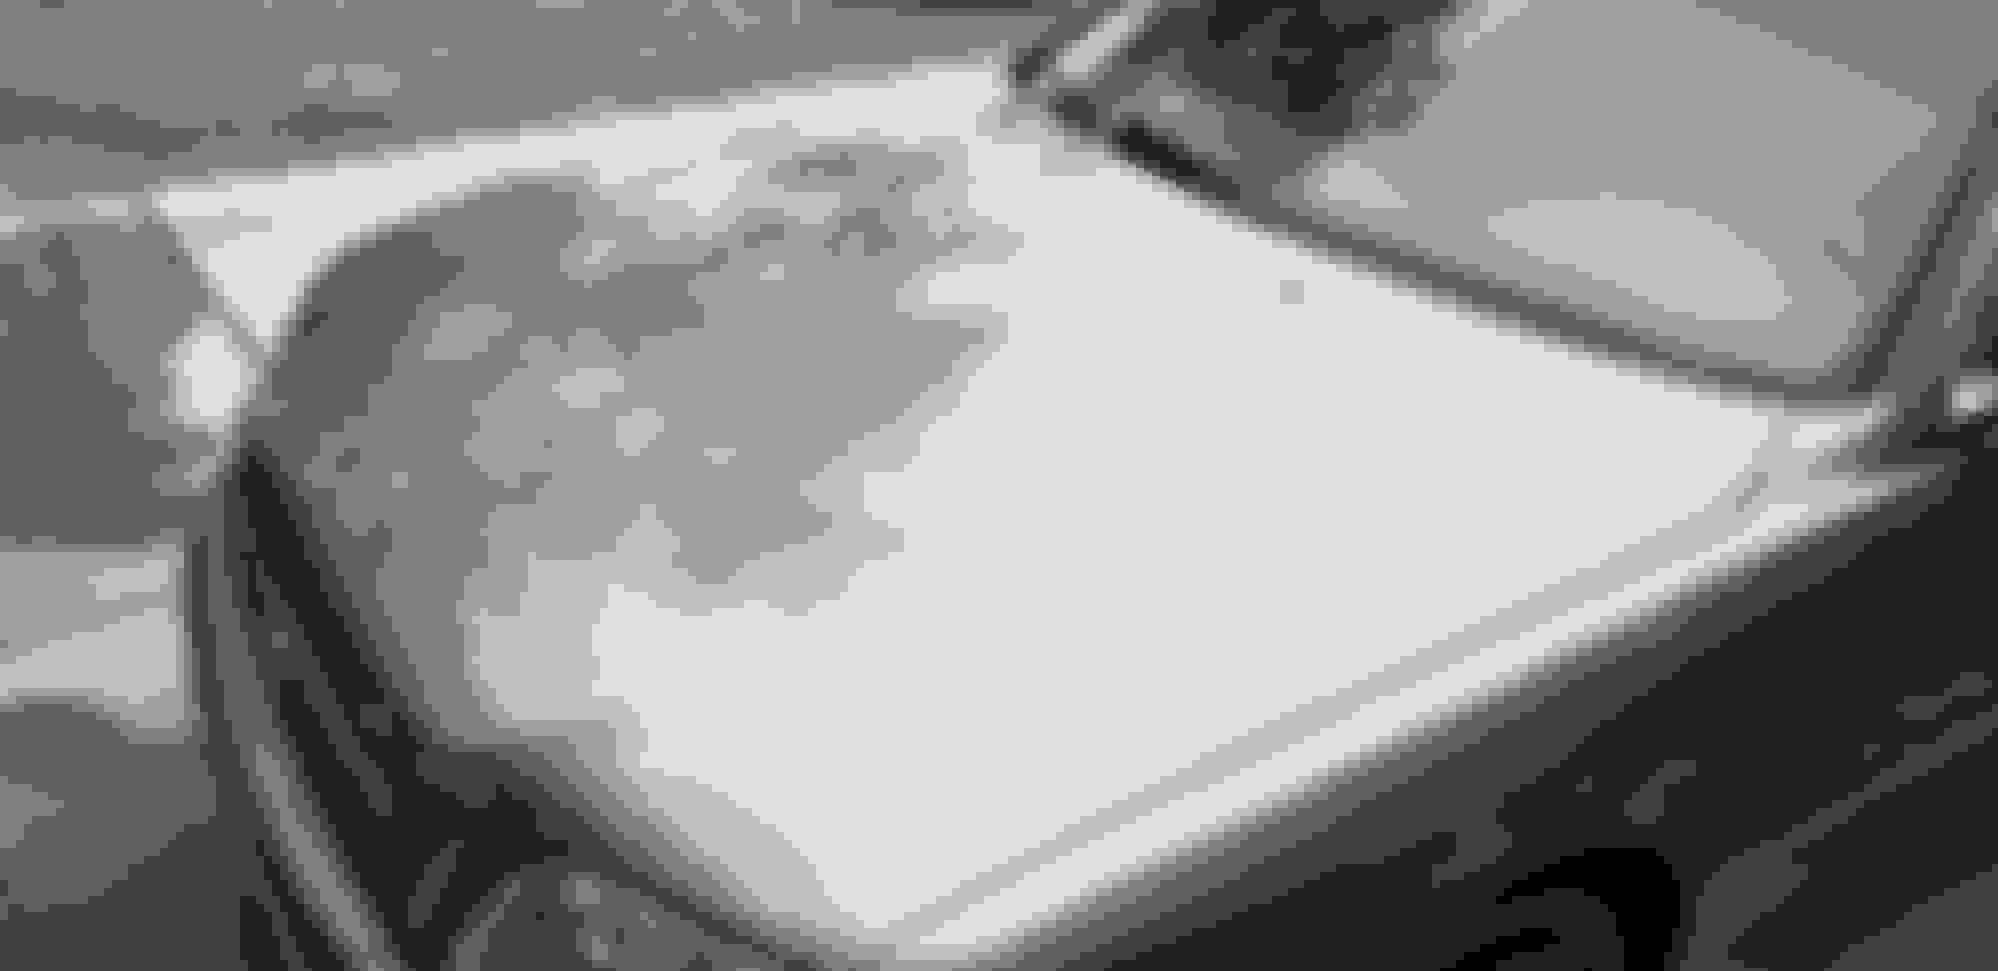
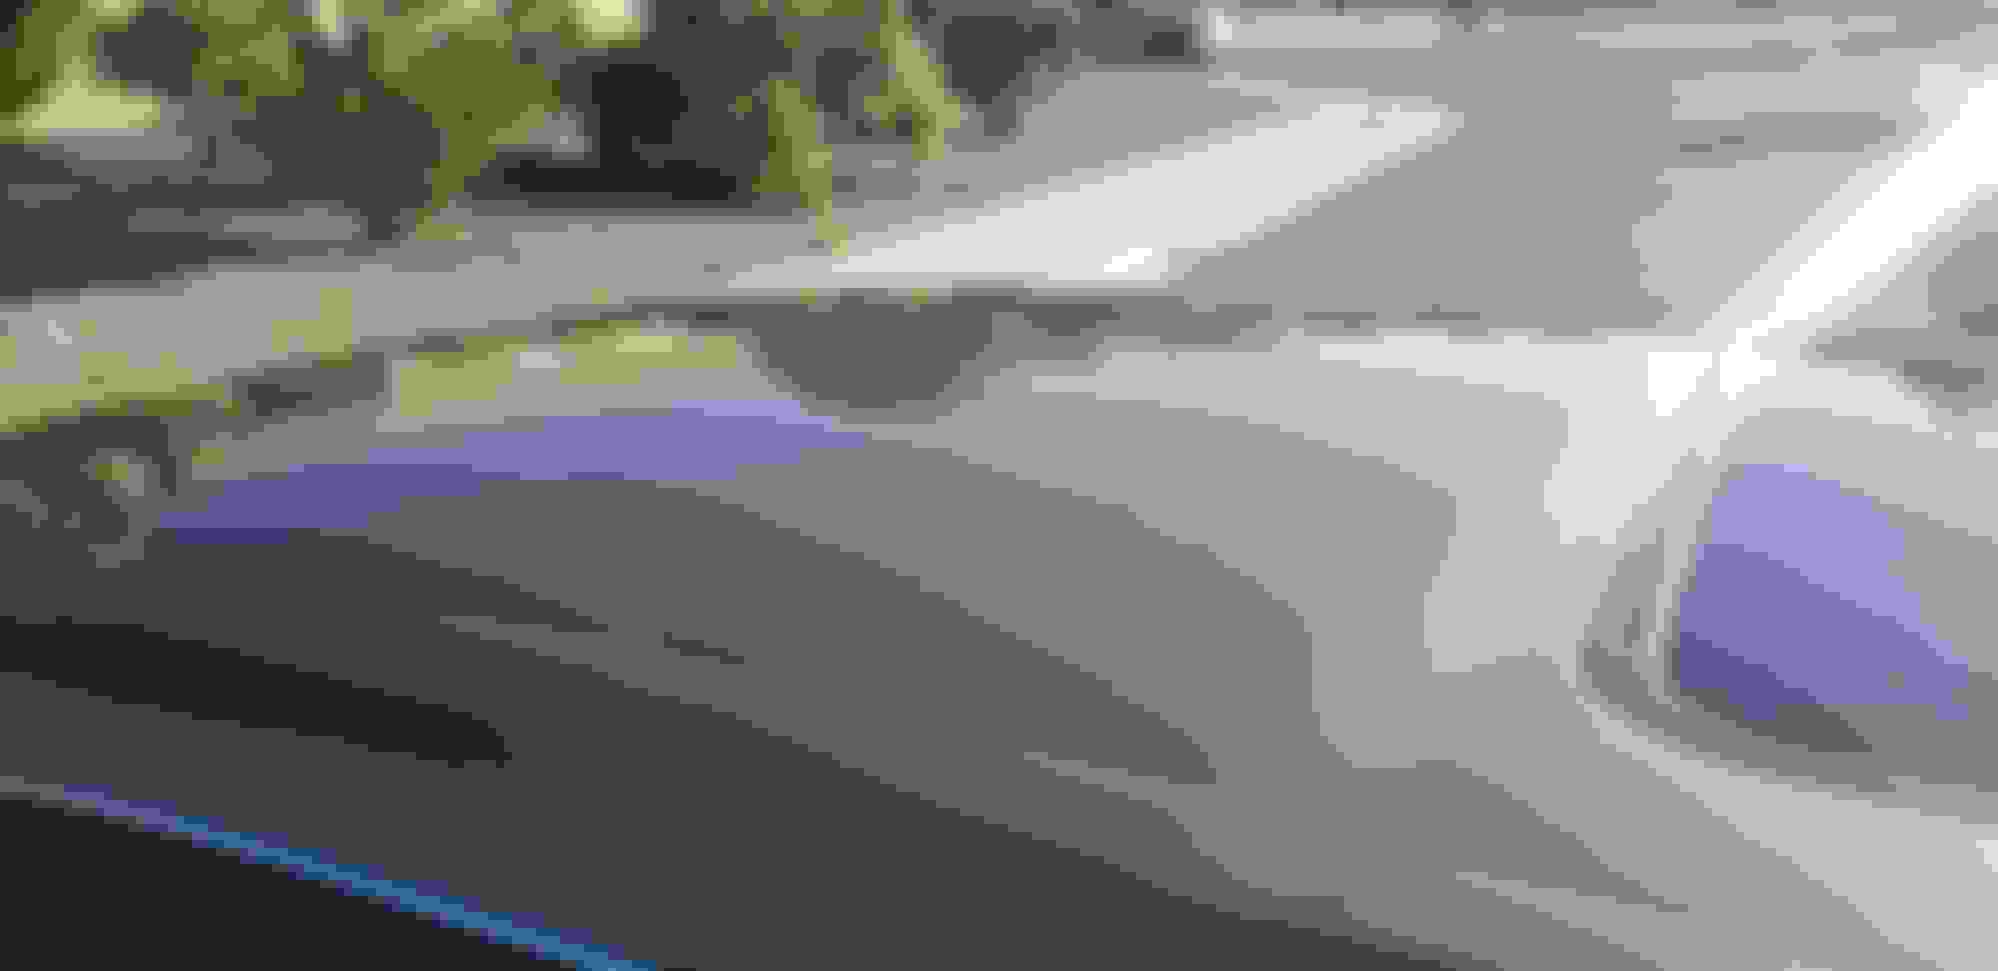
When I picked her up she had been left outside at the dealer for probably at least a month or so so the paint wasnt terrible but definitely needed some love. I figured the detailers on here would enjoy seeing some life brought back to one of the more rare paints on the LS400.

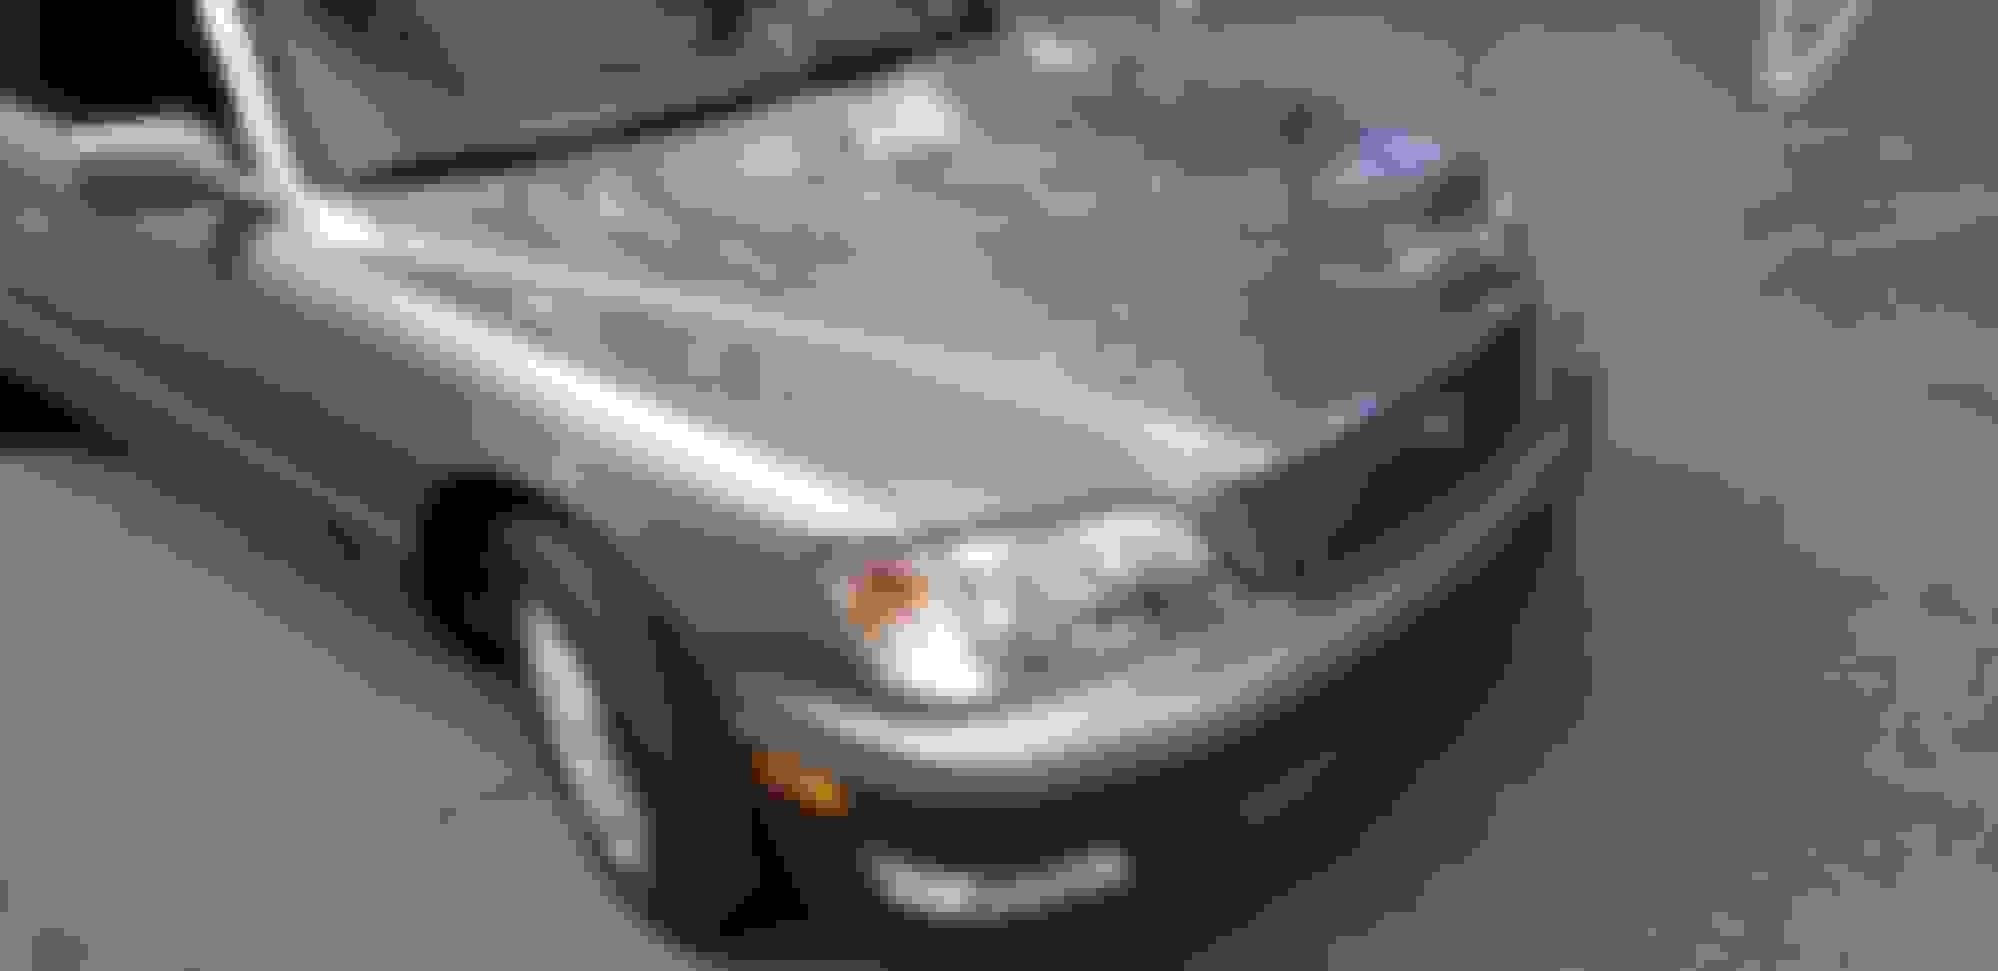
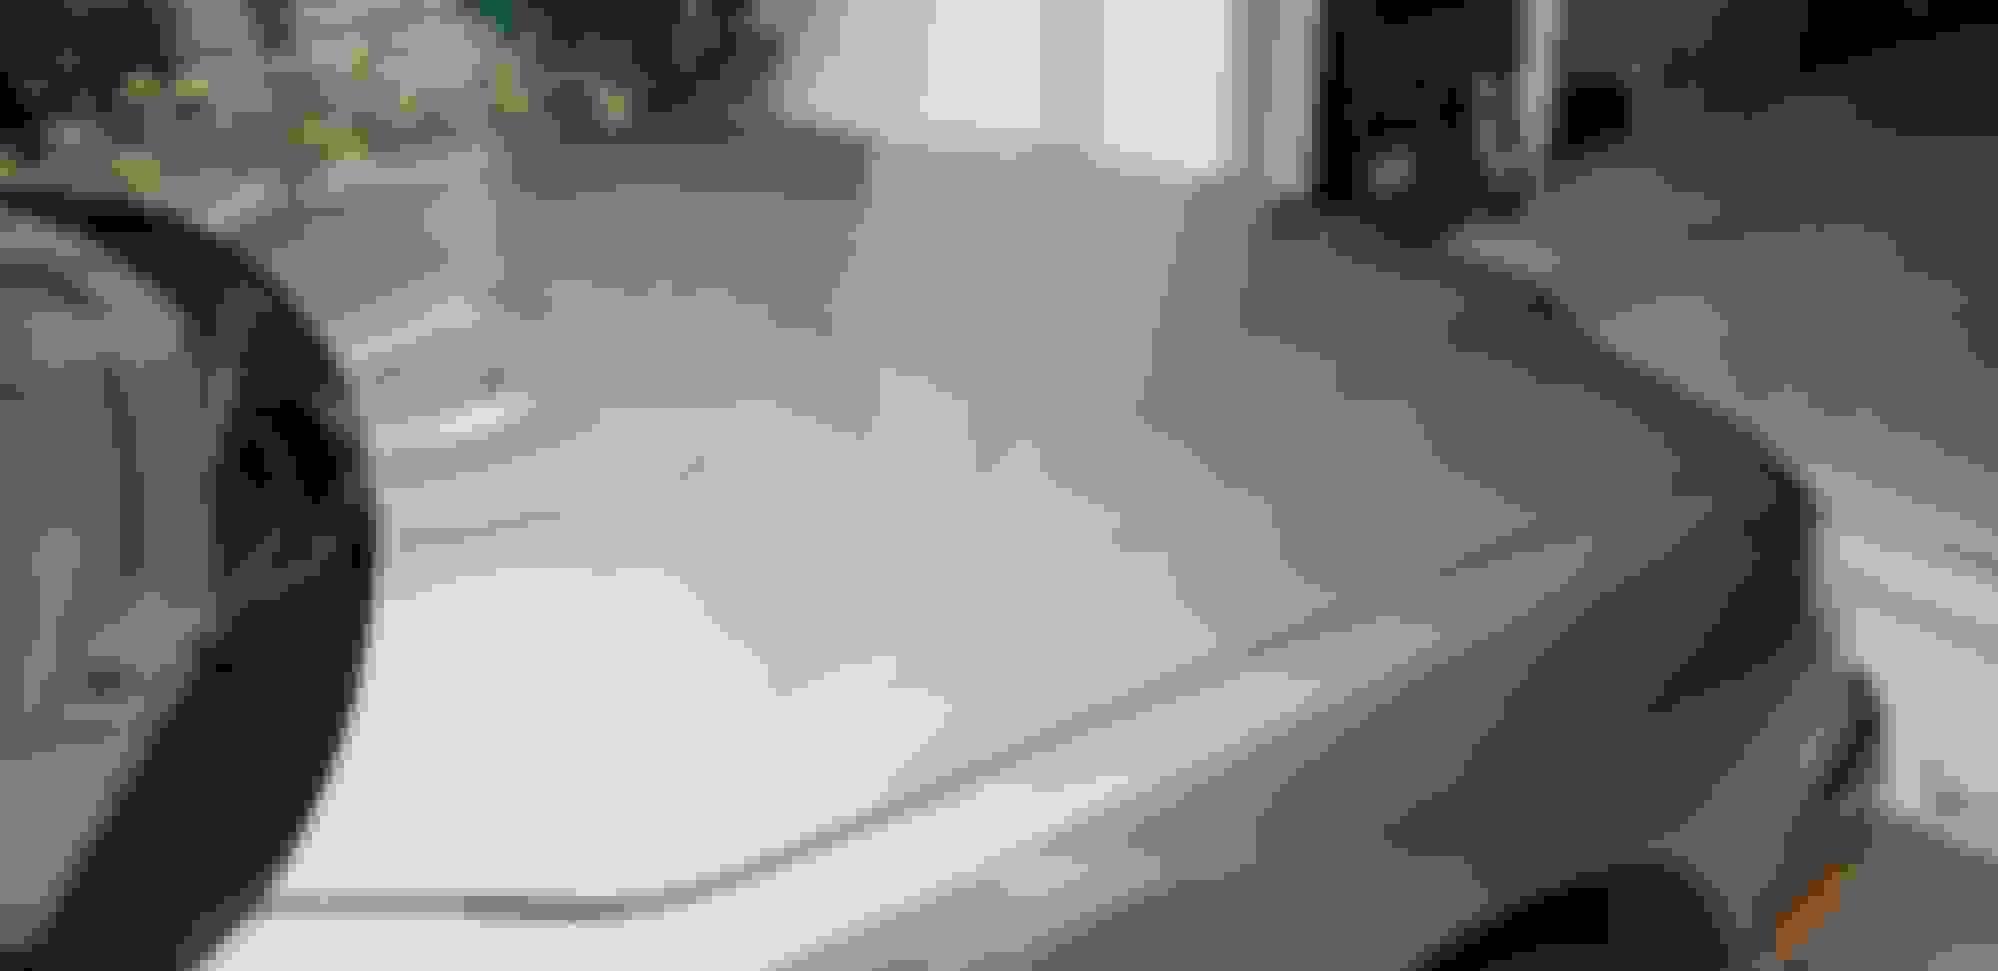
So far I've just done the hood, the rest will come and I'll update this thread more as I go. This is how she was when I got her.
The bottom 3 photos are after the work today.


The following 6 users liked this post by Cptnslo:
CELSI0R (05-26-19), Fit1too (05-20-19), Giorgio13 (05-20-19), KKOG (05-20-19), saleenssc (05-22-19), sha4000 (05-21-19) and 1 others liked this post. (Show less...)
Old 05-20-19, 06:30 PM
  #2  
Fit1too
Advanced
 
Fit1too's Avatar
 
Join Date: Jul 2018
Location: Indiana
Posts: 589
Received 122 Likes on 107 Posts
Default

That looks great! What product and/or technique did you use?
Old 05-20-19, 06:34 PM
  #3  
Cptnslo
Rookie
Thread Starter
 
Cptnslo's Avatar
 
Join Date: Jan 2018
Location: Texas
Posts: 74
Likes: 0
Received 17 Likes on 8 Posts
Default

Originally Posted by Fit1too
That looks great! What product and/or technique did you use?
I started with a basic wash, 2 bucket method and then did a complete claybar to remove any contaminants that may have been left. I then used a harbor frieght random orbital (I don't need to spend 300 for a professional orbital since it's not my livelihood) and meguiars 105 cutting compound, 2 to 3 times across the entire hood with varying directions to make sure I'm not missing anything. During the cutting stage I use a Rupes blue coarse wool pad. After the cutting is done I used a rupes yellow foam pad and some turtle wax polishing compound to finish up.
Once I finish the entire car I'll go over her once more for any microabrasions that I can get out and then a 50/50 mix of rubbing alcohol and water to remove all leftover polish, cutting solution etc before I apply my ceramic coat.
The following 4 users liked this post by Cptnslo:
Fit1too (05-20-19), Giorgio13 (05-20-19), sha4000 (05-21-19), spuds (05-20-19)
Old 05-21-19, 10:00 AM
  #4  
timmy0tool
Moderator
iTrader: (7)
 
timmy0tool's Avatar
 
Join Date: Sep 2008
Location: 714/949, SoCal
Posts: 6,927
Received 415 Likes on 370 Posts
Default

fabulous job!
crazy what a RO from harbor freight can do, and shows with the right technique and compounds what can be done.

what I always have a hard time with is around the windshield squirters! did you remove them? or just mask around them?
Old 05-21-19, 03:56 PM
  #5  
EthanS
Pole Position
 
EthanS's Avatar
 
Join Date: May 2016
Location: Arizona
Posts: 267
Received 77 Likes on 55 Posts
Default

That looks great! I would love to do this (or have it done) to mine. You sparked a bit of inspiration - thanks for sharing.
Old 05-21-19, 06:44 PM
  #6  
Cptnslo
Rookie
Thread Starter
 
Cptnslo's Avatar
 
Join Date: Jan 2018
Location: Texas
Posts: 74
Likes: 0
Received 17 Likes on 8 Posts
Default

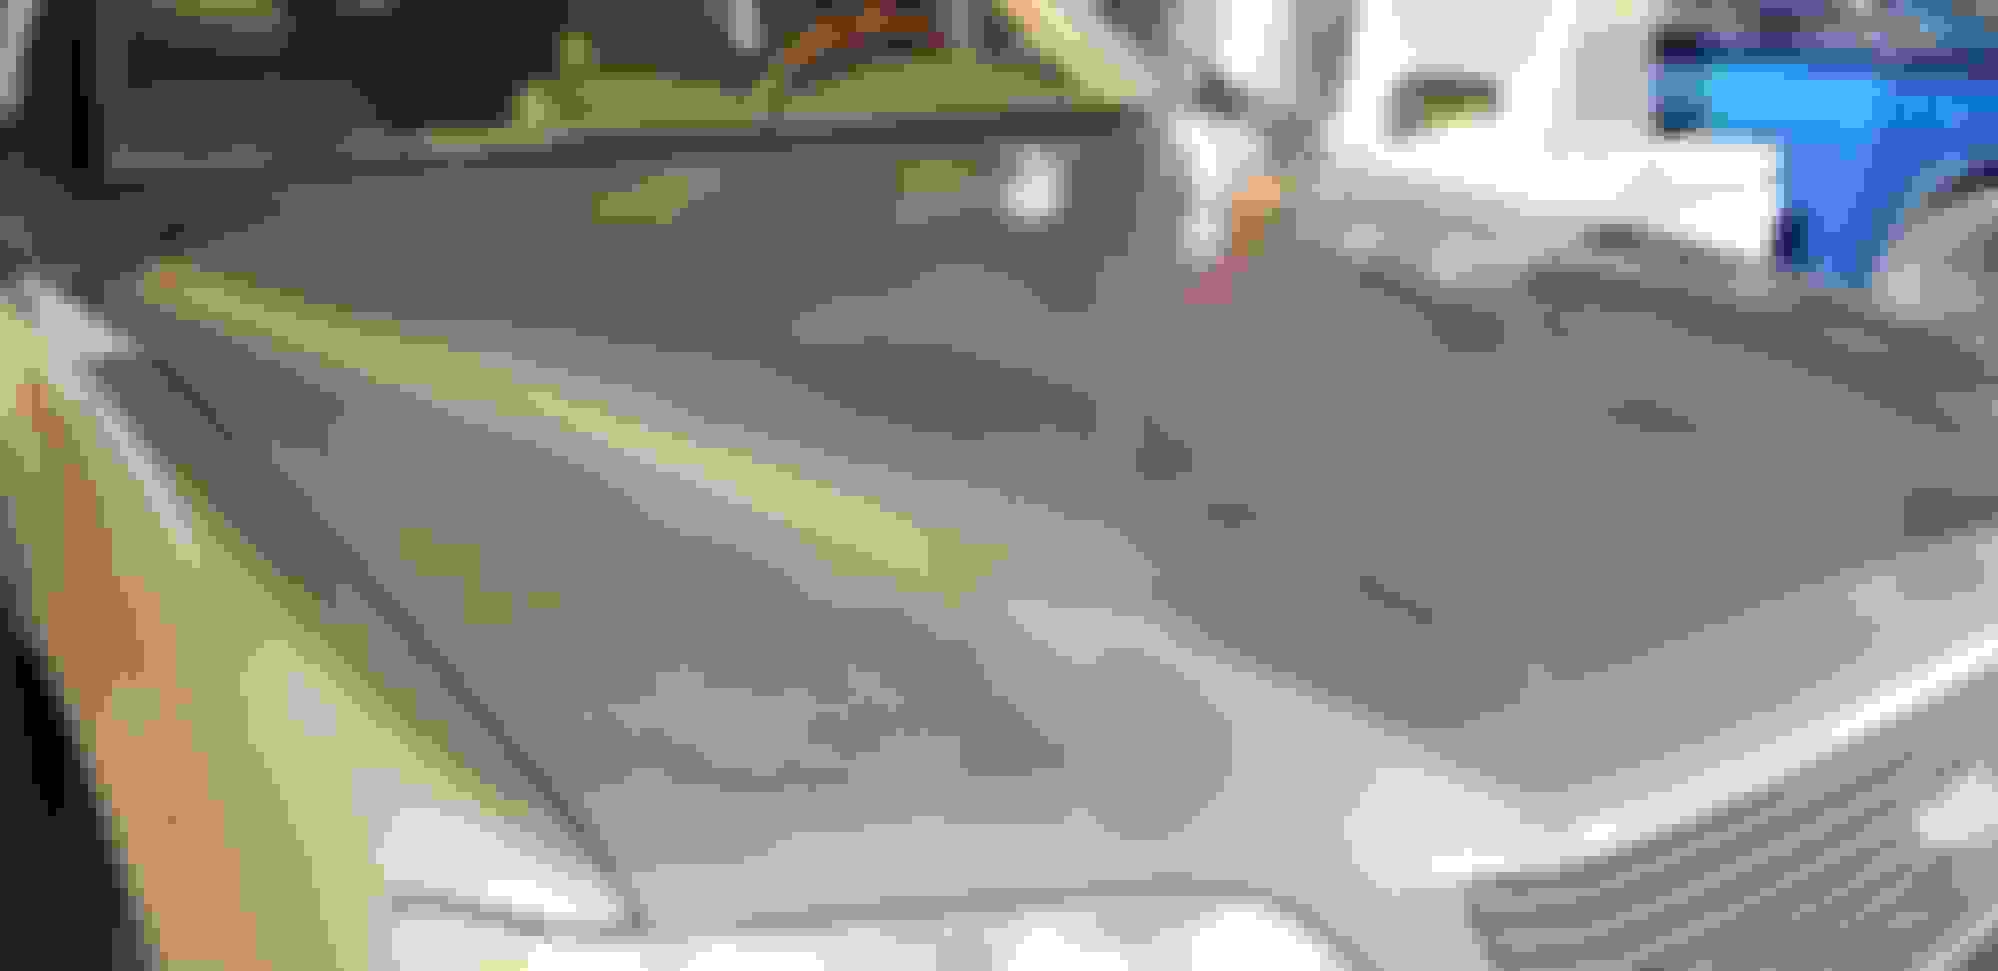
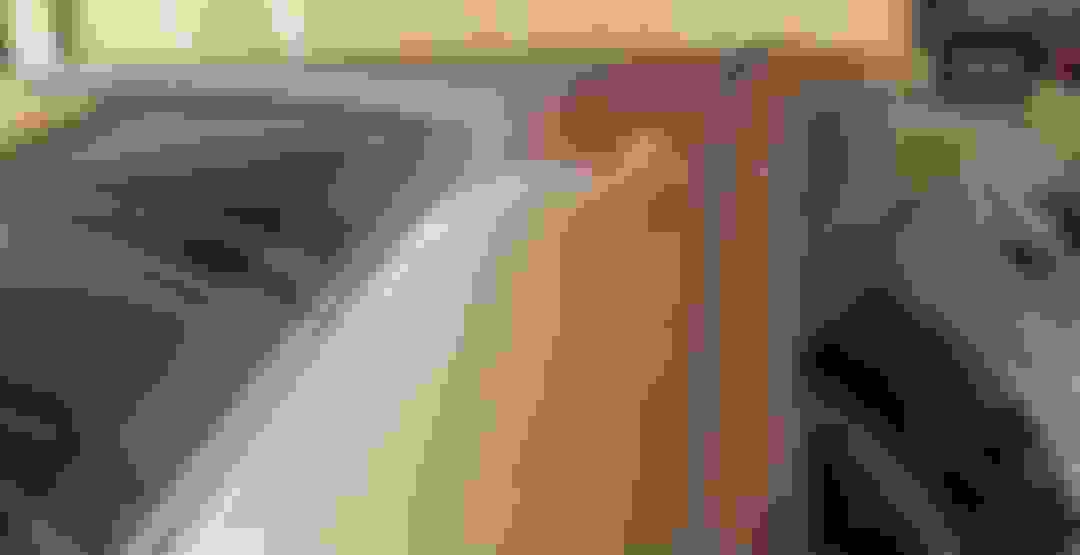
Got some more work done today, the C pillar on the passenger side was one of the worst areas and after 2 hours of work I think it came out pretty good for her age. I wish I couldve gotten the rear quarter panel a bit better but at this point theres no microabrasions and if I keep using compound I'll just burn through the clear. Also got the lid of the trunk done.


Old 05-21-19, 06:46 PM
  #7  
Cptnslo
Rookie
Thread Starter
 
Cptnslo's Avatar
 
Join Date: Jan 2018
Location: Texas
Posts: 74
Likes: 0
Received 17 Likes on 8 Posts
Default

Originally Posted by timmy0tool
fabulous job!
crazy what a RO from harbor freight can do, and shows with the right technique and compounds what can be done.

what I always have a hard time with is around the windshield squirters! did you remove them? or just mask around them?
I actually left them and was just careful to use light pressure on the side of the pad when I came in contact with them, I still want them to be clean and microabrasion free before I apply the ceramic since it will bond permanently with the clear coat.
Old 05-23-19, 05:32 PM
  #8  
Cptnslo
Rookie
Thread Starter
 
Cptnslo's Avatar
 
Join Date: Jan 2018
Location: Texas
Posts: 74
Likes: 0
Received 17 Likes on 8 Posts
Default

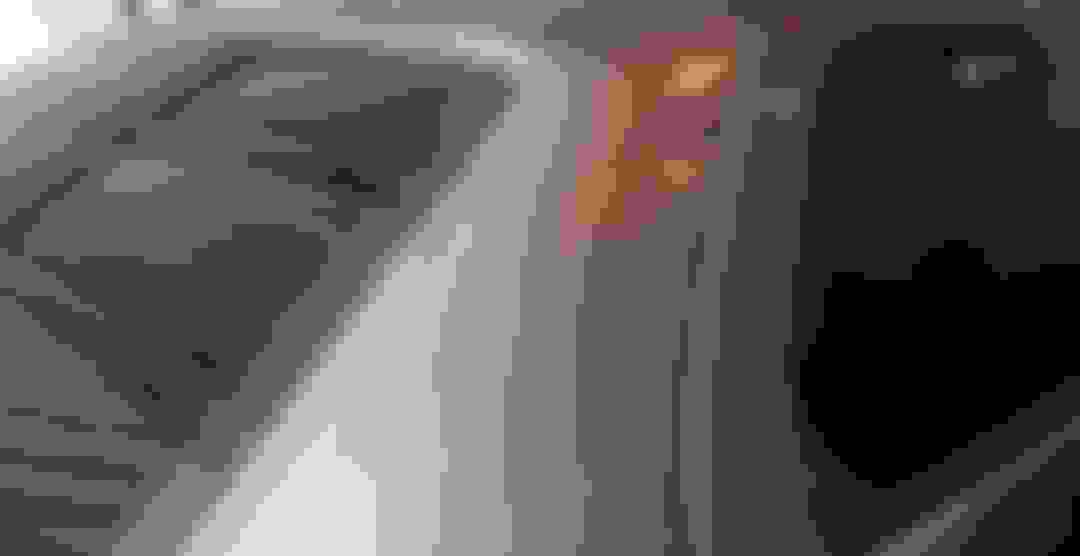
Today I officially finished the roof which was the last part of the car that had any semblance of paint discoloration/fading/blotchyness. All that's left is the doors and front and rear bumpers. However those are in much better shape.


Old 05-23-19, 07:34 PM
  #9  
Fit1too
Advanced
 
Fit1too's Avatar
 
Join Date: Jul 2018
Location: Indiana
Posts: 589
Received 122 Likes on 107 Posts
Default

The flat surfaces take most of the abuse. The sides are reserved for door dings.
Old 05-30-19, 11:13 AM
  #10  
Cptnslo
Rookie
Thread Starter
 
Cptnslo's Avatar
 
Join Date: Jan 2018
Location: Texas
Posts: 74
Likes: 0
Received 17 Likes on 8 Posts
Default

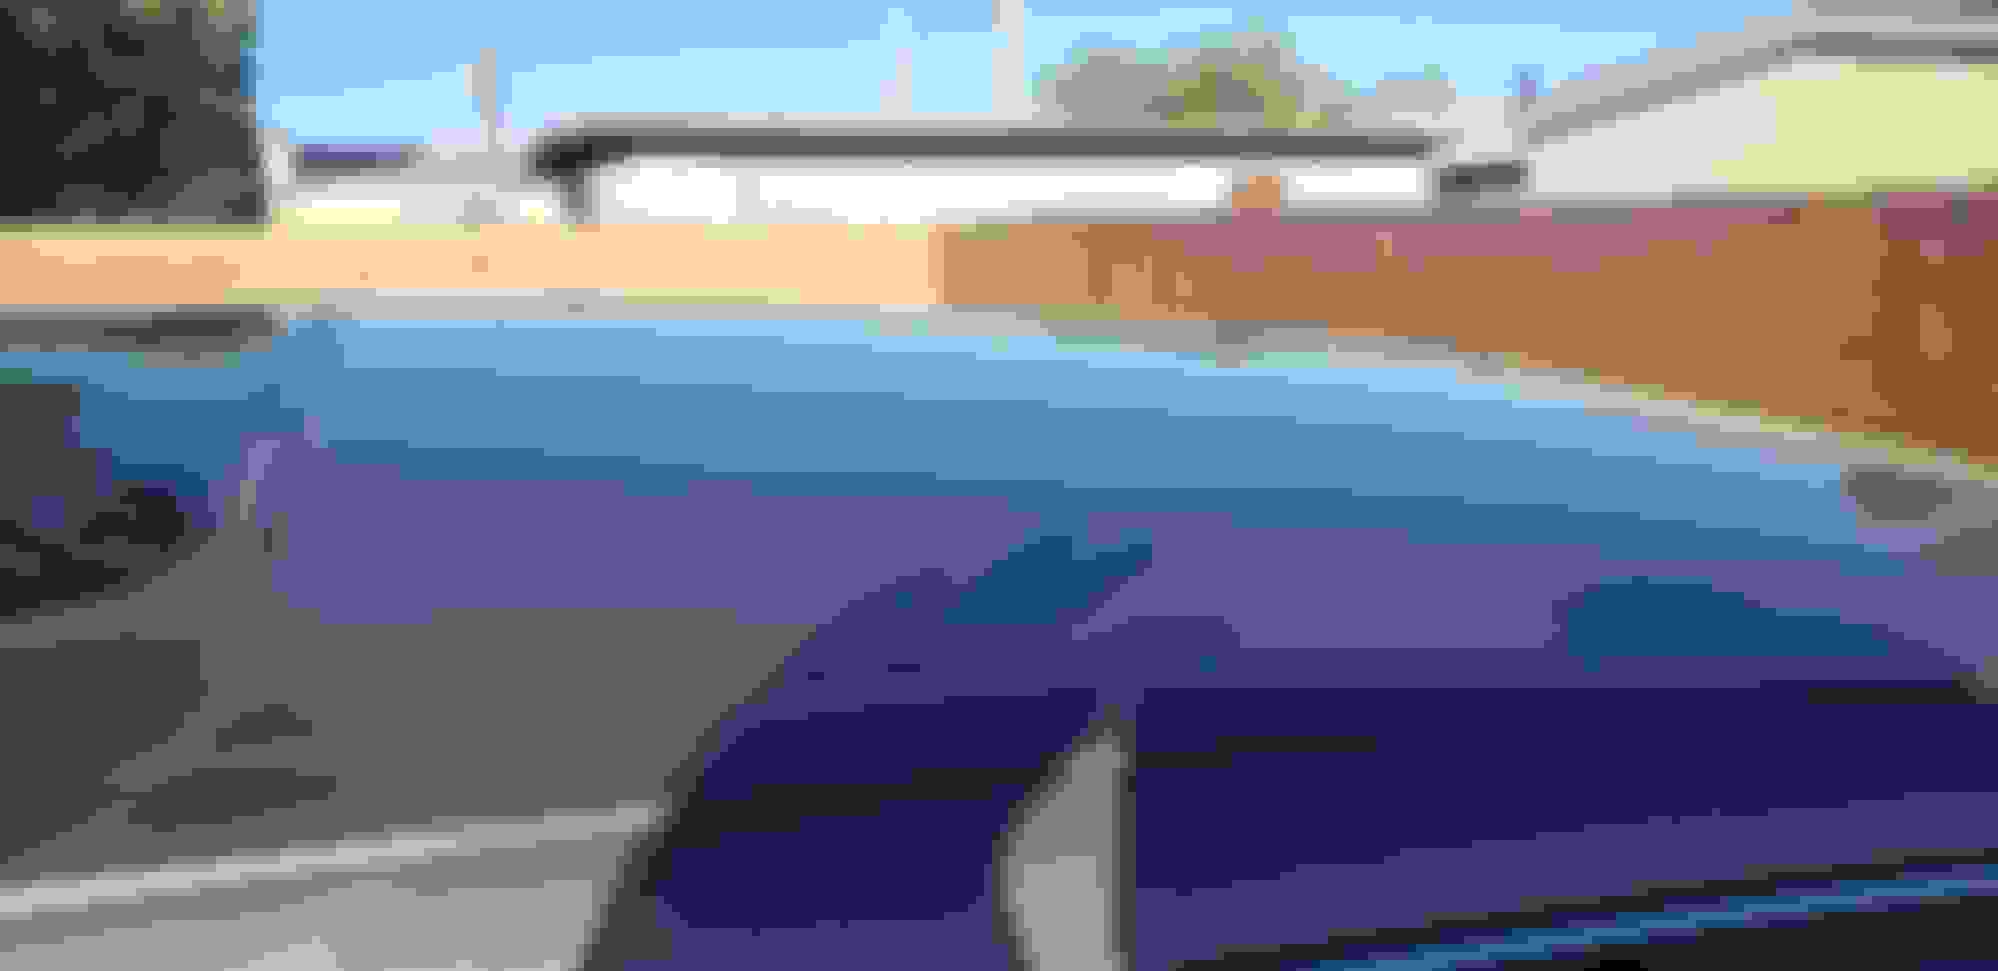
Well, spent 6 hours finishing her up yesterday and she is officially done. Not perfect but lightyears better. Ceramic is applied and just curing for another 24hrs.
Theres no filters on these photos either, this is just the paint and a perfect semi cloudy day. (Little beading photo at the end)


The following users liked this post:
CELSI0R (05-30-19)
Old 05-30-19, 11:20 AM
  #11  
Fit1too
Advanced
 
Fit1too's Avatar
 
Join Date: Jul 2018
Location: Indiana
Posts: 589
Received 122 Likes on 107 Posts
Default

Awesome work! You did a fantastic job. I get a rush making things new again!
Old 05-30-19, 11:27 AM
  #12  
Cptnslo
Rookie
Thread Starter
 
Cptnslo's Avatar
 
Join Date: Jan 2018
Location: Texas
Posts: 74
Likes: 0
Received 17 Likes on 8 Posts
Default

Originally Posted by Fit1too
Awesome work! You did a fantastic job. I get a rush making things new again!
It's a completely different feeling! My coils arrive tomorrow and I'm going Sunday to pickup wheels haha
Old 05-30-19, 02:13 PM
  #13  
CELSI0R
Racer
 
CELSI0R's Avatar
 
Join Date: Nov 2015
Location: NJ
Posts: 1,364
Received 282 Likes on 219 Posts
Default

Very nice work. Prior to your posts, I would have thought that the clearcoat would have been too thin to correct on a car like yours.

I am thoroughly impressed and may give this a try myself.
Old 06-01-19, 02:46 PM
  #14  
Cptnslo
Rookie
Thread Starter
 
Cptnslo's Avatar
 
Join Date: Jan 2018
Location: Texas
Posts: 74
Likes: 0
Received 17 Likes on 8 Posts
Default


we got some rain today. Thankfully 48 hours had passed, it's good to see the beading up working perfectly!
Related Topics
Thread
Thread Starter
Forum
Replies
Last Post
YODAONE
LS - 1st and 2nd Gen (1990-2000)
14
08-15-18 04:48 AM
ogaustin
LS - 1st and 2nd Gen (1990-2000)
10
06-29-16 02:41 PM
SonicC
LS - 1st and 2nd Gen (1990-2000)
61
07-28-15 11:04 AM
bunmango
Automotive Care & Detailing
20
01-24-08 06:22 PM
mastermind
Automotive Care & Detailing
2
04-09-04 09:01 AM


Quick Reply: Some ABM paint correction work


All times are GMT -7. The time now is 11:27 AM.