When you click on links to various merchants on this site and make a purchase, this can result in this site earning a commission. Affiliate programs and affiliations include, but are not limited to, the eBay Partner Network.
So I am trying to see why my radio does not light up anymore. My radio works fine just the back light does not work. I have been looking online but most of the fixes are for the older LS400 radios. I do know how to take it out since I installed my XM receiver. I was hoeing one of you guys here can tell me what may be wrong and how I can fix it. I did contact the dealer but they said that they cant help since they don't make that radio anymore. I am wondering if the lights went bad but looking around some people say it can be the resistor. I believe I have the Pioneer radio and the only number I see visible to me is the P1707. Since I bought the car the back light never worked I just figured I should try and fix it :P. If it does look like the bulbs are dead I would like to know what bulbs I should buy and how many would I need to replace? I would like to keep the same color and if possible get the OEM bulbs. I have attached some images of the radio below
Ok thanks, So I guess I should take mine apart and see if the resistor is loose? If it is not I am guessing then the bulbs are burnt? Also is there a guide showing on how to disassemble the radio?
winter4w if you have no talent for finding fault (burned out bulbs and cracks in soldering, maybe you should just take it out and have a pro fixit... my talent was finding fault, my failure was not seeing the BEST way of overcoming it, and I often did more work then was necessary to get it repaired.... when you reach the end of your talent, take photos and ask, here or somewhere... good luck..
winter4w if you have no talent for finding fault (burned out bulbs and cracks in soldering, maybe you should just take it out and have a pro fixit... my talent was finding fault, my failure was not seeing the BEST way of overcoming it, and I often did more work then was necessary to get it repaired.... when you reach the end of your talent, take photos and ask, here or somewhere... good luck..
Thanks, I think I am just making it more scary as it sounds since I love my car a lot lol. I have worked on may computers and have identified problems hard ware and software. I will look at her this weekend and post pictures or even better make a video. If the resistor looks good and the bulbs look good I will come back with more questions :P. Ill keep you all posted this weekend
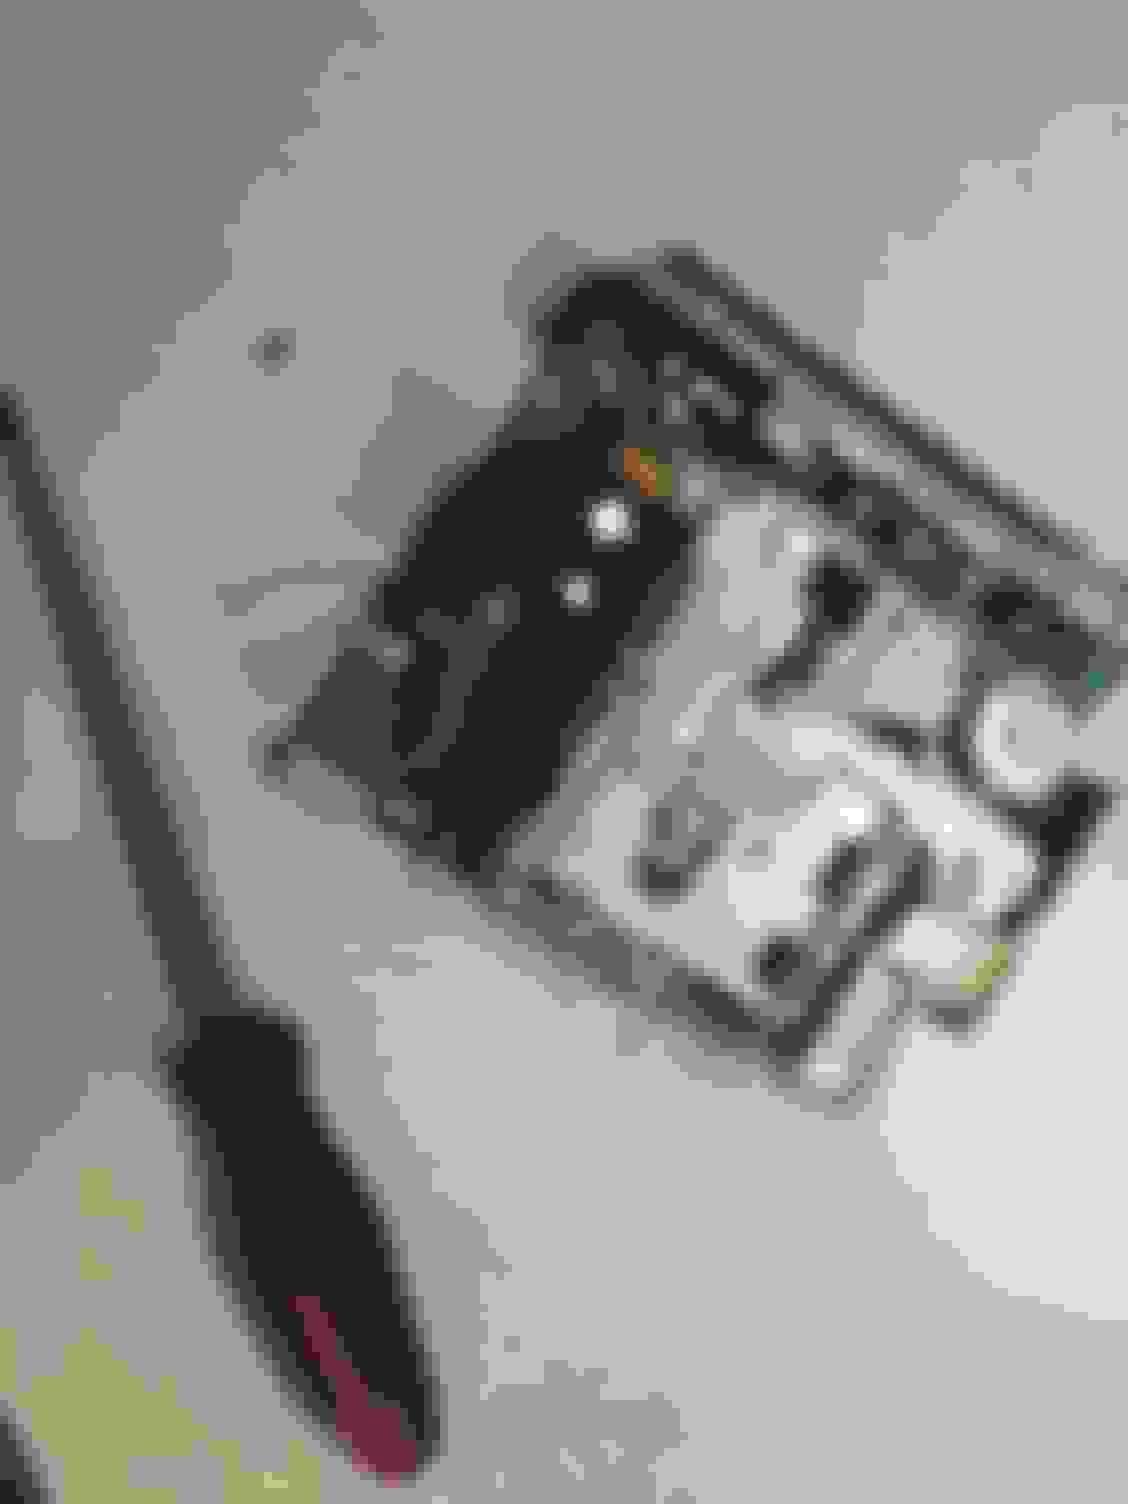
Ok so here is the update. It is 100% the resistors since one of them are loose. However I have ran into another issue. When trying to remove the tape deck one of the screws is really threaded out. I have posted a picture of it below. Any tips on what I should do to remove it? I was thinking of using a rotary tool so I can turn it into a flat head and use that, or use super glue, however I would like to hear your guys input on how I can safley remove it.
I'd use a drill to remove the top part of the screw in a case like that.
I would be concerned about breaking my tape deck then. I tried super glue and that did not work. I'm going to ask a person who I know to see if they can solderer it with the tape deck still in.
can you cut a slot in it with a dremel? I think you might be able to get at it from the side from your photos. Then just use a flathead and try and break it free by tapping and turning the screwdriver gently.
Another option, I'm not sure if the space is enough, is to use a needle nose vise grip on there and turn the screw once clamped. But by the looks of it, its a button head type which I hate, because they really give you no options when stripped.
They also have those thread out auger type removal tools, but finding one that small might pose a challenge at home depot or lowes.
use a rotary tool to drill out the screw it doesn't look like you will have enough room to use a cutting disk.
Originally Posted by Losiracer2
can you cut a slot in it with a dremel? I think you might be able to get at it from the side from your photos. Then just use a flathead and try and break it free by tapping and turning the screwdriver gently.
Another option, I'm not sure if the space is enough, is to use a needle nose vise grip on there and turn the screw once clamped. But by the looks of it, its a button head type which I hate, because they really give you no options when stripped.
They also have those thread out auger type removal tools, but finding one that small might pose a challenge at home depot or lowes.
Ok thanks I will try it with a rotary tool however my concern is that it wont fit. I currently don't own one so when I have time to take a trip down to the hardware store ill pick one up and give it a shot.
Lol but out of all the computers or electronics I have disassembled this is the second time I ever ran into a issue like this. Last time it was on a laptop but part of the head was still ok and I was able to remove it with a flat head.
Well just as all hope was lost I was able to get her out. I was still 50/50 on using a drill so I decided to carefully cut a slot with a triangle file. I got some paper towels and put them around the area so nothing else will get scratched and so metal wont get on the board and short it. I was able to cut a slot in the screw , once I was able to get her to budge I was able to take it off with my hands . I can see the cassette player is soldered to the board. I am taking it to someone else since I am not very knowledgeable in soldering and the last time I soldered something was 2 or 3 years ago. I posted some pics below of the progress
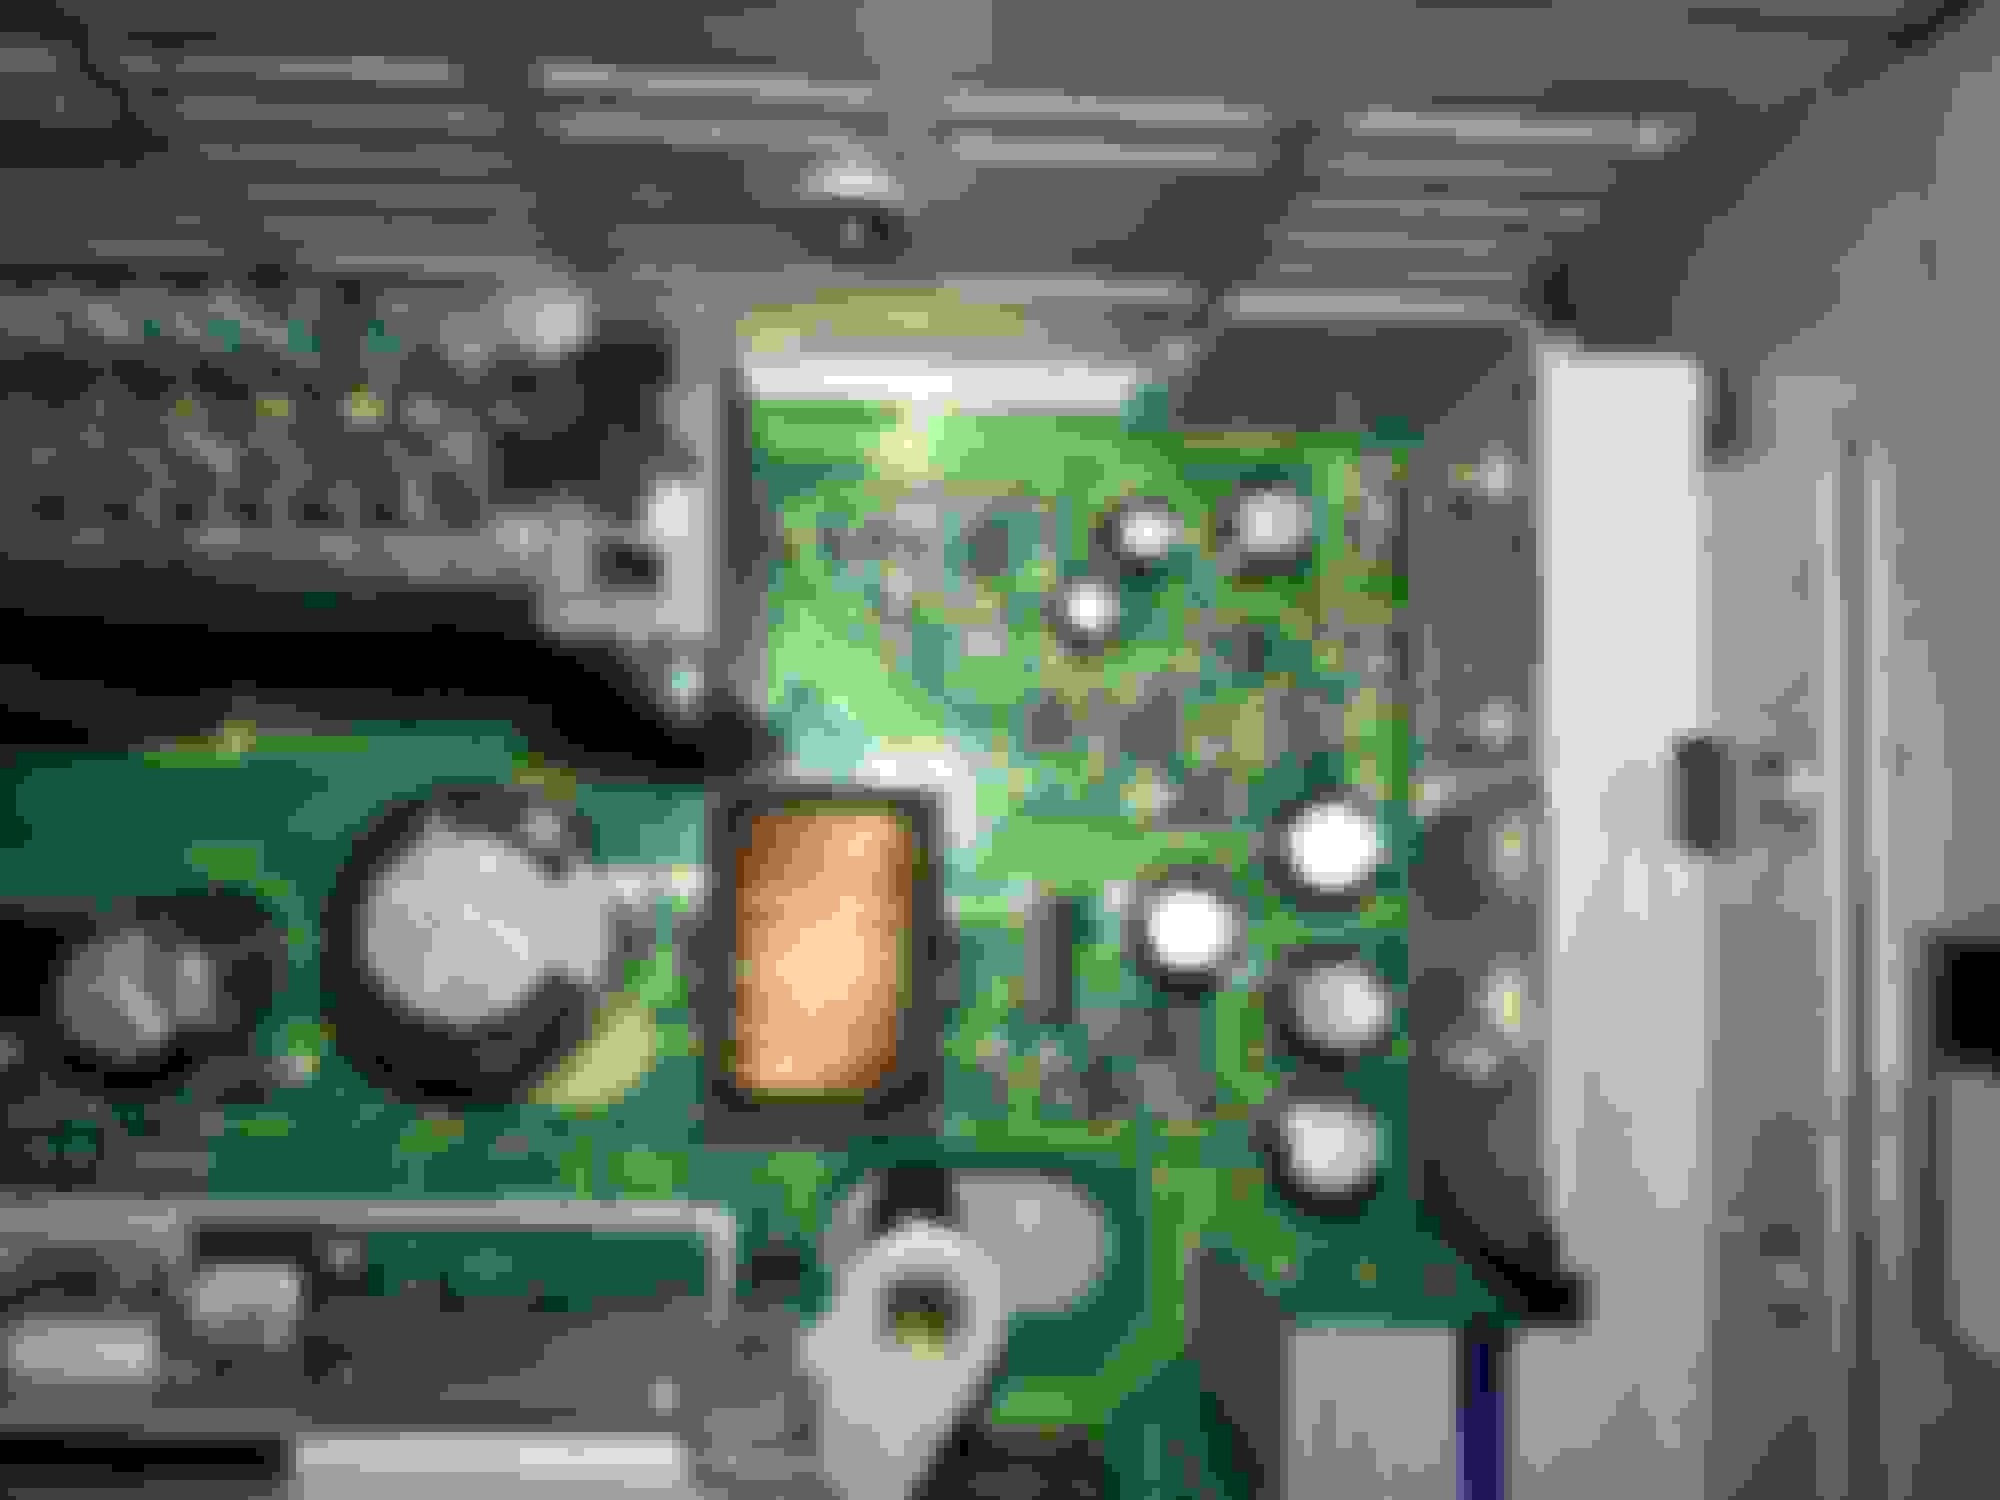
As you can also see in one of the picture one of the resistors are clearly loose.
Glad your file worked, I should also have mentioned using a left hand drill as they can catch it some times and take them right out. Maybe that whole board needs to be reflowed. So did you actually try to move it and its loose? It could just not be straight on the contact and still be soldered okay.
Glad your file worked, I should also have mentioned using a left hand drill as they can catch it some times and take them right out. Maybe that whole board needs to be reflowed. So did you actually try to move it and its loose? It could just not be straight on the contact and still be soldered okay.
Yea I tried to move it with a toothpick and it popped off the board. Im going to see if both can be re soldered just to make sure both will work.
 10-12-16, 05:57 PM