The all-thumbs, no experience, 1998 LS400 head unit swap
 07-04-13, 05:36 PM
#1
Driver School Candidate
Thread Starter

This is a follow up to this thread: https://www.clublexus.com/forums/ls4...-98-ls400.html
I am an all-thumbs, completely unhandy guy with only basic tools. I just replaced the Lexus Premium Sound System head unit in my 1998 LS400 with a JVC digital media receiver and wanted to document the process to show that anyone can do it. And if I can.. believe me, anyone can.
I had been unhappy with the level of tech in my car for a while, which is probably inevitable for a 1998 with no aux port, no, bluetooth, no USB. For a few years I had used various clip on bluetooth solutions, like a BlueAnt S4 and then a Dr. Dre Beats PIll. Both had the problem that they had to be kept charged. Also the BlueAnt was awful with music, but the Pill which had more power and did music well rolled around all the time and the microphone was built in so not well placed since the only place it could really go was the passenger seat. Neither one provided enough loudness or fidelity to carry on a phone conversation.
Beats Pill: a barely adequate car bluetooth solution.
But the real fatal flaw with using an add-on bluetooth solution is that it's not synched to your ignition. So when you get in the car and start the engine, you have to manually turn on the BT device and initiate pairing (they have all power saver modes that turn them off if not paired for an hour or so). If you stop, turn off the car, and get out without manually turning off the BT device, the BT device stays paired to your phone until you go out of range, which can be longer than expected. Many times I've taken a call and said "hello, hello? Is anyone there?" Only to realize that my caller's voice is saying the same thing into my empty car in the driveway (or parking lot if I got a really good parking space!)
So I decided that truly integrated bluetooth is required. And heck while I'm at it the HU should be able to charge my phone, because the phone's battery life sucks, and since it's an iPhone, might as well have full iPod control too! But I love my LS400 and want to keep it. So a HU swap was called for.
Many years ago I had a Blackberry and bought a car kit for it. The installer took one look at the LS400 and said "I'm not opening that. It's too well made and will never be the same after I'm done. Plus I have no idea how to get into it." That made me intimidated about opening up the dashboard for many years. Plus I loved the stock look of my radio. But then I found this forum with easy instructions on how to get the HU out. And I learned about the Beat Sonic adapter, which while expensive promised to make short work of the electrical wiring. I had a week off for 4th of July. So I decided to take the plunge.
Before:
More details to come!
Last edited by xyzzy_dude; 07-04-13 at 07:07 PM.
 07-04-13, 06:25 PM
#2
Driver School Candidate
Thread Starter
Let me emphasize how unhandy I am and that if I can do it you can. There is a video that is often linked to "average guy changes the timing belt in an LS400." I watched it and enjoyed learning from it, but the "average guy" in that video has a full box of snap-on (or similar) tools, jacks, and a classic car in the driveway that he probably works on. I am not that guy. I really don't do anything DIY normally.
So after research based on this form, I gathered what I expected to need. Here is everything, ready to start:
What's there:
- JVC KD-X250BT Digital Media Receiver HU
- Beatsonic SLA-220D $280 mystery box
- Dash mount kit from: http://www.ebay.com/itm/221094888255...S:3160&vxp=mtr
- non-scuffing trim removal tool
- 10 mm socket
- masking tape (for labelling wires, turned out to be unnecessary)
- towel
- HU removal instructions (on the iPad)
What I needed but didn't know I needed until I got there (more on each later):
- 16-14 AWG bullet connectors (both male and female, bought at Autozone)
- wire stripping/crimping tool (bought at Autozone with the connectors)
- coat hanger (for fishing the microphone wire through the dashboard)
- headlamp flashlight (handy for peeking into the dark recesses of the car)
To remove the existing HU I used the instructions that are attached to post #7 of this thread: https://www.clublexus.com/forums/ls4...-98-ls400.html
I dove rght into disassembly right away. Maybe I should have opened the packages and verified everything first, but no! Caution to the wind!
There was one challenge I expected. My HVAC vents have a crack in the top. I think it's just age, because it just appeared about a year ago. Crack is shown here:

I was worried that indicated that the vents were brittle and might shatter when I try to take them out. But they came out super easy with very little force required once the clips were opened per the referenced instructions. It went so well I didn't take any pictures of that part. The referenced instructions are exactly correct and need no further illustration.
Once I got everything apart, I found that my console chock full of 15 years worth of crumbs, dust, and assorted crap.
So I vacuumed it out.
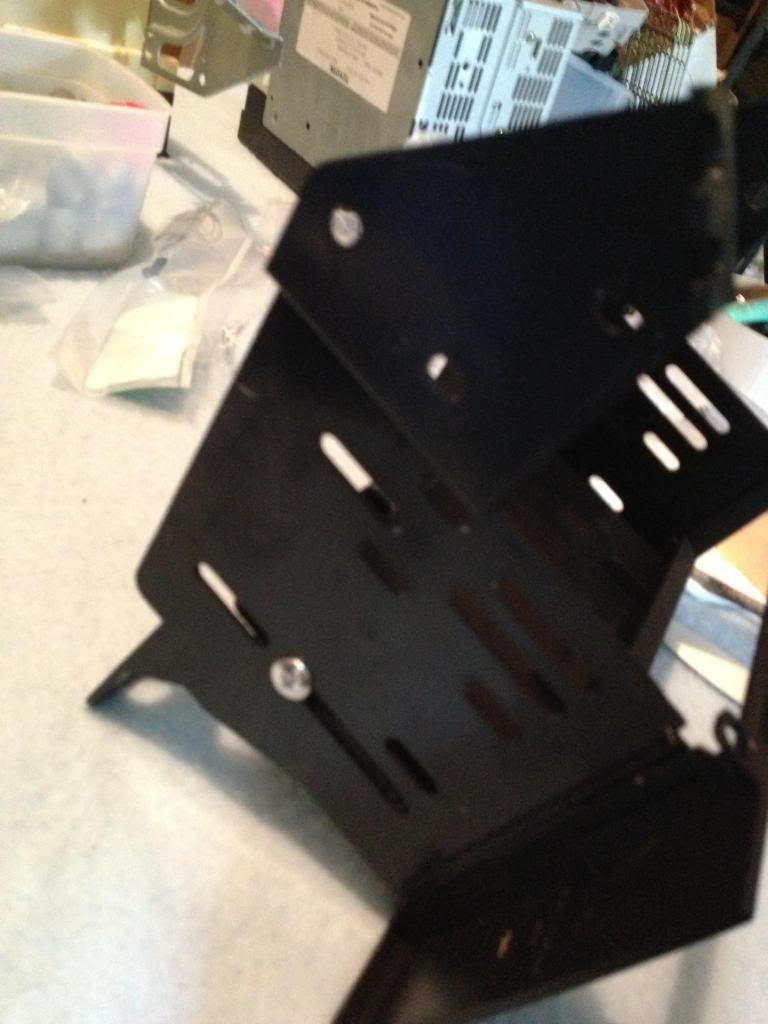
Once everything was apart and the insides cleaned out, it was back to my workbench (actually a card table, see I told you I'm not that "average guy" who has a bunch of tools) to separate the HU from the AC head (shown in the reference instructions) and get the new mount put together. This went relatively well except that the heads of the small screws that hold the storage cubby in were too small to be effective so I had to use the bigger screws provided in the kit:

Side view:
Here I hit my first problem. The new HU didn't fit into the Scosche rack! The opening appeared to be 3/16 of an inch too small. Crap. I was starting to regret taking the car apart before doing this part of the job. So I called Scosche tech support and they explained to me that I have to remove the trim piece and the metal sleeve from the HU and screw it in behind the faceplate, it doesn't go through. OH. Like I said, I have no experience at this. Here is the HU with the front trim and the metal sleeve removed:
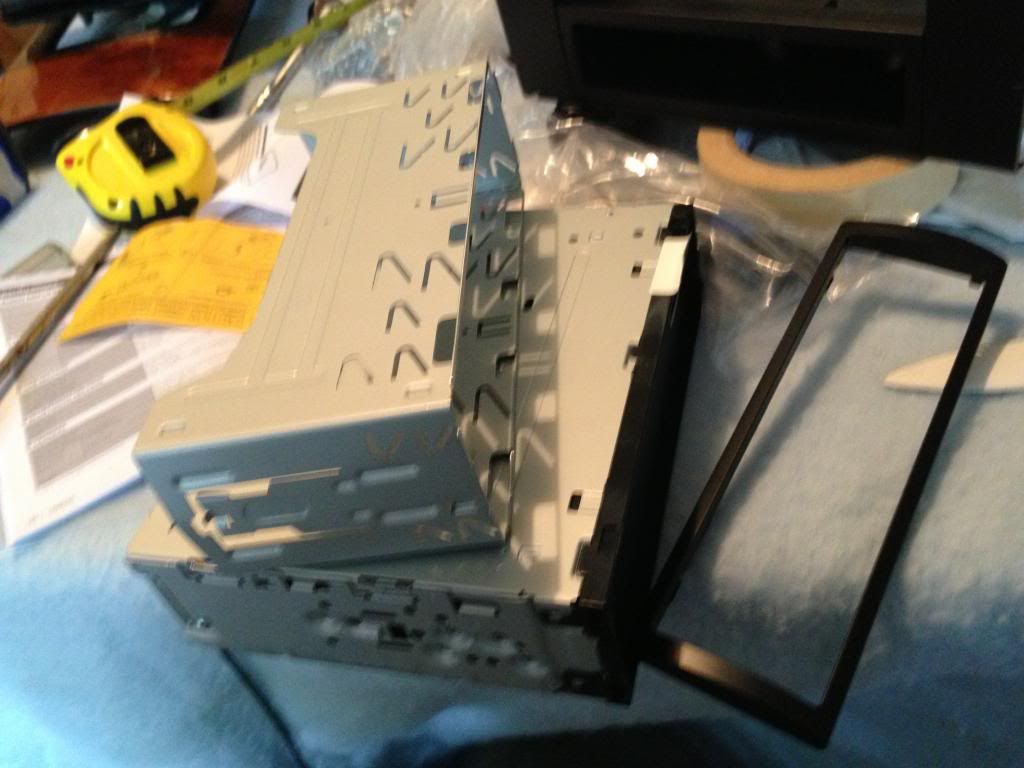
Let me take this opportunity to give Scosche some serious kudos for their tech support. They answered my call and talked me down in about 10 minutes. They would do it again later too. Those guys are awesome.
Here is the Scosche bracket with the new HU installed:
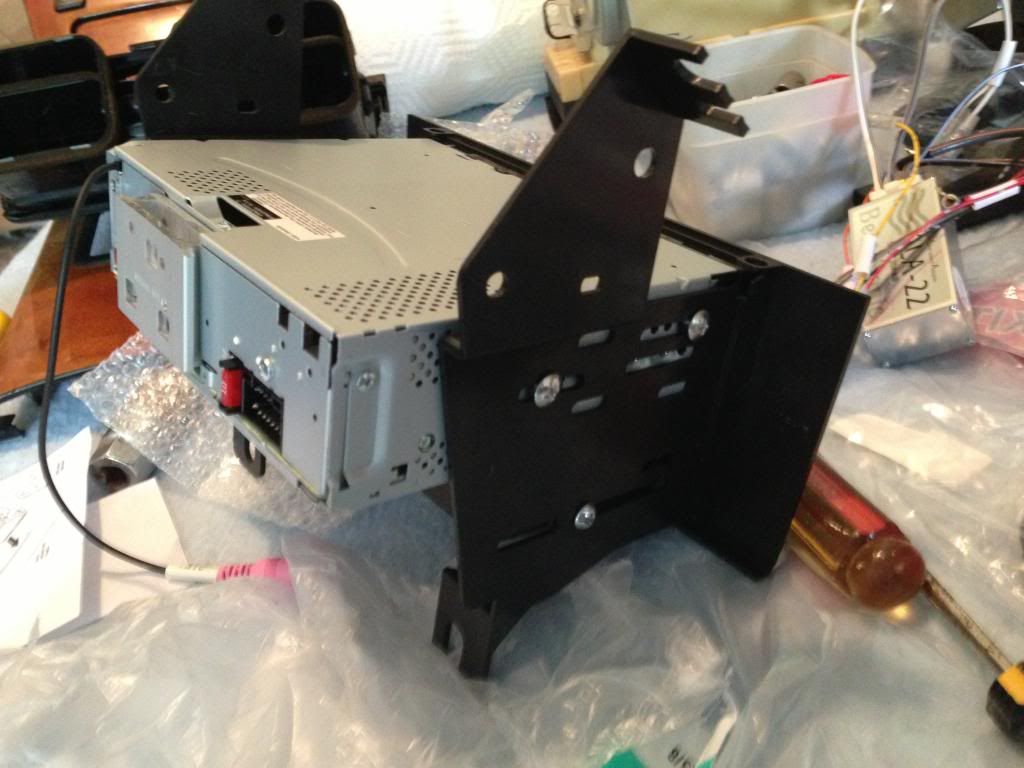
Front view:
Next: fun with the Beat Sonic $280 mystery box.
So after research based on this form, I gathered what I expected to need. Here is everything, ready to start:
What's there:
- JVC KD-X250BT Digital Media Receiver HU
- Beatsonic SLA-220D $280 mystery box
- Dash mount kit from: http://www.ebay.com/itm/221094888255...S:3160&vxp=mtr
- non-scuffing trim removal tool
- 10 mm socket
- masking tape (for labelling wires, turned out to be unnecessary)
- towel
- HU removal instructions (on the iPad)
What I needed but didn't know I needed until I got there (more on each later):
- 16-14 AWG bullet connectors (both male and female, bought at Autozone)
- wire stripping/crimping tool (bought at Autozone with the connectors)
- coat hanger (for fishing the microphone wire through the dashboard)
- headlamp flashlight (handy for peeking into the dark recesses of the car)
To remove the existing HU I used the instructions that are attached to post #7 of this thread: https://www.clublexus.com/forums/ls4...-98-ls400.html
I dove rght into disassembly right away. Maybe I should have opened the packages and verified everything first, but no! Caution to the wind!
There was one challenge I expected. My HVAC vents have a crack in the top. I think it's just age, because it just appeared about a year ago. Crack is shown here:
I was worried that indicated that the vents were brittle and might shatter when I try to take them out. But they came out super easy with very little force required once the clips were opened per the referenced instructions. It went so well I didn't take any pictures of that part. The referenced instructions are exactly correct and need no further illustration.
Once I got everything apart, I found that my console chock full of 15 years worth of crumbs, dust, and assorted crap.
So I vacuumed it out.
Once everything was apart and the insides cleaned out, it was back to my workbench (actually a card table, see I told you I'm not that "average guy" who has a bunch of tools) to separate the HU from the AC head (shown in the reference instructions) and get the new mount put together. This went relatively well except that the heads of the small screws that hold the storage cubby in were too small to be effective so I had to use the bigger screws provided in the kit:
Side view:
Here I hit my first problem. The new HU didn't fit into the Scosche rack! The opening appeared to be 3/16 of an inch too small. Crap. I was starting to regret taking the car apart before doing this part of the job. So I called Scosche tech support and they explained to me that I have to remove the trim piece and the metal sleeve from the HU and screw it in behind the faceplate, it doesn't go through. OH. Like I said, I have no experience at this. Here is the HU with the front trim and the metal sleeve removed:
Let me take this opportunity to give Scosche some serious kudos for their tech support. They answered my call and talked me down in about 10 minutes. They would do it again later too. Those guys are awesome.
Here is the Scosche bracket with the new HU installed:
Front view:
Next: fun with the Beat Sonic $280 mystery box.
Last edited by xyzzy_dude; 07-04-13 at 08:51 PM.
07-04-13, 06:40 PM
#3
Driver School Candidate
Thread Starter
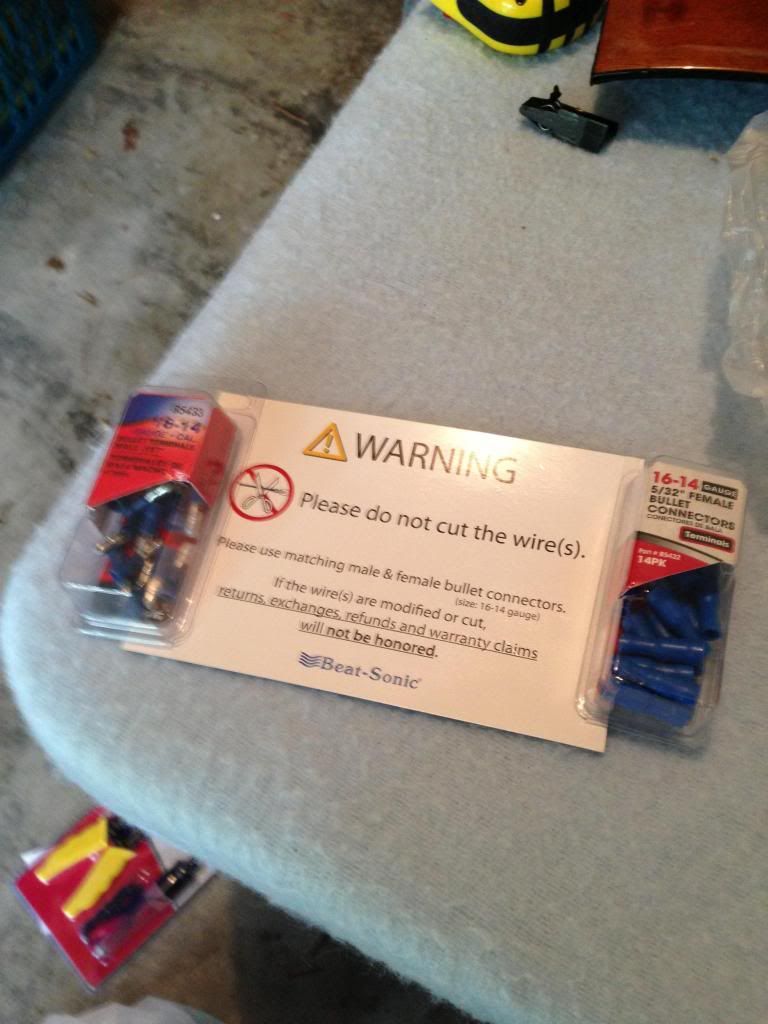
OK, so next it was time to get the wiring ready, which meant hooking up the Beat Sonic box to the wiring provided by the new HU. Beat Sonic's advertising says this makes it plug and play. Well sort of. What Beat Sonic doesn't tell you and you dont' find out until you open the box, is that you need 16-14 AWG bullet connectors to hook the Beat Sonic box to the HU, and they aren't included which seems kind of chintzy considering how expensive the Beatsonic box is.
So I had to take a break and drive to Autozone buy the connectors. And the crimping tool. Did I mention that I live in the sticks and this is a 25 minute drive one way? Really hurts the productivity to make unexpected trips into town.
So back from Autozone with my new bullet connectors, shown here with the stern warning card that BeatSonic includes in the package, a/k/a the first time they disclose that their kit is not complete:
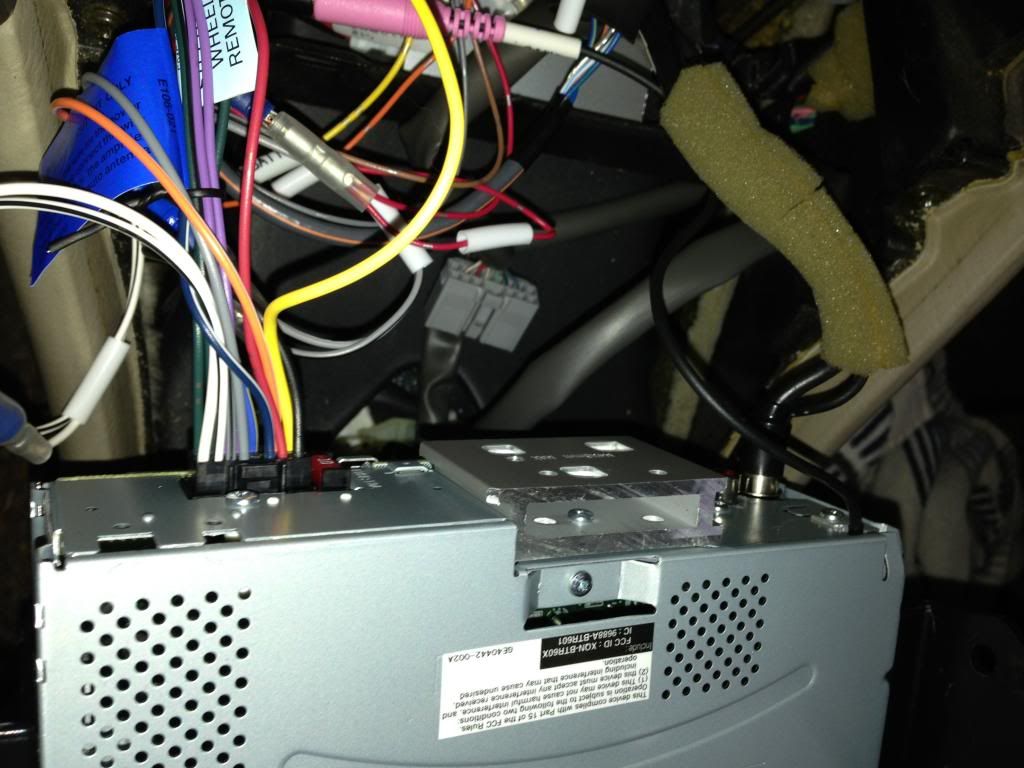
So now I'm ready. Time to lay out the BeatSonic adapter next to the wiring harness provided by JVC:
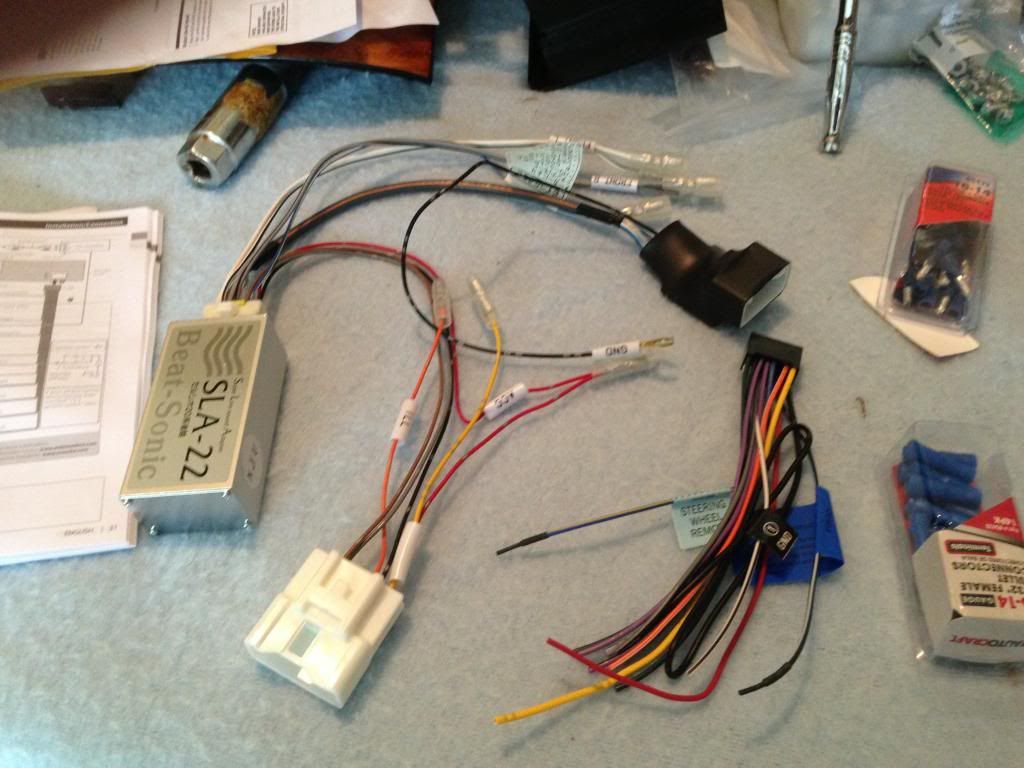
And put the bullet connectors onto the JVC wires so they can attach to the Beat Sonic adapter (look at each BeatSonic wire end to make sure you get the correct male/female connector on the HU wiring harness):
Then, connect it all up:
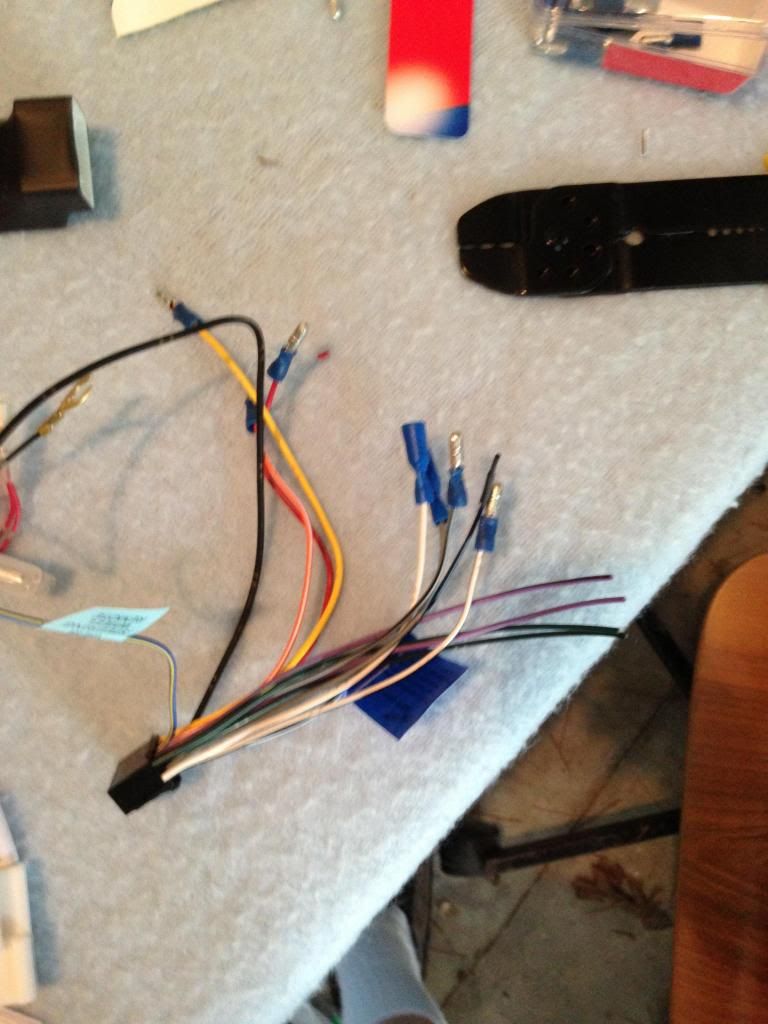
Note that the rear speaker wires from the HU do not get used. Only the front speaker wires and the BeatSonic box works with the factory amp to balance the sound with fader set to neutral. Also not used from the HU: the steering wheel control wire. I bundled the unused wires together and taped them off.
Now it's time for the only electrical decision I had to make for myself... where to attach the grounds. I chose this structural brace that's just to the left of the opening:
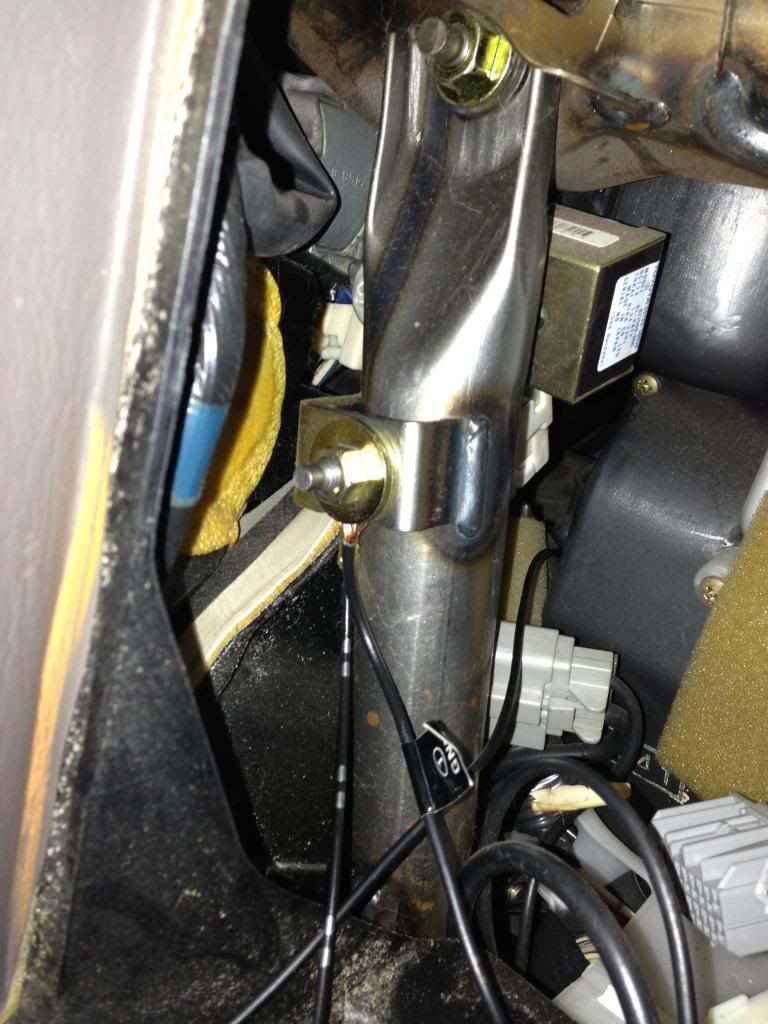
I loosened the existing bolt, slipped the ground wires from both the BeatSonic box and the JVC harness, and retightened.
Then, connect the BeatSonic connectors to the Lexus connectors that had been attached to the factory radio:
Simple as that. ONce you get the bullet connectors, it really was plug and play.
Next: smoke test!
So I had to take a break and drive to Autozone buy the connectors. And the crimping tool. Did I mention that I live in the sticks and this is a 25 minute drive one way? Really hurts the productivity to make unexpected trips into town.
So back from Autozone with my new bullet connectors, shown here with the stern warning card that BeatSonic includes in the package, a/k/a the first time they disclose that their kit is not complete:
So now I'm ready. Time to lay out the BeatSonic adapter next to the wiring harness provided by JVC:
And put the bullet connectors onto the JVC wires so they can attach to the Beat Sonic adapter (look at each BeatSonic wire end to make sure you get the correct male/female connector on the HU wiring harness):
Then, connect it all up:
Note that the rear speaker wires from the HU do not get used. Only the front speaker wires and the BeatSonic box works with the factory amp to balance the sound with fader set to neutral. Also not used from the HU: the steering wheel control wire. I bundled the unused wires together and taped them off.
Now it's time for the only electrical decision I had to make for myself... where to attach the grounds. I chose this structural brace that's just to the left of the opening:
I loosened the existing bolt, slipped the ground wires from both the BeatSonic box and the JVC harness, and retightened.
Then, connect the BeatSonic connectors to the Lexus connectors that had been attached to the factory radio:
Simple as that. ONce you get the bullet connectors, it really was plug and play.
Next: smoke test!
Last edited by xyzzy_dude; 07-04-13 at 08:37 PM.
07-04-13, 06:48 PM
#4
Driver School Candidate
Thread Starter
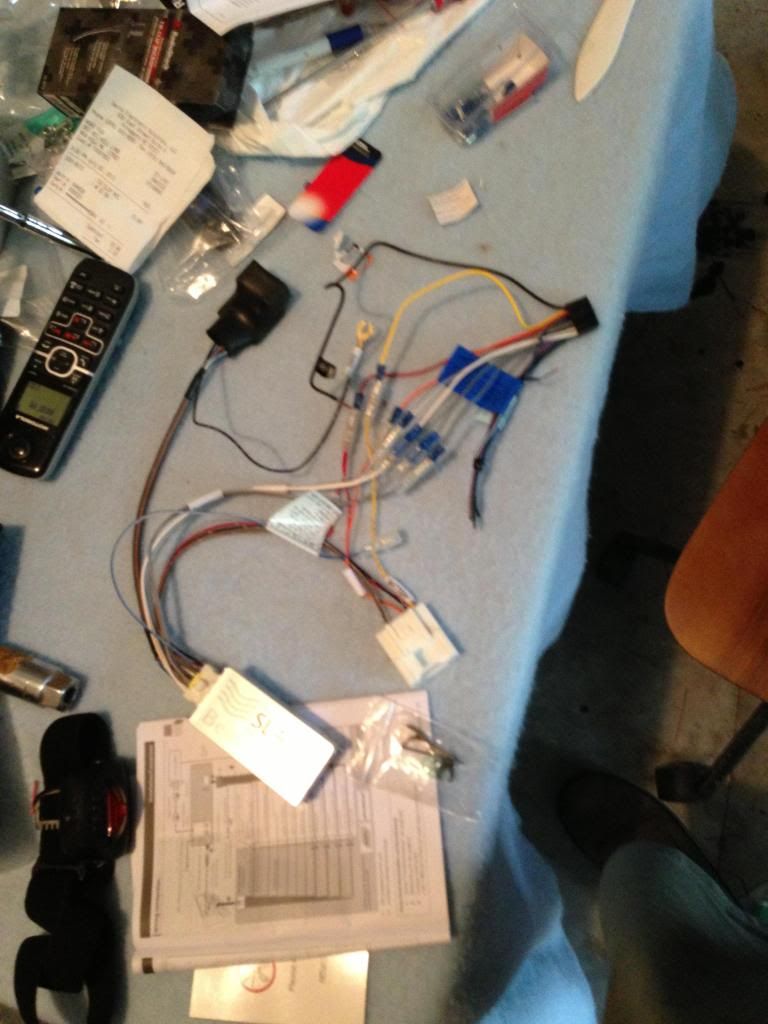
Now it's time for the all important smoke test... hook it up and verify it works! I brought the HU into the car, plugged in the JVC harness that's now attached to the BeatSonic adapter and the antenna:
Then hook the battery back up, turn the ignition key and hope for the best!
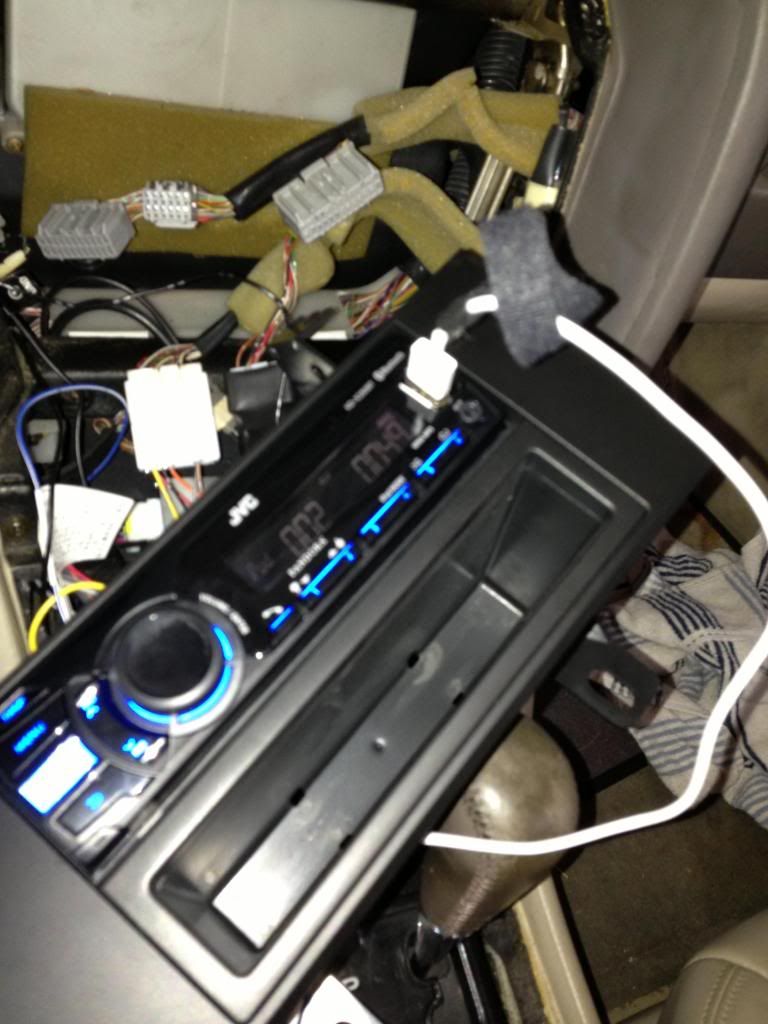
Success! It works! I tested all modes I cared about: FM, bluetooth, ipod. Note that this is a multimedia receiver and does not support CD, so my Lexus CD player is orphaned but I don't really care because I haven't used it in years.
ONce the test is over, whoops, can't take the key out of the ignition. Recall from the disassembly instructions that I had to push the shift interlock and move the shift lever all the way back. Like that, the key can't come out. So get the small screwdriver, push the interlock again, move the shift lever to park, take out the key, then move the shift lever back to the fully back position.
Now: time to start putting everything back together.
Then hook the battery back up, turn the ignition key and hope for the best!
Success! It works! I tested all modes I cared about: FM, bluetooth, ipod. Note that this is a multimedia receiver and does not support CD, so my Lexus CD player is orphaned but I don't really care because I haven't used it in years.
ONce the test is over, whoops, can't take the key out of the ignition. Recall from the disassembly instructions that I had to push the shift interlock and move the shift lever all the way back. Like that, the key can't come out. So get the small screwdriver, push the interlock again, move the shift lever to park, take out the key, then move the shift lever back to the fully back position.
Now: time to start putting everything back together.
07-04-13, 07:02 PM
#5
Driver School Candidate
Thread Starter
Putting it back together!
I hit a wall here. The Scosche instructions stop at putting the new HU into their bracket. No word on how to put the whole assembly back together. I puzzled with it for a while and simply could not make the Scosche brackets with the HU mate to the AC head with the factory brackets. Finally I called Scosche tech support again... and they explained: "take the factory brackets off the AC head, you don't need them, then just bolt the AC head into our bracket above the HU." Umm, duh.
Once again I have reiterate my kudos for Scosche tech support, which talked me off the ledge twice now during this process! They rock, and give great service for a $10-20 bracket (depending on where you buy it from).
So here is is put together:

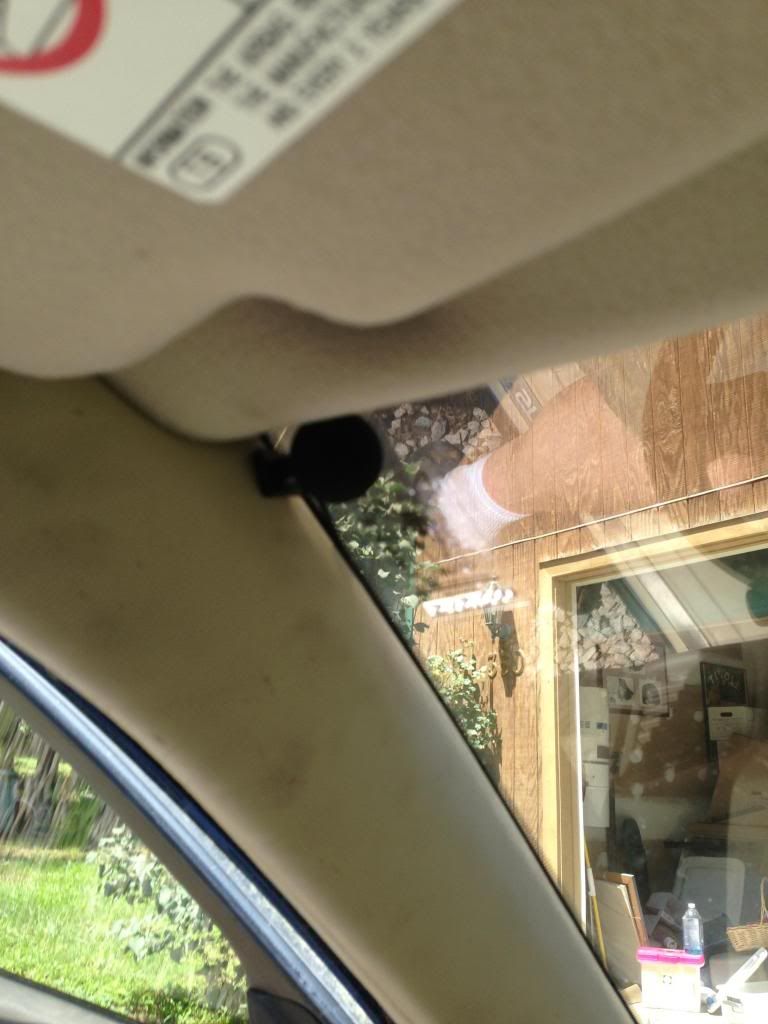
Now there is the matter of the external microphone for the BT phone support. I ended up taping the male connector to a coat hanger and fishing it forward into the space from just in front of the firewall. Worked well. I put the mike on the A pillar at face level and routed the wire down the A pillar, around and under the dash. I used the scuffless trim removal tool to push the wire under trim where applicable.
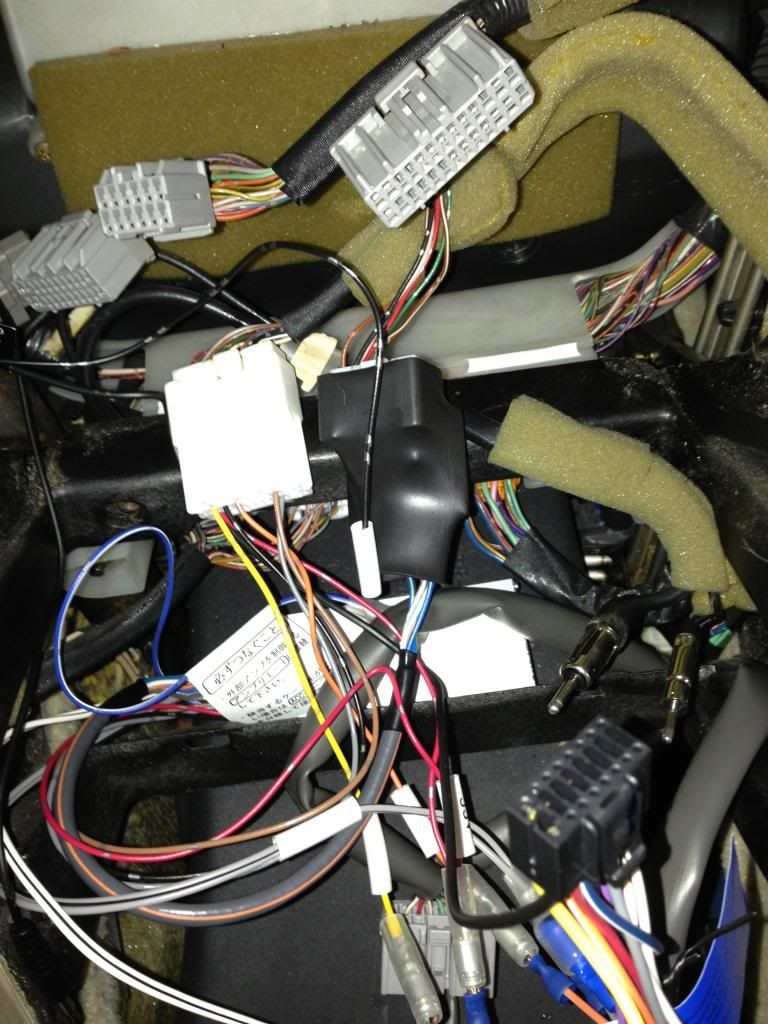
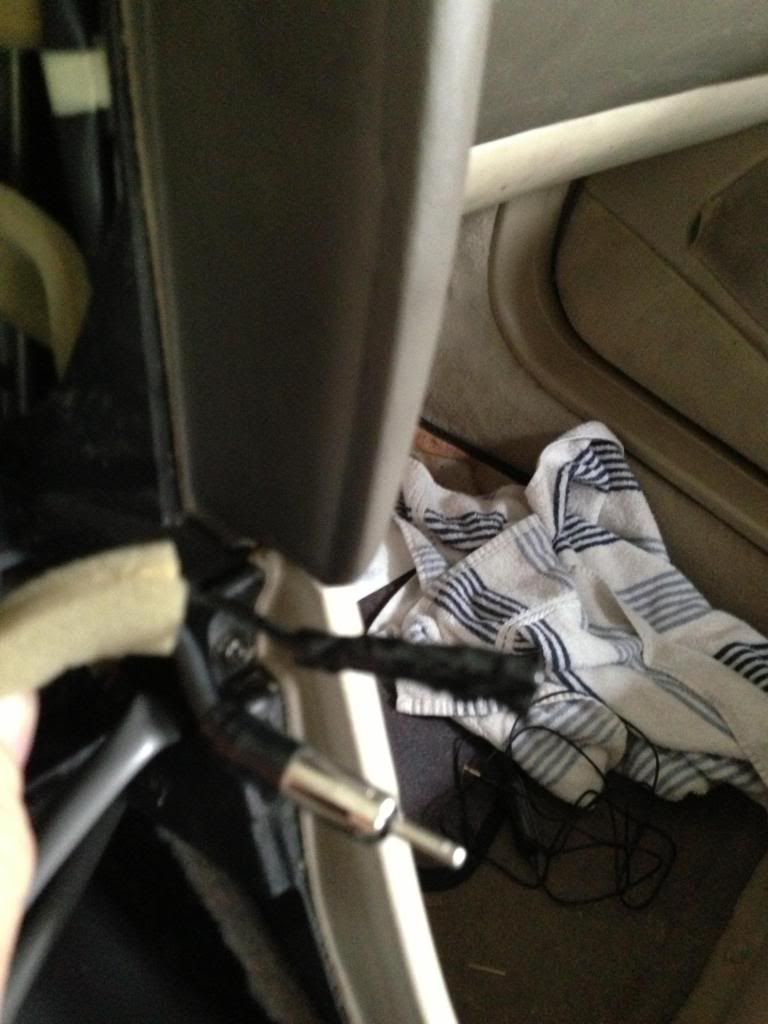
As I went to reinstall for good, I saw that there were two antenna wires in the car, but only one antenna plug in the JVC unit. I don't know that the purpose of the second, smaller antenna plug is. Maybe it's AM or maybe it's the "diversity" antenna that Lexus advertises? Either way my FM sounds great without it.
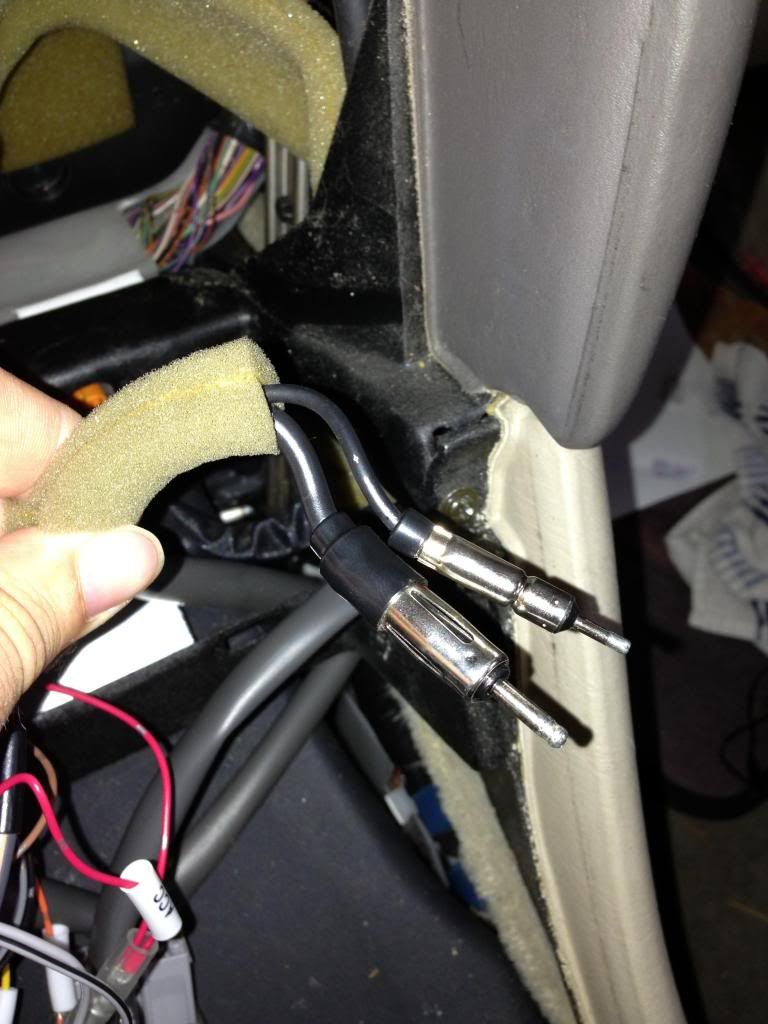
But I didn't want the bare metal connectors knocking around back there so I covered the unusable connector with electrical tape:
Now for trepidation. Taking apart the dash was easy. How easy or hard would reassembly be? Well I reconnected everything to the HU and the AC head, stuffed the towel in there to protect the rails and catch any dropped bolts, and manuevered the AC/HU assembly into the hole.
To my complete delight and surprise it clicked right into place! There are tabs to hold it in place while the bolts are put in. Toyota really engineered these things well!!
So before bolting everything up and reassembling the trim, one more smoke test with it all hooked up. Tested the radio and the A/C:

I cannot emphasize enough how delightfully easy the reassembly was! Reattach the three connectors (VSC, seat heaters, and ashtray light) to the wooden console and it just snapped right back into place. Reconnect the hazard flasher connector to the top vent assembly, and it just snapped back into place.
I was shocked and delighted at how easy the reassembly was!! Toyota engineers really knew what they were doing.
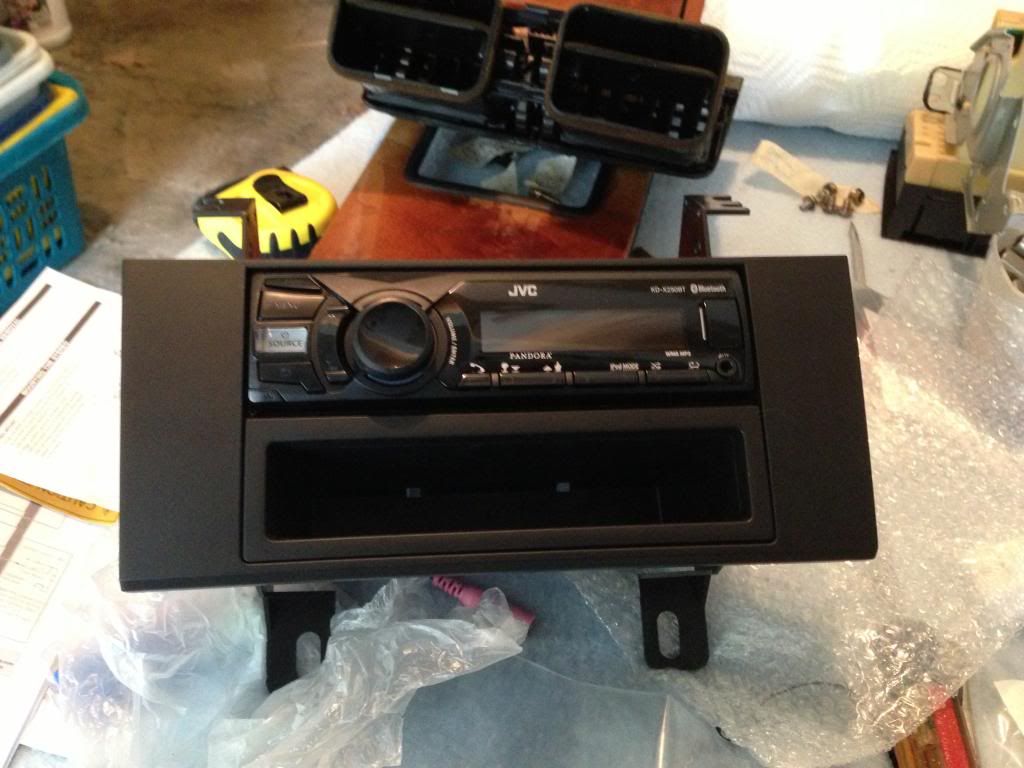
The finished product:
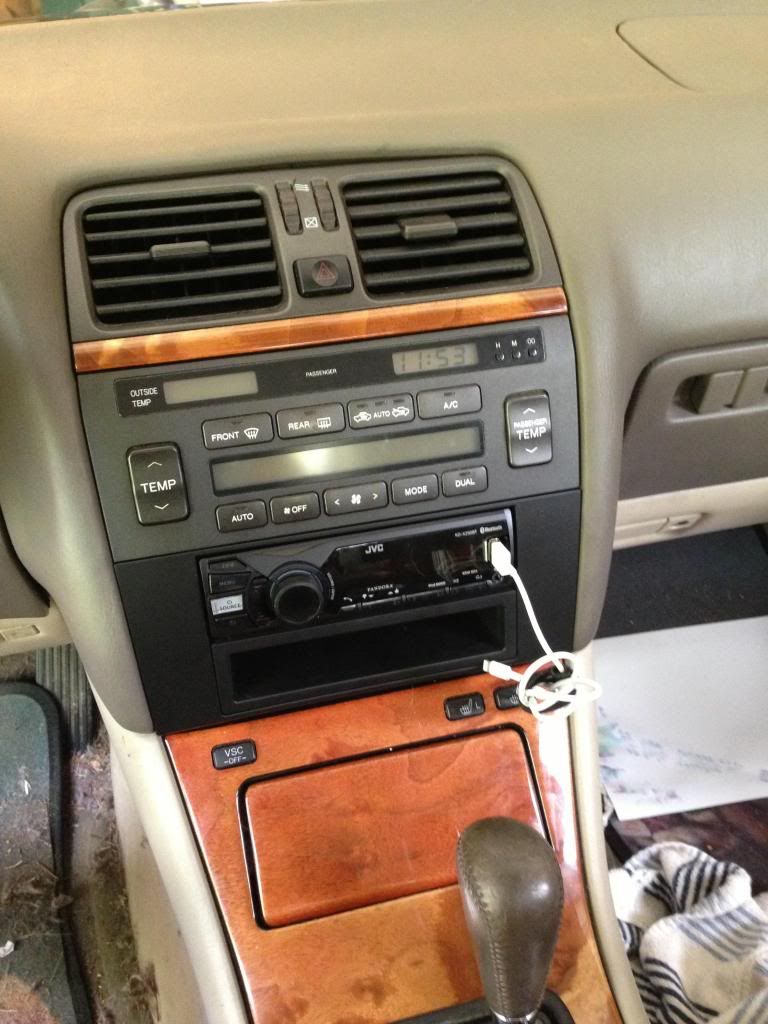
And that's all, folks!! And the best part is... I no longer have to envy the level of tech in my wife's Prius!
Postscript: The next day on a road trip I discovered in a Bojangles Drive Thru that I didn't have the console in correctly... the spring loaded cupholder wouldn't open because the console was blocking it. I had to take it out and reseat it. That went just as easily, 10 minutes tops, and it was my bad for not testing the cup holder during my initial install.
I hit a wall here. The Scosche instructions stop at putting the new HU into their bracket. No word on how to put the whole assembly back together. I puzzled with it for a while and simply could not make the Scosche brackets with the HU mate to the AC head with the factory brackets. Finally I called Scosche tech support again... and they explained: "take the factory brackets off the AC head, you don't need them, then just bolt the AC head into our bracket above the HU." Umm, duh.
Once again I have reiterate my kudos for Scosche tech support, which talked me off the ledge twice now during this process! They rock, and give great service for a $10-20 bracket (depending on where you buy it from).
So here is is put together:
Now there is the matter of the external microphone for the BT phone support. I ended up taping the male connector to a coat hanger and fishing it forward into the space from just in front of the firewall. Worked well. I put the mike on the A pillar at face level and routed the wire down the A pillar, around and under the dash. I used the scuffless trim removal tool to push the wire under trim where applicable.
As I went to reinstall for good, I saw that there were two antenna wires in the car, but only one antenna plug in the JVC unit. I don't know that the purpose of the second, smaller antenna plug is. Maybe it's AM or maybe it's the "diversity" antenna that Lexus advertises? Either way my FM sounds great without it.
But I didn't want the bare metal connectors knocking around back there so I covered the unusable connector with electrical tape:
Now for trepidation. Taking apart the dash was easy. How easy or hard would reassembly be? Well I reconnected everything to the HU and the AC head, stuffed the towel in there to protect the rails and catch any dropped bolts, and manuevered the AC/HU assembly into the hole.
To my complete delight and surprise it clicked right into place! There are tabs to hold it in place while the bolts are put in. Toyota really engineered these things well!!
So before bolting everything up and reassembling the trim, one more smoke test with it all hooked up. Tested the radio and the A/C:
I cannot emphasize enough how delightfully easy the reassembly was! Reattach the three connectors (VSC, seat heaters, and ashtray light) to the wooden console and it just snapped right back into place. Reconnect the hazard flasher connector to the top vent assembly, and it just snapped back into place.
I was shocked and delighted at how easy the reassembly was!! Toyota engineers really knew what they were doing.
The finished product:
And that's all, folks!! And the best part is... I no longer have to envy the level of tech in my wife's Prius!
Postscript: The next day on a road trip I discovered in a Bojangles Drive Thru that I didn't have the console in correctly... the spring loaded cupholder wouldn't open because the console was blocking it. I had to take it out and reseat it. That went just as easily, 10 minutes tops, and it was my bad for not testing the cup holder during my initial install.
Last edited by xyzzy_dude; 07-06-13 at 06:41 PM. Reason: added postscript
The following users liked this post:
spuds (02-20-18)
 07-04-13, 10:32 PM
#7
Let me first start out by saying THANK YOU for covering the Antenna connectors. I was confused on how it all connected but I guess it's the same connector as everyone else lol. And also, you did a really good job. The whole install practically looks factory, with the exception of the bracket being a little off in terms of color but that can be fixed easy lol.
Trending Topics
07-05-13, 05:20 PM
#8
Lead Lap
Nice write-up. Glad you found my head unit removal instruction document useful.
If your microphone location doesn't work out (e.g. if blocked by the sun visor), if the microphone cable is long enough, it is pretty easy to drop the overhead light module and route the mic cable into it - either mount the microphone on or to the side of the overhead light module - see attached photo. Some have even drilled a hole in the light cluster and mounted the microphone inside it letting the microphone stick out the hole (depends on the design of the microphone) ... similar to where the microphone is installed in the LS430.
The key question is: How does it sound? At least as good as the OEM head unit? Is the subwoofer working properly and putting out adequate base?
07-06-13, 12:25 AM
#10

 07-06-13, 08:23 AM
#12
Agreed. Great post OP.
One thing I have wondered though is
1. What the heck is in the Beat Sonic mystery box (Beat-Sonic SLA-20AD)?
2. Is it actually worth $225+ taxes and shipping? (I understand this question is relative)
3. Is it feasible to make one yourself?
One thing I have wondered though is
1. What the heck is in the Beat Sonic mystery box (Beat-Sonic SLA-20AD)?
2. Is it actually worth $225+ taxes and shipping? (I understand this question is relative)
3. Is it feasible to make one yourself?
 07-06-13, 01:52 PM
#14
Driver School Candidate
Thread Starter
well, not quite a "little extra". The Beat Sonic brackets were $125, or $100 when purchased with the mystery box. And, it appeared from the web picture that they are only for a double din installation, not a single DIN. I bought the Scoshce brackets for $10.99 and they included the cubby for under a single DIN HU.
I'm not sure if my color is mismatched because my Scosche bracket isn't exactly matched, or if it's because my car is 15 years old and the factory plastic has faded over time. If it's the latter, I doubt any faceplace would be a perfect match.
Congrats on the DIY OP.
07-06-13, 06:35 PM
#15
Driver School Candidate
Thread Starter
If your microphone location doesn't work out (e.g. if blocked by the sun visor), if the microphone cable is long enough, it is pretty easy to drop the overhead light module and route the mic cable into it
The key question is: How does it sound? At least as good as the OEM head unit? Is the subwoofer working properly and putting out adequate base?
My wife says the external mike sounds great too, when I use it to talk to her.
Last edited by xyzzy_dude; 07-06-13 at 06:42 PM.