


FlyAudio Install Instructions (56K BEWARE)

Thread Starter
Former Sponsor
Joined: Nov 2009
Posts: 485
Likes: 0
Hey guys/gals, over the last couple FlyAudio installs we have done I have compiled some pictures and instructions. There are alot of you out there who have already done this at home and can vouch for how straight forward this install can be. Please feel free to add to the instructions with hints and tricks. I will add more pictures as time goes on and we install more of these.
Confidence and basic tools are the only requirements. It helps to have someone to assist you because aligning the new FlyAudio system in the dash is difficult with only 1 set of hands. If you have any questions, please call our support hotline at 714-720-2797.
DISCLAIMER: Automax Service does not guarantee results and assumes no liability for any damage done due to the use of these instructions.
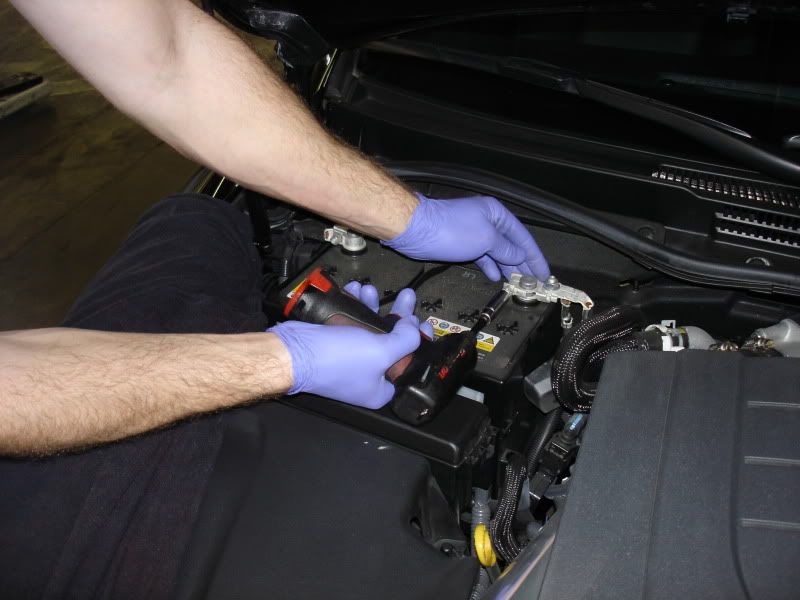
Disconnect the battery:
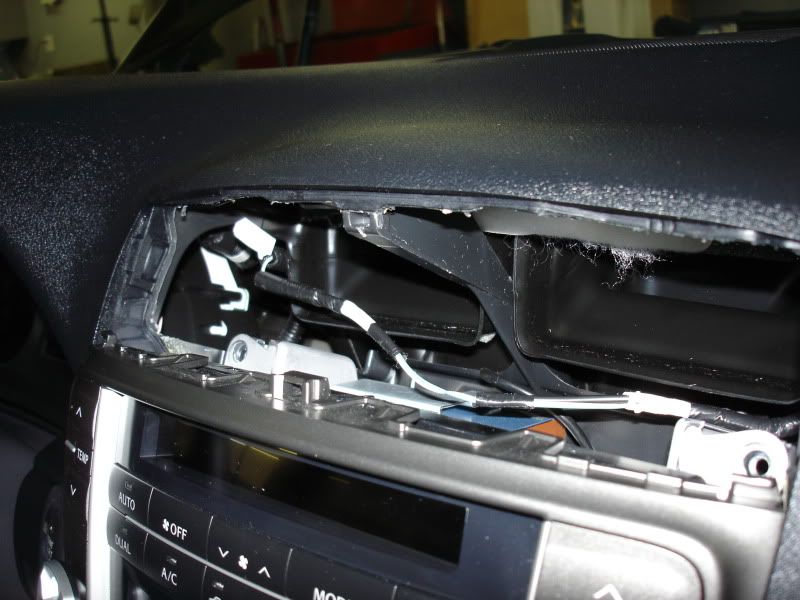
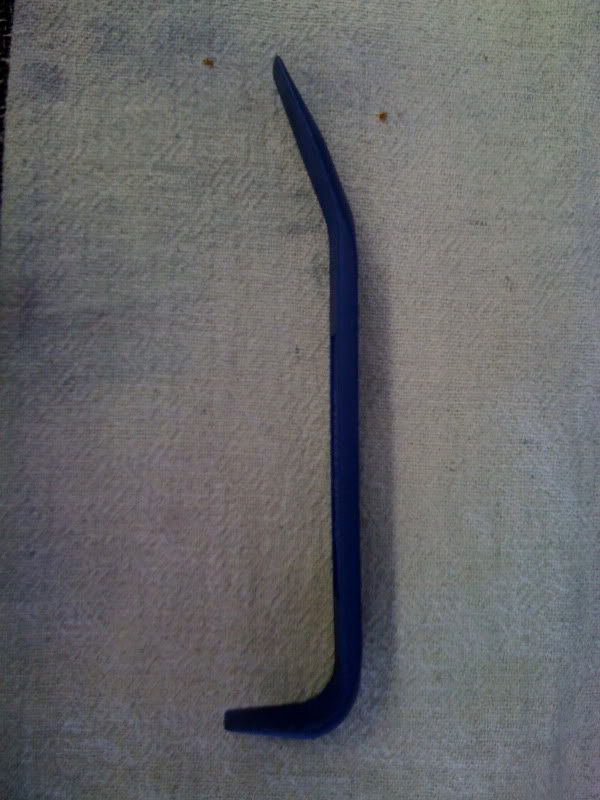
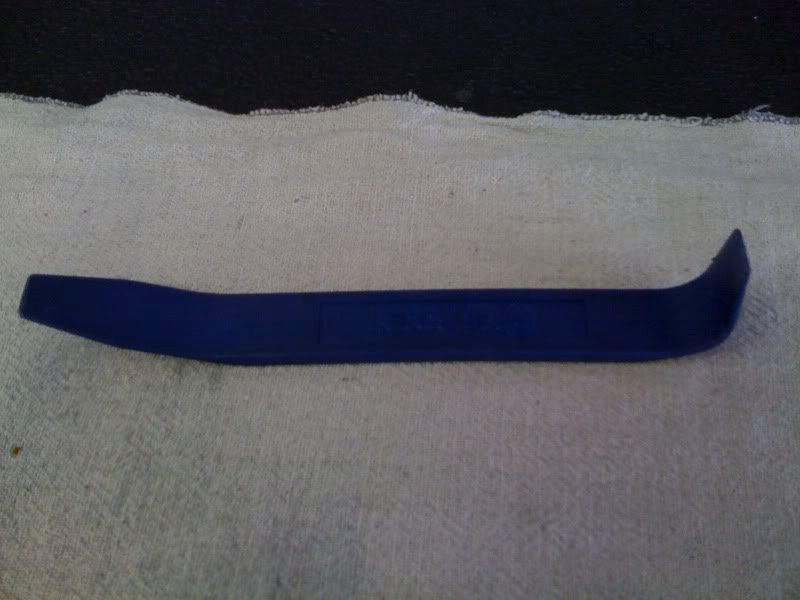
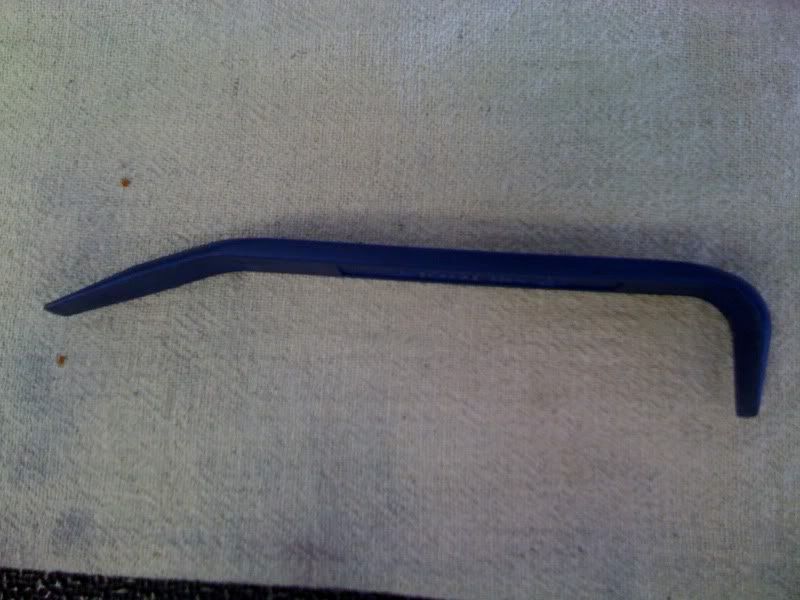
Remove the A/C vent above the stereo. You can use a plastic pry bar to apply pressure in the middle of the vent. This piece may put up a fight, but it is incredibly pliable and solid. Make sure to apply the most pressure in the middle (thickest part of the vent) and apply minimal pressure at other points on the vent if necessary.
The picture below is from the top down and shows where the tabs are on each side of the vent.

Pull the vent out slowly and disconnect the wires along the top/bottom of the vent. There are 2 connectors that run along the bottom of the vent that need to be removed.
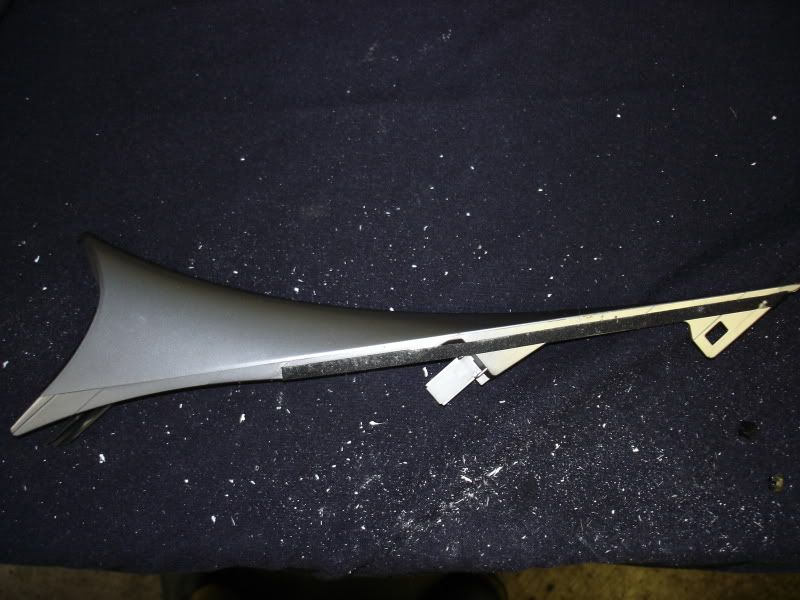
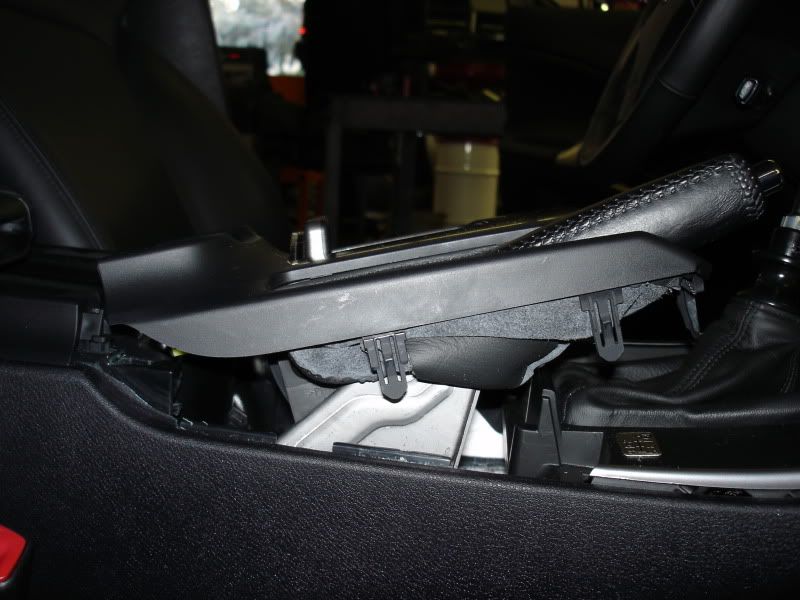
Next, remove the side grey trim pieces that run the length of the shift cover. You can use a plastic pry bar to get under the base of trim piece. Lift up to release. Then pull towards the rear of the vehicle to release the tabs.
If you have a manual transmission then follow this step: Lift the trim piece surrounding the E-Brake. It has 2 clips on each side. Then pop off the shift cover as well.
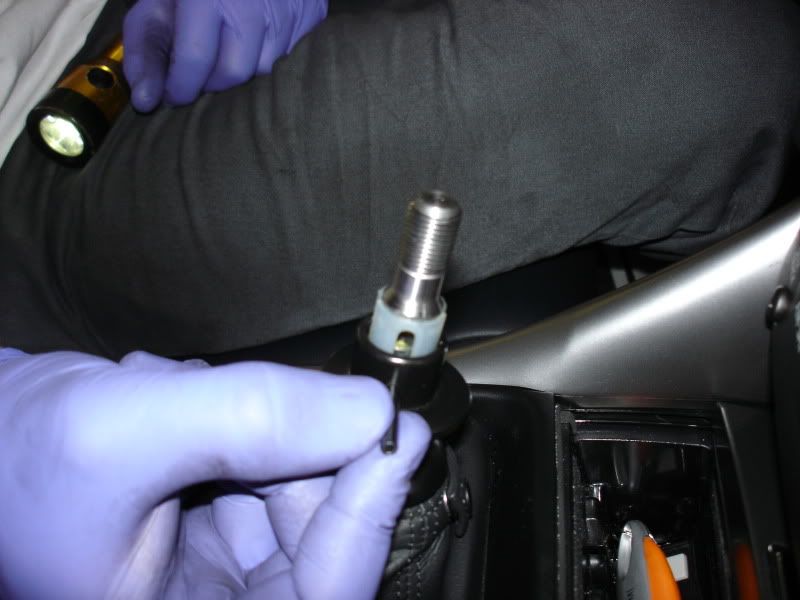
Unscrew the shift ****. The shift **** has a pin inside the black locking collar that needs to be removed. This can be kind of a fight to push it out one side (without bending the pin). Once the pin is removed, take the black shift cover off.
For the automatic transmission cars, follow the instructions below.
Unscrew the shift **** and remove. Take the center console cover off by pulling up and releasing the tab. Unclip the connector from the bottom of the shift cover.
Remove the ashtray by unscrewing the 2 screws at the base of the ashtray. There is a connector you need to remove when you pull the ashtray out.
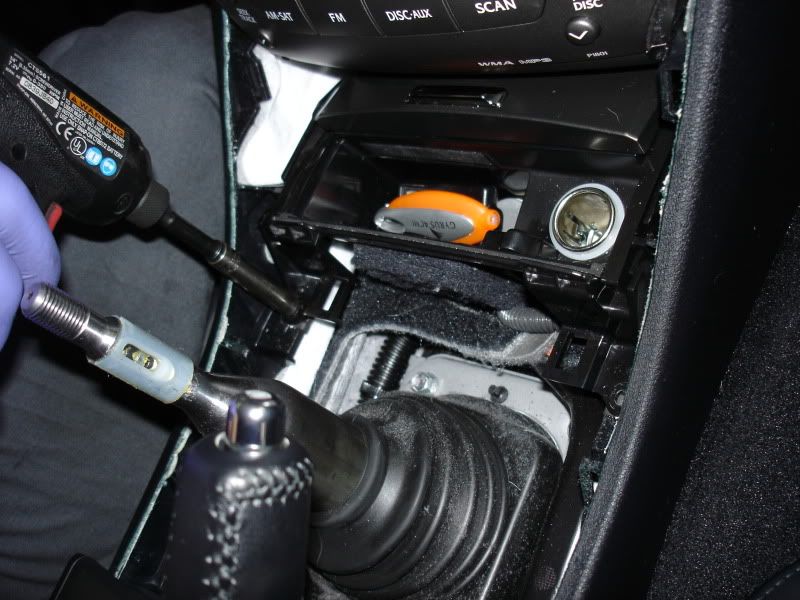
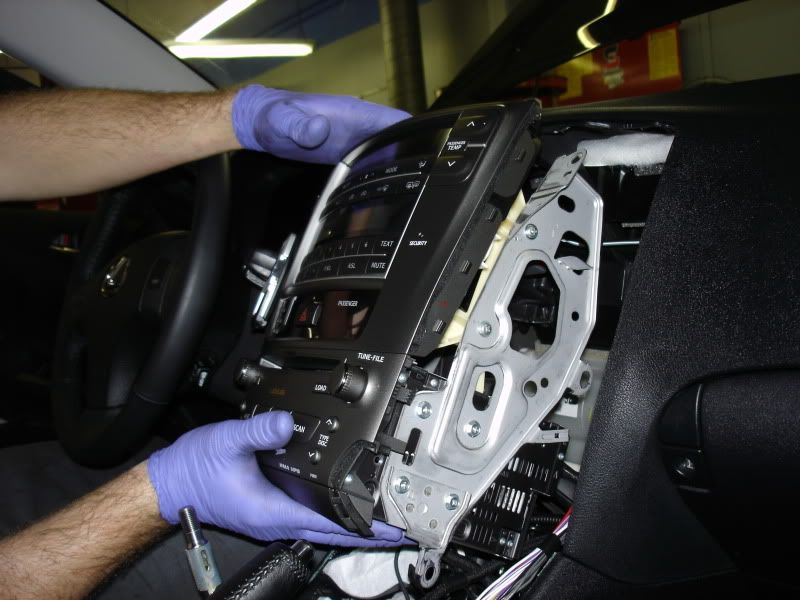
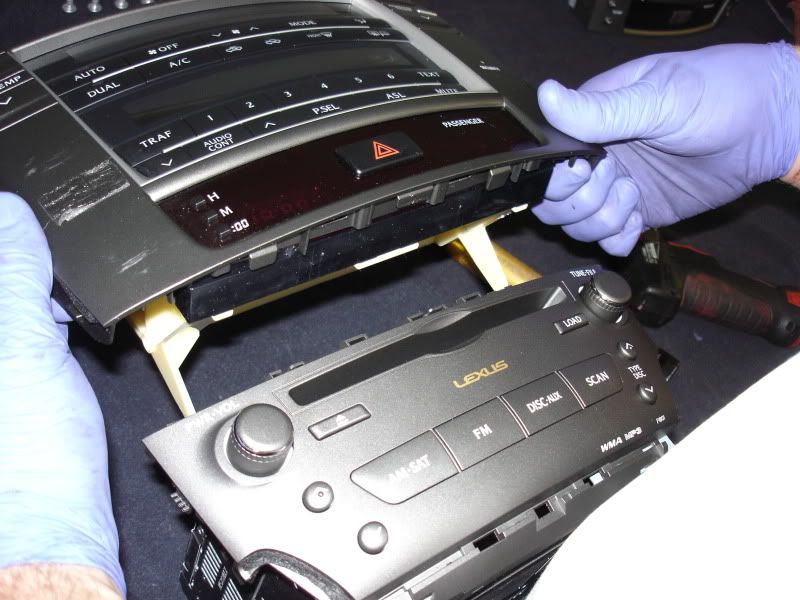
The entire A/C control unit and factory stereo are mounted in a bracket that has 4 screws that mount into the car’s center console. There are 2 screws at the top and 2 at the bottom. Un-screw those 4 screws and slowly pull the unit out. Once the unit is far enough out, unplug the 2 radio antenna cables and other connectors in the back of the unit. Once everything is disconnected, pull the entire unit out.
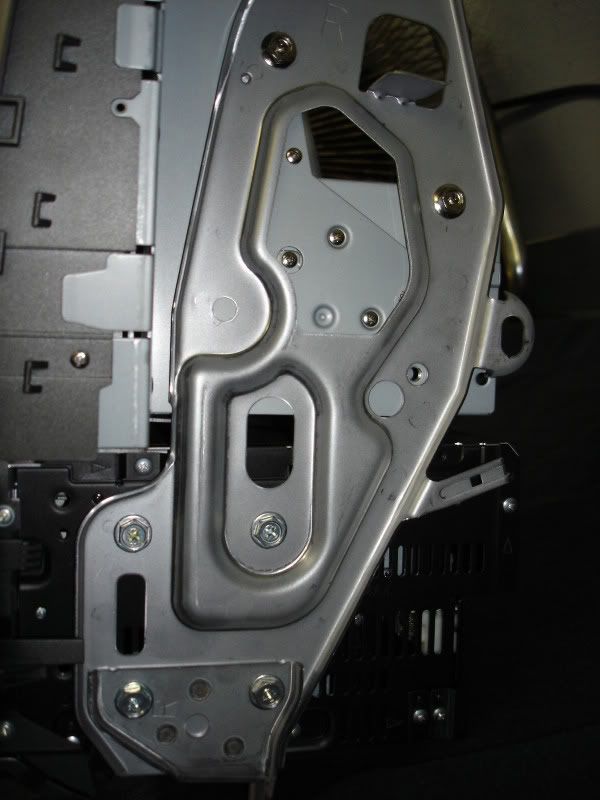
Below are the top 2 screws that need to be un-screwed to release the system.
Below are the bottom 2 screws that need to be unscrewed to remove the system.
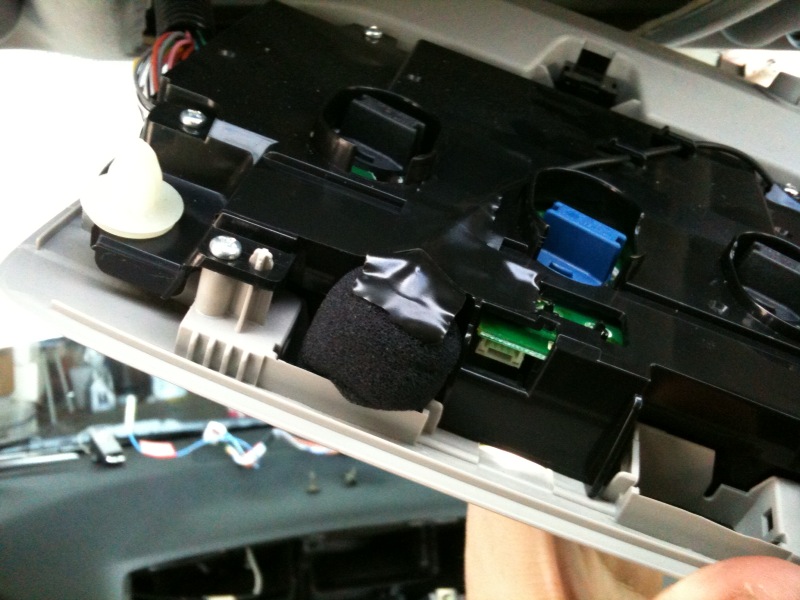
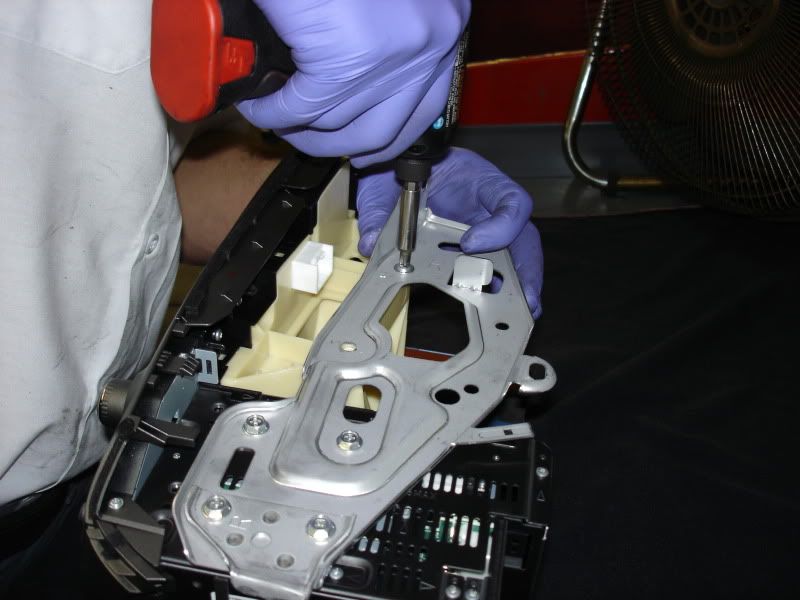
Remove the screws that hold the factory radio into the metal bracket. You can discard the screws, you won't need those anymore. Remove the TPMS module at the top of the bracket. You can find new screws in the FlyAudio box. You can plug the TPMS module back into the car and tuck it off to the side. It helps to place the whole system on a cardboard box when putting the FlyAudio into the factory bracket. Clip the bottom portion of the FlyAudio system into bottom factory stereo piece. Screw the FlyAudio system into the factory bracket. Set that unit aside and we'll get back to it later.

Time to run the wiring for the GPS antenna, bluetooth microphone, and optional backup camera.
Remove all of the trim pieces along the front driver side door and rear driver door. Remove the side access panel in the front door. Remove the kick panel under the steering wheel.

Unclip the rear seatbelts and remove the backseat. Follow the factory wiring into the trunk to see where to run the wiring.
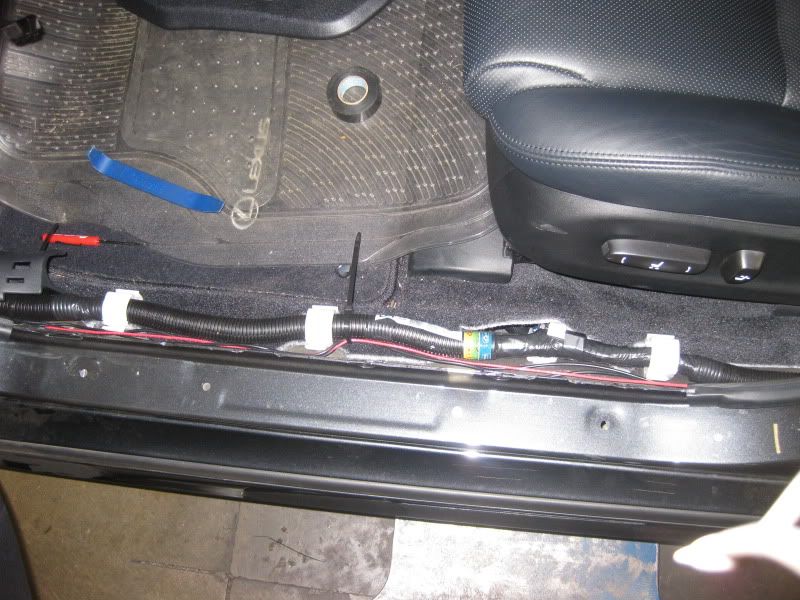
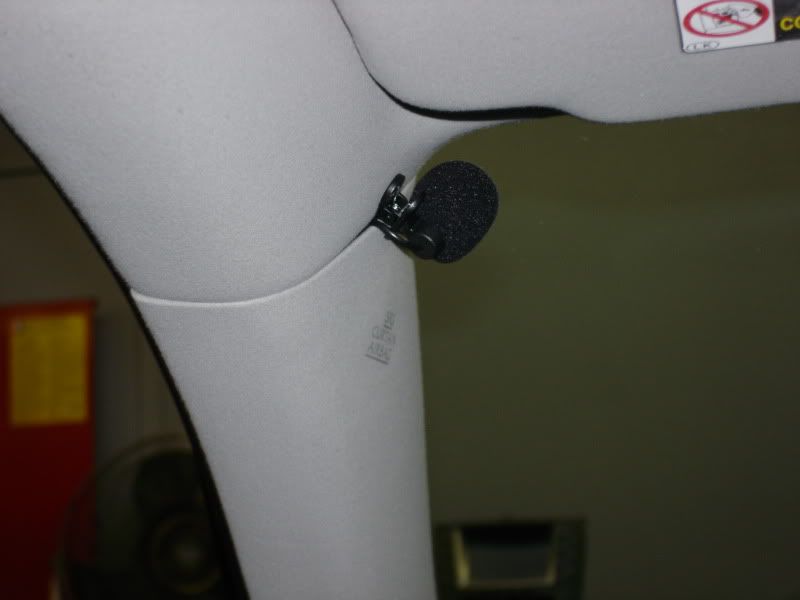
Once you do this, you can run the GPS antenna from where the headunit will end up, under the steering wheel, along the side panel with all of the other factory wiring, then rest it behind the passenger headrests in the rear window. We have found this is out of the way and gets great reception in the rear window. You can run the bluetooth microphone at the same time from where the headunit will be, under the steering wheel, and then up the Pillar. You don't have to remove the A-pillar cover, you can just tuck it under and run it up along the side. There are a couple different ways to mount it at the top of the A-pillar.
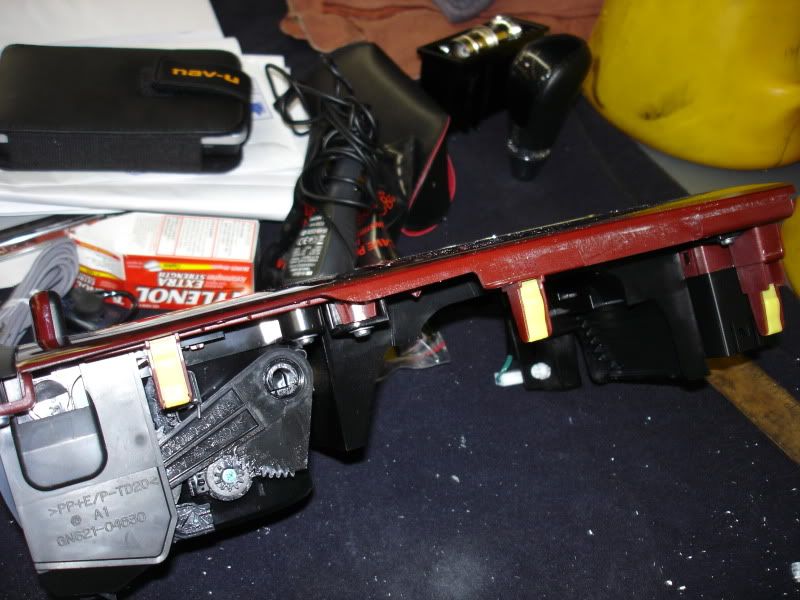
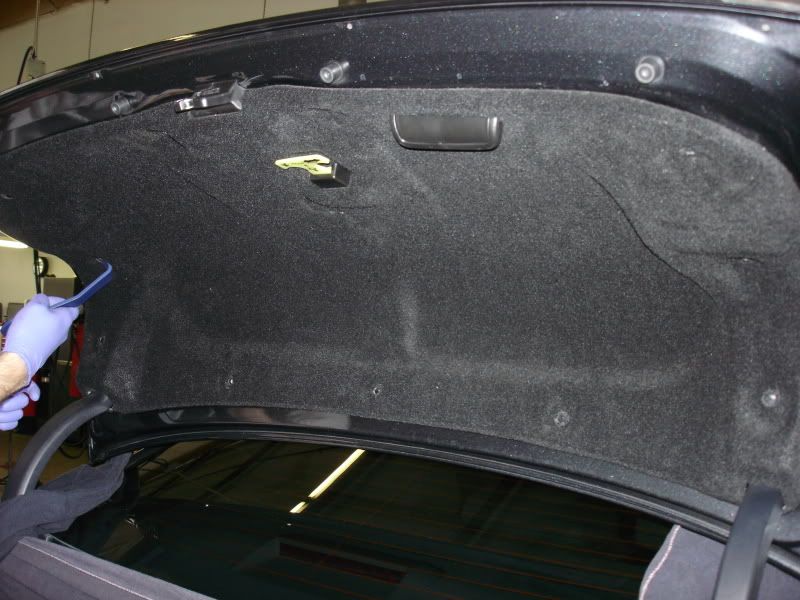
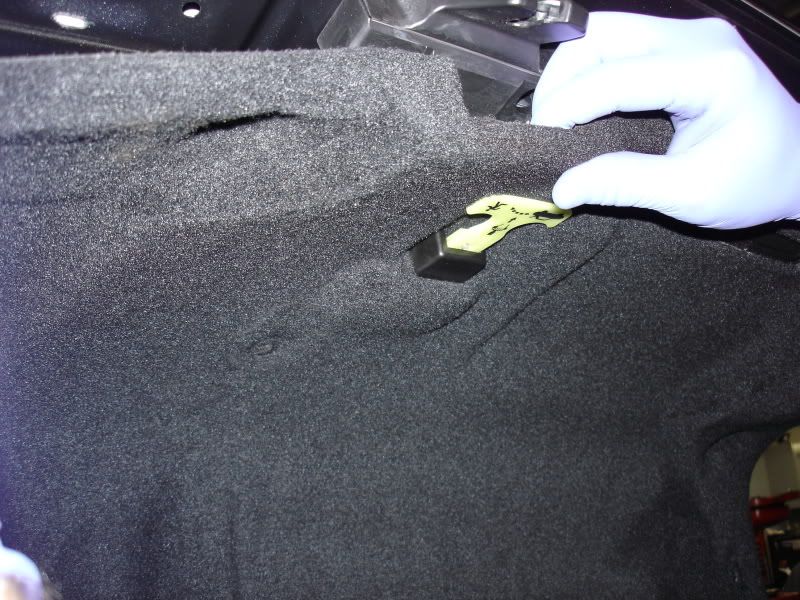
Start disassembling the trunk by removing the trunk liner. You can pop the buttons out of the liner and then you can remove the yellow trunk release. There is a trim piece separating the trunk side of the mechanism and the assembly itself, pry down to pop that cover off.
Find the connector that plugs into the driver side tail light assembly. Unplug the connector.

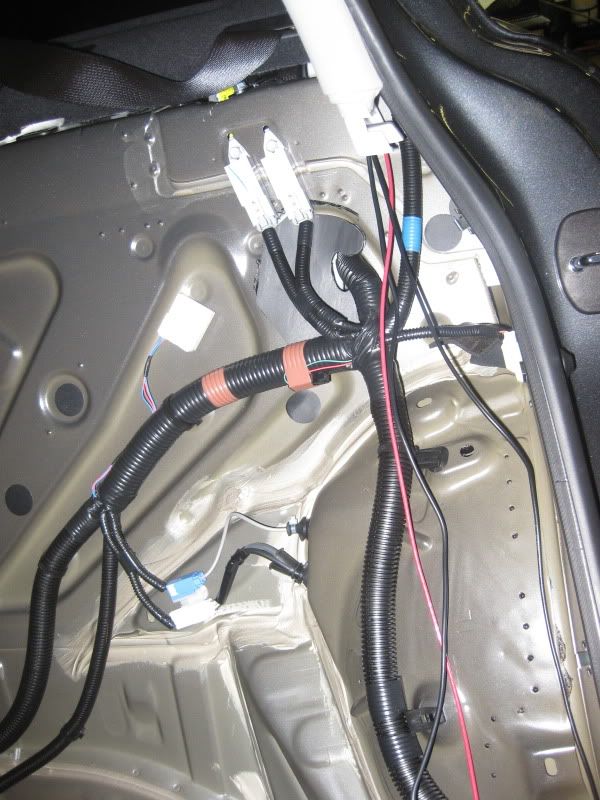
You are going to cut the plastic cover off of those 3 wires that go into the connector. You are going to solder the backup camera wiring into these wires. Identify the wires going into the connector as positive (yellow wire), negative (black and white), and ignore the other wire. Get the backup camera and identify the positive (red) and negative (black) wire. Solder the respective wires together. You will also solder the signal wire (provided by Automax Service, other retailers are NOT providing these currently) to the yellow (positive) wire and run that up to the front of the vehicle and connect it to the wire labeled "BACK".
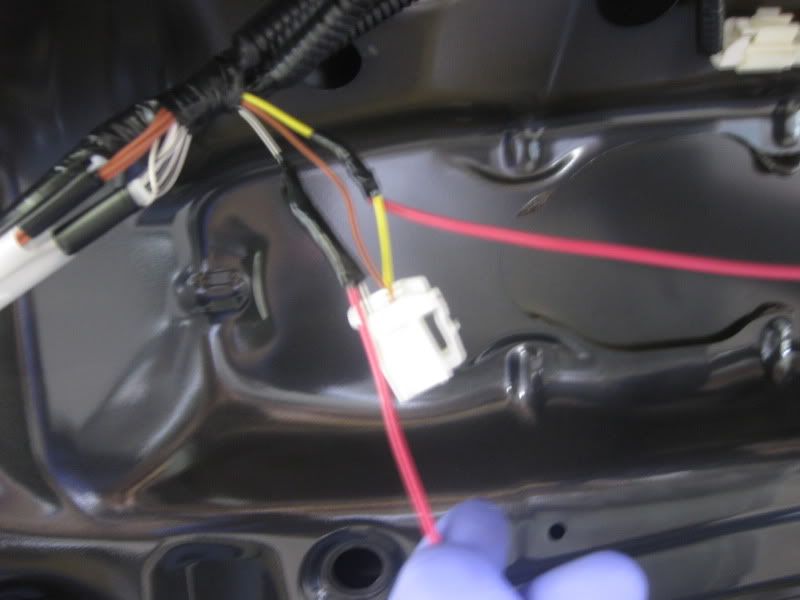
Here is a picture all bundled up:
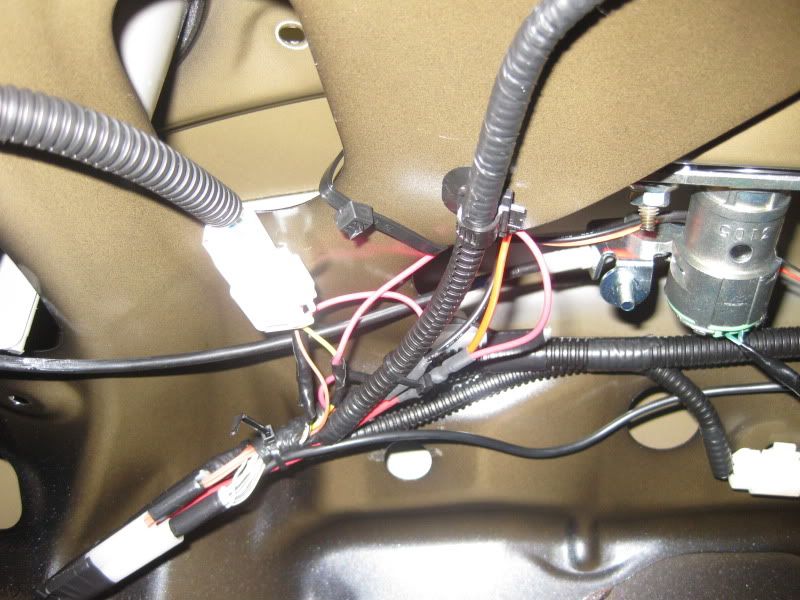
Once you do the wiring, you can run the wire for the actual camera thru the license plate light or the trunk button. We use double sided sticky tape to adhere the camera. We wait until everything is tested before we align the backup camera to make sure that it shows a straight picture on the display.
One of the last things to do is run the wiring for the USB, iPod, and RCA cables in the glovebox. You want to remove the shelf in the glovebox by popping it up and pulling to the left. Then remove the door in front of the cabin filter.
Confidence and basic tools are the only requirements. It helps to have someone to assist you because aligning the new FlyAudio system in the dash is difficult with only 1 set of hands. If you have any questions, please call our support hotline at 714-720-2797.
DISCLAIMER: Automax Service does not guarantee results and assumes no liability for any damage done due to the use of these instructions.
Disconnect the battery:
Remove the A/C vent above the stereo. You can use a plastic pry bar to apply pressure in the middle of the vent. This piece may put up a fight, but it is incredibly pliable and solid. Make sure to apply the most pressure in the middle (thickest part of the vent) and apply minimal pressure at other points on the vent if necessary.
The picture below is from the top down and shows where the tabs are on each side of the vent.
Pull the vent out slowly and disconnect the wires along the top/bottom of the vent. There are 2 connectors that run along the bottom of the vent that need to be removed.
Next, remove the side grey trim pieces that run the length of the shift cover. You can use a plastic pry bar to get under the base of trim piece. Lift up to release. Then pull towards the rear of the vehicle to release the tabs.
If you have a manual transmission then follow this step: Lift the trim piece surrounding the E-Brake. It has 2 clips on each side. Then pop off the shift cover as well.
Unscrew the shift ****. The shift **** has a pin inside the black locking collar that needs to be removed. This can be kind of a fight to push it out one side (without bending the pin). Once the pin is removed, take the black shift cover off.
For the automatic transmission cars, follow the instructions below.
Unscrew the shift **** and remove. Take the center console cover off by pulling up and releasing the tab. Unclip the connector from the bottom of the shift cover.
Remove the ashtray by unscrewing the 2 screws at the base of the ashtray. There is a connector you need to remove when you pull the ashtray out.
The entire A/C control unit and factory stereo are mounted in a bracket that has 4 screws that mount into the car’s center console. There are 2 screws at the top and 2 at the bottom. Un-screw those 4 screws and slowly pull the unit out. Once the unit is far enough out, unplug the 2 radio antenna cables and other connectors in the back of the unit. Once everything is disconnected, pull the entire unit out.
Below are the top 2 screws that need to be un-screwed to release the system.
Below are the bottom 2 screws that need to be unscrewed to remove the system.
Remove the screws that hold the factory radio into the metal bracket. You can discard the screws, you won't need those anymore. Remove the TPMS module at the top of the bracket. You can find new screws in the FlyAudio box. You can plug the TPMS module back into the car and tuck it off to the side. It helps to place the whole system on a cardboard box when putting the FlyAudio into the factory bracket. Clip the bottom portion of the FlyAudio system into bottom factory stereo piece. Screw the FlyAudio system into the factory bracket. Set that unit aside and we'll get back to it later.
Time to run the wiring for the GPS antenna, bluetooth microphone, and optional backup camera.
Remove all of the trim pieces along the front driver side door and rear driver door. Remove the side access panel in the front door. Remove the kick panel under the steering wheel.
Unclip the rear seatbelts and remove the backseat. Follow the factory wiring into the trunk to see where to run the wiring.
Once you do this, you can run the GPS antenna from where the headunit will end up, under the steering wheel, along the side panel with all of the other factory wiring, then rest it behind the passenger headrests in the rear window. We have found this is out of the way and gets great reception in the rear window. You can run the bluetooth microphone at the same time from where the headunit will be, under the steering wheel, and then up the Pillar. You don't have to remove the A-pillar cover, you can just tuck it under and run it up along the side. There are a couple different ways to mount it at the top of the A-pillar.
Start disassembling the trunk by removing the trunk liner. You can pop the buttons out of the liner and then you can remove the yellow trunk release. There is a trim piece separating the trunk side of the mechanism and the assembly itself, pry down to pop that cover off.
Find the connector that plugs into the driver side tail light assembly. Unplug the connector.
You are going to cut the plastic cover off of those 3 wires that go into the connector. You are going to solder the backup camera wiring into these wires. Identify the wires going into the connector as positive (yellow wire), negative (black and white), and ignore the other wire. Get the backup camera and identify the positive (red) and negative (black) wire. Solder the respective wires together. You will also solder the signal wire (provided by Automax Service, other retailers are NOT providing these currently) to the yellow (positive) wire and run that up to the front of the vehicle and connect it to the wire labeled "BACK".
Here is a picture all bundled up:
Once you do the wiring, you can run the wire for the actual camera thru the license plate light or the trunk button. We use double sided sticky tape to adhere the camera. We wait until everything is tested before we align the backup camera to make sure that it shows a straight picture on the display.
One of the last things to do is run the wiring for the USB, iPod, and RCA cables in the glovebox. You want to remove the shelf in the glovebox by popping it up and pulling to the left. Then remove the door in front of the cabin filter.
Last edited by Automax Service; Feb 9, 2010 at 02:37 PM.
Thread Starter
Former Sponsor
Joined: Nov 2009
Posts: 485
Likes: 0
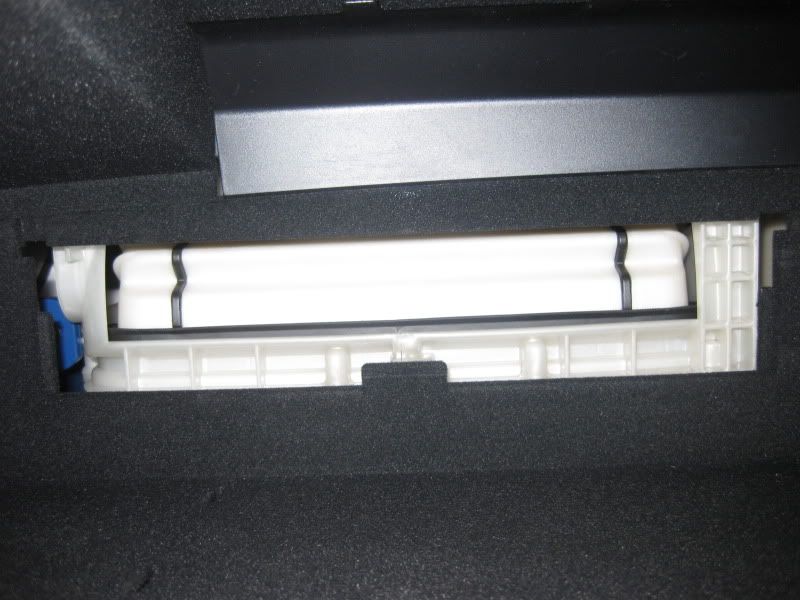
To the left of the air filter there is room to drop the wiring down and pull it thru to the main dash area.
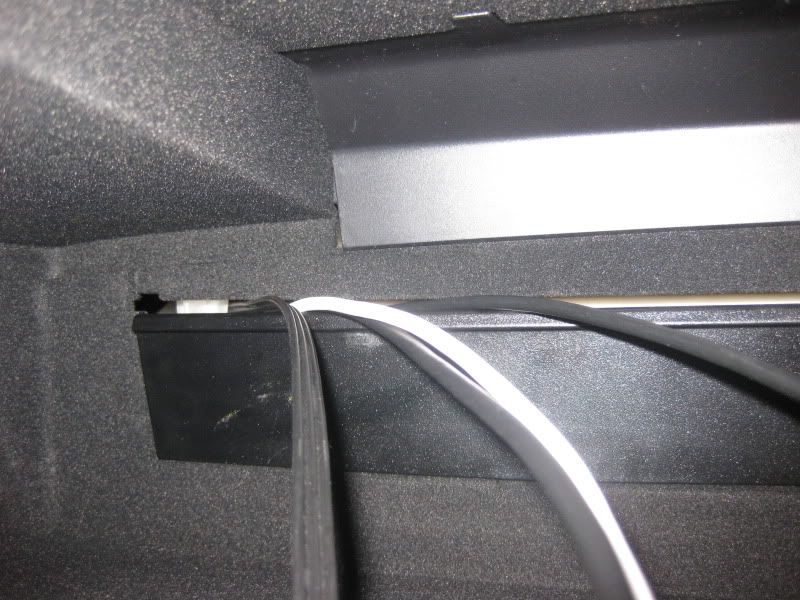
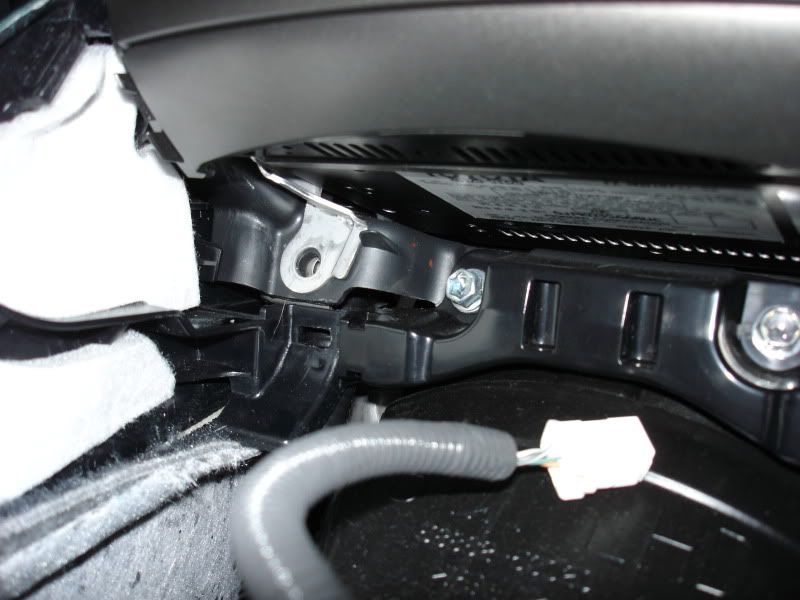
It's tough getting your hands in the main dash area to get the wiring, but using a flashlight helps to see back in there. Here is a picture of where the wiring should come thru.
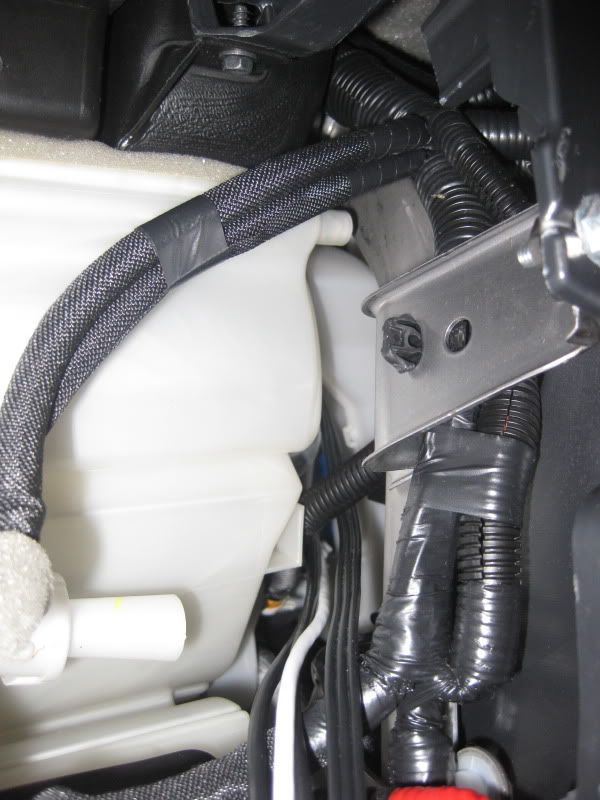
Ok, now that all of the wiring is installed, it’s time to install the head unit itself. It helps to have 2 people for this part, the last thing you want to do after taking the time to run all the wires is bang up your dash because the unit slipped out of your hands. In the box there should be a 6-10 inch cable with a clip on each end, this is an extension of the factory cable. Plug it into the vehicles harness, this will give you a little more room to install the system. Plug in all the connecters, there is only one place for each of them to go. There is a lot of wiring and not very much space behind the system. It helps to stuff some of the wiring to the left and right of the system, as far back towards the steering wheel or glovebox as possible. Moving as much as possible is crucial to getting the unit to fit just like your factory stereo. Tighten the top left, then bottom right, then top right, and then bottom left. If it does not sit flush the 1st time, you can play around with where the wiring is and it will get better. I would recommend reconnecting the battery and testing everything before you put everything back together.
There are probably some holes in these instructions, so for those that have already done it, let me know if I need to add more details somewhere. Also, if you are thinking about doing this, feel free to ask any questions. As always, if you are installing this and need some help, give me a call at 714-720-2797 and I'd be happy to help.
Last edited by Automax Service; Feb 9, 2010 at 02:38 PM.

Driver School Candidate
Joined: Jan 2010
Posts: 11
Likes: 0
From: ON
Hi Mat,
Great Write up.
A few notes to add:
1. First thing before installing, buy a round connector that will fit into the �Back� labeled cable and crimp it on the signal wire that will go to the reverse light. You can just cat the wire and use a simple connection but this one will be better.
2. Before starting to pull the A/C vent push down the four tabs located on the top section of the vent. The tabs can are accessed from through the vent push them down with a small flat screwdriver.
3. The microphone can be installed in the dome similar to the OEM installation. To do that, unscrew two screws that are located covered in the back side of the sunglasses compartment. Now pray down the opposite section of the dome and fit the microphone. You can take out the microphone foam as there is a screen for the microphone in the dome. The quality of the microphone is not the best and the sound is quite low (it will be the same if the mike is on the A pillar but the install is cleaner this way.
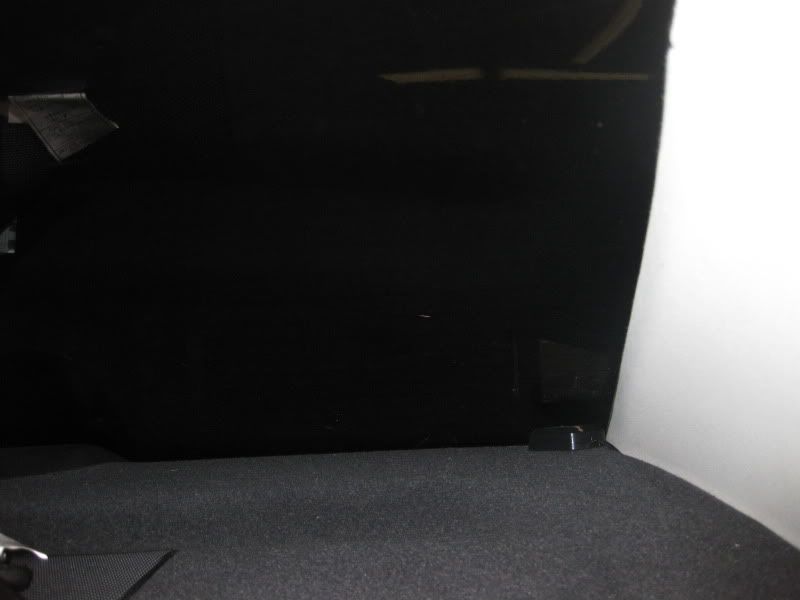
4. To run the wires to the camera you on from the inside of the car to the trunk can be done through one of the black plastic covers behind the rear seat back section.
5. Remove the rear seat by pulling up on the front lip of the bottom part of the seat. Then remove the screws that hold down the seatbelts just under the back seat and remove the 4 screws holding the back part of the rear seat and pull it up.
6. The black box located on the top left side of the OEM radio frame will have to be moved out in order to fit the new unit.
7. Once all is back and the battery is connected, reinitiate the windows.
Great Write up.
A few notes to add:
1. First thing before installing, buy a round connector that will fit into the �Back� labeled cable and crimp it on the signal wire that will go to the reverse light. You can just cat the wire and use a simple connection but this one will be better.
2. Before starting to pull the A/C vent push down the four tabs located on the top section of the vent. The tabs can are accessed from through the vent push them down with a small flat screwdriver.
3. The microphone can be installed in the dome similar to the OEM installation. To do that, unscrew two screws that are located covered in the back side of the sunglasses compartment. Now pray down the opposite section of the dome and fit the microphone. You can take out the microphone foam as there is a screen for the microphone in the dome. The quality of the microphone is not the best and the sound is quite low (it will be the same if the mike is on the A pillar but the install is cleaner this way.
4. To run the wires to the camera you on from the inside of the car to the trunk can be done through one of the black plastic covers behind the rear seat back section.
5. Remove the rear seat by pulling up on the front lip of the bottom part of the seat. Then remove the screws that hold down the seatbelts just under the back seat and remove the 4 screws holding the back part of the rear seat and pull it up.
6. The black box located on the top left side of the OEM radio frame will have to be moved out in order to fit the new unit.
7. Once all is back and the battery is connected, reinitiate the windows.
quick question, there are two sets of rca output, one about 6-8 inches and other one is the longer one. The shorter one you plug it in the harness with left (white) and right (red) channels. Where you plug it in the video cable (yellow)? I don't see anywhere I can plug the yellow cable.
Thread Starter
Former Sponsor
Joined: Nov 2009
Posts: 485
Likes: 0
Hi Mat,
Great Write up.
A few notes to add:
1. First thing before installing, buy a round connector that will fit into the “Back” labeled cable and crimp it on the signal wire that will go to the reverse light. You can just cat the wire and use a simple connection but this one will be better. Good call, we have those around the shop, I forgot that most people wouldn't just have that handy.
2. Before starting to pull the A/C vent push down the four tabs located on the top section of the vent. The tabs can are accessed from through the vent push them down with a small flat screwdriver. We are still contemplating if this is the best way to get this out. We have done it with depressing the tabs and without, either way its not fun
3. The microphone can be installed in the dome similar to the OEM installation. To do that, unscrew two screws that are located covered in the back side of the sunglasses compartment. Now pray down the opposite section of the dome and fit the microphone. You can take out the microphone foam as there is a screen for the microphone in the dome. The quality of the microphone is not the best and the sound is quite low (it will be the same if the mike is on the A pillar but the install is cleaner this way.
4. To run the wires to the camera you on from the inside of the car to the trunk can be done through one of the black plastic covers behind the rear seat back section.
5. Remove the rear seat by pulling up on the front lip of the bottom part of the seat. Then remove the screws that hold down the seatbelts just under the back seat and remove the 4 screws holding the back part of the rear seat and pull it up.
6. The black box located on the top left side of the OEM radio frame will have to be moved out in order to fit the new unit. I think you are referring to the TPMS module. We took this off in the beginning, attached it to the car and tucked it away between the main console and the glovebox, there is just enough space to get it up in there.
7. Once all is back and the battery is connected, reinitiate the windows.
quick question, there are two sets of rca output, one about 6-8 inches and other one is the longer one. The shorter one you plug it in the harness with left (white) and right (red) channels. Where you plug it in the video cable (yellow)? I don't see anywhere I can plug the yellow cable.
There is a short set of red/white plugs on the end of the main harness, that is an output for a sub (I think).
What are you trying to plug in that you are having trouble with?
Last edited by Automax Service; Feb 10, 2010 at 08:27 AM.
Trending Topics
ClubLexus Stories
Celebrating Lexus & Toyota from Around the Globe

Lexus NX 350h: A Fuel-Sipping Secret Hot Hatch???
Michael S. Palmer
5 Best & 5 Worst Lexus Daily Drivers
Joe Kucinski
Top 5 Hottest Lexus & Toyotas in 2026 (Hardest To Buy)
Brett Foote
2026 Lexus IS 350 F Sport Review: The Last of Its Kind Still Rocks
Michael S. Palmer
Top 10 Most Confusing Things Lexus Has Ever Done!
Joe Kucinski
2026 Lexus ES Review: Lexus Re-Embraces Founding Principles
Michael S. Palmer
10 Lexus Bargains That are Cheaper Than a New Toyota RAV4
Joe Kucinski
8 Weirdest Things Lexus Has Ever Built
Verdad Gallardo
10 Lexus Designs That Have Aged Like Fine Wine
Verdad Gallardo
Rookie
Joined: Jan 2010
Posts: 73
Likes: 0
From: TX
Anyone have any good tips for taking out the air vents over the center console? It's just a beast to take in an out and I was wondering if anyone who has done this multiple time knows any good tricks they can share.
Thread Starter
Former Sponsor
Joined: Nov 2009
Posts: 485
Likes: 0
I am going to ask Nick, my Lexus technician who has installed all of them for Automax, for his input. This is definitely one of the more tedious parts of the install.
i've seen tommy from musicbox use a flathead to pop the clips out, then he used a hook-type tool to pull out the vent
Rookie
Joined: Jan 2010
Posts: 73
Likes: 0
From: TX
A hook-type tool you say? I'm curious as to what Nick from Automax is going to respond back with. This is one the "tightly guarded" secrets from Lexus it seems. Us non dealer types always end up knicking up ours vents bc they will not say how they do it...so I'm very eager to hear how the pros are doing it. I always sweat having to take mine out.
Thread Starter
Former Sponsor
Joined: Nov 2009
Posts: 485
Likes: 0
I had a question from a client about removing the trunk liner. The yellow clip HAS to come out before the liner will come down. There is a wire with a small ball on the end of it that secures it into the carrier on the yellow clip, you have to work that yellow tab off, pull it off, then pull the trunk liner down.

