DIY: AFR Wideband and Ethanol content gauge install
 04-23-18, 09:01 AM
#1
Intermediate
Thread Starter

By reading this you accept all responsibility with any event related to your own vehicle, knowingly assuming all risks.
For this install I used zeitronix hacker series gauges due to lack of space in the ISF and also because I prefer no gauge pods.
http://www.zeitronix.com/Products/Products.htm
Let's start with the ethanol content analyzer.
DEPRESSURIZE YOUR FUEL SYSTEM BEFORE CONTINUING !!!!!!!!!!!!!!!!!!!!!!!!!!!!!!!!!!!!!!!!!!!!!!!!!!!!!!!!!!!!!!!!!!!!!!!!!!!!!!!!!!!!!!!!!!!!!!!!!!!!!!
DISCONNECT FUEL RESISTOR BY AIRBOX, PULL FUEL PUMP FUSE, OPEN FUEL CAP, START CAR REPEATEDLY UNTIL IT WILL NOT RUN/FIRE. CLEAR CODES WHEN FINISHED.
First you will need access to the underside of the vehicle. I'm doing this on a lift, so it's significantly easier.
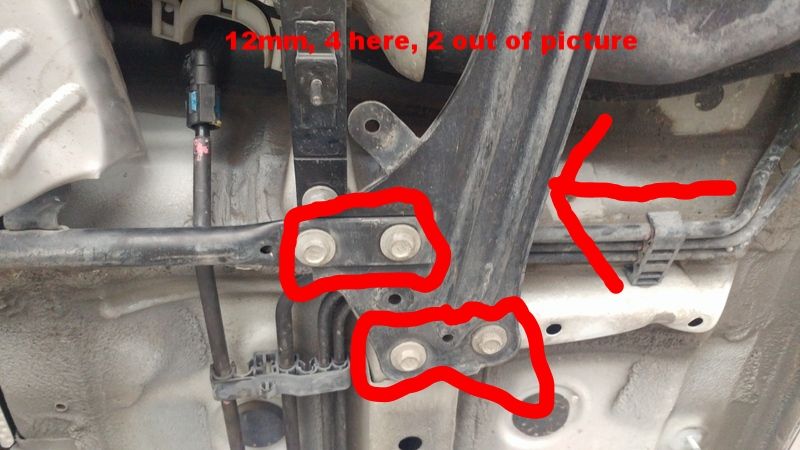
On the passenger side remove both lower splash shields that cover the fuel and brake lines.
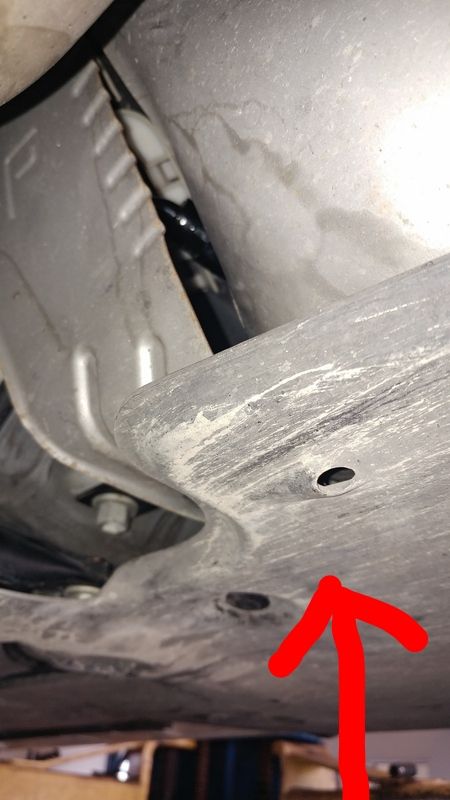
We also need to remove this bracket.
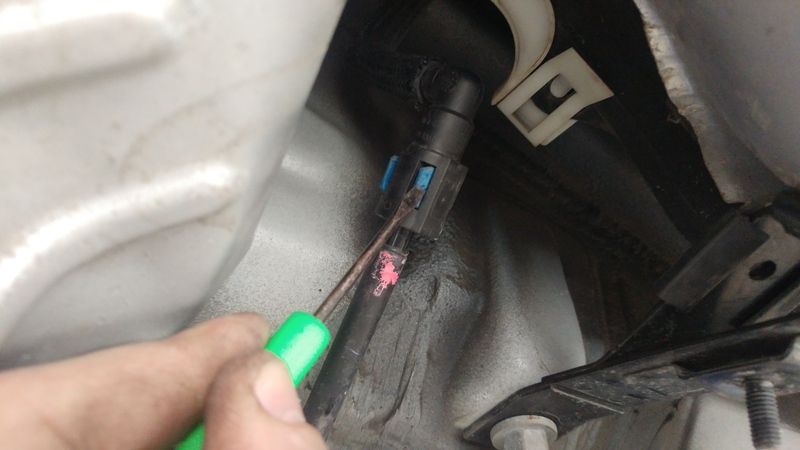
Locate fuel tank quick disconnect.
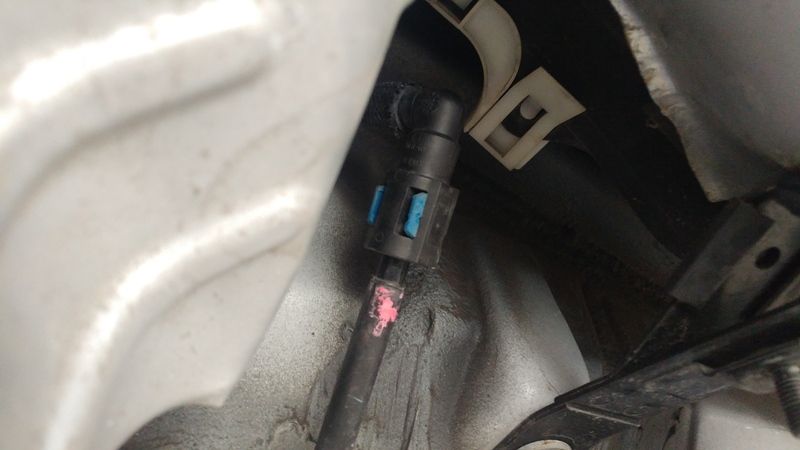
Use a pick, small screw driver, or your fingers to squeeze blue clip past housing lock. YOU WILL LEAK FUEL!!
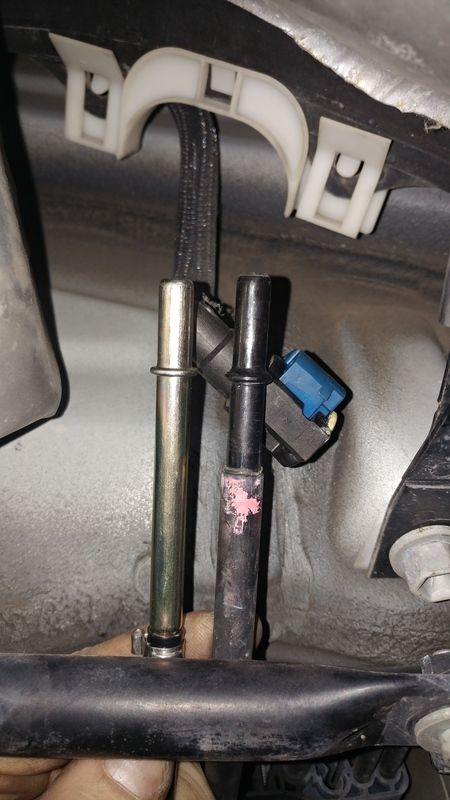
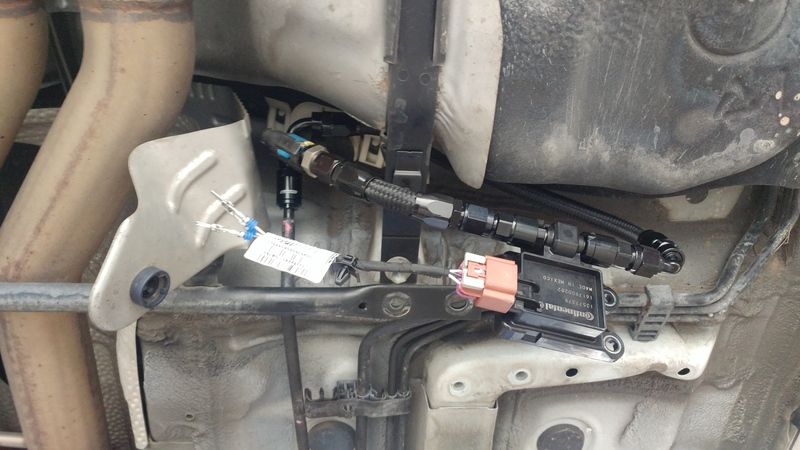
You will now be left with this. The fitting im holding up here on the left was a preliminary idea. I wanted the least amount of restriction possible here, so it was not used. But it became helpful in finding the correct fittings.
It's time to gather your parts.
You will need of course the ethanol content analyzer, the ethanol sensor (Note GM part number works totally fine!), 6AN line, 6an straight, 90s, 120s. However you decide to route it. Doing things again I would've gotten different angled fittings, but it's done and functional. More importantly here are the quick connect fittings that will attach to the sensor itself, pictured below.
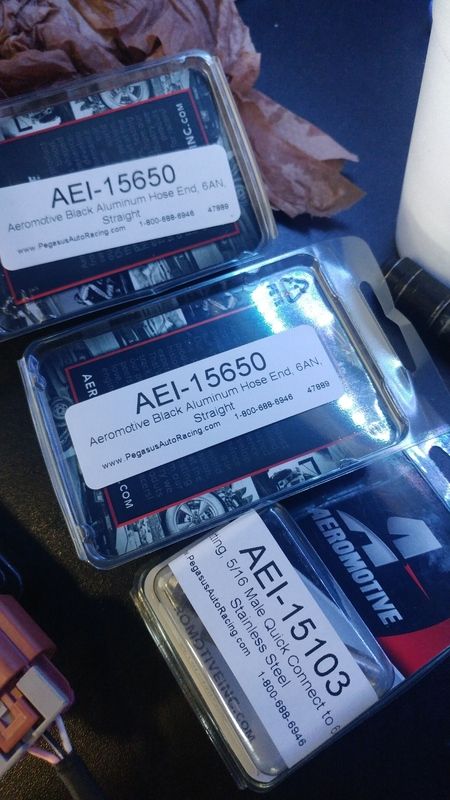
This quick connect is for the 5/16 OE line that we just took apart.

More fittings.
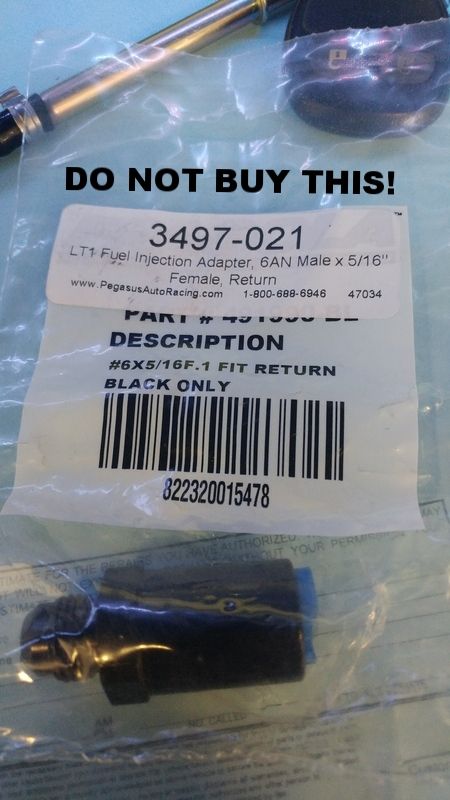
DO NOT BUY THIS STYLE
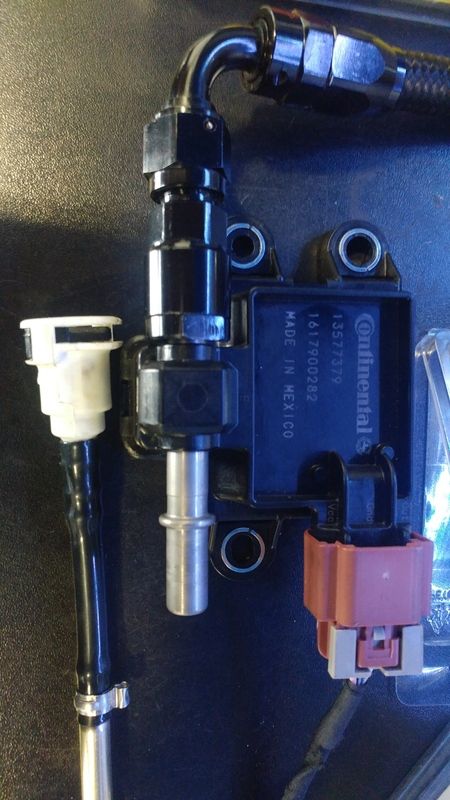
Ethanol sensor.
Start by finding your ideal mounting location, I wanted the sensor out of harms way, thus my positioning. Also, the bolts holding the sensor down are easily accessed under the rear passenger carpet for any servicing need.
If you do not know how to make AN lines, stop. Take it to a professional.
Here I'm mocking up fittings, and looking for an ideal routing of wiring and lines. There are later revisions I made. Note you do not need the pictured sensor pigtail as the connector is included with the zeitronix kit.
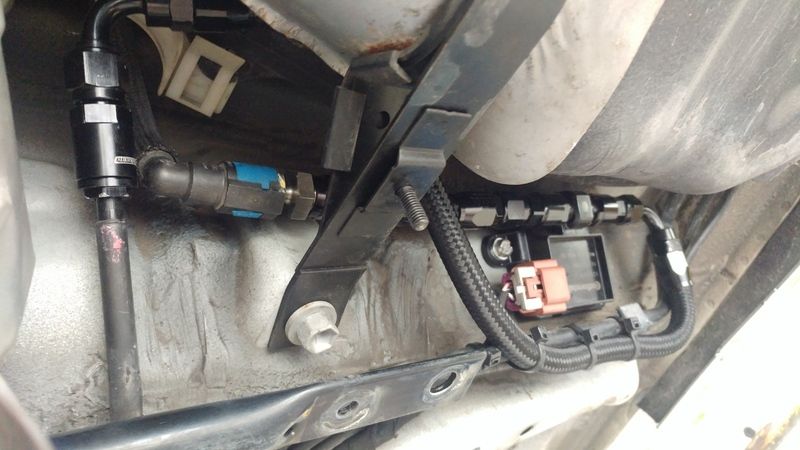
In the above picture, I really wasn't thinking why I routed the wires like this. Instead, they make these plastic spacers for wiring to run through sheet metal.
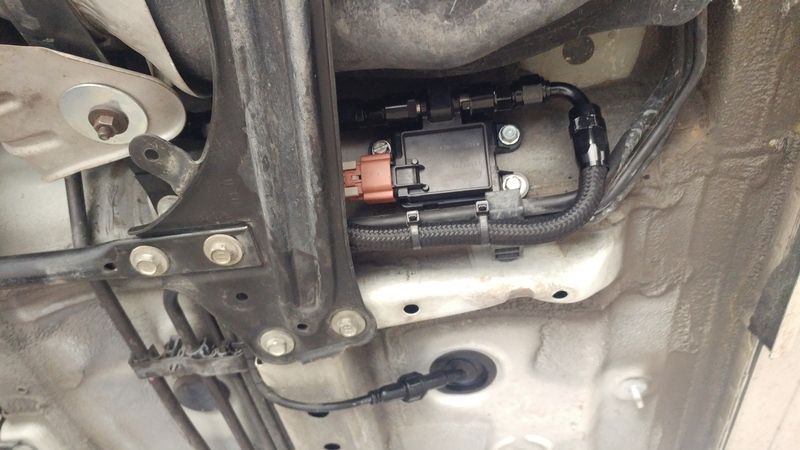
Revised wire routing below.
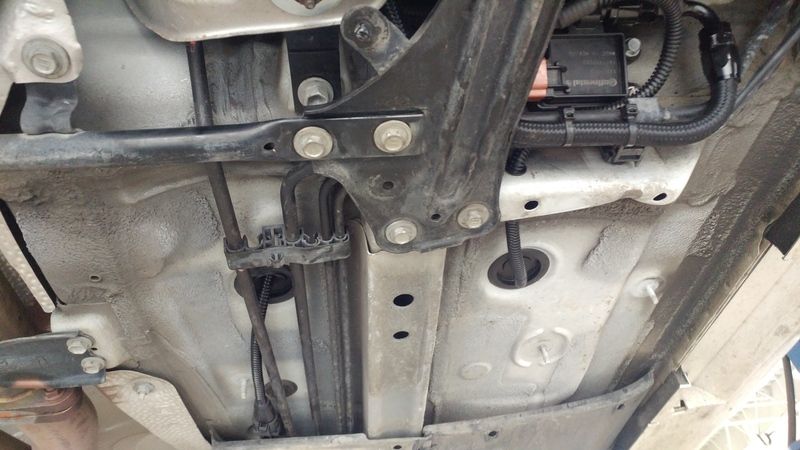
Here you will see both grommets which access directly to the floor pan of the passenger rear seat.
Plumbed up? Go start the car, verify no leaks.
Ok, so, we're a bit ahead of ourselves. Where did those wires go?
Passenger rear door, open door, lower sash door molding, gently remove, pull up rear seat and remove if you like, otherwise it can just hang there.
You will have to apply some force to manipulate the carpet upwards thus creating a air pocket if you will, wedge something in there or beat the **** out of the carpet till it conforms to your liking.
I ran the wiring through the last two pictured grommets, sorry no pictures but you'll obviously see them.
We are going over to the center console with the wiring, remove all your crap in the center console, remove the trap door with a 90* pick(not 100% necessary but helps feed wire, this requires some force.
Remove the rear vent/ ashtray - it will just pull straight out with the center console lid open.
You should've exposed the 4 10mm bolts. Remove them, this will allow you to lift the center console to feed the wiring up by the shifter.
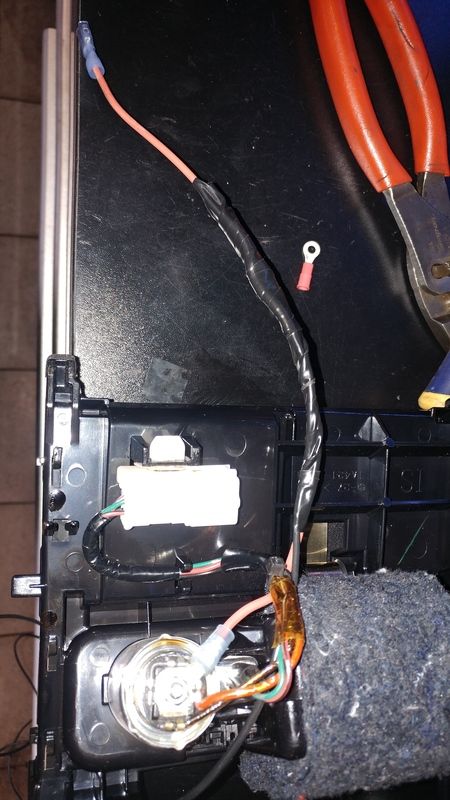
Ok, got your modules where you want them?
Steal a good ground under the shifter assembly, there is TONS of room to place modules, even with my GROM audio bluetooth and both units, i could easily fit 2 to 3 more modules under the shifter/radio.
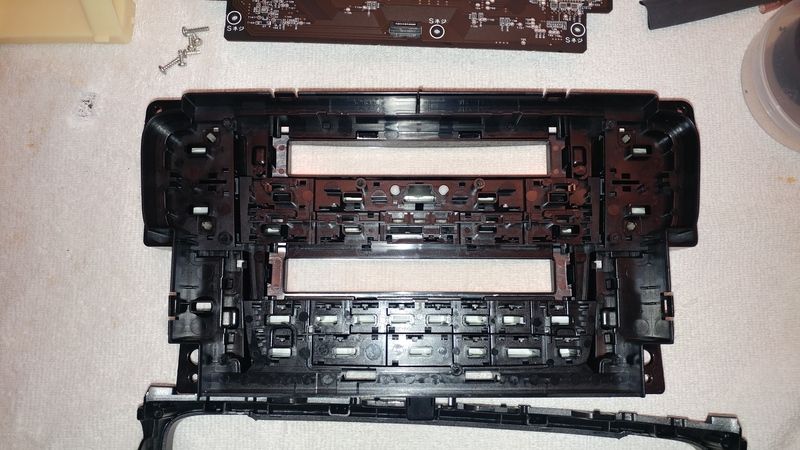
Remove radio (you haven't yet?). Sorry, Google it! I can only spoon-feed so much.
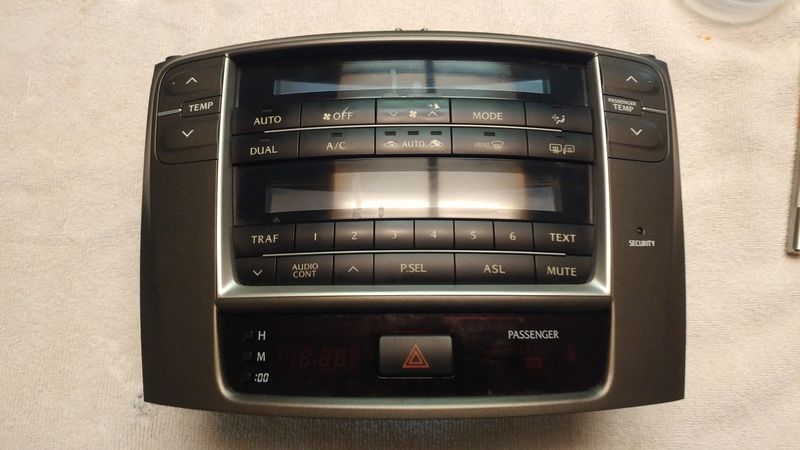
Yes, FFS I dont have nav, it was an option. Moving on, the clock is all we are interested in. Go inside, find a nice table with this as there are many delicate pieces and screws.
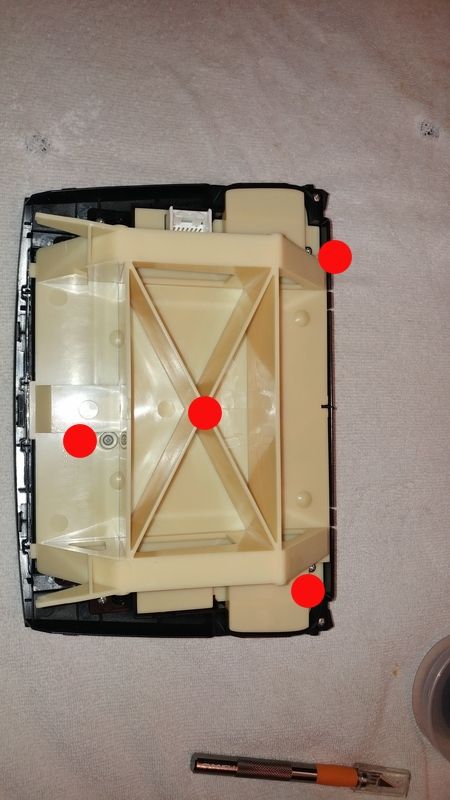
Bring that Dremmel tool.
Remove screws by red dots, Totally forgot how many are there IIRC 6. Easy.
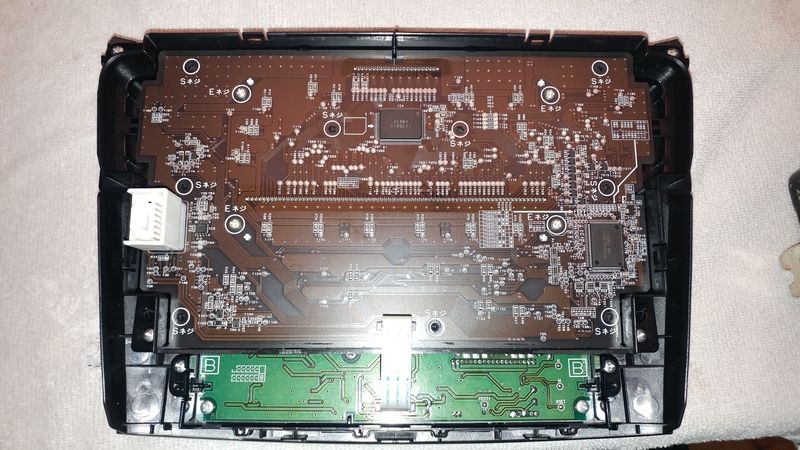
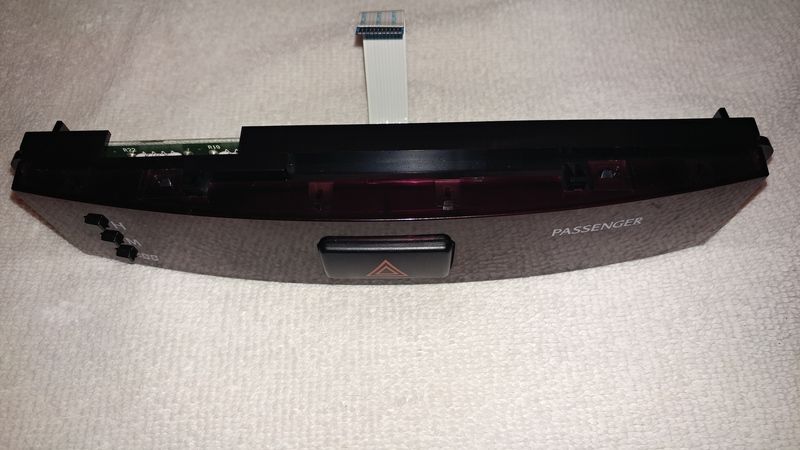
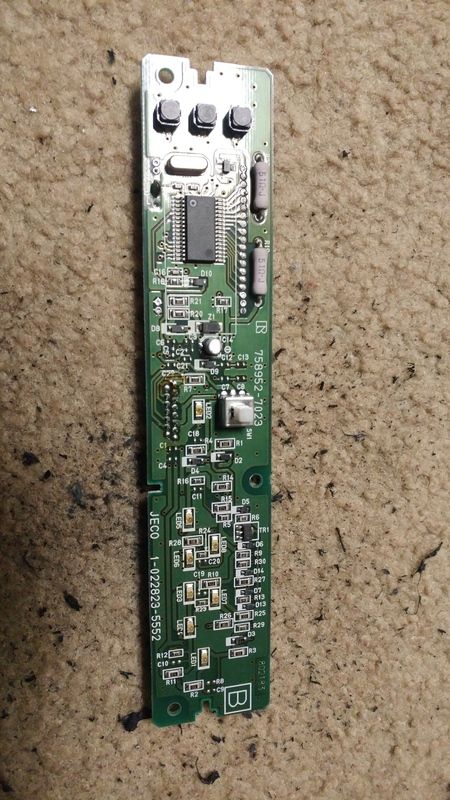
Now the circuit board, remove the ribbon strip gently from either side, doesn't matter.
Next remove the remaining screws.
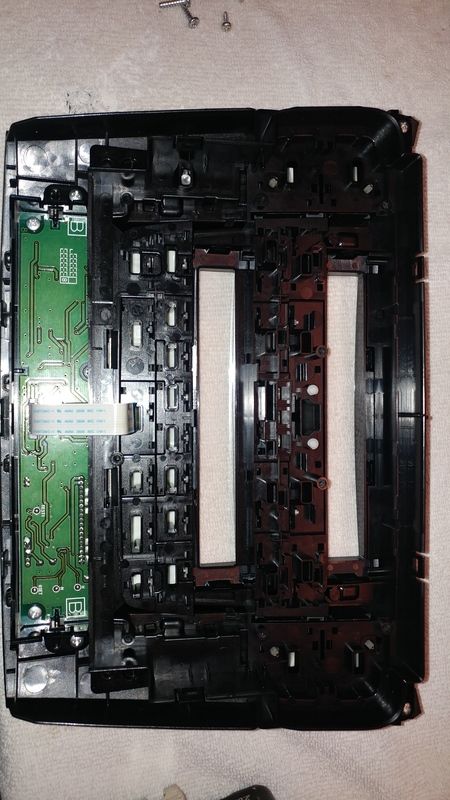

Ok, the next step is tricky. I reccomend a friend helping. All we are trying to do here is break the contact from the OE clock pins and circuit board soldering joints. Yeah you can use a solder sucker and all that, but the fastest way is to simply heat the solder in quick passes with a micro torch. DO NOT BURN THE BOARD!!!!
Once you've seperated the OE clock toss it in your parts bin.
Get trimming!
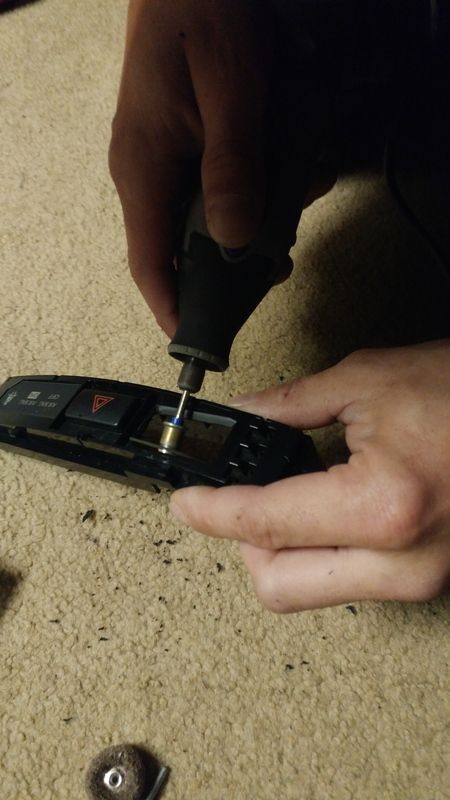
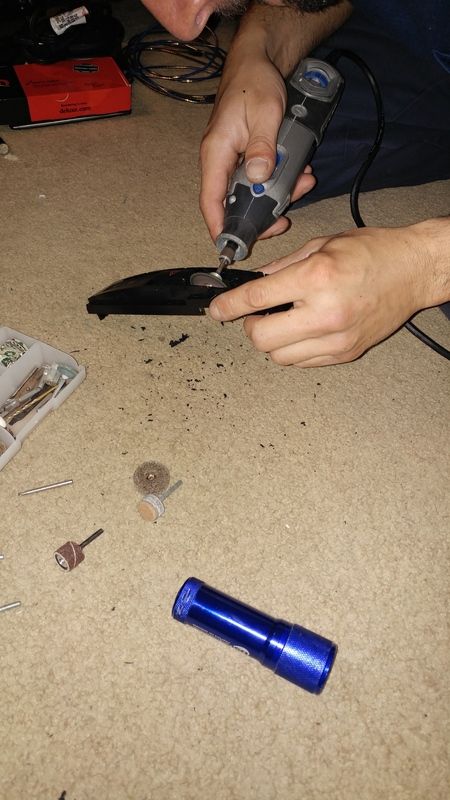
I lost my patience and my good friend took over the fine details, the gauge fits perfectly inside, mount how you'd like, I used a screw since it won't be visible unless you have a police flashlight on it.
Power source, cigarette lighter. Note my method of connection here. This is by FAR the best way to steal power from the cigarette lighter due to it's less invasive nature. Becareful removing the nut as the assembly comes apart. I made a Y splice here, one to feed each module.
Ground is ground, find a nice clean bolt. For your modules, pretty sure the one i used held a yaw (iirc) module down.
Stay tuned for more.
For this install I used zeitronix hacker series gauges due to lack of space in the ISF and also because I prefer no gauge pods.
http://www.zeitronix.com/Products/Products.htm
Let's start with the ethanol content analyzer.
DEPRESSURIZE YOUR FUEL SYSTEM BEFORE CONTINUING !!!!!!!!!!!!!!!!!!!!!!!!!!!!!!!!!!!!!!!!!!!!!!!!!!!!!!!!!!!!!!!!!!!!!!!!!!!!!!!!!!!!!!!!!!!!!!!!!!!!!!
DISCONNECT FUEL RESISTOR BY AIRBOX, PULL FUEL PUMP FUSE, OPEN FUEL CAP, START CAR REPEATEDLY UNTIL IT WILL NOT RUN/FIRE. CLEAR CODES WHEN FINISHED.
First you will need access to the underside of the vehicle. I'm doing this on a lift, so it's significantly easier.
On the passenger side remove both lower splash shields that cover the fuel and brake lines.

We also need to remove this bracket.

Locate fuel tank quick disconnect.

Use a pick, small screw driver, or your fingers to squeeze blue clip past housing lock. YOU WILL LEAK FUEL!!

You will now be left with this. The fitting im holding up here on the left was a preliminary idea. I wanted the least amount of restriction possible here, so it was not used. But it became helpful in finding the correct fittings.

It's time to gather your parts.
You will need of course the ethanol content analyzer, the ethanol sensor (Note GM part number works totally fine!), 6AN line, 6an straight, 90s, 120s. However you decide to route it. Doing things again I would've gotten different angled fittings, but it's done and functional. More importantly here are the quick connect fittings that will attach to the sensor itself, pictured below.

This quick connect is for the 5/16 OE line that we just took apart.

More fittings.
DO NOT BUY THIS STYLE

Ethanol sensor.

Start by finding your ideal mounting location, I wanted the sensor out of harms way, thus my positioning. Also, the bolts holding the sensor down are easily accessed under the rear passenger carpet for any servicing need.
If you do not know how to make AN lines, stop. Take it to a professional.
Here I'm mocking up fittings, and looking for an ideal routing of wiring and lines. There are later revisions I made. Note you do not need the pictured sensor pigtail as the connector is included with the zeitronix kit.


In the above picture, I really wasn't thinking why I routed the wires like this. Instead, they make these plastic spacers for wiring to run through sheet metal.
Revised wire routing below.
Here you will see both grommets which access directly to the floor pan of the passenger rear seat.

Plumbed up? Go start the car, verify no leaks.
Ok, so, we're a bit ahead of ourselves. Where did those wires go?
Passenger rear door, open door, lower sash door molding, gently remove, pull up rear seat and remove if you like, otherwise it can just hang there.
You will have to apply some force to manipulate the carpet upwards thus creating a air pocket if you will, wedge something in there or beat the **** out of the carpet till it conforms to your liking.
I ran the wiring through the last two pictured grommets, sorry no pictures but you'll obviously see them.
We are going over to the center console with the wiring, remove all your crap in the center console, remove the trap door with a 90* pick(not 100% necessary but helps feed wire, this requires some force.
Remove the rear vent/ ashtray - it will just pull straight out with the center console lid open.
You should've exposed the 4 10mm bolts. Remove them, this will allow you to lift the center console to feed the wiring up by the shifter.
Ok, got your modules where you want them?
Steal a good ground under the shifter assembly, there is TONS of room to place modules, even with my GROM audio bluetooth and both units, i could easily fit 2 to 3 more modules under the shifter/radio.
Remove radio (you haven't yet?). Sorry, Google it! I can only spoon-feed so much.

Yes, FFS I dont have nav, it was an option. Moving on, the clock is all we are interested in. Go inside, find a nice table with this as there are many delicate pieces and screws.
Bring that Dremmel tool.
Remove screws by red dots, Totally forgot how many are there IIRC 6. Easy.

Now the circuit board, remove the ribbon strip gently from either side, doesn't matter.
Next remove the remaining screws.


Ok, the next step is tricky. I reccomend a friend helping. All we are trying to do here is break the contact from the OE clock pins and circuit board soldering joints. Yeah you can use a solder sucker and all that, but the fastest way is to simply heat the solder in quick passes with a micro torch. DO NOT BURN THE BOARD!!!!
Once you've seperated the OE clock toss it in your parts bin.

Get trimming!


I lost my patience and my good friend took over the fine details, the gauge fits perfectly inside, mount how you'd like, I used a screw since it won't be visible unless you have a police flashlight on it.
Power source, cigarette lighter. Note my method of connection here. This is by FAR the best way to steal power from the cigarette lighter due to it's less invasive nature. Becareful removing the nut as the assembly comes apart. I made a Y splice here, one to feed each module.
Ground is ground, find a nice clean bolt. For your modules, pretty sure the one i used held a yaw (iirc) module down.

Stay tuned for more.
Last edited by viprez586; 04-23-18 at 08:50 PM.

The following 3 users liked this post by viprez586:
04-23-18, 09:02 AM
#2
Intermediate
Thread Starter

Ok, so I should mentioned the clock location is my AFR display.
Worthy mention is that if you are running O2 sims you can pull the o2 sensor and zip tie it to the head shield under the car so it still sees the o2 heater circuit as functional. Then simply insert your Wbo2. Bam no welding required - perfect for those who don't own/have access to a welder.
Since we don't have many other places to go I was looking for an area that I could shine the Ethanol content through. I chose the shifter since a LED shines through a reflector and displays PRND. Looking back, I should've just mounted it in the back of the glovebox or cventer console storage since im not 100% happy with the outcome.
There is a lot of cutting involved and I haven't dug too deep to find a replacement so I can change this mounting spot without buying the whole carbon fiber shifter assembly cover.
If I get enough request I'll go more in depth, but honestly I dont see many people doing this since it requires a lot of patience to get the window perfect dimensionally and brightness wise.


Last edited by viprez586; 04-24-18 at 08:32 PM.


The following users liked this post:
viprez586 (04-23-18)
 03-31-23, 12:49 PM
#7
Intermediate
Thread Starter
Yeah most definitely!
In the event a connection would fail, fuel isn't leaking into a hot engine bay as a significant fire hazard.
A leak will be significantly easier to visually see, given the location vs fuel having to drip it's entire pathway out of the engine compartment and splash shields.
My location would hit 1 splash shield that has built in drain holes.
The following 2 users liked this post by viprez586:
benvilla14 (03-31-23),
Positron (03-31-23)
Trending Topics

Thread
Thread Starter
Forum
Replies
Last Post