Installed my Wald "Style" spoiler today...
 04-24-13, 01:26 PM
#1

I did not include every step, as removal of the old spoiler is pretty simple. No lasagna noodles were harmed during this installation.
Ok....so decided to spend my first day of my holiday's this year and install my Wald Style spoiler. Remembering nothing is perfect and your going to be saving hundreds of dollars from the having someone else install this. I hope this may help the next guy, that wants to try this.
About 3 hours in total time, from stripping the trunk garnish to the finished product.
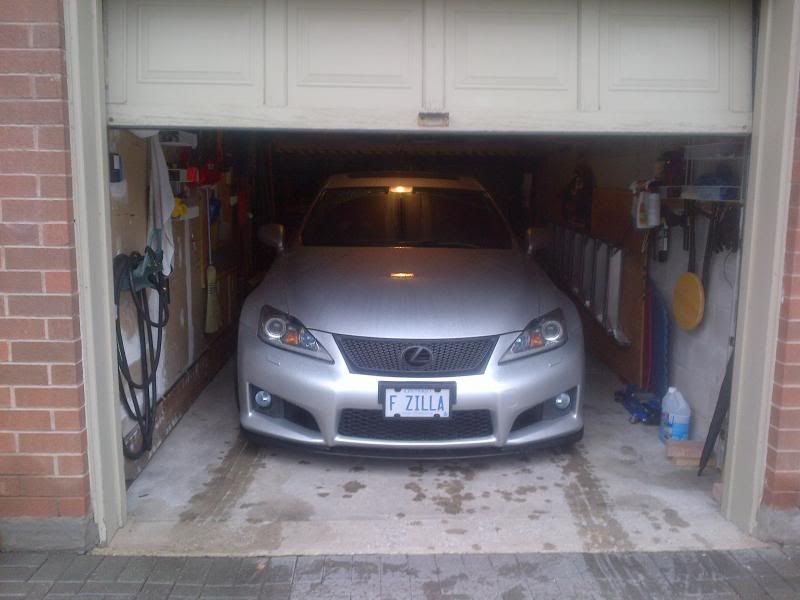
Step 1 - Wake up the car!
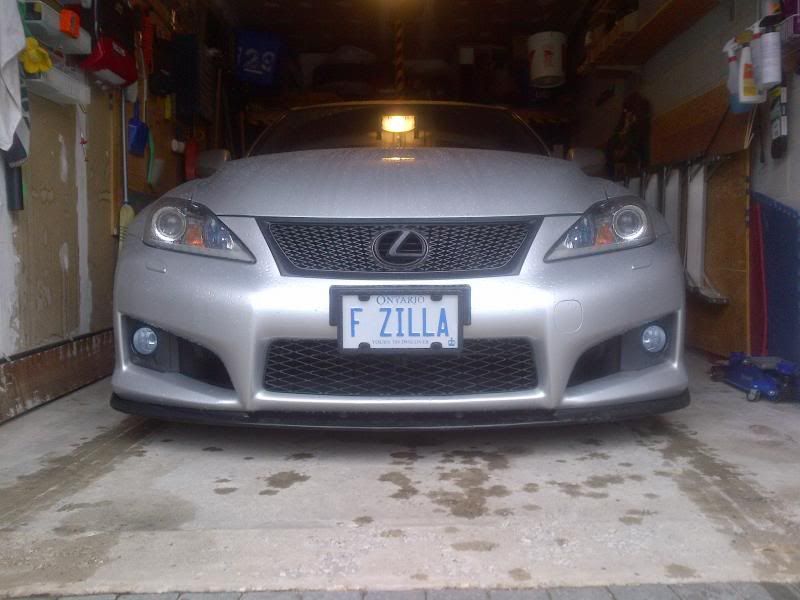
Step 2 - Make sure the paint matches, and live with the wavy crappy Taiwan body work!
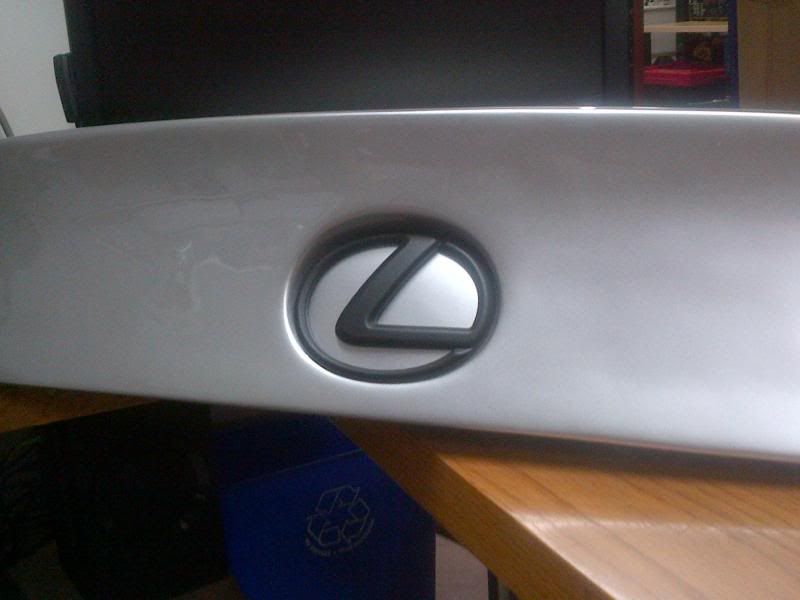
Step 3 - Transfer the logo and "Plasti-dip" if desired.
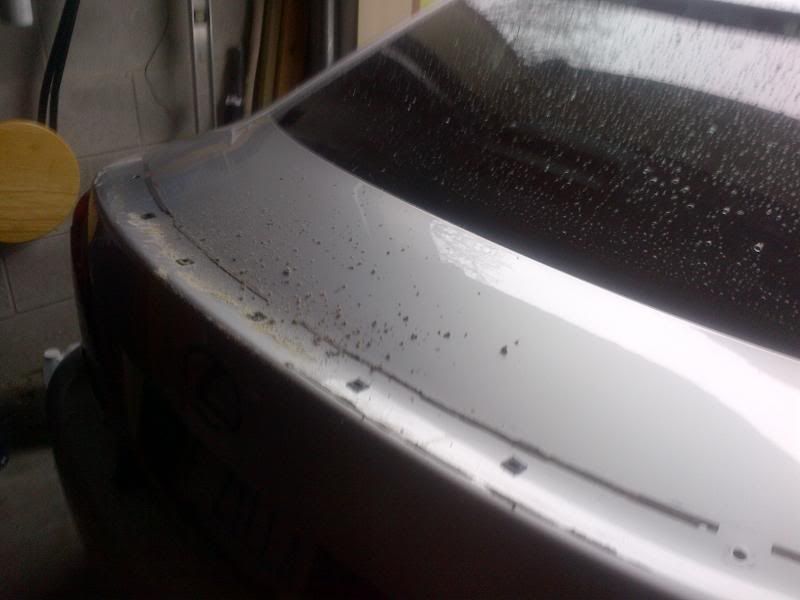
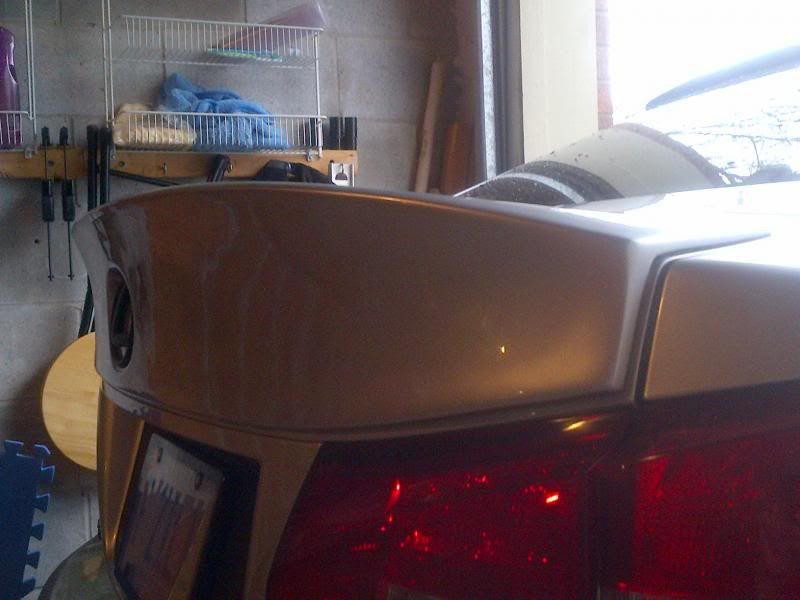
Step 4 - Remove the old spoiler - and wonder how your going to remove about 12 feet of factory 3M foam tape.
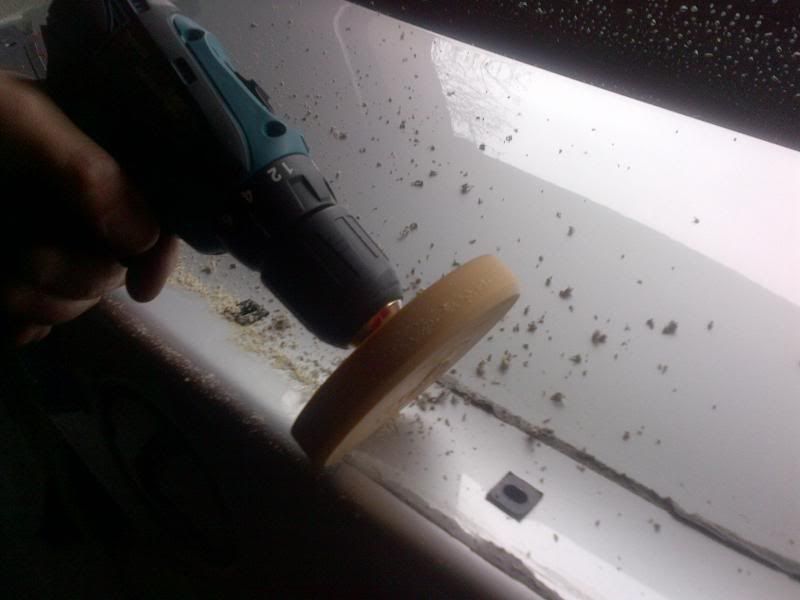
Step 5 - Load up the pin stripping wheel in my drill (basically a giant pencil eraser)
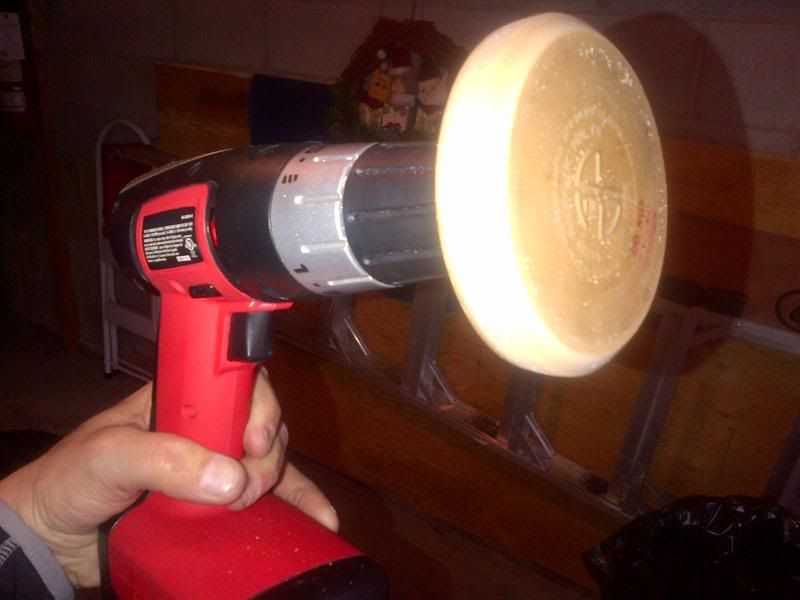
Step 6 - Start removing the tape! I had 3 drills, as my battery died - the wheel strips away all of the tape in about 10 minutes, with no chemicals, and will not mare the painted surface.
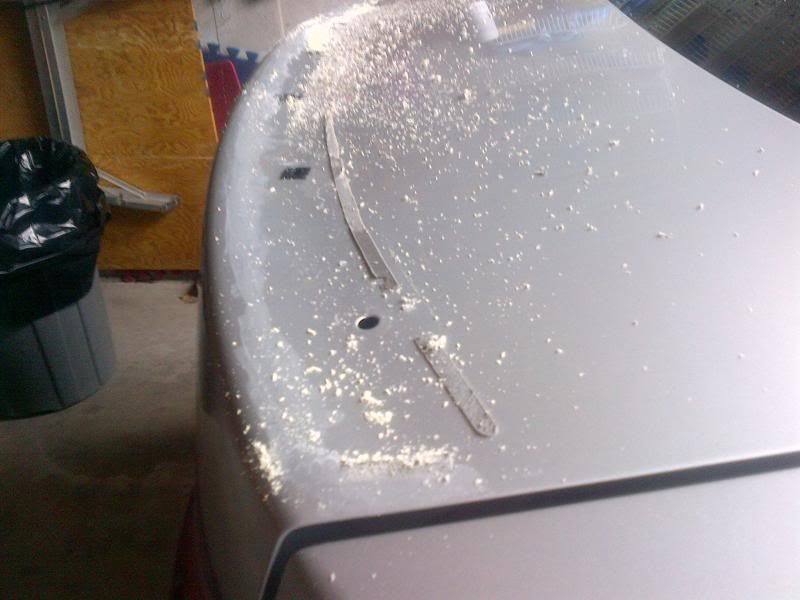
Step 7 - Clean up the surface, and then I used some finishing compound on my Porter/ Cable to remove any wax and eraser marks. I then cleaned the entire work area with Alcohol to prep for the 3M tape. I also covered the two outer holes with vinyl to prevent any water seepage. The other holes are filled with rubber plugs from the old spoiler set up.
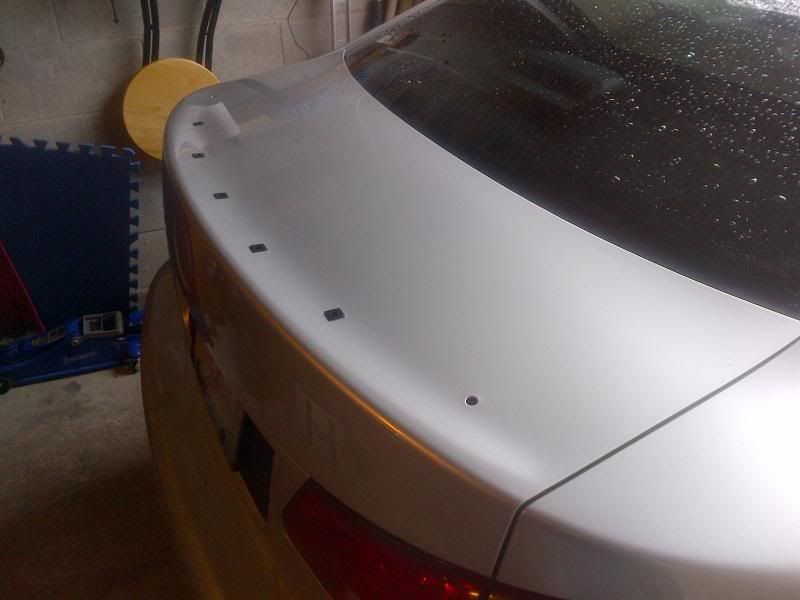
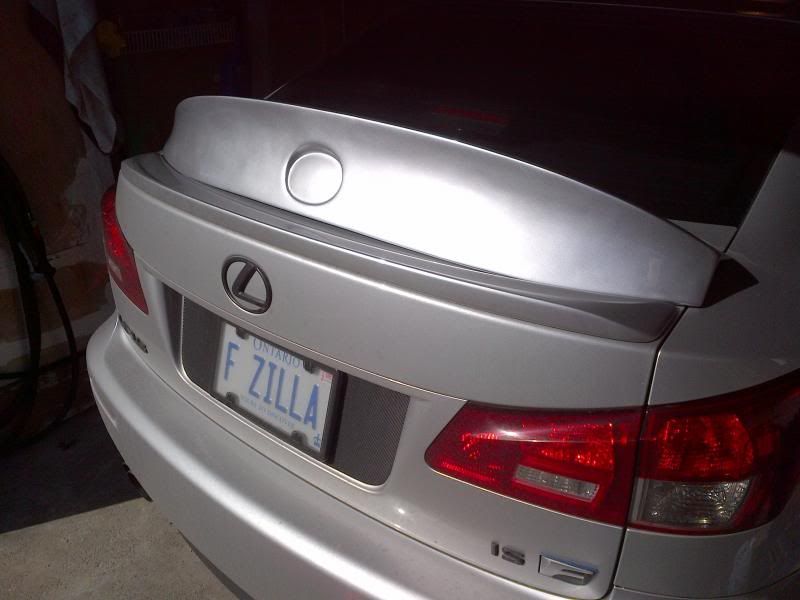
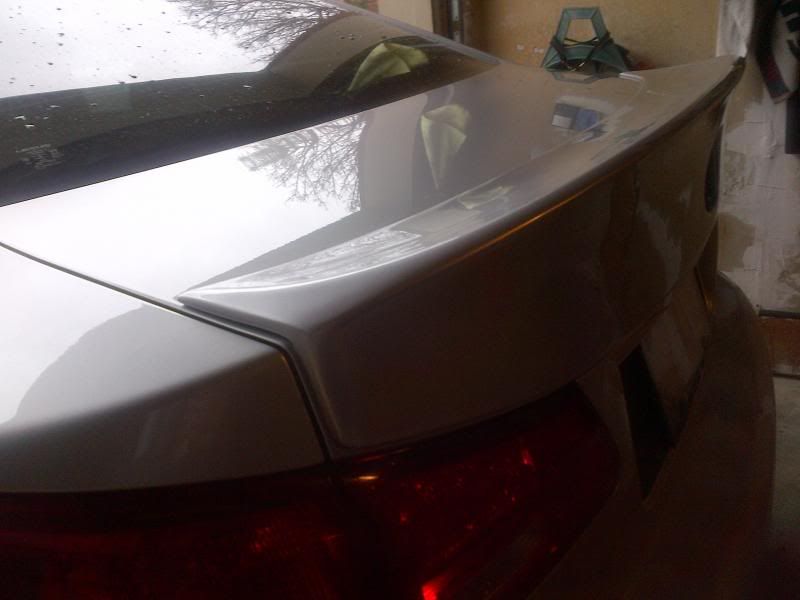
Step 8 - Test fitted my new Wald Style spoiler for fitment - seems to be pretty good!
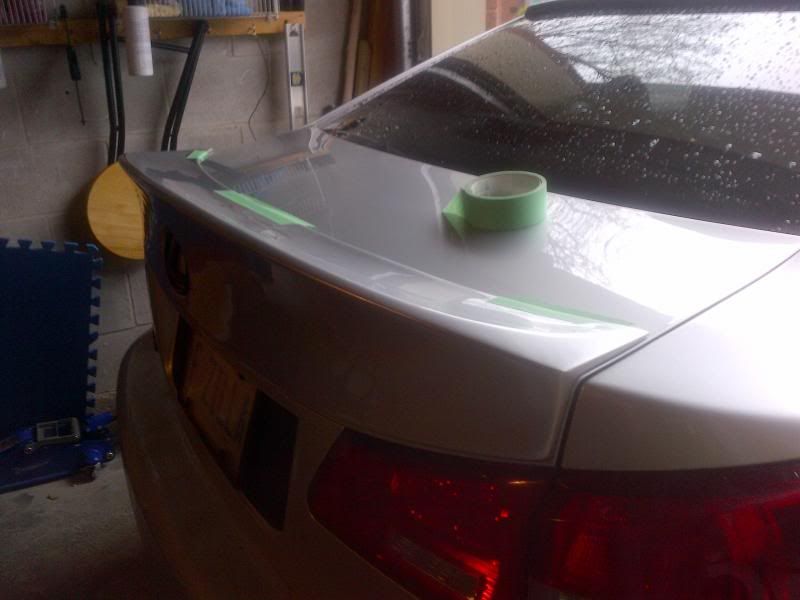
Check the sides too!
Step 9 - I prepared the spoiler with 3M foam tape and used a slight amount of silicone for security. Then fitted the final installation. I also heated the surface of the paint up prior, as it was a little cold out today, to ensure a good bond.
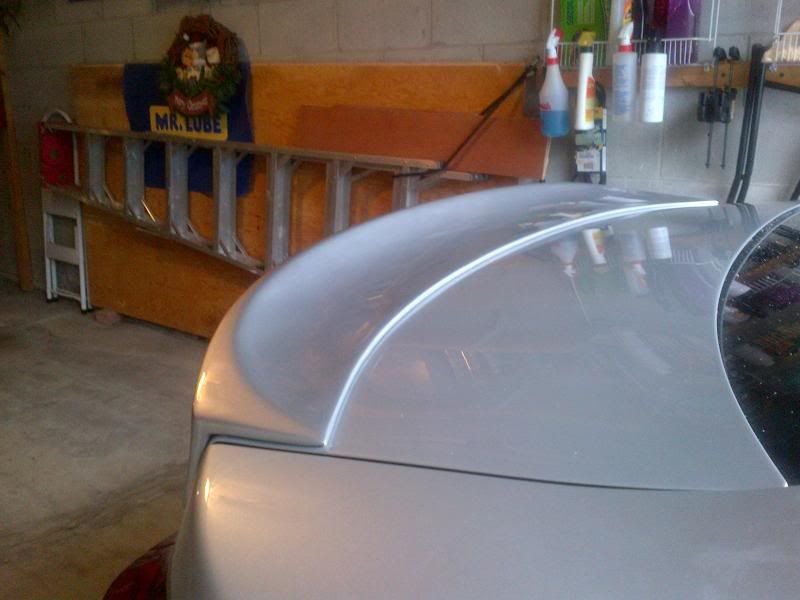
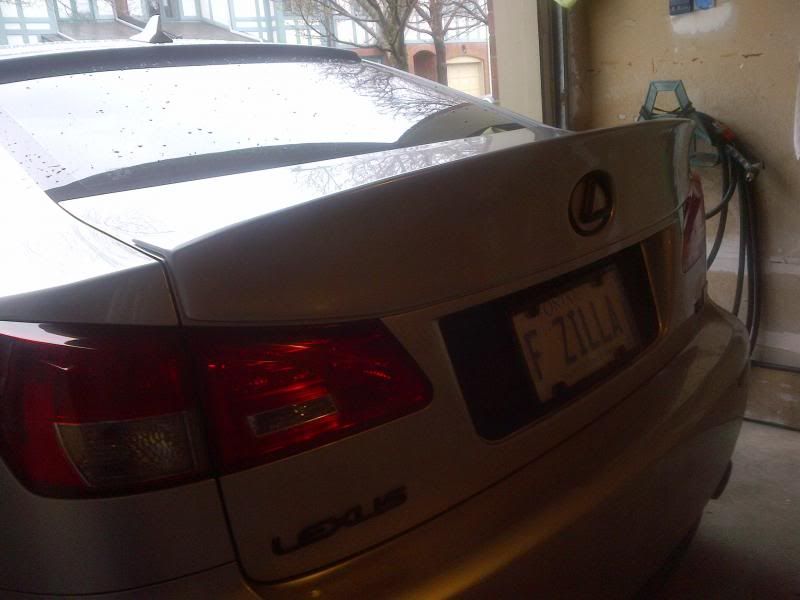
Step 10 - Tucked her away for the night to cure!
Digger08
Ok....so decided to spend my first day of my holiday's this year and install my Wald Style spoiler. Remembering nothing is perfect and your going to be saving hundreds of dollars from the having someone else install this. I hope this may help the next guy, that wants to try this.
About 3 hours in total time, from stripping the trunk garnish to the finished product.
Step 1 - Wake up the car!

Step 2 - Make sure the paint matches, and live with the wavy crappy Taiwan body work!

Step 3 - Transfer the logo and "Plasti-dip" if desired.

Step 4 - Remove the old spoiler - and wonder how your going to remove about 12 feet of factory 3M foam tape.

Step 5 - Load up the pin stripping wheel in my drill (basically a giant pencil eraser)

Step 6 - Start removing the tape! I had 3 drills, as my battery died - the wheel strips away all of the tape in about 10 minutes, with no chemicals, and will not mare the painted surface.


Step 7 - Clean up the surface, and then I used some finishing compound on my Porter/ Cable to remove any wax and eraser marks. I then cleaned the entire work area with Alcohol to prep for the 3M tape. I also covered the two outer holes with vinyl to prevent any water seepage. The other holes are filled with rubber plugs from the old spoiler set up.

Step 8 - Test fitted my new Wald Style spoiler for fitment - seems to be pretty good!

Check the sides too!

Step 9 - I prepared the spoiler with 3M foam tape and used a slight amount of silicone for security. Then fitted the final installation. I also heated the surface of the paint up prior, as it was a little cold out today, to ensure a good bond.


Step 10 - Tucked her away for the night to cure!

Digger08
Last edited by digger08; 03-24-14 at 08:02 PM. Reason: changed title
 04-24-13, 01:30 PM
#2
Lead Lap

I did not include every step, as removal of the old spoiler is pretty simple.
Ok....so decided to spend my first day of my holiday's this year and install my Wald Style spoiler. Remembering nothing is perfect and your going to be saving hundreds of dollars from the having someone else install this. I hope this may help the next guy, that wants to try this.
About 3 hours in total time, from stripping the trunk garnish to the finished product.
Step 1 - Wake up the car!
Step 2 - Make sure the paint matches, and live with the wavy crappy Taiwan body work!
Step 3 - Transfer the logo and "Plasti-dip" if desired.
Step 4 - Remove the old spoiler - and wonder how your going to remove about 12 feet of factory 3M foam tape.
Step 5 - Load up the pin stripping wheel in my drill (basically a giant pencil eraser)
Step 6 - Start removing the tape! I had 3 drills, as my battery died - the wheel strips away all of the tape in about 10 minutes, with no chemicals, and will not mare the painted surface.
Step 7 - Clean up the surface, and then I used some finishing compound on my Porter/ Cable to remove any wax and eraser marks. I then cleaned the entire work area with Alcohol to prep for the 3M tape. I also covered the two outer holes with vinyl to prevent any water seepage. The other holes are filled with rubber plugs from the old spoiler set up.
Step 8 - Test fitted my new Wald Style spoiler for fitment - seems to be pretty good!
Check the sides too!
Step 9 - I prepared the spoiler with 3M foam tape and used a slight amount of silicone for security. Then fitted the final installation. I also heated the surface of the paint up prior, as it was a little cold out today, to ensure a good bond.
Step 10 - Tucked her away for the night to cure!
Digger08

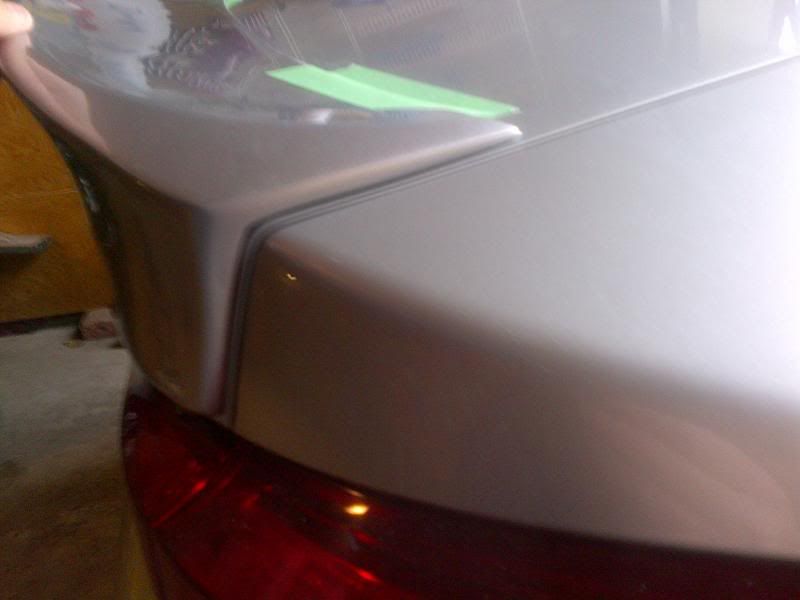
") (original spoiler stripped paint off of trunk, had to cover it up with more Wald spoiler)
(original spoiler stripped paint off of trunk, had to cover it up with more Wald spoiler)  04-24-13, 02:45 PM
#8

The only thing u used to attach the spoiler was the foam tape? Do u have any pics of we're u put the foam tape on thebottom of your new spoiler? Thank u I'm installing mine this weekend and it came with some sort of glue and did not like the idea of smearing glue all over my stock spoiler I prefer to use the 3m tape if its strong enough.
04-24-13, 02:55 PM
#9
The only thing u used to attach the spoiler was the foam tape? Do u have any pics of we're u put the foam tape on thebottom of your new spoiler? Thank u I'm installing mine this weekend and it came with some sort of glue and did not like the idea of smearing glue all over my stock spoiler I prefer to use the 3m tape if its strong enough.
 04-24-13, 03:38 PM
#12
what kind of tape should i buy to put on my wald tape? double sided adhesive 3m?
__________________

Your #1 Dealer for Aftermarket Performance Products
Orange County, CA
Email: info@merakiautoworks.com
Text/Call: 213 394 2886
Website: www.MerakiAutoworks.com
Your #1 Dealer for Aftermarket Performance Products
Orange County, CA
Email: info@merakiautoworks.com
Text/Call: 213 394 2886
Website: www.MerakiAutoworks.com


