ISF Aftermarket Seats
 08-09-12, 06:14 PM
#1
Driver
Thread Starter

Join Date: Aug 2011
Location: CA
Posts: 112
Likes: 0
Received 0 Likes
on
0 Posts
Hey guys, quick question for you. I want to put in aftermarket seats, but I was wondering if it will throw a light on right after I unplug them. Also, if I unplug the passenger side, wont it recognize their is no weight in the seat? For those of you who have successfully installed aftermarket seats in our cars, please chime in, Id really appreciate it. Thanks guys!

 08-09-12, 07:53 PM
#3

can i ask why you would want to? You could consider some seats that also have airbags like evo10 seats, or gtr seats, if you want them for racing rather than cosmetics I would suggest just changing the seat out, it's literally 4 bolts and one plug, and if you're like me you probably need the seat only a few times a year.

 08-10-12, 09:44 AM
#7
I think one of the members here had Bride seats installed on both sides but had warning light problems.
__________________

Your #1 Dealer for Aftermarket Performance Products
Orange County, CA
Email: info@merakiautoworks.com
Text/Call: 213 394 2886
Website: www.MerakiAutoworks.com
Your #1 Dealer for Aftermarket Performance Products
Orange County, CA
Email: info@merakiautoworks.com
Text/Call: 213 394 2886
Website: www.MerakiAutoworks.com
Trending Topics
08-10-12, 02:14 PM
#8
Driver
Thread Starter
Join Date: Aug 2011
Location: CA
Posts: 112
Likes: 0
Received 0 Likes
on
0 Posts
Damn... Yea, I read in a few other threads that most F owners want to keep the factory seats but I just really enjoy driving in "more aggressive" seats... I'll do a little more research to see if there is a fix or a resistor that a lot of people are using to get rid of the light. If anyone beats me to it, please chime in. Thanks guys.
08-10-12, 04:46 PM
#9
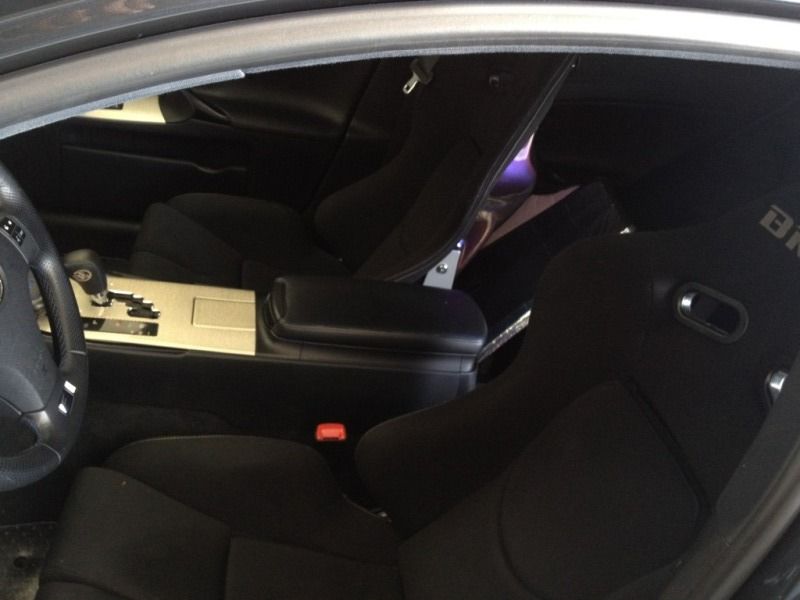
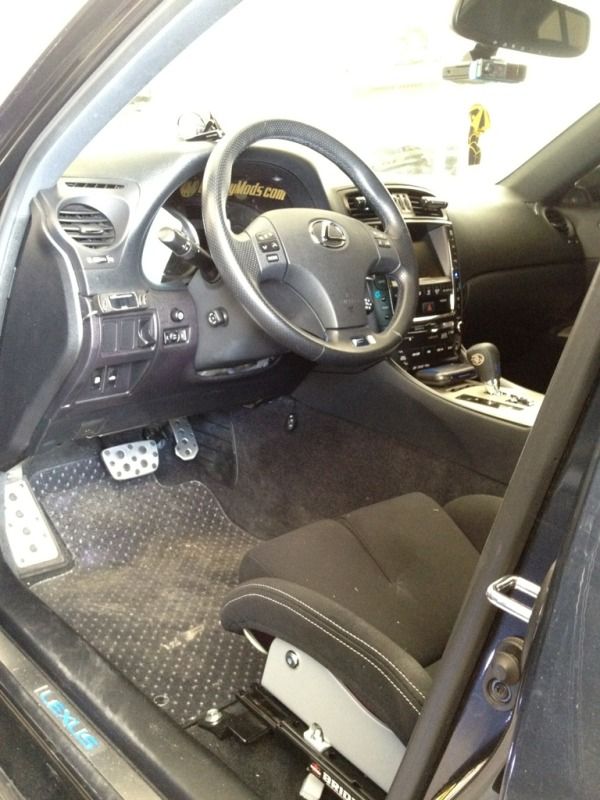
when i put my seats in the only light i got was the one in my cluster. i previously turned off the chime for the seat belt light prior to my after market seats. so iono if it will chime if u dont disable it. the harness for the seat belt is with the seat air bag harness and i didnt feel like taking all the wires of the OEM seats to plug it in. You can use is300 rails they fit. There are an additional 2 mounting holes on the rear 2 seat mounting point area. i like these seats better couse im a little skinny and the f seats are a little wide to me. hope this help. there is a kit or resistor u can buy , just been lazy to get it and the light doesnt bother me.
08-10-12, 05:10 PM
#10

this is from an acura blog, outlined is for a z and g35. but something like this should work for ours....i hope.
I asked the guy that's helping me with the wiring about doing a DIY
with me for you all. He's not into that so much I guess, but I'll be
able to get something out of him for sure.
I asked him today how exactly it is done, step by step in the 350Z he
just recently did, and this is what I got from him.
I adapted this to better serve DIY'ers and such:
-a 2.2 ohm or a 2.0 ohm resistance to trick the airbag system into thinking
that the airbag is still there is what we are going after here and accomplishing.
-Radio Shack 5 pack of 10ohm resistors. Either 1/4 watt or 1/2 watt is okay.
1/4 watt is what he uses but says 1/2 will work too if all out of 1/4 watt.
1/4 watt sku# 271-1301
1/2 watt sku# 271-1101
-18 or 22 awg wire. get one roll of red, one roll of black.
-heat shrink tubing. sku# 278-1627B
- Buchanan Tap-Splices. RED. for 22-18 awg wires.
- soldering iron, solder with resin mixed in.
okay...
disconnect battery.
basically what is needed is 5, 10ohm resistors in PARALLEL CIRCUIT.
that will end up with a final resistance of 2.0ohms. (not 2.2k, ohms, lol)
colors will go red to red and gold to gold.
so grab all 5 resistors and twist their ends together.
then solder one side with a piece of your red wire, and the other side
with a piece of your black wire.
put heat shrink over the resistor cluster when you're done and kind
of bend it into a U shape.
This is then spliced to each side of the yellow airbag harness.
doesn't matter what color goes where, just that the connection is solid.
tape up the splices with electrical tape.
repeat this for the passanger side airbag too.
Passanger side weight sensor for airbag:
on a Z there are metal slats that look a bit like fencing.
that has sensors in it. it's followed by a "brain" module and then
a bladder looking thing.
so remove the metal slats, they should have sensors in them,
on a Z they are yellow.
then unplug the "brain" and remove the bladder.
the bladder needs to be rolled up very tightly, like a burrito.
then it needs to be ziptied in several spots to keep it rolled.
then everything gets plugged back in.
see if the weight sensor light comes on.
if it doesn't and it's not working, zip tie the bladder even tighter
and retry again.. until the light comes on.
then tuck the bladder under the carpet or attach it to the bottom of
the new seat or whatever and you're good to go.
then you will need to go through the airbag reset procedure spelled out
in the factory service manual.
08-10-12, 07:32 PM
#11
Lexus Champion
this is from an acura blog, outlined is for a z and g35. but something like this should work for ours....i hope.
I asked the guy that's helping me with the wiring about doing a DIY
with me for you all. He's not into that so much I guess, but I'll be
able to get something out of him for sure.
I asked him today how exactly it is done, step by step in the 350Z he
just recently did, and this is what I got from him.
I adapted this to better serve DIY'ers and such:
-a 2.2 ohm or a 2.0 ohm resistance to trick the airbag system into thinking
that the airbag is still there is what we are going after here and accomplishing.
-Radio Shack 5 pack of 10ohm resistors. Either 1/4 watt or 1/2 watt is okay.
1/4 watt is what he uses but says 1/2 will work too if all out of 1/4 watt.
1/4 watt sku# 271-1301
1/2 watt sku# 271-1101
-18 or 22 awg wire. get one roll of red, one roll of black.
-heat shrink tubing. sku# 278-1627B
- Buchanan Tap-Splices. RED. for 22-18 awg wires.
- soldering iron, solder with resin mixed in.
okay...
disconnect battery.
basically what is needed is 5, 10ohm resistors in PARALLEL CIRCUIT.
that will end up with a final resistance of 2.0ohms. (not 2.2k, ohms, lol)
colors will go red to red and gold to gold.
so grab all 5 resistors and twist their ends together.
then solder one side with a piece of your red wire, and the other side
with a piece of your black wire.
put heat shrink over the resistor cluster when you're done and kind
of bend it into a U shape.
This is then spliced to each side of the yellow airbag harness.
doesn't matter what color goes where, just that the connection is solid.
tape up the splices with electrical tape.
repeat this for the passanger side airbag too.
Passanger side weight sensor for airbag:
on a Z there are metal slats that look a bit like fencing.
that has sensors in it. it's followed by a "brain" module and then
a bladder looking thing.
so remove the metal slats, they should have sensors in them,
on a Z they are yellow.
then unplug the "brain" and remove the bladder.
the bladder needs to be rolled up very tightly, like a burrito.
then it needs to be ziptied in several spots to keep it rolled.
then everything gets plugged back in.
see if the weight sensor light comes on.
if it doesn't and it's not working, zip tie the bladder even tighter
and retry again.. until the light comes on.
then tuck the bladder under the carpet or attach it to the bottom of
the new seat or whatever and you're good to go.
then you will need to go through the airbag reset procedure spelled out
in the factory service manual.
I asked the guy that's helping me with the wiring about doing a DIY
with me for you all. He's not into that so much I guess, but I'll be
able to get something out of him for sure.
I asked him today how exactly it is done, step by step in the 350Z he
just recently did, and this is what I got from him.
I adapted this to better serve DIY'ers and such:
-a 2.2 ohm or a 2.0 ohm resistance to trick the airbag system into thinking
that the airbag is still there is what we are going after here and accomplishing.
-Radio Shack 5 pack of 10ohm resistors. Either 1/4 watt or 1/2 watt is okay.
1/4 watt is what he uses but says 1/2 will work too if all out of 1/4 watt.
1/4 watt sku# 271-1301
1/2 watt sku# 271-1101
-18 or 22 awg wire. get one roll of red, one roll of black.
-heat shrink tubing. sku# 278-1627B
- Buchanan Tap-Splices. RED. for 22-18 awg wires.
- soldering iron, solder with resin mixed in.
okay...
disconnect battery.
basically what is needed is 5, 10ohm resistors in PARALLEL CIRCUIT.
that will end up with a final resistance of 2.0ohms. (not 2.2k, ohms, lol)
colors will go red to red and gold to gold.
so grab all 5 resistors and twist their ends together.
then solder one side with a piece of your red wire, and the other side
with a piece of your black wire.
put heat shrink over the resistor cluster when you're done and kind
of bend it into a U shape.
This is then spliced to each side of the yellow airbag harness.
doesn't matter what color goes where, just that the connection is solid.
tape up the splices with electrical tape.
repeat this for the passanger side airbag too.
Passanger side weight sensor for airbag:
on a Z there are metal slats that look a bit like fencing.
that has sensors in it. it's followed by a "brain" module and then
a bladder looking thing.
so remove the metal slats, they should have sensors in them,
on a Z they are yellow.
then unplug the "brain" and remove the bladder.
the bladder needs to be rolled up very tightly, like a burrito.
then it needs to be ziptied in several spots to keep it rolled.
then everything gets plugged back in.
see if the weight sensor light comes on.
if it doesn't and it's not working, zip tie the bladder even tighter
and retry again.. until the light comes on.
then tuck the bladder under the carpet or attach it to the bottom of
the new seat or whatever and you're good to go.
then you will need to go through the airbag reset procedure spelled out
in the factory service manual.
Too much reading...where's the cliff notes version? David can you call me and read it to me? I will not pay for long distance if you're in Japan right now

 08-11-12, 12:11 PM
#13
We are going to swap seats in our F and will make a bypass plug for thos interested. I can look up the correct resistor for the expected current value.
Also we are a Status Seat dealer now so going to put their FIA compliant seats in.
Also we are a Status Seat dealer now so going to put their FIA compliant seats in.
__________________
Redefining Lexus Aftermarket Parts Since 2001
-- We are your Lexus suspension experts--
BCR - KW - PENSKE - OHLINS - HKS - GREDDY - STANCEPARTS
Links - Arms - SuperPro Poly Bushings - Solid Bearing Conversions - Motor Mounts
RB BBK's and 2P Rotors, G-Loc pads, Radium Fuel Systems
Custom Fabrication Design and Machining - Industrial 3D Printing - Laser Cutting
2018 USTCC Sportsman Class Champions - 2018 NASA ST5 National Champions
08-13-12, 09:27 PM
#15
2.1 Ohm is the resistance from TIS. The voltage is uncertain but 1V is the keepup voltage on the output pin to the airbag. . I can verify voltages etc at some point. This is all TIS is giving at the moment.
__________________
Redefining Lexus Aftermarket Parts Since 2001
-- We are your Lexus suspension experts--
BCR - KW - PENSKE - OHLINS - HKS - GREDDY - STANCEPARTS
Links - Arms - SuperPro Poly Bushings - Solid Bearing Conversions - Motor Mounts
RB BBK's and 2P Rotors, G-Loc pads, Radium Fuel Systems
Custom Fabrication Design and Machining - Industrial 3D Printing - Laser Cutting
2018 USTCC Sportsman Class Champions - 2018 NASA ST5 National Champions